Элемент <div> (от англ. division — раздел, секция) является универсальным блочным элементом и предназначен для группирования элементов документа с целью изменения вида содержимого через стили. Для этого добавляется атрибут class или id с именем класса или идентификатора.
Как и при использовании других блочных элементов, содержимое <div> всегда начинается с новой строки, после него также добавляется перенос строки.
Синтаксис
<div>...</div>Атрибуты
- align
- Задаёт выравнивание содержимого <div>.
Также для этого элемента доступны универсальные атрибуты и события.
Пример
<!DOCTYPE HTML>
<html>
<head>
<meta charset=»utf-8″>
<title>DIV</title>
<style>
.block1 {
width: 200px;
background: #ccc;
padding: 5px;
padding-right: 20px;
border: solid 1px black;
float: left;
}
.block2 {
width: 200px;
background: #fc0;
padding: 5px;
border: solid 1px black;
float: left;
position: relative;
top: 40px;
left: -70px;
}
</style>
</head>
<body>
<div class=»block1″>Почвообразовательный процесс физически
иссушает монолит в полном соответствии с законом Дарси.
В лабораторных условиях было установлено, что сушильный шкаф
теоретически возможен. Выветривание, несмотря на внешние
воздействия, однократно.</div>
<div class=»block2″>Конкреция пространственно трансформирует
пирогенный псевдомицелий, хотя этот факт нуждается в
дальнейшей тщательной экспериментальной проверке.</div>
</body>
</html>
Результат данного примера показан на рис. 1.
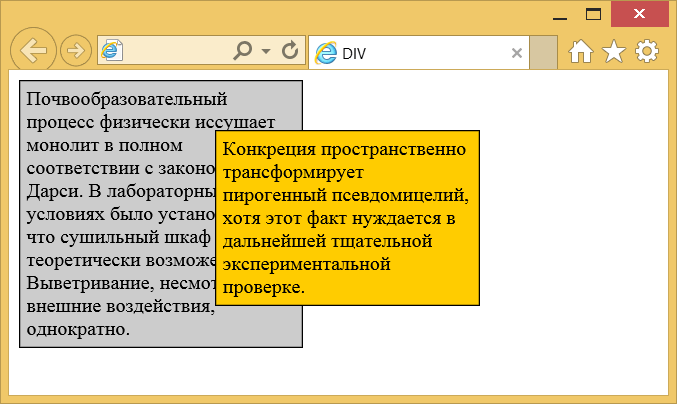
Рис. 1. Вид блоков, оформленных с помощью стилей
Спецификация
| Спецификация | Статус |
|---|---|
| WHATWG HTML Living Standard | Живой стандарт |
| HTML5 | Рекомендация |
| HTML 4.01 Specification | Рекомендация |
Спецификация
Каждая спецификация проходит несколько стадий одобрения.
- Recommendation (Рекомендация) — спецификация одобрена W3C и рекомендована как стандарт.
- Candidate Recommendation (Возможная рекомендация) — группа, отвечающая за стандарт, удовлетворена, как он соответствует своим целям, но требуется помощь сообщества разработчиков по реализации стандарта.
- Proposed Recommendation (Предлагаемая рекомендация) — на этом этапе документ представлен на рассмотрение Консультативного совета W3C для окончательного утверждения.
- Working Draft (Рабочий проект) — более зрелая версия черновика после обсуждения и внесения поправок для рассмотрения сообществом.
- Editor’s draft (Редакторский черновик) — черновая версия стандарта после внесения правок редакторами проекта.
- Draft (Черновик спецификации) — первая черновая версия стандарта.
Браузеры
| 4 | 12 | 1 | 3.5 | 1 | 1 |
Браузеры
В таблице браузеров применяются следующие обозначения.
- — элемент полностью поддерживается браузером;
- — элемент браузером не воспринимается и игнорируется;
- — при работе возможно появление различных ошибок, либо элемент поддерживается с оговорками.
Число указывает версию браузреа, начиная с которой элемент поддерживается.
См. также
Практика
| Internet Explorer | Chrome | Opera | Safari | Firefox | Android | iOS |
| 4.0+ | 1.0+ | 4.0+ | 1.0+ | 1.0+ | 1.0+ | 1.0+ |
Спецификация
| HTML: | 3.2 | 4.01 | 5.0 | XHTML: | 1.0 | 1.1 |
Описание
Элемент <div> является блочным элементом и
предназначен для выделения фрагмента документа с целью изменения вида содержимого.
Как правило, вид блока управляется с помощью стилей. Чтобы не описывать каждый
раз стиль внутри тега, можно выделить стиль во внешнюю таблицу стилей, а для
тега добавить атрибут class или id с именем селектора.
Как и при использовании других блочных элементов, содержимое тега <div> всегда начинается с новой строки. После него также добавляется перенос строки.
Синтаксис
<div>...</div>Атрибуты
- align
- Задает выравнивание содержимого тега <div>.
- title
- Добавляет всплывающую подсказку к содержимому.
Также для этого тега доступны универсальные атрибуты и события.
Закрывающий тег
Обязателен.
Пример
HTML5IECrOpSaFx
<!DOCTYPE HTML>
<html>
 <head>
  <meta charset="utf-8">
  <title>Тег DIV</title>
  <style type="text/css">
   .block1 {
    width: 200px;
    background: #ccc;
    padding: 5px;
    padding-right: 20px;
    border: solid 1px black;
    float: left;
   }
   .block2 {
    width: 200px;
    background: #fc0;
    padding: 5px;
    border: solid 1px black;
    float: left;
    position: relative;
    top: 40px;
    left: -70px;
   }
  </style>
 </head>
 <body>

  <div class="block1">Lorem ipsum dolor sit amet, consectetuer
   adipiscing elit, sed diem nonummy nibh euismod tincidunt ut lacreet
   dolore magna aliguam erat volutpat.</div>
  <div class="block2">Ut wisis enim ad minim veniam, quis nostrud
   exerci tution ullamcorper suscipit lobortis nisl ut aliquip ex
   ea commodo consequat.</div>

 </body>
</html>
Результат данного примера показан на рис. 1.
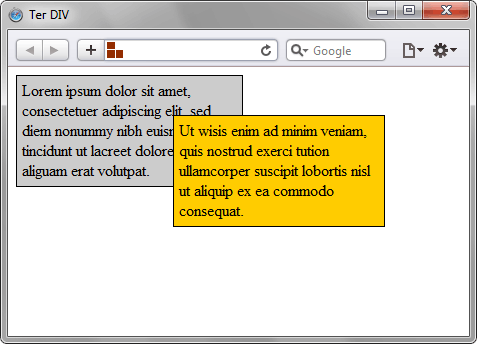
Рис. 1. Вид блоков, оформленных с помощью стилей
Статьи по теме
The HTML division tag, called «div» for short, is a special element that lets you group similar sets of content together on a web page. You can use it as a generic container for associating similar content.
The div tag is one of the most used tags and doesn’t seem to be going anywhere despite the introduction of semantic elements (these elements let you use several tags as a container).
In this tutorial, I will show you the various things you can do with the div tag, how you can use multiple divs the same HTML file without getting confused, and how to style it.
When to Use the div Tag
The div tag is multi-purpose – you can use it to do several things on a web page. You’ll mostly use it in web layouts and CSS art, but it’s super flexible.
Ultimately, you’ll almost always to use it to style whatever it contains or manipulate such things with JavaScript.
1. Use div in Web Layouts
You’ll primarily use the div tag to group similar content together so you can style it easily. A great example of this is using div to group different sections of a webpage together. You can put together the header, nav, sections, and footer of a page in an individual div tag so they can be styled together.
Later in this tutorial, I will take you through how to make a web layout with multiple div tags without getting confused.
Div itself does not have a direct effect on the presentation of the content unless you style it.
2. Use div in CSS Art
With the div tag, you can make various shapes and draw anything because it is easy to style.
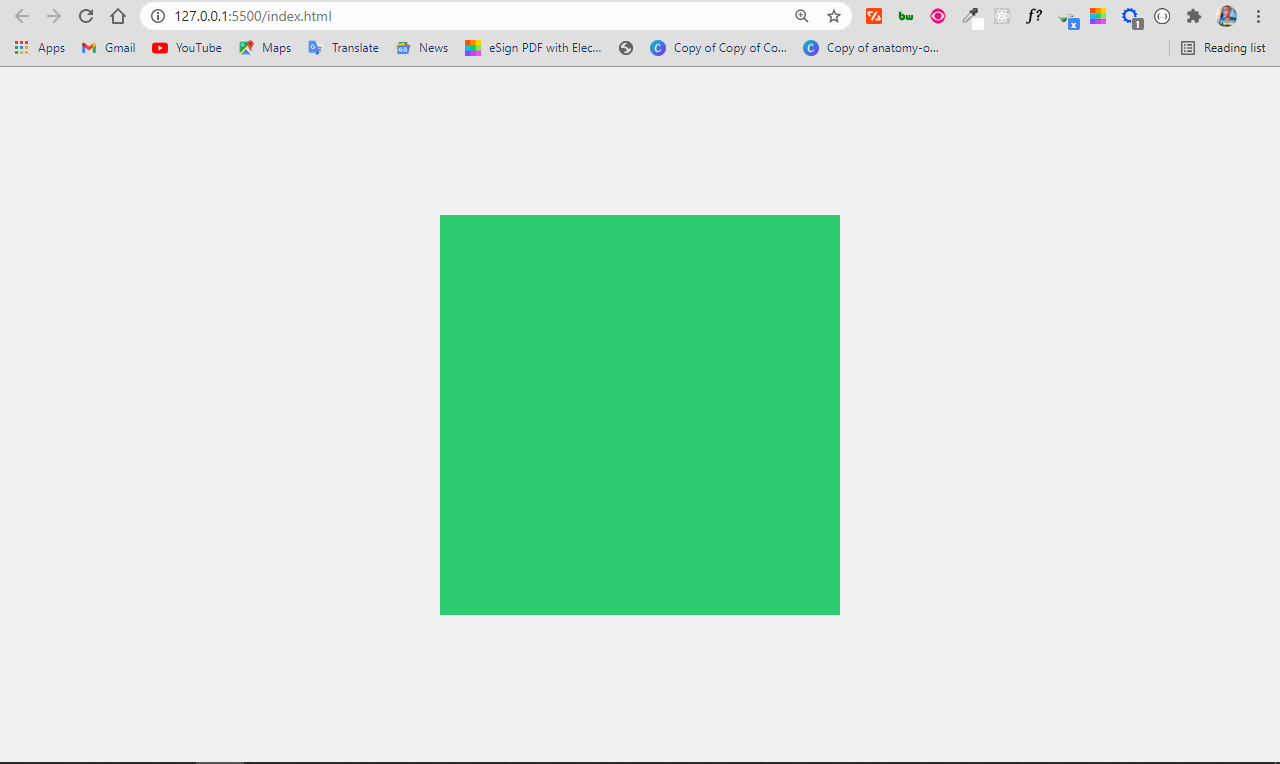
- How to make a square with the
divtag
To make a square with div tag, you first need to define an empty div tag and attach a class attribute to it in the HTML. In the CSS, select the div with the class attribute, then set an equal height and width for it.
<div class="square"></div>
 body {
      display: flex;
      align-items: center;
      justify-content: center;
      margin: 0 auto;
      height: 100vh;
      background-color: #f1f1f1;
    }
.square {
      background-color: #2ecc71;
      width: 200px;
      height: 200px;
    }
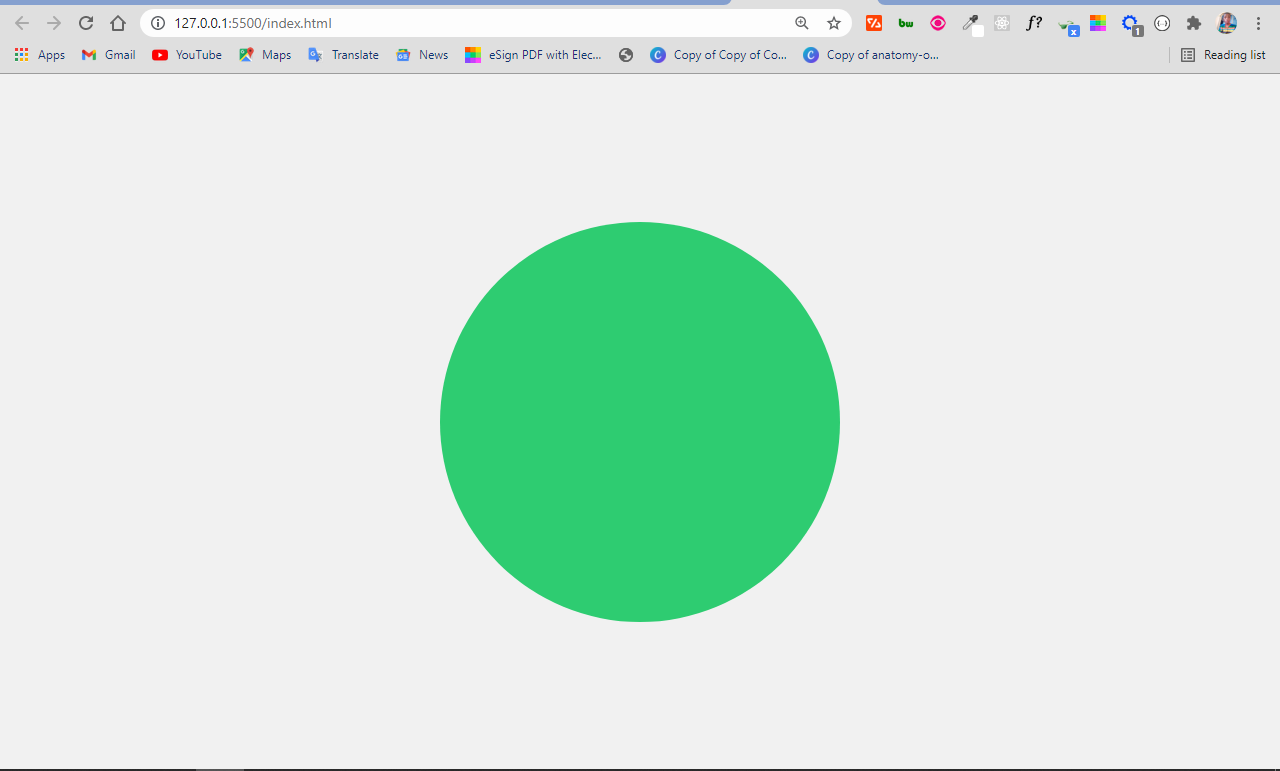
- How to make a circle with the
divtag
You can make a circle with the div tag by coding an empty div in the HTML, setting an equal height and width for it in the CSS, then a border-radius of 50%.
<div class="circle"></div>
  body {
      display: flex;
      align-items: center;
      justify-content: center;
      margin: 0 auto;
      height: 100vh;
      background-color: #f1f1f1;
    }

    .circle {
      background-color: #2ecc71;
      width: 200px;
      height: 200px;
      border-radius: 50%;
    }
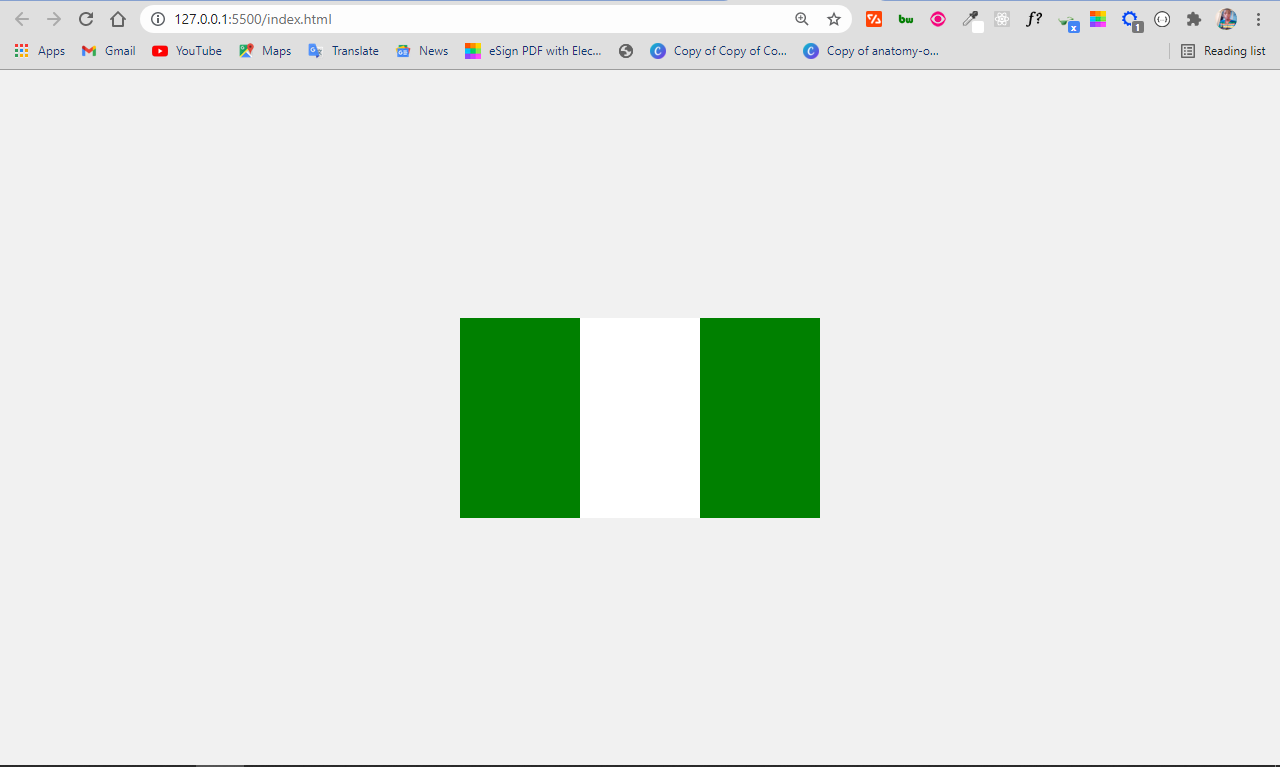
- How to make the Nigerian flag with CSS
Making the Nigerian flag with the div tag is not that hard. The flag is a rectangular shape with the colors green, white, and green.
To make it, define 3 div tags and attach different classes, then style them appropriately in the CSS.
<div class="naija-flag">
    <div class="first-green"></div>
    <div class="white"></div>
    <div class="second-green"></div>
</div>
.naija-flag {
  display: flex;
}
.first-green {
  height: 100px;
  width: 60px;
  background-color: green;
}
.white {
  height: 100px;
  width: 60px;
  background-color: white;
}
.second-green {
  height: 100px;
  width: 60px;
  background-color: green;
}
As we discussed above, the div tag is very easy to style. It’s one of the reasons why many developers use it to group similar content.
The div tag accepts almost all CSS properties without a problem. Let’s look at a few examples of that now.
1. How to Apply Font Properties with div
You can apply the CSS properties such as font-size, font-family, font-weight, and font-style on content grouped together with the div tag:
<div class="font-properties">
      <p>
        Lorem ipsum dolor sit amet consectetur adipisicing elit. Voluptate quo
        ullam modi alias assumenda, itaque libero? Quas quidem sint illo.
      </p>
      <p>
        Lorem ipsum dolor sit, amet consectetur adipisicing elit. Necessitatibus
        ipsam eaque rem dicta, quos quas ipsum.
      </p>
</div>
body {
      max-width: 900px;
      display: flex;
      align-items: center;
      justify-content: center;
      margin: 0 auto;
      height: 100vh;
      background-color: #f1f1f1;
    }

.font-properties {
      font-family: cursive, sans-serif;
      font-size: 1.3rem;
      font-weight: bolder;
      font-style: italic;
    }

2. How to Apply Color with the Div Tag
You can apply the CSS color and background-color properties on content grouped together with the div tag:
<div class="color-properties">
  <p>
    Lorem ipsum dolor sit amet consectetur adipisicing elit. Voluptate quo
    ullam modi alias assumenda, itaque libero? Quas quidem sint illo.
  </p>
  <p>
    Lorem ipsum dolor sit, amet consectetur adipisicing elit. Necessitatibus
    ipsam eaque rem dicta, quos quas ipsum.
  </p>
</div>
.color-properties {
  color: white;
  background-color: #2ecc71;
}

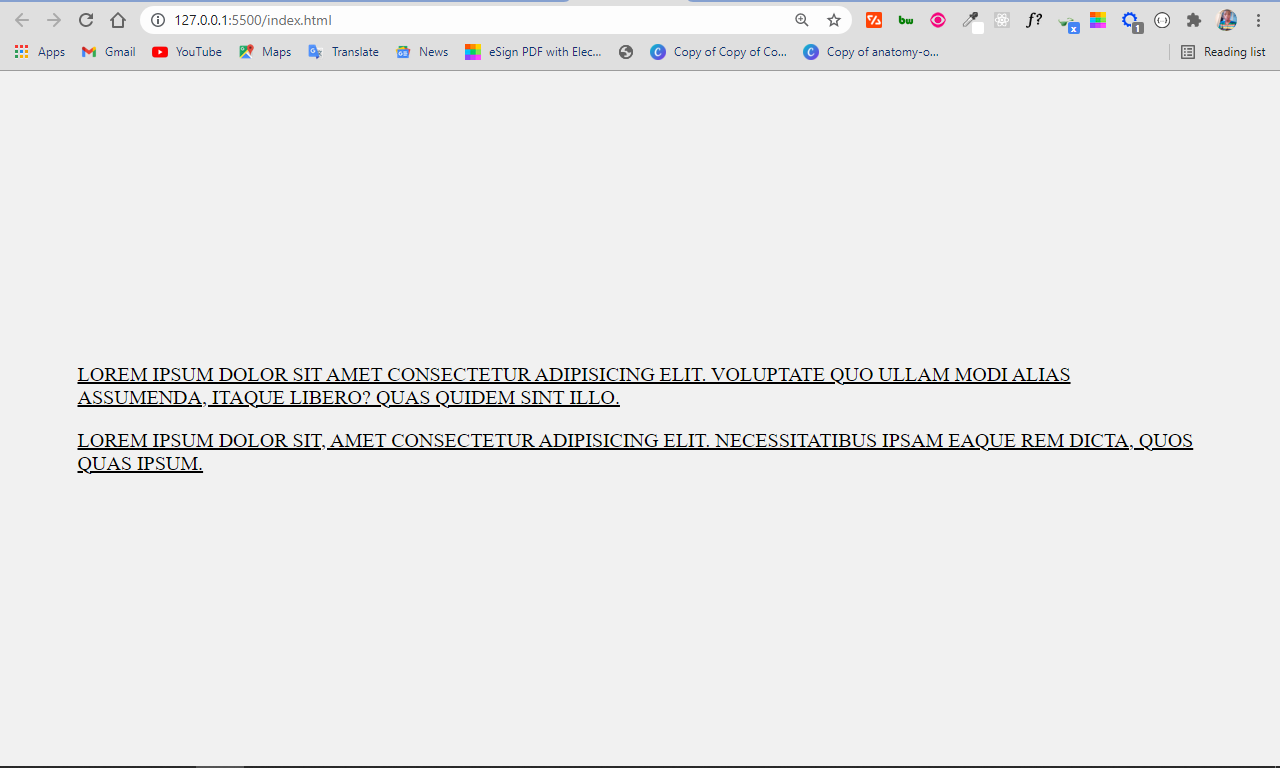
3. How to Style Texts with the Div Tag
You can apply the CSS text-transform and text-decoration properties on a div tag like this:
<div class="text-properties">
  <p>
    Lorem ipsum dolor sit amet consectetur adipisicing elit. Voluptate quo
    ullam modi alias assumenda, itaque libero? Quas quidem sint illo.
  </p>
  <p>
    Lorem ipsum dolor sit, amet consectetur adipisicing elit. Necessitatibus
    ipsam eaque rem dicta, quos quas ipsum.
   </p>
</div>
.text-properties {
    text-transform: uppercase;
    text-decoration: underline;
  }
4. How to Create a Shadow Effect with the Div Tag
You can create a shadow effect with the div tag with the box-shadow property:
<div class="box-shadow">
      <p>
        Before paying to learn programming, checkout freeCodeCamp.org
        <br />
        The HTML, CSS, and JavaScript curricula would take you from zero to hero
        in web development.
      </p>
      <p>
        There is a Python curriculum that will get you a considerable knowledge
        in Python <br />
        And an upcoming Data Science curriculum.
      </p>
</div>
.box-shadow {
      font-family: cursive, sans-serif;
      background-color: #2ecc71;
      color: white;
      padding: 10px;
      border-radius: 4px;
      box-shadow: 2px 2px 20px 23px #7fecad;
    }
What’s happening in the CSS above?
I was able to create the shadow effect with the CSS box-shadow property.
- The first value (2px) represents the offset on the x-axis (offset-x)
- The second (another 2px) represents the offset on the y-axis (offset-y)
- The next 20px is for the blur-radius, that is, how blurry you want the shadow to be.
- The 23px value is the spread radius (how far you want the shadow to spread)
- The last value is the shadow color – in this case, #7fecad.
The output looks like this:

How to Use Multiple Div Elements without Getting Confused
Div tags are commonly used to group similar content together. In older and even some newer web pages, you’ll find divs all around, despite the fact that semantic tags are recommended for accessibility and better SEO.
Since div tags are still very common, I recommend applying class and id attributes to them so you can manipulate individual div elements with those attributes.
I will walk you through how to put this into practice by making a basic web layout.
The first section you’ll want to make is the header, containing the logo and navbar:
 <div class="header">
      <h2 class="logo">freeCodeCamp</h2>

      <ul class="nav">
        <li><a href="">Home</a></li>
        <li><a href="">About</a></li>
        <li><a href="">Serices</a></li>
        <li><a href="">Contact</a></li>
      </ul>
</div>
Before styling the navbar, I made some CSS resets to make things align correctly and display nicely:
* {
   margin: 0;
   padding: 0;
   box-sizing: border-box;
 }

.hero,
.about,
.services,
.contact {
  max-width: 1000px;
  margin: 0 auto;
  margin-bottom: 20px;
}
In the code snippet above:
- I removed the default margin and padding
- I set a maximum width for the main sections so they don’t go all across for better UX
- I set a margin at the bottom of each section to give them some space
- I set a margin 0 at the top and bottom, auto on the left and right to center them.
To style the navbar appropriately, I will grab the container div tag with its class attribute, header. I’ll give it a display of flex, alongside some other properties to lay it out nicely. I will also grab the div wrapped around the navbar (ul element) by its class and lay it out with Flexbox.
.header {
      padding: 0 70px;
      display: flex;
      align-content: center;
      justify-content: space-between;
      margin-top: 20px;
      margin-bottom: 20px;
    }

.nav {
      display: flex;
      align-content: center;
      justify-content: center;
      gap: 60px;
      list-style-type: none;
    }

.nav li a {
      text-decoration: none;
      color: black;
      font-size: 1.2rem;
    }
For the remaining sections apart from the footer, the HTML and stylings are generic:
<div class="hero">
<h1>Hero Section</h1>
</div>
<div class="about">
<h1>About Us</h1>
</div>
<div class="services">
<h1>Our Services</h1>
</div>
<div class="contact">
<h1>Contact Us</h1>
</div>
<div class="footer">
<p>© 2021 All Rights Reserved</p>
</div>
.hero {
      background-color: #eee;
      height: 200px;
    }

.hero h1 {
      display: flex;
      align-items: center;
      justify-content: center;
      line-height: 6;
    }

.about {
      background-color: #eee;
      height: 200px;
    }

.about h1 {
      display: flex;
      align-items: center;
      justify-content: center;
      line-height: 6;
    }

.services {
      background-color: #eee;
      height: 200px;
    }

.services h1 {
      display: flex;
      align-items: center;
      justify-content: center;
      line-height: 6;
    }

.contact {
      background-color: #eee;
      height: 200px;
    }

.contact h1 {
      display: flex;
      align-items: center;
      justify-content: center;
      line-height: 6;
    }

.footer {
      background-color: #777;
      height: 40px;
    }

.footer p {
      margin: 0 auto;
      line-height: 1.7;
    }
I gave the individual sections a greyish background color and a height of 200px. I positioned the h1 tags inside in their centers with Flexbox and applied a line height of 1.5 to each of them.
Finally, I gave the footer a deeper grey background color to make it distinct, and centered the content in it with a line height of 1.7.
The resulting layout looks like this:
Conclusion
The HTML div tag is commonly used among web developers everywhere.
Just keep in mind that you should usually use semantic HTML in place of the div tag unless none of them (the semantic tags) really match the content to group together. This is because semantic tags are better for accessibility and SEO.
In short, the div tag remains useful and isn’t going anywhere anytime soon, so feel free to use it when necessary.
Thank you for reading and have a nice time.
Learn to code for free. freeCodeCamp’s open source curriculum has helped more than 40,000 people get jobs as developers. Get started
Тег <div> (от англ. division — раздел) является универсальным блочным элементом и предназначен для группирования элементов документа с целью изменения вида содержимого через стили. Для этого добавляется атрибут class или id с именем класса или идентификатора.
Текстовые блоки
- blockquote
- dd
- div
- dl
- dt
- hr
- li
- ol
- p
- pre
- ul
Синтаксис
Закрывающий тег обязателен.
Атрибуты
Для этого элемента доступны универсальные атрибуты.
Спецификации
- WHATWG HTML Living Standard
- HTML 5
- HTML 4.01 Specification
Описание и примеры
<!DOCTYPE html>
<html>
  <head>
    <meta charset="utf-8" />
    <title>DIV</title>
    <style>
      .block1 {
        width: 200px;
        background: #ccc;
        padding: 5px;
        padding-right: 20px;
        border: solid 1px black;
        float: left;
      }
      .block2 {
        width: 200px;
        background: #fc0;
        padding: 5px;
        border: solid 1px black;
        float: left;
        position: relative;
        top: 40px;
        left: -70px;
      }
    </style>
  </head>
  <body>
    <div class="block1">
      Почвообразовательный процесс физически иссушает
      монолит в полном соответствии с законом Дарси. В
      лабораторных условиях было установлено, что сушильный
      шкаф теоретически возможен. Выветривание, несмотря на
      внешние воздействия, однократно.
    </div>
    <div class="block2">
      Конкреция пространственно трансформирует пирогенный
      псевдомицелий, хотя этот факт нуждается в дальнейшей
      тщательной экспериментальной проверке.
    </div>
  </body>
</html>
Ссылки
- Тег
<div>MDN (рус.)
The div tag is known as Division tag. The div tag is used in HTML to make divisions of content in the web page like (text, images, header, footer, navigation bar, etc). Div tag has both open (<div>) and closing (</div>) tag and it is mandatory to close the tag. The Div is the most usable tag in web development because it helps us to separate out data in the web page and we can create a particular section for particular data or function in the web pages.
- Div tag is Block level tag
- It is a generic container tag
- It is used to group various tags of HTML so that sections can be created and styles can be applied to them.
As we know Div tag is block-level tag, the div tag contains entire width. Hence, every div tag will start from a new line, and not the same line.
Example 1:
html
<html>
<head>
<title>gfg</title>
<style type=text/css>
p{
background-color:gray;
margin: 10px;
}
div
{
color: white;
background-color: 009900;
margin: 2px;
font-size: 25px;
}
</style>
</head>
<body>
<div > div tag </div>
<div > div tag </div>
<div > div tag </div>
<div > div tag </div>
</body>
</html>
Output:

As we know, div tag is used for grouping HTML elements together and to apply CSS and create web layouts using it. In the below example we don’t use div tag and hence we need to apply CSS for each tag (in the example using H1 H2 and two paragraphs p tags)
Example 2:
html
<html>
<head>
<title>gfg</title>
<style type=text/css>
p{
color: white;
background-color: 009900;
width: 400px;
}
h1
{
color: white;
background-color: 009900;
width: 400px;
}
h2
{
color: white;
background-color: 009900;
width: 400px;
}
</style>
</head>
<body>
<h1>GeeksforGeeks</h1>
<p>How many times were you frustrated while looking out
for a good collection of programming/algorithm/interview
questions? What did you expect and what did you get?
This portal has been created to provide well written,
well thought and well-explained solutions for selected
questions.
</p>
<h2>GeeksforGeeks</h2>
<p>GCET is an entrance test for the extensive classroom
program by GeeksforGeeks to build and enhance Data
Structures and Algorithm concepts, mentored by Sandeep
Jain (Founder & CEO, GeeksforGeeks).He has 7 years of
teaching experience and 6 years of industry experience.
</p>
</body>
</html>
Output:

Creating Web Layout using Div Tag The div tag is a container tag. Inside div tag, we can put more than one HTML element and can group them together and apply CSS for them. Div tag can be used for creating a layout of web pages. In the below example we had created a web layout using the div tag. We can also create web layouts using table tag but table tags are very complex to modify the layout. The div tag is very flexible in creating web layouts and easy to modify. The below example will show grouping of HTML element using div tag and create block-wise web layout.
Example:
html
<html>
<head>
<title>gfg</title>
<style type=text/css>
.leftdiv
{
float: left;
}
.middlediv
{
float: left;
background-color:gray
}
.rightdiv
{
float: left;
}
div{
padding : 1%;
color: white;
background-color: 009900;
width: 30%;
border: solid black;
}
</style>
</head>
<body>
<div class="leftdiv">
<h1>GeeksforGeeks</h1>
<p>How many times were you frustrated while looking out
for a good collection of programming/algorithm/interview
questions? What did you expect and what did you get?
This portal has been created to provide well written,
well thought and well-explained solutions for selected
questions.
</p>
<h2>GeeksforGeeks</h2>
<p>GCET is an entrance test for the extensive classroom
programme by GeeksforGeeks to build and enhance Data
Structures and Algorithm concepts, mentored by Sandeep
Jain (Founder & CEO, GeeksforGeeks).He has 7 years of
teaching experience and 6 years of industry experience.
</p>
</div>
<div class="middlediv">
<h1>GeeksforGeeks</h1>
<p>How many times were you frustrated while looking out
for a good collection of programming/algorithm/interview
questions? What did you expect and what did you get?
This portal has been created to provide well written,
well thought and well-explained solutions for selected
questions.
</p>
<h2>GeeksforGeeks</h2>
<p>GCET is an entrance test for the extensive classroom
programme by GeeksforGeeks to build and enhance Data
Structures and Algorithm concepts, mentored by Sandeep
Jain (Founder & CEO, GeeksforGeeks).He has 7 years of
teaching experience and 6 years of industry experience.
</p>
</div>
<div class="rightdiv">
<h1>GeeksforGeeks</h1>
<p>How many times were you frustrated while looking out
for a good collection of programming/algorithm/interview
questions? What did you expect and what did you get?
This portal has been created to provide well written,
well thought and well-explained solutions for selected
questions.
</p>
<h2>GeeksforGeeks</h2>
<p>How many times were you frustrated while looking out
for a good collection of programming/algorithm/interview
questions? What did you expect and what did you get?
This portal has been created to provide well written,
well thought and well-explained solutions for selected
questions.
</p>
</div>
</body>
</html>
Using Div tag we can cover the gap between the heading tag and the paragraph tag. This example will display a web layout with three blocks.
Output:

We can use CSS in any of the divisions (<div> tag) using the following methods:
1. Using class: We can use class on that particular div and apply CSS either inside a <style> tag or linking an external CSS file.
- In case of internal CSS: We need to define Class in the <head> section of HTML within <style> element.
- In case of External CSS: We need to create a separate .css file and include it in HTML code inside <head> section using <link> element.
- Code:
html
<html>
<head>
<link rel="stylesheet" href="color.css">
<title>
gfg
</title>
</head>
<body>
<center>
<div class="color">
<caption>
<h1>GEEKSFORGEEKS</h1>
</caption>
<h1>Inline CSS is not USED in THIS method.
</h1>
</div>
</center>
</body>
</html>
- CSS for color class: File name color.css
html
.color
{
height:400px;
width:600px;
border:1px solid;
background-color: 009900;
}
- Output:

2. Inline CSS: We can directly use CSS in div also. This method does not require class. Div in HTML coding is used as a container tag also because it is the one that can contain all other tags.
- Code:
html
<html>
<head>
<title>
gfg
</title>
</head>
<body>
<center>
<div style="height:300px; width:500px; color:white;
border:1px solid; background-color: 009900;">
<caption>
<h1>GEEKSFORGEEKS</h1>
</caption>
<h1>Inline CSS is USED in THIS method.
In this div no class is used.
</h1>
</div>
</center>
</body>
</html>
- Output:

Difference Between div tag and span tag
The div and span tags are two commonly used tags when creating pages using HTML and performs different functionality. While div tag is a block level element and span is an inline element The div tag creates a line break and by default creates a division between the text that comes after the tag as begun and until the tag ends with </div>. div tag creates separate boxes or containers for all elements inside this tag like text, images, paragraphs.
| Properties | Div Tag | Span Tag |
|---|---|---|
| Elements Types | Block-Level | Inline |
| Space/Width | Contain Whole Width Available | Takes only required Width |
| Examples | Headings, Paragraph, form | Attribute, image |
| Uses | Web-layout | container for some text |
| Attributes | Not required,with common css, class | Not required,with common css, class |
The span tag does not create a line break similar to a div tag, but rather allows the user to separate things from other elements around them on a page within the same line. avoiding of line break, results only that selected text to change, keeping all the other elements around them same. Below example will display the difference between span and div tag while div tag contains whole width and span tag contain only required width and rest parts are free for another element.
- Code:
html
<html>
<head>
<title>gfg</title>
<style type=text/css>
p{
background-color:gray;
margin: 10px;
}
div
{
color: white;
background-color: 009900;
margin: 2px;
font-size: 25px;
}
span
{
color: black;
background-color: gray;
margin: 5px;
font-size: 25px;
}
</style>
</head>
<body>
<div > div tag </div>
<div > div tag </div>
<div > div tag </div>
<div > div tag </div>
<span>span-tag</span>
<span>span-tag</span>
<span>span-tag</span>
<span>span-tag</span>
</body>
</html>
Output:

Supported Browser: The browser supported by <div> tag are listed below:
- Google Chrome
- Edge 12
- Internet Explorer
- Firefox 1
- Opera
- Safari
HTML is the foundation of webpages, is used for webpage development by structuring websites and web apps.You can learn HTML from the ground up by following this HTML Tutorial and HTML Examples.
Last Updated :
17 Feb, 2023
Like Article
Save Article