- Manuals
- Brands
- Alinco Manuals
- Two-Way Radio
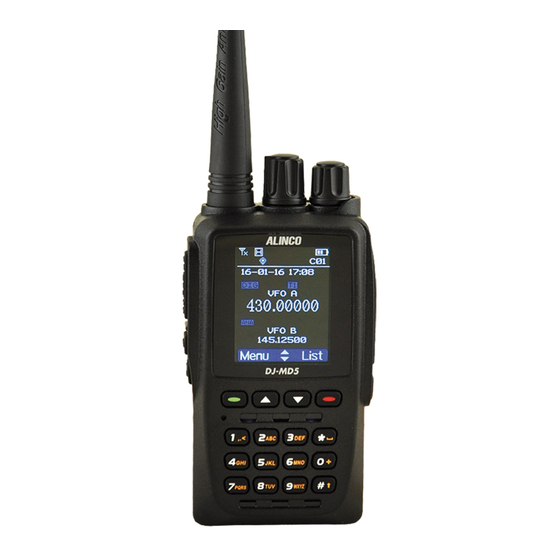
- DJ-MD5
- Operation manuals
-
Contents
-
Table of Contents
-
Bookmarks
Quick Links
DJ-MD5
Operation Manual
Ver, 1.00
2018/08/16
1
Related Manuals for Alinco DJ-MD5
Summary of Contents for Alinco DJ-MD5
-
Page 1
DJ-MD5 Operation Manual Ver, 1.00 2018/08/16… -
Page 2: Table Of Contents
Appendix. OVERVIEW OPERATION ……………………5 1. LED Indications ………………………. 5 2. Programmed Key ……………………..5 3. Default function ………………………. 5 4. Hot Key …………………………5 5. Basic Operations ……………………… 7 5.1 Power on the radio ……………………… 7 5.2 Adjust Volume ……………………..7 5.3 Battery Voltage Test ……………………
-
Page 3
13. Intro Dis (Intro Display) ………………….19 14. Main Channel ……………………..19 15. Sub Channel ……………………..19 16. Msg Note ……………………… 19 17. Call Ring ……………………… 19 18. Freq Step ……………………… 19 19. Ana SQ Level ……………………..20 20. Power Save ……………………..20 21. -
Page 4
18. OWN ID ………………………. 27 19. DTMF Enc ……………………..27 20. 2Tone Enc ……………………..27 21. 2Tone Dec ……………………..28 22. 5Tone Enc ……………………..28 9.6. Device Infor……………………..28 9.7 Reset ……………………….. 28… -
Page 5: Overview Operation
OVERVIEW OPERATION 1. LED Indications The top LED shows the current radio status. LED Indication Status Flashes Red Low battery voltage Constant Red Transmitting Constant Green Analog Receiving Constant Cyan Digital Receiving Flashes Green Scan 2. Programmed Key There are two programmable keys ([PF1], [PF2]) at the right side of radio. it can be assigned functions by manually set in radio or set by PC software.
-
Page 6
Should edit the analog quick call first, then choose analog in the hot key set. Press the key to transmit Analog 2Tone/5Tone/DTMF to start the analog quick call. Call It allows to select a contact from the digital contact list, press the key to switch the channel to the contact temporary. -
Page 7: Basic Operations
Combine ( MENU) + number key operation: ( MENU) key until the LCD display “Next Please Press Dial Key”, press the Press number key, it will perform the programmed function. 5. Basic Operations 5.1 Power on the radio Turn on the radio by turning the [Power/Volume] knob clockwise till a click is heard, LED lights green on and the LCD displays will show a start-up message, and you will hear a beep after 8 seconds.
-
Page 8
Enable/disable the recording function when TX or RX a call Record switch conversation Start/stop recording as a recorder. When stop recording, the Record radio will remind repeat or send the record In digital mode, press to enter into message box, only private call and group call can send and receive a message Dial Start the manually dial… -
Page 9: Battery Voltage Test
SIC OPERATIO 5.3 Battery Voltage Test Press the programmed key to check the current battery voltage, then press the key again to turn off. 5.4 Main band/Sub band switch Press [PF1] key to switch the main channel and sub channel. Both channels are shown on the screen but channel with bigger size is identified as main channel.
-
Page 10: Receiving And Responding To A Radio Call
Operation 1: Turn the channel knob to select a channel. Operation 2: Input the channel numbers by the keyboard. For example, if you want switch to channel 99, input 0 0 9 9 a total of 4 digits, and it will switch to channel 99. 5.9 Receiving and Responding to a Radio Call When the radio is in the digital mode, it can receive and respond to a call with the same frequency/color code/ slot.
-
Page 11: Monitor
5.10 Monitor Press and hold [PF2] key to enter the monitor function. Release to turn off. In analog channel: you can hear background noise and monitor even an incoming weak signal. Release [PF2] key, squelch is mute. In digital channel: it allows you to receive an incoming signal without matching color code or different talk group ID.
-
Page 12: Response And Save A Call In Digital Monitor Mode
5.12 Response and Save a call in Digital Monitor mode Response: During Digital Monitor is on, when radio receives an incoming call with unmatched ID, press key, on the screen will display «Monitor Response Setup Successfully», press [PTT] key will reponse to the call. Save the call: During Digital Monitor is on, when radio receives an incoming call with unmatched ID , Press…
-
Page 13: Moni (Remote Monitor)
2. Moni (Remote Monitor) Select Remote Monitor, the Remote Monitor feature allows a remote user to activate a target radio’s microphone and transmitter for a period of time. A call is silently set up on the target radio, and its PTT is controlled remotely without any indications given to the end user.
-
Page 14: Turn On Gps
7.Turn on GPS 1. Press (MENU) to enter the main Menu, press key to Settings. 2. Select Radio Set, press the key to GPS Set 3. Select GPS Set, press key to GPS On 4. Select GPS On. 7.1 Check the GPS Information There are 2 ways to check GPS information: Operation 1: Check GPS info from Menu Press…
-
Page 15: Recording Feature
8. RECOR 8. Recording Feature There are 2 recording features. a. Record a Call Conversation This feature will record the conversation during transmitting and receiving a signal automatically. Press (MENU) to enter main Menu, press key to Record. Select on or off to turn on or off the Record.
-
Page 16: Contacts
Record file. 3. Select a Record to see the detail information. 4. Select Record Send, and it will display the Contact list or Manual Dial. 5. Select Contact list to choose a contact, press select to send the Record. 6.Select Manual Dial, input the DMR ID, press key to switch group ID or private ID, press select to send the Record 9.
-
Page 17: Scan List
9.3 Scan List In the PC software Public Scan list, it allows to save 250 scan lists, and to program the required scan lists and write it into radio. Switch the radio to channel mode, as the scan list is only valid in the channel mode. Select a Scan list as current scan list, then you can also reset the priority channel 1 and priority channel 2 in the scan list.
-
Page 18: Power Off
6. Power Off Allow to set power off automatically when not used for a period of time, selectable in 10 minutes, 30 minutes, 1 hour or 2 hours. Off: Turn off the function. 7. TX Timer Selectable 30S-240S: The TX will be limited the transmission in a set time period. When this set time is reached, the radio will automatically stop transmission.
-
Page 19: Intro Dis (Intro Display)
13. Intro Dis (Intro Display) Picture: The radio will display an ALINCO picture when powered on. Character: The radio will display the characters set up in PC software when powered Customer`s: User able to change to desired picture. 14. Main Channel Main channel is a channel with showing size is bigger and just main channel able to be transmitted when press hand hold PTT.
-
Page 20: Ana Sq Level
19. Ana SQ Level Selectable 5 squelch levels to receive signal with different signal strength. This function is only valid for analog channel. 20. Power Save Turn on to active the power save function, to prolong the battery life. Save 1:1, work 30ms, dormant 30ms. Save 2:1, work 60ms, dormant 30ms When turn on the power save, it may not receive the message in time.
-
Page 21: Dtmf Speed
26. DTMF Speed Offers DTMF encode speed selectable for receiver decode speed is more suitable, 50~500ms are the options. 27. Radio Turn On/Off the FM radio. 28. FM Radio Monitoring Mon On: During FM radio is On, radio still allows to receive or transmit signal on the channel.
-
Page 22: Auto Repeater B
32. Auto Repeater B Turn on the Auto Repeater function, the TX frequency in VFO mode will be auto increased or decreased frequency on the channel B base on the set up offset frequency. Off: Turn off the function Positive: TX frequency= RX frequency + Offset frequency. Negative: TX frequency= RX frequency — Offset frequency.
-
Page 23: Chan Set (Digital Channel)
※Chan Set (Digital Channel) 1. Store Chan When select to store a channel it will store the current main channel displaying on the screen as a new channel in channel zone, the current channel will be overwritten if channel number is duplicated, input the desired channel number, then press select to enter next menu, input the channel name and then press (MENU) key to save.
-
Page 24: Talk Around
8. Talk Around As normal a radio communicates to a target radio through a repeater (TX and RX frequency are set as different values). This option allows 2 radios communicate to each others but you don’t want to change frequency settings when repeater is out of range or when the repeater is down.
-
Page 25: Time Slot
14. Time Slot Set up time Slot 1 or time Slot 2 for the current channel. The separated time slots often to be used with a repeater for 2 real time slots of 2 radios but must set them have the same color code.
-
Page 26: Slot Suit
21.Slot Suit Select On or Off ※Chan Set (Analog Channel) When the channel type is analog, it will auto hide the digital menus, instead, the channel set will show the analog menus. The below listed menus are for analog channel only, other not listed menus are same as the digital channel.
-
Page 27: Reverse
11.Reverse When this function is enabled, the RX frequency, TX frequency and CTCSS/DCS encode/decode will be reversed. 16.Busy Lock Always: Always allows transmissions Repeater: Will not allow transmit when receiving matched carrier but unmatched CTCSS/DCS. Busy: Will not allow transmit when receiving matched carrier. 17.
-
Page 28
21. 2Tone Dec Set the 2Tone Decode to decode the tone. 22. 5Tone Enc Set 5Tone is an Optional Signal for the current analog channel by using PC software. Set “call” is a function of a programmed key. Press the programed key to transmit the selected 5Tone. When squelch is opened at the receiver side press [PTT] to talk.
Уважаемые пользователи продукции Alinco, спасибо за посещение страницы ALINCO®RU
Пожалуйста, обратите внимание, что документы в PDF формате и могут быть архивированы. Если PDF документ не открывается, установите Adobe Reader DC.
Доводим до Вашего сведения, что некоторые документы содержат ограниченную информацию. Документация и/или инструкции отсутствующие здесь, могут быть доступны через Ваших местных дистрибьюторов ALINCO, как дополнительная опция. Инструкции по эксплуатации на более ранние модели могут быть доступны только на английском языке, либо не доступны вообще. ALINCO Inc. не продаёт в розницу документацию непосредственно потребителям.
В раскрывающимся меню таблицы Вы можете найти дополнительные сведения о продукции ALINCO, в том числе снятой с производства. После выбора модели продукции, начнётся автоматическая загрузка. Если этого не произошло, пожалуйста, проверьте настройки Вашего браузера. Мы надеемся, что эта информация, будет полезной и интересной для Вас.
Любая техника может дать сбои. Если у вас возникли проблемы с купленной в нашем магазине техникой ALINCO, вы можете обратиться в техподдержку. Бывает пользователь не прочитал инструкцию или читал её не полностью, соответственно неверно истолковал функцию. В большинстве случаев возникшая проблема может быть решена с помощью раздела возможные неисправности. Мы предоставляем гарантии, в случае технического брака можем заменить товар или вернуть деньги.
Системы радиосвязи ALINCO славятся своей надёжностью, в случае каких-либо проблем мы гарантированно поможем наладить связь и устранить недостатки.
Если у вас не работает рация ALINCO, приобретённая в нашем магазине, позвоните нам – и ваша проблема будет решена.