
Мануалы недоступны на серверах Mazda. Всё, что описано далее, не работает и сохранено для истории.
Огромное спасибо всем, кто предоставил официальные мануалы Mazda. Для себя я много интересного и полезного нашёл в архивах от mak22223. Но ни один из предложенных вариантов использования мне не понравился, поэтому я взялся изучить, как это работает.
На страницах HTML есть скрипты и они разрабатывались для старых версий Internet Explorer. Для нормальной работы в современном браузере их нужно было править. Постепенно исправляя ошибки мне удалось восстановить выбор вида руководства, «печать» — фактически это открытие ссылки на PDF. Дерево ссылок пришлось построить прямо по XML. Оказалось, что самые ценные файлы — это pu_srvc_menu.htm. В них есть ссылки на XML, которые можно скачать. Эти файлы и определяют уникальность модели. Сначала всё это я проделал для своей машины, а потом повторил для остальных моделей. Я не видел, как выглядит выбор модели, поэтому просто сделал страницу со ссылками, index.html в корне.
Пришлось немного изменить структуру папок, в итоге получился архив с рабочими ссылками на страницы официальных мануалов.
UPD 12.12.2021: Продолжая изучать мануалы и сравнивая их с австралийской версией выяснил, что тут были ссылки только на конкретную модификацию, т.к. выбор предоставлен по VIN. Оказалось, что несложно найти ссылки для остальных модификаций. В итоге опять изменил структуру папок, сгруппировал всё по моделям. Теперь «Руководство по ремонту» (Workshop Manual) содержит ссылки сразу на все модификации. К сожалению, так найти новые русские мануалы не удалось. Зато обычным поиском в интернете нашёл английские мануалы ещё нескольких моделей. Вот что получилось (выделил добавленное):
• Biante: 2012
• BT-50: (TF) 2020
• Mazda2: 2007; (DJ) 2014; (DJ/DL) 2016
• Mazda3: (BK) 2003; (BK) 2006; (BL) 2011; (BM) 2013; (BN) 2016; (BP) 2019
• Mazda5: 2005; 2007
• Mazda6: 2005; (GH) 2007; (GJ) 2012; (GJ) 2014; (GJ/GL) 2016; (GL) 2018
• Mazda8: 2011
• CX-3: (DK) 2015
• CX-5: 2012; (KE) 2014; (KF) 2017
• CX-7: 2007; 2009
• CX-8: (KG) 2018
• CX-9: 2008; (TC) 2016
• CX-30: (DM) 2019
• MX-5: (ND) 2015
• RX-8 (SE/FE) 2008
Архив с интерактивными ссылками, нужно заново скачать, распаковать и запустить index.html.
UPD 20.12.2022: Вот и закончилась халява. Ни по одной ссылке мануалы недоступны.
- Manuals
- Brands
- Mazda Manuals
- Automobile
ManualsLib has more than 382 Mazda Automobile manuals
Click on an alphabet below to see the full list of models starting with that letter:
1
2
3
4
5
6
8
A
B
C
D
E
G
J
M
N
P
R
S
T
X
Z
Popular manuals
322 pages
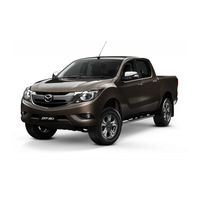
BT-50 2017 Owner’s Manual
391 pages
121 Workshop Manual
358 pages
Demio Owner’s Manual
247 pages
6 Workshop Manual

561 pages
CX-8 Manual

578 pages
626 Workshop Manual
1772 pages
CX-7 2007 Workshop Manual
358 pages
2 Owner’s Manual
1397 pages
B2200 1992 Workshop Manual
737 pages
Miata Service Manual
743 pages
MX-5 Workshop Manual

733 pages
CX-5 Owner’s Manual
329 pages
Tribute Owner’s Manual
257 pages
B4000 Owner’s Manual
972 pages
3 Workshop Manual

624 pages
CX-8 Quick Manual
763 pages
6 Owner’s Manual
2468 pages
RX-8 Manual
197 pages
323F Owner’s Manual
677 pages
323 Workshop Manual Supplement
Models
Document Type
1
121

Workshop Manual
121 1991
Workshop Manual
121 1992
Workshop Manual
121 1993
Workshop Manual
121 1994
Workshop Manual
121 1995
Workshop Manual
121 1996
Workshop Manual
121 1997
Workshop Manual
121 1998
Workshop Manual
1975 Rotary Pickup
Workshop Manual
1977 Rotary Pickup
Wiring Diagram
1978 GLC
Instructions; Maintenance And Servicing
1979-1984 RX7
Technical Service Bulletin
1982 RX-7
Wiring Diagram
1983 RX7
Service Manual
1984 RX7
Maintenance Information
1988 626
Owner’s Manual
1988 RX-7
Workshop Manual
1989 323
Manual
1989 MX-5
Workshop Manual
1990 323
Owner’s Manual • Workshop Manual Supplement
1990 626
Owner’s Manual
1990 MIATA
Manual • Manual • Quick Tips • Quick Tips • Service Manual
1990 MX-5
Workshop Manual Supplement • Workshop Manual • Workshop Manual • Workshop Manual
1990 Protege
Owner’s Manual
1991 323
Owner’s Manual
1991 626
Owner’s Manual
1991 MIATA
Manual
1991 Protege
Owner’s Manual
1992 323
Owner’s Manual
1992 626
Owner’s Manual
1992 MIATA
Manual
1992 MX-3
Manual
1992 Protege
Owner’s Manual
1993 323
Owner’s Manual
1993 MIATA
Manual
1993 MX-3
Manual
1993 Protege
Owner’s Manual
1994 323
Owner’s Manual
1994 MIATA
Manual
1994 MX-3
Manual
1994 Protege
Owner’s Manual
1995 323
Owner’s Manual
1995 MIATA
Manual
1995 MX-5
Workshop Manual Supplement
1995 Protege
Owner’s Manual
1996 323
Owner’s Manual
1996 626
Manual • Service Manual
1996 MIATA
Manual
1996 MX-3
Manual
1996 MX-6
Service Manual
1996 Protege
Owner’s Manual • Workshop Manual • Workshop Manual
1997 323
Owner’s Manual
1997 MIATA
Manual
1997 Protege
Owner’s Manual
1998 323
Owner’s Manual
1998 Protege
Owner’s Manual
1999 MIATA
Manual
2
2
Owner’s Manual • Specifications • Smart Start Manual • Quick Manual • Quick Start Manual • Owner’s Manual • Service Information
2 2011
Smart Start Manual • Owner’s Manual
2 2015
Owner’s Manual
2 2016
Owner’s Manual
2000 MIATA
Manual
2000 Miata MX-5
Wiring Diagram
2001 626
Quick Tips
2001 B-Series
Quick Tips
2001 MIATA
Manual • Quick Tips
2001 Millenia
Quick Tips
2001 MPV
Quick Tips
2001 Tribute
Owner’s Manual • Quick Tips
2002 626
Quick Tips • Owner’s Manual
2002 B2300
Owner’s Manual
2002 B3000
Owner’s Manual
2002 B4000
Owner’s Manual
2002 Mazda MX-5
Owner’s Manual
2002 MIATA
Manual • Quick Tips
2002 Miata MX-5
Owner’s Manual
2002 miata mx5
Owner’s Manual
2002 Millenia
Owner’s Manual • Quick Tips
2002 MPV
Owner’s Manual
2002 Protege
Owner’s Manual • Quick Tips
2002 Protege5
Owner’s Manual • Quick Tips
2002 Tribute
Owner’s Manual • Quick Tips • Manual
2003 B2300
Owner’s Manual
2003 B3000
Owner’s Manual
2003 B4000
Owner’s Manual
2003 MIATA
Manual
2003 Miata MX-5
Owner’s Manual
2003 MPV
Owner’s Manual • Quick Tips
2003 MX-5 Miata
Owner’s Manual • Quick Tips • Manual
2003 Protege
Owner’s Manual • Quick Tips
2003 PROTEGE 5
Quick Tips
2003 Protege5
Owner’s Manual
2003 Tribute
Owner’s Manual • Quick Tips
2004
Owner’s Manual
2004 6
Manual • Quick Tips • Service Bulletin • Owner’s Manual
2004 B-Series Truck
Quick Tips
2004 Mazda3
Owner’s Manual • Manual • Quick Tips
2004 MAZDA6
Owner’s Manual • Quick Tips • Quick Tips
2004 MIATA
Manual
2004 Miata MX-5
Owner’s Manual • Owner’s Manual
2004 MPV
Owner’s Manual • Owner’s Manual • Quick Tips • Quick Tips • Quick Tips
2004 MX-5 Miata
Owner’s Manual • Quick Tips
2004 RX-8
Owner’s Manual • Quick Tips • Service Highlights
2004 Tribute
Owner’s Manual • Quick Tips
2005 323
Owner’s Manual
2005 6 4-DOOR
Quick Tips
2005 6 5-DOOR
Quick Tips • Quick Tips
2005 6 SPORT WAGON
Quick Tips
2005 B Series
Owner’s Manual
2005 B-SERIES TRUCK
Quick Tips
2005 B2300 Truck
Owner’s Manual
2005 mazda 3
Owner’s Manual
2005 Mazda3 4-Door
Owner’s Manual
2005 Mazda6 Sports Sedan
Owner’s Manual
2005 Miata MX-5
Owner’s Manual • Owner’s Manual • Quick Tips • Manual • Manual
2005 MPV
Owner’s Manual • Quick Tips • Owner’s Manual
2005 RX-8
Owner’s Manual • Manual • Quick Tips
2005 Tribute
Brochure • Owner’s Manual • Quick Tips • Quick Tips • Owner’s Manual
2006 3
Quick Tips • Owner’s Manual
2006 B-Series
Owner’s Manual • Owner’s Manual
2006 Mazda3 4-Door
Owner’s Manual • Quick Tips • Owner’s Manual
2006 MAZDA6
Owner’s Manual • Owner’s Manual
2006 MazdaSpeed6
Owner’s Manual
2006 MPV
Owner’s Manual • Quick Tips
2006 MX-5
Service Bulletin • Service Highlights • Owner’s Manual
2006 RX-8
Owner’s Manual • Quick Tips • Service Highlights
2006 Tribute
Owner’s Manual • Owner’s Manual • Owner’s Manual • Quick Tips
2006-2008 RX7 Engine
Workshop Manual
2007 6 Sports Sedan
Owner’s Manual • Specification • Quick Tips • Specification • Service Highlights • Service Bulletin • Owner’s Manual • Manual • Quick Tips • Manual
2007 B-Series
Owner’s Manual
2007 B2300 Truck
Owner’s Manual
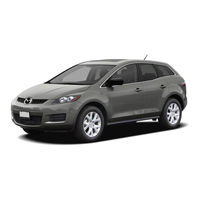
2007 CX-7
Owner’s Manual • Specification • Workshop Manual • Installation Instructions Manual • Bodyshop Manual
2007 CX-9
Owner’s Manual • Quick Tips • Quick Tips • Installation Instructions Manual • Service Highlights
2007 Mazda3 4-Door
Owner’s Manual • Quick Tips
2007 Mazdaspeed 3
Manual • Owner’s Manual • Owner’s Manual • Manual • Quick Tips • Maintenance And Care • Smart Start Manual • Smart Start Manual • Smart Start Manual • Quick Tips • Overview • Smart Start Manual • Smart Start Manual • Smart Start Manual • Owner’s Manual • Quich Start Manual • Smart Start Manual • Smart Start Manual • Owner’s Manual • Owner’s Manual • Owner’s Manual • Smart Start Manual • Quick Manual • Quick Start Manual • Manual
2007 MazdaSpeed6
Owner’s Manual • Specification
2007 MX-5 Miata
Brochure • Owner’s Manual • Quick Tips • Quick Tips • Service Highlights • Accessories Manual • Manual • Manual • Bodyshop Manual
2007 RX-8
Owner’s Manual • Quick Tips • Service Highlights
2007 SPEED 3
Service Highlights
2007 Zoom-Zoom
Owner’s Manual
2008 3
Reference Manual
2008 B2300 Truck
Owner’s Manual
2008 CX-7
Owner’s Manual • Quick Tips • Installation Instructions Manual • Bodyshop Manual
2008 CX-9
Owner’s Manual • Brochure & Specs
2008 Mazda3 4-Door
Owner’s Manual
2008 Mazda5
Owner’s Manual
2008 MAZDA6 5-Door
Owner’s Manual • Specification
2008 MazdaSpeed3
Owner’s Manual
2008 MX-5 Miata
Owner’s Manual • Brochure & Specs • Manual
2008 RX-8
Owner’s Manual
2008 Speed 3
Reference Manual
2008 Tribute
Owner’s Manual • Manual
2008 Tribute HEV
Owner’s Manual
2009 5
Owner’s Manual • Smart Start Manual • Brochure & Specs
2009 6
Smart Start Manual • Specification • Bodyshop Manual
2009 B Series
Smart Start Manual
2009 B2300 Truck
Smart Start Manual
2009 CX-7
Specifications • Manual • Smart Start Manual • Installation Instructions Manual • Bodyshop Manual
2009 CX-9
Owner’s Manual • Smart Start Manual
2009 Mazda3 4-Door
Owner’s Manual • Smart Start Manual
2009 Mazda5
Owner’s Manual • Brochure & Specs
2009 Mazda6
Owner’s Manual
2009 MX-5 Miata
Owner’s Manual • Smart Start Manual • Specification • Specification • Specifications • Brochure & Specs
2009 RX-8
Smart Start Manual • Quick Tips • Service Highlights
2009 Tribute
Owner’s Manual • Smart Start Manual
2009 Tribute HEV
Owner’s Manual
2009 Tribute Hybrid
Owner’s Manual
2010 3
Smart Start Manual • Vehicle Instruction Card
2010 5
Smart Start Manual
2010 6
Smart Start Manual • Brochure & Specs • Bodyshop Manual
2010 CX-7
Owner’s Manual • Smart Start Manual • Installation Instructions Manual • Bodyshop Manual • Smart Start Manual
2010 CX-9
Owner’s Manual • Smart Start Manual • Owner’s Manual • Brochure • Smart Start Manual
2010 Mazda3 4-Door
Owner’s Manual • Smart Start Manual • Specification • Overview • Specification • Owner’s Manual
2010 MAZDA3 i
Specification
2010 MAZDA3 s
Specification
2010 Mazda5
Owner’s Manual
2010 Mazda6
Smart Start Manual • Brochure & Specs • Manual
2010 MazdaSpeed3
Smart Start Manual
2010 MX-5 Miata
Smart Start Manual • Specification
2010 RX-8
Owner’s Manual • Smart Start Manual • Brochure & Specs • Owner’s Manual
2010 Tribute
Smart Start Manual • Owner’s Manual • Manual
2011 CX-9
Maintenance And Care • Start Manual • Owner’s Manual
2011 Mazda2
Smart Start Manual • Owner’s Manual
2011 MX-5 Miata
Smart Start Manual • Owner’s Manual
2011 RX-8
Specification • Smart Start Manual • Brochure & Specs • Workshop Manual
2011 Tribute
Owner’s Manual • Smart Start Manual • Features • Brochure & Specs
2012 CX5
Owner’s Manual
2012 2
Specifications • Smart Start Manual • Brochure & Specs • Owner’s Manual
2012 3
Manual • Owner’s Manual
2012 5
Maintenance And Care • Smart Start Manual • Owner’s Manual
2012 6
Smart Start Manual • Specification • Features Manual • Bodyshop Manual
2012 CX-7
Smart Start Manual • Owner’s Manual • Installation Instructions Manual • Bodyshop Manual • Owner’s Manual
2012 CX-7i
Specification
2012 CX-7s
Specification
2012 CX-9
Owner’s Manual • Smart Start Manual • Brochure & Specs • Owner’s Manual • Owner’s Manual
2012 Mazda2
Brochure & Specs
2012 Mazda3
Smart Start Manual • Owner’s Manual
2012 Mazda5
Owner’s Manual
2012 Mazda6
Owner’s Manual
2012 MX-5 Miata
Owner’s Manual • Smart Start Manual • Owner’s Manual
2013 6
Specification • Smart Start Manual • User Manual • Bodyshop Manual
2013 2
Smart Start Manual • Brochure & Specs
2013 5
Smart Start Manual • Brochure & Specs
2013 CX-5
Start Manual • Engine & Mechanical • Brochure • Workshop Manual
2013 CX-9
Smart Start Manual • Brochure & Specs • Owner’s Manual
2013 Mazda2
Brochure & Specs
2013 Mazda3
Smart Start Manual • Owner’s Manual • Owner’s Manual
2013 Mazda5
Brochure & Specs
2013 MX-5 Miata
Smart Start Manual • Smart Start Manual
2014 2
Brochure & Specs • Owner’s Manual • Manual
2014 3
Engine & Mechanical • Smart Start Manual
2014 3 4-Door
Engine & Mechanical
2014 6
Quick Manual • Engine & Mechanical • Smart Start Manual
2014 CX-5
Smart Start Manual • Owner’s Manual • Smart Start Manual
2014 CX-9
Smart Start Manual • Specifications • User Manual
2014 MAZDA2
Specifications • Smart Start Manual • Brochure & Specs
2014 Mazda3
Overview • Owner’s Manual
2014 MX-5 Miata
Smart Start Manual • Overview • Owner’s Manual
2014 Zoom-Zoom
User Manual
2015 5
Owner’s Manual • Owner’s Manual
2015 6
Smart Start Manual • Brochure & Specs
2015 CX-5
Specifications • Smart Start Manual • Brochure & Specs • Owner’s Manual
2015 CX-9
User Manual
2015 Mazda6
Smart Start Manual • Brochure & Specs
2016 CX3
Owner’s Manual • Installation And Removal Instructions • Service Information
3
3
Workshop Manual • Service Information
3 2007
Owner’s Manual • Service Highlights • Owner’s Manual
3 2015
Owner’s Manual • Owner’s Manual
3 2016
Manual
3 2018
Smart Start Manual • Owner’s Manual
3 2019
Owner’s Manual • Owner’s Manual • Owner’s Manual
3 2020
Owner’s Manual • Manual • Manual • Owner’s Manual
3 5-DOOR
Specification
3 5-Door 2011
Specification
3 Facelift 2006
Training Manual
3 i
Specification
3 Sedan 2019
Owner’s Manual • Manual
3 Sedan 2020
Owner’s Manual
3 Sport 2017
Manual
3 Sport 2020
Manual • Owner’s Manual
3-sport 2016
Manual
323 1988
Manual • Workshop Manual
323 Protege
Owner’s Manual • Owner’s Manual • Manual • Workshop Manual Supplement
323 Protege 1992
Workshop Manual
323F
Owner’s Manual
4
4WD
Owner’s Manual
5
5 2006
Quick Tips • Owner’s Manual
5 2007
Owner’s Manual • Service Highlights • Manual
5 2014
Smart Start Manual • Owner’s Manual
6
6 20014
Smart Start Manual
6 2002
Workshop Manual • Bodyshop Manual • Workshop Manual
6 2003
Manual • Quick Tips • Service Bulletin
6 2006
Owner’s Manual • Service Bulletin • Installation Instructions Manual
6 2008
Owner’s Manual
6 2011
Specification • Specification • Manual • Bodyshop Manual
6 2016
Smart Start Manual • Manual
6 2017
Owner’s Manual
6 Facelift 2005
Training Manual
6 MPS 2005
Training Manual Supplement
6 Sport Wagon
Quick Tips • Specification • Specification
6 Sport Wagon 2007
Specification
626 1981
Workshop Manual
626 1987
Workshop Manual
626 1989
Owner’s Manual • Workshop Manual
626 1993
Manual
626 1994
Manual • Workshop Manual
626 1995
Manual
626 1997
Manual
626 MX-6
Workshop Manual
626 MX-6 1989
Wiring Diagram
626 Station Wagon
Owner’s Manual • Owner’s Manual • Manual • Workshop Manual
8
8T12-EA-03K
User Manual
A
Automobile
Owner’s Manual • Manual • Maintenance Schedule • User Manual • Owner’s Manual
B
B 2008 Series
Quick Tips
B-Series
Quick Tips • Training Manual
B-Series 1997
Workshop Manual
B-Series Truck
Specification • Quick Tips
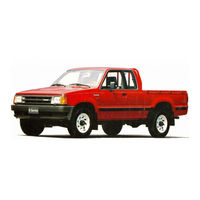
B2200 1992
Workshop Manual
B2300 2001
Manual
B2600i 1992
Workshop Manual
B4000
Owner’s Manual
B4000 2001
Manual
BT-50 2017
Owner’s Manual
C
car
Workshop Manual
Chassis Tuning
Setup Manual
CX 9 2021
Manual
CX-3
Smart Start Manual • Manual • Owner’s Manual • Owner’s Manual • Smart Start Manual • Owner’s Manual • Quick Start Manual • Service Information
CX-3 2018
Owner’s Manual
CX-30
Manual • Quick Start Manual • Manual • Quick Manual
CX-30 2020
Owner’s Manual • Manual • Owner’s Manual
CX-5
Owner’s Manual • Start Manual • Manual • Smart Start Manual • Brochure • Introduction Manual • Installation Instructions Manual • Owner’s Manual • Smart Start Manual • Manual • Quick Start Manual • Service Information
CX-5 2.0L Active MT
Introduction Manual
CX-5 2.0L Dynamic AT
Introduction Manual
CX-5 2.0L Individual AT
Introduction Manual
cx-5 2016
Manual
CX-5 2017
Manual
CX-5 2018
Owner’s Manual
CX-5 2021
Manual
CX-52017
Owner’s Manual • Owner’s Manual
CX-7 2011
Specification • Installation Instructions Manual • Bodyshop Manual
CX-7 Navigation System
Owner’s Manual • Owner’s Manual • Maintenance And Care • Smart Start Manual • Quick Start Manual • Specification • Quick Tips
CX-7i
Specification
CX-7s
Specification
CX-8
Manual • Quick Manual
CX-9
Audio Manual • Owner’s Manual • Owner’s Manual • Quick Start Manual • Quick Tips • Owner’s Manual • Maintenance And Care • Smart Start Manual • Quick Tips • Accessory Installation Manual • User Manual • Smart Start Manual • Instructions Manual • Service Information
CX-9 2016
Owner’s Manual • Owner’s Manual
CX-9 2018
Owner’s Manual
CX-9 2019
Owner’s Manual • Owner’s Manual
CX-9 2021
Manual • Manual
CX-9 Grand Touring 2007
Manual
CX-9 Grand Touring 2008
Manual
CX-9 Grand Touring 2009
Manual
D
Demio
Owner’s Manual
E
European Roadside Assistance
Handbook
G
Global MX-5 Cup
User Manual
J
J16R
Manual
M
Mazda 5 2006 year
Owner’s Manual
Mazda 6
Owner’s Manual • Owner’s Manual • Manual • Specification • Specification • Quick Tips • Quick Tips • Smart Start Manual • Smart Start Manual • Specification • Specification • Quick Tips • Features Manual • Smart Start Manual • Smart Start Manual • Workshop Manual • User Manual • Workshop Manual • Training Manual • Installation Instructions Manual • Installation Instructions Manual • Smart Start Manual • Manual • Smart Start Manual • Owner’s Manual • Service Bulletin • Quick Start Manual • Service Information
Mazda2
Smart Start Manual
MAZDA3 2011
Manual • Smart Start Manual • Specification
mazda3 2015
Owner’s Manual
Mazda3 2019
Owner’s Manual
Mazda3 Connectivity
Manual • Owner’s Manual • Maintenance And Care • Quich Start Manual • Smart Start Manual
Mazda5
Owner’s Manual
MAZDA5 2006
Owner’s Manual • Installation Instructions Manual
Mazda6
Owner’s Manual • User Manual • Maintenance Schedule
Mazda6 2011
Specification • Specification
Mazdaspeed3 5-Door Hatchback
Overview • Manual
Millenia
Quick Tips
Millenia 1996
Workshop Manual
MPV 2005
Owner’s Manual
MPV 2006
Owner’s Manual • Owner’s Manual
MX-3
Manual
MX-3 1995
Manual • Workshop Manual
MX-30 2020
Owner’s Manual
MX-30 2021
Disposal Manual
MX-30 2022
Owner’s Manual Leaflet
mx-5 2016
Manual • Shop Manual
mx-5 2017
Owner’s Manual
MX-5 2021
Manual
MX-5 Miata
Brochure • Owner’s Manual • Owner’s Manual • Owner’s Manual • Owner’s Manual • Owner’s Manual • Quick Tips • Quick Tips • Quick Tips • Quick Tips • Maintenance Schedule • Quick Tips • Smart Start Manual • Smart Start Manual • Smart Start Manual • Specification • Specification • Specification • Workshop Manual Supplement • Workshop Manual • Workshop Manual Supplement • Smart Start Manual • Workshop Manual • Installation Instructions Manual • Owner’s Manual • Owner’s Manual • Smart Start Manual • Quick Start Manual • Manual • Service Information
MX-5 Miata 1997
Workshop Manual
mx-5 miata 2004
Owner’s Manual
mx-5 miata 2012
Specification
mx-5 Miata 2017
Smart Start Manual
MX-5 Miata Sport 2007
Manual
MX-5 RF
Owner’s Manual • Quick Start Manual
MX-6
Manual
MX-6 1989
Workshop Manual
MX-6 1994
Workshop Manual
MX-6 1998
Workshop Manual
mx5 miata 1999
Workshop Manual
N
NMT-009
Training Manual
P
premacy
Training Manual
Protege
Quick Tips • Quick Tips
Protege 2001
Owner’s Manual
PROTEGE 5
Owner’s Manual • Quick Tips • Manual • Maintenance And Care • Maintenance And Care • Smart Start Manual • Smart Start Manual • Quick Start Manual • Smart Start Manual • Smart Start Manual • Quick Tips • Smart Start Manual • Manual • Workshop Manual • Workshop Manual • Workshop Manual • Quick Tips
Protege5
Quick Tips
R
RX-7
Service Manual
RX-7 1985
Service Bulletin
RX-7 1989
Service Highlights • Factory Service Manual
RX-7 1993
Service Highlights
RX-8
Owner’s Manual • Owner’s Manual • Specification • Quick Tips • Smart Start Manual • Maintenance Schedule • Smart Start Manual • Quick Tips • Owner’s Manual • Workshop Manual • Troubleshooting Manual • Service Manual • Manual • Workshop Manual
S
Scheduled Maintenance
Maintenance Schedule
SPEED3
Quick Tips
SPEED3 2007
Service Highlights
SPEED6
Specification
SPEED6 2007
Service Highlights
T
TC070-15-01H
Student Manual
Tribute
Owner’s Manual • Owner’s Manual • Owner’s Manual • Quick Tips • Specification • Quick Tips • Smart Start Manual • Smart Start Manual • Quick Tips
Tribute (j14)
Owner’s Manual
Tribute Om 2004
Owner’s Manual
TTCC007700—1155—0011H
Student Manual
X
Xedos 6
Owner’s Manual • Owner’s Manual
Z
Zoom-Zoom
Manual
ZOOM-ZOOM BT-50
Manual • Quick Start Manual • Owner’s Manual • Training Manual
Перейти к контенту
Схемы на английском языке электрооборудования автомобиля Mazda 6 после рестайлинга и Mazda 6 MPS.
Руководство на английском языке по техническому обслуживанию и ремонту автомобиля Mazda 626 1998 года
Руководство на пятнадцати языках по установке парктроников на автомобили Mazda Рекомендуем перед началом ремонта
Руководство по эксплуатации и ремонту автомобиля Mazda 626 1983-1991 годов выпуска с бензиновыми и
Руководство на английском языке по техническому обслуживанию и ремонту Mazda CX-7 2007 года выпуска.
Схемы на английском языке электрооборудования автомобиля Mazda 6 в кузове GH. Рекомендуем перед началом
Руководство на английском языке по техническому обслуживанию и ремонту двигателя автомобиля Mazda RX-4. Рекомендуем
Руководство по эксплуатации, техническому обслуживанию и ремонту автомобиля Mazda 626 с 1983 года выпуска.
Руководство по эксплуатации, техническому обслуживанию и ремонту автомобилей Mazda 3 и Mazda Axela в
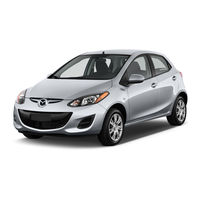
Мультимедийное руководство на английском языке по техническому обслуживанию и ремонту автомобиля Mazda 2 первого
- Manuals
- Brands
- Mazda Manuals
- Automobile
- CX-3
- Manual
-
Contents
-
Table of Contents
-
Troubleshooting
-
Bookmarks
Quick Links
Chapters
-
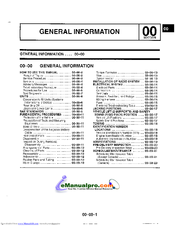
Table of Contents
5 -
2 Essential Safety Equipment
13 -
3 Before Driving
73 -
4 When Driving
121 -
5 Interior Features
259 -
6 Maintenance and Care
397 -
7 If Trouble Arises
465 -
8 Customer Information and Reporting Safety Defects
511
Related Manuals for Mazda CX-3
Summary of Contents for Mazda CX-3
-
Page 3
HIROSHIMA, JAPAN Important Notes About This Manual Keep this manual in the glove compartment as a handy reference for the safe and enjoyable use of your Mazda. Should you resell the vehicle, leave this manual with it for the next owner. -
Page 4: How To Use This Manual
Mazda. By reading your manual, you Please refer to the manual for a detailed can nd out about the features, important explanation.
-
Page 5: Table Of Contents
Table of Contents Pictorial Index Interior, exterior views and part identification of your Mazda. Essential Safety Equipment Important information about safety equipment, including seats, seat belt system, child-restraint systems and SRS air bags. Before Driving Use of various features, including keys, doors, mirrors and windows.
-
Page 7
Pictorial Index Interior, exterior views and part identi cation of your Mazda. Interior Overview …………….1-2 Interior Equipment (View A) …………1-2 Interior Equipment (View B) …………1-4 Interior Equipment (View C) …………1-5 Exterior Overview …………….1-6 1–1… -
Page 8
Pictorial Index Interior Overview Interior Equipment (View A) Door-lock knob ………………… page 3-18 Turn and lane-change signal …………….. page 4-46 Lighting control………………… page 4-41 Wiper and washer lever ………………page 4-47 TCS OFF switch………………..page 4-60 Tire pressure monitoring system set switch …………page 4-129 Blind Spot Monitoring (BSM) switch ………….. -
Page 9
Pictorial Index Interior Overview Audio control switches………………page 5-55 Instrument cluster ………………..page 4-12 Dashboard illumination knob …………….page 4-19 Cruise control switches …………….page 4-96 , 4-122 Seat warmer switches ………………..page 2-6 Hazard warning asher switch …………….page 4-53 Push button start …………………. -
Page 10
Pictorial Index Interior Overview Interior Equipment (View B) SRS air bags ………………….page 2-38 Active driving display ………………. page 4-22 Climate control system……………….. page 5-2 Rear window defogger switch…………….page 4-51 Audio system………………….page 5-14 CD player ………………….page 5-14 Accessory sockets ……………….. -
Page 11
Pictorial Index Interior Overview Interior Equipment (View C) Seat belts ………………….. page 2-12 SRS air bag………………….page 2-38 Bottle holder ………………….page 5-134 Sunvisor ………………….page 5-130 Vanity mirror ………………….. page 5-130 Overhead lights ………………..page 5-130 Moonroof switch ………………..page 3-35 Rearview mirror ……………….. -
Page 12
Pictorial Index Exterior Overview Hood ……………………page 6-24 Windshield wiper blades ………………page 6-34 Moonroof ………………….page 3-35 Doors and keys …………………. page 3-11 Fuel- ller lid ………………….page 3-27 Wheels and Tires ………………..page 6-42 Exterior lights ………………….page 6-46 Rear window wiper blade ……………… -
Page 13
Essential Safety Equipment Important information about safety equipment, including seats, seat belt system, child-restraint systems and SRS air bags. Seats ………………… 2-2 Seat Precautions …………….2-2 Front Seat ………………2-5 Rear Seat ………………2-7 Head Restraints …………….2-10 Seat Belt Systems …………….2-12 Seat Belt Precautions ………….. -
Page 14: Seats
The front seats contain air bag components essential to the supplemental restraint system. Such modifi cations could damage the supplemental restraint system and result in serious injury. Consult an Authorized Mazda Dealer if there is any need to remove or reinstall the front seats.
-
Page 15: Before Driving
Essential Safety Equipment Seats Do not drive with either front seats reclined: Sitting in a reclined position while the vehicle is moving is dangerous because you do not get the full protection from seat belts. During sudden braking or a collision, you can slide under the lap belt and suff er serious internal injuries.
-
Page 16
Essential Safety Equipment Seats CAUTION When operating a seat, be careful not to put your hands or fi ngers near the moving parts of the seat or on the side trim to prevent injury. When moving the seats, make sure there is no cargo in the surrounding area. If the cargo gets caught it could damage the cargo. -
Page 17: Front Seat
Essential Safety Equipment Seats Front Seat Seat Operation Seat Slide To move a seat forward or backward, raise the lever and slide the seat to the desired position and release the lever. Make sure the lever returns to its original position and the seat is locked in place by attempting to push it forward and backward.
-
Page 18: Seat Warmer
Essential Safety Equipment Seats Seat Warmer WARNING The front seats are electrically heated. The Be careful when using the seat warmer: ignition must be switched ON. The heat from the seat warmer may be Press the seat warmer switch while the too hot for some people, as indicated ignition is switched ON to operate the seat below, and could cause a low-…
-
Page 19: Rear Seat
Essential Safety Equipment Seats NOTE Rear Seat If the ignition is switched off while the seat warmer is operating (High, Mid or Split Folding the Seatback Low) and then switched ON again, the By lowering the rear seatbacks the luggage seat warmer will automatically operate compartment space can be expanded.
-
Page 20
Essential Safety Equipment Seats 1. Lower the head restraint all the way When transporting cargo, do not allow down. the cargo to exceed the height of the Refer to Head Restraints on page seatbacks. 2-10 . Transporting cargo stacked higher 2. -
Page 21
Essential Safety Equipment Seats To return the seatback to its upright 1. Make sure that the seat belt passes position: through the seat belt guide correctly and it is not twisted, then raise the seatback while preventing the seat belt WARNING from being caught in the seatback. -
Page 22: Head Restraints
Essential Safety Equipment Seats Height Adjustment Head Restraints Adjust the head restraint so that the center Your vehicle is equipped with head is even with the top of the passenger’s ears. restraints on all outboard seats and the rear center seat. The head restraints are intended to help protect you and the passengers from neck injury.
-
Page 23
Essential Safety Equipment Seats Rear outboard seat Removal/Installation To remove the head restraint, pull it up Except Mexico while pressing the stop-catch. To install the head restraint, insert the legs into the holes while pressing the stop- catch. WARNING Always drive with the head restraints installed when seats are being used and make sure they are properly installed: Driving with the head restraints not… -
Page 24: Seat Belt Systems
Seat Belt Precautions Seat belts help to decrease the possibility of severe injury during accidents and sudden stops. Mazda recommends that the driver and all passengers always wear seat belts. (Except Mexico) All of the seat belt retractors are designed to keep the lap/shoulder belts out of the way when not in use.
-
Page 25
Using a damaged seat belt is dangerous. An accident could damage the belt webbing of the seat belt in use. A damaged seat belt cannot provide adequate protection in a collision. Have an Authorized Mazda Dealer inspect all seat belt systems in use during an accident before they are used again. -
Page 26: Automatic Locking Mode
Essential Safety Equipment Seat Belt Systems Pregnant Women and Persons with Serious Medical Conditions Pregnant women should always wear seat belts. Ask your doctor for speci c recommendations. The lap belt should be worn SNUGLY AND AS LOW AS POSSIBLE OVER THE HIPS. The shoulder belt should be worn across your shoulder properly, but never across the stomach area.
-
Page 27: Seat Belt
If a belt does not fully retract, inspect it for kinks and twists. If it is still not retracting properly, have it inspected at an Authorized Mazda Dealer. Take up slack Keep low on Front Shoulder Belt Adjuster…
-
Page 28: Seat Belt Warning Systems
Essential Safety Equipment Seat Belt Systems Seat Belt Warning Seat Belt Pretensioner Systems and Load Limiting Systems If it detects that the occupant seat belt is unfastened, the warning light or beep For optimum protection, the driver and alerts the occupant. front passenger seat belts are equipped Refer to Warning/Indicator Lights on page with pretensioner and load limiting…
-
Page 29
In addition, the pretensioner system for limiter has been expended: the front passenger, like the front and side Always have an Authorized Mazda passenger air bag, is designed to only Dealer immediately inspect the seat deploy when the front passenger occupant… -
Page 30: Seat Belt Extender
If residue from the Please contact your Authorized Mazda deployment of the air bags or the front Dealer for more information. pretensioner system gets on the skin or in the eyes, wash it off as soon as possible.
-
Page 31
Using a seat belt extender to fasten extender in a diff erent vehicle or seat. a child-restraint system on any seat If you sell your Mazda, do not leave is dangerous. Always follow the your seat belt extender in the vehicle. It… -
Page 32: Child Restraint
Even if the front passenger air bag is shut off, Mazda strongly recommends that children be properly restrained and child-restraint systems of all kinds are properly secured on the rear seats which are the best place for children.
-
Page 33
Essential Safety Equipment Child Restraint WARNING Use the correct size child-restraint system: For eff ective protection in vehicle accidents and sudden stops, a child must be properly restrained using a seat belt or child-restraint system depending on age and size. If not, the child could be seriously injured or even killed in an accident. -
Page 34
Essential Safety Equipment Child Restraint Never use a rear-facing child-restraint system in the front seat with an air bag that could deploy: Rear-facing child-restraint systems on the front seat are particularly dangerous even though you may feel assured that a front passenger air bag will not deploy based on the fact that the front passenger air bag deactivation indicator light illuminates. -
Page 35
Essential Safety Equipment Child Restraint Do not install a front-facing child-restraint system on the front passenger seat unless it is unavoidable: In a collision, the force of a deploying air bag could cause serious injury or death to the child. If installing a front-facing child-restraint system on the front passenger seat is unavoidable, move the front passenger seat as far back as possible. -
Page 36
NOTE Your Mazda is equipped with LATCH lower anchors for attachment of specially designed LATCH child-restraint systems in the rear seats. When using these anchors to secure a child-restraint system, refer to «Using LATCH Lower Anchor» (page 2-34 ). -
Page 37: Child-Restraint System Installation
Essential Safety Equipment Child Restraint Infant seat Child-Restraint System An infant seat provides restraint by Installation bracing the infant’s head, neck and back against the seating surface. Child-Restraint System Types In this owner’s manual, explanation of child-restraint systems is provided for the following three types of popular child- restraint systems: infant seat, child seat, booster seat.
-
Page 38: Installing Child-Restraint Systems
Some child-restraint systems now come with tethers and therefore must be installed on the seats that take tethers to be effective. In your Mazda, tethered child-restraint systems can only be accommodated in the three positions on For left For right the rear seat.
-
Page 39
Essential Safety Equipment Child Restraint Using Automatic Locking Mode Always remove the head restraint and install child-restraint system: Follow these instructions when using Installing a child-restraint system a child-restraint system, unless you are without removing the head restraint is attaching a LATCH-equipped child- dangerous. -
Page 40
Essential Safety Equipment Child Restraint 4. To get the retractor into the automatic NOTE locking mode, pull the shoulder belt Inspect this function before each use of portion of the seat belt until the entire the child-restraint system. You should length of the belt is out of the retractor. -
Page 41
Essential Safety Equipment Child Restraint Always attach the tether strap to the WARNING correct tether anchor position: Attaching the tether strap to the Use the tether and tether anchor only incorrect tether anchor position is for a child-restraint system: dangerous. In a collision, the tether Using the tether or tether anchor to strap could come off and loosen the secure anything but a child-restraint… -
Page 42
To check if your front seats have side air front passenger air bag deactivation bags: indicator light illuminates, you should Mazda vehicles equipped with side air not use a rear-facing child-restraint bag will have a «SRS AIRBAG» tag on system in the front seat. -
Page 43
Essential Safety Equipment Child Restraint Do not allow a child or anyone to lean Always install the head restraint and over or against the side window of a adjust it to the appropriate position vehicle with side and curtain air bags: after removing the child-restraint It is dangerous to allow anyone to lean system:… -
Page 44
Essential Safety Equipment Child Restraint 6. Push the child-restraint system rmly 8. Switch the ignition ON and make sure into the vehicle seat. Be sure the the front passenger air bag deactivation belt retracts as snugly as possible. A indicator light illuminates after clicking noise from the retractor will installing a child-restraint system on be heard during retraction if the system… -
Page 45
If the indicator light does not illuminate after seating a child in a child-restraint system on the front passenger seat, seat a child in a child-restraint system on the rear seat and consult an Authorized Mazda Dealer as soon as possible. 2–33… -
Page 46
Child Restraint Using LATCH Lower Anchor Your Mazda is equipped with LATCH lower anchors for attachment of specially designed LATCH child-restraint systems in the rear seats. Both anchors must be used, otherwise the seat will bounce around and put the child in danger. Most LATCH child-restraint systems must also be used in conjunction with a tether to be effective. -
Page 47
Essential Safety Equipment Child Restraint Installation on rear outboard seats 6. If your child-restraint system came equipped with a tether, that means it is 1. First, adjust the front seat to allow very important to properly secure the clearance between the child-restraint tether for child safety. -
Page 48
Essential Safety Equipment Child Restraint Installation on rear center seat Always attach the tether strap to the correct tether anchor position: The LATCH lower anchors at the center Attaching the tether strap to the of the rear seat are much further apart incorrect tether anchor position is than the sets of LATCH lower anchors dangerous. -
Page 49
Essential Safety Equipment Child Restraint WARNING Always remove the head restraint and install child-restraint system: Installing a child-restraint system without removing the head restraint is dangerous. The child-restraint system cannot be installed correctly which may result in death or injury to the child in a collision. -
Page 50: Srs Air Bags
Essential Safety Equipment SRS Air Bags Supplemental Restraint System (SRS) Precautions The front and side supplemental restraint systems (SRS) include different types of air bags. Please verify which kinds of air bags are equipped on your vehicle by locating the “SRS AIRBAG”…
-
Page 51
Essential Safety Equipment SRS Air Bags If your vehicle is also equipped with a front passenger occupant classi cation system, refer to the Front Passenger Occupant Classi cation System (page 2-55 ) for details. If your vehicle is equipped with a front passenger occupant classi cation system, the front passenger air bag deactivation indicator light illuminates for a speci ed time after the ignition is switched ON. -
Page 52
Essential Safety Equipment SRS Air Bags Never use a rear-facing child-restraint system in the front seat with an air bag that could deploy: Rear-facing child-restraint systems on the front seat are particularly dangerous even though you may feel assured that a front passenger air bag will not deploy based on the fact that the front passenger air bag deactivation indicator light illuminates. -
Page 53
Essential Safety Equipment SRS Air Bags Do not attach objects on or around the area where a side air bag deploys: Attaching objects to the front seat in such a way as to cover the outboard side of the seat in any way is dangerous. In an accident the object could interfere with the side air bag, which infl ates from the outboard side of the front seats, impeding the added protection of the side air bag system or redirecting the air bag in a way that is dangerous. -
Page 54
Do not use tires or wheels other than those specifi ed for your Mazda: Use of any tire or wheel other than those specifi ed for your Mazda (page 9-8 ) is dangerous. Use of such wheels will prevent the vehicle’s accident detections system from accurately detecting a collision or roll-over accident resulting in incorrect or unexpected air bag deployment and the possibility of serious injuries. -
Page 55
Only a trained Authorized Mazda Dealer can fully evaluate these systems to see that they will work in any subsequent accident. Driving with an expended or damaged air bag or pretensioner unit will not aff ord you the necessary protection in the event of any subsequent accident which could result in serious injury or death. -
Page 56
Should you sell your Mazda, we urge you to tell the new owner of its air bag systems and that familiarization with all instructions about them, from the Owner’s Manual, is important. -
Page 57: Supplemental Restraint System Components
Essential Safety Equipment SRS Air Bags Supplemental Restraint System Components (With Front Passenger Occupant Classi cation System) 2–45…
-
Page 58
Essential Safety Equipment SRS Air Bags (Without Front Passenger Occupant Classi cation System) Driver/Front passenger in ators and air bags Roll-over sensor , crash sensors, and diagnostic module (SAS unit) Seat belt pretensioners (page 2-16 ) Front air bag sensors Side crash sensors Air bag/seat belt pretensioner system warning light (page 4-25 ) Side and curtain in ators and air bags… -
Page 59: How The Srs Air Bags Work
SRS Air Bags How the SRS Air Bags Work Your Mazda is equipped with the following types of SRS air bags. SRS air bags are designed to work together with the seat belts to help to reduce injuries during an accident.
-
Page 60
Essential Safety Equipment SRS Air Bags Front Passenger Air Bag The front passenger air bag is mounted in the front passenger dashboard. The in ation mechanism for the front passenger air bag is the same as the driver’s air bag. For more details about air bag deployment, refer to «SRS Air Bag Deployment Criteria»… -
Page 61
Essential Safety Equipment SRS Air Bags Side Air Bags The side air bags are mounted in the outboard sides of the front seatbacks. When the air bag crash sensors detect a side impact of greater than moderate force, the system in ates the side air bag only on the side in which the vehicle was hit. The side air bag in ates quickly to reduce injury to the driver or front passenger’s chest caused by directly hitting interior parts such as a door or window. -
Page 62
Essential Safety Equipment SRS Air Bags Curtain Air Bags The curtain air bags are mounted in the front and rear window pillars, and the roof edge along both sides. When the air bag crash sensors detect a side impact of greater than moderate force, the curtain air bag in ates quickly and helps to reduce injury mainly to the rear outboard passenger’s head caused by directly hitting interior parts such as a door or window. -
Page 63: Srs Air Bag Deployment Criteria
Essential Safety Equipment SRS Air Bags SRS Air Bag Deployment Criteria This chart indicates the applicable SRS equipment that will deploy depending on the type of collision. (The illustrations are the representative cases of collisions.) Types of collision A severe frontal/near frontal A severe side A roll-over/near A rear collision…
-
Page 64
Essential Safety Equipment SRS Air Bags NOTE In a frontal offset collision, the equipped air bags and pretensioners may all deploy depending on the direction, angle, and rate of impact. 2–52… -
Page 65: Limitations To Srs Air Bag
Essential Safety Equipment SRS Air Bags Limitations to SRS Air Bag In severe collisions such as those described previously in «SRS Air Bag Deployment Criteria», the applicable SRS air bag equipment will deploy. However, in some accidents, the equipment may not deploy depending on the type of collision and its severity. Limitations to front/near front collision detection: The following illustrations are examples of front/near front collisions that may not be detected as severe enough to deploy the SRS air bag equipment.
-
Page 66
Essential Safety Equipment SRS Air Bags Limitations to side collision detection: The following illustrations are examples of side collisions that may not be detected as severe enough to deploy the SRS air bag equipment. Side impacts with two-wheeled vehicles Side impacts involving trees or poles Roll-over (Without Front Passenger Occupant Classification System) (With Front Passenger Occupant Classi cation System) Limitations to roll-over detection:… -
Page 67: Front Passenger Occupant Classi Cation System
Essential Safety Equipment SRS Air Bags Front Passenger Occupant Classi cation System First, please read «Supplemental Restraint System (SRS) Precautions» (page 2-38 ) carefully. Front Passenger Occupant Classi cation Sensor Your vehicle is equipped with a front passenger occupant classi cation sensor as a part of the supplemental restraint system.
-
Page 68
ON and does not turn on as indicated in the front passenger air bag deactivation indicator light on/off condition chart, do not allow an occupant to sit in the front passenger seat and consult an Authorized Mazda Dealer as soon as possible. The system may not work properly in an accident. -
Page 69
Essential Safety Equipment SRS Air Bags WARNING Do not allow an occupant in the front passenger’s seat to sit with a posture which makes it diffi cult for the front passenger occupant classifi cation sensor to detect the occupant correctly: Sitting in the front passenger’s seat with a posture which makes it diffi cult for the front passenger occupant classifi cation sensor to detect the occupant correctly is dangerous. -
Page 70
Essential Safety Equipment SRS Air Bags A rear passenger pushes up on the front passenger seat with their feet. Luggage or other items placed under the front passenger seat or between the front passenger seat and driver seat that push up the front passenger seat bottom. An object, such as a seat cushion, is put on the front passenger’s seat or between the passenger’s back and the seatback. -
Page 71
Authorized Mazda Dealer as soon as possible. If the front passenger air bag deactivation indicator light turns on when an occupant is seated directly in the front passenger seat, have the passenger re-adjust their posture by sitting with their feet on the oor, and then re-fastening the seat belt. -
Page 72: Constant Monitoring
Essential Safety Equipment SRS Air Bags Constant Monitoring The following components of the air bag systems are monitored by a diagnostic system: Crash sensors, and diagnostic module (SAS unit) Front air bag sensors Air bag modules Side crash sensors Air bag/Front seat belt pretensioner system warning light Front seat belt pretensioners Related wiring (With Front Passenger Occupant Classi cation System)
-
Page 73
Before Driving Use of various features, including keys, doors, mirrors and windows. Keys …………3-2 Driving Tips ……..3-41 Keys ……….3-2 Break-In Period ……3-41 Keyless Entry System ….3-3 Saving Fuel and Protection of the Environment ……… 3-41 Advanced Keyless Entry System .. -
Page 74: Keys
The key is near electronic devices such be an interesting toy to play with and as personal computers. could cause the power windows or Non-Mazda genuine electronic other controls to operate, or even make equipment is installed in the vehicle. the vehicle move.
-
Page 75: Keyless Entry System
It can also help you signal for attention or help. If your key (auxiliary key) is lost, consult Operating the theft-deterrent system is your Authorized Mazda Dealer and have also possible on theft-deterrent system- your code number ready. equipped vehicles.
-
Page 76
Additional keys can be obtained at an Authorized Mazda Dealer. Up to 6 keys can be used with the keyless functions per vehicle. Bring all keys to an Authorized Mazda Dealer when additional keys are required. -
Page 77
Before Driving Keys (With the advanced keyless function) Lock button A beep sound can be heard for To lock the doors and the liftgate, press the con rmation when the doors and the lock button and the hazard warning lights liftgate are locked/unlocked using the will ash once. -
Page 78
Before Driving Keys Unlock button NOTE The system can be set to unlock all To unlock the driver’s door, press the doors by performing a single operation. unlock button and the hazard warning Refer to Personalization Features on lights will ash twice. page 9-10 . -
Page 79
Before Driving Keys (Auto re-lock function) (Turning on the alarm) After unlocking with the key, all doors Pressing the panic button for 1 second or and the liftgate will automatically lock more will trigger the alarm for about 2 if any of the following operations are minutes and 30 seconds, and the following not performed within about 60 seconds. -
Page 80
Before Driving Keys With the advanced keyless function Interior antenna Operational range Without the advanced keyless function Interior antenna Operational range NOTE The engine may not start if the key is placed in the following areas: Around the dashboard In the storage compartments such as the glove compartment or the center console Key Suspend Function… -
Page 81: Advanced Keyless Entry System
Consult an Authorized Before using the key near people who Mazda Dealer for details. If the advanced use medical devices, ask the medical keyless entry system has been deactivated, device manufacturer or your physician…
-
Page 82: Operational Range
Before Driving Advanced Keyless Entry System Opening the Liftgate Operational Range The system operates only when the driver Exterior antenna is in the vehicle or within operational range while the key is being carried. NOTE When the battery power is low, or in places where there are high-intensity radio 80 cm(31in) waves or noise, the operational range…
-
Page 83: Doors And Locks
Before Driving Doors and Locks Door Locks After closing the doors and the liftgate, always verify that they are securely closed: WARNING Doors and the liftgate not securely closed are dangerous, if the vehicle Always take all children and pets with is driven with a door and the liftgate you or leave a responsible person with not securely closed, the door and the…
-
Page 84
Before Driving Doors and Locks NOTE (Door unlock (control) system with collision detection) When the ignition is switched to ACC This system automatically unlocks or ON, the vehicle lock-out prevention the doors and the liftgate in the event feature prevents you from locking the vehicle is involved in an accident yourself out of the vehicle. -
Page 85
Before Driving Doors and Locks Locking, Unlocking with Auxiliary Locking, Unlocking with Request Switch (With the advanced keyless function) Turn the auxiliary key toward the front to lock, toward the back to unlock. All doors and the liftgate can be locked/ unlocked by pressing the request switch To lock on the front doors while the key is being… -
Page 86
Before Driving Doors and Locks To lock NOTE The system can be set to unlock all To lock the doors and the liftgate, press doors by performing a single operation. the request switch and the hazard warning Refer to Personalization Features on lights will ash once. -
Page 87
Before Driving Doors and Locks It may require a few seconds for the (With theft-deterrent system) doors to unlock after the request switch The hazard warning lights ash when is pressed. the theft-deterrent system is armed or A beep sound is heard for con rmation turned off. -
Page 88
Before Driving Doors and Locks Auto re-lock function Locking, Unlocking with Door- After unlocking with the request Lock Switch switch, all doors and the liftgate All doors and the liftgate lock will automatically lock if any of the automatically when the lock side is following operations are not performed pressed. -
Page 89
*1 Other settings for the auto door lock function are available at an Authorized Mazda Dealer. For NOTE details consult an Authorized Mazda Dealer. Refer Function number 3 in the following to Personalization Features on page 9-10 . -
Page 90
Before Driving Doors and Locks 4. Refer to the auto lock/unlock function Locking, Unlocking with Door- setting table, determine the function Lock Knob number for the desired setting. Press the unlock side of the driver’s door-lock Operation from inside switch the same number of times as the To lock any door from the inside, press the selected function number (Ex. -
Page 91
Before Driving Doors and Locks Operation from outside Rear Door Child Safety Locks To lock any door with the door-lock knob These locks are intended to help prevent from the outside, press the door-lock children from accidentally opening the knob to the lock position and close the rear doors. -
Page 92: Liftgate
Damper stay Do not modify or replace the liftgate damper stay. Consult an Authorized Mazda Dealer if a liftgate damper stay is deformed or damaged for reasons such as a collision or if there is some other problem.
-
Page 93
Before Driving Doors and Locks Opening and Closing the Liftgate NOTE (With the advanced keyless function) Opening the liftgate with Electric A locked liftgate can also be opened liftgate opener while the key is being carried. Unlock the doors and liftgate, then press When opening the liftgate with the the electric liftgate opener on the liftgate doors and the liftgate locked, it may… -
Page 94: Luggage Compartment
Before Driving Doors and Locks Closing the liftgate Luggage Compartment Luggage compartment cover CAUTION (With luggage board) WARNING When closing the liftgate, return the Do not place anything on top of the luggage board to its original position. cover: If the liftgate is closed with the Placing luggage or other cargo on top luggage board standing upright, the of the luggage compartment cover is…
-
Page 95
Before Driving Doors and Locks The luggage compartment can be accessed by opening the liftgate when the straps are attached to the sides of the liftgate. Strap Removing the cover This cover can be removed for more room. 1. Remove the straps from the hooks. 2. -
Page 96: Fuel And Emission
Never add fuel system additives, otherwise the emission control system could be damaged. Consult an Authorized Mazda Dealer for details. Gasoline blended with oxygenates such as alcohol or ether compounds are generally referred to as oxygenated fuels. The common gasoline blend that can be used with your vehicle is ethanol blended at no more than 10 %.
-
Page 97: Emission Control System
USE ONLY UNLEADED FUEL. Do not drive your Mazda with any sign of engine malfunction. Do not coast with the ignition switched off . Do not descend steep grades in gear with the ignition switched off .
-
Page 98
When inhaled, it can cause loss of consciousness and death. If you smell exhaust gas inside the vehicle, keep all windows fully open and contact an Authorized Mazda Dealer immediately. Do not run the engine when inside an enclosed area: Running the engine inside an enclosed area, such as a garage, is dangerous. -
Page 99: Fuel-Filler Lid And Cap
Before Driving Fuel and Emission Fuel-Filler Lid and Cap CAUTION Always use only a genuine Mazda fuel- WARNING fi ller cap or an approved equivalent, When removing the fuel-fi ller cap, available at an Authorized Mazda loosen the cap slightly and wait for any Dealer.
-
Page 100
Before Driving Fuel and Emission Fuel-Filler Cap To remove the fuel- ller cap, turn it counterclockwise. Attach the removed cap to the inner side of the fuel lid. To close the fuel- ller cap, turn it clockwise until a click is heard. Open Close CAUTION… -
Page 101: Steering Wheel
Before Driving Steering Wheel NOTE Steering Wheel Make sure that the steering wheel is locked rmly in place. If it is dif cult to raise WARNING the lever, lightly move the steering wheel forward and back to pull up the lever. Never adjust the steering wheel while the vehicle is moving: Adjusting the steering wheel while…
-
Page 102: Mirrors
Before Driving Mirrors Power mirror adjustment Mirrors The ignition must be switched to ACC or Before driving, adjust the inside and ON position. outside mirrors. To adjust: Outside Mirrors 1. Rotate the mirror switch to the left or right to choose the left or right side WARNING mirror.
-
Page 103: Rearview Mirror
Before Driving Mirrors Folding mirror Rearview Mirror WARNING WARNING Always return the outside mirrors to Do not stack cargo or objects higher the driving position before you start than the seatbacks: driving: Cargo stacked higher than the Driving with the outside mirrors folded seatbacks is dangerous.
-
Page 104: Windows
Before Driving Windows Operating the Driver’s Side Power Power Windows Window The ignition must be switched ON for the power windows to operate. Normal opening/closing To open the window to the desired WARNING position, lightly hold down the switch. To close the window to the desired Make sure the opening is clear before position, lightly pull up the switch.
-
Page 105
Before Driving Windows Power window system initialization NOTE procedure Depending on driving conditions, a closing power window could stop and If the battery was disconnected during start opening when the window feels vehicle maintenance, or for other reasons a shock that is similar to something (such as a switch continues to be operated blocking it. -
Page 106
Before Driving Windows Operating the Passenger Power Power Window Lock Switch Windows This feature prevents all power windows To open the window to the desired from operating, except the driver’s power position, hold down the switch. window. Keep this switch in the locked To close the window to the desired position while children are in the vehicle. -
Page 107: Moonroof
ON. After washing your Mazda or after it rains, wipe the water off the moonroof before Tilt/Slide switch operating it to avoid water penetration which could cause rust and water damage to your headliner.
-
Page 108
Before Driving Windows Slide Operation Sunshade To fully open automatically, momentarily The sunshade can be opened and closed press the tilt/slide switch in the backward by hand. direction. To stop sliding partway, press the tilt/slide The sunshade opens automatically when switch. -
Page 109: Security System
Immobilizer System Equipment The immobilizer system allows the engine to start only with a key the system Mazda cannot guarantee the immobilizer recognizes. and the theft-deterrent systems’ operation if the system has been modi ed or if any If someone attempts to start the engine add-on equipment has been installed.
-
Page 110
Always keep a spare key in case one is lost. If a key is lost, consult an Authorized Mazda Dealer as soon as possible. If you lose a key, an Authorized Mazda Disarming Dealer will reset the electronic codes of The system is disarmed when the… -
Page 111: Theft-Deterrent System
Before Driving Security System NOTE Theft-Deterrent System The liftgate does not open while the If the theft deterrent system detects an theft-deterrent system is operating. inappropriate entry into the vehicle, If the battery goes dead while the theft- which could result in the vehicle or its deterrent system is armed, the horn will contents being stolen, the alarm alerts the activate and the hazard warning lights…
-
Page 112
(With the advanced keyless function) Mazda recommends that you af x it to the lower rear corner of a front door window. Pressing a request switch on the doors. The hazard warning lights will ash twice. -
Page 113: Driving Tips
Environment (600 miles) may add to the performance, economy, and life of the vehicle. How you operate your Mazda determines how far it will travel on a tank of fuel. Use Do not race the engine. these suggestions to help save fuel and Do not maintain one constant speed, reduce CO2.
-
Page 114: Hazardous Driving
Driving Tips Hazardous Driving Floor Mat We recommend the use of Genuine WARNING Mazda oor mats. Be extremely careful if it is necessary to WARNING downshift on slippery surfaces: Downshifting into lower gear Make sure the fl oor mats are hooked on…
-
Page 115: Rocking The Vehicle
Do not spin the wheels at more than sand or salt. 56 km/h (35 mph), and do not allow Ask an Authorized Mazda Dealer to check anyone to stand behind a wheel when the following: pushing the vehicle:…
-
Page 116
If your vehicle is to be used on snow and ice covered roads, Mazda recommends that you replace the tires originally equipped on your vehicle with snow tires during the winter months. -
Page 117: Driving In Flooded Area
Install the chains on the front tires only. Do not use chains on the rear tires. Please consult an Authorized Mazda Dealer. Installing the chains 1. If your vehicle is equipped with wheel covers remove them, otherwise the chain bands will scratch them.
-
Page 118: Overloading
Before Driving Driving Tips Overloading WARNING Be careful not to overload your vehicle: The gross axle weight rating (GAWR) and the gross vehicle weight rating (GVWR) of the vehicle are on the Motor Vehicle Safety Standard Label on the driver’s door frame. Exceeding these ratings can cause an accident or vehicle damage.
-
Page 119: Driving On Uneven Road
Before Driving Driving Tips Driving on Uneven Road Your vehicle’s suspension and underbody can be damaged if driven on rough/uneven roads or over speed bumps at excessive speeds. Use care and reduce speed when traveling on rough/uneven roads or over speed bumps. Use care not to damage the vehicle’s underbody, bumpers or muf er(s) when driving under the following conditions: Ascending or descending a slope with a sharp transition angle…
-
Page 120: Towing
Before Driving Towing Trailer Towing Recreational Towing Your Mazda is not designed for towing. An example of «recreational towing» is Never tow a trailer with your Mazda. towing your vehicle behind a motorhome. The transaxle is not designed for towing this vehicle on all 4 wheels.
-
Page 121
……..4-86 Hazard Warning Flasher ….4-53 Rear Cross Traf c Alert (RCTA) ……..4-89 Brake ……….4-54 Mazda Radar Cruise Control Brake System ……. 4-54 (MRCC) ……..4-92 Hill Launch Assist (HLA) …. 4-56 Smart City Brake Support (SCBS) …….. -
Page 122
Cruise Control ……… 4-122 Cruise Control ……4-122 Tire Pressure Monitoring System … 4-126 Tire Pressure Monitoring System ……..4-126 Rear View Monitor ……4-130 Rear View Monitor ….4-130 4–2 *Some models. -
Page 123
MEMO 4–3… -
Page 124: When Driving
When Driving Start/Stop Engine Ignition Switch The power supply to electrical devices turns off and the push button start indicator Push Button Start Positions light (amber) also turns off. The system operates only when the driver In this position the steering wheel is is in the vehicle or within operational locked.
-
Page 125: Starting The Engine
When Driving Start/Stop Engine Starting the Engine This is the normal running position after the engine is started. The indicator light WARNING (amber) turns off. (The indicator light (amber) illuminates when the ignition Radio waves from the key may aff ect is switched ON and the engine is not medical devices such as pacemakers: running.)
-
Page 126
6. Verify that the KEY indicator light the key. Consult an Authorized Mazda (green) in the instrument cluster and the Dealer for details. If the push button push button start indicator light (green) start system functions have been illuminate. -
Page 127
ACC or could indicate that the engine may not ON. Have your vehicle inspected at an start using the usual starting method. Authorized Mazda Dealer as soon as Have your vehicle inspected at an possible. Authorized Mazda Dealer as soon as possible. -
Page 128
Emergency Starting. If the engine still does not start, have your vehicle inspected by an Authorized Mazda Dealer (page 7-21 ). Devices for electronic purchases, or security passage touch or come near the key. -
Page 129
In this case, the engine may start, following this. however, have the vehicle checked at an Authorized Mazda Dealer as soon as 3. Touch the push button start using the possible. backside of the key (as shown) while… -
Page 130: Turning The Engine Off
Stopping the engine while the vehicle starting method. Have your vehicle is moving for any reason other than in inspected at an Authorized Mazda Dealer an emergency is dangerous. Stopping as soon as possible. If this occurs, the the engine while the vehicle is moving engine can be force-started.
-
Page 131
When Driving Start/Stop Engine NOTE The cooling fan in the engine compartment could turn on for a few minutes after the ignition is switched from ON to OFF, whether or not the A/C is on or off, to cool the engine compartment quickly. -
Page 132: Instrument Cluster And Display
When Driving Instrument Cluster and Display Meters and Gauges Instrument Cluster Type A (Digital Speedometer Type) Type B (Analog Speedometer Type (With Tachometer)) Type C (Analog Speedometer Type (Without Tachometer)) Steering Switch 4–12…
-
Page 133
When Driving Instrument Cluster and Display Speedometer ………………….page 4-14 Odometer, Trip Meter and Trip Meter Selector ………… page 4-14 Tachometer ………………….page 4-18 Fuel Gauge ………………….page 4-18 Dashboard Illumination………………page 4-19 Outside Temperature Display …………….page 4-19 Cruise Control Set Vehicle Speed Display …………page 4-20 Active Driving Display ……………… -
Page 134
When Driving Instrument Cluster and Display Speedometer Odometer, Trip Meter and Trip Meter Selector The speedometer indicates the speed of the vehicle. The display mode can be changed from odometer to trip meter A to trip meter B and then back to odometer by pressing the NOTE selector while one of them is displayed. -
Page 135
When Driving Instrument Cluster and Display Odometer NOTE (Vehicles with type B audio) The odometer records the total distance If the fuel economy data is reset using the vehicle has been driven. the fuel economy monitor, or trip A Trip meter is reset using the trip meter when the The trip meter can record the total distance function which synchronizes the fuel… -
Page 136
When Driving Instrument Cluster and Display Odometer, Trip Meter, Trip NOTE Computer and Trip Meter When the ignition is switched to ACC or Selector off, the odometer or trip meters cannot be displayed, however, pressing the selector The display mode can be changed can inadvertently switch the trip meters or between trip meter A and trip meter B by reset them during an approximate ten-… -
Page 137
Current fuel economy Current fuel economy will be calculated If you have any problems with your trip and displayed every 2 seconds. computer, consult an Authorized Mazda Dealer. Distance-to-empty mode When you’ve slowed to about 5 km/h (3 This mode displays the approximate… -
Page 138
When Driving Instrument Cluster and Display Tachometer Fuel Gauge The tachometer shows engine speed in The fuel gauge shows approximately thousands of revolutions per minute (rpm). how much fuel is remaining in the tank when the ignition is switched ON. We CAUTION recommend keeping the tank over 1/4 full. -
Page 139
When Driving Instrument Cluster and Display Dashboard Illumination Function for cancelling illumination dimmer When the position lights are turned The illumination dimmer can be canceled on with the ignition switched ON, by rotating the dashboard illumination the brightness of the instrument panel knob to the right until a beep sound is illumination is dimmed. -
Page 140
The vehicle is parked. Average vehicle speed The vehicle is driven at low speeds. If you have any problems with your trip computer, consult an Authorized Mazda The outside temperature unit can be Dealer. switched between Celsius and Fahrenheit using the following procedure. -
Page 141
When Driving Instrument Cluster and Display NOTE Current fuel economy mode Even though the distance-to-empty This mode displays the current fuel display may indicate a suf cient amount economy by calculating the amount of fuel of remaining driving distance before consumption and the distance traveled. -
Page 142: Active Driving Display
When Driving Instrument Cluster and Display Active Driving Display Combiner Mirror Optical receiver WARNING Always adjust the display brightness and position with the vehicle stopped: Adjusting the display brightness and position while driving the vehicle is dangerous as doing so could distract your attention from the road ahead and lead to an accident. CAUTION Do not try to adjust the angle or open/close the active driving display manually.
-
Page 143
The active driving display indicates the following information: Mazda Radar Cruise Control (MRCC) Operation Conditions and Warnings Refer to Mazda Radar Cruise Control (MRCC) on page 4-92 . Lane Departure Warning System (LDWS) Operation Conditions and Warnings Refer to Lane Departure Warning System (LDWS) on page 4-74 . -
Page 144: Warning/Indicator Lights
When Driving Instrument Cluster and Display Warning/Indicator Lights Instrument Cluster varies depending on model and speci cations. Instrument Cluster Type A (Digital Speedometer Type) Type B (Analog Speedometer Type (With Tachometer)) Type C (Analog Speedometer Type (Without Tachometer)) Center of Dashboard Warning/Indicator lights will appear in any of the highlighted areas 4–24…
-
Page 145: Warning Lights
When Driving Instrument Cluster and Display Warning Lights These lights turn on or ash to notify the user of the system operation status or a system malfunction. Signal Warning Lights Page Master Warning Light 7-27 Brake System Warning Light 7-27 *1*2 ABS Warning Light 7-27…
-
Page 146
7-27 (Amber) LED Headlight Warning Light 7-27 Mazda Radar Cruise Control (MRCC) Warning Light 7-27 (Amber) *1 The light turns on when the ignition is switched on for an operation check, and turns off a few seconds later or when the engine is started. If the light does not turn on or remains turned on, have the vehicle inspected at an Authorized Mazda Dealer. -
Page 147: Indicator Lights
When Driving Instrument Cluster and Display Indicator Lights These lights turn on or ash to notify the user of the system operation status or a system malfunction. Signal Indicator Lights Page Blind Spot Monitoring (BSM) OFF Indicator Light 4-84 Lane Departure Warning System (LDWS) OFF Indicator 4-77 Light KEY Indicator Light…
-
Page 148
Page Headlight High-Beam Indicator Light 4-44 , 4-44 Turn Signal/Hazard Warning Indicator Lights 4-46 , 4-53 Security Indicator Light 3-38 Mazda Radar Cruise Control (MRCC) Indicator Light 4-96 (Green) Cruise Main Indicator Light 4-123 (Amber) Cruise Set Indicator Light 4-123… -
Page 149
If the low engine coolant temperature indicator light remains illuminated after the engine has been suf ciently warmed up, the temperature sensor could have a malfunction. Consult an Authorized Mazda Dealer. 4–29… -
Page 150: Transaxle
When Driving Transaxle Automatic Transaxle Controls Lock-release button Various Lockouts: Indicates that you must depress the brake pedal and hold in the lock-release button to shift (The ignition must be switched ON). Indicates the selector lever can be shifted freely into any position. Indicates that you must hold in the lock-release button to shift.
-
Page 151
When Driving Transaxle Shift Position Indication CAUTION Shifting into P, N or R while the vehicle is moving can damage your transaxle. Shifting into a driving gear or reverse when the engine is running faster than idle can damage the transaxle. The selector position is indicated when the ignition is switched ON. -
Page 152
AAS mode will maintain the optimum gear position. 3. Press and hold the lock-release button. 4. Move the selector lever. Take the vehicle to an Authorized Mazda Dealer to have the system checked. 4–32… -
Page 153: Manual Shift Mode
Refer to Over Rev. Buzzer on page 7-43 . *1 To determine which instrument cluster is equipped on your Mazda, Refer to Meters and Gauges on page 4-12 . Changing to manual shift mode while Gear position indication driving will not damage the transaxle.
-
Page 154
When Driving Transaxle Type B NOTE If the gears cannot be shifted down when driving at higher speeds, the gear position indication will ash twice to signal that the gears cannot be shifted down (to protect the transaxle). If the automatic transaxle uid (ATF) temperature becomes too high, there is the possibility that the transaxle will switch to automatic shift mode,… -
Page 155
When Driving Transaxle Using steering shift switch NOTE When driving slowly, the gears may not To shift up to a higher gear with the shift up. steering shift switches, pull the UP switch In manual shift mode, do not run the ) toward you once with your engine with the tachometer needle in ngers. -
Page 156
When Driving Transaxle Using steering shift switch NOTE When driving at high speeds, the gear To shift down to a lower gear with the may not shift down. steering shift switches, pull the DOWN During deceleration, the gear may switch toward you once with your automatically shift down depending on ngers. -
Page 157
When Driving Transaxle Shift gear (shifting) speed limit For each gear position while in the manual mode, the speed limit is set as follows: When the selector lever is operated within the range of the speed limit, the gear is shifted. Shift up The gear does not shift up while the vehicle speed is lower than the speed limit. -
Page 158
When Driving Transaxle Recommendations for shifting Upshifting For normal acceleration and cruising, Mazda recommends these shift points: Gear Vehicle speed M1 to M2 24 km/h (15 mph) M2 to M3 40 km/h (25 mph) M3 to M4 65 km/h (40 mph) -
Page 159
When Driving Transaxle Direct Mode Type B Direct mode can be used for temporarily switching gears by operating the steering shift switch while the vehicle is being driven with the selector lever in the D range. While in direct mode, the D and M indication illuminate and the gear position in use is illuminated. -
Page 160
When Driving Transaxle Driving Tips Climbing steep grades from a stop To climb a steep grade from a stopped position: WARNING 1. Depress the brake pedal. Do not let the vehicle move in a 2. Shift to D or M1, depending on the direction opposite to the direction load weight and grade steepness. -
Page 161: Switches And Controls
When Driving Switches and Controls Lighting Control Headlights Turn the headlight switch to turn the headlights, other exterior lights and dashboard illumination on or off. When the lights are turned on, the lights-on indicator light in the instrument cluster turns on. NOTE If the light switch is left on, the lights will automatically switch off approximately 30 seconds after switching the ignition off.
-
Page 162
When Driving Switches and Controls With auto-light control Switch Position Ignition Position Headlights Auto Auto Daytime running lights Taillights Parking lights License lights Auto Auto Side-marker lights Dashboard illumination *1 The lights are turned on while the vehicle is driven. *2 The headlight and other light settings switch automatically depending on the surrounding brightness detected by the sensor. -
Page 163
Also, the day/night mode can be changed by rotating the knob until a beep sound is heard. To adjust the brightness of the dashboard illumination: Refer to Dashboard Illumination on page 4-19 . The sensitivity of the AUTO lights may be changed by an Authorized Mazda Dealer. Refer to Personalization Features on page 9-10 . 4–43… -
Page 164
When Driving Switches and Controls Headlight High-Low Beam The headlight high-beam indicator light in the instrument cluster illuminates The headlights switch between high and simultaneously. The lever will return to the low beams by moving the lever forward or normal position when released. backward. -
Page 165: Daytime Running Lights
When Driving Switches and Controls NOTE NOTE The time until the headlights turn off Operation of the leaving home light can after all of the doors are closed can be be turned on or off. changed. Refer to Personalization Features on Refer to Personalization Features on page 9-10 .
-
Page 166: Fog Lights
When Driving Switches and Controls Fog Lights Turn and Lane-Change Signals The fog lights can be used when the ignition is switched ON. The ignition must be switched ON to use Use this switch to turn on the fog lights. the turn and lane-change signals.
-
Page 167: Windshield Wipers And Washer
When Driving Switches and Controls NOTE Windshield Wipers and If an indicator light stays on without Washer ashing or if it ashes abnormally, one of the turn signal bulbs may be burned The ignition must be switched ON to use out.
-
Page 168
OFF, INT ring Fast consult an Authorized Mazda Dealer as With auto-wiper control soon as possible. Windshield Wipers Turn the wipers on by pressing the lever up or down. -
Page 169
When Driving Switches and Controls Auto-wiper control CAUTION When the wiper lever is in the position, the rain sensor senses the amount Do not shade the rain sensor by of rainfall on the windshield and turns the adhering a sticker or a label on the wipers on or off automatically (off—… -
Page 170
If the washer does not work, inspect the automatically from the effect of strong uid level (page 6-32 ). If the uid level light sources, electromagnetic waves, or is normal, consult an Authorized Mazda infrared light because the rain sensor Dealer. uses an optical sensor. It is… -
Page 171: Rear Window Wiper And Washer
After the switch is released, the washer will stop. If the washer does not work, inspect the uid level (page 6-32 ). If the uid level is normal and the washer still does not work, consult an Authorized Mazda Dealer. 4–51…
-
Page 172
When Driving Switches and Controls Mirror Defogger CAUTION The mirror defoggers defrost the outside Do not use sharp instruments or mirrors. window cleaners with abrasives to clean the inside of the rear window The mirror defoggers operate in surface. They may damage the conjunction with the rear window defogger grid inside the window. -
Page 173: Horn
When Driving Switches and Controls Horn Hazard Warning Flasher To sound the horn, press the mark on The hazard warning lights should always the steering wheel. be used when you stop on or near a roadway in an emergency. The hazard warning lights warn other drivers that your vehicle is a traf c hazard and that they must take extreme caution when near it.
-
Page 174: Brake
When Driving Brake Brake System Dry off brakes that have become wet by driving slowly, releasing the accelerator pedal and lightly applying Foot Brake the brakes several times until the brake This vehicle has power-assisted brakes performance returns to normal: that adjust automatically through normal Driving with wet brakes is dangerous.
-
Page 175: Parking Brake
When the disc brake pads become worn, the built-in wear indicators contact the disc plates. This causes a screeching noise to warn that the pads should be replaced. When you hear this noise, consult an Authorized Mazda Dealer as soon as possible. 4–55…
-
Page 176: Hill Launch Assist (Hla)
As soon as depresses the accelerator pedal while you hear a screeching noise consult an on a slope, the function prevents the Authorized Mazda Dealer. vehicle from rolling. The braking force is maintained automatically after the brake Brake Assist pedal is released on a steep grade.
-
Page 177
When Driving Brake NOTE Hill Launch Assist (HLA) does not operate on a gentle slope. In addition, the gradient of the slope on which the system will operate changes depending on the vehicle’s load. Hill Launch Assist (HLA) does not operate if the parking brake is applied, or if the vehicle has not stopped completely. -
Page 178: Abs/Tcs/Dsc
When Driving ABS/TCS/DSC NOTE Antilock Brake System Braking distances may be longer on (ABS) loose surfaces (snow or gravel, for example) which usually have a hard The ABS control unit continuously foundation. A vehicle with a normal monitors the speed of each wheel. If braking system may require less one wheel is about to lock up, the ABS distance to stop under these conditions…
-
Page 179: Traction Control System (Tcs)
Refer to Warning Lights on page 4-25 . malfunction and they may not operate correctly. Take your vehicle to an WARNING Authorized Mazda Dealer. Do not rely on the Traction Control System (TCS) as a substitute for safe NOTE driving:…
-
Page 180
10 seconds or more, the TCS TCS is not switched off, take your vehicle OFF switch malfunction detection to an Authorized Mazda Dealer. The DSC function operates and the TCS system may have a malfunction. activates automatically. The TCS OFF… -
Page 181: Dynamic Stability Control (Dsc)
Use tires of the correct size specifi ed torque in conjunction with systems such for your Mazda on all four wheels. as ABS and TCS to help control side slip Use tires of the same manufacturer,…
-
Page 182: Fuel Economy Monitor
When Driving Fuel Economy Monitor Fuel Economy Monitor For vehicles with type B audio, the Fuel Consumption are switched and displayed by operating each icon in the display. In addition, after completing a trip, the total energy ef ciency to date is displayed in the ending display when the ending display is turned on.
-
Page 183
When Driving Fuel Economy Monitor NOTE The fuel economy data can be reset by doing the following operation: Press the reset switch from the menu screen. When the function which synchronizes the fuel economy monitor and the trip meter is on, reset trip A of the trip meter. -
Page 184: Drive Selection
It may cause tire slipping. NOTE When the sport mode is selected, driving at higher engine speeds increases and it may increase fuel consumption. Mazda recommends that you cancel the sport mode on normal driving. Drive mode cannot be switched in the following conditions: ABS/TCS/DSC is operating The Mazda Radar Cruise Control (MRCC) system/cruise control is operating.
-
Page 185: I-Activ Awd
When Driving i-ACTIV AWD Tires i-ACTIV AWD Operation When replacing tires, always replace all AWD provides excellent drivability on front and rear tires at the same time. snow-covered and ice-packed roads, sand All tires must be of the same size, and mud, as well as on steep slopes and manufacture, brand and tread pattern.
-
Page 186
When Driving i-ACTIV AWD Towing If the vehicle requires towing, have it towed with all four wheels completely off the ground. Refer to Towing Description on page 7-24 . 4–66… -
Page 187: Power Steering
If the steering feels stiffer than usual during normal driving or the steering vibrates, consult an Authorized Mazda Dealer. The warning light noti es the driver of system abnormalities and operation conditions.
-
Page 188
Rear Cross Traf c Alert (RCTA) ………………4-89 Driver support system Inter-vehicle distance Mazda Radar Cruise Control (MRCC) …………….4-92 Pre-Crash Safety Technology Pre-crash safety technology is designed to assist the driver in averting collisions or reduce their severity in situations where they cannot be avoided. -
Page 189: I-Activsense
The radar sensor (front) functions by detecting the radio waves re ected off a vehicle ahead sent from the radar sensor. The following systems also use the radar sensor (front). Mazda Radar Cruise Control (MRCC) Distance Recognition Support System (DRSS) Smart Brake Support (SBS) The radar sensor (front) is mounted behind the radiator grille.
-
Page 190: Adaptive Front Lighting System (Afs)
When Driving i-ACTIVSENSE Adaptive Front Lighting System (AFS) The adaptive front lighting system (AFS) automatically adjusts the headlight beams to the left or right in conjunction with the operation of the steering wheel after the headlights have been turned on and the vehicle speed is about 2 km/h (2 mph) or higher. A system malfunction or operation conditions are indicated by a warning.
-
Page 191: High Beam Control System (Hbc)
When Driving i-ACTIVSENSE High Beam Control System (HBC) The High Beam Control System (HBC) determines the conditions in front of the vehicle using the Forward Sensing Camera (FSC) while driving in darkness to automatically switch the headlights between high and low beams. Refer to Warning/Indicator Lights on page 4-24 .
-
Page 192
When Driving i-ACTIVSENSE NOTE The timing in which the system switches the headlights changes under the following conditions. If the system does not switch the headlights appropriately, manually switch between high and low beams according to the visibility as well as road and traf c conditions. -
Page 193
When Driving i-ACTIVSENSE To Operate the System Manual Switching The High Beam Control System (HBC) Switching to low beams operates to switch the headlights Shift the lever to the low beam position. automatically between high and low The High Beam Control System (HBC) beams after the ignition is switched ON indicator light (green) turns off. -
Page 194: Lane Departure Warning System (Ldws)
When Driving i-ACTIVSENSE Lane Departure Warning System (LDWS) The LDWS system noti es the driver that the vehicle may be deviating from its lane. The system detects the white or yellow lines on the traf c lane using the Forward Sensing Camera (FSC) and if it determines that the vehicle may be deviating from its lane, it noti es the driver using the active driving display (vehicles with active driving display), and by ashing the LDWS warning light and activating the LDWS warning beep.
-
Page 195
When Driving i-ACTIVSENSE CAUTION Do not modify the suspension. If the vehicle height or the damping force of the suspensions is changed, the LDWS may not operate correctly. 4–75… -
Page 196
When Driving i-ACTIVSENSE NOTE If your vehicle deviates from its traf c lane, the LDWS operates (warning sound and indicator light). Steer the vehicle adequately to drive the vehicle to the center of the lane. When the turn signal lever is operated for a lane change, the LDWS warning is automatically canceled. -
Page 197
When Driving i-ACTIVSENSE When the System Operates 2. Drive the vehicle in the center of the driving lane while the LDWS OFF 1. The system goes on operation standby indicator light is turned off. The system when the LDWS switch is pressed becomes operational when all of the and the LDWS OFF indicator light following conditions are met. -
Page 198
When Driving i-ACTIVSENSE NOTE Auto cancel warning The LDWS does not operate until the When the following operations are system detects a white or yellow line on performed, the LDWS determines that either the left or right. the driver intends to make a lane change When the system detects a white or and the LDWS warning is canceled yellow line on one side only, the system… -
Page 199
When Driving i-ACTIVSENSE LDWS Warning NOTE If the LDWS warning sound is set to If the system determines that there is the rumble , the sound will be heard from possibility of a lane departure, the LDWS the vehicle speaker on the side which warning beep activates and the LDWS the system determined the vehicle may warning light ashes. -
Page 200: Blind Spot Monitoring (Bsm)
When Driving i-ACTIVSENSE Blind Spot Monitoring (BSM) The Blind Spot Monitoring (BSM) is designed to assist the driver in checking the area to the rear of the vehicle on both sides during lane changes by alerting the driver to the presence of vehicles approaching from the rear in an adjacent lane.
-
Page 201
In the following cases, the Blind Spot Monitoring (BSM) OFF indicator light turns on and operation of the system is stopped. If the Blind Spot Monitoring (BSM) OFF indicator light remains illuminated, have the vehicle inspected at an Authorized Mazda Dealer as soon as possible. -
Page 202
When Driving i-ACTIVSENSE In the following cases, the activation of the Blind Spot Monitoring (BSM) warning lights and the warning beep may not occur or they may be delayed. A vehicle makes a lane change from a driving lane two lanes over to an adjacent lane. Driving on steep slopes. -
Page 203
When Driving i-ACTIVSENSE Blind Spot Monitoring (BSM) Warning Lights/Blind Spot Monitoring (BSM) Warning Beep The Blind Spot Monitoring (BSM) or Rear Cross Traf c Alert (RCTA) system noti es the driver of the presence of vehicles in adjacent lanes to the rear of your vehicle using the Blind Spot Monitoring (BSM) warning lights and the warning beep while the systems are operational. -
Page 204: Indicator Light
If the switch is pressed again, the Blind conditions. Have your vehicle inspected Spot Monitoring (BSM) and Rear Cross at an Authorized Mazda Dealer. Traf c Alert (RCTA) systems become The light does not turn on when the operable and the Blind Spot Monitoring ignition is switched ON.
-
Page 205
When Driving i-ACTIVSENSE NOTE When the ignition is switched off, the condition before the system was turned off is maintained. For example, if the ignition is switched OFF while the Blind Spot Monitoring (BSM) and Rear Cross Traf c Alert (RCTA) systems are operational, the Blind Spot Monitoring (BSM) and Rear Cross Traf c Alert (RCTA) systems remain operational the… -
Page 206: Distance Recognition Support System (Drss)
When Driving i-ACTIVSENSE Distance Recognition Support System (DRSS) The Distance Recognition Support System (DRSS) measures the distance between your vehicle and a vehicle ahead using a radar sensor (front) while the vehicle speed is 30 km/h or faster (19 mph or faster), and indicates a recommended distance to maintain between the vehicles.
-
Page 207
When Driving i-ACTIVSENSE Indication on Display The Distance Recognition Support System (DRSS) operation status is displayed in the active driving display. Problems are indicated in the center display (Type B audio). If there is a problem, take appropriate action according to the displayed message. Refer to Warning/Indicator Lights on page 4-24 . -
Page 208
When Driving i-ACTIVSENSE Distance between vehicles Distance between vehicles guidelines guidelines Indication on display (During travel at about 40km/h (During travel at about 80km/h (25 mph)) (50 mph)) About 15 m (49 ft) About 30 m (98 ft) About 10 m (32 ft) About 20 m (65 ft) About 10 m (32 ft) or less About 20 m (65 ft) or less… -
Page 209: Rear Cross Traf C Alert (Rcta)
When Driving i-ACTIVSENSE Rear Cross Traf c Alert (RCTA) The Rear Cross Traf c Alert (RCTA) system is designed to assist the driver in checking the area to the rear of the vehicle on both sides while the vehicle is reversing by alerting the driver to the presence of vehicles approaching the rear of the vehicle.
-
Page 210
In the following cases, the Blind Spot Monitoring (BSM) OFF indicator light turns on and operation of the system is stopped. If the Blind Spot Monitoring (BSM) OFF indicator light remains illuminated, have the vehicle inspected at an Authorized Mazda Dealer as soon as possible. -
Page 211
When Driving i-ACTIVSENSE Under the following conditions, the radar sensors (rear) cannot detect target objects or it may be dif cult to detect them. The vehicle speed when reversing is about 10 km/h (6.3 mph) or faster. The radar sensor (rear) detection area is obstructed by a nearby wall or parked vehicle. -
Page 212: Mazda Radar Cruise Control (Mrcc)
WARNING Do not rely completely on the Mazda Radar Cruise Control (MRCC) system and always drive carefully: The Mazda Radar Cruise Control (MRCC) system is designed to reduce load on the…
-
Page 213
For the purposes of safety, switch the Mazda Radar Cruise Control (MRCC) system off when it is not being used. CAUTION If the vehicle is towed or you are towing something, switch the Mazda Radar Cruise Control (MRCC) system off to prevent an incorrect operation. 4–93… -
Page 214
While the Mazda Radar Cruise Control (MRCC) system is in use, it does not cancel even if the selector lever is operated and any intended engine braking will not occur. If deceleration is required, lower the vehicle speed setting or depress the brake pedal. -
Page 215
When Driving i-ACTIVSENSE Mazda Radar Cruise Control (MRCC) Display Indication The setting status and operation conditions of the Mazda Radar Cruise Control (MRCC) system are indicated in the active driving display. Vehicle ahead display MRCC Set vehicle speed MRCC Distance between vehicle display… -
Page 216
NOTE When the ignition is switched to ACC or OFF while the Mazda Radar Cruise Control (MRCC) is ON, the Mazda Radar Cruise Control (MRCC) remains ON automatically. When the ON switch is pressed continuously for about 2 seconds while the Mazda Radar Cruise Control (MRCC) system is turned on, the system switches the function to only cruise control. -
Page 217
The Mazda Radar Cruise switches back to travel at constant Control (MRCC) indicator light (green) speed. -
Page 218
When Driving i-ACTIVSENSE Changing the Set Vehicle Speed Distance-between- vehicles guideline Indication on display (at 80 km/h (50 mph) Changing the set vehicle speed using the vehicle speed) SET switch Press the SET switch to accelerate. Press the SET switch to decelerate. Long (about 50 m (164 ft)) The set vehicle speed changes as follows each time the SET switch is pressed. -
Page 219
When the system is temporarily pedal canceled Depress the accelerator pedal and press In the following cases, the Mazda Radar and release the SET or SET switch at Cruise Control (MRCC) system is the desired speed. If a switch cannot be temporarily canceled. -
Page 220
When Driving i-ACTIVSENSE NOTE WARNING The Mazda Radar Cruise Control (MRCC) system may be canceled during Do not use the cruise control function in rain, fog, snow or other inclement the following locations: weather conditions, or the front surface Otherwise, it could lead to an accident. -
Page 221
2 seconds while driving conditions such as steep up or the Mazda Radar Cruise Control (MRCC) down slopes. system is turned on, the system is switched The speed will continue increasing to the cruise control function. -
Page 222
When Driving i-ACTIVSENSE Cancelling the function Cancelling using OFF switch When the OFF switch is pressed, the cruise control function is cancelled. Cancelling using ON switch When the ON switch is pressed continuously for about 2 seconds, the cruise control function is canceled and the headway control function is made available for operation. -
Page 223: Smart City Brake Support (Scbs)
When Driving i-ACTIVSENSE Smart City Brake Support (SCBS) The Smart City Brake Support (SCBS) system is designed to reduce damage in the event of a collision by operating the brake control (SCBS brake) when the system’s laser sensor (front) detects a vehicle ahead and determines that a collision with a vehicle ahead is unavoidable.
-
Page 224
(front), stop using the Smart City Brake Support (SCBS) system immediately and have your vehicle inspected by an Authorized Mazda Dealer. If the vehicle continues to be driven with cracks or scratch marks left on the windshield near the laser sensor (front), the system may operate unnecessarily and cause an unexpected accident. -
Page 225
When Driving i-ACTIVSENSE Turn off the Smart City Brake Support (SCBS) when the vehicle is running on a chassis roller or being towed: Turn off the Smart City Brake Support (SCBS) system to prevent mistaken operation when the vehicle is running on a chassis roller or being towed. Refer to the Stopping the Smart City Brake Support (SCBS) System Operation on page 4-107 on how to turn off the Smart City Brake Support (SCBS) system. -
Page 226
When Driving i-ACTIVSENSE The Smart City Brake Support (SCBS) detects a vehicle ahead by emitting a near-infrared laser beam and receiving the beam re ected off the re ector of the vehicle ahead, and then using it for the measurement. Consequently, the Smart City Brake Support (SCBS) may not operate under the following conditions: Re ection of the laser is poor due to the shape of the vehicle ahead. -
Page 227
When Driving i-ACTIVSENSE Smart City Brake Support (SCBS) Stopping the Smart City Brake Indicator Light (Red) Support (SCBS) System Operation If the Smart City Brake Support (SCBS) is The Smart City Brake Support (SCBS) operating, the indicator light (red) ashes. system can be temporarily deactivated. -
Page 228: Smart Brake Support (Sbs)
When Driving i-ACTIVSENSE Smart Brake Support (SBS) Smart Brake Support (SBS) is a system which alerts the driver of a possible collision using an indicator and warning sound in the instrument cluster while the vehicle is being driven at about 15 km/h or faster (10 mph or faster) and the system’s radar sensor (front) determines that your vehicle may hit a vehicle ahead.
-
Page 229
When Driving i-ACTIVSENSE NOTE The Smart Brake Support (SBS) system operates when all of the following conditions are met: The ignition is switched ON. The Smart Brake Support (SBS) system is on. The vehicle speed is about 15 km/h or faster (10 mph or faster). The relative speed between your vehicle and the vehicle ahead is about 15 km/h or faster (10 mph or faster). -
Page 230
When Driving i-ACTIVSENSE Smart Brake Support (SBS) Stopping The Smart Brake Indicator Light (Red) Support (SBS) System Operation If the Smart Brake Support (SBS) is The Smart Brake Support (SBS) system operating, the indicator light (red) ashes. can be temporarily deactivated. Refer to Personalization Features on page 9-10 . -
Page 231: Forward Sensing Camera (Fsc)
When Driving i-ACTIVSENSE Forward Sensing Camera (FSC) Your vehicle is equipped with a Forward Sensing Camera (FSC). The Forward Sensing Camera (FSC) is positioned near the rearview mirror and used by the following systems. High Beam Control System (HBC) Lane Departure Warning System (LDWS) Smart Brake Support (SBS) Forward Sensing Camera (FSC) The Forward Sensing Camera (FSC) determines the conditions ahead of the vehicle while…
-
Page 232
Always keep the windshield glass around the camera clean by removing dirt or fogging. Use the windshield defroster to remove fogging on the windshield. Consult an Authorized Mazda Dealer regarding cleaning the interior side of the windshield around the Forward Sensing Camera (FSC). -
Page 233
When Driving i-ACTIVSENSE NOTE In the following cases, the Forward Sensing Camera (FSC) cannot detect target objects correctly, and each system may be unable to operate normally. The height of the vehicle ahead is low. You drive your vehicle at the same speed as the vehicle ahead. Headlights are not turned on during the night or when going through a tunnel. -
Page 234: Radar Sensor (Front)
Radar Sensor (Front) Your vehicle is equipped with a radar sensor (front). The following systems also use the radar sensor (front). Mazda Radar Cruise Control (MRCC) Distance Recognition Support System (DRSS) Smart Brake Support (SBS) The radar sensor (front) functions by detecting the radio waves re ected off a vehicle ahead or an obstruction sent from the radar sensor.
-
Page 235
If the front part of the vehicle has been damaged in a vehicle accident, the position of the radar sensor (front) may have moved. Stop the system immediately and always have the vehicle inspected at an Authorized Mazda Dealer. Do not use the front bumper to push other vehicles or obstructions such as when pulling out of a parking space. -
Page 236
When Driving i-ACTIVSENSE NOTE Under the following conditions, the radar sensor (front) may not be able to detect vehicles ahead or obstructions correctly and each system may not operate normally. The rear surface of a vehicle ahead does not re ect radio waves effectively, such as an unloaded trailer or an automobile with a loading platform covered by a soft top, vehicles with a hard plastic tailgate, and round-shaped vehicles. -
Page 237: Laser Sensor (Front)
When Driving i-ACTIVSENSE Laser Sensor (Front) Your vehicle is equipped with a laser sensor (front). The laser sensor (front) is positioned near the rearview mirror and used by the following systems. Smart City Brake Support (SCBS) Smart Brake Support (SBS) Laser sensor (front) 4–117 *Some models.
-
Page 238
Refer to the Personalization Features on page 9-10 on how to turn off the system. Do not apply a coating agent to the windshield. When replacing the windshield wipers or windshield, consult an Authorized Mazda Dealer. Never remove the sensor. -
Page 239
Exhaust gas from the vehicle in front, sand, snow, and water vapor rising from manholes and grating, and water splashed into the air. If there are recognizable cracks or damage caused by ying gravel or debris on the windshield, always have the windshield replaced. Consult an Authorized Mazda Dealer for replacement. 4–119… -
Page 240: Radar Sensors (Rear)
Refer to Exterior Care on page 6-59 . CAUTION If the rear bumper receives a severe impact, the system may no longer operate normally. Stop the system immediately and have the vehicle inspected at an Authorized Mazda Dealer. 4–120 *Some models.
-
Page 241
For repairs or replacement of the radar sensors (rear), or bumper repairs, paintwork, and replacement near the radar sensors, consult an Authorized Mazda Dealer. Turn off the system while pulling a trailer or while an accessory such as a bicycle carrier is installed to the rear of the vehicle. -
Page 242: Some Models
When Driving Cruise Control Cruise Control With cruise control, you can set and automatically maintain any speed of more than about 25 km/h (16 mph). WARNING Do not use the cruise control under the following conditions: Using the cruise control under the following conditions is dangerous and could result in loss of vehicle control.
-
Page 243
When Driving Cruise Control Cruise Main Indicator Light NOTE (Amber)/Cruise Set Indicator When the ignition is switched OFF, the Light (Green) system status before it was turned off is maintained. For example, if the ignition is switched OFF with the cruise control system operable, the system will be operable when the ignition is switched ON the next time. -
Page 244
When Driving Cruise Control NOTE To Increase Cruising Speed The cruise control speed setting cannot Follow either of these procedures. be performed under the following To increase speed using cruise control conditions: switch The selector lever is in the P or N Press the SET switch and hold it. -
Page 245
When Driving Cruise Control To Decrease Cruising Speed NOTE If any of the following conditions occur, Press the SET switch and hold it. The the cruise control system is temporarily vehicle will gradually slow. canceled. Release the switch at the speed you want. The parking brake is applied. -
Page 246: Tire Pressure Monitoring System
When Driving Tire Pressure Monitoring System Tire Pressure Monitoring System The Tire Pressure Monitoring System (TPMS) monitors the air pressure of all four tires. If the air pressure of one or more tires is too low, the system warns the driver by indicating the tire pressure monitoring system warning light in the instrument cluster and operating a beep sound.
-
Page 247
When Driving Tire Pressure Monitoring System CAUTION Each tire, including the spare (if provided), should be checked monthly when cold and infl ated to the infl ation pressure recommended by the vehicle manufacturer on the vehicle placard or tire infl ation pressure label. (If your vehicle has tires of a diff erent size than the size indicated on the vehicle placard or tire infl ation pressure label, you should determine the proper tire infl ation pressure for those tires.) As an added safety feature, your vehicle has been equipped with a tire pressure monitoring… -
Page 248
When Driving Tire Pressure Monitoring System NOTE Because this system detects slight changes in tire conditions, the timing of the warning may be faster or slower in the following cases: The size, manufacturer, or the type of tires is different from the speci cation. The size, manufacturer, or the type of a tire is different from the others, or the level of tire wear is excessively different between them. -
Page 249
When Driving Tire Pressure Monitoring System Tire Pressure Monitoring System CAUTION Initialization If the system initialization is performed In the following cases, system without adjusting the tire pressure, initialization must be performed so that the the system cannot detect the normal system operates normally. -
Page 250: Rear View Monitor
When Driving Rear View Monitor Rear View Monitor The rear view monitor provides visual images of the rear of the vehicle when reversing. WARNING Always drive carefully confi rming the safety of the rear and the surrounding conditions by looking directly with your eyes: Reversing the vehicle by only looking at the screen is dangerous as it may cause an accident or a collision with an object.
-
Page 251
If the camera temperature changes rapidly (Hot to cold, cold to hot), the rear view monitor may not operate correctly. When replacing the tires, consult an Authorized Mazda Dealer. Replacing the tires could result in deviation of the guide lines which appear on the display. -
Page 252
When Driving Rear View Monitor Displayable Range on the Screen The images on the screen may be different from the actual conditions. (Screen display) Garnish Bumper (Actual view) Object NOTE The displayable range varies depending on the vehicle and road conditions. The displayable range is limited. -
Page 253: Rear View Monitor Operation
When Driving Rear View Monitor Viewing the Display Guide lines which indicate the width of the vehicle (yellow) are displayed on the screen as a reference to the approximate width of the vehicle in comparison to the width of the parking space you are about to back into.
-
Page 254
When Driving Rear View Monitor NOTE Images displayed on the monitor from the rear view parking camera are reversed images (mirror images). 1. Shift the shift lever to R to switch the display to the rear view monitor display. 2. Con rming the surrounding conditions, reverse the vehicle. (Display condition) (Vehicle condition) 3. -
Page 255
When Driving Rear View Monitor 5. Once they are parallel, straighten the wheels and back your vehicle slowly into the parking space. Continue checking the vehicle’s surroundings and then stop the vehicle in the best possible position. (If the parking space has division lines, check whether the vehicle width guide lines are parallel to them.) (Display condition) (Vehicle condition) -
Page 256
When Driving Rear View Monitor NOTE Because there may be a difference between the displayed image, such as indicated below, and the actual conditions when parking, always verify the safety at the rear of the vehicle and the surrounding area directly with your eyes. In the image of the parking space (or garage) displayed on the screen, the back end and distance guide lines may appear aligned in the monitor, but they may not actually be aligned on the ground. -
Page 257
When Driving Rear View Monitor When there is a steep grade behind the vehicle When there is a steep upgrade (downgrade) behind the vehicle, the object displayed on the screen appears farther (downgrade: closer) than the actual distance. Appears Appears closer than farther than actual… -
Page 258
When Driving Rear View Monitor Picture Quality Adjustment WARNING Always adjust the picture quality of the rear view monitor while the vehicle is stopped: Do not adjust the picture quality of the rear view monitor while driving the vehicle. Adjusting the picture quality of the rear view monitor such as brightness, contrast, color, and tint while driving the vehicle is dangerous as it could distract your attention from the vehicle operation which could lead to an accident. -
Page 259: Interior Features
Interior Features Use of various features for ride comfort, including air-conditioning and audio system. Climate Control System…………..5-2 Operating Tips …………….5-2 Vent Operation …………….5-3 Manual Type …………….. 5-5 Fully Automatic Type …………..5-10 Audio System ………………5-14 Antenna ………………5-14 Operating Tips for Audio System ……….
-
Page 260: Climate Control System
For details, consult an Authorized The recirculate mode should be used Mazda Dealer. when driving through tunnels or while in a traf c jam, or when you would like to Label shut off outside air for quick cooling of the interior.
-
Page 261: Vent Operation
Interior Features Climate Control System Center vents (front passenger) Vent Operation Air vent open/close Adjusting the Vents Close Open Directing air ow To adjust the direction of air ow, move the adjustment knob. Knob NOTE Air ow direction adjustment When using the air conditioner under humid ambient temperature conditions, the system may blow fog from the vents.
-
Page 262
Interior Features Climate Control System Selecting the Air ow Mode Dashboard Vents Defroster and Floor Vents Defroster Vents Dashboard and Floor Vents Floor Vents 5–4… -
Page 263: Manual Type
Interior Features Climate Control System Manual Type Type A Temperature control dial Rear window defogger switch Fan control dial A/C switch Mode selector dial Air intake selector (outside air position) Air intake selector (recirculated air position) * Some models Type B Rear window defogger switch Temperature control dial Fan control dial…
-
Page 264
Interior Features Climate Control System Control Switches A/C switch Press the A/C switch to turn the air Temperature control dial conditioner on. The indicator light on the switch will illuminate when the fan control This dial controls temperature. Turn it dial is set at position 1, 2, 3, or 4. -
Page 265
Interior Features Climate Control System Air intake selector (Type B) Heating This lever controls the source of air 1. Set the mode selector dial to the entering the vehicle. position. 2. (Type A) It is recommended that under normal Set the air intake selector to the outside conditions the switch be kept in the air position. -
Page 266
Interior Features Climate Control System Cooling (With air conditioner) Ventilation 1. Set the mode selector dial to the 1. Set the mode selector dial to the position. position. 2. Set the temperature control dial to the 2. (Type A) cold position. Set the air intake selector to the outside 3. -
Page 267
Interior Features Climate Control System Windshield Defrosting and Dehumidifying (With air Defogging conditioner) 1. Set the mode selector dial to the Operate the air conditioner in cool or cold position. weather to help defog the windshield and 2. (Type B) side windows. -
Page 268: Fully Automatic Type
Interior Features Climate Control System Fully Automatic Type Type A Temperature control dial Fan control dial Mode selector dial A/C switch Air intake selector switch Rear window defogger switch Type B Temperature control dial Fan control dial Mode selector dial A/C switch Air intake selector switch Rear window defogger switch…
-
Page 269
Interior Features Climate Control System Control Switches NOTE With the air ow mode set to the Temperature control dial position and the temperature control dial set at a medium temperature, This dial controls temperature. Turn it heated air is directed to the feet and air clockwise for hot and counterclockwise at a comparably lower temperature will for cold. -
Page 270
Interior Features Climate Control System Air intake selector Operation of Automatic Air- Conditioning Outside or recirculated air positions can be selected. Press the switch to select outside/ 1. Set the mode selector dial to the AUTO recirculated air positions. position. 2. -
Page 271
Interior Features Climate Control System Windshield Defrosting and Sunlight/Temperature Sensor Defogging The climate control system measures Set the mode selector dial to the inside and outside temperatures, and position and turn the fan control dial to the sunlight. It then sets temperatures inside desired speed. -
Page 272: Audio System
Interior Features Audio System Antenna Operating Tips for Audio System Antenna WARNING Always adjust the audio while the vehicle is stopped: Do not adjust the audio control switches while driving the vehicle. Adjusting the audio while driving the vehicle is dangerous as it could distract your attention from the vehicle operation which could lead to a serious accident.
-
Page 273
Interior Features Audio System Do not spill any liquid on the audio Radio Reception system. AM characteristics AM signals bend around such things as buildings or mountains and bounce off the ionosphere. Therefore, they can reach longer distances than FM signals. Because of this, two stations may Do not insert any objects, other than CDs, sometimes be picked up on the same… -
Page 274
Interior Features Audio System Signals from an FM transmitter are similar Flutter/Skip noise to beams of light because they do not Signals from an FM transmitter move in bend around corners, but they do re ect. straight lines and become weak in valleys Unlike AM signals, FM signals cannot between tall buildings, mountains, and travel beyond the horizon. -
Page 275
Interior Features Audio System Strong signal noise Operating Tips for CD Player This occurs very close to a transmitter Condensation phenomenon tower. The broadcast signals are extremely strong, so the result is noise and sound Immediately after turning on the heater breakup at the radio receiver. -
Page 276
Interior Features Audio System If the memory portion of the CD is CDs bearing the logo shown in the transparent or translucent, do not use the illustration can be played. No other discs disc. can be played. Transparent A new CD may have rough edges on its inner and outer perimeters. -
Page 277
Interior Features Audio System The CD player ejects the CD if the CD Operating Tips for MP3 is inserted upside down. Also dirty and/ MP3 stands for MPEG Audio Layer 3, or defective CDs may be ejected. which is standardized voice compression Do not insert cleaning discs in the CD established by the ISO working group… -
Page 278
Interior Features Audio System This audio system handles MP3 les Operating Tips for AAC that have been recorded on CD-R/CD- AAC stands for Advanced Audio Coding, RW/CD-ROMs. which is standardized voice compression When naming an MP3 le, be sure to established by the ISO working group add an MP3 le extension (.mp3) after… -
Page 279
Interior Features Audio System Operating Tips for OGG Operating Tips for USB device OGG is the audio compression format for This unit plays audio les as follows: Xiph. Org Foundation. Audio data can be created and stored at a Extension Playback with this unit higher compression ratio than MP3. -
Page 280
If data in the iPod is lost while it is MP3/WMA/AAC/OGG les written connected to the unit, Mazda cannot under speci cations other than the guarantee recovery of any lost data. indicated speci cation may not play If the iPod battery is deteriorated, the… -
Page 281: Audio Set [Type A (Non-Touchscreen)]
Interior Features Audio System Audio Set [Type A (non-touchscreen)] Power/Volume/Sound Controls …………….page 5-24 Clock ……………………page 5-26 Operating the Radio ………………..page 5-28 Operating the Compact Disc (CD) Player…………. page 5-30 How to use Auxiliary jack/USB port …………..page 5-33 Error Indications ………………..
-
Page 282
Interior Features Audio System Power/Volume/Sound Controls Audio display Menu button Power/Volume/Audio control dial Power ON/OFF 2. Turn the audio control dial to adjust the selected functions as follows: Switch the ignition to ACC or ON. Press the power/volume dial to turn the audio system on. -
Page 283
Interior Features Audio System NOTE If not operated for several seconds, the display returns to the previous display. To reset bass, treble, fade, and balance, press the menu button ( ) for 2 seconds. The unit will beep and “ CLEAR ” will be displayed. -
Page 284
Interior Features Audio System Clock :00 button Audio control dial Audio display Clock button Menu button Hour/Minute set switch NOTE Setting the time When the :00 button ( 1 ) is pressed, the The clock can be set at any time when the seconds will start at “… -
Page 285
MEMO 5–27… -
Page 286
Interior Features Audio System Operating the Radio Audio display Channel preset buttons Tuning button Scan button Auto memory button Band selector button Radio ON Seek tuning Press a band selector button ( ) to Automatic search for radio stations starts turn the radio on. -
Page 287
Interior Features Audio System Preset channel tuning The 6 preset channels can be used to store 6 AM and 12 FM stations. 1. To set a channel rst select AM, FM1, or FM2. Tune to the desired station. 2. Press a channel preset button for about 2 seconds until a beep is heard. -
Page 288
Interior Features Audio System Operating the Compact Disc (CD) Player Repeat button Text button Play/Pause button Random button Audio display Folder up button Track down/ Reverse button Folder down button Track up/ Media/Scan button Fast-forward button CD eject button CD slot Ejecting the CD Type Playable data… -
Page 289
Interior Features Audio System Track search Repeat playback Press the track up button ( ) once to skip During music CD playback forward to the beginning of the next track. Press the track down button ( ) within a 1. Press the repeat button ( 1 ) during few seconds after playback begins to track playback to play the current track down to the beginning of the previous… -
Page 290
Interior Features Audio System Random playback Switching the display Tracks are randomly selected and played. The information displayed on the audio display changes as follows each time the During music CD playback text button ( 3 ) is pressed during playback. 1. -
Page 291
CD for damage, dirt, or smudges, and then properly reinsert it. If the message appears again, insert another known good CD. If the message continues to appear, take the unit to an Authorized Mazda Dealer for service. How to use Auxiliary jack/USB port… -
Page 292: Audio Set [Type B (Touchscreen)]
Interior Features Audio System Audio Set [Type B (touchscreen)] NOTE The explanation of functions described in this manual may differ from the actual operation, and the shapes of screens and buttons and the letters and characters displayed may also differ from the actual appearance. Additionally, depending on future software updates, the content may successively change without notice.
-
Page 293
Interior Features Audio System Switches around commander knob The following operations can be done by pressing the switches around the commander knob. : Displays the home screen. : Displays the Entertainment screen. : Displays the Navigation screen (Only navigation-equipped vehicles). For operation of the Navigation screen, refer to the navigation system manual. -
Page 294
Interior Features Audio System Commander knob operation (Selection of icons on screen) 1. Tilt or turn the commander knob and move the cursor to the desired icon. 2. Press the commander knob and select the icon. NOTE Long-press operation of the commander knob is also possible for some functions. Touch panel operation CAUTION Do not press the screen strongly or press it with a sharp-pointed object. -
Page 295
Interior Features Audio System Basic Operation Method TOUCH & TAP 1. Touch or tap on the item indicated on the screen. 2. The operation is launched and the next item is displayed. SLIDE 1. Touch the setting item displaying a slider bar. 2. -
Page 296
Interior Features Audio System Return to previous screen 1. Touch the Displaying the home screen 1. Touch the Home screen Icon Function Applications Information such as average fuel economy, maintenance, and warnings can be veri ed. Depending on the grade and speci cation, the screen display may differ. Entertainment Operates audio such as the radio and CDs. -
Page 297
MEMO 5–39… -
Page 298
Interior Features Audio System Volume/Display/Sound Controls Audio control switch Commander switch Volume switch Volume dial Volume adjustment Daytime/nighttime (System) screen setting Turn the commander switch volume dial. The volume switch on the steering switch The daytime or nighttime screen can be can also be pressed. -
Page 299
Interior Features Audio System Audio sound adjustment Select the icon on the home screen to display the Settings screen. Select the tab to select the item you would like to change. Indication Setting value Side: Low pitch Bass enhancement (Low pitch sound) Side: Low pitch reduction Side: Treble… -
Page 300
Interior Features Audio System Operating the Radio Radio ON Select the icon on the home screen to display the Entertainment screen. When selecting the desired radio, the following icons are indicated in the lower part of the center display. AM/FM Radio Icon Function Displays the Entertainment menu. -
Page 301
Interior Features Audio System Favorites Radio Changing Favorites list order Selected stations can be registered for 1. Select the icon to display the convenient operation. Up to 50 stations Favorites list. can be registered. The Favorites list is 2. Select common to AM, FM, and satellite radio. -
Page 302
Interior Features Audio System NOTE HD Radio To change the desired genre, select the What is HD Radio Technology and ™ icon. how does it work? HD Radio Technology is the digital ™ Ex.) evolution of analog AM/FM radio. Your 89.3 is currently being received. -
Page 303
Interior Features Audio System NOTE iTunes Tagging (for Apple devices with USB use only) If an analog broadcast is received once is received while HD1 is By tagging a song currently being aired, selected, the audio unit switches to the the song can be easily purchased from the station automatically. -
Page 304
(some areas of World-class news plus local traf c and the United States and Canada). Contact weather. Authorized Mazda Dealer for details. Sign up for SiriusXM Satellite Radio today! 5–46 *Some models. -
Page 305
Interior Features Audio System How to Activate Satellite Radio You must call SiriusXM to activate your service. Activation is free and takes only a few minutes. New customers can receive a free introductory subscription with a limited term trial offer by calling 877-447-0011 (U.S.A.)/877-209-0079 (Canada) to activate. -
Page 306
Interior Features Audio System SiriusXM operation Select the icon on the home screen to display the Entertainment screen. When selected, the following icons are indicated in the bottom part of the center display. Icon Function Displays the Entertainment menu. Use to switch to a different audio source. Displays the channel list of the current category. -
Page 307
Interior Features Audio System Selection from channel list PIN code reset Receivable channels can be displayed on If the registered code has been forgotten, the channel list screen. You can easily reset the code to the default [0000] code. select the channel you want to listen 1. -
Page 308
Interior Features Audio System Operating the Compact Disc (CD) Player CD eject button CD slot Ejecting the CD Type Playable data Press the CD eject button ( ) to eject the Music/MP3/WMA/ Music data (CD-DA) AAC CD player MP3/WMA/AAC le NOTE If a disc has both music data (CD-DA) and MP3/WMA/AAC les, playback of the… -
Page 309
Interior Features Audio System Playback Select the icon on the home screen with a CD inserted and display the Entertainment screen. When is selected, the following icons are indicated in the lower part of the center display. Icon Function Displays the Entertainment menu. Use to switch to a different audio source. (Music CD) Displays the track list of the CD. -
Page 310
Interior Features Audio System Icon Function Plays a CD. When selected again, playback is temporarily stopped. Advances to the beginning of the next song. Long-press to fast forward. It stops when you remove your hand from the icon or the commander knob. -
Page 311
Interior Features Audio System Settings NOTE Depending on the grade and speci cation, the screen display may differ. Select the icon on the home screen and display the Settings screen. Switch the tab and select the setting item you want to change. You can customize settings in the setup display as follows: Item Function… -
Page 312
2. Voice recognition assistance for Play Artist Music Database Update System and Play Album Gracenote can be downloaded from the Mazda Handsfree Website. Refer to Gracenote Database (Type B) on page 5-70 . Memory and settings are initialized to the factory settings. -
Page 313: Audio Control Switch Operation
Interior Features Audio System Applications Audio Control Switch Operation NOTE Depending on the grade and speci cation, Without Bluetooth Hands-Free ® the screen display may differ. Select the icon on the home screen to display the Applications screen. The following information can be veri ed. Top screen Item Function…
-
Page 314
Interior Features Audio System Adjusting the Volume USB Audio/Bluetooth Audio /CD ® Press the seek switch ( ) to skip forward To increase the volume, press up the to the beginning of the next track. volume switch ( ). Press the seek switch ( ) within a few To decrease the volume, press down the seconds after playback begins to track volume switch ( ). -
Page 315: Aux/Usb Mode
The SD card slot is for the navigation How to use USB mode system. For vehicles with the navigation (Type A) ……..page 5-60 system, the SD card (Mazda genuine) with How to use iPod mode stored map data is inserted into the SD (Type A) ……..page 5-64 card slot and used.
-
Page 316
Interior Features Audio System How to connect USB port/ CAUTION Auxiliary jack Depending on the portable audio Type A device, noise may occur when the device is connected to the vehicle accessory socket. (If noise occurs, do USB port Auxiliary jack not use the accessory socket.) NOTE This mode may not be usable depending… -
Page 317
Interior Features Audio System How to use AUX mode (Type A) WARNING 1. Switch the ignition to ACC or ON. Do not allow the connection plug cord 2. Press the power/volume dial to turn the to get tangled with the parking brake or audio system on. -
Page 318
Interior Features Audio System How to use USB mode (Type A) Random button Audio display Repeat button Text button Play/Pause button Track down/Reverse button Folder up button Media/Scan button Track up/Fast-forward button Folder down button NOTE Type Playable data Some devices such as smart phones USB mode MP3/WMA/AAC le may require a setting change to allow… -
Page 319
Interior Features Audio System Track search Folder repeat Press the track up button ( ) once to skip 1. Press the repeat button ( 1 ) during forward to the beginning of the next track. playback, and then press the button Press the track down button ( ) within a again within 3 seconds to play the few seconds after playback begins to track… -
Page 320
USB device has MP3/WMA/AAC les and re-connect Information displayed Button correctly. If the message reappears, have on audio display the unit checked by an Authorized Mazda File number/ Elapsed time Dealer. Folder number/ File number File name… -
Page 321
MEMO 5–63… -
Page 322
Interior Features Audio System How to use iPod mode (Type A) Audio display Text button Play/Pause button Random button Category down button Repeat button Category up button Track down/Reverse button List up button Track up/Fast-forward button List down button Media/Scan button An iPod may not be compatible depending Pause on the model or OS version. -
Page 323
Interior Features Audio System NOTE Random playback The types of categories include Playlist, Tracks are randomly selected and played. Artist, Album, Song, Podcast, Genre, Song random Composer, and Audio book. 1. Press the random button ( 2 ) during List search playback to play the tracks in the list randomly. -
Page 324
If you has information which can be displayed. cannot clear the error indication, take the This unit cannot display some vehicle to an Authorized Mazda Dealer. characters. Characters which cannot be displayed are indicated by an asterisk Indication… -
Page 325
Interior Features Audio System How to use AUX mode (Type B) 1. Select the icon on the home screen to display the Entertainment screen. 2. Select to switch to the AUX mode. The following icons are displayed in the lower part of the center display. -
Page 326
Interior Features Audio System Playback 1. Select the icon on the home screen to display the Entertainment screen. 2. Select to switch the USB mode. The following icons are displayed in the lower part of the center display. Icon Function Displays the Entertainment menu. -
Page 327: Category List
Interior Features Audio System Category list Select the icon to display the following category list. Select a desired category and item. Category Function Playlist Displays playlists on the device. Displays the artist name list. Artist All the tracks or tracks for each album of the selected artist can be played. Album Displays the album name list.
-
Page 328
Gracenote music recognition service. CAUTION For information related to the most recent Gracenote database which can be used and how to install it, go to the Mazda Hands Free Website: http://www.mazdahandsfree.com Introduction Music recognition technology and related data are provided by Gracenote . -
Page 329
4. Select . The list of the update package stored in the USB device and the version are displayed. 5. Select the package to use the update. 6. Select NOTE Gracenote can be downloaded from the Mazda Hands-free Website. 5–71… -
Page 330: Bluetooth
CAUTION Some Bluetooth ® mobile devices are not compatible with the vehicle. Consult an Authorized Mazda Dealer, Mazda’s call center or Web support center for information regarding Bluetooth ® mobile device compatibility: U.S.A.
-
Page 331
Interior Features Bluetooth ® Applicable Bluetooth speci cation (Recommended) ® Type A: Ver. 2.0 Type B: Ver. 1.1/1.2/2.0 EDR/2.1 EDR/3.0 (conformity) Component Parts Audio unit Type A Type B Talk button, Pick-up button and Hang-up button Talk button Pick-up button Hang-up button Microphone Microphone… -
Page 332
Interior Features Bluetooth ® Volume adjustment The power/volume dial of the audio unit or the volume dial of the commander switch is used to adjust the volume. Turn the dial to the right to increase volume, to the left to decrease it. -
Page 333
Interior Features Bluetooth ® Bluetooth Preparation (Type A) Device pairing ® To use Bluetooth Hands-Free, the device ® Bluetooth Hands-Free Preparation ® equipped with Bluetooth has to be paired ® to the Bluetooth unit using the following ® Pairing code setting procedure. -
Page 334
For the operation of the device, refer to its Device registration can also be done by instruction manual. operating the audio unit. 10. Select “Mazda” from the device list Depending on the device, the searched by the device. registration status may be lost after a 11. -
Page 335
Interior Features Bluetooth ® 7. Prompt: “XXXXX…, XXXXX…, (Hands-free phone) XXXXX… (Ex. Device A, device B, 1. Press the pick-up button or talk button device C)” (The voice guidance reads with a short press. out the device tags registered to the 2. -
Page 336
Interior Features Bluetooth ® 8. Say: [Beep] “Yes” or “No” 6. Say: [Beep] “Delete” 9. If “Yes”, go to Step 10. If “No”, the 7. Prompt: “Please say the name of procedure returns to Step 5. the device you would like to delete. 10. -
Page 337
Interior Features Bluetooth ® 11. Prompt: “XXXXX… (Ex. device C) 2. Turn the audio control dial and select a (Device tag), is this correct?” desired mode. 12. Say: [Beep] “Yes” 13. Prompt: “New name saved.” Bluetooth Audio Preparation ® Bluetooth audio device set-up ®… -
Page 338
Interior Features Bluetooth ® NOTE 3. Input the PIN code of your Bluetooth ® audio device by pressing channel preset If a Bluetooth device has already been ® buttons 1 to 4 while “ PIN 0000 ” is paired to the vehicle as a hands-free displayed. -
Page 339
Interior Features Bluetooth ® NOTE NOTE Some Bluetooth audio devices need a If pairing cannot be completed, try ® certain amount of time before the “1234” instead. Refer to the owner’s symbol is displayed. manual of your mobile device for the If the pairing failed, “… -
Page 340
Interior Features Bluetooth ® 4. Turn the audio control dial to select the NOTE name of the device you would like to Some Bluetooth audio devices need a ® link. certain amount of time before the symbol is displayed. If a hands-free type mobile phone has Device name 1 been the most recently paired device, the Bluetooth… -
Page 341
Interior Features Bluetooth ® 4. Rotate the audio control dial and select NOTE the name of the paired device you Select “ GO BACK ” and press the audio would like to delete. control dial to return to the “ PAIR DELETE ”… -
Page 342
Interior Features Bluetooth ® Available Language (Type A) 7. Prompt: “French (Desired language) selected. Is this correct?” The available languages are English, 8. Say: [Beep] “Yes” Spanish, and Canadian French. If the 9. Prompt: “French (Desired language) language setting is changed, all of the selected”… -
Page 343
Interior Features Bluetooth ® Voice Recognition (Type A) Commands useable anytime during voice recognition In this section, the basic operation of the “Help” or “Go Back” are commands voice recognition is explained. which can be used at anytime during voice Activating Voice Recognition recognition. -
Page 344
Interior Features Bluetooth ® To prevent a deterioration in the voice Security Setting (Type A) recognition rate and voice quality, the If a passcode is set, the system cannot be following points should be observed: activated unless the passcode is input. The voice recognition cannot be performed while voice guidance or NOTE… -
Page 345
Interior Features Bluetooth ® Using Bluetooth Hands-Free with a Con rmation Prompts ® passcode The con rmation prompt con rms the 1. Press the pick-up button or talk button command content to the user before with a short press. advancing to the operation requested by 2. -
Page 346
Interior Features Bluetooth ® Voice Recognition Learning 6. Say: [Beep] “0123456789” (Say Function (Speaker Enrollment) the voice input command for voice (Type A) recognition learning (1 to according to the voice guidance.) The voice recognition learning function 7. Prompt: “Speaker enrollment is enables voice recognition appropriate to complete.”…
 -
Page 347
Interior Features Bluetooth ® NOTE Voice recognition learning on/off If an error occurred in the voice 1. Press the pick-up button or talk button recognition learning, re-learning can be with a short press. done by pressing the talk button with a 2. -
Page 348
NOTE device). The Bluetooth system may not operate ® 7. Select “Mazda” from the device list for 1 or 2 minutes after the ignition searched by the device. is switched to ACC or ON. However, 8. (Device with Bluetooth version 2.0) ®… -
Page 349
The following functions can be used for If pairing is redone on the same the Hands-free or audio. mobile phone device, rst clear “Mazda” displayed on the Bluetooth ® Hands-free: Phone calls and E-mail/ setting screen of the mobile device. -
Page 350
Interior Features Bluetooth ® Deleting all devices Voice Recognition (Type B) 1. Select the icon on the home screen In this section, the basic operation of the to display the Settings screen. voice recognition is explained. 2. Select the tab. Activating Voice Recognition 3. -
Page 351
Interior Features Bluetooth ® To prevent a deterioration in the voice recognition rate and voice quality, the following points should be observed: The voice recognition cannot be performed while voice guidance or the beep sound is operating. Wait until the voice guidance or the beep sound is nished before saying your commands. -
Page 352
Interior Features Bluetooth ® Audio Operation Using Voice Recognition (Type B) Main audio operation The below commands are examples of the available commands. When the talk button is pressed and the following command is spoken out, the audio can be operated. -
Page 353: Bluetooth
Interior Features Bluetooth ® 1. Press the pick-up button or talk button Bluetooth Hands-Free ® with a short press. (Type A) 2. Say: [Beep] “Phonebook” 3. Prompt: “Select one of the following: New entry, edit, list names, delete, Making a Call erase all or import contact.”…
-
Page 354
Interior Features Bluetooth ® 16. (Registration) 6. Device (Mobile phone) operation: Press the pick-up button or say “Enter”, Select one entry from the phonebook then go to Step 17. and send it using Bluetooth ® (Adding/inputting telephone 7. Prompt: “X (Number of locations number) which include data) numbers have been Say, “XXXX”… -
Page 355
Interior Features Bluetooth ® 6. Say: [Beep] “XXXXX… (Ex. “Mary’s 14. (Number Change) phone”)” (Say the voice tag for the Press the pick-up button, then go to registered name to be edited in the Step 15. phonebook.) (Adding/inputting telephone 7. Prompt: “Home, Work, Mobile, or number) Other?”… -
Page 356
Interior Features Bluetooth ® 8. Say: [Beep] “Yes” Read-out of names registered to the 9. Prompt: “XXXXX… (Ex. “John’s Bluetooth Hands-Free phonebook ® phone”) (Registered voice tag) Home Bluetooth Hands-Free can read out the ® (Registered location) deleted.” list of names registered to its phonebook. 1. -
Page 357
Interior Features Bluetooth ® Redial Function NOTE The “Dial” command and a telephone Redialing the number of the person number can be combined. previously dialed using the phone is Ex. In Step 2, say, “Dial 123-4567” then, possible. Steps 3 and 4 can be skipped. 1. -
Page 358
Interior Features Bluetooth ® Canceling mute NOTE To refuse an incoming call, press the 1. Press the talk button with a short press. hang-up button. 2. Say: [Beep] “Mute off” After receiving a new incoming call, the 3. Prompt: “Microphone unmuted” previous call is placed on hold. -
Page 359
Interior Features Bluetooth ® 6. (Dialing) DTMF (Dual Tone Multi- Press the pick-up button or say “Dial”, Frequency Signal) Transmission then go to Step 7. This function is used when transmitting (Adding/inputting telephone DTMF via the user’s voice. The receiver number) of a DTMF transmission is generally a Say, “XXXX”… -
Page 360
Interior Features Bluetooth ® (Automatic downloading) Bluetooth Hands-Free ® The “Auto Download Contacts” (Type B) setting must be on. When hands-free is connected to the device, the phonebook is Making a Call downloaded automatically. Refer to Communication Settings on page Phonebook Usage 5-110 . -
Page 361
Interior Features Bluetooth ® Registering your favorites Deleting a favorite 1. Select the icon on the home screen 1. Select the icon on the home screen to display the Communication screen. to display the Communication screen. 2. Select to display the favorites 2. -
Page 362
Communication screen. not call 911, doing so will defeat 2. When is pressed, the dial pad the purpose of the system. Mazda is displayed. recommends that the Mobile 911 3. Input the telephone number using the system remain activated. -
Page 363: Receiving An Incoming Call
Interior Features Bluetooth ® Receiving an Incoming Call When an incoming call is received, the incoming call noti cation screen is displayed. The “Incoming Call Noti cations” setting must be on. Refer to Communication Settings on page 5-110 . To accept the call, press the pick-up button on the audio control switch or select the screen.
-
Page 364
Interior Features Bluetooth ® NOTE Receiving and Replying to Messages (available only with If the ignition is switched off during a E-mail/SMS compatible phones) hands-free call, the line is transferred to the device (Mobile phone) SMS (Short Message Service) messages, automatically. -
Page 365
Interior Features Bluetooth ® NOTE Attached data is not downloaded. Messages up to 1 kilobyte (E-mail)/140- bytes (SMS) can be downloaded. A message list is created for each device. If the connected device does not correspond to MAP 1.0, the AT command is used to download. -
Page 366
Interior Features Bluetooth ® The following icons are displayed in the lower part of the details on the message. Icons which can be used differ depending on use conditions. Icon Function Displays the Communication menu. Displays the inbox. Plays back a message. When selected again, playback is temporarily stopped. -
Page 367
Interior Features Bluetooth ® Example of use (verify unread E-mail) NOTE 1. Select the icon on the home screen Select the icon to change the to display the Communication screen. language. 2. Select to display the inbox. Select the icon to switch between capitalized and lower-case characters. -
Page 368
Interior Features Bluetooth ® Communication Settings Select the icon on the home screen to display the Communication screen. Select to change the setting. Item Setting Function Go to Bluetooth setting menu. ® Bluetooth — ® Refer to Bluetooth Preparation (Type B) on page 5-90 . ®… -
Page 369: Bluetooth ® Audio (Type A)
Interior Features Bluetooth ® NOTE Bluetooth Audio (Type A) ® The battery consumption of Bluetooth ® Applicable Bluetooth speci cation ® audio devices increases while (Recommended) Bluetooth is connected. ® Ver. 2.0 If a general mobile phone device is USB connected during music playback Response pro le over the Bluetooth connection, the…
-
Page 370
Interior Features Bluetooth ® Fast-forward/Reverse (AVRCP Ver. 1.3) 3. Press the media button ( ) to switch to the Bluetooth audio mode ® Fast-forward and start playback. Press and hold the fast-forward button ( If the current device version is lower than AVRCP Ver. -
Page 371
Interior Features Bluetooth ® Bluetooth Audio Device ® Bluetooth Audio (Type B) ® Information Display Applicable Bluetooth speci cation ® If a Bluetooth audio device is connected, ® (Recommended) the following information is displayed in Ver. 1.1/1.2/2.0 EDR/2.1 EDR/3.0 the audio display. (conformity) Response pro le AVRCP Ver. -
Page 372
Interior Features Bluetooth ® A2DP is a pro le which transmits only NOTE audio to the Bluetooth unit. If your ® The battery consumption of Bluetooth ® Bluetooth audio device corresponds ® audio devices increases while only to A2DP, but not AVRCP, you Bluetooth is connected. -
Page 373
Interior Features Bluetooth ® How to Use the Bluetooth Audio System ® Switching to Bluetooth audio mode ® To listen to music or voice audio recorded to a Bluetooth audio device, switch to the ® Bluetooth audio mode to operate the audio device using the audio system control panel. ®… -
Page 374
Interior Features Bluetooth ® Playback To listen to a Bluetooth audio device over the vehicle’s speaker system, switch the mode to ® Bluetooth audio mode. (Refer to “Switching to Bluetooth audio mode”) ® ® After switching to the Bluetooth audio mode, the following icons are displayed in the ®… -
Page 375
Interior Features Bluetooth ® Example of use (When searching for a Bluetooth Audio Device ® song from the top level of a device) Information Display 1. Select the icon to display the If a Bluetooth audio device is connected, ® folder/ le list at the top level. -
Page 376
Interior Features Bluetooth ® How to Use Pandora ® * What is Pandora ® Pandora is free personalized Internet radio. Simply enter a favorite artist, track, genre, ® *1 and Pandora will create a personalized station that plays their music and more like it. ®… -
Page 377
Interior Features Bluetooth ® Icon Function Displays sound settings to adjust audio quality level. Refer to Volume/Display/Sound Controls on page 5-40 . NOTE The skip function may not be available depending on the device. The number of skips is limited by Pandora ®… -
Page 378
Interior Features Bluetooth ® How to Use Aha ™ What is Aha ™ is an application which can be used to enjoy various Internet content such as Internet radio and podcasts. Stay connected to your friends activities by getting updates from Facebook and Twitter. Using the location-based service, nearby services and destinations can be searched or real- time local information can be obtained. -
Page 379
Interior Features Bluetooth ® Icon Function Like Evaluates the current content as “Like”. Dislike Evaluates the current content as “Dislike”. Reverses for 15 seconds. Map (vehicles with navigation system) Displays the destination searched by the location based services on the navigation system. Call A call can be made to the telephone number of a shop searched using the Location Based Services. -
Page 380: Main Menu
Interior Features Bluetooth ® Main menu Select the icon. Switch the tab and select the station category. Function Displays the preset station list set on the device. Presets Select the preset station name to play the station content. Select the desired station. Guidance is provided to the searched destination near the vehicle’s position.
-
Page 381
Interior Features Bluetooth ® Example of use (Location Based Shout Services) Some social stations, such as Facebook or 1. Select the desired station from the Caraoke, support the ability to record and “Nearby” tab on the main menu. share voice messages using the “Shout” The destination name or address function. -
Page 382
Interior Features Bluetooth ® How to Use Stitcher Radio ™ What is Stitcher Radio? ™ Stitcher radio is an application which can be used to listen to Internet radio or stream ™ *1 podcasts. Recommended content is automatically selected by registering content which you put into your favorites, or by pressing the Like or Dislike button. -
Page 383
Interior Features Bluetooth ® Icon Function Plays the station. Select it again to pause playback. Goes to the next station. Displays sound settings to adjust audio quality level. Refer to Volume/Display/Sound Controls on page 5-40 . Station list 1. Select the icon to display the station list. -
Page 384
Interior Features Bluetooth ® Add to your favorites If the current program has not been registered to your favorites, it can be registered to your favorites. 1. Select the icon to display the favorites station which the registration can be added. 2. -
Page 385: Troubleshooting
The pairing information paired to Pairing cannot be performed again the Bluetooth ® unit or device is not Clear “Mazda” stored in the device. recognized correctly. Perform pairing again. Unable to perform pairing The Bluetooth function and the ®…
-
Page 386
® If you pair your phone which has already been paired to your vehicle more than once in the past, you need to delete “Mazda” on your mobile device. Then, execute the Bluetooth ® search on your mobile device once again, and pair to a newly detected “Mazda”. -
Page 387
Interior Features Bluetooth ® Symptom Cause Solution method By carrying out the following measures, the rate of recognition will improve. Clear memory from the phonebook The Bluetooth ® system is under a Names in the phonebook are not which is not used very often. condition in which recognition is easily recognized Avoid shortened names, use full… -
Page 388: Interior Equipment
Interior Features Interior Equipment Sunvisors Interior Lights When you need a sunvisor, lower it for use in front or swing it to the side. NOTE Do not leave the lights on for long periods Sunvisor while the engine is turned off. Otherwise, the battery power could be depleted.
-
Page 389: Illuminated Entry System
Interior Features Interior Equipment Map Lights Illuminated Entry System When the overhead light switch is in the The overhead lights (switch is in the door or off position, press the lens to DOOR position) turn on when any of illuminate the map lights, and then press the following operations is done with the the lens again to turn them off.
-
Page 390: Accessory Sockets
Interior Equipment NOTE Accessory Sockets Battery saver Only use genuine Mazda accessories or If any door is left open with the the equivalent requiring no greater than overhead light switch in the DOOR 120 W (DC 12 V, 10 A).
-
Page 391: Cup Holder
120 W (DC 12 V, 10 A). liquids while the vehicle is moving is Do not use accessories that are not dangerous. If the contents spill, you genuine Mazda accessories or the could be scalded. equivalent. Close the cover when the accessory…
-
Page 392: Bottle Holder
Interior Features Interior Equipment Bottle Holder Storage Compartments Bottle holders are on the inside of the WARNING doors. Keep storage boxes closed when driving: Driving with the storage boxes open is dangerous. To reduce the possibility of injury in an accident or a sudden stop, keep the storage boxes closed when driving.
-
Page 393: Glove Compartment
Interior Features Interior Equipment Overhead Console Center Console Tray This console box is designed to store WARNING eyeglasses or other accessories. Push and release to open. Never use a cup holder to hold hot liquids while the vehicle is moving: Using a cup holder to hold hot liquids while the vehicle is moving is dangerous.
-
Page 394
Interior Features Interior Equipment Cargo Securing Loops Luggage Board When using the luggage board in the WARNING upper level Make sure luggage and cargo is secured before driving: CAUTION Not securing cargo while driving is dangerous as it could move or be Make sure the luggage board is crushed during sudden braking or a securely inserted into the grooves. -
Page 395
Interior Features Interior Equipment When using the luggage board in the NOTE lower level When using the luggage board on the lower level, make sure that it is placed By placing the luggage board on top of the horizontally. The front part of the luggage luggage mat, more space is available for board folds up on vehicles equipped with placing taller items. -
Page 396
MEMO 5–138… -
Page 397: Maintenance And Care
Maintenance and Care How to keep your Mazda in top condition. Essential Information ……………. 6-2 Introduction ………………. 6-2 Scheduled Maintenance …………..6-4 Scheduled Maintenance (U.S.A., Canada, and Puerto Rico) ..6-4 Scheduled Maintenance (Mexico) ……….6-13 Maintenance Monitor …………..6-20 Owner Maintenance ……………..
-
Page 398: Essential Information
If you elect to perform maintenance yourself or have your vehicle serviced at a location other than an Authorized Mazda Dealer, Mazda requires that all uids, parts and materials must meet Mazda standards for durability and performance as described in this manual.
-
Page 399
Claims against the warranty resulting from lack of maintenance, as opposed to defective materials or authorized Mazda workmanship, will not be honored. Any auto repair shop using parts equivalent to your Mazda’s original equipment may perform maintenance. But we recommend that it always be done by an Authorized Mazda Dealer using genuine Mazda parts. -
Page 400: Scheduled Maintenance
Change the oil as soon as possible within the next 500 km (300 mile) or 15 days. Refer page 6-20 for the details. Mazda Genuine 0W-20 Oil and Castrol 0W-20 Oil are required to achieve optimum ®…
-
Page 401
Maintenance and Care Scheduled Maintenance Schedule 1 U.S.A. and Puerto Rico residents — Engine oil exible maintenance interval Use when the maintenance monitor for “Oil Change” is set to “Flexible”. For details, see maintenance monitor. (page 6-20 ) Number of months or kilometers (miles), whichever comes rst. Months Maintenance Interval ×1000 km… -
Page 402
*3 According to state/provincial and federal regulations, failure to perform maintenance on these items will not void your emissions warranties. However, Mazda recommends that all maintenance services be performed at the recommended time or mileage/kilometer period to ensure long-term reliability. -
Page 403
Maintenance and Care Scheduled Maintenance U.S.A. and Puerto Rico residents — Fixed maintenance interval Use when the maintenance monitor for “Oil Change” is set to “Fixed”. For details, see maintenance monitor. (page 6-20 ) Number of months or kilometers (miles), whichever comes rst. Months Maintenance Interval ×1000 km… -
Page 404
*3 To equalize tread wear for maintaining good performance in handling and braking, rotate the tires every 12,000 km (7,500 miles). However Mazda recommends to rotate every 8,000 km (5,000 miles) to help increase tire life and distribute wear more evenly. -
Page 405
Maintenance and Care Scheduled Maintenance Schedule 2 U.S.A. and Puerto Rico residents — Severe driving conditions maintenance interval Number of months or kilometers (miles), whichever comes rst. Months Maintenance Interval ×1000 km ×1000 miles ENGINE Drive belts Replace when wrench indicator light is ON. (Max interval: 12 Flexible months/16,000 km (10,000 miles)) Engine oil &… -
Page 406
*4 According to state/provincial and federal regulations, failure to perform maintenance on these items will not void your emissions warranties. However, Mazda recommends that all maintenance services be performed at the recommended time or mileage/kilometer period to ensure long-term reliability. -
Page 407
Maintenance and Care Scheduled Maintenance Canada residents Number of months or kilometers (miles), whichever comes rst. Months Maintenance Interval ×1000 km ×1000 miles ENGINE Drive belts Engine oil & lter COOLING SYSTEM Replace at rst 192,000 km (120,000 miles) or 10 years; after Engine coolant that, every 96,000 km (60,000 miles) or 5 years. -
Page 408
*2 According to state/provincial and federal regulations, failure to perform maintenance on these items will not void your emissions warranties. However, Mazda recommends that all maintenance services be performed at the recommended time or mileage/kilometer period to ensure long-term reliability. -
Page 409: Scheduled Maintenance (Mexico)
Maintenance and Care Scheduled Maintenance Scheduled Maintenance (Mexico) Follow Schedule 1 if the vehicle is operated mainly where none of the following conditions (severe driving conditions) apply. Repeated short-distance driving Driving in dusty conditions Driving with extended use of brakes Driving in areas where salt or other corrosive materials are used Driving on rough or muddy roads Extended periods of idling or low-speed operation…
-
Page 410
Maintenance and Care Scheduled Maintenance Schedule 1 Number of months or kilometers, whichever comes rst Maintenance Interval Months ×1000 km 90 100 110 120 ENGINE Drive belts Engine oil & lter COOLING SYSTEM Cooling system Replace at rst 200,000 km or 10 years; after that, every Engine coolant 100,000 km or 5 years FUEL SYSTEM… -
Page 411
*2 According to state/provincial and federal regulations, failure to perform maintenance on these items will not void your emissions warranties. However, Mazda recommends that all maintenance services be performed at the recommended time or kilometer period to ensure long-term reliability. -
Page 412
Maintenance and Care Scheduled Maintenance Schedule 2 Number of months or kilometers, whichever comes rst Maintenance Interval Months ×1000 km ENGINE Drive belts Engine oil & lter COOLING SYSTEM Cooling system Replace at rst 200,000 km or 10 years; after that, every Engine coolant 100,000 km or 5 years Engine coolant level… -
Page 413
*2 According to state/provincial and federal regulations, failure to perform maintenance on these items will not void your emissions warranties. However, Mazda recommends that all maintenance services be performed at the recommended time or kilometer period to ensure long-term reliability. -
Page 414
Maintenance and Care Scheduled Maintenance (Cont.) Number of months or kilometers, whichever comes rst Maintenance Interval Months ×1000 km 95 100 105 110 115 120 ENGINE Drive belts Engine oil & lter COOLING SYSTEM Cooling system Replace at rst 200,000 km or 10 years; after that, every Engine coolant 100,000 km or 5 years Engine coolant level… -
Page 415
*2 According to state/provincial and federal regulations, failure to perform maintenance on these items will not void your emissions warranties. However, Mazda recommends that all maintenance services be performed at the recommended time or kilometer period to ensure long-term reliability. -
Page 416: Maintenance Monitor
*1 The exible setting is available in the United States and Puerto Rico. Based on the engine operating conditions, the onboard computer in your vehicle calculates the remaining oil life. Mazda Genuine 0W-20 oil and Castrol 0W-20 oil are required to ®…
-
Page 417
The vehicle lets you know when an oil change is due by illuminating the wrench indicator light in the instrument cluster. Mazda Genuine 0W-20 oil and Castrol ® 0W-20 oil are required to achieve optimum performance. -
Page 418: Owner Maintenance
The owner or a quali ed service technician should make these vehicle inspections at the indicated intervals to ensure safe and dependable operation. Bring any problem to the attention of an Authorized Mazda Dealer or quali ed service technician as soon as possible.
-
Page 419
Maintenance and Care Owner Maintenance WARNING Do not perform maintenance work if you lack suffi cient knowledge and experience or the proper tools and equipment to do the work. Have maintenance work done by a qualifi ed technician: Performing maintenance work on a vehicle is dangerous if not done properly. You can be seriously injured while performing some maintenance procedures. -
Page 420: Hood
Maintenance and Care Owner Maintenance 2. Insert your hand into the hood opening, Hood slide the latch lever to the right, and lift up the hood. WARNING Always check that the hood is closed and securely locked: Lever A hood that is not closed and securely locked is dangerous as it could fl y open while the vehicle is moving and block the driver’s vision which could result in…
-
Page 421
Maintenance and Care Owner Maintenance Closing the Hood 1. Check under the hood area to make certain all ller caps are in place and all loose items (e.g. tools, oil containers, etc.) have been removed. 2. Lift the hood, grasp the padded area on the support rod, and secure the support rod in the clip. -
Page 422: Engine Compartment Overview
Maintenance and Care Owner Maintenance Engine Compartment Overview Windshield washer fluid reservoir Brake fluid reservoir Fuse block Engine oil dipstick Battery Engine coolant reservoir Cooling system cap Engine oil-filler cap 6–26…
-
Page 423: Engine Oil
Recommended Oil U.S.A., Canada, and Puerto Rico Use SAE 0W-20 engine oil. Mazda Genuine Oil is used in your Mazda vehicle. Mazda Genuine 0W-20 Oil is required to achieve optimum fuel (ILSAC) economy. Only use SAE 0W-20 oil “Certi ed For Gasoline Engines”…
-
Page 424
For maintenance service, Mazda –20 –40 –30 –10 recommends Mazda Genuine Parts and Castrol (Mexico only). ® –40 –20 (ILSAC) 6–28… -
Page 425
This procedure is intended for vehicles with the engine oil exible maintenance setting selected. After replacing the engine oil, have a repair shop such as an Authorized Mazda Dealer perform the initialization (engine oil data resetting) of the recorded value. If the value recorded by the computer is not initialized, the wrench indicator light may not turn off or it may turn on earlier than normal. -
Page 426: Engine Coolant
Maintenance and Care Owner Maintenance Inspecting Engine Oil Level Engine Coolant 1. Be sure the vehicle is on a level surface. Inspecting Coolant Level 2. Warm up the engine to normal operating temperature. WARNING 3. Turn it off and wait at least 5 minutes for the oil to return to the oil pan.
-
Page 427
Maintenance and Care Owner Maintenance NOTE CAUTION Changing the coolant should be done by an Authorized Mazda Dealer. Radiator coolant will damage paint. Rinse it off quickly if spilled. Inspect the antifreeze protection and coolant level in the coolant reservoir at Use only soft (demineralized) water in least once a year—at the beginning of the… -
Page 428: Brake Fluid
Authorized Mazda Dealer. result in an accident. In cold weather, always use washer fl uid with anti- freeze protection.
-
Page 429: Body Lubrication
Maintenance and Care Owner Maintenance Inspect uid level in the washer uid Body Lubrication reservoir; add uid if necessary. All moving points of the body, such as door and hood hinges and locks, should be lubricated each time the engine oil is changed.
-
Page 430: Wiper Blades
Maintenance and Care Owner Maintenance Replacing Windshield Wiper Wiper Blades Blades When the wipers no longer clean well, the CAUTION blades are probably worn or cracked. Replace them. Hot waxes applied by automatic car washers have been known to aff ect the CAUTION wiper’s ability to clean windows.
-
Page 431
Maintenance and Care Owner Maintenance 3. Tilt the blade assembly and remove it CAUTION from the arm. Do not bend or discard the stiff eners. You need to use them again. If the metal stiff eners are switched, the blade’s wiping effi ciency could be reduced. -
Page 432
Maintenance and Care Owner Maintenance 1. Remove the cover. 4. Pull down the blade rubber and slide it out of the blade holder. 2. Remove the stopper and raise the wiper arm. 5. Remove the metal stiffeners from the Stopper blade rubber and install them in the new blade. -
Page 433: Battery
Maintenance and Care Owner Maintenance Battery WARNING Wash hands after handling the battery and related accessories: Battery posts, terminals and related accessories contain lead and lead compounds, chemicals known to the State of California to cause cancer and reproductive harm. Read the following precautions carefully before using the battery or inspecting to ensure safe and correct handling: Always wear eye protection when working near the battery:…
-
Page 434
Maintenance and Care Owner Maintenance Keep all fl ames, including cigarettes, and sparks away from open battery cells: Flames and sparks near open battery cells are dangerous. Hydrogen gas, produced during normal battery operation, could ignite and cause the battery to explode. An exploding battery can cause serious burns and injuries. -
Page 435: Battery Maintenance
Never disassemble. Battery Replacement Never throw the battery into fi re or Contact an Authorized Mazda Dealer for a water. battery replacement purchase. Never deform or crush. Replace only with the same type battery (CR2025 or equivalent).
-
Page 436
The system’s operational range is reduced. Replacing the battery at an Authorized Mazda Dealer is recommended to prevent damage to the key. If replacing the battery 3. Insert the tape-wrapped athead by yourself, follow the instruction. screwdriver into the gap and slide it in Replacing the key battery the direction of the arrow. -
Page 437
Maintenance and Care Owner Maintenance 5. Remove the battery cap, then remove CAUTION the battery. Be careful not to allow the rubber ring shown in the fi gure to be scratched or damaged. If the rubber ring detaches, reattach it before inserting a new battery. -
Page 438: Tires
Using Diff erent Tire Types: Refer to Tires on page 9-8 . Driving your vehicle with diff erent types of tires is dangerous. It could Use only a Mazda-genuine tire valve cause poor handling and poor braking; cap: leading to loss of control.
-
Page 439
(With tire pressure monitoring system) braking, rotate the tires every 12,000 After adjusting the tire pressure, km (7,500 miles). However Mazda initialization of the tire pressure recommends to rotate every 8,000 km monitoring system is necessary to make (5,000 miles) to help increase tire life the system operate normally. -
Page 440: Temporary Spare Tire
4-digit number. braking resulting in loss of vehicle Refer to Tire Labeling on page 8-24 . control. Mazda strongly recommends Temporary Spare Tire that you replace all four tires at the same time. Inspect the temporary spare tire at least…
-
Page 441
4-digit number. and offset (inset/outset). Refer to Tire Labeling on page 8-24 . For details, contact an Authorized Mazda Dealer. Proper tire balancing provides the best riding comfort and helps reduce tread wear. Out-of-balance tires can cause vibration and uneven wear, such as cupping and at spots. -
Page 442: Light Bulbs
Maintenance and Care Owner Maintenance Light Bulbs With LED Headlights With Halogen Headlights Overhead lights (Front)/Map lights Overhead lights (Front)/Map lights Side turn signal lights Side turn signal lights Front side-marker lights/ Front side-marker lights/ Parking lights Parking lights Headlights (Low beam) Headlights (Low beam) Fog lights Fog lights…
-
Page 443
The LED bulb has to be replaced with the When a halogen bulb breaks, it is unit. We recommend an Authorized Mazda dangerous. These bulbs contain Dealer when the replacement is necessary. pressurized gas. If one is broken, it will… -
Page 444
Maintenance and Care Owner Maintenance 4. Turn the socket and bulb assembly Low-beam bulbs to remove it. Carefully remove the 1. Make sure the ignition is switched off, bulb from its socket in the re ector by and the headlight switch is off. gently pulling it straight backward out 2. -
Page 445
The LED bulb has to be replaced with the the mudguard. unit. We recommend an Authorized Mazda Dealer when the replacement is necessary. Front side-marker lights/Parking lights (With halogen headlights) 1. -
Page 446
The LED bulb cannot be replaced as a single unit because it is an integrated unit. The LED bulb has to be replaced with the unit. We recommend an Authorized Mazda Dealer when the replacement is necessary. Rear turn signal lights, Brake lights/… -
Page 447
Maintenance and Care Owner Maintenance 5. Disconnect the bulb from the socket. 6. Install the new bulb in the reverse order Rear turn signal lights of the removal procedure. Reverse lights 1. Make sure the ignition is switched off, and the headlight switch is off. 2. -
Page 448
Maintenance and Care Owner Maintenance License plate lights Replacing Interior Light Bulbs 1. Make sure the ignition is switched off, Overhead lights (Front)/Map lights, and the headlight switch is off. Overhead lights (Rear) 2. Remove the cover. 1. Wrap a small athead screwdriver with a soft cloth to prevent damage to the lens, and then remove the lens by carefully prying on the edge of the lens… -
Page 449: Fuses
Edge If the same fuse blows again, avoid using that system and consult an Authorized Mazda Dealer as soon as possible. Fuse Replacement 3. Install the new bulb in the reverse order of the removal procedure.
-
Page 450
AUDIO or OUTLET circuit. CAUTION Normal Blown Always replace a fuse with a genuine Mazda fuse or equivalent of the same rating. Otherwise you may damage the electric system. 6. Reinstall the cover and make sure that it is securely installed. -
Page 451
Maintenance and Care Owner Maintenance WARNING Do not replace the main fuse and multiplex slow blow fuse by yourself. Have an Authorized Mazda Dealer perform the replacement: Replacing these fuses by yourself is dangerous because they are high current fuses. Incorrect replacement could cause an electrical shock or a short circuit resulting in a fi re. -
Page 452: Fuse Panel Description
Maintenance and Care Owner Maintenance Fuse Panel Description Fuse block (Engine compartment) FUSE DESCRIPTION PROTECTED COMPONENT RATING C/U IG1 15 A For protection of various circuits ENGINE IG1 7.5 A Engine control system SUNROOF 10 A Moonroof INTERIOR 15 A Overhead light 7.5 A Engine control system…
-
Page 453
Maintenance and Care Owner Maintenance FUSE DESCRIPTION PROTECTED COMPONENT RATING AT PUMP 15 A Transaxle control system 15 A Transaxle control system D.LOCK 25 A Power door locks H/L RH 20 A Headlight (RH) 7.5 A Engine control system TAIL 20 A Taillights, License plate lights, Parking lights —… -
Page 454
Maintenance and Care Owner Maintenance Fuse block (Left side) FUSE DESCRIPTION PROTECTED COMPONENT RATING — — — — — — — — — — — — F.OUTLET 15 A Accessory sockets — — — AT IND 7.5 A AT shift indicator MIRROR 7.5 A Power control mirror… -
Page 455: Appearance Care
These acids can settle on a vehicle’s nish. As the water evaporates, Prevention the acid becomes concentrated and can It is necessary to have your Mazda washed damage the nish. and waxed to preserve its nish according And the longer the acid remains on the to the instructions in this section.
-
Page 456
Chipped paint can lead to rust forming form white rings. The rings can damage on your Mazda. Before this happens, your vehicle’s nish. repair the damage by using Mazda Prevention touch-up paint according to the instructions in this section. -
Page 457
NOTE Keep hands and scrapers clear of the Mazda is not responsible for scratches windshield when the wiper lever is in the caused by automatic car washes or position and the ignition is improper washing. -
Page 458
Maintenance and Care Appearance Care When using an automatic car wash CAUTION Retract the door mirrors. The automatic car wash brushes could Do not use steel wool, abrasive reduce the paint lustre or hasten paint cleaners, or strong detergents deterioration. containing highly alkaline or caustic agents on chrome-plated or anodized aluminum parts. -
Page 459
It would also help to coat them with noncorrosive petroleum jelly or CAUTION some other protective compound. If your Mazda is damaged and needs CAUTION metal parts repaired or replaced, make sure the body shop applies anti- Do not use steel wool, abrasive… -
Page 460: Underbody Maintenance
Maintenance and Care Appearance Care Underbody Maintenance Aluminum Wheel Maintenance Road chemicals and salt used for ice and A protective coating is provided over the snow removal and solvents used for dust aluminum wheels. Special care is needed control may collect on the underbody. If to protect this coating.
-
Page 461: Interior Care
Maintenance and Care Appearance Care Plastic Part Maintenance Interior Care When cleaning the plastic lenses of the lights, do not use gasoline, kerosene, WARNING recti ed spirit, paint, thinner, highly Do not spray water into the vehicle acidic detergents, or strongly alkaline cabin: detergents.
-
Page 462
If a seat belt appears frayed or has Fabric abrasions, have it replaced by an Authorized Mazda Dealer: 1. Clean the soiled area by lightly dabbing If a seat belts is used under such a it with a soft cloth soaked in a mild condition, it cannot function at its full detergent (approx. -
Page 463
Maintenance and Care Appearance Care NOTE Instrument Panel Top Maintenance Because genuine leather is a natural material, its surface is not uniform and 1. Wipe the soiled area with a soft cloth it may have natural scars, scratches, soaked in a mild detergent (approx. and wrinkles. -
Page 464
Maintenance and Care Appearance Care Cleaning the Window Interiors If the windows become covered with an oily, greasy, or waxy lm, clean them with glass cleaner. Follow the directions on the container. CAUTION Do not scrape or scratch the inside of the window glass. -
Page 465: If Trouble Arises
If Trouble Arises Helpful information on what to do if a problem arises with the vehicle. Parking in an Emergency …………..7-2 Parking in an Emergency ………….. 7-2 Flat Tire………………..7-3 Spare Tire and Tool Storage …………7-3 Changing a Flat Tire …………..7-9 Battery Runs Out …………….
-
Page 466: Parking In An Emergency
If Trouble Arises Parking in an Emergency Parking in an Emergency The hazard warning lights should always be used when you stop on or near a roadway in an emergency. The hazard warning lights warn other drivers that your vehicle is a traf c hazard and that they must take extreme caution when near it.
-
Page 467: Flat Tire
If Trouble Arises Flat Tire Spare Tire and Tool Storage Spare tire and tools are stored in the locations illustrated in the diagram. With sub-woofer Type A Tiedown eyelet Flat tire belt Jack Spare tire Spare tire hold-down bolt Jack lever Lug wrench Type B Tiedown eyelet…
-
Page 468
If Trouble Arises Flat Tire Without sub-woofer Type A Tiedown eyelet Flat tire belt Jack Spare tire Spare tire hold-down bolt Jack lever Lug wrench Type B Tiedown eyelet Jack Spare tire Spare tire hold-down bolt Jack lever Lug wrench Some models. -
Page 469
If Trouble Arises Flat Tire Jack 4. Remove the cargo sub compartment. To remove the jack 1. (With luggage board) Lift up the luggage board. 2. (With luggage board) Pull the luggage board outward a little and insert the opposite end into the holders so that the luggage board stands. -
Page 470
To secure the jack Spare Tire 1. Insert the wing bolt into the jack with Your Mazda has a temporary spare tire. the jack screw pointing down and turn The temporary spare tire is lighter and the wing bolt clockwise to temporarily smaller than a conventional tire, and is tighten it. -
Page 471
Do not use your temporary spare tire on any other vehicle, it has been designed only for your Mazda. Use only one temporary spare tire on 3. Lift the luggage mat. your vehicle at the same time. -
Page 472
If Trouble Arises Flat Tire 4. For vehicles equipped with a sub- 5. For vehicles equipped with a sub- woofer, uncouple the connector. woofer, loosen the hold-down bolt and remove the woofer and spare tire. Connector For vehicles not equipped with a sub- woofer, turn the spare tire hold-down bolt counterclockwise and remove the NOTE… -
Page 473: Changing A Flat Tire
If Trouble Arises Flat Tire 1. Park on a level surface off the right-of- Changing a Flat Tire way and rmly set the parking brake. 2. Shift into Park (P) and turn off the NOTE engine. 3. Turn on the hazard warning asher. If the following occurs while driving, it 4.
-
Page 474
If Trouble Arises Flat Tire Removing a Flat Tire 2. Loosen the lug nuts by turning them counterclockwise one turn each, but do 1. If your vehicle is equipped with a not remove any lug nuts until the tire wheel cover, pry off the wheel cover has been raised off the ground. -
Page 475
Use only the jack provided with your Mazda: Using a jack that is not designed for your Mazda is dangerous. The vehicle could slip off the jack and seriously injure someone. Jacking position Never place objects under the jack: Jacking the vehicle with an object under the jack is dangerous. -
Page 476
Never go under the vehicle while it is removing the lug nuts, make sure your jacked up: Mazda is rmly in position and that it Going under the vehicle while it is cannot slip or move. jacked up is dangerous as it could result in death or serious injury if the vehicle were to fall off the jack. -
Page 477: Locking Lug Nuts
Locking Lug Nuts To install the antitheft lug nut 1. Place the special key on top of the nut, If your vehicle has Mazda optional and be sure to hold the key square to antitheft wheel lug nuts, one on each it.
-
Page 478
Applying oil or grease to lug nuts and Because the wheel studs and lug nuts bolts is dangerous. The lug nuts could on your Mazda have metric threads, loosen while driving and cause the tire using a non-metric nut is dangerous. -
Page 479
If Trouble Arises Flat Tire 6. (Without at tire belt) 8. (With luggage board) Store the damaged tire in the luggage Pull the luggage board outward and compartment. place it on top of the luggage mat. (With at tire belt) Remove the luggage compartment cover (if equipped). -
Page 480
If Trouble Arises Flat Tire 10. Thread the belt through the rear seat as 12. Thread the buckle through the wheel as shown in the gure. shown in the gure. 13. Thread the belt through the buckle while pressing the tire to the seatback. 11. -
Page 481
If Trouble Arises Flat Tire 15. Insert the luggage compartment WARNING cover from the top of the luggage compartment opening with the cloth Do not drive with any tires that have side of the cover facing outward, incorrect air pressure: and slide it between the at tire and Driving on tires with incorrect air the inside perimeter of the luggage… -
Page 482: Battery Runs Out
If Trouble Arises Battery Runs Out Jump-Starting Jump-starting is dangerous if done incorrectly. So follow the procedure carefully. If you feel unsure about jump-starting, we strongly recommend that you have a competent service technician do the work. WARNING Follow These Precautions Carefully: To ensure safe and correct handling of the battery, read the following precautions carefully before using the battery or inspecting it.
-
Page 483
If Trouble Arises Battery Runs Out CAUTION Use only a 12 V booster system. You can damage a 12 V starter, ignition system, and other electrical parts beyond repair with a 24 V power supply (two 12 V batteries in series or a 24 V motor generator set). -
Page 484
If Trouble Arises Battery Runs Out 1. Remove the battery cover. 7. If the battery cover has been removed, install it in the reverse order of removal. NOTE Verify that the covers are securely installed. 2. Make sure the booster battery is 12 V and that its negative terminal is grounded. -
Page 485: Emergency Starting
5. If the engine fails to start, crank it without depressing the accelerator. If the engine still does not start using the above procedure, have your vehicle inspected by an Authorized Mazda Dealer. 7–21…
-
Page 486: Overheating
Stop the When the engine and radiator are hot, engine and call an Authorized Mazda scalding coolant and steam may shoot Dealer. out under pressure and cause serious injury.
-
Page 487
Carefully add coolant as required (page 6-30 ). CAUTION If the engine continues to overheat or frequently overheats, have the cooling system inspected. The engine could be seriously damaged unless repairs are made. Consult an Authorized Mazda Dealer. 7–23… -
Page 488: Emergency Towing
Towing Description WARNING We recommend that towing be done only Always tow an AWD vehicle with all four by an Authorized Mazda Dealer or a wheels off the ground: commercial tow-truck service. Towing an AWD vehicle with either the front or rear wheels on the ground…
-
Page 489: Tiedown Hooks
If Trouble Arises Emergency Towing Tiedown Hooks CAUTION Do not tow the vehicle pointed CAUTION backward with driving wheels on the ground. This may cause internal damage Do not use the front tiedown eyelet for to the transaxle. towing the vehicle. They have been designed only for securing the vehicle to a transport vessel during shipping.
-
Page 490
If Trouble Arises Emergency Towing NOTE Tiedown Hook-Rear Remove the cap completely and store it so The hook positioned under the rear as not to lose it. bumper on the right side is for tying down the vehicle during transport, and it cannot 3. -
Page 491: Warning/Indicator Lights And Warning Sounds
If the brake warning light remains illuminated even though the parking brake is released, the brake uid may be low or there could be a problem with the brake system. Park the vehicle in a safe place immediately and contact an Authorized Mazda Dealer. WARNING Brake System Warning Do not drive with the brake system warning light illuminated.
-
Page 492
WARNING Do not drive with both the ABS warning light and brake warning light illuminated. Have the vehicle towed to an Authorized Mazda Dealer to have the brakes Electronic Brake Force inspected as soon as possible:… -
Page 493
If the light illuminates/ ashes, stop the vehicle in a safe place and do not operate the steering wheel. There is no problem if the light turns off after a while. Contact an Authorized Mazda Dealer if the light illuminates/ ashes continuously. NOTE If the indicator light illuminates/ ashes, the power steering will not operate normally. -
Page 494
Transaxle Warning If the automatic transaxle warning light illuminates, the transaxle has an electrical Light problem. Continuing to drive your Mazda in this condition could cause damage to your transaxle. Consult an Authorized Mazda Dealer as soon as possible. 7–30… -
Page 495
When the light is ashing Park the vehicle in a safe place. After a few moments, if the warning light stops ashing, AWD Warning you can resume driving. If the light does not stop ashing, contact an Authorized Mazda Light Dealer. -
Page 496
This light illuminates if there is a malfunction in the LED headlight. Have your vehicle inspected by an Authorized Mazda Dealer. LED Headlight Warning Light The warning light turns on if there is a malfunction in the system while the Mazda Radar (Amber) Cruise Control (MRCC) system is on. Mazda Radar Have your vehicle inspected at an Authorized Mazda Dealer. -
Page 497
Warning A problem in the system may be indicated under the following conditions. Have your vehicle inspected at an Authorized Mazda Dealer. The light does not turn on when the ignition is switched ON. The light remains turned on even if the Blind Spot Monitoring (BSM) switch is operated. -
Page 498
If Trouble Arises Warning/Indicator Lights and Warning Sounds Signal Warning Action to be taken Except Mexico The seat belt warning light turns on if the driver or front passenger’s seat is occupied and the seat belt is not fastened with the ignition switched ON. If the driver or front passenger’s seat belt is unfastened (only when the front passenger’s seat is occupied) and the vehicle is driven at a speed… -
Page 499
TPMS cannot tell if the tires are system monitored again by an Authorized getting too soft over time or you have Mazda Dealer or a tire repair station. a at. However, when you nd one low tire in a set of four-that is an indication Do not ignore the TPMS Warning Light: of trouble;… -
Page 500
Smart Brake emblem. system. Support/Smart For any other reasons, have the vehicle City Brake inspected at an Authorized Mazda Dealer. Support (SBS/ (Vehicles without type B audio) SCBS) Warning Light If the reason why the warning light is illuminated is due to a dirty windshield, clean the windshield. -
Page 501: Message Indicated On Display
Stop Vehicle in Safe Place Immediately If the following messages are displayed in the center display (Type B audio), a vehicle system may be malfunctioning. Stop the vehicle in a safe place and contact an Authorized Mazda Dealer. Display Indicated Condition Displays if the engine coolant temperature has increased excessively.
-
Page 502
If Trouble Arises Warning/Indicator Lights and Warning Sounds Verify Display Content Displays in the following cases: Display Indicated Condition/Action to be taken The following message is displayed when the temperature around the center display is high. Lowering the temperature in the cabin or the temperature around the center display by avoiding direct sunlight is recommended. -
Page 503: Warning Sound Is Activated
35 opened. minutes. Have your vehicle inspected at *1 If the light switch is left on, the auto an Authorized Mazda Dealer as soon as headlight off function automatically possible. turns off the lights about 30 seconds after switching the ignition off.
-
Page 504
If Trouble Arises Warning/Indicator Lights and Warning Sounds Seat Belt Warning Beep NOTE Placing heavy items on the front Except Mexico passenger’s seat may cause the front passenger’s seat belt warning function If the driver’s seat belt is not fastened to operate depending on the weight of when the ignition is switched ON, a beep the item. -
Page 505
If Trouble Arises Warning/Indicator Lights and Warning Sounds Key Removed from Vehicle Key Left-in-luggage Compartment Warning Beep Warning Beep (With the advanced keyless function) Vehicles with advanced keyless function If the key is left in the luggage If the key is taken out of the vehicle while compartment with all the doors locked and the ignition is not switched OFF and the liftgate closed, a beep will be heard… -
Page 506
Blind Spot Monitoring (BSM) Mazda Radar Cruise Control Warning Beep (MRCC) System Warnings The Mazda Radar Cruise Control (MRCC) Driving forward system warnings notify the driver of The warning beep operates when the turn system malfunctions and cautions on use signal lever is operated to the side where when required. -
Page 507
If Trouble Arises Warning/Indicator Lights and Warning Sounds Over Rev. Buzzer The buzzer sounds to notify the driver if the engine speed is about to exceed the permissible engine speed. CAUTION Operate the accelerator and shift gears according to the driving conditions so that the buzzer does not sound. -
Page 508: When Liftgate Cannot Be Opened
2. Remove cover on the interior surface of the liftgate using a athead screwdriver. After performing this emergency measure, have the vehicle inspected at Cover an Authorized Mazda Dealer as soon as possible. 3. Using a athead screwdriver, open the inner cover. 7–44…
-
Page 509: Active Driving Display Does Not Operate
If the active driving display does not operate, switch the ignition off and then restart the engine. If the active driving display does not operate even with the engine restarted, have the vehicle inspected at an Authorized Mazda Dealer. 7–45…
-
Page 510
MEMO 7–46… -
Page 511: Customer Information And Reporting Safety Defects
Vehicle Loading ……8-36 (Canada) ……..8-14 Steps for Determining the Correct Load Limit ……..8-42 Warranty ……….8-15 Warranties for Your Mazda ..8-15 Declaration of Conformity ….8-43 Outside the United States/ Declaration of Conformity … 8-43 Canada ………. 8-16…
-
Page 512: Customer Assistance (Canada)
Answers to many questions, including how to locate or contact a local Mazda dealership in the U.S., can be found here. E-mail: click on “Contact Us” located on the “Inside Mazda” tab, or at the bottom of the page at www.MazdaUSA.com By phone at: 1 (800) 222-5500 8–2…
-
Page 513
The whole process normally takes 40 days or less. The arbitration decision is not binding on you or Mazda unless you accept the decision. For more information about BBB AUTO LINE, including current eligibility standards, please call 1-800-955-5100 or visit the BBB website at www.lemonlaw.bbb.org. -
Page 514: Customer Assistance (Mexico)
The arbitrator’s decision should ordinarily be issued within 40 days from the time your complaint is led; there may be a delay of 7 days if you did not rst contact Mazda about your problem, or a delay of up to 30 days if the arbitrator requests an inspection/report by an impartial technical expert or further investigation and report by BBB AUTO LINE.
-
Page 515
AND the nonconformity has been subject to repair two or more times by Mazda or its agents AND the buyer or lessee has directly noti ed Mazda of the need for the repair of the nonconformity; OR… -
Page 516
Your complete and permanent satisfaction is of primary concern to Mazda. All Authorized Mazda Dealers have both the knowledge and tools to keep your Mazda in top condition. In our experience, any questions, problems, or complaints regarding the operation of your Mazda or any other general service transactions are most effectively resolved by your dealer. -
Page 517
If a speci c item of concern arises, where a solution cannot be reached between an owner, Mazda, and/or one of its dealers (that all parties cannot agree upon), the owner may wish to use the services offered by the Canadian Motor Vehicle Arbitration Plan (CAMVAP). -
Page 518
Ontario 1 (800) 207-0685 Atlantic Canada 1 (800) 207-0685 Quebec 1 (800) 207-0685 Regional Of ces REGIONAL OFFICES COVERING AREAS MAZDA CANADA INC. WESTERN REGION ALBERTA, 5011 275 STREET BRITISH COLUMBIA, LANGLEY, BRITISH COLUMBIA MANITOBA, V4W 0A8 SASKATCHEWAN, (778) 369-2100… -
Page 519
STEP 1 Discuss the matter with an Authorized Mazda Dealer. This is the quickest and best way to address the issue. If your concern has not been resolved by the CUSTOMER RELATIONS, SALES, SERVICE, or PARTS MANAGER, then please contact the GENERAL MANAGER of the dealership or the OWNER. -
Page 520
Mazda vehicle or servicing by Mazda Dealer personnel, we recommend that you take the following steps: Contact Your Mazda Dealer Discuss the matter with an Authorized Mazda Dealer. This is the quickest and best way to address the issue. If your concern has not been resolved by the CUSTOMER RELATIONS, SALES, SERVICE, or PARTS MANAGER, then please contact the GENERAL MANAGER of the dealership or the OWNER. -
Page 521
Customer Information and Reporting Safety Defects Customer Assistance In order to serve you ef ciently and effectively, please help us by providing the following information: 1. Your name, address, and telephone number 2. Year and model of vehicle 3. Vehicle Identi cation Number (17 digits, noted on your registration or title or located on the upper driver’s side corner of the dash) 4. -
Page 522: Mazda Importer/Distributors
TEL: (684) 699-9347 TEL: 1 (800) 263-4680 (in Canada) (905) 787-7000 (outside Canada) PUERTO RICO/U.S. Virgin Island International Automotive Distributor Group, LLC. (Mazda de Puerto Rico) P.O. Box 191850, San Juan, Puerto Rico 00919-1850 TEL: (787) 641-1777 MEXICO Mazda Motor de Mexico Mario Pani # 150, PB Col.
-
Page 523: Reporting Safety Defects
Irvine, California 92618-2922 P.O. Box 19734 Irvine, CA 92623-9734 Customer Experience Center or toll free at 1 (800) 222-5500 If you live outside of the U.S.A., please contact the nearest Mazda Distributor shown (page 8-12 ) in this manual. 8–13…
-
Page 524: Reporting Safety Defects (Canada)
Customer Information and Reporting Safety Defects Reporting Safety Defects Reporting Safety Defects (Canada) Canadian customers who wish to report a safety-related defect to Transport Canada, Defect Investigations and Recalls, may telephone the toll free hotline 1-800-333-0510, or contact Transport Canada by mail at: Transport Canada, ASFAD, Place de Ville Tower C, 330 Sparks Street, Ottawa ON K1A 0N5.
-
Page 525: Warranty
Customer Information and Reporting Safety Defects Warranty Warranties for Your Mazda New Vehicle Limited Warranty Powertrain Limited Warranty Safety Restraint System Limited Warranty Anti-perforation Limited Warranty Federal Emission Control Warranty/California Emission Control Warranty Emission Defect Warranty Emission Performance Warranty Emission Control Warranty…
-
Page 526: Outside The United States/Canada
Canadian Motor Vehicle Safety Standards (CMVSS). Canada However, in the event that you are moving to the United States permanently, Mazda vehicles built for use in Canada could be eligible for exportation to the United States with speci c vehicle modi cations to comply with the United States Federal Motor Vehicle Safety Standards (FMVSS).
-
Page 527: Registering Your Vehicle In A Foreign Country (Except United States And Canada)
Parts, servicing techniques, and tools necessary to maintain and repair your vehicle may be unavailable. There might not be an Authorized Mazda Dealer in the country you plan to take your vehicle. The Mazda warranty is valid only in certain countries.
-
Page 528: Add-On Non-Genuine Parts And Accessories
Non-genuine parts and accessories for Mazda vehicles can be found in stores. These may t your vehicle, but they are not approved by Mazda for use with Mazda vehicles. When you install non-genuine parts or accessories, they could affect your vehicle’s performance or safety systems;…
-
Page 529: Cell Phones
Customer Information and Reporting Safety Defects Cell Phones Cell Phones Warning WARNING Please comply with the legal regulations concerning the use of communication equipment in vehicles in your country: Use of any electrical devices such as cell phones, computers, portable radios, vehicle navigation or other devices by the driver while the vehicle is moving is dangerous.
-
Page 530: Event Data Recorder
EDR. Mazda will not disclose any of the data recorded in an EDR to a third party unless: A written agreement from the vehicle owner or the lessee is obtained…
-
Page 531: Recording Of Vehicle Data
Mazda and its subcontracting parties may obtain and use the recorded data for vehicle malfunction diagnosis, research and development, and quality improvement. Mazda will not disclose or provide any of the obtained data to a third party unless: An agreement from the vehicle owner (agreements from lessor and lessee for leased…
-
Page 532: Uniform Tire Quality Grading System (Utqgs)
Customer Information and Reporting Safety Defects Uniform Tire Quality Grading System (UTQGS) Uniform Tire Quality Grading System (UTQGS) This information relates to the tire grading system developed by the U.S. National Highway Traf c Safety Administration for grading tires by tread wear, traction, and temperature performance.
-
Page 533
These grades will be added to the sidewalls of passenger vehicle tires over the next several years according to a schedule established by the NHTSA and the tire manufacturers. The grade of tires available as standard or optional equipment on Mazda vehicles may vary with respect to grade. -
Page 534: Tire Information (U.s.a.)
Customer Information and Reporting Safety Defects Tire Information (U.S.A.) Tire Labeling Federal law requires tire manufacturers to place standardized information on the sidewall of all tires. This information identi es and describes the fundamental characteristics of the tire and also provides a tire identi cation number for safety standard certi cation and in case of a recall.
-
Page 535
Customer Information and Reporting Safety Defects Tire Information (U.S.A.) Indicates a tire that may be installed on cars, SUVs, minivans and light trucks as designated by the Tire and Rim Association (T&RA). NOTE If your tire size does not begin with a letter this may mean it is designated by either ETRTO (European Tire and Rim Technical Organization) or JATMA (Japan Tire Manufacturing Association). -
Page 536
Customer Information and Reporting Safety Defects Tire Information (U.S.A.) M S or M/S: Mud and Snow AT: All Terrain. AS: All Season. The “M S” or “M/S” indicates that the tire has some functional use in mud and snow. U.S. DOT Tire Identi cation Number (TIN) This begins with the letters “DOT”… -
Page 537
Customer Information and Reporting Safety Defects Tire Information (U.S.A.) SAFETY WARNING The following safety warning appears on the tire’s sidewall. SERIOUS INJURY MAY RESULT FROM: EXPLOSION OF TIRE/RIM ASSEMBLY DUE TO IMPROPER MOUNTING-MATCH TIRE DIAMETER TO RIM DIAMETER; NEVER EXCEED 40 psi (275 kPa) TO SEAT BEADS-ONLY SPECIALLY TRAINED PERSONS SHOULD MOUNT TIRES. -
Page 538
Customer Information and Reporting Safety Defects Tire Information (U.S.A.) Information on Temporary Tires Please refer to the sample below. 1. Temporary tires 2. Nominal width of tire in millimeters 3. Ratio of height to width (aspect ratio) 4. Diagonal 5. Rim diameter code 6. -
Page 539
Customer Information and Reporting Safety Defects Tire Information (U.S.A.) “90” is the Load Index. This two-or three-digit number indicates how much weight each tire can support. “M” is the speed rating. The speed rating denotes the maximum speed for which the use of the tire is rated. -
Page 540: Location Of The Tire Label (Placard)
Customer Information and Reporting Safety Defects Tire Information (U.S.A.) Location of the Tire Label (Placard) You will nd the tire label containing tire in ation pressure by tire size and other important information on the driver’s side B-pillar or on the edge of the driver’s door frame. SAMPLE Recommended Tire In ation Pressure On the tire label you will nd the recommended tire in ation pressure in both kPa and…
-
Page 541: Checking Tire Pressure
Customer Information and Reporting Safety Defects Tire Information (U.S.A.) WARNING Always check the tire infl ation pressures on a regular basis according to the recommended tire infl ation pressure on the tire label and in conjunction with the information in this owner’s manual: Driving your vehicle with under-infl ated tires is dangerous.
-
Page 542
Customer Information and Reporting Safety Defects Tire Information (U.S.A.) Glossary of Terms Tire Placard: A label indicating the OE tire sizes, recommended in ation pressure, and the maximum weight the vehicle can carry. Tire Identi cation Number (TIN): A number on the sidewall of each tire providing information about the tire brand and manufacturing plant, tire size, and date of manufacture. -
Page 543: Tire Maintenance
To equalize tread wear, rotate the tires every 12,000 km (7,500 miles) at the latest or sooner if irregular wear develops. Mazda recommends to rotate every 8,000 km (5,000 miles) to help increase tire life and distribute wear more evenly.
-
Page 544
Customer Information and Reporting Safety Defects Tire Information (U.S.A.) Replacing a Tire WARNING Always use tires that are in good condition: Driving with worn tires is dangerous. Reduced braking, steering, and traction could result in an accident. If a tire wears evenly, a wear indicator will appear as a solid band across the tread. Replace the tire when this happens. -
Page 545
Customer Information and Reporting Safety Defects Tire Information (U.S.A.) Safety Practices The way you drive has a great deal to do with your tire mileage and safety. So cultivate good driving habits for your own bene t. Observe posted speed limits and drive at speeds that are safe for the existing weather conditions Avoid fast starts, stops and turns Avoid potholes and objects on the road… -
Page 546: Vehicle Loading
Customer Information and Reporting Safety Defects Tire Information (U.S.A.) Vehicle Loading WARNING Do not tow a trailer with this vehicle: Towing a trailer with this vehicle is dangerous because it has not been designed to tow a trailer and doing so will aff ect the drive system which could result in vehicle damage. This section will guide you in the proper loading of your vehicle, to keep your loaded vehicle weight within its design rating capability.
-
Page 547
Customer Information and Reporting Safety Defects Tire Information (U.S.A.) Base Curb Weight is the weight of the vehicle including a full tank of fuel and all standard equipment. It does not include passengers, cargo, or optional equipment. Vehicle Curb Weight is the weight of your new vehicle when you picked it up from your dealer plus any aftermarket equipment. -
Page 548
Customer Information and Reporting Safety Defects Tire Information (U.S.A.) Payload is the combination weight of cargo and passengers that the vehicle is designed to carry. The maximum payload for your vehicle can be found on the Tire and Load Information label on the driver’s door frame or door pillar. Look for “THE COMBINATION WEIGHT OF OCCUPANTS AND CARGO SHOULD NEVER EXCEED XXX kg or XXX lbs”… -
Page 549
Customer Information and Reporting Safety Defects Tire Information (U.S.A.) Cargo Weight includes all weight added to the Base Curb Weight, including cargo and optional equipment. The cargo weight limit decreases depending on the number of vehicle occupants. The cargo weight limit can be calculated by subtracting the total weight of the vehicle occupants from the “combination weight of occupants and cargo should never exceed”… -
Page 550
Customer Information and Reporting Safety Defects Tire Information (U.S.A.) GVW (Gross Vehicle Weight) is the Vehicle Curb Weight cargo passengers. GVWR (Gross Vehicle Weight Rating) is the maximum allowable weight of the fully loaded vehicle (including all options, equipment, passengers and cargo). The GVWR is shown on the Safety Compliance Certi cation Label located on the driver’s door frame or door pillar. -
Page 551: Specifications
Customer Information and Reporting Safety Defects Tire Information (U.S.A.) GCW (Gross Combination Weight) is the weight of the loaded vehicle (GVW). GCWR (Gross Combination Weight Rating) is the maximum allowable weight of the vehicle — including all cargo and passengers — that the vehicle can handle without risking damage.
-
Page 552: Steps For Determining The Correct Load Limit
Customer Information and Reporting Safety Defects Tire Information (U.S.A.) Steps for Determining the Correct Load Limit Steps for Determining Correct Load Limit- (1) Locate the statement “The combined weight of occupants and cargo should never exceed XXX kg or XXX lbs.” on your vehicle’s placard. (2) Determine the combined weight of the driver and passengers that will be riding in your vehicle.
-
Page 553: Declaration Of Conformity
Customer Information and Reporting Safety Defects Declaration of Conformity Declaration of Conformity Keyless Entry System/Immobilizer System 8–43…
-
Page 554
Customer Information and Reporting Safety Defects Declaration of Conformity Blind Spot Monitoring (BSM) System 8–44… -
Page 555
The antenna used for this transmitter must not be co-located or operating in conjunction with any other antenna or transmitter. End-users and installers must be provided with installation instructions and transmitter operating conditions for satisfying RF exposure compliance. Mazda Bluetooth Hands-Free Customer Service ® U.S.A. -
Page 556
Warranty period, items covered by the warranty and its possible limitations or exceptions: Refer to the Warranty Booklet for detailed warranty information. Warranty procedure: Center of Attention to Client (CAC) Phone: 01-800-01-MAZDA Web: www.mazdamexico.com.mx Electrical speci cations: Voltage: 9-16V, Frequency: 2.4Ghz, Current: 270mA(Typ) -
Page 557
Customer Information and Reporting Safety Defects Declaration of Conformity Type B U.S.A. and Canada 8–47… -
Page 558
Customer Information and Reporting Safety Defects Declaration of Conformity Mexico 8–48… -
Page 559
Customer Information and Reporting Safety Defects Declaration of Conformity Smart Brake Support (SBS)/Mazda Radar Cruise Control (MRCC)/Distance Recognition Support System (DRSS) 8–49… -
Page 560
MEMO 8–50… -
Page 561
Speci cations Technical information about your Mazda. Identi cation Numbers …………..9-2 Vehicle Information Labels …………9-2 Speci cations ………………9-4 Speci cations …………….9-4 Personalization Features …………..9-10 Personalization Features …………. 9-10 9–1… -
Page 562
Speci cations Identi cation Numbers Chassis Number Vehicle Information Labels Open the cover shown in the gure to check the chassis number. Vehicle Identi cation Number The vehicle identi cation number legally identi es your vehicle. The number is on a plate attached to the cowl panel located on the left corner of the dashboard. -
Page 563
Speci cations Identi cation Numbers Tire Pressure Label Engine Number Forward 9–3… -
Page 564: Electrical System
Spark-plug number Mazda Genuine spark plug PE5R-18-110 or PE5S-18-110 *1 The spark plugs provide the SKYACTIV-G its optimum performance. Consult an Authorized Mazda Dealer for details. CAUTION When cleaning the iridium plugs, do not use a wire brush. The fi ne particulate coating on the iridium alloy and platinum tips could be damaged.
-
Page 565
Speci cations Speci cations Capacities (Approximate Quantities) Item Capacity With oil lter replacement 4.2 L (4.4 US qt, 3.7 Imp qt) Engine oil Without oil lter replacement 4.0 L (4.2 US qt, 3.5 Imp qt) U.S.A. and Canada 5.8 L (6.1 US qt, 5.1 Imp qt) Coolant Mexico 6.1 L (6.4 US qt, 5.4 Imp qt) -
Page 566: Air Conditioner
Speci cations Speci cations Weights U.S.A. and Canada Weight Item GVWR (Gross Vehicle Weight 1,742 kg (3,840 lbs) 1,810 kg (3,990 lbs) Rating) Front 933 kg (2,057 lbs) 958 kg (2,112 lbs) GAWR (Gross Axle Weight Rating) Rear 812 kg (1,790 lbs) 860 kg (1,896 lbs) Mexico Weight…
-
Page 567: Exterior Light
Speci cations Speci cations Light Bulbs Exterior light Category Light bulb Wattage UNECE (SAE) High beam HB3 (9005) Halogen headlights Low beam H11 (H11) Headlights High beam — (—) LED headlights Low beam — (—) With halogen headlights HB3 (9005) Daytime running lights With LED headlights —…
-
Page 568
NOTE The tires have been optimally matched with the chassis of your vehicle. When replacing tires, Mazda recommends that you replace tires of the same type originally tted to your vehicle. For details, contact an Authorized Mazda Dealer. Check the tire pressure label for tire size and in ation pressure. -
Page 569
Speci cations Speci cations Temporary spare tire (U.S.A. and Canada) Tire size In ation pressure T125/90D16 98M 420 kPa (60 psi) (Mexico) Tire size In ation pressure 185/60R16 86M 300 kPa (3.0 bar, 44 psi) Lug nut tightening torque When installing a tire, tighten the lug nut to the following torque. 108—147 N·m (12—14 kgf·m, 80—108 ft·lbf) Fuses Refer to Fuses on page 6-53 . -
Page 570: Personalization Features
Speci cations Personalization Features Personalization Features The following personalization features can be set or changed by an Authorized Mazda Dealer. Consult an Authorized Mazda Dealer for details. Additionally, some of the personalization features can be changed by the customer depending on the feature.
-
Page 571
Speci cations Personalization Features Settings Change Factory Item Feature Available Settings Method Setting The warning timing in which the Lane Departure Warning System (LDWS) determines Before At/Before — that the vehicle may be deviating from its lane can be changed. Lane Departure Warning The sensitivity of the warning System (LDWS) (page… -
Page 572
Speci cations Personalization Features Settings Change Factory Item Feature Available Settings Method Setting Vehicle Lock: When Driving Unlock: In Park/ Changes the auto lock/ Lock: Out of Park unlock function setting for Lock: When Unlock: In Park/ Power Door locks (page all the doors according to the Driving Lock: Shifting Out… -
Page 573
Speci cations Personalization Features Settings Change Factory Item Feature Available Settings Method Setting 120 seconds/ 90 seconds/ Auto headlight off Time until headlights turn off 30 seconds 60 seconds/ — (page 4-41 ) 30 seconds/ High/ Med. High/ Auto-light control (page Timing by which lights turn Medium Medium/… -
Page 574
*1 Though these systems can be turned Off, doing so will defeat the purpose of the system and Mazda recommends that these systems remain On. *2 For vehicles with an audio system other than the on-screen function type, the warning sound cannot be changed. -
Page 575: Index
Index 10–1…
-
Page 576
Index Accessory Socket ……5-132 Battery ……….6-37 Active Driving Display ……. 4-22 Maintenance ……..6-39 Adaptive Front Lighting System Replacement ……..6-39 (AFS)……….. 4-70 Speci cations ……..9-4 Add-On Non-Genuine Parts and Battery runs out ……..7-18 Accessories ……… 8-18 Jump-Starting …….. -
Page 577
Index Climate Control System ……5-2 Driving Tips Fully Automatic Type ….5-10 Automatic transaxle …… 4-40 Gas speci cations ……9-6 Break-in period……3-41 Manual Type ……..5-5 Driving in ooded area….3-45 Operating Tips ……… 5-2 Driving on uneven road ….3-47 Vent Operation …….. -
Page 578
Lane Departure Warning System Fuses ……….. 6-53 (LDWS) ……… 4-74 Panel description ……6-56 Laser Sensor …….. 4-117 Replacement ……..6-53 Mazda Radar Cruise Control (MRCC)……… 4-92 Pre-Crash Safety Technology ..4-68 Radar Sensors (Rear)….4-120 Gauges ……….4-12 Radar sensor (front)….. 4-114 Glove Compartment …… -
Page 579
Jump-Starting ……..7-18 Scheduled ……..6-4 Maintenance Monitor ……6-20 Map Lights ……..5-130 Mazda Radar Cruise Control (MRCC) … 4-92 Key Suspend Function ……3-8 Close proximity warning ….4-95 Key left-in-luggage compartment warning Cruise control function ….4-100 beep (With the advanced keyless Display indication …… -
Page 580
Index Mazda Radar Cruise Control (MRCC) Rear View Monitor……4-130 System warnings ……… 7-42 Displayable range on the screen … 4-132 Message Indicated on Display …. 7-37 Picture quality adjustment … 4-138 Meters and Gauges ……4-12 Rear view monitor operation ..4-133 Mirror Defogger …….. -
Page 581
Index Saving Fuel and Protection of the Tiedown Environment ……..3-41 Hook ……….7-25 Scheduled Maintenance ……6-4 Tire Information ……..8-24 Seat Belt System ……… 2-15 Tire Pressure Monitoring System ..4-126 Automatic locking ……2-14 Tire in ation pressure warning beep … 7-41 Emergency locking …… -
Page 582
……….7-41 Lane Departure Warning System (LDWS) warning sound ….7-42 Lights-on reminder ……7-39 Mazda Radar Cruise Control (MRCC) System warnings ……7-42 Over Rev. buzzer ……7-43 Power steering warning buzzer ..7-42 Request switch inoperable warning beep (With the advanced keyless function) ……..
 according to the voice guidance.) The voice recognition learning function 7. Prompt: “Speaker enrollment is enables voice recognition appropriate to complete.”…