-
Contents
-
Table of Contents
-
Troubleshooting
-
Bookmarks
Quick Links
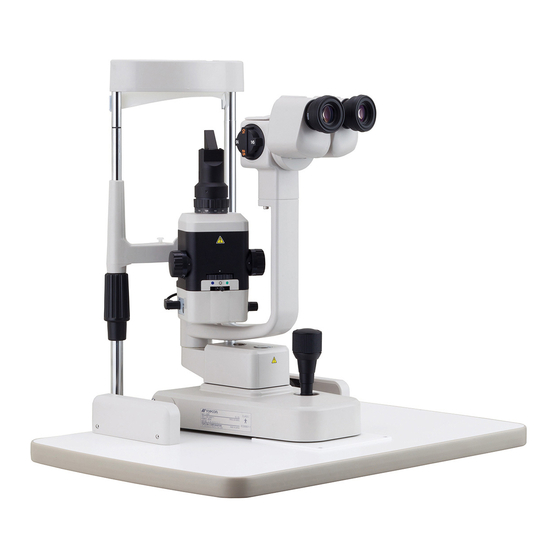
INSTRUCTION MANUAL
SLIT LAMP
SL-2G
Related Manuals for Topcon Slit Lamp SL-2G
Summary of Contents for Topcon Slit Lamp SL-2G
-
Page 1
INSTRUCTION MANUAL SLIT LAMP SL-2G… -
Page 3: Introduction
Thank you for purchasing the Slit Lamp SL-2G. INTENDED USE / INDICATIONS FOR USE The Slit Lamp SL-2G is an AC-powered slitlamp biomicroscope intended for use in eye examina- tion of the anterior eye segment, from the cornea epithelium to the posterior capsule. It is used to aid in the diagnosis of diseases or trauma which affect the structural properties of the anterior eye segment.
-
Page 4
(4) Do not store the instrument where chemicals are stored or gas is generated. 2. Usage period: 8 years from delivery providing regular maintenance is performed (according to the self-certifi- cation [TOPCON data]). USER MAINTENANCE 1. Regularly maintain and check the instrument and its parts. -
Page 5: Displays For Safe Use
DISPLAYS FOR SAFE USE In order to ensure the safe use of the product and to prevent danger to the operator and others, or damage to property, important warnings are placed on the product and inserted in the instruction manual. It is recommended for all users to take note of the meaning of the following displays and icons before reading the «Safety Cautions»…
-
Page 6: Safety Cautions
SAFETY CAUTIONS WARNING Icons Prevention item Page To avoid fire in the event of an instrument malfunction, immediately –– turn OFF the power switch and unplug the cable if you see smoke coming from the insturment, etc. Ask your dealer for service. CAUTION Icons Prevention item…
-
Page 7
CAUTION Icons Prevention item Page Connect and organize AC adapter cables according to the assem- bly procedure. –– To avoid injury and disconnection, take care not to catch the cables with your feet. Use only the attached AC adapter. Using any other AC adapter might cause incorrect operation/failure. The light radiated from the instrument is potentially hazardous. -
Page 8: Usage And Maintenance
USAGE AND MAINTENANCE Usage • This Slit lamp SL-2G is a precision electrical device for medical use that must be used under the instruction of a doctor. USER MAINTENANCE To maintain the safety and performance of the instrument, unless done by an authorized ser- vice engineer, never attempt to do maintenance of items other than those specified here in.
-
Page 9: Warning Indications And Positions
To ensure safety, warning labels are provided on the instrument body. Use the instrument following these warning instructions. If any of the following labels are miss- ing, contact your dealer or TOPCON (see the back cover). CAUTION • To prevent electric shocks, switch off the power supply and remove the power cable before replacing the lamp.
-
Page 10: Table Of Contents
CONTENTS INTRODUCTION ………………….1 INTENDED USE / INDICATIONS FOR USE …………1 DISPLAYS FOR SAFE USE ………………3 SAFETY CAUTIONS ………………..4 USAGE AND MAINTENANCE………………6 DISCLAIMERS ………………….6 WARNING INDICATIONS AND POSITIONS ………….7 CONFIGURATION NAMES OF MAIN BODY COMPONENTS ……………10 CONFIGURATION OF PARTS THAT COME INTO CONTACT WITH THE PATIENT …10 STANDARD ACCESSORIES ……………….11 PREPARATIONS POWERING ON …………………..12…
-
Page 11
OPTIONAL ACCESSORIES SYSTEM CONFIGURATION ………………34 BEAM SPLITTER …………………35 TV RELAY LENS ………………….35 TV RELAY LENS TL-54………………..36 TV RELAY LENS TL-55………………..36 TV ATTACHMENT TL-56 ………………37 TV RELAY LENS TL-57………………..37 OBSERVATION TUBE …………………37 EXTERNAL FIXATION TARGET SO-FT02 …………..38 12.5X EYEPIECE …………………38 20X EYEPIECE ………………….38 TONOMETER MOUNT SO-TM1 …………….38 TONOMETER MOUNT SO-TM2 …………….39 HRUBY LENS SO-HL01 ……………….39… -
Page 12: Configuration
CONFIGURATION NAMES OF MAIN BODY COMPONENTS Chinrest Unit Chinrest External fixation target hole Chinrest adjuster Microscope Unit Forehead rest Objective lens Binocular tube/ Illumination Unit Accessory locking knob Prism Diopter adjusting ring Eyepiece Binocular tubes Slit rotation ring Magnification index mark Magnification selector handle Microscope arm Slit width control knob…
-
Page 13: Standard Accessories
STANDARD ACCESSORIES Make sure that all the following standard accessories are included. Figures in parentheses are the quantities. AC adapter (1) Power cable (1) (Model: JMW110kA15) Chinrest paper (1) Dustcover (1) Instruction manual, Assembly Manual (1 each) Spare chinrest tissue pin (2) INSTRUCTION MANUAL SLIT LAMP SL-2G…
-
Page 14: Preparations
PREPARATIONS POWERING ON Connect the power cable. When connected, the indicator lamp turns to orange. Turn the Power switch & Brightness control knob clockwise and switch the power ON. The indicator lamp turns to green. ADJUSTING THE DIOPTER AND PUPILLARY DISTANCE(PD) To ensure sharp observation of slit images, always carry out NOTE the diopter and eye width adjustment.
-
Page 15
Looking through the eyepiece, hold the prism box and adjust the pupillary distance of the eyepiece to enable binocular vision. Prism box Eyepiece PREPARATIONS… -
Page 16: Operation Procedures
OPERATION PROCEDURES POSITIONING THE PATIENT Place the patient’s chin on the chinrest and instruct them to place their forehead against the forehead rest. By rotating the chinrest adjuster, align the patient’s eye with the canthus marker on the chinrest frame. Forehead rest Canthus marker Chinrest…
-
Page 17: Operating The Base And Focusing
OPERATING THE BASE AND FOCUSING To avoid injury to the patient’s eye and nose, pay particular CAUTION attention while operating the instrument body. To prevent fingers from being caught in between, beware of CAUTION the moving parts while operating the main body. To prevent dropping the base locking knob from the base, do NOTE not loosen the knob too much.
-
Page 18: Operating The Illumination Unit
OPERATING THE ILLUMINATION UNIT To avoid causing discomfort to the patient and damage to the CAUTION patient’s eye, do not make the illumination too bright. • Adjust the slit width suitably for the purpose of observation. NOTE • The slit width scale should be used as a guideline. ADJUSTING THE BRIGHTNESS Turn the Power switch &…
-
Page 19
CHANGING THE APERTURE/SLIT LENGTH Turn the aperture/slit length selector turret. When the slit is fully opened, 5 types of spot illumination (φ14, φ10, φ5, φ1, φ0.3mm) are avail- able. The slit length can be changed gradually between 1mm and 14mm. Aperture/slit length selector turret TURNING THE SLIT Turn the slit rotation ring. -
Page 20: Ending Procedure
CHANGING FILTERS Lay the filter selector lever in the direction of the desired filter indication. Filter selector lever The desired filter can be selected from two filter types. No filter Red free filter Blue filter Filter selector lever The blue filter is used for fluorescent staining observation. The red-free filter (colored green) is used to visualize the nerve fiber layer.
-
Page 21: Troubleshooting
If normal operating conditions can not be restored after following the recommended remedies, or if the problem does not fall within any of the conditions in the check list, contact your dealer or TOPCON (see the back cover). Check List…
-
Page 22: Specifications And Performance
SPECIFICATIONS AND PERFORMANCE PERFORMANCE Microscope unit Type Galileo type convergent binocular tubes Magnification Drum, 3-step magnification Magnification steps 10, 16, 25 φ φ φ Overall magnification 10.00 ( 22.5mm)/15.98 ( 14.1mm)/25.53 ( 8.8mm) (actual vision field) Eyepiece lens Magnification: 12.5x Binocular tubes Diopter adjustment range: -5D to +3D PD adjustment: 55 — 78mm…
-
Page 23: Environmental Conditions
ENVIRONMENTAL CONDITIONS ENVIRONMENTAL CONDITIONS FOR USE Temperature: 10 to 40°C Humidity: 30 to 90% (without dew condensation) Air pressure: 700hPa to 1060hPa STORAGE CONDITIONS Environmental conditions (without package) *Temperature : 10°C to 40°C Humidity : 10% to 95% (without dew condensation) Air pressure : 700hPa — 1060hPa * THIS INSTRUMENT DOES NOT MEET THE TEMPERATURE REQUIREMENTS OF ISO…
-
Page 24: Electromagnetic Compatibility
ELECTROMAGNETIC COMPATIBILITY This product conforms to the EMC Standard (IEC 60601-1-2 Ed.3.0:2007). a) MEDICAL ELECTRICAL EQUIPMENT needs special precautions regarding EMC and needs to be installed and put into service according to the EMC information provided in the ACCOMPA- NYING DOCUMENTS. b) Portable and mobile RF communications equipment can affect MEDICAL ELECTRICAL EQUIPMENT.
-
Page 25
Guidance and manufacturer’s declaration — electromagnetic immunity The SL-2G is intended for use in the electromagnetic environment specified below. The customer or the user of the SL-2G should assure that it is used in such an environment. Immunity test IEC 60601 Compliance Electromagnetic environment — test level… -
Page 26
Guidance and manufacturer’s declaration — electromagnetic immunity The SL-2G is intended for use in the electromagnetic environment specified below. The customer or the user of the SL-2G should assure that it is used in such an environment. Immunity test IEC 60601 Compliance Electromagnetic environment- test level… -
Page 27
Recommended separation distance between portable and mobile RF com- munications equipment and the SL-2G The SL-2G is intended for use in an electromagnetic environment in which radiated RF distur- bances are controlled. The customer or the user of the SL-2G can help prevent electromagnetic interference by maintaining a minimum distance between portable and mobile RF communica- tions equipment (transmitters) and the SL-2G as recommended below, according to the maxi- mum output power of the communications equipment. -
Page 28: Optical Radiation Hazard
OPTICAL RADIATION HAZARD The light radiated from the instrument is potentially hazardous. The longer the exposure time is, the higher the risk of causing disorder to the eye is. When operating with the maximum CAUTION intensity, the light radiation reaches values exceeding the safety guideline in about 160sec.
-
Page 29: Electric Rating Ac
ELECTRIC RATING AC AC ADAPTER RATING Source voltage: AC 100-240V Frequency: 50-60Hz Power input: 40VA SAFETY DESIGNATIONS PER IEC 60601-1 STANDARD • Classification of applied part by grade of protection against electric shocks: B type applied part B type applied part provides a certain grade of protection against electric shocks, particu- larly with regard to leak current, measuring current for patient, and reliability of connection to protective facility (Class I equipment).
-
Page 30: References
REFERENCES SHAPE OF PLUG Country Voltage/frequency Shape of plug Mexico 110V/50Hz Type C&E Argentina 220V/60Hz Type A Peru 220V/60Hz Type A Venezuela 110V/50Hz Type C&E Type A (Most common) Bolivia & Paraguay 220V/60Hz Type H (Infrequently) Chile 220V/60Hz Type A Colombia 110V/50Hz Type C…
-
Page 31: Maintenance And Checkups
• This instrument may be affected adversely by dust. Apply the dust cover when not in use. PLACING AN ORDER FOR CONSUMABLES • When ordering consumable items, contact your dealer or TOPCON (see the back cover) and specify the article name, product code and quantity.
-
Page 32: Replacing Illumination Lamps
REPLACING ILLUMINATION LAMPS When replacing the lamp, switch off the power supply and CAUTION remove the power cable to avoid electric shocks. To avoid burns, beware of high temperatures when replacing CAUTION the lamp immediately after switching it off. To ensure perfect illumination, make sure that the socket NOTE flange and notch are firmly fitted.
-
Page 33: Restocking Chinrest Tissue
Remove the connector from the lamp cover. Remove the screws with a cross slot screwdriver, and remove the lamp unit. Replace the lamp unit with a new one, and set it in reverse order. When touching the lamp unit, take care not to damage the LED. RESTOCKING CHINREST TISSUE When the chinrest tissue supply is depleted, pull out the chinrest tissue pins and replace the tissue.
-
Page 34: Maintenance Procedure
Remove dust from lens and prism surfaces. Using clean gauze, lightly draw a circle from the lens/prism center outward. If the stains remain, repeat this 2 to 3 times. If stains are persistent, call your dealer or TOPCON (see the back cover). MAINTENANCE AND CHECKUPS…
-
Page 35: Disposing The Product
CLEANING THE SLIDING PLATE, RAIL AND WHEEL SHAFT When stained, the movement of the sliding plate and the rail of NOTE the table top and the wheel shaft of the base becomes less smooth. Clean them with a dry cloth. Wipe the wheel shaft clean by moving the base right and left.
-
Page 36: System Configuration
OPTIONAL ACCESSORIES The TOPCON SL-2G Slit Lamp provides the following optional accessories. For inquiries, please call your dealer or TOPCON (see the back cover). To prevent falling during use and movement, secure optional CAUTION accessories. • For details, please refer to the instruction manuals of each product.
-
Page 37: Beam Splitter
BEAM SPLITTER FEATURES • Used to attach the TV relay lens and observation tube. • The TV relay lens and observation tube can be attached to either side. • The beam splitter division ratio is TV 50%: patient 50%. TV RELAY LENS •…
-
Page 38: Tv Relay Lens Tl-54
TV RELAY LENS TL-54 TV RELAY LENS TL-55 • Two types of TV relay lenses differ according to the type of TV camera to be used. For C mount 1/2 type TV camera: TL-54 For C mount 1/3 type TV camera: TL-55 FEATURES •…
-
Page 39: Tv Attachment Tl-56
TV ATTACHMENT TL-56 FEATURES • Used to connect a digital camera. • Combined with beam splitter. • The beam splitter division ratio is TV 50%: patient 50%. TV RELAY LENS TL-57 • Used to connect a digital camera. • Combined with beam splitter. •…
-
Page 40: External Fixation Target So-Ft02
EXTERNAL FIXATION TARGET SO-FT02 FEATURES • Attached to the upper part of the chinrest to easily guide and fixate the patient’s visual line. 12.5X EYEPIECE FEATURES There are four types as below: • One with internal measurement scale and no click stops.
-
Page 41: Tonometer Mount So-Tm2
TONOMETER MOUNT SO-TM2 FEATURES • This is a mount used for attaching the Applanation Tonometer 900.4.3 (Model 870Z) (for Slit Lamp 900 (Medical Device Approval No. 15200BZY00166000)) to the SL-2G. HRUBY LENS SO-HL01 Normally, observation is possible only up to the ante- rior vitreous body due to the refractive power of the cornea and lens.
-
Page 43
• Serial number (Shown on the rating plate on the back of the instrument) • Period of Usage (Please give us the date of purchase). • Description of Problem (as detailed as possible). SLIT LAMP SL-2G INSTRUCTION MANUAL Version of 2011 (2011.2-100LW1) Date of issue: 18, Feb, 2011 Published by TOPCON CORPORATION 75-1 Hasunuma-cho, Itabashi-ku, Tokyo, 174-8580 Japan. -
Page 44
SLIT LAMP SL-2G…
Щелевая лампа предназначена для биомикроскопического исследования переднего и заднего отдела глаза. Прибор оснащен бинокулярным стереомикроскопом с устройством для дискретной смены увеличений. Обеспечена возможность работы в очках.
Щелевая лампа обладает высокой рабочей надежностью и прекрасным качеством оптики, повышенной яркостью изображения щели, простотой управления, удобно расположенных элементов регулировки щели, высоты и вращения. Простая, но совершенная конструкция узла перемещения приборов в горизонтальной плоскости позволяет плавно и с высокой степенью точности производить наводку для наблюдения.
Пользуясь этой лампой, можно применять все способы исследования переднего и заднего отделов глаза, известные в офтальмологической практике.
Габаритные размеры:
-
в упаковке — 660х560х400 мм.
-
без упаковки — 475х385х600 мм.
Варианты исполнения:
-
SL-P-01- с тонометром;
-
SL-P-02 — с адаптером (передача изображения на компьютер или телевизионный приемник);
-
SL-P-03 — с тонометром и адаптером.
В комплект поставки входит бумага для лицевого установа.
ТЕХНИЧЕСКИЕ ХАРАКТЕРИСТИКИ:
Увеличение микроскопа пятиступенчатое, крат …………………………….. 5,6 | 9 | 14 | 22 | 35
Поле зрения, мм ……………………………………………………………………………. 32 | 19,6 | 12,5 | 8 | 5
Увеличение окуляров …………………………………………………………………….12,5
Изменение величины изображения цели по длине дискретно, мм …. 1; 3; 8; 12
Изменение величины изображения цели по ширине плавно, мм ……. 0,04 — 11,5
Межзрачковое расстояние, мм …………………………………………………….. 56-72
Диоптрийная регулировка окуляров, дптр ……………………………………. от -6 до +6
Величина наблюдаемого участка глзного дна, мм ………………………… 5-6
Повопрот щели ……………………………………………………………………………. ±90 (от 0° до 180°)
Осветитель ………………………………………………………………………………….. Галогенный, нижнее расположение
Перемещение подвижного основания, мм …………………………………….. Вперед-назад 90,
вправо-влево 100,
вертикально 30
Разрешение микроскопа ………………………………………………………………. от 9 до 35
По полю ……………………………………………………………………………………….. от 90 лин/мм
Регулировка яркости ……………………………………………………………………. Плавная, на блоке питания
Светофильтры ……………………………………………………………………………… Красный, синий, нейтральный, прозрачный,
сине — зеленый (бескрасный), поляроид
Интересные материалы
Наши новости
Наши опросы
![]()
Производитель: ЗОМЗ
Артикул: 00000031714
Цена опт.: 400 408 руб.
НДС не облагается
Регистрационное удостоверение Росздравнадзора ФСР 2011/11308 от 12.07.2011


Описание
Лампа щелевая SL-P-06 (с видеоадаптером).
SL-P — лидер среди российских щелевых ламп. Эта модель пришла на замену хорошо известной ЩЛ-3Г-06, которая выпускалась Загорским оптико-механическим заводов раньше.
SL-P — универсальная, экономичная модель для стандартного оснащения офтальмологического кабинета.
Предназначена для биомикроскопического исследования переднего отдела глаза, а также заднего отдела глаза с помощью дополнительной асферической линзы 60 дптр. Прибор оснащён бинокулярным стереомикроскопом с устройством для дискретной смены увеличений. Оптимальное удаление выходных зрачков окуляров обеспечивает возможность комфортного наблюдения через микроскоп даже в очках.
Щелевая лампа обладает высокой рабочей надёжностью и прекрасным качеством оптики, повышенной яркостью изображения щели, простотой управления удобно расположенных элементов регулировки щели. Простая, но надёжная конструкция узла перемещения прибора в горизонтальной плоскости позволяет плавно и с высокой степенью точности производить наводку для наблюдения.
SL-P-06 — модификация щелевой лампы SL-P с асферической линзой. В комплектацию входит асферическая линза (60 дптр) и адаптер для передачи изображения на монитор компьютера или телевизор.
Особенности:
- Стационарный;
- Асферическая линза;
- Адаптер к ПК.
Документы и сертификаты
Технические характеристики
| Параметр | Значение |
|---|---|
|
Тип прибора |
стационарный |
| Линза | асферическая |
| Увеличение микроскопа пятиступенчатое, крат | 5,6; 9; 14; 22; 35 |
| Поле зрения, мм | 32; 19,6; 12,5; 8; 5 |
| Увеличение окуляров | 12,5 |
|
Изменение величины изображения цели, мм: — по ширине (изменяется плавно); — по длине (изменяется дискретно) |
0 — 14; 0,2; 1; 3; 5; 8; 14 |
| Межзрачковое расстояние, мм | 56 — 72 |
| Диоптрийная регулировка окуляров, дптр | от минус 6 до плюс 6 |
| Величина наблюдаемого участка глазного дна, мм | 5 — 6 |
| Поворот щели | ±90 (от 0° до 180°) |
| Осветитель щели | Галогеновый, нижнее расположение |
| Освещенность, создаваемая в плоскости изображения щели, лк, не менее | 50 000 |
| Перемещение подвижного основания, мм |
Вперёд-назад 90, вправо-влево 100, вертикально 30 |
| Разрешение микроскопа от 9 до 35 | По полю от 90 лин/мм |
| Регулировка яркости | Плавная, на блоке питания |
| Светофильтры | Синий, пурпурный, зелёный, прозрачный |
| Источник излучения галогеновая лампа (напряжение / мощность) |
12 В; 30 В·А |
|
Габаритные размеры, мм, не более: — щелевой лампы; — блока питания |
475 х 385 х 600; 230 х 145 х 80 |
|
Масса, кг, не более: — щелевой лампы; — блока питания |
17; 1 |
Транспортные характеристики
Онлайн-заявка
Если вы заинтересованы в приобретении товара «Щелевая лампа ЗОМЗ SL-P-06 (с видеоадаптером)», или хотите задать вопрос, то сделайте это прямо здесь:
— физическое лицо,
— юридическое лицо
Описание по КТРУ
КТРУ – это каталог товаров, работ и услуг для обеспечения государственных и муниципальных нужд, который формируется на основе общероссийского классификатора ОКПД2. Описание и коды по КТРУ необходимы для оформления документов, если вы участвуете в закупках по закону № 44-ФЗ.
Вы можете скопировать с сайта «НВ-Лаб» код ОКПД2 и описание по КТРУ для Щелевая лампа ЗОМЗ SL-P-06 (с видеоадаптером) и вставить в свои закупочные документы.
|
Код по КТРУ |
26.60.12.119-00000710 |
|
Код по ОКПД2 |
26.60.12.119 |
|
Наименование |
Аппараты |
|
Наименование |
Лампа |
|
Единицы |
Штука |
|
Дата |
02.11.2020 |
|
Дата |
Бессрочно |
Характеристики товара
|
Наименование характеристики |
Вид характеристики |
Значение характеристики |
Единица измерения характеристики |
|
Увеличение |
Неизменяемая |
≥ 12.5 и ≤ |
|
|
Максимальное |
Неизменяемая |
≥ 35 и ≤ |
|
|
Источник |
Неизменяемая |
Галогеновый |
Уважаемые покупатели, информируем Вас, что производитель может изменить цвет, внешний вид и характеристики товара без дополнительного уведомления продавца (НВ-Лаб). Поэтому размещенные на нашем сайте характеристики и фотографии являются справочными. Характеристики и внешний вид купленного товара иногда могут отличаться от опубликованных. Мы стараемся поддерживать описания в актуальном состоянии и обновляем информацию по мере получения её от производителей.
Вся размещённая на сайте информация опубликована исключительно для ознакомительных целей и ни при каких условиях не является публичной офертой.