GTK is a widget toolkit.
Each user interface created by GTK consists of widgets. This is implemented
in C using GObject, an object-oriented framework for C. Widgets
are organized in a hierarchy. The window widget is the main container.
The user interface is then built by adding buttons, drop-down menus, input
fields, and other widgets to the window. If you are creating complex user
interfaces it is recommended to use GtkBuilder and its GTK-specific markup
description language, instead of assembling the interface manually.
GTK is event-driven. The toolkit listens for events such as a click
on a button, and passes the event to your application.
This chapter contains some tutorial information to get you started with
GTK programming. It assumes that you have GTK, its dependencies and a C
compiler installed and ready to use. If you need to build GTK itself first,
refer to the Compiling the GTK libraries section in this reference.
Basics
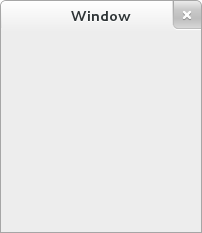
To begin our introduction to GTK, we’ll start with a very simple
application. This program will create an empty 200 × 200 pixel window.
Create a new file with the following content named example-0.c.
#include <gtk/gtk.h>

static void
activate (GtkApplication* app,
          gpointer        user_data)
{
  GtkWidget *window;

  window = gtk_application_window_new (app);
  gtk_window_set_title (GTK_WINDOW (window), "Window");
  gtk_window_set_default_size (GTK_WINDOW (window), 200, 200);
  gtk_widget_show (window);
}

int
main (int    argc,
      char **argv)
{
  GtkApplication *app;
  int status;

  app = gtk_application_new ("org.gtk.example", G_APPLICATION_DEFAULT_FLAGS);
  g_signal_connect (app, "activate", G_CALLBACK (activate), NULL);
  status = g_application_run (G_APPLICATION (app), argc, argv);
  g_object_unref (app);

  return status;
}
You can compile the program above with GCC using:
gcc $( pkg-config --cflags gtk4 ) -o example-0 example-0.c $( pkg-config --libs gtk4 )
Note: If the above compilation does not work due to an error regarding G_APPLICATION_DEFAULT_FLAGS
this could be due to your OS providing an older version of GLib. For GLib versions older than 2.74 you
will need to replace G_APPLICATION_DEFAULT_FLAGS with G_APPLICATION_FLAGS_NONE in this example, and
others in this documentation.
For more information on how to compile a GTK application, please
refer to the Compiling GTK Applications
section in this reference.
All GTK applications will, of course, include gtk/gtk.h, which declares
functions, types and macros required by GTK applications.
Even if GTK installs multiple header files, only the top-level gtk/gtk.h
header can be directly included by third-party code. The compiler will abort
with an error if any other header is directly included.
In a GTK application, the purpose of the main() function is to create a
GtkApplication object and run it. In this example a
GtkApplication pointer named app is declared and then initialized
using gtk_application_new().
When creating a GtkApplication, you need to pick an application
identifier (a name) and pass it to gtk_application_new() as parameter. For
this example org.gtk.example is used. For choosing an identifier for your
application, see this guide.
Lastly, gtk_application_new() takes GApplicationFlags as input
for your application, if your application would have special needs.
Next the activate signal is
connected to the activate() function above the main() function. The activate
signal will be emitted when your application is launched with g_application_run()
on the line below. The g_application_run() call also takes as arguments the
command line arguments (the argc count and the argv string array).
Your application can override the command line handling, e.g. to open
files passed on the commandline.
Within g_application_run() the activate signal is sent and we then proceed
into the activate() function of the application. This is where we construct
our GTK window, so that a window is shown when the application is launched.
The call to gtk_application_window_new() will create a new
GtkApplicationWindow and store it inside the window pointer. The
window will have a frame, a title bar, and window controls depending on the platform.
A window title is set using gtk_window_set_title(). This function
takes a GtkWindow pointer and a string as input. As our window pointer
is a GtkWidget pointer, we need to cast it to GtkWindow; instead of
casting window via a typical C cast like (GtkWindow*), window can be
cast using the macro GTK_WINDOW(). GTK_WINDOW() will check if the
pointer is an instance of the GtkWindow class, before casting, and emit a
warning if the check fails. More information about this convention can be
found in the GObject documentation.
Finally the window size is set using gtk_window_set_default_size()
and the window is then shown by GTK via gtk_widget_show().
When you close the window, by (for example) pressing the X button, the
g_application_run() call returns with a number which is saved inside an
integer variable named status. Afterwards, the GtkApplication object is
freed from memory with g_object_unref(). Finally the status integer is
returned and the application exits.
While the program is running, GTK is receiving events. These are typically
input events caused by the user interacting with your program, but also things
like messages from the window manager or other applications. GTK processes
these and as a result, signals may be emitted on your widgets. Connecting
handlers for these signals is how you normally make your program do something
in response to user input.
The following example is slightly more complex, and tries to
showcase some of the capabilities of GTK.
Hello, World
In the long tradition of programming languages and libraries,
this example is called Hello, World.

Hello World in C
Create a new file with the following content named example-1.c.
#include <gtk/gtk.h>

static void
print_hello (GtkWidget *widget,
             gpointer   data)
{
  g_print ("Hello Worldn");
}

static void
activate (GtkApplication *app,
          gpointer        user_data)
{
  GtkWidget *window;
  GtkWidget *button;
  GtkWidget *box;

  window = gtk_application_window_new (app);
  gtk_window_set_title (GTK_WINDOW (window), "Window");
  gtk_window_set_default_size (GTK_WINDOW (window), 200, 200);

  box = gtk_box_new (GTK_ORIENTATION_VERTICAL, 0);
  gtk_widget_set_halign (box, GTK_ALIGN_CENTER);
  gtk_widget_set_valign (box, GTK_ALIGN_CENTER);

  gtk_window_set_child (GTK_WINDOW (window), box);

  button = gtk_button_new_with_label ("Hello World");

  g_signal_connect (button, "clicked", G_CALLBACK (print_hello), NULL);
  g_signal_connect_swapped (button, "clicked", G_CALLBACK (gtk_window_destroy), window);

  gtk_box_append (GTK_BOX (box), button);

  gtk_widget_show (window);
}

int
main (int    argc,
      char **argv)
{
  GtkApplication *app;
  int status;

  app = gtk_application_new ("org.gtk.example", G_APPLICATION_DEFAULT_FLAGS);
  g_signal_connect (app, "activate", G_CALLBACK (activate), NULL);
  status = g_application_run (G_APPLICATION (app), argc, argv);
  g_object_unref (app);

  return status;
}
You can compile the program above with GCC using:
gcc $( pkg-config --cflags gtk4 ) -o example-1 example-1.c $( pkg-config --libs gtk4 )
As seen above, example-1.c builds further upon example-0.c by adding a
button to our window, with the label “Hello World”. Two new GtkWidget
pointers are declared to accomplish this, button and box. The box
variable is created to store a GtkBox, which is GTK’s way of
controlling the size and layout of buttons.
The GtkBox widget is created with gtk_box_new(), which takes a
GtkOrientation enumeration value as parameter. The buttons which
this box will contain can either be laid out horizontally or vertically.
This does not matter in this particular case, as we are dealing with only
one button. After initializing box with the newly created GtkBox, the code
adds the box widget to the window widget using gtk_window_set_child().
Next the button variable is initialized in similar manner.
gtk_button_new_with_label() is called which returns a
GtkButton to be stored in button. Afterwards button is added to
our box.
Using g_signal_connect(), the button is connected to a function in our app called
print_hello(), so that when the button is clicked, GTK will call this function.
As the print_hello() function does not use any data as input, NULL is passed
to it. print_hello() calls g_print() with the string “Hello World” which will
print Hello World in a terminal if the GTK application was started from one.
After connecting print_hello(), another signal is connected to the “clicked”
state of the button using g_signal_connect_swapped(). This functions is similar
to a g_signal_connect(), with the difference lying in how the callback function
is treated; g_signal_connect_swapped() allows you to specify what the callback
function should take as parameter by letting you pass it as data. In this case
the function being called back is gtk_window_destroy() and the window pointer
is passed to it. This has the effect that when the button is clicked, the whole
GTK window is destroyed. In contrast if a normal g_signal_connect() were used
to connect the “clicked” signal with gtk_window_destroy(), then the function
would be called on button (which would not go well, since the function expects
a GtkWindow as argument).
More information about creating buttons can be found
here.
The rest of the code in example-1.c is identical to example-0.c. The next
section will elaborate further on how to add several GtkWidgets to your
GTK application.
Packing
When creating an application, you’ll want to put more than one widget inside
a window. When you do so, it becomes important to control how each widget is
positioned and sized. This is where packing comes in.
GTK comes with a large variety of layout containers whose purpose it
is to control the layout of the child widgets that are added to them, like:
GtkBoxGtkGridGtkRevealerGtkStackGtkOverlayGtkPanedGtkExpanderGtkFixed
The following example shows how the GtkGrid container lets you
arrange several buttons:

Packing buttons
Create a new file with the following content named example-2.c.
#include <gtk/gtk.h>

static void
print_hello (GtkWidget *widget,
             gpointer   data)
{
  g_print ("Hello Worldn");
}

static void
activate (GtkApplication *app,
          gpointer        user_data)
{
  GtkWidget *window;
  GtkWidget *grid;
  GtkWidget *button;

  /* create a new window, and set its title */
  window = gtk_application_window_new (app);
  gtk_window_set_title (GTK_WINDOW (window), "Window");

  /* Here we construct the container that is going pack our buttons */
  grid = gtk_grid_new ();

  /* Pack the container in the window */
  gtk_window_set_child (GTK_WINDOW (window), grid);

  button = gtk_button_new_with_label ("Button 1");
  g_signal_connect (button, "clicked", G_CALLBACK (print_hello), NULL);

  /* Place the first button in the grid cell (0, 0), and make it fill
   * just 1 cell horizontally and vertically (ie no spanning)
   */
  gtk_grid_attach (GTK_GRID (grid), button, 0, 0, 1, 1);

  button = gtk_button_new_with_label ("Button 2");
  g_signal_connect (button, "clicked", G_CALLBACK (print_hello), NULL);

  /* Place the second button in the grid cell (1, 0), and make it fill
   * just 1 cell horizontally and vertically (ie no spanning)
   */
  gtk_grid_attach (GTK_GRID (grid), button, 1, 0, 1, 1);

  button = gtk_button_new_with_label ("Quit");
  g_signal_connect_swapped (button, "clicked", G_CALLBACK (gtk_window_destroy), window);

  /* Place the Quit button in the grid cell (0, 1), and make it
   * span 2 columns.
   */
  gtk_grid_attach (GTK_GRID (grid), button, 0, 1, 2, 1);

  gtk_widget_show (window);

}

int
main (int    argc,
      char **argv)
{
  GtkApplication *app;
  int status;

  app = gtk_application_new ("org.gtk.example", G_APPLICATION_DEFAULT_FLAGS);
  g_signal_connect (app, "activate", G_CALLBACK (activate), NULL);
  status = g_application_run (G_APPLICATION (app), argc, argv);
  g_object_unref (app);

  return status;
}
You can compile the program above with GCC using:
gcc $( pkg-config --cflags gtk4 ) -o example-2 example-2.c $( pkg-config --libs gtk4 )
Custom Drawing
Many widgets, like buttons, do all their drawing themselves. You just tell
them the label you want to see, and they figure out what font to use, draw
the button outline and focus rectangle, etc. Sometimes, it is necessary to
do some custom drawing. In that case, a GtkDrawingArea might be the right
widget to use. It offers a canvas on which you can draw by setting its
draw function.
The contents of a widget often need to be partially or fully redrawn, e.g.
when another window is moved and uncovers part of the widget, or when the
window containing it is resized. It is also possible to explicitly cause a
widget to be redrawn, by calling gtk_widget_queue_draw(). GTK takes
care of most of the details by providing a ready-to-use cairo context to the
draw function.
The following example shows how to use a draw function with GtkDrawingArea.
It is a bit more complicated than the previous examples, since it also
demonstrates input event handling with event controllers.

Drawing in response to input
Create a new file with the following content named example-3.c.
#include <gtk/gtk.h>

/* Surface to store current scribbles */
static cairo_surface_t *surface = NULL;

static void
clear_surface (void)
{
  cairo_t *cr;

  cr = cairo_create (surface);

  cairo_set_source_rgb (cr, 1, 1, 1);
  cairo_paint (cr);

  cairo_destroy (cr);
}

/* Create a new surface of the appropriate size to store our scribbles */
static void
resize_cb (GtkWidget *widget,
           int        width,
           int        height,
           gpointer   data)
{
  if (surface)
    {
      cairo_surface_destroy (surface);
      surface = NULL;
    }

  if (gtk_native_get_surface (gtk_widget_get_native (widget)))
    {
      surface = gdk_surface_create_similar_surface (gtk_native_get_surface (gtk_widget_get_native (widget)),
                                                    CAIRO_CONTENT_COLOR,
                                                    gtk_widget_get_width (widget),
                                                    gtk_widget_get_height (widget));

      /* Initialize the surface to white */
      clear_surface ();
    }
}

/* Redraw the screen from the surface. Note that the draw
 * callback receives a ready-to-be-used cairo_t that is already
 * clipped to only draw the exposed areas of the widget
 */
static void
draw_cb (GtkDrawingArea *drawing_area,
         cairo_t        *cr,
         int             width,
         int             height,
         gpointer        data)
{
  cairo_set_source_surface (cr, surface, 0, 0);
  cairo_paint (cr);
}

/* Draw a rectangle on the surface at the given position */
static void
draw_brush (GtkWidget *widget,
            double     x,
            double     y)
{
  cairo_t *cr;

  /* Paint to the surface, where we store our state */
  cr = cairo_create (surface);

  cairo_rectangle (cr, x - 3, y - 3, 6, 6);
  cairo_fill (cr);

  cairo_destroy (cr);

  /* Now invalidate the drawing area. */
  gtk_widget_queue_draw (widget);
}

static double start_x;
static double start_y;

static void
drag_begin (GtkGestureDrag *gesture,
            double          x,
            double          y,
            GtkWidget      *area)
{
  start_x = x;
  start_y = y;

  draw_brush (area, x, y);
}

static void
drag_update (GtkGestureDrag *gesture,
             double          x,
             double          y,
             GtkWidget      *area)
{
  draw_brush (area, start_x + x, start_y + y);
}

static void
drag_end (GtkGestureDrag *gesture,
          double          x,
          double          y,
          GtkWidget      *area)
{
  draw_brush (area, start_x + x, start_y + y);
}

static void
pressed (GtkGestureClick *gesture,
         int              n_press,
         double           x,
         double           y,
         GtkWidget       *area)
{
  clear_surface ();
  gtk_widget_queue_draw (area);
}

static void
close_window (void)
{
  if (surface)
    cairo_surface_destroy (surface);
}

static void
activate (GtkApplication *app,
          gpointer        user_data)
{
  GtkWidget *window;
  GtkWidget *frame;
  GtkWidget *drawing_area;
  GtkGesture *drag;
  GtkGesture *press;

  window = gtk_application_window_new (app);
  gtk_window_set_title (GTK_WINDOW (window), "Drawing Area");

  g_signal_connect (window, "destroy", G_CALLBACK (close_window), NULL);

  frame = gtk_frame_new (NULL);
  gtk_window_set_child (GTK_WINDOW (window), frame);

  drawing_area = gtk_drawing_area_new ();
  /* set a minimum size */
  gtk_widget_set_size_request (drawing_area, 100, 100);

  gtk_frame_set_child (GTK_FRAME (frame), drawing_area);

  gtk_drawing_area_set_draw_func (GTK_DRAWING_AREA (drawing_area), draw_cb, NULL, NULL);

  g_signal_connect_after (drawing_area, "resize", G_CALLBACK (resize_cb), NULL);

  drag = gtk_gesture_drag_new ();
  gtk_gesture_single_set_button (GTK_GESTURE_SINGLE (drag), GDK_BUTTON_PRIMARY);
  gtk_widget_add_controller (drawing_area, GTK_EVENT_CONTROLLER (drag));
  g_signal_connect (drag, "drag-begin", G_CALLBACK (drag_begin), drawing_area);
  g_signal_connect (drag, "drag-update", G_CALLBACK (drag_update), drawing_area);
  g_signal_connect (drag, "drag-end", G_CALLBACK (drag_end), drawing_area);

  press = gtk_gesture_click_new ();
  gtk_gesture_single_set_button (GTK_GESTURE_SINGLE (press), GDK_BUTTON_SECONDARY);
  gtk_widget_add_controller (drawing_area, GTK_EVENT_CONTROLLER (press));

  g_signal_connect (press, "pressed", G_CALLBACK (pressed), drawing_area);

  gtk_widget_show (window);
}

int
main (int    argc,
      char **argv)
{
  GtkApplication *app;
  int status;

  app = gtk_application_new ("org.gtk.example", G_APPLICATION_DEFAULT_FLAGS);
  g_signal_connect (app, "activate", G_CALLBACK (activate), NULL);
  status = g_application_run (G_APPLICATION (app), argc, argv);
  g_object_unref (app);

  return status;
}
You can compile the program above with GCC using:
gcc $( pkg-config --cflags gtk4 ) -o example-3 example-3.c $( pkg-config --libs gtk4 )
Building user interfaces
When constructing a more complicated user interface, with dozens
or hundreds of widgets, doing all the setup work in C code is
cumbersome, and making changes becomes next to impossible.
Thankfully, GTK supports the separation of user interface
layout from your business logic, by using UI descriptions in an
XML format that can be parsed by the GtkBuilder class.
Packing buttons with GtkBuilder
Create a new file with the following content named example-4.c.
#include <gtk/gtk.h>
#include <glib/gstdio.h>

static void
print_hello (GtkWidget *widget,
             gpointer   data)
{
  g_print ("Hello Worldn");
}

static void
quit_cb (GtkWindow *window)
{
  gtk_window_close (window);
}

static void
activate (GtkApplication *app,
          gpointer        user_data)
{
  /* Construct a GtkBuilder instance and load our UI description */
  GtkBuilder *builder = gtk_builder_new ();
  gtk_builder_add_from_file (builder, "builder.ui", NULL);

  /* Connect signal handlers to the constructed widgets. */
  GObject *window = gtk_builder_get_object (builder, "window");
  gtk_window_set_application (GTK_WINDOW (window), app);

  GObject *button = gtk_builder_get_object (builder, "button1");
  g_signal_connect (button, "clicked", G_CALLBACK (print_hello), NULL);

  button = gtk_builder_get_object (builder, "button2");
  g_signal_connect (button, "clicked", G_CALLBACK (print_hello), NULL);

  button = gtk_builder_get_object (builder, "quit");
  g_signal_connect_swapped (button, "clicked", G_CALLBACK (quit_cb), window);

  gtk_widget_show (GTK_WIDGET (window));

  /* We do not need the builder any more */
  g_object_unref (builder);
}

int
main (int   argc,
      char *argv[])
{
#ifdef GTK_SRCDIR
  g_chdir (GTK_SRCDIR);
#endif

  GtkApplication *app = gtk_application_new ("org.gtk.example", G_APPLICATION_DEFAULT_FLAGS);
  g_signal_connect (app, "activate", G_CALLBACK (activate), NULL);

  int status = g_application_run (G_APPLICATION (app), argc, argv);
  g_object_unref (app);

  return status;
}
Create a new file with the following content named builder.ui.
<?xml version="1.0" encoding="UTF-8"?>
<interface>
  <object id="window" class="GtkWindow">
    <property name="title">Grid</property>
    <child>
      <object id="grid" class="GtkGrid">
        <child>
          <object id="button1" class="GtkButton">
            <property name="label">Button 1</property>
            <layout>
              <property name="column">0</property>
              <property name="row">0</property>
            </layout>
          </object>
        </child>
        <child>
          <object id="button2" class="GtkButton">
            <property name="label">Button 2</property>
            <layout>
              <property name="column">1</property>
              <property name="row">0</property>
            </layout>
          </object>
        </child>
        <child>
          <object id="quit" class="GtkButton">
            <property name="label">Quit</property>
            <layout>
              <property name="column">0</property>
              <property name="row">1</property>
              <property name="column-span">2</property>
            </layout>
          </object>
        </child>
      </object>
    </child>
  </object>
</interface>
You can compile the program above with GCC using:
gcc $( pkg-config --cflags gtk4 ) -o example-4 example-4.c $( pkg-config --libs gtk4 )
Note that GtkBuilder can also be used to construct objects that are
not widgets, such as tree models, adjustments, etc. That is the reason
the method we use here is called gtk_builder_get_object() and
returns a GObject instead of a GtkWidget.
Normally, you would pass a full path to gtk_builder_add_from_file() to
make the execution of your program independent of the current directory.
A common location to install UI descriptions and similar data is
/usr/share/appname.
It is also possible to embed the UI description in the source code as a
string and use gtk_builder_add_from_string() to load it. But keeping
the UI description in a separate file has several advantages:
- it is possible to make minor adjustments to the UI without recompiling your program
- it is easier to isolate the UI code from the business logic of your application
- it is easier to restructure your UI into separate classes using composite
widget templates
Using GResource it is possible
to combine the best of both worlds: you can keep the UI definition files
separate inside your source code repository, and then ship them embedded into
your application.
Building applications
An application consists of a number of files:
- The binary
- This gets installed in
/usr/bin. - A desktop file
- The desktop file provides important information about the application to
the desktop shell, such as its name, icon, D-Bus name, commandline to launch
it, etc. It is installed in/usr/share/applications. - An icon
- The icon gets installed in
/usr/share/icons/hicolor/48x48/apps, where it
will be found regardless of the current theme. - A settings schema
- If the application uses GSettings, it will install its schema in
/usr/share/glib-2.0/schemas, so that tools like dconf-editor can find it. - Other resources
- Other files, such as GtkBuilder ui files, are best loaded from
resources stored in the application binary itself. This eliminates the
need for most of the files that would traditionally be installed in
an application-specific location in/usr/share.
GTK includes application support that is built on top of GApplication. In this
tutorial we’ll build a simple application by starting from scratch, adding more
and more pieces over time. Along the way, we’ll learn about GtkApplication,
templates, resources, application menus, settings, GtkHeaderBar, GtkStack,
GtkSearchBar, GtkListBox, and more.
The full, buildable sources for these examples can be found in the
examples directory of the GTK source distribution, or
online in the GTK
source code repository. You can build each example separately by using make
with the Makefile.example file. For more information, see the README
included in the examples directory.
A trivial application
When using GtkApplication, the main() function can be very simple. We just call
g_application_run() and give it an instance of our application class.
#include <gtk/gtk.h>

#include "exampleapp.h"

int
main (int argc, char *argv[])
{
  return g_application_run (G_APPLICATION (example_app_new ()), argc, argv);
}
All the application logic is in the application class, which is a subclass of
GtkApplication. Our example does not yet have any interesting functionality.
All it does is open a window when it is activated without arguments, and open
the files it is given, if it is started with arguments.
To handle these two cases, we override the activate() vfunc, which gets
called when the application is launched without commandline arguments, and
the open() virtual function, which gets called when the application is
launched with commandline arguments.
To learn more about GApplication entry points, consult the GIO
documentation.
#include <gtk/gtk.h>

#include "exampleapp.h"
#include "exampleappwin.h"

struct _ExampleApp
{
  GtkApplication parent;
};

G_DEFINE_TYPE(ExampleApp, example_app, GTK_TYPE_APPLICATION);

static void
example_app_init (ExampleApp *app)
{
}

static void
example_app_activate (GApplication *app)
{
  ExampleAppWindow *win;

  win = example_app_window_new (EXAMPLE_APP (app));
  gtk_window_present (GTK_WINDOW (win));
}

static void
example_app_open (GApplication  *app,
                  GFile        **files,
                  int            n_files,
                  const char    *hint)
{
  GList *windows;
  ExampleAppWindow *win;
  int i;

  windows = gtk_application_get_windows (GTK_APPLICATION (app));
  if (windows)
    win = EXAMPLE_APP_WINDOW (windows->data);
  else
    win = example_app_window_new (EXAMPLE_APP (app));

  for (i = 0; i < n_files; i++)
    example_app_window_open (win, files[i]);

  gtk_window_present (GTK_WINDOW (win));
}

static void
example_app_class_init (ExampleAppClass *class)
{
  G_APPLICATION_CLASS (class)->activate = example_app_activate;
  G_APPLICATION_CLASS (class)->open = example_app_open;
}

ExampleApp *
example_app_new (void)
{
  return g_object_new (EXAMPLE_APP_TYPE,
                       "application-id", "org.gtk.exampleapp",
                       "flags", G_APPLICATION_HANDLES_OPEN,
                       NULL);
}
Another important class that is part of the application support in GTK is
GtkApplicationWindow. It is typically subclassed as well. Our
subclass does not do anything yet, so we will just get an empty window.
#include <gtk/gtk.h>

#include "exampleapp.h"
#include "exampleappwin.h"

struct _ExampleAppWindow
{
  GtkApplicationWindow parent;
};

G_DEFINE_TYPE(ExampleAppWindow, example_app_window, GTK_TYPE_APPLICATION_WINDOW);

static void
example_app_window_init (ExampleAppWindow *app)
{
}

static void
example_app_window_class_init (ExampleAppWindowClass *class)
{
}

ExampleAppWindow *
example_app_window_new (ExampleApp *app)
{
  return g_object_new (EXAMPLE_APP_WINDOW_TYPE, "application", app, NULL);
}

void
example_app_window_open (ExampleAppWindow *win,
                         GFile            *file)
{
}
As part of the initial setup of our application, we also
create an icon and a desktop file.

[Desktop Entry]
Type=Application
Name=Example
Icon=exampleapp
StartupNotify=true
Exec=@bindir@/exampleapp
Note that `bindir@` needs to be replaced with the actual path to the binary
before this desktop file can be used.
Here is what we’ve achieved so far:
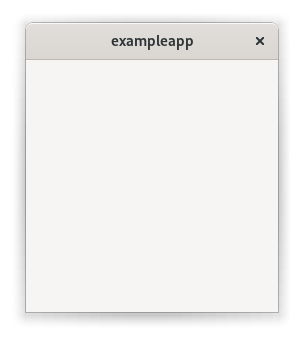
This does not look very impressive yet, but our application is already
presenting itself on the session bus, it has single-instance semantics,
and it accepts files as commandline arguments.
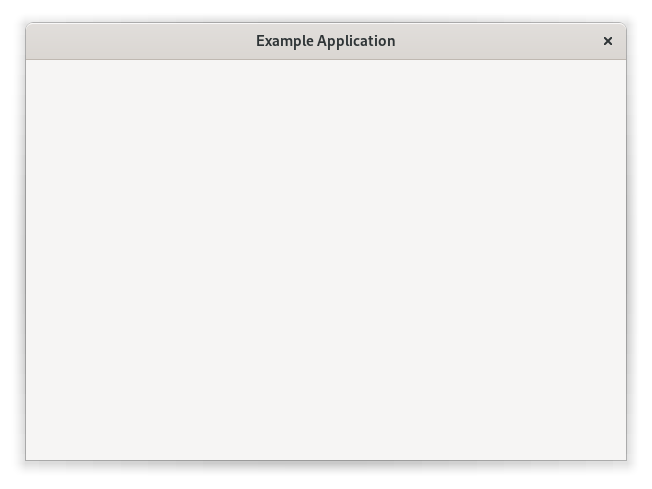
Populating the window
In this step, we use a GtkBuilder template to associate a
GtkBuilder ui file with our application window class.
Our simple ui file gives the window a title, and puts a GtkStack
widget as the main content.
<?xml version="1.0" encoding="UTF-8"?>
<interface>
  <template class="ExampleAppWindow" parent="GtkApplicationWindow">
    <property name="title" translatable="yes">Example Application</property>
    <property name="default-width">600</property>
    <property name="default-height">400</property>
    <child>
      <object class="GtkBox" id="content_box">
        <property name="orientation">vertical</property>
        <child>
          <object class="GtkStack" id="stack"/>
        </child>
      </object>
    </child>
  </template>
</interface>
To make use of this file in our application, we revisit our
GtkApplicationWindow subclass, and call
gtk_widget_class_set_template_from_resource() from the class init
function to set the ui file as template for this class. We also
add a call to gtk_widget_init_template() in the instance init
function to instantiate the template for each instance of our class.
 ...

static void
example_app_window_init (ExampleAppWindow *win)
{
  gtk_widget_init_template (GTK_WIDGET (win));
}

static void
example_app_window_class_init (ExampleAppWindowClass *class)
{
  gtk_widget_class_set_template_from_resource (GTK_WIDGET_CLASS (class),
                                               "/org/gtk/exampleapp/window.ui");
}

 ...
(full source)
You may have noticed that we used the _from_resource() variant of the function
that sets a template. Now we need to use
GLib’s resource functionality
to include the ui file in the binary. This is commonly done by listing all resources
in a .gresource.xml file, such as this:
<?xml version="1.0" encoding="UTF-8"?>
<gresources>
  <gresource prefix="/org/gtk/exampleapp">
    <file preprocess="xml-stripblanks">window.ui</file>
  </gresource>
</gresources>
This file has to be converted into a C source file that will be compiled and linked
into the application together with the other source files. To do so, we use the
glib-compile-resources utility:
glib-compile-resources exampleapp.gresource.xml --target=resources.c --generate-source
The gnome module of the Meson build system
provides the gnome.compile_resources()
method for this task.
Our application now looks like this:
Opening files
In this step, we make our application show the content of all the files
that it is given on the commandline.
Note: Providing filenames (e.g. ./exampleapp examplewin.c examplewin.h) at
the command line is a requirement for example apps 3-9 to display as shown in
the screenshots below.
To this end, we add a member to the struct of our application window subclass
and keep a reference to the GtkStack there. The first member of the struct
should be the parent type from which the class is derived. Here,
ExampleAppWindow is derived from GtkApplicationWindow. The
gtk_widget_class_bind_template_child() function arranges things so that after
instantiating the template, the stack member of the struct will point to the
widget of the same name from the template.
...

struct _ExampleAppWindow
{
  GtkApplicationWindow parent;

  GtkWidget *stack;
};

G_DEFINE_TYPE (ExampleAppWindow, example_app_window, GTK_TYPE_APPLICATION_WINDOW)

...

static void
example_app_window_class_init (ExampleAppWindowClass *class)
{
  gtk_widget_class_set_template_from_resource (GTK_WIDGET_CLASS (class),
                                               "/org/gtk/exampleapp/window.ui");
  gtk_widget_class_bind_template_child (GTK_WIDGET_CLASS (class), ExampleAppWindow, stack);
}

...
(full source)
Now we revisit the example_app_window_open() function that is called for each
commandline argument, and construct a GtkTextView that we then add as a page
to the stack:
...

void
example_app_window_open (ExampleAppWindow *win,
                         GFile            *file)
{
  char *basename;
  GtkWidget *scrolled, *view;
  char *contents;
  gsize length;

  basename = g_file_get_basename (file);

  scrolled = gtk_scrolled_window_new ();
  gtk_widget_set_hexpand (scrolled, TRUE);
  gtk_widget_set_vexpand (scrolled, TRUE);
  view = gtk_text_view_new ();
  gtk_text_view_set_editable (GTK_TEXT_VIEW (view), FALSE);
  gtk_text_view_set_cursor_visible (GTK_TEXT_VIEW (view), FALSE);
  gtk_scrolled_window_set_child (GTK_SCROLLED_WINDOW (scrolled), view);
  gtk_stack_add_titled (GTK_STACK (win->stack), scrolled, basename, basename);

  if (g_file_load_contents (file, NULL, &contents, &length, NULL, NULL))
    {
      GtkTextBuffer *buffer;

      buffer = gtk_text_view_get_buffer (GTK_TEXT_VIEW (view));
      gtk_text_buffer_set_text (buffer, contents, length);
      g_free (contents);
    }

  g_free (basename);
}

...
(full source)
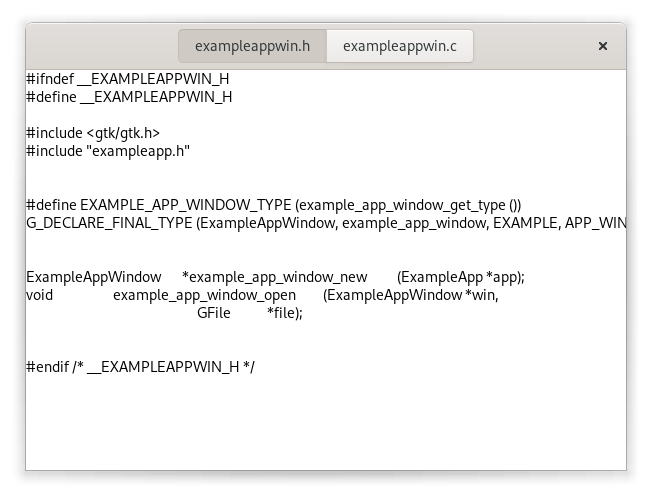
Lastly, we add a GtkStackSwitcher to the titlebar area in the UI file, and we
tell it to display information about our stack.
The stack switcher gets all its information it needs to display tabs from
the stack that it belongs to. Here, we are passing the label to show for
each file as the last argument to the gtk_stack_add_titled() function.
Our application is beginning to take shape:
The menu is shown at the right side of the headerbar. It is meant to collect
infrequently used actions that affect the whole application.
Just like the window template, we specify our menu in a ui file, and add it
as a resource to our binary.
<?xml version="1.0" encoding="UTF-8"?>
<interface>
  <menu id="menu">
    <section>
      <item>
        <attribute name="label" translatable="yes">_Preferences</attribute>
        <attribute name="action">app.preferences</attribute>
      </item>
    </section>
    <section>
      <item>
        <attribute name="label" translatable="yes">_Quit</attribute>
        <attribute name="action">app.quit</attribute>
      </item>
    </section>
  </menu>
</interface>
To make the menu appear, we have to load the ui file and associate the
resulting menu model with the menu button that we’ve added to the headerbar.
Since menus work by activating GActions, we also have to add a suitable set
of actions to our application.
Adding the actions is best done in the startup() vfunc, which is guaranteed
to be called once for each primary application instance:
...

static void
preferences_activated (GSimpleAction *action,
                       GVariant      *parameter,
                       gpointer       app)
{
}

static void
quit_activated (GSimpleAction *action,
                GVariant      *parameter,
                gpointer       app)
{
  g_application_quit (G_APPLICATION (app));
}

static GActionEntry app_entries[] =
{
  { "preferences", preferences_activated, NULL, NULL, NULL },
  { "quit", quit_activated, NULL, NULL, NULL }
};

static void
example_app_startup (GApplication *app)
{
  GtkBuilder *builder;
  GMenuModel *app_menu;
  const char *quit_accels[2] = { "<Ctrl>Q", NULL };

  G_APPLICATION_CLASS (example_app_parent_class)->startup (app);

  g_action_map_add_action_entries (G_ACTION_MAP (app),
                                   app_entries, G_N_ELEMENTS (app_entries),
                                   app);
  gtk_application_set_accels_for_action (GTK_APPLICATION (app),
                                         "app.quit",
                                         quit_accels);
}

static void
example_app_class_init (ExampleAppClass *class)
{
  G_APPLICATION_CLASS (class)->startup = example_app_startup;
  ...
}

...
(full source)
Our preferences menu item does not do anything yet, but the Quit menu item
is fully functional. Note that it can also be activated by the usual Ctrl-Q
shortcut. The shortcut was added with gtk_application_set_accels_for_action().
The application menu looks like this:

A preference dialog
A typical application will have a some preferences that should be remembered
from one run to the next. Even for our simple example application, we may
want to change the font that is used for the content.
We are going to use GSettings to store our preferences. GSettings requires
a schema that describes our settings:
<?xml version="1.0" encoding="UTF-8"?>
<schemalist>
  <schema path="/org/gtk/exampleapp/" id="org.gtk.exampleapp">
    <key name="font" type="s">
      <default>'Monospace 12'</default>
      <summary>Font</summary>
      <description>The font to be used for content.</description>
    </key>
    <key name="transition" type="s">
      <choices>
        <choice value='none'/>
        <choice value='crossfade'/>
        <choice value='slide-left-right'/>
      </choices>
      <default>'none'</default>
      <summary>Transition</summary>
      <description>The transition to use when switching tabs.</description>
    </key>
  </schema>
</schemalist>
Before we can make use of this schema in our application, we need to compile
it into the binary form that GSettings expects. GIO provides macros to do
this in Autotools-based projects, and the gnome module of the Meson build
system provides the gnome.compile_schemas()
method for this task.
Next, we need to connect our settings to the widgets that they are supposed
to control. One convenient way to do this is to use GSettings bind
functionality to bind settings keys to object properties, as we do here
for the transition setting.
...

static void
example_app_window_init (ExampleAppWindow *win)
{
  gtk_widget_init_template (GTK_WIDGET (win));
  win->settings = g_settings_new ("org.gtk.exampleapp");

  g_settings_bind (win->settings, "transition",
                   win->stack, "transition-type",
                   G_SETTINGS_BIND_DEFAULT);
}

...
(full source)
The code to connect the font setting is a little more involved, since there
is no simple object property that it corresponds to, so we are not going to
go into that here.
At this point, the application will already react if you change one of the
settings, e.g. using the gsettings command line tool. Of course, we expect
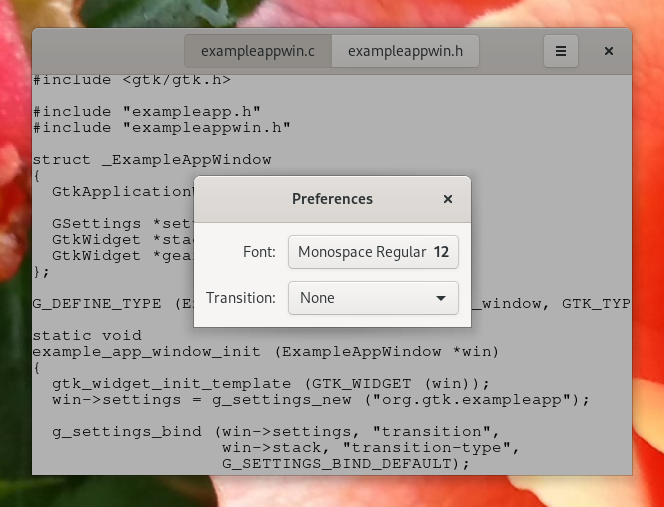
the application to provide a preference dialog for these. So lets do that
now. Our preference dialog will be a subclass of GtkDialog, and
we’ll use the same techniques that we’ve already seen: templates, private
structs, settings bindings.
Lets start with the template.
<?xml version="1.0" encoding="UTF-8"?>
<interface>
  <template class="ExampleAppPrefs" parent="GtkDialog">
    <property name="title" translatable="yes">Preferences</property>
    <property name="resizable">0</property>
    <property name="modal">1</property>
    <child internal-child="content_area">
      <object class="GtkBox" id="content_area">
        <child>
          <object class="GtkGrid" id="grid">
            <property name="margin-start">12</property>
            <property name="margin-end">12</property>
            <property name="margin-top">12</property>
            <property name="margin-bottom">12</property>
            <property name="row-spacing">12</property>
            <property name="column-spacing">12</property>
            <child>
              <object class="GtkLabel" id="fontlabel">
                <property name="label">_Font:</property>
                <property name="use-underline">1</property>
                <property name="mnemonic-widget">font</property>
                <property name="xalign">1</property>
                <layout>
                  <property name="column">0</property>
                  <property name="row">0</property>
                </layout>
              </object>
            </child>
            <child>
              <object class="GtkFontButton" id="font">
                <layout>
                  <property name="column">1</property>
                  <property name="row">0</property>
                </layout>
              </object>
            </child>
            <child>
              <object class="GtkLabel" id="transitionlabel">
                <property name="label">_Transition:</property>
                <property name="use-underline">1</property>
                <property name="mnemonic-widget">transition</property>
                <property name="xalign">1</property>
                <layout>
                  <property name="column">0</property>
                  <property name="row">1</property>
                </layout>
              </object>
            </child>
            <child>
              <object class="GtkComboBoxText" id="transition">
                <items>
                  <item translatable="yes" id="none">None</item>
                  <item translatable="yes" id="crossfade">Fade</item>
                  <item translatable="yes" id="slide-left-right">Slide</item>
                </items>
                <layout>
                  <property name="column">1</property>
                  <property name="row">1</property>
                </layout>
              </object>
            </child>
          </object>
        </child>
      </object>
    </child>
  </template>
</interface>
Next comes the dialog subclass.
#include <gtk/gtk.h>

#include "exampleapp.h"
#include "exampleappwin.h"
#include "exampleappprefs.h"

struct _ExampleAppPrefs
{
  GtkDialog parent;

  GSettings *settings;
  GtkWidget *font;
  GtkWidget *transition;
};

G_DEFINE_TYPE (ExampleAppPrefs, example_app_prefs, GTK_TYPE_DIALOG)

static void
example_app_prefs_init (ExampleAppPrefs *prefs)
{
  gtk_widget_init_template (GTK_WIDGET (prefs));
  prefs->settings = g_settings_new ("org.gtk.exampleapp");

  g_settings_bind (prefs->settings, "font",
                   prefs->font, "font",
                   G_SETTINGS_BIND_DEFAULT);
  g_settings_bind (prefs->settings, "transition",
                   prefs->transition, "active-id",
                   G_SETTINGS_BIND_DEFAULT);
}

static void
example_app_prefs_dispose (GObject *object)
{
  ExampleAppPrefs *prefs;

  prefs = EXAMPLE_APP_PREFS (object);

  g_clear_object (&prefs->settings);

  G_OBJECT_CLASS (example_app_prefs_parent_class)->dispose (object);
}

static void
example_app_prefs_class_init (ExampleAppPrefsClass *class)
{
  G_OBJECT_CLASS (class)->dispose = example_app_prefs_dispose;

  gtk_widget_class_set_template_from_resource (GTK_WIDGET_CLASS (class),
                                               "/org/gtk/exampleapp/prefs.ui");
  gtk_widget_class_bind_template_child (GTK_WIDGET_CLASS (class), ExampleAppPrefs, font);
  gtk_widget_class_bind_template_child (GTK_WIDGET_CLASS (class), ExampleAppPrefs, transition);
}

ExampleAppPrefs *
example_app_prefs_new (ExampleAppWindow *win)
{
  return g_object_new (EXAMPLE_APP_PREFS_TYPE, "transient-for", win, "use-header-bar", TRUE, NULL);
}
Now we revisit the preferences_activated() function in our application
class, and make it open a new preference dialog.
...

static void
preferences_activated (GSimpleAction *action,
                       GVariant      *parameter,
                       gpointer       app)
{
  ExampleAppPrefs *prefs;
  GtkWindow *win;

  win = gtk_application_get_active_window (GTK_APPLICATION (app));
  prefs = example_app_prefs_new (EXAMPLE_APP_WINDOW (win));
  gtk_window_present (GTK_WINDOW (prefs));
}

...
(full source)
After all this work, our application can now show a preference dialog
like this:
Adding a search bar
We continue to flesh out the functionality of our application. For now, we
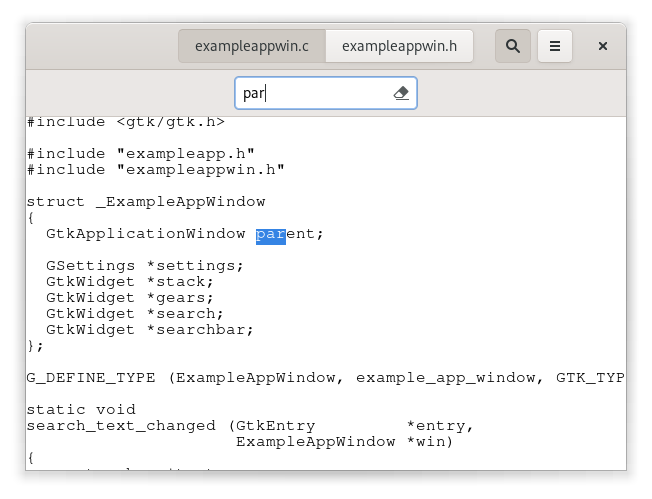
add search. GTK supports this with GtkSearchEntry and
GtkSearchBar. The search bar is a widget that can slide in from the
top to present a search entry.
We add a toggle button to the header bar, which can be used to slide out
the search bar below the header bar.
<?xml version="1.0" encoding="UTF-8"?>
<interface>
  <template class="ExampleAppWindow" parent="GtkApplicationWindow">
    <property name="title" translatable="yes">Example Application</property>
    <property name="default-width">600</property>
    <property name="default-height">400</property>
    <child type="titlebar">
      <object class="GtkHeaderBar" id="header">
        <child type="title">
          <object class="GtkStackSwitcher" id="tabs">
            <property name="stack">stack</property>
          </object>
        </child>
        <child type="end">
          <object class="GtkMenuButton" id="gears">
            <property name="direction">none</property>
          </object>
        </child>
        <child type="end">
          <object class="GtkToggleButton" id="search">
            <property name="sensitive">0</property>
            <property name="icon-name">edit-find-symbolic</property>
          </object>
        </child>
      </object>
    </child>
    <child>
      <object class="GtkBox" id="content_box">
        <property name="orientation">vertical</property>
        <child>
          <object class="GtkSearchBar" id="searchbar">
            <child>
              <object class="GtkSearchEntry" id="searchentry">
                <signal name="search-changed" handler="search_text_changed"/>
              </object>
            </child>
          </object>
        </child>
        <child>
          <object class="GtkStack" id="stack">
            <signal name="notify::visible-child" handler="visible_child_changed"/>
          </object>
        </child>
      </object>
    </child>
  </template>
</interface>
Implementing the search needs quite a few code changes that we are not
going to completely go over here. The central piece of the search
implementation is a signal handler that listens for text changes in
the search entry.
...

static void
search_text_changed (GtkEntry         *entry,
                     ExampleAppWindow *win)
{
  const char *text;
  GtkWidget *tab;
  GtkWidget *view;
  GtkTextBuffer *buffer;
  GtkTextIter start, match_start, match_end;

  text = gtk_editable_get_text (GTK_EDITABLE (entry));

  if (text[0] == '')
    return;

  tab = gtk_stack_get_visible_child (GTK_STACK (win->stack));
  view = gtk_scrolled_window_get_child (GTK_SCROLLED_WINDOW (tab));
  buffer = gtk_text_view_get_buffer (GTK_TEXT_VIEW (view));

  /* Very simple-minded search implementation */
  gtk_text_buffer_get_start_iter (buffer, &start);
  if (gtk_text_iter_forward_search (&start, text, GTK_TEXT_SEARCH_CASE_INSENSITIVE,
                                    &match_start, &match_end, NULL))
    {
      gtk_text_buffer_select_range (buffer, &match_start, &match_end);
      gtk_text_view_scroll_to_iter (GTK_TEXT_VIEW (view), &match_start,
                                    0.0, FALSE, 0.0, 0.0);
    }
}

static void
example_app_window_init (ExampleAppWindow *win)
{

...

  gtk_widget_class_bind_template_callback (GTK_WIDGET_CLASS (class), search_text_changed);

...

}

...
(full source)
With the search bar, our application now looks like this:
Adding a side bar
As another piece of functionality, we are adding a sidebar, which demonstrates
GtkMenuButton, GtkRevealer and GtkListBox.
<?xml version="1.0" encoding="UTF-8"?>
<interface>
  <template class="ExampleAppWindow" parent="GtkApplicationWindow">
    <property name="title" translatable="yes">Example Application</property>
    <property name="default-width">600</property>
    <property name="default-height">400</property>
    <child type="titlebar">
      <object class="GtkHeaderBar" id="header">
        <child type="title">
          <object class="GtkStackSwitcher" id="tabs">
            <property name="stack">stack</property>
          </object>
        </child>
        <child type="end">
          <object class="GtkToggleButton" id="search">
            <property name="sensitive">0</property>
            <property name="icon-name">edit-find-symbolic</property>
          </object>
        </child>
        <child type="end">
          <object class="GtkMenuButton" id="gears">
            <property name="direction">none</property>
          </object>
        </child>
      </object>
    </child>
    <child>
      <object class="GtkBox" id="content_box">
        <property name="orientation">vertical</property>
        <child>
          <object class="GtkSearchBar" id="searchbar">
            <child>
              <object class="GtkSearchEntry" id="searchentry">
                <signal name="search-changed" handler="search_text_changed"/>
              </object>
            </child>
          </object>
        </child>
        <child>
          <object class="GtkBox" id="hbox">
            <child>
              <object class="GtkRevealer" id="sidebar">
                <property name="transition-type">slide-right</property>
                <child>
                  <object class="GtkScrolledWindow" id="sidebar-sw">
                    <property name="hscrollbar-policy">never</property>
                    <child>
                      <object class="GtkListBox" id="words">
                        <property name="selection-mode">none</property>
                      </object>
                    </child>
                  </object>
                </child>
              </object>
            </child>
            <child>
              <object class="GtkStack" id="stack">
                <signal name="notify::visible-child" handler="visible_child_changed"/>
              </object>
            </child>
          </object>
        </child>
      </object>
    </child>
  </template>
</interface>
The code to populate the sidebar with buttons for the words found in each
file is a little too involved to go into here. But we’ll look at the code
to add a checkbutton for the new feature to the menu.
<?xml version="1.0" encoding="UTF-8"?>
<interface>
  <menu id="menu">
    <section>
      <item>
        <attribute name="label" translatable="yes">_Words</attribute>
        <attribute name="action">win.show-words</attribute>
      </item>
      <item>
        <attribute name="label" translatable="yes">_Preferences</attribute>
        <attribute name="action">app.preferences</attribute>
      </item>
    </section>
    <section>
      <item>
        <attribute name="label" translatable="yes">_Quit</attribute>
        <attribute name="action">app.quit</attribute>
      </item>
    </section>
  </menu>
</interface>
To connect the menuitem to the show-words setting, we use
a GAction corresponding to the given GSettings key.
...

static void
example_app_window_init (ExampleAppWindow *win)
{

...

  builder = gtk_builder_new_from_resource ("/org/gtk/exampleapp/gears-menu.ui");
  menu = G_MENU_MODEL (gtk_builder_get_object (builder, "menu"));
  gtk_menu_button_set_menu_model (GTK_MENU_BUTTON (priv->gears), menu);
  g_object_unref (builder);

  action = g_settings_create_action (priv->settings, "show-words");
  g_action_map_add_action (G_ACTION_MAP (win), action);
  g_object_unref (action);
}

...
(full source)
What our application looks like now:

Properties
Widgets and other objects have many useful properties.
Here we show some ways to use them in new and flexible ways, by wrapping
them in actions with GPropertyAction or by binding them with
GBinding.
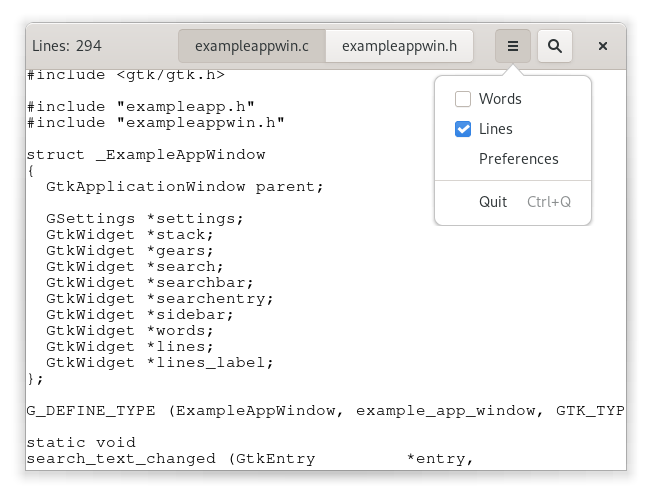
To set this up, we add two labels to the header bar in our window template,
named lines_label and lines, and bind them to struct members in the
private struct, as we’ve seen a couple of times by now.
We add a new “Lines” menu item to the gears menu, which triggers the
show-lines action:
<?xml version="1.0" encoding="UTF-8"?>
<interface>
  <menu id="menu">
    <section>
      <item>
        <attribute name="label" translatable="yes">_Words</attribute>
        <attribute name="action">win.show-words</attribute>
      </item>
      <item>
        <attribute name="label" translatable="yes">_Lines</attribute>
        <attribute name="action">win.show-lines</attribute>
      </item>
      <item>
        <attribute name="label" translatable="yes">_Preferences</attribute>
        <attribute name="action">app.preferences</attribute>
      </item>
    </section>
    <section>
      <item>
        <attribute name="label" translatable="yes">_Quit</attribute>
        <attribute name="action">app.quit</attribute>
      </item>
    </section>
  </menu>
</interface>
To make this menu item do something, we create a property action for the
visible property of the lines label, and add it to the actions of the
window. The effect of this is that the visibility of the label gets toggled
every time the action is activated.
Since we want both labels to appear and disappear together, we bind
the visible property of the lines_label widget to the same property
of the lines widget.
...

static void
example_app_window_init (ExampleAppWindow *win)
{
  ...

  action = (GAction*) g_property_action_new ("show-lines", win->lines, "visible");
  g_action_map_add_action (G_ACTION_MAP (win), action);
  g_object_unref (action);

  g_object_bind_property (win->lines, "visible",
                          win->lines_label, "visible",
                          G_BINDING_DEFAULT);
}

...
(full source)
We also need a function that counts the lines of the currently active tab,
and updates the lines label. See the full source
if you are interested in the details.
This brings our example application to this appearance:
Browse Topics
Get set with the topic of your choice and explore the documentation.
Getting Started
Get started now by building a Hello World app and playing around it.
Dev Tools
Learn how to setup your development environment with GTK recommended tools.
Language Bindings
Learn to integrate your favorite programming language with GTK through bindings.
API References
Dig deep into the API references for GTK3 and GTK4.
Architecture
Learn about the sub modules the GTK has been built upon.
Installations
Figure out how to install GTK on different platforms.
- I. Introduction
-
- Начало работы с GTK
-
- Basics
- Hello, World
-
- Hello World на языке C
- Packing
-
- Packing buttons
- Custom Drawing
-
- Рисование в ответ на ввод
- Построение пользовательских интерфейсов
-
- Упаковка кнопок с помощью GtkBuilder
- Building applications
-
- Тривиальное применение
- Заполнение окна
- Opening files
- A menu
- Диалоговое окно предпочтений
- Добавление строки поиска
- Добавление боковой панели
- Properties
- Контактная информация и сообщения об ошибках
-
- Открытие запроса об ошибке или функции
- Работа над GTK
- Common Questions
-
- General Questions
- Какой виджет я должен использовать…
- Вопросы о GtkWidget
- GtkTextView questions
- GtkTreeView questions
- Использование cairo с GTK
- II.Концепции GTK
-
- Обзор модели чертежа
-
- Окна и события
- Кадровые часы
- Граф сцены
- Hierarchical drawing
- Обзор ввода и обработки событий в GTK
-
- Устройства и события
- Event propagation
- Keyboard input
- Контроллеры событий и жесты
- Gesture states
- Обзор действий в GTK
-
- Основы действий
- Состояние и параметры действия
- Action scopes
- Группы действий и карты действий
- Подключение действий к виджетам
- Activation
- Built-in Actions
- III.Виджеты и объекты GTK
-
- Object Hierarchy
- Widget Gallery
- GListModel support
-
- GtkBitset — Наборы целых чисел
- GtkExpression — Выражения к значениям
- GtkFilterListModel — модель списка, которая фильтрует свои элементы
-
- GtkFilter — Фильтрация элементов
- GtkCustomFilter — Фильтрация с обратными вызовами
- GtkMultiFilter — Объединение нескольких фильтров
- GtkBoolFilter — Фильтрация по логическим выражениям
- GtkStringFilter — Фильтрация по строкам
- GtkFileFilter — Фильтрация файлов
- GtkFlattenListModel — Модель списка, которая сглаживает список списков.
- GtkMapListModel — Модель списка, которая преобразует свои элементы
- GtkSliceListModel — Модель списка, представляющая срез из большего списка.
- GtkSortListModel — модель списка, которая сортирует элементы
-
- GtkSorter — Сортировка элементов
- GtkCustomSorter — Сортировка с обратными вызовами
- GtkMultiSorter — Объединение нескольких сортировщиков
- GtkStringSorter — Сортировка путем сравнения строк
- GtkNumericSorter — Сортировка путем сравнения чисел
- GtkSelectionModel — Расширение интерфейса модели списка, которое обрабатывает выборки.
-
- GtkNoSelection — Модель выбора, которая не позволяет выбирать что-либо
- GtkSingleSelection — Модель выбора, позволяющая выбрать один элемент.
- GtkMultiSelection — Модель выбора, позволяющая выбирать несколько элементов.
- GtkSelectionFilterModel — Модель списка, которая превращает выбор в модель
- GtkBookmarkList — Модель списка недавно использованных файлов
- GtkDirectoryList — Модель списка для списков каталогов
- GtkStringList — Модель списка для строк
- List-based Widgets
-
- Список Обзор виджетов
-
- Terminology
- За кулисами
- Выбор правильной модели
- Displaying trees
- List styles
- Сравнение с GtkTreeView
- GtkListItem — Объект, используемый для представления элементов модели списка
- GtkListItemFactory — Сопоставление элементов списка с виджетами
-
- GtkSignalListItemFactory — Фабрика элементов списка, предоставляющая сигналы
- GtkBuilderListItemFactory — Фабрика элементов списка с использованием файлов пользовательского интерфейса
- GtkListView — Виджет для отображения списков
- GtkGridView — Виджет для отображения сетки
- GtkColumnView — виджет для отображения списков в нескольких столбцах
-
- GtkColumnViewColumn — столбец, добавленный в GtkColumnView
- GtkDropDown — выбрать элемент из списка
- Tree support
-
- GtkTreeListModel — модель списка, которая может создавать дочерние модели по запросу.
-
- GtkTreeListRow — Строка в GtkTreeListModel
- GtkTreeListRowSorter — Сортировка деревьев по уровням
- GtkTreeExpander — кнопка расширения отступа для использования в древовидном списке
- Application support
-
- GtkApplication — Класс приложения
- GtkApplicationWindow — подкласс GtkWindow с поддержкой GtkApplication.
- GtkActionable — интерфейс для виджетов, которые можно связать с действиями.
- Interface builder
-
- GtkBuilder — Создание интерфейса из XML-определения пользовательского интерфейса.
- GtkBuildable — Интерфейс для объектов, которые могут быть созданы с помощью GtkBuilder.
- GtkBuilderScope — привязки для GtkBuilder
- Windows
-
- GtkRoot — Интерфейс для корневых виджетов
- GtkNative — интерфейс для виджетов с поверхностями
- GtkWindow — Верхний уровень, который может содержать другие виджеты.
- GtkDialog — Создание всплывающих окон
- GtkMessageDialog — Удобное окно сообщений
- GtkAboutDialog — Показать информацию о приложении
- GtkAssistant — виджет, используемый для помощи пользователям в многоэтапных операциях.
- GtkWindowGroup — Ограничение эффекта захватов
- GtkNativeDialog — интеграция с нативными диалогами
- Layout Containers
-
- GtkBox — контейнер для упаковки виджетов в одну строку или столбец.
- GtkCenterBox — Центрирующий контейнер
- GtkGrid — упаковка виджетов в строки и столбцы
- GtkRevealer — Скрыть и показать с анимацией
- GtkListBox — Контейнер списка
- GtkFlowBox — контейнер, который позволяет перекомпоновывать свои дочерние элементы.
- GtkStack — стекирующий контейнер
- GtkStackSwitcher — контроллер для GtkStack
- GtkStackSidebar — автоматический виджет боковой панели
- GtkActionBar — полоса полной ширины для представления контекстных действий.
- GtkHeaderBar — Блок с дочерним элементом по центру
- GtkOverlay — Контейнер, который накладывает виджеты друг на друга.
- GtkPaned — виджет с двумя настраиваемыми панелями.
- GtkNotebook — Контейнер блокнота с вкладками
- GtkExpander — Контейнер, который может скрывать дочерний элемент
- GtkOrientable — интерфейс для переворачиваемых виджетов
- GtkAspectFrame — Кадр, который ограничивает дочерний элемент определенным соотношением сторон.
- GtkFixed — контейнер, позволяющий размещать виджеты в фиксированных координатах.
- Layout Managers
-
- GtkLayoutManager — Базовый класс для менеджера компоновки
- GtkLayoutChild — объект, содержащий свойства макета
- GtkBinLayout — Менеджер компоновки для корзиноподобных виджетов
- GtkBoxLayout — менеджер компоновки для размещения всех дочерних элементов в одной строке или столбце
- GtkCenterLayout — Центрирующий макет
- GtkFixedLayout — менеджер компоновки, который позволяет позиционировать в фиксированных координатах.
- GtkGridLayout — Менеджер компоновки для виджетов в виде сетки
- GtkOverlayLayout — менеджер компоновки, который размещает виджеты как наложения
- GtkCustomLayout — Удобный менеджер компоновки
- GtkConstraintLayout — Менеджер компоновки, использующий ограничения
- GtkConstraint — Описание ограничения
- GtkConstraintGuide — Невидимая цель ограничения
- Display Widgets
-
- GtkLabel — виджет, отображающий небольшое или среднее количество текста.
- GtkImage — виджет, отображающий изображение
- GtkPicture — виджет, отображающий GdkPaintable
- GtkSpinner — Показать анимацию спиннера
- GtkInfoBar — Сообщать пользователю о важных сообщениях
- GtkProgressBar — виджет, визуально отображающий прогресс
- GtkLevelBar — бар, который можно использовать как индикатор уровня
- GtkStatusbar — Сообщать о сообщениях второстепенной важности для пользователя
- GtkCalendar — отображает календарь и позволяет пользователю выбрать дату
- Media Support
-
- GtkVideo — виджет для отображения видео
- GtkMediaControls — виджет, показывающий элементы управления медиапотоком
- GtkMediaStream — Показать медиа в GTK
- GtkMediaFile — открывает медиафайлы для использования в GTK
- Кнопки и переключатели
-
- GtkButton — виджет, который излучает сигнал при нажатии.
- GtkCheckButton — Создание виджетов с отдельной кнопкой-переключателем
- GtkToggleButton — Создает кнопки, которые сохраняют свое состояние
- GtkLinkButton — Создание кнопок, привязанных к URL
- GtkMenuButton — виджет, который показывает всплывающее окно при нажатии.
- GtkSwitch — переключатель в стиле «выключатель света».
- GtkScaleButton — Кнопка, которая вызывает шкалу
- GtkVolumeButton — Кнопка, которая вызывает регулятор громкости.
- GtkLockButton — виджет для разблокировки или блокировки привилегированных операций.
- Ввод числовых и текстовых данных
-
- GtkEditable — Интерфейс для виджетов редактирования текста
- GtkEntryBuffer — Текстовый буфер для GtkEntry
- GtkText — Простое однострочное поле ввода текста
- GtkEntry — однострочное поле ввода текста
- GtkEntryCompletion — Функция завершения для GtkEntry
- GtkPasswordEntry — Запись секретов
- GtkScale — Ползунок для выбора значения из диапазона
- GtkSpinButton — Получить целое число или число с плавающей запятой от пользователя
- GtkSearchEntry — запись со значком поиска
- GtkSearchBar — панель инструментов для интеграции записи поиска с
- GtkEditableLabel — метка, которую можно редактировать
- Многострочный текстовый редактор
-
- Обзор текстового виджета
-
- Simple Example
- Пример изменения атрибутов текста
- GtkTextIter — Итератор текстового буфера
- GtkTextMark — позиция в буфере, сохраняемая при изменениях буфера.
- GtkTextBuffer — Сохраняет атрибутированный текст для отображения в GtkTextView
- GtkTextTag — Тег, который можно применить к тексту в GtkTextBuffer.
- GtkTextTagTable — Коллекция тегов, которые можно использовать вместе
- GtkTextView — Виджет, отображающий GtkTextBuffer
- Виджеты сетки деревьев,списков и иконок
-
- Обзор виджета «Дерево и список
-
- Создание модели
- Создание компонента представления
- Колонки и рендеринг ячеек
- Selection handling
- Simple Example
- GtkTreeModel — древовидный интерфейс, используемый GtkTreeView
- GtkTreeSelection — Объект выбора для GtkTreeView
- GtkTreeViewColumn — видимый столбец в виджете GtkTreeView
- GtkTreeView — виджет для отображения как деревьев, так и списков
- GtkTreeView drag-and-drop — Интерфейсы для поддержки перетаскивания в GtkTreeView
- GtkCellView — виджет, отображающий одну строку GtkTreeModel.
- GtkIconView — виджет, отображающий список иконок в сетке.
- GtkTreeSortable — Интерфейс для сортируемых моделей, используемый GtkTreeView.
- GtkTreeModelSort — GtkTreeModel, который делает базовую древовидную модель сортируемой.
- GtkTreeModelFilter — GtkTreeModel, который скрывает части базовой модели дерева.
- GtkCellLayout — Интерфейс для упаковки ячеек
- GtkCellArea — абстрактный класс для размещения GtkCellRenderers.
- GtkCellAreaBox — область ячейки, которая отображает GtkCellRenderers в строку или столбец.
- GtkCellAreaContext — сохраняет геометрическую информацию для ряда строк в GtkCellArea.
- GtkCellRenderer — Объект для рендеринга одной ячейки
- GtkCellEditable — Интерфейс для виджетов, которые можно использовать для редактирования ячеек.
- GtkCellRendererAccel — Визуализирует клавиатурный ускоритель в ячейке
- GtkCellRendererCombo — Визуализирует поле со списком в ячейке
- GtkCellRendererPixbuf — Отрисовывает картинку в ячейке
- GtkCellRendererProgress — Визуализирует числа в виде индикаторов выполнения
- GtkCellRendererSpin — Визуализирует кнопку прокрутки в ячейке
- GtkCellRendererText — Визуализирует текст в ячейке
- GtkCellRendererToggle — Визуализирует кнопку-переключатель в ячейке
- GtkCellRendererSpinner — Визуализирует анимацию вращения в ячейке
- GtkListStore — Структура данных, похожая на список, которую можно использовать с GtkTreeView.
- GtkTreeStore — древовидная структура данных, которую можно использовать с GtkTreeView.
- Меню,комбинированный блок
-
- GtkComboBox — виджет, используемый для выбора из списка элементов
- GtkComboBoxText — простое текстовое поле со списком
- GtkPopover — Пузыри, зависящие от контекста
- GtkPopoverMenu — всплывающие окна для использования в качестве меню
- GtkPopoverMenuBar — Строка меню с всплывающими окнами
- GtkDropDown — выбрать элемент из списка
- Виджеты и диалоги селектора
-
- GtkColorChooser — Интерфейс, реализованный виджетами для выбора цвета
- GtkColorButton — Кнопка для запуска диалогового окна выбора цвета
- GtkColorChooserWidget — Виджет для выбора цвета
- GtkColorChooserDialog — Диалог выбора цветов
- GtkFileChooser — Интерфейс выбора файлов, используемый GtkFileChooserWidget и GtkFileChooserDialog
- GtkFileChooserNative — собственный диалог выбора файла, подходящий для команд «Открыть файл» или «Сохранить файл».
- GtkFileChooserDialog — диалоговое окно выбора файла, подходящее для команд «Открыть файл» или «Сохранить файл».
- GtkFileChooserWidget — Виджет выбора файлов
- GtkFontChooser — Интерфейс, реализованный виджетами, отображающими шрифты.
- GtkFontButton — Кнопка для запуска диалогового окна выбора шрифта
- GtkFontChooserWidget — Виджет для выбора шрифтов
- GtkFontChooserDialog — Диалог для выбора шрифтов
- GtkEmojiChooser — всплывающее окно для выбора символа эмодзи
- Виджеты для пользовательского рисования
-
- GtkDrawingArea — Простой виджет для рисования с помощью cairo
- GtkGLArea — виджет для пользовательского рисования с помощью OpenGL.
- Ornaments
-
- GtkFrame — виджет с декоративной рамкой и опциональной меткой.
- GtkSeparator — Виджет-разделитель
- Scrolling
-
- GtkScrollbar — полоса прокрутки
- GtkScrolledWindow — Добавляет полосы прокрутки к своему дочернему виджету
- GtkScrollable — Интерфейс для прокручиваемых виджетов.
- GtkViewport — адаптер, делающий виджеты прокручиваемыми.
- Printing
-
- GtkPrintOperation — высокоуровневый API печати
- GtkPrintContext — Инкапсулирует контекст для страниц рисования
- GtkPrintSettings — сохраняет настройки печати
- GtkPageSetup — сохраняет информацию о настройке страницы
- GtkPaperSize — Поддержка именованных размеров бумаги
- GtkPrinter — представляет принтер
- GtkPrintJob — Представляет задание на печать
- GtkPrintUnixDialog — диалоговое окно печати
- GtkPageSetupUnixDialog — Диалог настройки страницы
- Shortcuts Overview
-
- GtkShortcutsWindow — Верхний уровень, который показывает справку по ярлыкам.
- GtkShortcutsSection — представляет режим приложения в GtkShortcutsWindow.
- GtkShortcutsGroup — представляет группу ярлыков в GtkShortcutsWindow.
- GtkShortcutsShortcut — Представляет сочетание клавиш в GtkShortcutsWindow.
- GtkShortcutLabel — Отображает сочетание клавиш
- Accessibility
-
- GTK Accessibility
-
- Стандартный интерфейс доступности
- Доступные роли и атрибуты
- Правила разработки приложений
- Implementations
- Authoring practices
- Скрытие элементов пользовательского интерфейса из доступного дерева
- Шаблоны проектирования и пользовательские виджеты
- GtkAccessible — Доступный интерфейс
- GtkATContext — объект, взаимодействующий со вспомогательными технологиями.
- Miscellaneous
-
- GtkAdjustment — Представление регулируемого ограниченного значения
- GtkIMContextSimple — Контекст метода ввода, поддерживающий табличные методы ввода.
- GtkIMMulticontext — контекст метода ввода, поддерживающий несколько загружаемых методов ввода.
- GtkSizeGroup — группирует виджеты, чтобы они запрашивали одинаковый размер
- GtkSnapshot — Вспомогательный объект для снимков
- GtkTooltip — Добавляйте подсказки к своим виджетам
- GtkWidgetPaintable — Рисование виджета в другом месте
- GtkWindowControls — Виджет, отображающий оконные кнопки
- GtkWindowHandle — Виджет области заголовка
- Абстрактные базовые классы
-
- GtkWidget — Базовый класс для всех виджетов
- GtkRange — Базовый класс для виджетов, визуализирующих корректировку
- GtkIMContext — Базовый класс для контекстов методов ввода
- GtkNativeDialog — интеграция с нативными диалогами
- GtkAccessible — Доступный интерфейс
- Недавно использованные документы
-
- GtkRecentManager — Управление недавно использованными файлами
- Выбор из установленных приложений
-
- GtkAppChooser — Интерфейс, реализованный виджетами для выбора приложения
- GtkAppChooserButton — Кнопка для запуска диалогового окна выбора приложений.
- GtkAppChooserDialog — диалог выбора приложений
- GtkAppChooserWidget — Виджет выбора приложений, который может быть встроен в другие виджеты.
- Жесты и обработка событий
-
- GtkEventController — Автономный обработчик серии событий
- GtkEventControllerKey — Контроллер событий для ключевых событий
- GtkEventControllerFocus — Контроллер событий для фокуса
- GtkEventControllerLegacy — Контроллер событий для разных событий
- GtkEventControllerScroll — Контроллер событий для событий прокрутки
- GtkEventControllerMotion — Контроллер событий для событий движения
- GtkGesture — Базовый класс для жестов
- GtkGestureSingle — Базовый класс для жестов мыши/в одно касание
- GtkGestureDrag — Жест перетаскивания
- GtkGestureLongPress — жест «Нажать и удерживать»
- GtkGestureClick — Жест многократного нажатия
- GtkGesturePan — жест панорамирования
- GtkGestureSwipe — Жест смахивания
- GtkGestureRotate — жест поворота
- GtkGestureZoom — жест масштабирования
- GtkGestureStylus — Жест для ввода стилусом
- GtkPadController — Контроллер для рисования планшетов
- GtkShortcutController — Контроллер событий для ярлыков
- Keyboard shortcuts
-
- Keyboard Accelerators — Утилиты для акселераторов
- GtkShortcut — объект, описывающий сочетание клавиш
- GtkShortcutTrigger — Триггеры для отслеживания, должны ли быть активированы ярлыки
- GtkShortcutAction — отслеживание необходимости активации ярлыков
- GtkShortcutManager — Интерфейс для управления ярлыками
- Обмен данными,буферы обмена и Drag-and-Drop
-
- GtkDragSource — Контроллер событий, чтобы инициировать операции DND
- GtkDragIcon — Верхний уровень для использования в качестве значка перетаскивания
- GtkDropTarget — Контроллер событий для получения сбросов DND
- GtkDropTargetAsync — Контроллер событий для получения сбросов DND
- GtkDropControllerMotion — Контроллер событий для событий движения во время падения
- IV.Справочник по ядру GTK
-
- Initialization — Инициализация библиотеки и основной цикл
- Информация о версии — переменные и функции для проверки версии GTK.
- Настройки — обмен настройками между приложениями.
- Стандартные перечисления — общедоступные перечисляемые типы, используемые в GTK.
- Тестирование — Утилиты для тестирования приложений GTK.
- Утилиты файловой системы — Функции для работы с GIO
- V.Теминг в GTK
-
- CSS в GTK
-
- CSS nodes
-
- CSS-узлы шкалы GtkScale
- Selectors
-
- Селекторы GTK CSS
- Свойства CSS GTK
-
- Basic types
- Colors
- Images
- Свойства CSS GTK
- GtkStyleContext — Отрисовка элементов пользовательского интерфейса
- GtkCssProvider — CSS-стиль для виджетов
- GtkStyleProvider — Интерфейс для предоставления информации о стиле в GtkStyleContext
- GtkIconTheme — Поиск иконок по имени
- VI.Переход с предыдущих версий GTK
-
- Переход от GTK 2.x к GTK 4
- Переход от GTK 3.x к GTK 4
-
- Подготовка в GTK 3.x
-
- Не используйте устаревшие символы
- Включить диагностические предупреждения
- Не используйте специфические для GTK аргументы командной строки
- Не используйте свойства стиля виджета
- Просмотрите флаги создания окна
- Прекратите использовать прямой доступ к структурам GdkEvent
- Прекратите использовать
gdk_pointer_warp() - Прекратите использовать не-RGBA визуальные эффекты
- Перестаньте использовать дочерние свойства GtkBox padding,fill и expand
- Перестаньте использовать аргумент state в геттерах GtkStyleContext
- Прекратите использовать
gdk_pixbuf_get_from_window()иgdk_cairo_set_source_surface() - Прекратите использовать сигналы событий GtkWidget
- Установите правильный идентификатор приложения
- Прекратите использовать
gtk_main()и связанные API - Уменьшите использование
gtk_widget_destroy() - Сократить использование общих API для контейнеров
- Проанализируйте использование ресурсов иконы
- Изменения,которые необходимо произвести во время переключения
-
- Larger changes
- Прекратите использование GdkScreen
- Прекратите использовать корневое окно
- Прекратите использование GdkVisual
- Прекратите использование GdkDeviceManager
- Адаптация к изменениям API GdkWindow
- Состояние окна «с иконкой» было переименовано в «свернутое»
- Адаптация к изменениям API GdkEvent
- Перестаньте использовать захват
- Адаптация к координации изменений API
- Адаптация к изменениям API GdkKeymap
- Адаптация к изменениям в работе с модификаторами клавиатуры
- Замените GtkClipboard на GdkClipboard.
- Прекратите использовать
gtk_get_current_...API - Преобразование файлов ui
- Адаптироваться к изменениям GtkBuilder API
- Адаптация к изменениям API контроллера событий
- Изменения в работе с фокусом
- Используйте новые apis для клавиатурных сокращений
- Прекратите использовать GtkEventBox
- Прекратите использовать GtkButtonBox
- Адаптация к изменениям API GtkBox
- Адаптация к изменениям API GtkWindow
- Адаптация к изменениям API GtkHeaderBar и GtkActionBar
- Адаптация к изменениям API GtkStack,GtkAssistant и GtkNotebook
- Адаптация к изменениям иерархии классов кнопок
- Адаптация к изменениям API GtkScrolledWindow
- Адаптация к удалению GtkBin
- Адаптация к удалению GtkContainer
- Перестаньте использовать GtkContainer::border-width
- Адаптироваться к удалению
gtk_widget_destroy() - Адаптация к координации изменений API
- Адаптация к изменениям API GtkStyleContext
- Адаптация к изменениям API GtkCssProvider
- Прекратите использовать свойства GtkShadowType и GtkRelief
- Адаптация к изменениям запроса размера GtkWidget
- Адаптация к изменениям в распределении размеров GtkWidget
- Переход на дочерние API GtkWidget
- Не используйте -gtk-gradient в вашем CSS
- Не используйте -gtk-icon-effect в своем CSS
- Не используйте -gtk-icon-theme в своем CSS
- Не используйте -gtk-outline-…-radius в своем CSS
- Адаптация к изменениям модели чертежа
- Прекратите использовать API для запроса GdkSurfaces
- Виджеты теперь видны по умолчанию
- Адаптация к изменениям в анимированном скрытии и показе виджетов
- Прекратите передавать аргументы командной строки в gtk_init
- GdkPixbuf деэмалирован
- Сигналы событий GtkWidget удалены
- Обработка недействительности изменилась
- Перестаньте использовать GtkWidget::draw
- Наблюдение за содержимым окна изменилось
- Работа с монитором изменилась
- Адаптация для отслеживания изменений в API
- Адаптация к изменениям API курсора
- Адаптация к изменениям API размера иконок
- Адаптация к изменениям в API GtkAssistant
- Адаптация к изменениям в API GtkEntry,GtkSearchEntry и GtkSpinButton
- Адаптация к изменениям в API GtkOverlay
- Используйте GtkFixed вместо GtkLayout
- Адаптация к изменениям в поисковой выдаче
- Адаптация к изменениям GtkScale
- Прекратите использовать
gtk_window_activate_default() - Прекратите использовать
gtk_widget_grab_default() - Прекратите устанавливать ::has-default и ::has-focus в .ui файлах
- Перестаньте использовать сигнал GtkWidget::display-changed
- GtkPopover::modal был переименован в autohide
- gtk_widget_get_surface был удален
- gtk_widget_is_toplevel был удален
- gtk_widget_get_toplevel был удален
- GtkEntryBuffer ::deleted-text изменился
- GtkMenu,GtkMenuBar и GtkMenuItem исчезли
- GtkToolbar был удален
- GtkAspectFrame больше не является фреймом
- Прекратите использовать пользовательские окна всплывающих подсказок
- Переход на новый Drag-and-Drop api
- Адаптация к изменениям API GtkIconTheme
- Обновление изменений в API GtkFileChooser
- Прекратите использовать блокирующие диалоговые функции
- Прекратите использовать API GtkBuildable
- Адаптация к изменениям API GtkAboutDialog
- Адаптация к изменениям контекста всплывающей подсказки GtkTreeView и GtkIconView
- Прекратите использовать GtkFileChooserButton
- Адаптироваться к измененным свойствам GtkSettings
- Изменения,которые следует учитывать после перехода
-
- Рассмотрите возможность переноса на новые виджеты списков
- VII.Инструменты GTK
-
- gtk4-demo — Демонстрация виджетов GTK
- gtk4-demo-application — Демонстрация GtkApplication
- gtk4-widget-factory — Демонстрация виджетов GTK
- gtk4-icon-browser — Список тематических иконок
- gtk4-update-icon-cache — Утилита кэширования тем значков
- gtk4-encode-symbolic-svg — Утилита преобразования символических иконок
- gtk4-builder-tool — файловая утилита GtkBuilder
- gtk4-launch — Запустить приложение
- gtk4-query-settings — Утилита для печати имени и значения всех свойств GtkSettings.
- gtk4-broadwayd — сервер отображения Broadway
- VIII.Поддержка платформ GTK
-
- Компиляция библиотек GTK
-
- Building GTK
- Build types
-
- Debug builds
- Release builds
- Dependencies
- Сборка и тестирование GTK
- Дополнительные параметры конфигурации
-
x11-backend,win32-backend,broadway-backend,wayland-backendиmacos-backendvulkanxineramamediaprintcloudproviderssysproftrackercolordgtk_docи справочныеman-pagesintrospectionbuild-tests,install-tests,demos
- Компиляция приложений GTK на UNIX
- Запуск и отладка приложений GTK
-
- Environment variables
-
- GTK_DEBUG
- GTK_PATH
- GTK_IM_MODULE
- GTK_MEDIA
- GTK_EXE_PREFIX
- GTK_DATA_PREFIX
- GTK_THEME
- GDK_PIXBUF_MODULE_FILE
- GDK_DEBUG
- GSK_DEBUG
- GDK_BACKEND
- GDK_VULKAN_DEVICE
- GSK_RENDERER
- GTK_CSD
- GTK_A11Y
- XDG_DTA_HOME, XDG_DATA_DIRS
- DESKTOP_STARTUP_ID
- Interactive debugging
- Profiling
- GTK для X Window System
-
- Переменные среды,специфичные для X11
-
- GDK_SYNCHRONIZE
- GDK_SCALE
- Понимание архитектуры X11
-
- Сервер,клиент,оконный менеджер
- Использование GTK в Windows
-
- Переменные среды,специфичные для Windows
-
- GDK_IGNORE_WINTAB
- GDK_USE_WINTAB
- Работа с курсорами,специфичная для Windows
- Использование GTK на Apple macOS
- Использование GTK с Broadway
-
- Переменные среды,специфичные для Бродвея
-
- BROADWAY_DISPLAY
- Использование GTK с Wayland
-
- Переменные среды,специфичные для Wayland
-
- WAYLAND_DISPLAY
- XDG_RUNTIME_DIR
- Указатель всех символов
- Annotation Glossary
GTK
4.0
-
Accessibility
-
Application development rules
-
Overview of actions in GTK
-
Build types
GTK is a widget toolkit. Each user interface created by GTK consists of
widgets. This is implemented in C using GObject, an object-oriented
framework for C. Widgets are organized in a hierachy. The window widget is
the main container. The user interface is then built by adding buttons,
drop-down menus, input fields, and other widgets to the window. If you are
creating complex user interfaces it is recommended to use GtkBuilder and its
GTK-specific markup description language, instead of assembling the
interface manually. You can also use a visual user interface editor, like Glade.
GTK is event-driven. The toolkit listens for events such as a click on a
button, and passes the event to your application.
This chapter contains some tutorial information to get you started with GTK
programming. It assumes that you have GTK, its dependencies and a C compiler
installed and ready to use. If you need to build GTK itself first, refer to
the Compiling the GTK libraries section in this reference.
Basics
To begin our introduction to GTK, we’ll start with a simple signal-based Gtk
application. This program will create an empty 200×200 pixel window.
Save the following code as a file named example-0.c:
#include <gtk/gtk.h>

static void
activate (GtkApplication* app,
          gpointer        user_data)
{
  GtkWidget *window;

  window = gtk_application_window_new (app);
  gtk_window_set_title (GTK_WINDOW (window), "Window");
  gtk_window_set_default_size (GTK_WINDOW (window), 200, 200);
  gtk_widget_show_all (window);
}

int
main (int    argc,
      char **argv)
{
  GtkApplication *app;
  int status;

  app = gtk_application_new ("org.gtk.example", G_APPLICATION_FLAGS_NONE);
  g_signal_connect (app, "activate", G_CALLBACK (activate), NULL);
  status = g_application_run (G_APPLICATION (app), argc, argv);
  g_object_unref (app);

  return status;
}
You can compile the program above with GCC using:
gcc `pkg-config --cflags gtk+-3.0` -o example-0 example-0.c `pkg-config --libs gtk+-3.0`

For more information on how to compile a GTK application, please refer to
the Compiling GTK Applications section.
All GTK applications must include the gtk/gtk.h header, which declares
functions, types and macros required by GTK applications. Even if GTK
installs multiple header files, only the top level gtk/gtk.h header can be
directly included by third party code. The compiler will abort with an error
if any other header is directly included.
In a GTK application, the purpose of the main() function is to create a
GtkApplication object and run it. In this example a
GtkApplication pointer named app is called and then initialized using
gtk_application_new().
When creating a GtkApplication you need to pick an application identifier
(a name) and input to gtk_application_new() as parameter. For this example
org.gtk.example is used but for choosing an identifier for your
application see the corresponding tutorial on the GNOME developer
documentation website.
Lastly gtk_application_new() takes a GApplicationFlags as input
for your application, if your application would have special needs.
Next the GApplication::activate signal is connected to the
activate() function defined above the main() function. The activate
signal will be sent when your application is launched with
g_application_run() on the line below. The g_application_run()
function also takes as arguments the pointers to the command line arguments
counter and string array; this allows GTK to parse specific command line
arguments that control the behavior of GTK itself.
Within g_application_run(), the activate signal is emitted and we then
proceed into the activate() function of the application. Inside the
activate() function we want to construct our GTK window, so that a window
is shown when the application is launched. The call to
gtk_application_window_new() will create a new GtkWindow and
store it inside the window pointer. The window will have a frame, a title
bar, and window controls depending on the platform.
A window title is set using gtk_window_set_title(). This function
takes a GtkWindow pointer and a string as input. As our window pointer is
a GtkWidget pointer, we need to cast it to GtkWindow. But instead of
casting window via the typical C cast (GtkWindow *), window can be cast
using the macro GTK_WINDOW(). GTK_WINDOW() will check if the pointer is
an instance of the GtkWindow class, before casting, and emit a warning if
the check fails. More information about this convention can be found in the
GObject documentation.
Finally the window size is set using gtk_window_set_default_size()
and the window is then shown by GTK via gtk_widget_show_all().
When you exit the window, by for example pressing the X, the
g_application_run() function returns with a number which is saved inside
an integer named status. Afterwards, the GtkApplication object is freed
from memory with g_object_unref(). Finally the status integer
is returned and the GTK application exits.
While the program is running, GTK is receiving events. These are typically
input events caused by the user interacting with your program, but also
things like messages from the window manager or other applications. GTK
processes these and as a result, signals may be emitted on your widgets.
Connecting handlers for these signals is how you normally make your program
do something in response to user input.
The following example is slightly more complex, and tries to showcase some
of the capabilities of GTK.
In the long tradition of programming languages and libraries, it is called
Hello, World.
Save the following code as a file named example-1.c:
#include <gtk/gtk.h>

static void
print_hello (GtkWidget *widget,
             gpointer   data)
{
  g_print ("Hello Worldn");
}

static void
activate (GtkApplication *app,
          gpointer        user_data)
{
  GtkWidget *window;
  GtkWidget *button;
  GtkWidget *button_box;

  window = gtk_application_window_new (app);
  gtk_window_set_title (GTK_WINDOW (window), "Window");
  gtk_window_set_default_size (GTK_WINDOW (window), 200, 200);

  button_box = gtk_button_box_new (GTK_ORIENTATION_HORIZONTAL);
  gtk_container_add (GTK_CONTAINER (window), button_box);

  button = gtk_button_new_with_label ("Hello World");
  g_signal_connect (button, "clicked", G_CALLBACK (print_hello), NULL);
  g_signal_connect_swapped (button, "clicked", G_CALLBACK (gtk_widget_destroy), window);
  gtk_container_add (GTK_CONTAINER (button_box), button);

  gtk_widget_show_all (window);
}

int
main (int    argc,
      char **argv)
{
  GtkApplication *app;
  int status;

  app = gtk_application_new ("org.gtk.example", G_APPLICATION_FLAGS_NONE);
  g_signal_connect (app, "activate", G_CALLBACK (activate), NULL);
  status = g_application_run (G_APPLICATION (app), argc, argv);
  g_object_unref (app);

  return status;
}
You can compile the program above with GCC using:
gcc `pkg-config --cflags gtk+-3.0` -o example-1 example-1.c `pkg-config --libs gtk+-3.0`
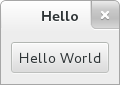
As seen above, example-1.c builds further upon example-0.c by adding a
button to our window, with the label “Hello World”. Two new GtkWidget
pointers are declared to accomplish this, button and button_box. The
button_box variable is created to store a GtkButtonBox which is
GTK’s way of controlling the size and layout of buttons. The GtkButtonBox
is created and assigned to gtk_button_box_new() which takes a
GtkOrientation enumeration as parameter. The buttons which this box
will contain can either be stored horizontally or vertically but this does
not matter in this particular case as we are dealing with only one button.
After initializing button_box with horizontal orientation, the code adds
the button_box widget to the window widget using
gtk_container_add().
Next the button variable is initialized in similar manner.
gtk_button_new_with_label() is called which returns a
GtkButton to be stored inside button. Afterwards button is
added to our button_box. Using g_signal_connect() the button
is connected to a function in our app called print_hello(), so that when
the button is clicked, GTK will call this function. As the print_hello()
function does not use any data as input, NULL is passed to it.
print_hello() calls g_print() with the string “Hello World” which will
print Hello World in a terminal if the GTK application was started from one.
After connecting print_hello(), another signal is connected to the
clicked signal of the button using
g_signal_connect_swapped(). This functions is similar to
g_signal_connect() with the difference lying in how the callback function
is treated. g_signal_connect_swapped() allows you to specify what the
callback function should take as parameter by letting you pass it as data.
In this case the function being called back is gtk_widget_destroy() and
the window pointer is passed to it. This has the effect that when the button
is clicked, the whole GTK window is destroyed. In contrast, if a normal
g_signal_connect() were used to connect the clicked signal with
gtk_widget_destroy(), then the button itself would have been destroyed,
not the window.
The rest of the code in example-1.c is identical to example-0.c.
The next section will elaborate further on how to add several widgets to
your GTK application.
Packing
When creating an application, you’ll want to put more than one widget inside
a window. When you want to put more than one widget into a window, it
becomes important to control how each widget is positioned and sized. This
is where packing comes in.
GTK comes with a large variety of layout containers whose purpose it is to
control the layout of the child widgets that are added to them.
The following example shows how the GtkGrid container lets you
arrange several buttons.
Save the following code as a file named example-2.c:
#include <gtk/gtk.h>

static void
print_hello (GtkWidget *widget,
             gpointer   data)
{
  g_print ("Hello Worldn");
}

static void
activate (GtkApplication *app,
          gpointer        user_data)
{
  GtkWidget *window;
  GtkWidget *grid;
  GtkWidget *button;

  /* create a new window, and set its title */
  window = gtk_application_window_new (app);
  gtk_window_set_title (GTK_WINDOW (window), "Window");
  gtk_container_set_border_width (GTK_CONTAINER (window), 10);

  /* Here we construct the container that is going pack our buttons */
  grid = gtk_grid_new ();

  /* Pack the container in the window */
  gtk_container_add (GTK_CONTAINER (window), grid);

  button = gtk_button_new_with_label ("Button 1");
  g_signal_connect (button, "clicked", G_CALLBACK (print_hello), NULL);

  /* Place the first button in the grid cell (0, 0), and make it fill
   * just 1 cell horizontally and vertically (ie no spanning)
   */
  gtk_grid_attach (GTK_GRID (grid), button, 0, 0, 1, 1);

  button = gtk_button_new_with_label ("Button 2");
  g_signal_connect (button, "clicked", G_CALLBACK (print_hello), NULL);

  /* Place the second button in the grid cell (1, 0), and make it fill
   * just 1 cell horizontally and vertically (ie no spanning)
   */
  gtk_grid_attach (GTK_GRID (grid), button, 1, 0, 1, 1);

  button = gtk_button_new_with_label ("Quit");
  g_signal_connect_swapped (button, "clicked", G_CALLBACK (gtk_widget_destroy), window);

  /* Place the Quit button in the grid cell (0, 1), and make it
   * span 2 columns.
   */
  gtk_grid_attach (GTK_GRID (grid), button, 0, 1, 2, 1);

  /* Now that we are done packing our widgets, we show them all
   * in one go, by calling gtk_widget_show_all() on the window.
   * This call recursively calls gtk_widget_show() on all widgets
   * that are contained in the window, directly or indirectly.
   */
  gtk_widget_show_all (window);

}

int
main (int    argc,
      char **argv)
{
  GtkApplication *app;
  int status;

  app = gtk_application_new ("org.gtk.example", G_APPLICATION_FLAGS_NONE);
  g_signal_connect (app, "activate", G_CALLBACK (activate), NULL);
  status = g_application_run (G_APPLICATION (app), argc, argv);
  g_object_unref (app);

  return status;
}
You can compile the program above with GCC using:
gcc `pkg-config --cflags gtk+-3.0` -o example-2 example-2.c `pkg-config --libs gtk+-3.0`
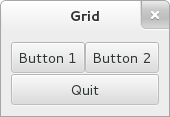
Building user interfaces
When constructing a more complicated user interface, with dozens or hundreds
of widgets, doing all the setup work in C code is cumbersome, and making
changes becomes next to impossible.
Thankfully, GTK supports the separation of user interface layout from your
business logic, by using UI descriptions in an XML format that can be parsed
by the GtkBuilder class.
Save the following XML as a file named builder.ui:
<interface>
  <object id="window" class="GtkWindow">
    <property name="visible">True</property>
    <property name="title">Grid</property>
    <property name="border-width">10</property>
    <child>
      <object id="grid" class="GtkGrid">
        <property name="visible">True</property>
        <child>
          <object id="button1" class="GtkButton">
            <property name="visible">True</property>
            <property name="label">Button 1</property>
          </object>
          <packing>
            <property name="left-attach">0</property>
            <property name="top-attach">0</property>
          </packing>
        </child>
        <child>
          <object id="button2" class="GtkButton">
            <property name="visible">True</property>
            <property name="label">Button 2</property>
          </object>
          <packing>
            <property name="left-attach">1</property>
            <property name="top-attach">0</property>
          </packing>
        </child>
        <child>
          <object id="quit" class="GtkButton">
            <property name="visible">True</property>
            <property name="label">Quit</property>
          </object>
          <packing>
            <property name="left-attach">0</property>
            <property name="top-attach">1</property>
            <property name="width">2</property>
          </packing>
        </child>
      </object>
      <packing>
      </packing>
    </child>
  </object>
</interface>
Save the following code as a file named example-3.c:
#include <gtk/gtk.h>

static void
print_hello (GtkWidget *widget,
             gpointer   data)
{
  g_print ("Hello Worldn");
}

int
main (int   argc,
      char *argv[])
{
  GtkBuilder *builder;
  GObject *window;
  GObject *button;
  GError *error = NULL;

  gtk_init (&argc, &argv);

  /* Construct a GtkBuilder instance and load our UI description */
  builder = gtk_builder_new ();
  if (gtk_builder_add_from_file (builder, "builder.ui", &error) == 0)
    {
      g_printerr ("Error loading file: %sn", error->message);
      g_clear_error (&error);
      return 1;
    }

  /* Connect signal handlers to the constructed widgets. */
  window = gtk_builder_get_object (builder, "window");
  g_signal_connect (window, "destroy", G_CALLBACK (gtk_main_quit), NULL);

  button = gtk_builder_get_object (builder, "button1");
  g_signal_connect (button, "clicked", G_CALLBACK (print_hello), NULL);

  button = gtk_builder_get_object (builder, "button2");
  g_signal_connect (button, "clicked", G_CALLBACK (print_hello), NULL);

  button = gtk_builder_get_object (builder, "quit");
  g_signal_connect (button, "clicked", G_CALLBACK (gtk_main_quit), NULL);

  gtk_main ();

  return 0;
}
You can compile the program above with GCC using:
gcc `pkg-config --cflags gtk+-3.0` -o example-3 example-3.c `pkg-config --libs gtk+-3.0`
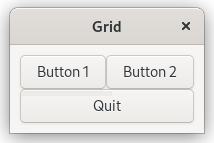
Note that GtkBuilder can also be used to construct objects that are not
widgets, such as tree models, adjustments, etc. That is the reason the
method we use here is called gtk_builder_get_object() and returns a
GObject instead of a GtkWidget.
GtkBuilder will load the file from the current directory; for installed
applications, you can pass a full path to
gtk_builder_add_from_file() to make the execution of your program
independent of the current directory. A common location to install UI
descriptions and similar data is /usr/share/appname, but it will require
installing the file separately from your binary.
It is also possible to embed the UI description in the source code as a
string and use gtk_builder_add_from_string() to load it; keeping
the UI description in a separate file has several advantages: it is then
possible to make minor adjustments to the UI without recompiling your
program, and, more importantly, graphical UI editors such as Glade can load
the file and allow you to create and modify your UI by point-and-click.
It is possible to have the UI description as a separate file during
development, and then embed it in the compiled executable at build time by
using GResource.
Building applications
A GTK application consists of a number of files:
A binary:
The main executable of your application; it typically is installed in the
binaries directory, e.g. /usr/bin.
A desktop file:
The desktop file provides important information about the application to the
desktop shell, such as its name, icon, D-Bus name, command line to launch it,
etc. It is typically installed in /usr/share/applications.
An icon:
The icon gets installed in the “hicolor” icon theme directory, e.g.
/usr/share/icons/hicolor/48x48/apps, where it will be found regardless of
the current icon theme.
A settings schema:
If the application uses GSettings, it will install its schema in
/usr/share/glib-2.0/schemas and run glib-compile-schemas to ensure
that the schema can be used.
Other resources:
Other files, such as GtkBuilder UI definition files, are best loaded from
resources stored in the application binary itself. This eliminates the need
for most of the files that would traditionally be installed in an
application-specific location in /usr/share.
GTK includes application support that is built on top of GApplication. In
this tutorial we’ll build a simple application by starting from scratch,
adding more and more pieces over time. Along the way, we’ll learn about
GtkApplication, templates, resources, application menus, settings,
GtkHeaderBar, GtkStack, GtkSearchBar,
GtkListBox, and more.
The full, buildable sources for these examples can be found in the
examples directory of the GTK source distribution, or online in the GTK
Git repository. You can build each example separately by using make with the
Makefile.example file. For more information, see the README included in
the examples directory.
A trivial application
When using GtkApplication, the main() function can be very simple. We
just call g_application_run() and give it an instance of our application class.
#include <gtk/gtk.h>

#include "exampleapp.h"

int
main (int argc, char *argv[])
{
  return g_application_run (G_APPLICATION (example_app_new ()), argc, argv);
}
All the application logic is in the application class, which is a subclass
of GtkApplication. Our example does not yet have any interesting
functionality. All it does is open a window when it is activated without
arguments, and open the files it is given, if it is started with arguments.
To handle these two cases, we override the activate() virtual function,
which gets called when the application is launched without commandline
arguments; and the open() virtual function, which gets called when the
application is launched with command line arguments.
To learn more about GApplication entry points, consult the GIO documentation.
#include <gtk/gtk.h>

#include "exampleapp.h"
#include "exampleappwin.h"

struct _ExampleApp
{
  GtkApplication parent;
};

G_DEFINE_TYPE(ExampleApp, example_app, GTK_TYPE_APPLICATION);

static void
example_app_init (ExampleApp *app)
{
}

static void
example_app_activate (GApplication *app)
{
  ExampleAppWindow *win;

  win = example_app_window_new (EXAMPLE_APP (app));
  gtk_window_present (GTK_WINDOW (win));
}

static void
example_app_open (GApplication  *app,
                  GFile        **files,
                  gint           n_files,
                  const gchar   *hint)
{
  GList *windows;
  ExampleAppWindow *win;
  int i;

  windows = gtk_application_get_windows (GTK_APPLICATION (app));
  if (windows)
    win = EXAMPLE_APP_WINDOW (windows->data);
  else
    win = example_app_window_new (EXAMPLE_APP (app));

  for (i = 0; i < n_files; i++)
    example_app_window_open (win, files[i]);

  gtk_window_present (GTK_WINDOW (win));
}

static void
example_app_class_init (ExampleAppClass *class)
{
  G_APPLICATION_CLASS (class)->activate = example_app_activate;
  G_APPLICATION_CLASS (class)->open = example_app_open;
}

ExampleApp *
example_app_new (void)
{
  return g_object_new (EXAMPLE_APP_TYPE,
                       "application-id", "org.gtk.exampleapp",
                       "flags", G_APPLICATION_HANDLES_OPEN,
                       NULL);
}
Another important class that is part of the application support in GTK is
GtkApplicationWindow. It is typically subclassed as well. Our subclass
does not do anything yet, so we will just get an empty window.
#include <gtk/gtk.h>

#include "exampleapp.h"
#include "exampleappwin.h"

struct _ExampleAppWindow
{
  GtkApplicationWindow parent;
};

G_DEFINE_TYPE(ExampleAppWindow, example_app_window, GTK_TYPE_APPLICATION_WINDOW);

static void
example_app_window_init (ExampleAppWindow *app)
{
}

static void
example_app_window_class_init (ExampleAppWindowClass *class)
{
}

ExampleAppWindow *
example_app_window_new (ExampleApp *app)
{
  return g_object_new (EXAMPLE_APP_WINDOW_TYPE, "application", app, NULL);
}

void
example_app_window_open (ExampleAppWindow *win,
                         GFile            *file)
{
}
As part of the initial setup of our application, we also create an icon and
a desktop file:

[Desktop Entry]
Type=Application
Name=Example
Icon=exampleapp
StartupNotify=true
Exec=@bindir@/exampleapp
Note that `bindir@` needs to be replaced with the actual path to the binary
before this desktop file can be used.
Here is what we’ve achieved so far:
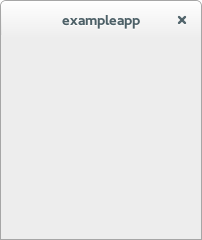
This does not look very impressive yet, but our application is already
presenting itself on the session bus, it has single-instance semantics, and
it accepts files as commandline arguments.
Populating the window
In this step, we use a GtkBuilder template to associate a GtkBuilder ui file
with our application window class.
Our simple ui file puts a GtkHeaderBar on top of a GtkStack widget. The
header bar contains a GtkStackSwitcher, which is a standalone widget to show
a row of ‘tabs’ for the pages of a GtkStack.
<?xml version="1.0" encoding="UTF-8"?>
<interface>
  <!-- interface-requires gtk+ 3.8 -->
  <template class="ExampleAppWindow" parent="GtkApplicationWindow">
    <property name="title" translatable="yes">Example Application</property>
    <property name="default-width">600</property>
    <property name="default-height">400</property>
    <child>
      <object class="GtkBox" id="content_box">
        <property name="visible">True</property>
        <property name="orientation">vertical</property>
        <child>
          <object class="GtkHeaderBar" id="header">
            <property name="visible">True</property>
            <child type="title">
              <object class="GtkStackSwitcher" id="tabs">
                <property name="visible">True</property>
                <property name="stack">stack</property>
              </object>
            </child>
          </object>
        </child>
        <child>
          <object class="GtkStack" id="stack">
            <property name="visible">True</property>
          </object>
        </child>
      </object>
    </child>
  </template>
</interface>
To make use of this file in our application, we revisit our
GtkApplicationWindow subclass, and call
gtk_widget_class_set_template_from_resource() from the class init function
to set the ui file as template for this class. We also add a call to
gtk_widget_init_template() in the instance init function to instantiate the
template for each instance of our class.
// ...

static void
example_app_window_init (ExampleAppWindow *win)
{
  gtk_widget_init_template (GTK_WIDGET (win));
}

static void
example_app_window_class_init (ExampleAppWindowClass *class)
{
  gtk_widget_class_set_template_from_resource (GTK_WIDGET_CLASS (class),
                                               "/org/gtk/exampleapp/window.ui");
}

// ...
(Full source)
You may have noticed that we used the _from_resource() variant of the
function that sets a template. Now we need to use GLib’s resource
functionality to include the ui file in the binary. This is commonly done by
listing all resources in a .gresource.xml file, such as this:
<?xml version="1.0" encoding="UTF-8"?>
<gresources>
  <gresource prefix="/org/gtk/exampleapp">
    <file preprocess="xml-stripblanks">window.ui</file>
  </gresource>
</gresources>
This file has to be converted into a C source file that will be compiled and
linked into the application together with the other source files. To do so,
we use the glib-compile-resources utility:
glib-compile-resources exampleapp.gresource.xml --target=resources.c --generate-source
Our application now looks like this:
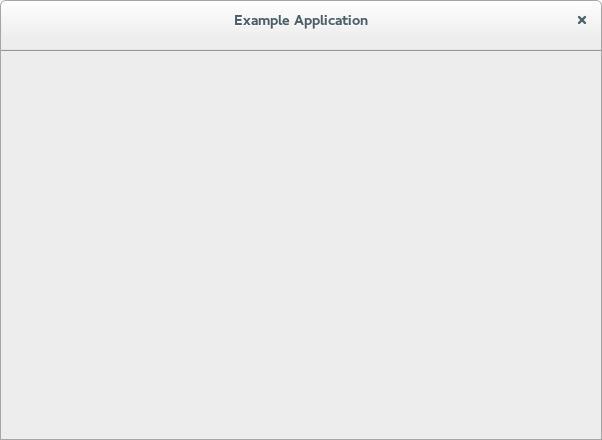
Opening files
In this step, we make our application show the content of all the files that
it is given on the commandline.
To this end, we add a private struct to our application window subclass and
keep a reference to the GtkStack there. The
gtk_widget_class_bind_template_child_private() function arranges things so
that after instantiating the template, the stack member of the private
struct will point to the widget of the same name from the template.
// ...

struct _ExampleAppWindowPrivate
{
  GtkWidget *stack;
};

G_DEFINE_TYPE_WITH_PRIVATE(ExampleAppWindow, example_app_window, GTK_TYPE_APPLICATION_WINDOW)

...

static void
example_app_window_class_init (ExampleAppWindowClass *class)
{
  gtk_widget_class_set_template_from_resource (GTK_WIDGET_CLASS (class),
                                               "/org/gtk/exampleapp/window.ui");
  gtk_widget_class_bind_template_child_private (GTK_WIDGET_CLASS (class),
                                                ExampleAppWindow,
                        stack);
}

// ...
(Full source)
Now we revisit the example_app_window_open() function that is called for
each commandline argument, and construct a GtkTextView that we then add as a
page to the stack:
// ...

void
example_app_window_open (ExampleAppWindow *win,
                         GFile            *file)
{
  ExampleAppWindowPrivate *priv;
  gchar *basename;
  GtkWidget *scrolled, *view;
  gchar *contents;
  gsize length;

  priv = example_app_window_get_instance_private (win);
  basename = g_file_get_basename (file);

  scrolled = gtk_scrolled_window_new (NULL, NULL);
  gtk_widget_show (scrolled);
  gtk_widget_set_hexpand (scrolled, TRUE);
  gtk_widget_set_vexpand (scrolled, TRUE);
  view = gtk_text_view_new ();
  gtk_text_view_set_editable (GTK_TEXT_VIEW (view), FALSE);
  gtk_text_view_set_cursor_visible (GTK_TEXT_VIEW (view), FALSE);
  gtk_widget_show (view);
  gtk_container_add (GTK_CONTAINER (scrolled), view);
  gtk_stack_add_titled (GTK_STACK (priv->stack), scrolled, basename, basename);

  if (g_file_load_contents (file, NULL, &contents, &length, NULL, NULL))
    {
      GtkTextBuffer *buffer;

      buffer = gtk_text_view_get_buffer (GTK_TEXT_VIEW (view));
      gtk_text_buffer_set_text (buffer, contents, length);
      g_free (contents);
    }

  g_free (basename);
}

// ...
(Full source)
Note that we did not have to touch the stack switcher at all. It gets all
its information from the stack that it belongs to. Here, we are passing the
label to show for each file as the last argument to the
gtk_stack_add_titled() function.
Our application is beginning to take shape:
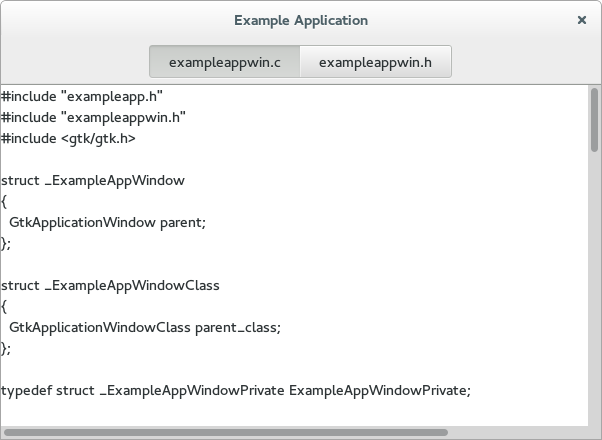
An application menu is shown by GNOME shell at the top of the screen. It is
meant to collect infrequently used actions that affect the whole application.
Just like the window template, we specify our application menu in a ui file,
and add it as a resource to our binary.
<?xml version="1.0"?>
<interface>
  <!-- interface-requires gtk+ 3.0 -->
  <menu id="appmenu">
    <section>
      <item>
        <attribute name="label" translatable="yes">_Preferences</attribute>
        <attribute name="action">app.preferences</attribute>
      </item>
    </section>
    <section>
      <item>
        <attribute name="label" translatable="yes">_Quit</attribute>
        <attribute name="action">app.quit</attribute>
      </item>
    </section>
  </menu>
</interface>
To associate the app menu with the application, we have to call
gtk_application_set_app_menu(). Since app menus work by activating GActions,
we also have to add a suitable set of actions to our application.
Both of these tasks are best done in the startup() virtual function, which
is guaranteed to be called once for each primary application instance:
// ...

static void
preferences_activated (GSimpleAction *action,
                       GVariant      *parameter,
                       gpointer       app)
{
}

static void
quit_activated (GSimpleAction *action,
                GVariant      *parameter,
                gpointer       app)
{
  g_application_quit (G_APPLICATION (app));
}

static GActionEntry app_entries[] =
{
  { "preferences", preferences_activated, NULL, NULL, NULL },
  { "quit", quit_activated, NULL, NULL, NULL }
};

static void
example_app_startup (GApplication *app)
{
  GtkBuilder *builder;
  GMenuModel *app_menu;
  const gchar *quit_accels[2] = { "<Ctrl>Q", NULL };

  G_APPLICATION_CLASS (example_app_parent_class)->startup (app);

  g_action_map_add_action_entries (G_ACTION_MAP (app),
                                   app_entries, G_N_ELEMENTS (app_entries),
                                   app);
  gtk_application_set_accels_for_action (GTK_APPLICATION (app),
                                         "app.quit",
                                         quit_accels);

  builder = gtk_builder_new_from_resource ("/org/gtk/exampleapp/app-menu.ui");
  app_menu = G_MENU_MODEL (gtk_builder_get_object (builder, "appmenu"));
  gtk_application_set_app_menu (GTK_APPLICATION (app), app_menu);
  g_object_unref (builder);
}

static void
example_app_class_init (ExampleAppClass *class)
{
  G_APPLICATION_CLASS (class)->startup = example_app_startup;
}

// ...
(Full source)
Our preferences menu item does not do anything yet, but the Quit menu item
is fully functional. Note that it can also be activated by the usual
Ctrl+Q shortcut. The shortcut was added with
gtk_application_set_accels_for_action().
The application menu looks like this:
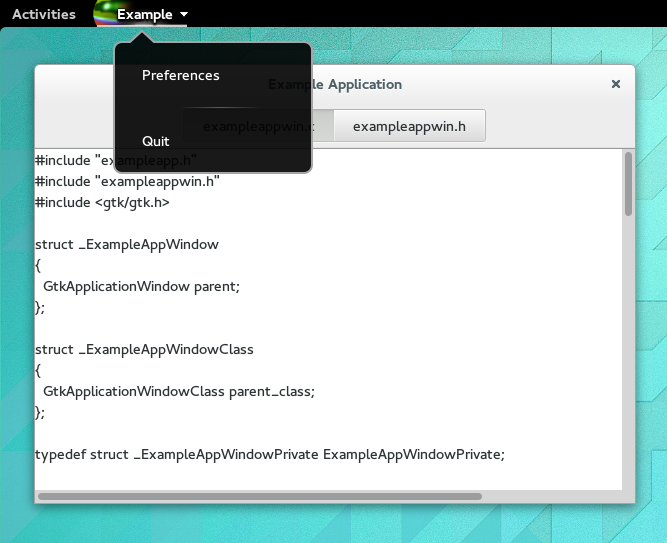
A preference dialog
A typical application will have a some preferences that should be remembered
from one run to the next. Even for our simple example application, we may
want to change the font that is used for the content.
We are going to use GSettings to store our preferences. GSettings requires a
schema that describes our settings:
<?xml version="1.0" encoding="UTF-8"?>
<schemalist>
  <schema path="/org/gtk/exampleapp/" id="org.gtk.exampleapp">
    <key name="font" type="s">
      <default>'Monospace 12'</default>
      <summary>Font</summary>
      <description>The font to be used for content.</description>
    </key>
    <key name="transition" type="s">
      <choices>
        <choice value='none'/>
        <choice value='crossfade'/>
        <choice value='slide-left-right'/>
      </choices>
      <default>'none'</default>
      <summary>Transition</summary>
      <description>The transition to use when switching tabs.</description>
    </key>
  </schema>
</schemalist>
Before we can make use of this schema in our application, we need to compile
it into the binary form that GSettings expects. GIO provides macros to do
this in Autotools-based projects, whereas Meson provides the same
functionality through the gnome module.
Next, we need to connect our settings to the widgets that they are supposed
to control. One convenient way to do this is to use GSettings bind
functionality to bind settings keys to object properties, as we do here for
the transition setting.
// ...

static void
example_app_window_init (ExampleAppWindow *win)
{
  ExampleAppWindowPrivate *priv;

  priv = example_app_window_get_instance_private (win);
  gtk_widget_init_template (GTK_WIDGET (win));
  priv->settings = g_settings_new ("org.gtk.exampleapp");

  g_settings_bind (priv->settings, "transition",
                   priv->stack, "transition-type",
                   G_SETTINGS_BIND_DEFAULT);
}

// ...
(Full source)
The code to connect the font setting is a little more involved, since there
is no simple object property that it corresponds to, so we are not going to
go into that here.
At this point, the application will already react if you change one of the
settings, e.g. using the gsettings commandline tool. Of course, we expect
the application to provide a preference dialog for these. So lets do that
now. Our preference dialog will be a subclass of GtkDialog, and we’ll use
the same techniques that we’ve already seen: templates, private structs,
settings bindings.
Lets start with the template:
<?xml version="1.0" encoding="UTF-8"?>
<interface>
  <!-- interface-requires gtk+ 3.8 -->
  <template class="ExampleAppPrefs" parent="GtkDialog">
    <property name="title" translatable="yes">Preferences</property>
    <property name="resizable">False</property>
    <property name="modal">True</property>
    <child internal-child="vbox">
      <object class="GtkBox" id="vbox">
        <child>
          <object class="GtkGrid" id="grid">
            <property name="visible">True</property>
            <property name="margin">6</property>
            <property name="row-spacing">12</property>
            <property name="column-spacing">6</property>
            <child>
              <object class="GtkLabel" id="fontlabel">
                <property name="visible">True</property>
                <property name="label">_Font:</property>
                <property name="use-underline">True</property>
                <property name="mnemonic-widget">font</property>
                <property name="xalign">1</property>
              </object>
              <packing>
                <property name="left-attach">0</property>
                <property name="top-attach">0</property>
              </packing>
            </child>
            <child>
              <object class="GtkFontButton" id="font">
                <property name="visible">True</property>
              </object>
              <packing>
                <property name="left-attach">1</property>
                <property name="top-attach">0</property>
              </packing>
            </child>
            <child>
              <object class="GtkLabel" id="transitionlabel">
                <property name="visible">True</property>
                <property name="label">_Transition:</property>
                <property name="use-underline">True</property>
                <property name="mnemonic-widget">transition</property>
                <property name="xalign">1</property>
              </object>
              <packing>
                <property name="left-attach">0</property>
                <property name="top-attach">1</property>
              </packing>
            </child>
            <child>
              <object class="GtkComboBoxText" id="transition">
                <property name="visible">True</property>
                <items>
                  <item translatable="yes" id="none">None</item>
                  <item translatable="yes" id="crossfade">Fade</item>
                  <item translatable="yes" id="slide-left-right">Slide</item>
                </items>
              </object>
              <packing>
                <property name="left-attach">1</property>
                <property name="top-attach">1</property>
              </packing>
            </child>
          </object>
        </child>
      </object>
    </child>
  </template>
</interface>
Next comes the dialog class:
#include <gtk/gtk.h>

#include "exampleapp.h"
#include "exampleappwin.h"
#include "exampleappprefs.h"

struct _ExampleAppPrefs
{
  GtkDialog parent;
};

typedef struct _ExampleAppPrefsPrivate ExampleAppPrefsPrivate;

struct _ExampleAppPrefsPrivate
{
  GSettings *settings;
  GtkWidget *font;
  GtkWidget *transition;
};

G_DEFINE_TYPE_WITH_PRIVATE(ExampleAppPrefs, example_app_prefs, GTK_TYPE_DIALOG)

static void
example_app_prefs_init (ExampleAppPrefs *prefs)
{
  ExampleAppPrefsPrivate *priv;

  priv = example_app_prefs_get_instance_private (prefs);
  gtk_widget_init_template (GTK_WIDGET (prefs));
  priv->settings = g_settings_new ("org.gtk.exampleapp");

  g_settings_bind (priv->settings, "font",
                   priv->font, "font",
                   G_SETTINGS_BIND_DEFAULT);
  g_settings_bind (priv->settings, "transition",
                   priv->transition, "active-id",
                   G_SETTINGS_BIND_DEFAULT);
}

static void
example_app_prefs_dispose (GObject *object)
{
  ExampleAppPrefsPrivate *priv;

  priv = example_app_prefs_get_instance_private (EXAMPLE_APP_PREFS (object));
  g_clear_object (&priv->settings);

  G_OBJECT_CLASS (example_app_prefs_parent_class)->dispose (object);
}

static void
example_app_prefs_class_init (ExampleAppPrefsClass *class)
{
  G_OBJECT_CLASS (class)->dispose = example_app_prefs_dispose;

  gtk_widget_class_set_template_from_resource (GTK_WIDGET_CLASS (class),
                                               "/org/gtk/exampleapp/prefs.ui");
  gtk_widget_class_bind_template_child_private (GTK_WIDGET_CLASS (class), ExampleAppPrefs, font);
  gtk_widget_class_bind_template_child_private (GTK_WIDGET_CLASS (class), ExampleAppPrefs, transition);
}

ExampleAppPrefs *
example_app_prefs_new (ExampleAppWindow *win)
{
  return g_object_new (EXAMPLE_APP_PREFS_TYPE, "transient-for", win, "use-header-bar", TRUE, NULL);
}
Now we revisit the preferences_activated() function in our application
class, and make it open a new preference dialog:
// ...

static void
preferences_activated (GSimpleAction *action,
                       GVariant      *parameter,
                       gpointer       app)
{
  ExampleAppPrefs *prefs;
  GtkWindow *win;

  win = gtk_application_get_active_window (GTK_APPLICATION (app));
  prefs = example_app_prefs_new (EXAMPLE_APP_WINDOW (win));
  gtk_window_present (GTK_WINDOW (prefs));
}

// ...
(Full source)
After all this work, our application can now show a preference dialog like this:
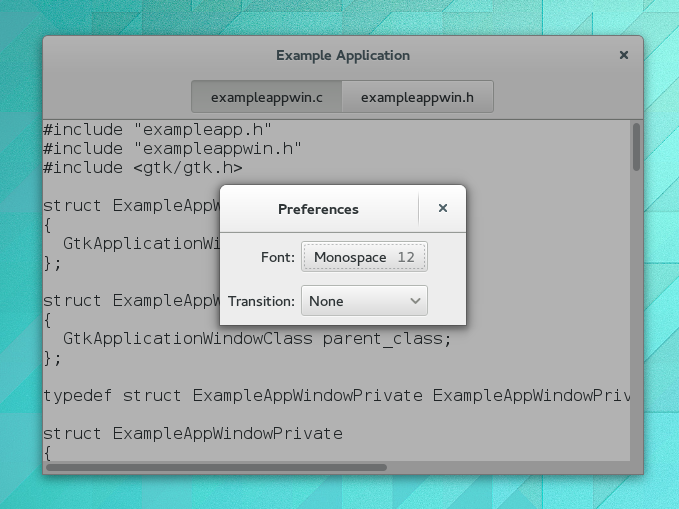
Adding a search bar
We continue to flesh out the functionality of our application. For now, we
add search. GTK supports this with GtkSearchEntry and GtkSearchBar. The
search bar is a widget that can slide in from the top of a container to
present a search entry.
We add a toggle button to the header bar, which can be used to slide out the
search bar below the header bar.
<?xml version="1.0" encoding="UTF-8"?>
<interface>
  <!-- interface-requires gtk+ 3.8 -->
  <template class="ExampleAppWindow" parent="GtkApplicationWindow">
    <property name="title" translatable="yes">Example Application</property>
    <property name="default-width">600</property>
    <property name="default-height">400</property>
    <child>
      <object class="GtkBox" id="content_box">
        <property name="visible">True</property>
        <property name="orientation">vertical</property>
        <child>
          <object class="GtkHeaderBar" id="header">
            <property name="visible">True</property>
            <child type="title">
              <object class="GtkStackSwitcher" id="tabs">
                <property name="visible">True</property>
                <property name="stack">stack</property>
              </object>
            </child>
            <child>
              <object class="GtkToggleButton" id="search">
                <property name="visible">True</property>
                <property name="sensitive">False</property>
                <style>
                  <class name="image-button"/>
                </style>
                <child>
                  <object class="GtkImage" id="search-icon">
                    <property name="visible">True</property>
                    <property name="icon-name">edit-find-symbolic</property>
                    <property name="icon-size">1</property>
                  </object>
                </child>
              </object>
              <packing>
                <property name="pack-type">end</property>
              </packing>
            </child>
          </object>
        </child>
        <child>
          <object class="GtkSearchBar" id="searchbar">
            <property name="visible">True</property>
            <child>
              <object class="GtkSearchEntry" id="searchentry">
                <signal name="search-changed" handler="search_text_changed"/>
                <property name="visible">True</property>
              </object>
            </child>
          </object>
        </child>
        <child>
          <object class="GtkStack" id="stack">
            <signal name="notify::visible-child" handler="visible_child_changed"/>
            <property name="visible">True</property>
          </object>
        </child>
      </object>
    </child>
  </template>
</interface>
Implementing the search needs quite a few code changes that we are not going
to completely go over here. The central piece of the search implementation
is a signal handler that listens for text changes in the search entry:
// ...

static void
search_text_changed (GtkEntry         *entry,
                     ExampleAppWindow *win)
{
  ExampleAppWindowPrivate *priv;
  const gchar *text;
  GtkWidget *tab;
  GtkWidget *view;
  GtkTextBuffer *buffer;
  GtkTextIter start, match_start, match_end;

  text = gtk_entry_get_text (entry);

  if (text[0] == '')
    return;

  priv = example_app_window_get_instance_private (win);

  tab = gtk_stack_get_visible_child (GTK_STACK (priv->stack));
  view = gtk_bin_get_child (GTK_BIN (tab));
  buffer = gtk_text_view_get_buffer (GTK_TEXT_VIEW (view));

  /* Very simple-minded search implementation */
  gtk_text_buffer_get_start_iter (buffer, &start);
  if (gtk_text_iter_forward_search (&start, text, GTK_TEXT_SEARCH_CASE_INSENSITIVE,
                                    &match_start, &match_end, NULL))
    {
      gtk_text_buffer_select_range (buffer, &match_start, &match_end);
      gtk_text_view_scroll_to_iter (GTK_TEXT_VIEW (view), &match_start,
                                    0.0, FALSE, 0.0, 0.0);
    }
}

static void
example_app_window_init (ExampleAppWindow *win)
{
  // ...

  gtk_widget_class_bind_template_callback (GTK_WIDGET_CLASS (class), search_text_changed);

  // ...
}

// ...
(Full source)
With the search bar, our application now looks like this:

Adding a side bar
As another piece of functionality, we are adding a sidebar, which
demonstrates GtkMenuButton, GtkRevealer and GtkListBox.
<?xml version="1.0" encoding="UTF-8"?>
<interface>
  <!-- interface-requires gtk+ 3.8 -->
  <template class="ExampleAppWindow" parent="GtkApplicationWindow">
    <property name="title" translatable="yes">Example Application</property>
    <property name="default-width">600</property>
    <property name="default-height">400</property>
    <child>
      <object class="GtkBox" id="content_box">
        <property name="visible">True</property>
        <property name="orientation">vertical</property>
        <child>
          <object class="GtkHeaderBar" id="header">
            <property name="visible">True</property>
            <child type="title">
              <object class="GtkStackSwitcher" id="tabs">
                <property name="visible">True</property>
                <property name="stack">stack</property>
              </object>
            </child>
            <child>
              <object class="GtkToggleButton" id="search">
                <property name="visible">True</property>
                <property name="sensitive">False</property>
                <style>
                  <class name="image-button"/>
                </style>
                <child>
                  <object class="GtkImage" id="search-icon">
                    <property name="visible">True</property>
                    <property name="icon-name">edit-find-symbolic</property>
                    <property name="icon-size">1</property>
                  </object>
                </child>
              </object>
              <packing>
                <property name="pack-type">end</property>
              </packing>
            </child>
            <child>
              <object class="GtkMenuButton" id="gears">
                <property name="visible">True</property>
                <property name="direction">none</property>
                <property name="use-popover">True</property>
                <style>
                  <class name="image-button"/>
                </style>
              </object>
              <packing>
                <property name="pack-type">end</property>
              </packing>
            </child>
          </object>
        </child>
        <child>
          <object class="GtkSearchBar" id="searchbar">
            <property name="visible">True</property>
            <child>
              <object class="GtkSearchEntry" id="searchentry">
                <signal name="search-changed" handler="search_text_changed"/>
                <property name="visible">True</property>
              </object>
            </child>
          </object>
        </child>
        <child>
          <object class="GtkBox" id="hbox">
            <property name="visible">True</property>
            <child>
              <object class="GtkRevealer" id="sidebar">
                <property name="visible">True</property>
                <property name="transition-type">slide-right</property>
                <child>
                 <object class="GtkScrolledWindow" id="sidebar-sw">
                   <property name="visible">True</property>
                   <property name="hscrollbar-policy">never</property>
                   <property name="vscrollbar-policy">automatic</property>
                   <child>
                     <object class="GtkListBox" id="words">
                       <property name="visible">True</property>
                       <property name="selection-mode">none</property>
                     </object>
                   </child>
                 </object>
                </child>
              </object>
            </child>
            <child>
              <object class="GtkStack" id="stack">
                <signal name="notify::visible-child" handler="visible_child_changed"/>
                <property name="visible">True</property>
              </object>
            </child>
          </object>
        </child>
      </object>
    </child>
  </template>
</interface>
The code to populate the sidebar with buttons for the words found in each
file is a little too involved to go into here. But we’ll look at the code to
add the gears menu.
As expected by now, the gears menu is specified in a GtkBuilder UI file:
<?xml version="1.0"?>
<interface>
  <!-- interface-requires gtk+ 3.0 -->
  <menu id="menu">
    <section>
      <item>
        <attribute name="label" translatable="yes">_Words</attribute>
        <attribute name="action">win.show-words</attribute>
      </item>
    </section>
  </menu>
</interface>
To connect the menuitem to the show-words setting, we use a GAction
corresponding to the given GSettings key.
// ...

static void
example_app_window_init (ExampleAppWindow *win)
{
  // ...

  builder = gtk_builder_new_from_resource ("/org/gtk/exampleapp/gears-menu.ui");
  menu = G_MENU_MODEL (gtk_builder_get_object (builder, "menu"));
  gtk_menu_button_set_menu_model (GTK_MENU_BUTTON (priv->gears), menu);
  g_object_unref (builder);

  action = g_settings_create_action (priv->settings, "show-words");
  g_action_map_add_action (G_ACTION_MAP (win), action);
  g_object_unref (action);
}

// ...
(Full source)
What our application looks like now:

Properties
Widgets and other objects have many useful properties.
Here we show some ways to use them in new and flexible ways, by wrapping
them in actions with GPropertyAction or by binding them with GBinding.
To set this up, we add two labels to the header bar in our window template,
named lines_label and lines, and bind them to struct members in the
private struct, as we’ve seen a couple of times by now.
We add a new “Lines” menu item to the gears menu, which triggers the
show-lines action:
<?xml version="1.0"?>
<interface>
  <!-- interface-requires gtk+ 3.0 -->
  <menu id="menu">
    <section>
      <item>
        <attribute name="label" translatable="yes">_Words</attribute>
        <attribute name="action">win.show-words</attribute>
      </item>
      <item>
        <attribute name="label" translatable="yes">_Lines</attribute>
        <attribute name="action">win.show-lines</attribute>
      </item>
    </section>
  </menu>
</interface>
To make this menu item do something, we create a property action for the
visible property of the lines label, and add it to the actions of the
window. The effect of this is that the visibility of the label gets toggled
every time the action is activated.
Since we want both labels to appear and disappear together, we bind the
visible property of the lines_label widget to the same property of the
lines widget.
// ...

static void
example_app_window_init (ExampleAppWindow *win)
{
  // ...

  action = (GAction*) g_property_action_new ("show-lines", priv->lines, "visible");
  g_action_map_add_action (G_ACTION_MAP (win), action);
  g_object_unref (action);

  g_object_bind_property (priv->lines, "visible",
                          priv->lines_label, "visible",
                          G_BINDING_DEFAULT);
}

// ...
(Full source)
We also need a function that counts the lines of the currently active tab,
and updates the lines label. See the full source if you are interested in
the details.
This brings our example application to this appearance:
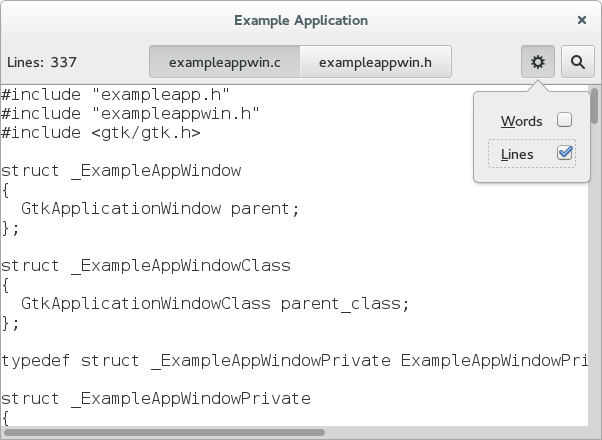
Our application already uses a GtkHeaderBar, but so far it still gets a
‘normal’ window titlebar on top of that. This is a bit redundant, and we
will now tell GTK to use the header bar as replacement for the titlebar. To
do so, we move it around to be a direct child of the window, and set its
type to be titlebar.
<?xml version="1.0" encoding="UTF-8"?>
<interface>
  <!-- interface-requires gtk+ 3.8 -->
  <template class="ExampleAppWindow" parent="GtkApplicationWindow">
    <property name="title" translatable="yes">Example Application</property>
    <property name="default-width">600</property>
    <property name="default-height">400</property>
        <child type="titlebar">
          <object class="GtkHeaderBar" id="header">
            <property name="visible">True</property>
            <property name="show-close-button">True</property>
            <child>
              <object class="GtkLabel" id="lines_label">
                <property name="visible">False</property>
                <property name="label" translatable="yes">Lines:</property>
              </object>
              <packing>
                <property name="pack-type">start</property>
              </packing>
            </child>
            <child>
              <object class="GtkLabel" id="lines">
                <property name="visible">False</property>
              </object>
              <packing>
                <property name="pack-type">start</property>
              </packing>
            </child>
            <child type="title">
              <object class="GtkStackSwitcher" id="tabs">
                <property name="visible">True</property>
                <property name="stack">stack</property>
              </object>
            </child>
            <child>
              <object class="GtkToggleButton" id="search">
                <property name="visible">True</property>
                <property name="sensitive">False</property>
                <style>
                  <class name="image-button"/>
                </style>
                <child>
                  <object class="GtkImage" id="search-icon">
                    <property name="visible">True</property>
                    <property name="icon-name">edit-find-symbolic</property>
                    <property name="icon-size">1</property>
                  </object>
                </child>
              </object>
              <packing>
                <property name="pack-type">end</property>
              </packing>
            </child>
            <child>
              <object class="GtkMenuButton" id="gears">
                <property name="visible">True</property>
                <property name="direction">none</property>
                <property name="use-popover">True</property>
                <style>
                  <class name="image-button"/>
                </style>
              </object>
              <packing>
                <property name="pack-type">end</property>
              </packing>
            </child>
          </object>
        </child>
    <child>
      <object class="GtkBox" id="content_box">
        <property name="visible">True</property>
        <property name="orientation">vertical</property>
        <child>
          <object class="GtkSearchBar" id="searchbar">
            <property name="visible">True</property>
            <child>
              <object class="GtkSearchEntry" id="searchentry">
                <signal name="search-changed" handler="search_text_changed"/>
                <property name="visible">True</property>
              </object>
            </child>
          </object>
        </child>
        <child>
          <object class="GtkBox" id="hbox">
            <property name="visible">True</property>
            <child>
              <object class="GtkRevealer" id="sidebar">
                <property name="visible">True</property>
                <property name="transition-type">slide-right</property>
                <child>
                 <object class="GtkScrolledWindow" id="sidebar-sw">
                   <property name="visible">True</property>
                   <property name="hscrollbar-policy">never</property>
                   <property name="vscrollbar-policy">automatic</property>
                   <child>
                     <object class="GtkListBox" id="words">
                       <property name="visible">True</property>
                       <property name="selection-mode">none</property>
                     </object>
                   </child>
                 </object>
                </child>
              </object>
            </child>
            <child>
              <object class="GtkStack" id="stack">
                <signal name="notify::visible-child" handler="visible_child_changed"/>
                <property name="visible">True</property>
              </object>
            </child>
          </object>
        </child>
      </object>
    </child>
  </template>
</interface>
A small extra bonus of using a header bar is that we get a fallback
application menu for free. Here is how the application now looks, if this
fallback is used:
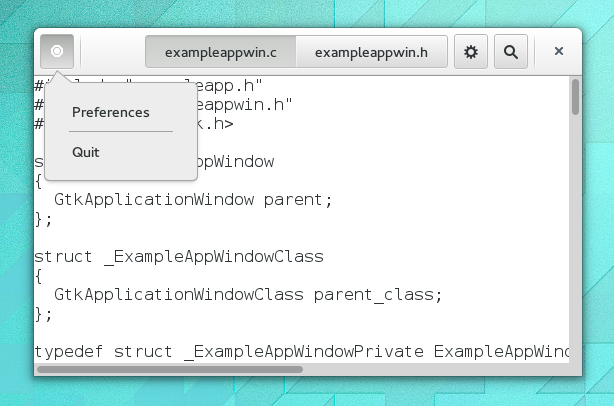
If we set up the window icon for our window, the menu button will use that
instead of the generic placeholder icon you see here.
Custom drawing
Many widgets, like buttons, do all their drawing themselves. You just tell
them the label you want to see, and they figure out what font to use, draw
the button outline and focus rectangle, etc. Sometimes, it is necessary to
do some custom drawing. In that case, a GtkDrawingArea might be the right
widget to use. It offers a canvas on which you can draw by connecting to the
GtkWidget::draw signal.
The contents of a widget often need to be partially or fully redrawn, e.g.
when another window is moved and uncovers part of the widget, or when the
window containing it is resized. It is also possible to explicitly cause
part or all of the widget to be redrawn, by calling gtk_widget_queue_draw()
or its variants. GTK takes care of most of the details by providing a
ready-to-use Cairo context to the draw signal handler.
The following example shows a draw signal handler. It is a bit more
complicated than the previous examples, since it also demonstrates input
event handling by means of GtkWidget::button-press-event and
GtkWidget::motion-notify-event signal handlers.
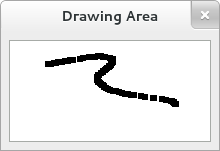
Save the following example in a file name example-4.c:
#include <gtk/gtk.h>

/* Surface to store current scribbles */
static cairo_surface_t *surface = NULL;

static void
clear_surface (void)
{
  cairo_t *cr;

  cr = cairo_create (surface);

  cairo_set_source_rgb (cr, 1, 1, 1);
  cairo_paint (cr);

  cairo_destroy (cr);
}

/* Create a new surface of the appropriate size to store our scribbles */
static gboolean
configure_event_cb (GtkWidget         *widget,
                    GdkEventConfigure *event,
                    gpointer           data)
{
  if (surface)
    cairo_surface_destroy (surface);

  surface = gdk_window_create_similar_surface (gtk_widget_get_window (widget),
                                               CAIRO_CONTENT_COLOR,
                                               gtk_widget_get_allocated_width (widget),
                                               gtk_widget_get_allocated_height (widget));

  /* Initialize the surface to white */
  clear_surface ();

  /* We've handled the configure event, no need for further processing. */
  return TRUE;
}

/* Redraw the screen from the surface. Note that the ::draw
 * signal receives a ready-to-be-used cairo_t that is already
 * clipped to only draw the exposed areas of the widget
 */
static gboolean
draw_cb (GtkWidget *widget,
         cairo_t   *cr,
         gpointer   data)
{
  cairo_set_source_surface (cr, surface, 0, 0);
  cairo_paint (cr);

  return FALSE;
}

/* Draw a rectangle on the surface at the given position */
static void
draw_brush (GtkWidget *widget,
            gdouble    x,
            gdouble    y)
{
  cairo_t *cr;

  /* Paint to the surface, where we store our state */
  cr = cairo_create (surface);

  cairo_rectangle (cr, x - 3, y - 3, 6, 6);
  cairo_fill (cr);

  cairo_destroy (cr);

  /* Now invalidate the affected region of the drawing area. */
  gtk_widget_queue_draw_area (widget, x - 3, y - 3, 6, 6);
}

/* Handle button press events by either drawing a rectangle
 * or clearing the surface, depending on which button was pressed.
 * The ::button-press signal handler receives a GdkEventButton
 * struct which contains this information.
 */
static gboolean
button_press_event_cb (GtkWidget      *widget,
                       GdkEventButton *event,
                       gpointer        data)
{
  /* paranoia check, in case we haven't gotten a configure event */
  if (surface == NULL)
    return FALSE;

  if (event->button == GDK_BUTTON_PRIMARY)
    {
      draw_brush (widget, event->x, event->y);
    }
  else if (event->button == GDK_BUTTON_SECONDARY)
    {
      clear_surface ();
      gtk_widget_queue_draw (widget);
    }

  /* We've handled the event, stop processing */
  return TRUE;
}

/* Handle motion events by continuing to draw if button 1 is
 * still held down. The ::motion-notify signal handler receives
 * a GdkEventMotion struct which contains this information.
 */
static gboolean
motion_notify_event_cb (GtkWidget      *widget,
                        GdkEventMotion *event,
                        gpointer        data)
{
  /* paranoia check, in case we haven't gotten a configure event */
  if (surface == NULL)
    return FALSE;

  if (event->state & GDK_BUTTON1_MASK)
    draw_brush (widget, event->x, event->y);

  /* We've handled it, stop processing */
  return TRUE;
}

static void
close_window (void)
{
  if (surface)
    cairo_surface_destroy (surface);
}

static void
activate (GtkApplication *app,
          gpointer        user_data)
{
  GtkWidget *window;
  GtkWidget *frame;
  GtkWidget *drawing_area;

  window = gtk_application_window_new (app);
  gtk_window_set_title (GTK_WINDOW (window), "Drawing Area");

  g_signal_connect (window, "destroy", G_CALLBACK (close_window), NULL);

  gtk_container_set_border_width (GTK_CONTAINER (window), 8);

  frame = gtk_frame_new (NULL);
  gtk_frame_set_shadow_type (GTK_FRAME (frame), GTK_SHADOW_IN);
  gtk_container_add (GTK_CONTAINER (window), frame);

  drawing_area = gtk_drawing_area_new ();
  /* set a minimum size */
  gtk_widget_set_size_request (drawing_area, 100, 100);

  gtk_container_add (GTK_CONTAINER (frame), drawing_area);

  /* Signals used to handle the backing surface */
  g_signal_connect (drawing_area, "draw",
                    G_CALLBACK (draw_cb), NULL);
  g_signal_connect (drawing_area,"configure-event",
                    G_CALLBACK (configure_event_cb), NULL);

  /* Event signals */
  g_signal_connect (drawing_area, "motion-notify-event",
                    G_CALLBACK (motion_notify_event_cb), NULL);
  g_signal_connect (drawing_area, "button-press-event",
                    G_CALLBACK (button_press_event_cb), NULL);

  /* Ask to receive events the drawing area doesn't normally
   * subscribe to. In particular, we need to ask for the
   * button press and motion notify events that want to handle.
   */
  gtk_widget_set_events (drawing_area, gtk_widget_get_events (drawing_area)
                                     | GDK_BUTTON_PRESS_MASK
                                     | GDK_POINTER_MOTION_MASK);

  gtk_widget_show_all (window);
}

int
main (int    argc,
      char **argv)
{
  GtkApplication *app;
  int status;

  app = gtk_application_new ("org.gtk.example", G_APPLICATION_FLAGS_NONE);
  g_signal_connect (app, "activate", G_CALLBACK (activate), NULL);
  status = g_application_run (G_APPLICATION (app), argc, argv);
  g_object_unref (app);

  return status;
}
You can compile the program above with GCC using:
gcc `pkg-config --cflags gtk+-3.0` -o example-4 example-4.c `pkg-config --libs gtk+-3.0`
Время на прочтение
4 мин
Количество просмотров 124K
На ХабраХабре наконец-то появился новый блог, посвящённый GTK. Присоединяйтесь! 
Привет, %username%!
В сети бытуют страшные слухи об этом фреймворке, однако серией статей о нём на ХабраХабре я попытаюсь разрушить сложившиеся стереотипы.
GTK+ — это фреймворк для создания кроссплатформенного графического интерфейса пользователя (GUI). Наряду с Qt он является одной из двух наиболее популярных на сегодняшний день библиотек для X Window System.
Изначально эта библиотека была частью графического редактора GIMP, но позже стала независимой и приобрела популярность. GTK+ — это свободное ПО, распространяемое на условиях GNU LGPL и позволяющее создавать как свободное, так и проприетарное программное обеспечение.
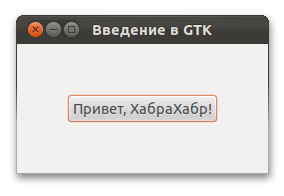
Как это работает
GTK+ написан на языке Си, однако несмотря на это, является объектно-ориентированным. Также можно использовать обёртки для следующих языков: Ada, C, C++, C#, D, Erlang, Fortran, GOB, Genie, Haskell, FreeBASIC, Free Pascal, Java, JavaScript, Lua, OCaml, Perl, PHP, PureBasic, Python, R, Ruby, Smalltalk, Tcl, Vala.
Внутри GTK+ состоит из двух компонентов: GTK, который содержит набор виджетов (кнопка, метка и т.д.) и GDK, который занят выводом результата на экран.
Внешний вид приложений может меняться программистом и/или пользователем. По-умолчанию приложения выглядят нативно, т.е. так же, как и другие приложение в этой системе. Кроме того, начиная с версии 3.0, можно менять внешний вид элементов с помощью CSS.
Делаем «Hello, World»
Для начала за основу возьмём вот такую заготовку:
#include <gtk/gtk.h> /* подключаем GTK+ */

/* эта функция будет выполнена первой */
int main( int argc, char *argv[])
{
        /* тут мы объявим переменные */

        /* запускаем GTK+ */
        gtk_init(&argc, &argv);

        /* тут будет код нашего приложения */

        /* передаём управление GTK+ */
        gtk_main();

        return 0;
}
Пожалуйста, не используйте одинарные комментарии (//), если как и я решили писать на Си.
Давайте для начала создадим окно нашего приложения. В GTK существует несколько типов окошек, но нам понадобится обычный GtkWindow. Вставьте в нашу заготовку следующий код:
        /* это вставьте вначале, хотя на самом деле порядок не так важен */
        GtkWidget *window;

        /* ... */

        /* создать новый виджет - окно */
        window = gtk_window_new(GTK_WINDOW_TOPLEVEL);
        /* дать окну заголовок */
        gtk_window_set_title(GTK_WINDOW(window), "Введение в GTK");
        /* установить внутренние границы (читайте ниже) */
        gtk_container_set_border_width (GTK_CONTAINER(window), 50);
Прежде чем продолжить, несколько слов об упаковке.
В GTK+ виджеты принято размещать не по координатам, а упаковывать в специальные контейнеры. Окно, которое мы создали, также является контейнером, который может содержать только один виджет. Нам этого хватит, но в ином случае нам бы пришлось добавить специальный виджет-контейнер, который может представлять из себя сетку, а также горизонтальные или вертикальные поля. Но об этом я подробнее расскажу в следующем топике.
Пока остановимся на окне. Напомню, что окно — это контейнер, которому мы указали толщину границ в 50 пикселей. Что это значит?

Это значит, что мы создаём своего рода невидимую рамку вокруг этого контейнера и по этому ничего не сможем разместить в этой области.
Теперь рассмотрим сигналы.
Мы можем связать определённое событие, которое должно произойти с виджетом, со своей функцией.
        /* когда пользователь закроет окно, то выйти из приложения */
        g_signal_connect(G_OBJECT(window), "destroy", G_CALLBACK(gtk_main_quit), NULL);
В данном случае это стандартная фунция gtk_main_quit(), которая безопасно завершит наше приложение.
Теперь создадим кнопку, по нажатию на которую будет появляться окошко с надписью «И тебе привет, %username%!».
Кнопка (GtkButton) — это тоже контейнер, который также может содержать один виджет. Чтобы не усложнять код созданием метки и помещением её в кнопку, сделаем вот так:
        /* это вставьте вначале, хотя на самом деле порядок не так важен */
        GtkWidget *button;

        /* ... */

        /* создать кнопку с меткой */
        button = gtk_button_new_with_label("Привет, ХабраХабр!");
        /* упаковать нашу кнопку в окно */
        gtk_container_add(GTK_CONTAINER(window), button);

        /* когда пользователь кликнет по ней, то вызвать ф-цию welcome */
        g_signal_connect(GTK_BUTTON(button), "clicked", G_CALLBACK(welcome), NULL);
Выглядеть это будет так:
Теперь реализация функции welcome:
/* выводит приветствие */
void welcome (GtkButton *button, gpointer data)
{
        /* виджеты */
        GtkWidget *dialog;
        GtkWidget *label;
        GtkWidget *content_area;

        /* создать диалог */
        dialog = gtk_dialog_new_with_buttons("Ошибка LOL!!!111",
                                             NULL,
                                             GTK_DIALOG_MODAL | GTK_DIALOG_DESTROY_WITH_PARENT,
                                             GTK_STOCK_OK,
                                             GTK_RESPONSE_ACCEPT,
                                             NULL);

        /* получить контейнер, в который будем пихать метку */
        content_area = gtk_dialog_get_content_area(GTK_DIALOG(dialog));

        /* сама метка */
        label = gtk_label_new("nnИ тебе привет, %username!%");
        gtk_container_add(GTK_CONTAINER(content_area), label);
        gtk_widget_show(label);

        /* запускаем диалог */
        gtk_dialog_run(GTK_DIALOG(dialog));
        /* а потом прячем */
        gtk_widget_destroy(dialog);
}
Результат после нажатия:

Вот так просто и быстро мы создали рабочую программу. В следующих топиках я расскажу про использование Glade (программа, чтобы рисовать виджеты без кода) и создание собственных виджетов.
Компиляция
gcc file_name.c -o file_name `pkg-config --cflags --libs gtk+-3.0`
Не забудьте установить пакет GTK для разработчика (кончается на «-dev»).
Что-нибудь ещё?
Да, пожалуй, приведу несколько ссылок:
www.gtk.org — официальный сайт
www.gtkforums.com — англоязычный форум, посвящённый GTK
developer.gnome.org — информация для разработчиков под среду GNOME. Содержит много полезной информации о GTK, в том числе и на русском языке.
UPD: Полный код примера на PasteBin — pastebin.com/iPttWBne ![]()