Файлы:
|
Дизельный двигатель TD5 для автомобилей Land Rover Discovery и Defender. Характеристики, конструкция, система управления. Все подробно и достоверно. |
Создан Размер Скачиваний |
11-02-2016 15.08 MB 517 |
|
Очень удачный каталог некогда популярной комании упаковщика Bearmach. Хорошие картинки, которые помогают выбрать детали соответсвующие именно вашему автомобилю. Радует то что коды Bearmach совпадают с оригинальными. |
Создан Размер Скачиваний |
20-02-2016 3.28 MB 433 |
| Создан Размер Скачиваний |
17-02-2016 320.51 KB 431 |
|
Анлоязычная инструкция с картинками о том как сделать Land Rover Defender герметичным. |
Создан Размер Скачиваний |
11-02-2016 565.6 KB 305 |
| Создан Размер Скачиваний |
17-02-2016 1.24 MB 299 |
| Создан Размер Скачиваний |
17-02-2016 36.75 MB 470 |
|
Все сказано о маслах и других технических жидкостях в этом англоязычном мануале на 100% подходит к Land Rover Defender TD5 1998-2006 годов с МКПП LT320. С 2007 началась новая эпоха: новый двигатель, новая МКПП и новые инструкции. |
Создан Размер Скачиваний |
18-02-2016 569.43 KB 636 |
|
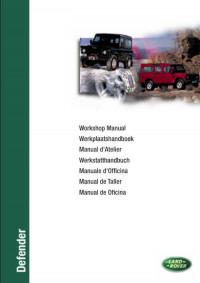
Workshop Manual Land Rover Defender 90/110 TD5 1998-2006 2nd Edition Eng Наверно наиболее полная инструкция по ремонту на Land Rover Defender 1998-2006 годов с двигателем TD5. Язык английский. Разобраться можно если приспичит. |
Создан Размер Скачиваний |
19-02-2016 7.58 MB 708 |
|
Land Rover Defender TD5 1998-2006 LRL0452ENG Electrical Circuit Diagrams — говоря русским языком: схемы электрические принципиальные. |
Создан Размер Скачиваний |
19-02-2016 4.19 MB 933 |
|
Руководство по ремонту Land Rover Defender 2007 года (WSM-8941) c двигателем Puma ID4 2.4L корпорации Ford. Для тех кто хочет все и сразу одни архивом. Владельцам автомобилей с двигателем 300TDI и TD5 руководство тоже может быть интересно, но лишь отчасти. Читайте внимательно, не примените к своей машине того что к ней не имеет отношения. У нас разные двигатели, разные МКПП и разные раздатки. |
Создан Размер Скачиваний |
19-02-2016 132.82 MB 1 431 |
| Обратный звонок
Обратный звонок × Введите имя Введите телефон * |
 |
| Каталог з/ч |  |
| Расчет стоимости |  |
| Цены на работы |  |
| Акции и скидки |  |
![]()
 Адрес:
Москва, Смирновская, 19
 График работы:
Пн-Вс 9:00 — 21:00
+7 (495) 221-70-90


| О нас | Услуги и цены Land Rover | Jaguar | Акции | Модели LR |
запчасти | Контакты | Оплата

![]()
+7 (495) 221-70-90 
Москва, Смирновская, 19
Пн-Вс 9.00 — 21.00
| О нас | Услуги и цены | Jaguar | Акции | Модели LR | Запчасти | Контакты


Обратный звонок
×
Общие вопросы | Акции, Отзывные кампании, Тех.бюллетени | Устройство узлов и систем LR | RANGE ROVER 2013- | RANGE ROVER 2010-2012 | RANGE ROVER 2002-2009 | RANGE ROVER 1995-2001 | RANGE ROVER CLASSIC | RANGE ROVER SPORT 2014- | RANGE ROVER SPORT 2010-2013
| RANGE ROVER VOGUE
| RANGE ROVER DISCOVERY 2
| RANGE ROVER SPORT 05-09 | RANGE ROVER EVOQUE | DISCOVERY SPORT | DISCOVERY 4 | DISCOVERY 3 | DISCOVERY 2 | DISCOVERY 1 | FREELANDER 2 2010- | FREELANDER 2 2006-2009 | FREELANDER -2005 | DEFENDER | DEFENDER 2007-
Показать дополнительное меню
Общие вопросы
Акции, Отзывные кампании, Тех.бюллетени
Устройство узлов и систем LR
RANGE ROVER 2013-
RANGE ROVER 2010-2012
RANGE ROVER 2002-2009
RANGE ROVER 1995-2001
RANGE ROVER CLASSIC
RANGE ROVER SPORT 2014-
RANGE ROVER SPORT 2010-2013
RANGE ROVER VOGUE
RANGE ROVER DISCOVERY 2
RANGE ROVER SPORT 05-09
RANGE ROVER EVOQUE
DISCOVERY SPORT
DISCOVERY 4
DISCOVERY 3
DISCOVERY 2
DISCOVERY 1
FREELANDER 2 2010-
FREELANDER 2 2006-2009
FREELANDER -2005
DEFENDER
DEFENDER 2007-
- Лэндровер
-
Файлы для скачивания DEFENDER
Назад
| Название | Язык | Размер файла |
|---|---|---|
|
Инструкция по эксплуатации Land Rover Defender |
на английском языке |
1.6МБ |
|
Руководство по ремонту Land Rover Defender 90-110-130 |
на английском языке |
3,9МБ |
|
Руководство по ремонту двигателя 2,5ТД (300ТД) |
на английском языке |
1,8МБ |
|
Карта технического обслуживания Land Rover Defender 1999 — 2006 (двигатель TD5) |
на русском языке |
0.5МБ |
|
Карта технического обслуживания Land Rover Defender 1999 — 2006 (двигатель TDI) |
на русском языке |
0.5МБ |
|
Карта технического обслуживания Land Rover Defender 2007 — |
на русском языке |
0.5МБ |
|
Руководство по эксплуатации Land Rover Defender, 2002 мод./г |
на английском языке |
8,6МБ |
|
Руководство по эксплуатации Land Rover Defender, 2008 мод./г |
на английском языке |
|
|
Электросхема Land Rover Defender с дв.TD5, 2002-2005г/в. |
4,2 MB |
|
|
Руководство при движении вне дорог (а/м от 2007г/в) |
на английском языке |
2,6МБ |
|
Электросхема Land Rover Defender с дв.300TD |
11МБ |


Мы здесь
Москва, ул. Смирновская, д. 19
Обратный звонок
×
Введите имя
Введите телефон *
![]()
Copyright © 2001-2021 LRService.ru — Техцентр Land Rover, ремонт, обслуживание, тюнинг, запчасти для британских внедорожников в Москве. | Создание и продвижение сайтов — IMPERIA DIGITAL | Дизайн сайта — IMPERI.PRO.
4/5 | Карта сайта


Главная
Компания
Информация по моделям
Кузовной ремонт всех авто
Ремонт Jaguar
Услуги
LR-клуб
Запчасти
Контакты
Контакты:
Адрес: Москва, ЮВАО, ул. Смирновская, д. 19
График работы: Пн-Вс 9:00 — 21:00
 Телефон: +7 (495) 221-70-90
 Почта: Этот адрес электронной почты защищён от спам-ботов. У вас должен быть включен JavaScript для просмотра.
Обработка персональных данных
Политика конфиденциальности
Пользовательское Соглашение

Записаться на обслуживание
×
Введите имя
Введите телефон *
Записаться на ремонт
×
Введите имя
Введите телефон *
Записаться на ТО
×
Введите имя
Введите телефон *
Отправить заявку
×
Введите имя
Введите телефон *
Обратная связь
×
Введите имя
Введите телефон *
Специальный инструмент(ы) Домкрат для силового агрегата в сборе HTJ1200-02 Опорная часть раздаточной коробки 100-045
Специальный инструмент(ы) Домкрат для силового агрегата в сборе HTJ1200-02 Опорная часть раздаточной коробки 100-045
Специальный инструмент(ы) Устройство фиксации фланца вторичного вала 205-053 Универсальный съемник 100-005A Съемное устройство, Масляное
Снятие 1. ПРЕДУПРЕЖДЕНИЕ: Запрещается производить работы на автомобиле, стоящем только на одном домкрате. Всегда
Снятие 1. Снимите консоль пола. За дополнительной информацией обратитесь к главе: Консоль пола (501-12
Снятие 1. ПРЕДУПРЕЖДЕНИЕ: Запрещается производить работы на автомобиле, стоящем только на одном домкрате. Всегда
Смазочные материалы Элемент Технические характеристики Рекомендуемое масло SAE 75W/90 или SAE 80W/90, API GL5,
Снятие 1. Ослабьте регулировочный болт тормозных колодок. 2. Снимите задний карданный вал. За дополнительной
Снятие 1. Слейте масло из раздаточной коробки. За дополнительной информацией обратитесь к главе: Слив
Специальный инструмент(ы) Устройство блокировки, Селектор высокого/низкого диапазона 308-711 ПРИМЕЧАНИЕ: При осуществлении данной процедуры после
Комментарии
23
Войдите или зарегистрируйтесь, чтобы писать комментарии, задавать вопросы и участвовать в обсуждении.


а как его распечатать? есть порядок?

Респект долго эту радость искал
Комментарий удалён
Только что это за сервак? там кроме этих файлов еще фото эротического содержания лежат)))))

знакомый мне фтп на нем создал, я человеку файлы туда закинул чтоб он глянул как окно менять, но у него ссылка не открылась(
Комментарий удалён
да работает))
Не ну понятно что эти мануалы на Топиксе лежат, но достоп то к ним вроде всегда был платный?
15 фунтов платил в прошлом году
С этого и стоило начинать))
думаю собрать как нибудь из этого человеческий мануал, а то он только на одном компе у меня открывается
Все тоже самое я залил на гугл диск )) в формате PDF
скачал посмотрел
видел такую уже, но она идет в виде множества файликов в разных папках
на сайте LR она интерактивная, с перелинковкой, очень удобно пользоваться)
sashQ-def
Не ну понятно что эти мануалы на Топиксе лежат, но достоп то к ним вроде всегда был платный?
оно того стоило, там не только инструкция по ремонту была, но и вся инфа касательно болячек этого авто
Эти все сервисные бюллетени так-же есть в открытом доступе если поискать, правда в основном на английском!
Руководство по ремонту
Административный бюллютень
Технический бюллютень
Специальные служебные сообщения
на официальном сайте LR доступно интерактивное руководство на русском, плюс описание выявленных проблем, модернизаций по конкретным машинам (определяется по VIN)
Какое руководство? По эксплуатации или по ремонту?
Все комментарии
Руководство на английском языке по техническому обслуживанию и ремонту автомобиля Land Rover Defender 1999/2002 модельного года.
- Автор: —
- Издательство: Land Rover
- Год издания: 2001
- Страниц: 627
- Формат: PDF
- Размер: 7,5 Mb
Руководство на английском языке по техническому обслуживанию и ремонту автомобиля Land Rover Defender 300TDi 1996 модельного года.
- Автор: —
- Издательство: Rover Group Limited
- Год издания: 1996
- Страниц: 450
- Формат: PDF
- Размер: 7,5 Mb
Руководство на английском языке по техническому обслуживанию и ремонту автомобиля Land Rover Defender 90 1993 года выпуска.
- Автор: —
- Издательство: Land Rover
- Год издания: 1993
- Страниц: 492
- Формат: PDF
- Размер: 14,9 Mb
Руководство на английском языке по техническому обслуживанию и ремонту автомобиля Land Rover Defender 90 1997 модельного года.
- Автор: —
- Издательство: Rover Group Limited
- Год издания: 1996
- Страниц: 405
- Формат: PDF
- Размер: 5,4 Mb
Руководство на английском языке по техническому обслуживанию и ремонту автомобиля Land Rover Defender 90/110/130.
- Автор: —
- Издательство: —
- Год издания: —
- Страниц: —
- Формат: PDF
- Размер: 29,8 Mb
Руководство на английском языке по техническому обслуживанию и ремонту автомобиля Land Rover Defender с 2007 модельного года.
- Автор: —
- Издательство: —
- Год издания: —
- Страниц: 1213
- Формат: PDF
- Размер: 61,0 Mb

Руководство по ремонту автомобиля Land Rover Defender 2007 года выпуска.
- Автор: —
- Издательство: —
- Год издания: 2011
- Страниц: —
- Формат: PDF
- Размер: 132,9 Mb

Руководство по ремонту автомобиля Land Rover Defender.
- Автор: —
- Издательство: Легион-Автодата
- Год издания: —
- Страниц: 426
- Формат: —
- Размер: —
Подборка руководств на английском языке по ремонту электрооборудования + электросхемы автомобиля Land Rover Defender с 1997 года выпуска.
- Автор: —
- Издательство: Land Rover
- Год издания: —
- Страниц: —
- Формат: PDF
- Размер: 23,3 Mb

Жгуты проводов для датчиков скорости колеса Defender 2007
1. Проверьте правильность разводки и надежность крепления электропроводки каждого датчика скорости колеса.
ПРИМЕЧАНИЕ: В случае необходимости в замене датчика скорости колеса следует довести это до сведения клиента, так как требуются дополнительные затраты труда и/ или материальные…
Жгуты электропроводки Defender 2007
Введение
ПРЕДОСТЕРЕЖЕНИЕ: Не используйте любой другой термоусадочный шланг, кроме рекомендованного проклеенного термоусадочного шланга, упомянутого в процедуре ремонта.
Этот документ предназначен для информирования о быстром и эффективном мелком ремонте разъемов или кабелей с…
Жиклер омывателя заднего стекла Defender 2007
Снятие
1. Освободите и снимите отделку обоих задних боковых окон.
2. Выверните 8 винтов крепления обоих задних поручней.
3. Снимите оба задних поручня.
4. Снимите 4 декоративные шпильки крепления верхнего заднего элемента отделки к кузову.
5. Освободите…
Звуковой сигнал — снятие и установка Defender 2007
Снятие
1. Снимите левую фару.
За дополнительной информацией обратитесь к главе: Headlamp Assembly (417-01, Снятие и установка).
2. Рассоедините электрический разъем звукового сигнала.
3. Отверните гайку и снимите звуковой сигнал с опорного кронштейна.
…
Защелка капота Defender 2007
Снятие
Откройте капот.
Отметьте положение направляющей пластины и замка относительно опорной панели капота.
Выверните 8 винтов крепления решетки.
Снимите решетку.
Отверните 2 болта крепления направляющей пластины и замка.
Снимите направляющую пластину.
Отпустите пружину крепления замка к опорной…
Защелка передней двери Defender 2007
Снятие
1. Снимите панель усиления двери и подоприте стекло доской.
За дополнительной информацией обратитесь к главе: Панель усилителя передней двери (501-03 Запираемые элементы кузова, Снятие и установка).
2. Отсоедините приводную тягу от рычага привода ручки.
3. Отсоедините…
Защелка задней двери Defender 2007
Снятие
1. Снимите панель отделки двери.
За дополнительной информацией обратитесь к главе: Панель отделки задней двери (501-05 Отделка салона, Снятие и установка).
2. Отогните по месту пластмассовый лист, чтобы получить доступ к защелке двери.
3. Отцепите приводную тягу ручки…
Защита от коррозии Defender 2007
Типы соединений
Поз.
№ запасной
Наименование
1.
части
Между панелями с болтовым креплением
2.
—
Между краями панелей с болтовым креплением
3.
—
Между панелями, соединенными с помощью точечной сварки
4.
—
Между краями панелей, соединенных с помощью точечной сварки
5.
—
Между склеиваемыми…
Заслонки панели приборов Defender 2007
Снятие
Рычагом подденьте каждый нижний угол и отсоедините воздуховоды холодного воздуха от дефлекторов панели приборов.
Выверните винт крепления обратной стороны дефлекторов к панели приборов.
Выверните три винта крепления внутренней стороны дефлекторов к панели приборов.
4. Приподнимите и…
Зазор в стыке поршневого кольца Defender 2007
1. ПРЕДОСТЕРЕЖЕНИЕ: Не путайте поршневые кольца. Устанавливать поршневые кольца следует в том же самом положении и на те же самые места.
Используя калиберный щуп, измерьте зазор поршневого кольца.
Приведенные в спецификации значения относятся к калибровочному кольцу,…
Страницы

- Manuals
- Brands
- Rover Manuals
- Automobile
- DEFENDER 300Tdi
- Workshop manual
-
Bookmarks
Quick Links
This file was downloaded from www.RepairMyLandrover.co.uk
The ONLY site you will ever need when maintaining your Landrover.
Related Manuals for Rover DEFENDER 300Tdi
Summary of Contents for Rover DEFENDER 300Tdi
-
Page 1
This file was downloaded from www.RepairMyLandrover.co.uk The ONLY site you will ever need when maintaining your Landrover. -
Page 2
AMENDMENT INSTRUCTION SHEET DEFENDER WORKSHOP MANUAL Publication Number LRL0097ENG Amendment Number: LD003.97 Date: 09/97 To ensure that this manual is kept up to date and that a record of amendments to this manual is available, an Amendment Instruction Sheet will be issued with each set of revised pages. The Title page of the Manual is re-issued, and the Part No. -
Page 3
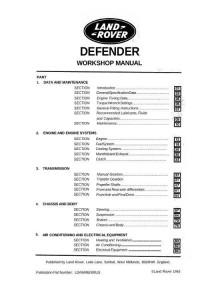
FRONT AXLE AND FINAL DRIVE STEERING FRONT SUSPENSION REAR SUSPENSION BRAKES WHEELS AND TYRES CHASSIS AND BODY HEATING AND VENTILATION AIR CONDITIONING WIPERS AND WASHERS ELECTRICAL INSTRUMENTS Publication Part No. LRL 0097 ENG Published by Rover Technical Communication © 1996 Rover Group Limited… -
Page 4
REPAIRS AND REPLACEMENTS be carried out by a Land Rover Dealer. Repairs to such items should NEVER be attempted by untrained When replacement parts are required it is essential individuals. -
Page 5
INTRODUCTION FUEL HANDLING PRECAUTIONS Hot fuel handling precautions The following information provides basic precautions WARNING: Before commencing any which must be observed if fuel is to be handled safely. operation requiring fuel to be drained from It also outlines the other areas of risk which must not the fuel tank, the following procedure must be ignored. -
Page 6
INTRODUCTION SYNTHETIC RUBBER USED ENGINE OIL Many ’0’ ring seals, flexible pipes and other similar WARNING: Prolonged and repeated items which appear to be natural rubber are made of contact with engine or motor oil will result synthetic materials called Fluoroelastomers. Under in the removal of natural fats from the normal operating conditions this material is safe, and skin, leading to dryness, irritation and dermatitis. -
Page 7
They are essential if service operations are Land Rover will not accept liability for death, personal to be carried out efficiently, and safely. Where special injury, or damage to property which may occur as a… -
Page 8
INTRODUCTION JACKING The following instructions must be carried out before raising the vehicle off the ground. 1. Use a solid level ground surface. 2. Apply parking brake. 3. Select 1st gear in main gearbox. 4. Select Low range in transfer gearbox. CAUTION: To avoid damage occurring to the under body components of the vehicle the following jacking procedures must be… -
Page 9
The manufacturer of LAND ROVER VEHICLES DOES NOT recommend using ’Two Post’ ramps that employ four adjustable support arms. These are NOT considered safe for Land Rover vehicles. If vehicle is installed on a Two Post ramp responsibility for safety of vehicle and personnel performing service operations is in the hands of the Service Provider. -
Page 10
INTRODUCTION TOWING Rear suspended tow by breakdown vehicle CAUTION: The vehicle has permanent 1. If the front axle is to be trailed turn ignition key to four-wheel drive. The following towing position ’1’ to release steering lock. instructions must be adhered to: 2. -
Page 11
INTRODUCTION JUMP STARTING WARNING: Hydrogen and oxygen gases are produced during normal battery operation. This gas mixture can explode if flames, sparks or lighted tobacco are brought near battery. When charging or using a battery in an enclosed space, always provide ventilation and shield your eyes. -
Page 12
INTRODUCTION ABBREVIATIONS AND SYMBOLS USED IN THIS MANUAL Across flats (bolt size) ……….Low tension …………. l.t. After bottom dead centre ……..ABDC Maximum …………max. After top dead centre ……… ATDC Metre ……………. Alternating current ……….a.c. Millilitre …………..Ampere ………….. -
Page 13
INTRODUCTION CROSS REFERENCE OF EMISSION SYSTEM TERMINOLOGY NEW TERM (ACRONYM) OLD TERM (ACRONYM) Accelerator pedal ……….(AP) Throttle pedal …………Air cleaner …………(ACL) Air cleaner …………… Air conditioning ………… (AC) Air conditioning ………… (AC) Battery positive voltage ……..(B+) Battery plus, bat +, bat feed ……… -
Page 14
SAL LD H M F 7 T A SAL = World manufacturer identifier A. Type approval LD = Land Rover Defender B. Identification H = 110 inch, V= 90inch, K= 130 inch C. Maximum permitted laden weight for vehicle M = 4 door Station Wagon, A= 90 Soft Top, Hard Top, D. -
Page 15
INTRODUCTION LOCATION OF IDENTIFICATION NUMBERS Engine serial number — 300Tdi Engine The 300Tdi engine number is stamped on the cylinder block on the RH side of the engine above the camshaft front cover plate. Front axle serial number Stamped on the front of LH axle tube, inboard of radius arm mounting bracket. -
Page 16
INTRODUCTION FAULT DIAGNOSTIC EQUIPMENT READING THIS MANUAL TESTBOOK This manual is divided into sections shown on the contents page, alongside a range of icons, familiar to For Defender models fitted with the vehicle Anti-theft service technicians. Immobilisation and Alarm System, diagnostic equipment, named TestBook, is available to assist in Relevant information is contained within each of these the diagnostic and fault finding abilities of the Dealer… -
Page 17
GENERAL SPECIFICATION DATA 300Tdi ENGINE Type …………….. Direct injection, turbocharged, intercooled Number of cylinders …………Bore …………….. 90,47 mm Stroke …………….97,00 mm Capacity …………….2495 cc 19.5:1 ± 0.5:1 Compression ratio …………Valve operation …………..O.H.V. pushrod operated Crankshaft Main bearing journal diameter ………. -
Page 18
GENERAL SPECIFICATION DATA Camshaft Drive …………….. 30 mm wide dry toothed belt Location …………….Right hand side (thrust side) End float …………….0,1 — 0,2 mm Number of bearings …………Material …………….Steel shell, white metal lined Valves Tappet clearance: — Inlet and exhaust ……….. -
Page 19
GENERAL SPECIFICATION DATA FUEL SYSTEM Fuel lift pump type …………Mechanical with hand primer Fuel lift pump pressure …………. 42 — 55 Kgf/cm (3 — 4 lbf/in ) at 1800 rpm Fuel filter …………….Paper element in disposable canister Air cleaner ……………. -
Page 20
GENERAL SPECIFICATION DATA Front axle Type …………….. Spiral bevel, enclosed constant velocity joints, fully floating shafts, 32° angularity of universal joint on full lock Ratio …………….. 3.54:1 Propeller shafts Type, front and rear …………Tubular 51 mm dia. Universal joints ………….. -
Page 21
GENERAL SPECIFICATION DATA SUSPENSION Type …………….. Coil springs controlled by telescopic dampers front and rear. Front …………….. Transverse location of axle by Panhard rod, and fore and aft location by two radius arms. Anti-roll bar fitted as standard on 90 models with 265/75 tyres and 130 models. -
Page 22
GENERAL SPECIFICATION DATA SHOCK ABSORBERS Type …………….. Telescopic, double-acting non-adjustable Bore diameter …………..35.47mm BRAKES Front service brake Caliper …………….AP Lockheed, four opposed pistons Operation …………….. Hydraulic, self adjusting Disc ……………… 90 — Solid, outboard, 110/130 — Ventilated, outboard Disc diameter ………….. -
Page 23
….rev/min ELECTRICAL System …………….12 volt, negative ground Battery Make/type — standard …………Land Rover Parts and Equipment/Lucas maintenance free 9-plate 072 Make/type — heavy duty ………… Land Rover Parts and Equipment/Lucas maintenance free 14-plate 663 Generator Manufacturer ………….. -
Page 24
GENERAL SPECIFICATION DATA Fuses Type …………….. Autofuse (blade type) blow ratings to suit individual circuits Horns Make/type ……………. Mixo TR99 Starter motor Make and type …………..Bosch 12v BULBS REPLACEMENT BULBS TYPE Headlamps 60/55W Halogen Front side lamps bayonet Side repeater lamps capless Tail lamps 5/21W… -
Page 25
GENERAL SPECIFICATION DATA VEHICLE WEIGHTS AND PAYLOAD When loading a vehicle to its maximum (Gross Vehicle Weight), consideration must be taken of the unladen vehicle weight and the distribution of the payload to ensure that axle loadings do not exceed the permitted maximum values. -
Page 26
GENERAL SPECIFICATION DATA TOWING WEIGHTS On-road Off-road Unbraked trailers ………….. 750 Kg (1653 lb) 500 Kg (1102 lb) Trailers with overrun brakes ……….3500 Kg (7716 lb) 1000 Kg (2204 lb) 4 wheel trailers with coupled brakes * ……4000 Kg (8818 lb) 1000 Kg (2204 lb) NOTE: * Only applies to vehicles modified to accept coupled brakes. -
Page 27
GENERAL SPECIFICATION DATA TYRE SIZE AND PRESSURES 90 models Front Rear Normal — all load conditions 205 R16 radial & 265/75 R16 (multi-terrain) ……..1,9 bar 2,4 bar 28 Ibf/in 35 Ibf/in 2,0 kgf/cm 2,5 kgf/cm 750 R16 radial …………1,9 bar 2,75 bar 28 Ibf/in… -
Page 28
GENERAL SPECIFICATION DATA VEHICLE DIMENSIONS 90 models Overall length: Soft top and Pick-up ……….3722 mm (146.5 in) Hard top and Station wagon ……..3883 mm (152.9 in) Overall width: …………..1790 mm (70.5 in) Overall height: Soft top …………..1965 mm (77.4 in) Pick-up and Station wagon …….. -
Page 29
ENGINE TUNING DATA 300 Tdi ENGINE Type …………….. 2.5 Litre Turbo diesel intercooled Firing order …………..1-3-4-2 Injection timing …………… 1,54 mm lift at T.D.C. Injection timing with electronic EGR ……1,40 mm lift at T.D.C. Timing marks: Valve timing — manual ………… -
Page 30
ENGINE TUNING DATA INJECTORS Make & type — standard ………… Bosch KBAL 90 P37 Nozzle type …………..DSLA 145P366 Opening pressure (working pressure) ……Initial pressure 200 atmospheres, Secondary 280 atmospheres TURBOCHARGER Make & type …………..Garrett T250 — 04 Maximum boost pressure ………. -
Page 31
GENERAL FITTING REMINDERS GENERAL FITTING REMINDERS SAFETY PRECAUTIONS WORKSHOP SAFETY IS YOUR RESPONSIBILITY! 1. Whenever possible, use a lift when working beneath vehicle, in preference to jacking. Chock The suggestions, cautions and warnings in the wheels as well as applying parking brake. section are intended to serve as reminders for trained and experienced mechanics. -
Page 32
GENERAL FITTING REMINDERS PREPARATION INSPECTION-GENERAL 1. Clean components and surrounding area prior to 1. Never inspect a component for wear or removal. dimensional check unless it is absolutely clean; 2. Blank off any openings exposed by component a slight smear of grease can conceal an incipient removal using greaseproof paper and masking failure. -
Page 33
GENERAL FITTING REMINDERS BALL AND ROLLER BEARINGS 8. If one bearing assembly of a pair shows an imperfection it is generally advisable to replace CAUTION: Never refit a ball or roller both with new bearings; an exception could be bearing without first ensuring that it is in a made if the faulty bearing had covered a low fully serviceable condition. -
Page 34
GENERAL FITTING REMINDERS OIL SEALS NOTE: Ensure that the seal running track is free from pits, scores, corrosion and general damage prior to fitting replacement seal. 1. Always fit new oil seals when rebuilding an assembly. 2. Carefully examine seal before fitting to ensure that it is clean and undamaged. -
Page 35
GENERAL FITTING REMINDERS JOINTS AND JOINT FACES FLEXIBLE HYDRAULIC PIPES, HOSES 1. Always use correct gaskets where they are 1. Before removing any brake or power steering specified. hose, clean end fittings and area surrounding 2. Use jointing compound only when them as thoroughly as possible. -
Page 36
GENERAL FITTING REMINDERS FUEL SYSTEM HOSES METRIC NUT IDENTIFICATION CAUTION: All fuel hoses are made up of two laminations, an armoured rubber outer sleeve and an inner viton core. If any of the fuel system hoses have been disconnected, it is imperative that the internal bore is inspected to ensure that the viton lining has not become separated from the amoured outer sleeve. -
Page 37
GENERAL FITTING REMINDERS COTTER PINS SCREW THREADS 1. Both UNF and Metric threads to ISO standards are used. See below for thread identification. 2. Damaged threads must always be discarded. Cleaning up threads with a die or tap impairs the strength and closeness of fit of the threads and is not recommended. -
Page 38
LUBRICANTS, FLUIDS AND CAPACITIES RECOMMENDED LUBRICANTS AND FLUIDS All climates and conditions AMBIENT TEMPERATURE °C COMPONENT SPECIFICATION VISCOSITY Diesel RES.22.OL.PD-2 15W/40 Engine sump or CCMC PD-2 or API CD Main Gearbox ATF Dexron IID manual Final drive units API or GL5 90 EP Swivel pin housings MIL — L — 2105 or… -
Page 39
LUBRICANTS, FLUIDS AND CAPACITIES Propeller shaft Front NLGI — 2 Multi-purpose Lithium based GREASE and Rear Lubrication nipples (hubs, ball joints etc.) Seat slides Door lock striker Brake and clutch Brake fluids having a minimum boiling point of 260° C (500° F) and complying with reservoirs FMVSS 116 DOT4 Engine coolant… -
Page 40
LUBRICANTS, FLUIDS AND CAPACITIES CAPACITIES The following capacity figures are approximate and are provided as a guide only. Capacities (approx.)* Litres Pints Engine sump oil …………..10.20 Extra when refilling after fitting new filter ……0,85 1.50 Manual gearbox …………… 2,67 4.70 Transfer gearbox oil… -
Page 41
LUBRICANTS, FLUIDS AND CAPACITIES RECOMMENDED FUEL Diesel fuel oil, distillate, diesel fuel, automotive gas or Derv to British standard 2869, Class A1 or A2 Using diesel fuel with a class rating lower than stated above could seriously impair vehicle performance. FUEL TANK CAPACITY Side tank: 90 models… -
Page 42
Procedures in the Workshop Manual must be used in conjunction with the Service Schedule sheets. Service Maintenance Schedules are available from: Land Rover Publications, Character Mailing, Heysham Road, Bootle, Merseyside, L70 1JL 4. -
Page 43
MAINTENANCE BATTERY CONNECTIONS VEHICLE EXTERIOR NOTE: The vehicle may be fitted with an CHECK/ADJUST HEADLAMP ALIGNMENT alarm and immobilisation system using a battery backed-up alarm sounder. See Check/adjust headlamp alignment. ELECTRICAL, Repair, Battery Disconnect battery leads, clean and grease with CHECK ROAD WHEELS AND TYRES petroleum jelly, including battery terminals. -
Page 44
MAINTENANCE UNDER BONNET MAINTENANCE UNDER BONNET COMPONENTS A — RH drive 1. Brake fluid reservoir 10. Intercooler and hoses 2. Clutch fluid reservoir 11. Radiator filler plug 3. Air cleaner element 12. Radiator 4. Engine breather filter 13. Oil cooler 5. -
Page 45
MAINTENANCE UNDER BONNET COMPONENTS B — LH drive 1. Brake fluid reservoir 10. Intercooler and hoses 2. Clutch fluid reservoir 11. Radiator filler plug 3. Air cleaner element 12. Radiator 4. Engine breather filter 13. Oil cooler 5. Oil filler cap 14. -
Page 46
MAINTENANCE CHECK COOLING, INTERCOOLING AND HEATING Check intercooler and turbo-charger system for air SYSTEMS leaks and pipes/hoses for security and condition. Check cooling, and heater systems for leaks and All system hoses should be renewed at first signs of pipes/hoses for security and condition. Refill or top up deterioration. -
Page 47
MAINTENANCE RENEW AIR CLEANER ELEMENT AND CLEAN Refit DUMP VALVE 6. Fit new element, seal first, into casing and Remove secure with wing nut. 7. Fit end cover, align mating arrows, and secure 1. Release 2 retaining clips and lift air cleaner from with wing nut. -
Page 48
MAINTENANCE RENEW AUXILIARY DRIVE BELT CHECK/TOP UP CLUTCH FLUID RESERVOIR Renew drive belt. See ELECTRICAL, Repair, WARNING: Clutch fluid will damage Auxiliary drive belt painted surfaces; clean up any spillage immediately and rinse with plenty of water. If clutch fluid should come into contact with the RENEW COMPRESSOR DRIVE BELT skin or eyes, rinse immediately with plenty of water. -
Page 49
MAINTENANCE CHECK/TOP UP BRAKE FLUID RESERVOIR CHECK/ADJUST ENGINE IDLE SPEED WARNING: DO NOT drive the vehicle with Check/adjust low and high engine idle speed with the fluid level below ’MIN’ mark. engine at normal running temperature. See FUEL Brake fluid will damage painted surfaces; clean up SYSTEM, Adjustment, low and high idle speed any spillage immediately and rinse with plenty of adjustment… -
Page 50
MAINTENANCE UNDER VEHICLE MAINTENANCE A — 90 chassis, B — 110/130 chassis UNDER VEHICLE COMPONENTS 8. Rear axle filler/level plug 9. Rear axle drain plug 1. Swivel pin housing 10. Propeller shaft universal joints 2. Engine oil filter 11. Fuel sedimenter, if fitted 3. -
Page 51
MAINTENANCE NOTE: A chassis undertray may be fitted on some vehicle derivatives to conform to legal requirements. When under chassis maintenance, or remove and refit procedures are required, it may be necessary to remove the undertray and/or integral access panels See CHASSIS AND BODY, Repair, Front undertray or See CHASSIS AND BODY, Repair, Rear undertray RENEW ENGINE OIL AND FILTER… -
Page 52
MAINTENANCE RENEW GEARBOX OIL 1. Ensure vehicle is level. 2. Place suitable tray under gearbox. 3. Disconnect battery. 4. Place suitable tray under transfer gearbox. 5. Remove filler/level plug to vent gearbox and assist draining. 6. Remove drain plug and allow oil to drain. 7. -
Page 53
MAINTENANCE RENEW FRONT AND REAR AXLE OIL 3. If necessary inject new oil until oil runs out from filler/level hole. Allow excess oil to drain and 1. Ensure vehicle is level and place suitable tray wipe clean. See LUBRICANTS, FLUIDS AND under axle to be drained. -
Page 54
MAINTENANCE LUBRICATE PROPELLER SHAFT UNIVERSAL Ball joints are lubricated for life during manufacture AND SLIDING JOINTS and require no further lubrication unless the rubber boot has been dislodged or damaged. All joints should 1. Clean all grease nipples on front and rear be checked at specified service intervals, but more propeller shafts. -
Page 55
MAINTENANCE 2. When pure diesel is emitted, retighten drain CARRY OUT ROAD OR ROLLER TEST plug. 3. Disconnect fuel inlet pipe at sedimenter. Raise WARNING: Two wheel roller tests MUST and support pipe above level of fuel tank to NOT be carried out. prevent fuel draining from tank. -
Page 56
MAINTENANCE ADDITIONAL MAINTENANCE SCHEDULES Air cleaner Camshaft drive belt When the vehicle is used in dusty or field conditions or deep wading, frequent attention to the air cleaner may The engine timing gears are driven by a toothed be required. rubber belt which must be renewed at intervals determined by the severity of operating conditions. -
Page 57
ENGINE VALVE CLEARANCES — CHECK AND ADJUST Service repair no — 12.29.48 Adjust WARNING: If the crankshaft is rotated with excessive valve clearace, it is possible that the push rods could be dislodged from the cam follower seating and fracture the cam follower slide. -
Page 58
ENGINE CYLINDER COMPRESSION TEST 10. Repeat test procedure for remaining clinders in turn. Service repair no — 12.25.01 NOTE: A variation in compression 1. Start and run engine to normal operating readings between cylinders is often a temperature. better indication of an engine problem 2. -
Page 59
ENGINE ENGINE OIL PRESSURE TEST 6. If pressure is low it can be caused by the following:- Service repair no — 12.90.09/01 Thin or diluted oil. Low oil in sump. WARNING: Use suitable exhaust Choked oil strainer. extraction equipment if an engine test is Faulty oil pressure relief valve. -
Page 60
ENGINE ENGINE 8. Remove radiator assembly. See COOLING SYSTEM, Repair, Radiator Service repair no — 12.41.01 If air conditioning is fitted the condenser will have to be removed, compressor pipes and Remove heater matrix hoses disconnected. See AIR CONDITIONING, Repair, Condenser NOTE: A chassis undertray may be fitted 9. -
Page 61
ENGINE 14. Disconnect engine harness multi-plug. 15. Remove single bolt securing transmission breather pipe clip to cylinder head and move breather pipes aside. 18. Remove 3 retaining nuts and disconnect exhaust down pipe. 19. Disconnect inlet and outlet hoses from power steering pump. -
Page 62
ENGINE 30. Using suitable hoist, fit chains to lifting brackets and support engine. 31. Remove nuts and plain washers securing front engine mountings to chassis. 26. Disconnect both pipes from fuel lift pump. 27. Release fuel feed pipe from retaining clip on air cleaner bracket. -
Page 63
ENGINE 42. Raise engine, and locate front engine mountings CRANKSHAFT PULLEY to chassis. 43. Remove gearbox support and lower engine. Service repair no — 12.21.01 44. Tighten front engine mounting to chassis fixings to 45 Nm (33 lbf/ft). Remove 45. Release chains from engine lifting brackets and remove hoist. -
Page 64
ENGINE Refit FRONT COVER PLATE AND SEAL 12. Lightly grease pulley spigot and locate pulley Service repair no — 12.65.01 onto cranshaft. 13. Fit pulley retaining bolt. Remove 14. Fit pulley retainer LRT-12-080 and secure with 4 bolts. 1. Disconnect battery. 15. -
Page 65
ENGINE Refit CAMSHAFT DRIVE BELT 14. Fit gasket to centre bolt boss. Service repair no — 12.65.18 15. Locate new gasket and fit front cover plate using fixing bolts as shown. Tighten bolts to 25 Nm (18 Remove lbf/ft). 1. Remove front cover plate. See Front cover plate 2. -
Page 66
ENGINE NOTE: If the camshaft gear is to be Belt tensioner removed during these operations its retaining bolt should be slackened before NOTE: The belt tensioner need only be the timing belt is removed. removed if it is being replaced or for access purposes to remove front cover. -
Page 67
ENGINE 17. Slacken belt tensioner securing bolt to finger CRANKSHAFT GEAR tight. 18. Insert 13 mm square drive extension bar in Service repair no — 12.65.25 tensioner plate. Remove 1. Remove camshaft drive belt. See Camshaft drive belt 2. If the crankshaft gear cannot be removed by hand, use special tool LRT-12-078 with main NOTE: Belt tensioning should be carried body and thrust button from special tool… -
Page 68
ENGINE CRANKSHAFT OIL SEAL CAMSHAFT GEAR Service repair no — 12.21.14 Service repair no — 12.65.24 Remove Remove 1. Remove crankshaft gear. See Crankshaft gear 1. Remove camshaft drive belt. See Camshaft 2. Prise out oil seal from front cover. drive belt 2. -
Page 69
ENGINE CAMSHAFT OIL SEAL INJECTION PUMP GEAR Service repair no — 12.13.05 Service repair no — 19.30.06 Remove Remove 1. Remove camshaft gear. See Camshaft gear 1. Remove camshaft drive belt. See Camshaft drive belt 2. Remove camshaft oil seal from front cover using special tool LRT-12-083. -
Page 70
ENGINE FRONT COVER GASKET 15. Secure with bolts of correct length in locations where slave studs are not fitted, see J6149. Service repair no — 12.65.10 16. Remove slave studs and fit correct length bolts. 17. Tighten all bolts to 25 Nm (18 lbf/ft). Remove 1. -
Page 71
ENGINE ENGINE OIL SUMP OIL PICK-UP STRAINER Service repair no — 12.60.44 Service repair no — 12.60.20 Remove Remove 1. Disconnect battery. 1. Disconnect battery. 2. Drain engine oil. 2. Drain engine oil. 3. Remove engine oil sump. See Engine oil NOTE: A chassis undertray may be fitted sump on some vehicle derivatives to conform to… -
Page 72
ENGINE FLYWHEEL Service repair no — 12.53.07 Remove 1. Disconnect battery. 2. Remove gearbox. See MANUAL GEARBOX, Repair, R380 gearbox 3. Remove clutch. See CLUTCH, Repair, Clutch assembly 9. Check the flywheel for possible run-out by mounting a dial test indicator with the stylus in a loaded condition resting on the flywheel face at a radius of 114 mm (4.50 in) from the centre. -
Page 73
ENGINE CRANKSHAFT REAR OIL SEAL Service repair no — 12.21.20 Remove NOTE: The crankshaft rear oil seal is retained in its own housing, if the seal requires replacing, the complete housing assembly (1) must be renewed. Housing and seal assemblies are supplied with their own former/seal guide (2) already fitted. -
Page 74
ENGINE 11. Refit clutch. See CLUTCH, Repair, Clutch Method 2. assembly 12. Refit gearbox. See MANUAL GEARBOX, Thread the bore of the existing bush and using a Repair, R380 gearbox suitable bolt extract the bush. Thoroughly clean bush 13. Reconnect battery. location ensuring all swarf is removed. -
Page 75
ENGINE FLYWHEEL HOUSING Refit Service repair no — 12.53.01 9. Clean rear face of housing and mating face on block, ensuring all old sealant is removed. Remove 1. Disconnect battery. 2. Remove gearbox. See MANUAL GEARBOX, Repair, R380 gearbox 3. Remove clutch. See CLUTCH, Repair, Clutch assembly 4. -
Page 76
ENGINE OIL FILTER OIL TEMPERATURE CONTROL VALVE Service repair no — 12.60.01 Service repair no — 12.60.69 Remove Remove 1. Place drain tray under oil filter. 1. Clean adaptor housing. 2. Unscrew filter anti-clockwise, using a strap 2. Disconnect oil cooler feed pipe from thermostat wrench, if necessary. -
Page 77
ENGINE OIL FILTER HEAD GASKET CYLINDER HEAD GASKET Service repair no — 12.60.03 Service repair no — 12.29.02 Remove Remove 1. Clean filter head adaptor. 1. Disconnect battery 2. Disconnect oil cooler pipes and plug to prevent 2. Remove bonnet. ingress of dirt. -
Page 78
ENGINE 12. Remove induction manifold. See MANIFOLD AND EXHAUST SYSTEM, Repair, Induction manifold 13. Remove exhaust manifold and turbocharger assembly. See MANIFOLD AND EXHAUST SYSTEM, Repair, Exhaust manifold 14. Disconnect heater hose from water pump and move heater rail aside. 15. -
Page 79
ENGINE 28. Lower cylinder head onto block ensuring correct location with dowels. 32. Attach angle gauge LRT-12-007. 33. Make a suitable pointer from welding rod and NOTE: Cylinder head retaining bolts can attach to a bolt screwed into a rocker shaft be used up to a maximum of five times. -
Page 80
ENGINE OIL PUMP Service repair no — 12.60.26 Remove 1. Remove engine front cover. See Front cover gasket 43. Check and adjust valve clearances. See Adjustment, Valve clearances — check and adjust 44. Fit rocker cover, ensuring oil seal is satisfactory for continued use, and renew if necessary. -
Page 81
ENGINE Refit OIL PRESSURE RELIEF VALVE 8. Fit oil pump rotors in front cover. Service repair no — 12.60.56 9. Apply a bead of RTV sealant around retaining plate. Remove 10. Fit oil pump retaining plate to front cover, securely tighten screws. 1. -
Page 82
ENGINE TORQUE VALUES NOTE: Torque wrenches should be regularly checked for accuracy to ensure that all fixings are tightened to the correct torque. Engine block Bearing cap ………………..Blanking plug, oil gallery, rear …………..Oil squirt jet assembly …………….Drain plug, cylinder block ……………. -
Page 83
ENGINE Cylinder head Cylinder head to cylinder block M10 x 117 ………………… 60° + 60° M12 x 100 ………………… 60° + 60° M12 x 140 ………………60° + 60°+ 20° Stub pipe heater feed …………….. Water temperature sensor …………….. Blanking plug cylinder head …………… -
Page 84
ENGINE Turbo charger oil drain adaptor to block ………… Oil drain pipe to turbocharger …………..Turbocharger oil drain pipe to adaptor …………Turbocharger oil feed pipe adaptor to block ……….Turbocharger oil feed pipe to adaptor …………Oil feed pipe to turbocharger ………….. -
Page 85
ENGINE METRIC …………………………………………………………………………………………………………………………..UNC / UNF …………………. 5/16 ………………………………….7/16 ……………………………………………………NOTE: Torque values above are to be used as a guide where no torque is specified. SPECIFICATIONS, TORQUE… -
Page 86
FUEL SYSTEM DESCRIPTION On standard 110 and 130 models the fuel tank is located at the rear of the vehicle between the chassis Fuel system longitudenal sections, as shown in J6192. The fuel system incorporates a supply and spill return As an option, a twin tank system fitted with a line on all models as illustrated below. -
Page 87
FUEL SYSTEM A mechanical lift pump, with a hand priming facility, is Exhaust gas recirculation (EGR), when fitted. driven by the camshaft, and is mounted on the RH side of the engine. Exhaust gas recirculation is controlled by an ECU mounted under the front centre seat or cubby box and A fuel filter, with a replaceable element and receives the following inputs:… -
Page 88
FUEL SYSTEM 90 FUEL SYSTEM 110 FUEL SYSTEM 1. Fuel filter 7. Supply pipe, sedimentor to fuel pump 2. Supply pipe, lift pump to filter 8. Fuel tank 3. Supply pipe, fuel filter to injection pump 9. Supply pipe, fuel tank to sedimentor 4. -
Page 89
FUEL SYSTEM 110/130 TWIN TANK FUEL SYSTEM — 5 DOOR VEHICLES 1. Fuel filter 12. Supply pipe, side tank to sedimentor 2. Supply pipe, lift pump to filter 13. Sedimentor, if fitted, side tank 3. Supply pipe, filter to injection pump 14. -
Page 90
FUEL SYSTEM 110/130 TWIN TANK FUEL SYSTEM — 2 DOOR VEHICLES 1. Fuel filter 13. Breather pipe 2. Supply pipe, fuel lift pump to filter 14. Sedimentor, if fitted, side tank 3. Supply pipe, filter to injection pump 15. Supply pipe, sedimentor to fuel tank 4. -
Page 91
FUEL SYSTEM TWIN TANK FUEL CHANGE — OVER MECHANISM 1. Change-over tap, fuel tanks 8. Spill return, injection pump to change-over tap 2. Fuel supply, side tank 9. Control rod, operating lever to fuel change-over 3. Fuel supply, rear tank 4. -
Page 92
FUEL SYSTEM FUEL SYSTEM COMPONENT LOCATION 1. Fuel filter bleed screw 7. Heater plug 2. Fuel filter 8. Heater plug controller 3. Turbocharger 9. Coolant temperature transmitter 4. Actuator 10. Fuel injection pump 5. Air cleaner 11. Fuel lift pump 6. -
Page 93
FUEL SYSTEM EGR FUEL SYSTEM COMPONENT LOCATION, (when fitted) 1. EGR modulator valve 7. EGR valve 2. Electrical harness plug 8. Vacuum pipe, modulator valve to EGR valve 3. Vacuum spill pipe, modulator to air cleaner hose 9. Multi-plug connector, EGR valve 4. -
Page 94
FUEL SYSTEM OPERATION Cold Starting is assisted by heater plugs, a cold start advance unit and a high idle setting. Diesel engines operate by compression ignition. The rapid compression of air in the cylinder during the Heater plugs compression cycle heats the air and when fuel is injected into the heated air, it ignites instantaneously. -
Page 95
FUEL SYSTEM Under varying engine speed and load condition the control unit sends a signal to open the vacuum modulator which allows a vacuum to be applied above the EGR diaphragm. The vacuum supply is taken from a ’T’ connector in the brake servo hose. This process is controlled by an engine speed/load map stored in the EGR control unit memory. -
Page 96
FUEL SYSTEM THROTTLE CABLE EGR THROTTLE POSITION SENSOR Adjust Check 1. Run engine until normal operating temperature is reached. 1. Slacken throttle cable adjustment ferrule. 2. Hold throttle lever in fully closed position. 3. Adjust outer cable, by rotating ferrule, to give 2. -
Page 97
FUEL SYSTEM LOW AND HIGH IDLE SPEED ADJUSTMENT THROTTLE PEDAL ADJUSTMENT NOTE: The high idle speed (cold start idle) Adjust is automatically set by the setting of the low idle speed and cannot be adjusted 1. First ensure that throttle cable is correctly individually. -
Page 98
FUEL SYSTEM INJECTION PUMP TIMING — CHECK AND ADJUST Service repair no — 19.30.01 1. Viewing the valve mechanism through oil filler aperture, turn crankshaft clockwise until inlet valve of No.1 cylinder has just closed. No.1 cylinder is now just before TDC. 10. -
Page 99
FUEL SYSTEM TURBOCHARGER BOOST PRESSURE — CHECK PRIMING THE FUEL SYSTEM Service repair no — 19.42.06 Service repair no — 19.50.01 NOTE: If the fuel system has been completely drained carry out the procedures for priming both the sedimentor, if fitted, and fuel filter and injection pump. -
Page 100
FUEL SYSTEM Fuel injection pump If the fuel injection pump has been removed or renewed carry out the following: 1. Slacken fuel inlet pipe banjo bolt at injection pump. 2. Operate hand priming lever on fuel lift pump until fuel, free from air, emerges from injection pump. 3. -
Page 101
FUEL SYSTEM FUEL INJECTION PUMP Service repair no — 19.30.07 Remove 1. Disconnect battery. 2. Disconnect and remove high pressure fuel injection pipes, pump to injectors. 3. Viewing valve mechanism through oil filler cap aperture, turn crankshaft clockwise until No. 1 cylinder is just before TDC. -
Page 102
FUEL SYSTEM 25. Connect fuel cut-off solenoid lead and throttle position sensor multi-plug, if fitted. 26. Connect throttle cable and where applicable, hand throttle cable. 27. Remove pump gear retaining tool LRT-12-045. 28. Carefully turn the pump hub nut in a clockwise direction, sufficiently enough to enable timing tool pin to be inserted into injection pump. -
Page 103
FUEL SYSTEM FUEL INJECTORS 5. Remove retaining nut and release each injector clamp plate from cylinder head. Service repair no — 19.60.10 6. Remove injector and discard copper washer. Remove Refit NOTE: When a fuel injector is considered 7. Ensure injectors and seating in cylinder head are to be the cause of irregular running and clean. -
Page 104
FUEL SYSTEM FUEL LIFT PUMP FUEL SEDIMENTOR Service repair no — 19.45.09 Service repair no — 19.25.01 Remove Remove NOTE: Blank off pipe ends and 1. Disconnect battery. connections to prevent ingress of dirt. 1. Disconnect battery. 2. Remove high pressure fuel pipes, injection pump to injectors. -
Page 105
FUEL SYSTEM FUEL FILTER ASSEMBLY Refit Service repair no — 19.25.02 9. Position filter assembly and fit fuel inlet and outlet pipes using new copper sealing washers Remove both sides of the banjo connections. 10. Secure filter head to inner wing. 1. -
Page 106
FUEL SYSTEM SIDE MOUNTED FUEL TANK Service repair no — 19.55.05 NOTE: This fuel tank is standard on 90 3. Remove fuel tank drain plug, allow fuel to drain models and an option on 110/130 2 door into a clean container and refit plug. vehicles fitted with twin tanks. -
Page 107
FUEL SYSTEM SIDE MOUNTED FUEL TANK — 5 DOOR VEHICLES Service repair no — 19.55.01 NOTE: This fuel tank is used on 110/130 5 door vehicles fitted with a twin tank option. WARNING: Before any attempt is made to start the removal procedure it is vital that the FUEL HANDLING PRECAUTIONS, See INTRODUCTION, Information, Fuel handling precautions are carefully studied and… -
Page 108
FUEL SYSTEM REAR MOUNTED FUEL TANK — 110/130 Service repair no — 19.55.26 WARNING: Before any attempt is made to 5. Disconnect breather hose from filler tube. start the removal procedure it is vital that 6. Disconnect electrical plug and fuel supply pipe the FUEL HANDLING PRECAUTIONS See from outlet pipe union on fuel gauge unit. -
Page 109
FUEL SYSTEM 23. Fit anti-roll bar chassis mountings. See REAR SUSPENSION, Repair, Anti-roll bar 24. Check that drain plug is secure and fill fuel tank. 25. Reconnect battery. 26. Prime fuel system. See Adjustment, Priming the fuel system and start engine. 27. -
Page 110
FUEL SYSTEM TWIN TANK CHANGE-OVER TAP ASSEMBLY 12. Remove fuel tap, complete with operating rod and lever. Service repair no — 19.43.50 — Fuel supply tap 13. Plug all connections to prevent ingress of dirt. Service repair no — 19.43.51 — Spill return tap 14. -
Page 111
FUEL SYSTEM HEATER PLUGS Service repair no — 19.60.31 Remove 1. Disconnect battery. No.1 heater plug — air conditioning models: 2. Release drive belt from compressor pulley. See AIR CONDITIONING, Repair, Compressor drive belt 3. Remove 4 bolts securing compressor to front cover, move compressor aside. -
Page 112
FUEL SYSTEM HEATER PLUG CONTROL UNIT AIR CLEANER Service repair no — 19.60.33 Service repair no — 19.10.01 Remove Remove 1. Disconnect battery. 1. Slacken hose clip and detach outlet hose. 2. Release clips and open air cleaner retaining straps. 3. -
Page 113
FUEL SYSTEM THROTTLE CABLE Refit Service repair no — 19.20.06 8. Feed throttle cable through bulkhead from engine compartment and fit grommet. Remove 9. Secure throttle cable to pedal lever. Use new split pin to secure clevis. 1. Disconnect battery. 10. -
Page 114
FUEL SYSTEM TURBOCHARGER INLET HOSE TURBOCHARGER OIL FEED PIPE Service repair no — 19.42.11 Service repair no — 19.42.14 Remove Remove 1. Disconnect battery. 1. Disconnect battery. 2. Remove exhaust front pipe. See MANIFOLD AND EXHAUST SYSTEM, Repair, Exhaust front pipe 3. -
Page 115
FUEL SYSTEM TURBOCHARGER OIL DRAIN PIPE Service repair no — 19.42.12 Remove 1. Disconnect battery. 2. Remove exhaust front pipe. See MANIFOLD AND EXHAUST SYSTEM, Repair, Exhaust front pipe 3. Unscrew union and disconnect oil drain pipe from cylinder block. 4. -
Page 116
FUEL SYSTEM INTERCOOLER Service repair no — 19.42.15 Remove 1. Disconnect battery. Refit 11. Manoeuvre intercooler into position at LH side of 2. Remove 2 nuts securing fan cowl to radiator top radiator. cover. 12. Carefully lower intercooler and locate bottom 3. -
Page 117
FUEL SYSTEM EGR VALVE EGR VALVE MODULATOR Service repair no — 17.45.01 Service repair no — 17.45.04 Remove Remove 1. Disconnect multi-plug from EGR valve. 1. Disconnect multi-plug from modulator. 2. Disconnect vacuum pipe from EGR valve. 2. Disconnect spill pipe (green), modulator to air 3. -
Page 118
FUEL SYSTEM EGR THROTTLE POSITION SENSOR EGR CONTROL UNIT Service repair no — 17.45.08 Service repair no — 17.45.07 Remove Remove 1. Raise centre seat, or cubby box See CHASSIS AND BODY, Repair, Cubby box to gain access to EGR control unit harness. 1. -
Page 119
COOLING SYSTEM ENGINE COOLING SYSTEM The intercooler is a separate aluminium unit, located on the LH side of the engine compartment adjacent to Description the radiator, sharing the same upper and lower mountings. For details of turbo intercooling See The complete cooling system of the 300Tdi engine FUEL SYSTEM, Description and operation, incorporates three independent functions:- Engine Operation . -
Page 120
COOLING SYSTEM ENGINE (COOLANT) COOLING pumps coolant to the engine crankcase, cylinder head and vehicle heater unit. Description An eleven bladed fan, incorporating a viscous The 300Tdi engine uses a pressurised cooling system coupling, is driven by an independent pulley secured and cross flow radiator which is supplied with coolant to the front cover plate. -
Page 121
COOLING SYSTEM COOLANT CIRCULATION VISCOUS FAN Operation Description When the engine is started from cold the thermostat The viscous drive unit for the engine cooling fan, (2) prevents coolant circulation through the radiator by provides a means of controlling the speed of the fan closing off the top hose (6). -
Page 122
COOLING SYSTEM Operation When this clearance is filled with viscous fluid, a shearing action, caused by the speed differential To engage and disengage the fan drive the bi-metal between the two drive components, transmits torque coil senses air temperature behind the radiator. When to the fan. -
Page 123
COOLING SYSTEM DRAIN AND REFILL COOLING SYSTEM Refill Service repair no — 26.10.01 CAUTION: It is important that the correct procedure is followed when refilling or Draining topping up the cooling system to avoid trapping air in the system. WARNING: DO NOT remove caps or plugs when the engine is hot. -
Page 124
COOLING SYSTEM VISCOUS COUPLING AND FAN Service repair no — 26.25.19 — Viscous coupling Service repair no — 26.25.05 — Fan Remove NOTE: The viscous coupling has a LH thread. 1. Disconnect battery. 2. Using special pulley restraining tool LRT-12-094 and special spanner LRT-12-093 unscrew viscous coupling from pulley hub adaptor thread. -
Page 125
COOLING SYSTEM FAN COWL Refit Service repair no — 26.25.11 9. Position fan cowl. 10. Fit viscous fan unit. See Viscous coupling Remove and fan 11. Fit expansion tank hose into fan cowl clips. 1. Disconnect battery. 12. Secure top of fan cowl to radiator top cover. 2. -
Page 126
COOLING SYSTEM WATER PUMP Service repair no — 26.50.01 Remove 1. Disconnect battery. 2. Drain cooling system. See Adjustment, Drain and refill cooling system 3. Remove radiator top hose. 4. Remove intercooler top hose. 5. Slacken water pump and power steering pump pulley retaining bolts. -
Page 127
COOLING SYSTEM AUXILIARY MOUNTING BRACKET AND GASKET 15. Disconnect bottom hose/heater return hose at water pump and heater rail. Service repair no — 26.50.04 16. Disconnect by-pass hose from water pump and thermostat housing. Remove 17. Remove 5 bolts (one with nut) and single retaining nut, securing auxiliary mounting 1. -
Page 128
COOLING SYSTEM 28. Secure steering pump and bracket to auxiliary THERMOSTAT mounting bracket. 29. Fit steering pump pulley. Service repair no — 26.45.01 30. Fit drive belt See ELECTRICAL, Repair, Auxiliary drive belt . Remove 31. Fit fan cowl See Fan cowl . 32. -
Page 129
COOLING SYSTEM RADIATOR Refit Service repair no — 26.40.01 13. Position radiator between intercooler and RH side frame. Remove 14. Fit radiator top cover to side covers. 15. Lower radiator/intercooler assembly into 1. Disconnect radiator bottom hose and drain position. cooling system. -
Page 130
COOLING SYSTEM EXPANSION TANK Service repair no — 26.15.01 Remove 1. Position container to collect coolant spillage. 2. Slacken retaining clips and disconnect both hoses from base of expansion tank. 3. Remove 3 bolts securing expansion tank to inside wing and mounting bracket. 4. -
Page 131
MANIFOLD AND EXHAUST SYSTEM MANIFOLDS AND EXHAUST SYSTEM leak proof jointing between the various sections, which are supported by flexible rubber mountings. Description Catalytic convertor The exhaust systems fitted on all models with the 300Tdi engine comprise three sections; front pipe When fitted, the catalytic converter is integral with the assembly, intermediate silencer assembly, and tail front pipe assembly, which also incorporates a flexible… -
Page 132
MANIFOLD AND EXHAUST SYSTEM The catalyst comprises platinum coated ceramic elements. The Hydrocarbons (HC), Oxides of nitrogen (NOx) and Carbon monoxide (CO) emitted by the engine react with the catalytic element and exhaust temperature to convert the toxic gas into Nitrogen ), Carbon dioxide (CO ) and water vapour. -
Page 133
MANIFOLD AND EXHAUST SYSTEM INDUCTION MANIFOLD INDUCTION/EXHAUST MANIFOLD GASKET Service repair no — 30.15.02 Service repair no — 30.15.15 Remove Remove 1. Disconnect battery. 1. Remove induction manifold See Induction 2. Remove oil filler cap and remove rocker cover manifold . insulation. -
Page 134
MANIFOLD AND EXHAUST SYSTEM Refit EXHAUST MANIFOLD/TURBOCHARGER ASSEMBLY 11. Fit new gasket over manifold studs. 12. Loosely fit induction manifold lower nuts to Service repair no — 30.15.10 studs. 13. Fit exhaust manifold and secure with central Remove upper and lower nuts. 14. -
Page 135
MANIFOLD AND EXHAUST SYSTEM EXHAUST FRONT PIPE Service repair no — 30.10.09 Remove 1. Disconnect battery. 2. Raise vehicle on ramp. 6. Remove flange nuts securing front pipe to intermediate silencer assembly and separate flanges. 7. Release front pipe at manifold and remove gasket. -
Page 136
MANIFOLD AND EXHAUST SYSTEM INTERMEDIATE PIPE — 90 INTERMEDIATE PIPE — 110/130 Service repair no — 30.10.11 Service repair no — 30.10.11 Remove Remove 1. Raise vehicle on ramp. 1. Raise vehicle on ramp. 2. Release intermediate pipe from front mounting 2. -
Page 137
MANIFOLD AND EXHAUST SYSTEM TAILPIPE — 90 TAILPIPE — 110/130 Service repair no — 30.10.22 Service repair no — 30.10.22 Remove Remove 1. Raise vehicle on ramp. 1. Raise vehicle on ramp. 2. Remove 2 flange nuts securing tail pipe to 2. -
Page 138
CLUTCH DESCRIPTION OPERATION The clutch unit comprises a single dry plate friction The unit is operated hydraulically by the clutch master disc and diaphragm spring clutch unit, secured to the cylinder (12) and a slave cylinder (13) attached to the engine flywheel. -
Page 139
CLUTCH When the clutch pedal is depressed, hydraulic fluid As the the clamping force is removed from the friction transmits the movement via the slave cylinder, release plate (2), the plate slides on the splines of the primary lever (10), bearing (9), to the inner fingers of the shaft (15) and takes up a neutral position between the diaphragm spring (4). -
Page 140
CLUTCH CLUTCH ASSEMBLY CONDITIONS CLUTCH SPIN — DRAG For the clutch to operate correctly it is important the Symptoms following conditions are satisfied:- Clutch spin is that, with engine running and clutch The primary shaft (15) must be free in the pedal depressed, the gears cannot be immediately crankshaft spigot bush (17). -
Page 141
CLUTCH FAULT/SYMPTOM CHART Symptoms Slip Spin/Drag Judder/Fierce Fault Item Worn or oil on clutch linings Mechanical damage 4 5 6 7 8 Distorted clutch plate Failed or air in hydraulic system 12 13 Primary shaft tight fit in crankshaft bush 15 17 Clutch splines sticking 2 15… -
Page 142
CLUTCH CLUTCH PEDAL AND MASTER CYLINDER 7. Check operation of clutch pedal and ensure that SETTING there is a minimum of 6 mm (0.25 in) of free play before pressure is felt. If necessary, readust 1. Remove 6 screws and detach pedal box top master cylinder push-rod. -
Page 143
CLUTCH CLUTCH ASSEMBLY BLEED HYDRAULIC SYSTEM Service repair no — 33.10.01 Service repair no — 33.15.01 Clutch pressure plate Procedure Renew pressure plate if diaphragm spring fingers are NOTE: During bleed procedure, keep fluid worn or if pressure plate shows signs of wear, cracks reservoir topped up to avoid introducing or burning. -
Page 144
CLUTCH MASTER CYLINDER 8. Remove 6 screws and detach pedal box top cover and gasket. Service repair no — 33.20.01/03 9. Remove nut and washer securing master cylinder push rod to clutch pedal trunnion. NOTE: All hose and pipe connections and 10. -
Page 145
CLUTCH CLUTCH PEDAL NOTE: If new pedal pivot bushes are required they must be reamed to 16 mm Service repair no — 33.33.02 (0.625 in). Remove Refit 1. Remove pedal bracket assembly and master 7. If removed, fit trunnion bush and trunnion to cylinder See Master cylinder . -
Page 146
CLUTCH RELEASE BEARING ASSEMBLY SLAVE CYLINDER Service repair no — 33.10.07 Service repair no — 33.35.01 Remove NOTE: All hose and pipe connections and joints should be tightened to 15 Nm (11 1. Remove gearbox See MANUAL GEARBOX, lbf/ft). Repair, R380 Gearbox . 2. -
Page 147
CLUTCH MASTER CYLINDER — OVERHAUL Service repair no — 33.20.07 Dismantle 1. Remove master cylinder from vehicle See Repair, Master cylinder . 8. Withdraw spring and retainer. 9. Withdraw valve spacer and spring washer from valve stem. 10. Remove valve seal. 2. -
Page 148
CLUTCH SLAVE CYLINDER — OVERHAUL Service repair no — 33.35.07 Dismantle 1. Remove slave cylinder See Repair, Slave cylinder . 18. Place coil spring over valve stem. 19. Insert retainer into spring. 20. Compress spring and engage valve stem in keyhole slot in retainer. -
Page 149
CLUTCH Assemble 10. Fit bleed valve to cylinder body, do not overtighten. 11. Lubricate seals, piston and bore with new hydraulic fluid. 12. Fit seal into piston groove with lip of seal towards fluid inlet end of cylinder. 13. Locate spring over front end of piston. 14. -
Page 150
MANUAL GEARBOX R380 GEARBOX Description The whole of the geartrain is lubricated through drillings in the shafts, supplied by a low pressure The all synchromesh five speed manual gearbox unit, pump driven from the rear of the layshaft. The gear is married to a two speed transfer gearbox. -
Page 151
MANUAL GEARBOX R380 GEARBOX Symptom — Excessive force required to engage or change gear, vehicle stationary or moving. Symptom — Gear jumps out of engagement (any forward gear) 1. Check lubricant specification and level, if low do not top up at this stage. 1. -
Page 152
MANUAL GEARBOX Symptom — Noise from gearbox in one or more gears when being driven. 1. Check lubricant specification and level, if low do not top up at this stage. 2. Drain lubricant and check for contamination or metal particles. Suspect worn roller bearings on particular mainshaft gears, see Overhaul Manual. -
Page 153
MANUAL GEARBOX GEAR CHANGE LEVER BIAS SPRING — ADJUST Service repair no — 37.16.26 1. Remove gear lever and transfer box lever knobs. 2. Remove gear lever cover. 3. Remove nut and washer securing gear lever. 4. Mark gear lever spline setting, remove lever and gaiter from lower lever. -
Page 154
MANUAL GEARBOX FIFTH GEAR STOP SCREW — ADJUST Service repair no — 37.16.67 7. Remove retaining screws and release fuse box cover. 8. Remove 2 screws and release fuse box from bulkhead to assist next operation. 1. Remove gear lever and transfer box lever knobs. 2. -
Page 155
MANUAL GEARBOX 12. Slacken stop screw locknut. 13. Apply light pressure to gear lever towards LH side and turn screw clockwise until it abuts yoke. 14. Turn screw anti-clockwise until 25 mm freeplay is felt at gear lever knob. Ensure 5th gear can be engaged. -
Page 156
MANUAL GEARBOX R380 GEARBOX Service repair no — 37.20.51 Remove The R380 gearbox should be removed from underneath the vehicle, using a hydraulic hoist and support plate LRT-99-007. WARNING: Where the use of a transmission hoist is necessary, it is absolutely essential to follow the manufacturer’s instructions to ensure safe and effective use of equipment. -
Page 157
MANUAL GEARBOX 17. Remove bolt securing transmission breather pipe clip to rear of engine. 18. Release breather pipes. 19. Release ties securing gearbox harness to 10. Remove 3 trim studs and lift up handbrake breather pipes. gaiter. 20. Raise vehicle on ramp. 11. -
Page 158
MANUAL GEARBOX 24. Remove 2 bolts, withdraw clutch slave cylinder and backing plate from bell housing, and tie aside. 25. Mark rear propeller shaft drive flange and transmission brake drum for reassembly. 26. Remove 4 nuts, disconnect propeller shaft from brake drum, and tie aside. -
Page 159
MANUAL GEARBOX 37. Pull handbrake cable through heel board and tie aside. 44. Disconnect differential lock switch and reverse light connectors. 38. Remove retaining nut, release clamp, and disconnect speedometer cable from transfer box. 39. Release speedometer cable from retaining clip on transfer box. -
Page 160
MANUAL GEARBOX Separating transfer gearbox from main gearbox 50. Remove transmission assembly from hoist cradle and position safely on a bench. 63. Fit link to differential lock lever and secure with 2 clips 64. Align lever to high/low shaft, position washer, fit bolt and new Nyloc nut. -
Page 161
MANUAL GEARBOX 78. Position crossmember and locate over fixing 100. Refill cooling system See COOLING SYSTEM, studs of LH and RH gearbox mounting rubbers. Adjustment, Drain and refill cooling system . 79. Align crossmember and secure to chassis with 4 101. -
Page 162
MANUAL GEARBOX TORQUE VALUES NOTE: Torque wrenches should be regularly checked for accuracy to ensure that all fixings are tightened to the correct torque. Slave cylinder to bell housing …………..Breather ………………… Bell housing to cylinder block …………..High/low level to shaft …………….. -
Page 163
TRANSFER GEARBOX TRANSFER GEARBOX The intermediate gears pass the drive to high and low speed gears on the rear output shaft. The rear output Description shaft passes through the speedo drive housing, which also forms the mounting for the transmission brake. A The transfer gearbox is a permanent 4 wheel drive, worm gear fitted to the rear output shaft drives a two speed ratio reducing gearbox, incorporating high… -
Page 164
TRANSFER GEARBOX TRANSFER GEARBOX — OIL SEAL LOCATIONS 1. Input seal. 5. Rear output seal. 2. Cover plate joints. 6. Power take off cover plate joint. 3. Front output seal. 7. Bearing plate joint. 4. Front and rear housing joint faces. FAULT DIAGNOSIS… -
Page 165
TRANSFER GEARBOX OIL LEAKS Leak between main and transfer gearboxes. Verify that oil leak is from transfer box and not main 1. Site vehicle onto a ramp . gearbox before proceeding with checks. 2. Select neutral in transfer box and select 4th gear in main gearbox. -
Page 166
TRANSFER GEARBOX TRANSFER GEARBOX Service repair no — 41.20.25 Remove The transfer gearbox should be removed from underneath the vehicle, using a hydraulic hoist and adaptor plate LRT-99-010. 6. Remove 4 screws securing centre access panel to seat or cubby box base. 7. -
Page 167
TRANSFER GEARBOX 11. Remove 3 trim studs and lift up handbrake gaiter. 12. Remove split pin, clevis pin, washer and disconnect cable from handbrake lever. Ensure handbrake is off. 13. Release handbrake outer cable from heelboard. 14. Remove fan cowl See COOLING SYSTEM, Repair, Fan cowl . -
Page 168
TRANSFER GEARBOX 23. Position 4, 30 mm (1.25 in), spacers between top of hoist and adaptor plate, LRT-99-010, at securing points and secure adaptor plate to hoist. 24. Remove 4 central bolts from transfer box bottom cover, move hoist into position and secure adaptor plate to transfer box. -
Page 169
TRANSFER GEARBOX Refit 42. Ensure joint faces of transfer box and main gearbox are clean and guide studs, LRT-41-009, are fitted to extension case. 43. Lubricate oil seal in joint face of transfer box. 44. Secure transfer box to adaptor plate on lifting hoist and raise hoist until transfer box can be located over guide studs. -
Page 170
TRANSFER GEARBOX 63. Feed transmission brake cable through heel board. Ensure cable grommet is correctly located. NOTE: Apply a soap solution to aid fitment of cable. 64. Lower vehicle ramp. 65. Connect cable clevis to handbrake lever and fit handbrake gaiter. 66. -
Page 171
TRANSFER GEARBOX TORQUE VALUES NOTE: Torque wrenches should be regularly checked for accuracy to ensure that all fixings are tightened to the correct torque. Transfer gearbox Pinch bolt — operating arm to crank arm …………End cover gear change housing ………….. -
Page 172
PROPELLER SHAFTS PROPELLER SHAFT Description The front and rear propeller shafts have non-constant velocity type universal joints, with needle roller bearings. The bearing cups are pre-packed with lubricant on assembly and a grease nipple is fitted for servicing as specified, in maintenance section. Both shafts have Rilsan coated sliding splines to accommodate the variation in distance between the axles and transmission. -
Page 173
PROPELLER SHAFTS VIBRATION HARSHNESS Check that the propeller shaft universal joints and sliding splines are not siezed or worn and that the shafts are correctly aligned. NOTE: In the event that both shafts are satisfactory, but the vibration/harshness is still present, the transfer box operation and balance of the road wheels should be checked. -
Page 174
PROPELLER SHAFTS PROPELLER SHAFT Service repair no — 47.15.02/03 Remove 1. Place vehicle on ramp. CAUTION: To ensure correct assembly and reduce possibility of imbalance, mark position of spider pin lubricator relative to journal yoke ears, before removing propeller shaft joint. -
Page 175
PROPELLER SHAFTS Assembly 21. Fit grease nipples to spider and sliding member. 22. Apply instructions 14 to 19 to opposite end of 11. Remove bearing cups from new spider. propeller shaft. 12. Check all needle rollers are present and 23. Fit grease nipple and lubricate. positioned in bearing cups. -
Page 176
REAR AXLE AND FINAL DRIVE DESCRIPTION The hub bearings are fitted with inner and outer seals. The outer seals prevent the differential oil mixing with The welded steel rear axle casing houses a separate the hub grease and the inner seals prevent dirt spiral bevel type differential unit, which is off set to the ingress into the hub. -
Page 177
REAR AXLE AND FINAL DRIVE Rear axle hub — 110/130 1. Axle casing 8. Outer hub/axle shaft seal 2. Ventilation pipe 9. Hub lock plate, thrust washer and nuts 3. Axle shaft 10. Brake disc 4. Wheel studs and hub 11. -
Page 178
REAR AXLE AND FINAL DRIVE FAULT DIAGNOSIS Complaint — Oil leaks An external leak of lubrication from the hub seals can be caused by a faulty internal seal. For example, if the seals which separate the differential from the hubs are faulty and the vehicle is operating or parked on an embankment, oil from the differential may flood one hub resulting in a lack of lubrication in the differential. -
Page 179
REAR AXLE AND FINAL DRIVE Service repair no — 51.25.01 REAR AXLE Remove WARNING: Remove and refit of axle 8. Mark differential and propeller shaft flanges with requires a further two persons to steady identification marks for assembly. the axle when lowering or repositioning 9. -
Page 180
REAR AXLE AND FINAL DRIVE Refit 15. Position axle and fit lower links. Tighten fixings to 176 Nm (130 lbf/ft). 16. If applicable, fit anti-roll bar links to axle See REAR SUSPENSION, Repair, Anti-roll bar links . 17. Raise axle and locate road springs. 18. -
Page 181
REAR AXLE AND FINAL DRIVE REAR HUB ASSEMBLY — 90 WARNING: Take care not to kink brake hose. Service repair no — 64.15.01 3. Remove 5 bolts and withdraw axle shaft. Remove 4. Remove joint washer. 5. Bend back lock washer tabs. 1. -
Page 182
REAR AXLE AND FINAL DRIVE Refit 10. Clean stub axle. 11. Fit hub assembly to stub axle. 12. Fit spacing washer. 13. Fit hub adjusting nut. Tighten to 50 Nm (37 lbf/ft). Ensure hub is free to rotate with no bearing play. -
Page 183
REAR AXLE AND FINAL DRIVE REAR HUB ASSEMBLY — 110/130 3. Lever off dust cap. 4. Remove circlip from driveshaft. Service repair no — 64.15.01 5. Remove 5 bolts and withdraw driving member and joint washer. Remove 6. Bend back lock washer tabs. 7. -
Page 184
REAR AXLE AND FINAL DRIVE Refit 11. Clean stub axle and drive shaft and fit hub assembly to axle. 12. Fit spacing washer. 13. Fit hub adjusting nut. Tighten to 50 Nm (37 lbf/ft) . Ensure hub is free to rotate with no bearing play. -
Page 185
5. Remove 10 nuts securing differential to axle case. 6. Withdraw differential unit. NOTE: The differential unit can only be serviced as a complete assembly with matching drive pinion. For advice ring Land Rover Service Department. REPAIR… -
Page 186
REAR AXLE AND FINAL DRIVE DIFFERENTIAL ASSEMBLY — 110/130 Service repair no — 51.15.07 Overhaul 1. Drain off differential lubricating oil, and refit plug. 2. Remove rear axle assembly from vehicle See Repair, Rear axle 3. Remove hub driving member fixings. 4. -
Page 187
REAR AXLE AND FINAL DRIVE CAUTION: To prevent permanent damage to the gear carrier case, it must not be over-stretched. Each flat on the turnbuckle is numbered to enable a check to be made on the amount turned. The maximum stretch permitted is 0,30 mm, equivalent to three flats. -
Page 188
REAR AXLE AND FINAL DRIVE 25. Withdraw four dished thrust washers. Remove final drive pinion 26. Withdraw lower differential wheel and thrust washer. 29. Using LTR-51-003 to prevent coupling flange from rotating, remove flange locknut and plain washer. 30. Support drive pinion and remove coupling flange by tapping with a hide hammer. -
Page 189
REAR AXLE AND FINAL DRIVE ASSEMBLE Differential 45. Fit differential lower wheel and thrust washer to differential case. See illustration following instruction 23. 46. Fit dished thrust washers. 47. Fit cross-shaft and pinions. 48. Fit differential upper wheel and thrust washer. 49. -
Page 190
REAR AXLE AND FINAL DRIVE Fit drive pinion 63. Select shim washers of same thickness value as those removed from under pinion inner cup, instruction 35, and place ready for fitting. 55. Position a suitable dial gauge indicator on casing with stylus registering on back face of crown wheel. -
Page 191
REAR AXLE AND FINAL DRIVE 79. The nominal setting dimension is represented by setting gauge block 18G191P or LRT-54-503, which is referenced from pinion end face to bottom radius of differential bearing bore. The latter gauge is illustrated following instruction 85. 70. -
Page 192
REAR AXLE AND FINAL DRIVE 83. Position dial gauge centrally on pinion end face with stylus registering on lowest point on one differential bearing bore. Note dial gauge deviation from zeroed setting. 84. Repeat on other bearing bore. Add together readings, then halve sum to obtain mean reading. -
Page 193
REAR AXLE AND FINAL DRIVE 86. Before adjusting shim thickness, check pinion face marking and if it has a plus (+) figure, subtract that from shim thickness figure obtained in previous instruction. Alternatively if pinion has a minus (-) figure, add amount to shim thickness figure. -
Page 194
REAR AXLE AND FINAL DRIVE Differential backlash checks 106. Fit bearing caps in their correct position, referring to relationship markings on caps and on 96. Pick up differential unit as left after instruction axle casing. 107. Tighten bearing caps fixings to 135 Nm (100 lbf/ft). -
Page 195
REAR AXLE AND FINAL DRIVE REAR HUB ASSEMBLY — 90 4. Remove 5 bolts and separate hub from brake disc. Service repair no — 64.15.13. WARNING: A maximum of two road wheel 1. Remove rear hub See Repair, Rear hub retaining studs can be renewed. -
Page 196
REAR AXLE AND FINAL DRIVE 10. Assemble brake disc to hub, line up reassembly marks. Applying Loctite 270, fit and tighten retaining bolts to 73 Nm (54 lbf/ft). 11. Pack hub outer bearing with grease and fit to hub. 12. Fit rear hub assembly See Repair, Rear hub assembly . -
Page 197
REAR AXLE AND FINAL DRIVE REAR STUB AXLE — 90 Overhaul Service repair no — 64.15.22. 1. Remove hub assembly See Repair, Rear hub assembly . 2. Remove 6 bolts from stub axle to axle casing. 3. Remove mudshield. 4. Remove stub axle and joint washer. Renew rear stub axle oil seal STUB AXLE COMPONENTS 1. -
Page 198
REAR AXLE AND FINAL DRIVE REAR HUB — 110/130 2. Remove outer bearing. 3. Mark, for reassembly, relationship between hub Service repair no — 64.15.14. and brake disc, if original hub is to be refitted. 4. Remove 5 bolts and separate hub from brake Overhaul disc. -
Page 199
REAR AXLE AND FINAL DRIVE 10. Fit brake disc to hub, lining up to marks made during dismantling. apllying Loctite 270, fit retaining bolts. Tighten to 73 Nm (54 lbf/ft). 11. Grease and fit outer bearing to hub. 12. Fit hub assembly See Repair, Rear hub assembly . -
Page 200
REAR AXLE AND FINAL DRIVE REAR STUB AXLE — 110/130 Overhaul Service repair no — 64.15.22 1. Remove hub assembly See Repair, Rear hub assembly . 2. Remove 6 bolts from stub axle to axle casing. 3. Remove mudshield. 4. Remove stub axle and joint washer. 5. -
Page 201
REAR AXLE AND FINAL DRIVE TORQUE VALUES NOTE: Torque wrenches should be regularly checked for accuracy to ensure that all fixings are tightened to the correct torque. REAR AXLE Pinion housing to axle case …………… Crown wheel to differential case ………….. -
Page 202
FRONT AXLE AND FINAL DRIVE DESCRIPTION The front wheels are pivoted on tape roller bearings at the top and bottom of the swivel housing. The wheel The welded steel front axle casing houses a separate hubs on all axles are supported by two taper bearings spiral bevel type differential unit, which is off-set to the and driven by drive flanges which are splined to the right of the vehicle centre line. -
Page 203
FRONT AXLE AND FINAL DRIVE Lubrication The differential, swivel pin housing and wheel hubs are indiviudally lubricated and separated by oil seals (7) and (8), see J6267A, to prevent oil transfer across the axle when the vehicle is traversing steep inclines. The wheel bearings are lubricated with grease and the swivel housing and differential with oil. -
Page 204
FRONT AXLE AND FINAL DRIVE FAULT DIAGNOSIS Complaint — Oil leaks An external leak of lubrication can be caused by a faulty internal seal. For example, if the seals which separate the differential from the swivel housings are faulty and the vehicle is operating or parked on an embankment, oil may leak across the axle leaving one swivel with a high level and the opposite swivel and differential lacking lubrication. -
Page 205
FRONT AXLE AND FINAL DRIVE FRONT AXLE ASSEMBLY Service repair no — 54.10.01 Remove WARNING: Remove and refit of axle requires a further two persons to steady axle when lowering or repositioning axle. 1. Support chassis front. 2. Remove road wheels. 3. -
Page 206
FRONT AXLE AND FINAL DRIVE FRONT HUB ASSEMBLY 3. Lever off dust cap. 4. Remove circlip and drive shaft shim from Service repair no — 60.25.01. driveshaft. 5. Remove 5 bolts and withdraw driving member Remove and joint washer. 6. Bend back lock washer tabs. 1. -
Page 207
FRONT AXLE AND FINAL DRIVE Refit 11. Clean stub axle and drive shaft and fit hub assembly to axle. 20. To check drive shaft end play, mount a dial gauge using bracket LRT-99-503 and rest pin in a loaded condition on end of drive shaft. 21. -
Page 208
FRONT AXLE AND FINAL DRIVE FRONT DIFFERENTIAL Service repair no — 54.10.07. Overhaul NOTE: The front axle differential, for all models, is the same as that fitted to the 90 rear axle and can only be serviced as a complete assembly See REAR AXLE AND FINAL DRIVE, Repair, Differential assembly — 90 . -
Page 209
FRONT AXLE AND FINAL DRIVE FRONT STUB AXLE, CONSTANT VELOCITY JOINT AND SWIVEL PIN HOUSING Service repair no — 60.15.43. Remove stub axle, axle shaft and constant velocity joint. 1. Remove front hub assembly See Repair, Front hub assembly . 2. -
Page 210
FRONT AXLE AND FINAL DRIVE 12. Examine all components, in particular, inner and outer track, cage balls and bearing surfaces for damage and excessive wear. 13. Maximum acceptable end-float on assembled joint 0,64mm. Renew if worn or damaged. Lubricate with a recommended oil during assembly. -
Page 211
FRONT AXLE AND FINAL DRIVE Swivel pin housing Swivel assembly components 22. Remove bolts securing oil seal retaining plate and joint washer. Release assembly from swivel pin housing. NOTE: Removal of oil seal and retaining plate is achieved when swivel bearing housing is removed. -
Page 212
FRONT AXLE AND FINAL DRIVE 38. Place retaining plate, joint washer and oil seal 50. Fit oil seal, joint washer and retaining plate with over axle flange ready for assembly. 7 bolts and spring washers. Tighten to 11 Nm (8 39. -
Page 213
FRONT AXLE AND FINAL DRIVE TORQUE VALUES NOTE: Torque wrenches should be regularly checked for accuracy to ensure that all fixings are tightened to the correct torque. FRONT AXLE Hub driving member to hub …………… Brake disc to hub ………………Stub axle to swivel pin housing ………….. -
Page 214
STEERING DESCRIPTION Power steering system The steering system incorporates a compression joint The power steering system comprises a hydraulic in the lower shaft and is designed to collapse on pump which is belt driven from the engine and impact. The mis-alignment of the upper steering supplied with fluid from a reservoir that also acts as a column with the steering box and the inclusion of two cooler. -
Page 215
STEERING Power steering box components 1. Housing complete with sector shaft bearings 11. ’Teflon’ and rubber seal for piston 2. Cover plate complete with bearing 12. End cover seal and snap ring 3. Sector shaft 13. Adjustment components for piston/rack 4. -
Page 216
STEERING Rotary valve operation Rotary valve at neutral The rotary valve assembly comprises a worm (1), No demand for assistance (Valve at neutral) valve sleeve (2), input shaft (4) and torsion bar (5). When there is no demand for assistance the torsion The valve sleeve is retained inside the worm by a trim bar holds the input shaft and sleeve valve ports in screw (3), and incorporates valve ports in its inner… -
Page 217
STEERING Rotary valve misaligned Demand for assistance (Valve misaligned) CAUTION: To avoid excessive fluid temperatures which could damage the oil When the steering wheel and input shaft is turned, seals, the steering must not be held on full steering resistance transmitted to the worm causes lock for more than 30 seconds in one minute. -
Page 218
STEERING Pump and regulator valve operation No flow, through box — High pressure The pump which is belt driven from the engine is an When the steering is turned, the rotary valve eccentric roller type and also houses the pressure effectively stops all fluid flow through the steering box, regulator and flow control valve. -
Page 219
STEERING INSUFFICIENT POWER ASSISTANCE CAUTION: Do not hold steering wheel on full lock for more than 30 seconds in any 1. Is fluid level correct? one minute to avoid overheating fluid and YES — go to 3. possibly damaging seals. NO — Fill/bleed sytem NOTE: 1. -
Page 220
STEERING POWER STEERING SYSTEM — TEST Procedure NOTE: If steering lacks power assistance. 1. A hydraulic pressure gauge and test adaptor is Check pressure of hydraulic pump before used to test power steering system. This gauge fitting new components. Use fault is able to measure 140 kgf/cm . -
Page 221
STEERING STEERING DAMPER STEERING FAULTS The power steering system, as well as reducing the Symptom:- effort required to manoeuvre the vehicle when parking, also helps to dampen any deflections of the Excessive kickback through steering wheel — when road wheels, being transmitted back to the steering driven on rough terrain. -
Page 222
STEERING Symptom:- Symptom:- Fluid leaks from steering box seals. Steering heavy — stiff, poor castor return action. CAUTION: The steering wheel must not be 1. Are tyres correct type and pressure? held on full lock for more than 30 seconds NO — See INTRODUCTION, Information, in one minute, as this may overheat the Wheels and Tyres . -
Page 223
STEERING Symptom :- 4. Check steering linkage ball joints for wear, correct alignment and security, including steering Steering excessively light/sensitive. Excessive box and tie rod See Steering Linkage Inspect freeplay at steering wheel. 1. Are steering box adjustments correct? 5. Check all front suspension rubbers for wear. NO — See Adjustment, Power Steering Box . -
Page 224
STEERING STEERING STABILITY AND VEER UNDER 1. GENERAL STEERING BRAKING 1. Carry out visual and safety checks See Visual Possible cause: and Safety Checks . Incorrectly set, swivel pin bearing preload. 2. Road test vehicle See Road Test Procedure . Remedy. -
Page 225
STEERING 2. STEERING VEER 3. VEER UNDER BRAKING From 1. GENERAL STEERING: From 1. GENERAL STEERING: 1. Vehicle veers, not under braking, swap front 1. Vehicle veers under braking, bleed brake tyres side to side. system. 2. Is problem resolved? 2. -
Page 226
STEERING 4. DIRECTIONAL STABILITY POWER STEERING FLUID LEAKS From 1. GENERAL STEERING: 1. Is fluid level correct? YES — go to 3. 1. Is directional stability concern when vehicle is NO — Refill or drain to correct level. Bleed towing? system, check for leaks See Repair, Power YES — Check towing/vehicle loading parameters Steering System — Bleed. -
Page 227
STEERING POWER STEERING SYSTEM — EXCESSIVE NOISE 13. Is noise an intermittent «grunt»? YES — See Power Steering System — Grunt . 1. Is fluid level correct? NO — continue. YES — go to 3. NO — Refill or drain to correct level. Bleed 14. -
Page 228
STEERING VISUAL AND SAFETY CHECKS 2. Steering load assessment — drive at 16 km/h (10 mph). Put 90°turn input into steering wheel, WARNING: Before taking vehicle out on check self centering. The self centering should the public highway for road test, it is be equal on each lock but not necessarily return important that the following basic visual to exactly straight ahead without assistance from… -
Page 229
STEERING STIFF STEERING CHECKLIST Lower steering shaft universal joint lubrication NOTE: Having completed visual checks 1. Check lower steering shaft is correctly phased and steering assessment and confirmed See Repair, Lower Steering Shaft and that vehicle steering load is incorrect carry Universal Joints . -
Page 230
STEERING VISUAL CHECK AND BASIC ADJUSTMENTS 11. Having completed all the above checks and adjustments, road test vehicle See Road Test NOTE: It is important that the following Procedure . instructions are carried out in the Attempt to reproduce the symptoms established sequence shown and the results recorded. -
Page 231
STEERING POWER STEERING BOX — ADJUST 8. Repeat the check for backlash. If backlash exists loosen locknut and repeat adjustment Service repair no — 57.35.01 procedure. 9. Turn steering wheel lock to lock and check no WARNING: Adjustments of steering box tightness exists. -
Page 232
STEERING STEERING LOCK STOPS LOCK STOP SETTINGS Service repair no — 57.65.03 Tyre & wheel size — alloys Check Make Size Setting 1. Measure clearance between tyre wall and radius arm at full lock. This must be not less than 20 BF Goodrich Mud Terrain 59,7 mm Goodyear GT+4… -
Page 233
STEERING FRONT WHEEL ALIGNMENT Service repair no — 57.65.01 Checking Toe-out dimensions NOTE: Recognised front wheel alignment and tracking equipment should be used for this operation. Only the use of basic equipment is described below. No Adjustment is provided for castor, camber or swivel pin inclinations. -
Page 234
STEERING STEERING COLUMN 5. Prise centre cap from steering wheel. 6. Remove steering wheel retaining nut and Service repair no — 57.40.01 withdraw wheel from column spline. 7. Disconnect battery. Remove 8. Remove 4 screws securing instrument panel and pull panel away from facia to enable 1. -
Page 235
STEERING 13. Disconnect 3 switch multi-plugs. 14. Slacken clamp screw on top of switch cluster and withdraw switch assembly. 15. Note position of harness leads on back of starter switch and disconnect lucars. If fitted, remove alarm system passive coil from switch See ELECTRICAL, Repair, Vehicle immobilisation and alarm system . -
Page 236
STEERING NOTE: The steering column is a non 43. Fit lower half of nacelle and loosely tighten fixing servicable component and can only be screws. serviced as a complete assembly. 44. Ensure switch gaiters/grommets are correctly located and fully tighten fixings. 25. -
Page 237
STEERING POWER STEERING BOX 8. Remove 2 bolts securing tie bar to steering box and move aside. Service repair no — 57.10.01 9. Remove filler cap from power steering fluid reservoir. NOTE: A chassis undertray may be fitted 10. Position suitable container under steering box. on some vehicle derivatives to conform to 11. -
Page 238
STEERING 23. Fit panhard rod See FRONT SUSPENSION, CAUTION: Do not maintain this pressure Repair, Panhard rod . for more than 30 seconds in any one 24. Fit road wheels. Lower vehicle to ground and minute, to avoid oil overheating and tighten wheel nuts to correct torque: possible seal damage. -
Page 239
STEERING POWER STEERING SYSTEM — BLEED POWER STEERING FLUID RESERVOIR Service repair no — 57.15.02 Service repair no — 57.15.08 1. Check that fluid level is at maximum level See Remove MAINTENANCEMaintenance Under bonnet maintenance . 1. Position drain tin beneath reservoir. 2. -
Page 240
STEERING POWER STEERING PUMP Service repair no — 57.20.14 Remove NOTE: A chassis undertray may be fitted on some vehicle derivatives to conform to legal requirements. When under chassis remove and refit procedures are required, it may be necessary to remove the undertray See CHASSIS AND BODY, Repair, Front undertray . -
Page 241
STEERING LOWER STEERING SHAFT AND UNIVERSAL Refit JOINTS 9. Fit universal joints so pinch bolt holes line up Service repair no — 57.40.16 with flat on shaft. Note that the long joint is fitted to short length of shaft and short joint to long Remove end. -
Page 242
STEERING STEERING COLUMN LOCK 14. Fit steering column nacelle See Steering column nacelle . Service repair no — 57.40.28 15. Fit instrument panel See INSTRUMENTS, Repair, Instrument panel . Remove 16. Fit steering wheel See Steering wheel . 17. Reconnect battery. 1. -
Page 243
STEERING STEERING COLUMN NACELLE DROP ARM Service repair no — 57.40.29 Service repair no — 57.50.14 Remove Remove 1. Disconnect battery. 1. Park vehicle on level surface and chock rear 2. Remove steering wheel See Steering wheel . wheels. 2. Raise vehicle and locate axle stands or use a ramp. -
Page 244
STEERING 8. Remove nut and discard locking washer. 9. Remove drop arm. Refit 10. Centralise steering box See Adjustment, Centralise steering box . 11. Align reassembly marks and fit drop arm onto steering box splines. 12. Fit new tab washer and retaining nut. Tighten to 176 Nm (130 lbf/ft) and bend over tab washer. -
Page 245
STEERING STEERING DAMPER Service repair no — 57.55.21 Remove Refit 1. Park vehicle on level ground and chock rear 7. Ensuring rubber bushes and washers are wheels. correctly positioned, fit steering damper to 2. Raise vehicle and locate axle stands or use a chassis mounting. -
Page 246
STEERING TRACK ROD AND LINKAGE Service repair no — 57.55.09 Remove 1. Park vehicle on level ground and chock rear wheels. 2. Raise vehicle and locate axle stands or use a ramp. 3. Centralise steering See Adjustment, Centralise steering box . 4. -
Page 247
STEERING DRAG LINK AND DRAG LINK ENDS 4. Remove front road wheel. 5. Disconnect steering damper at drag link bracket. Service repair no — 57.55.17 6. Remove split pin and castellated nut securing drag link ball joints to swivel housing arms. Remove 7. -
Page 248
STEERING 15. Centralise steering box See Adjustment, Centralise steering box . 16. Align steering wheel, if necessary. CAUTION: A drag link that is damaged or bent must be renewed. DO NOT attempt repair. 17. Fit drag link to swivel housing arms and tighten nuts to 40 Nm (30 lbf/ft). -
Page 249
STEERING POWER STEERING BOX — ADWEST Service repair no — 57.10.07 Overhaul NOTE: Overhaul of steering box should not be carried out during the warranty period. WARNING: Wear safety glasses while removing and refitting circlips and retaining ring. CAUTION: Absolute cleanliness is essential when overhauling power steering box. -
Page 250
STEERING 12. Remove piston, a bolt screwed into piston will Steering box seals assist removal. 13. Remove input shaft dirt excluder. 14. Remove worm adjuster locknut using ’C’ wrench LRT-57-007. 15. Remove worm adjuster using wrench 20. Remove circlip and seal from sector shaft LRT-57-006. -
Page 251
STEERING INSPECTING Sector shaft assembly Piston 26. Check there is no side play on roller. 27. If side play on roller exists fit a new sector shaft. 22. Discard all rubber seals and obtain 28. Check condition of adjuster screw threads. replacements. -
Page 252
STEERING 37. If required, replace all three rings, using ring expander LRT-57-019. The expander will not pass over rings already fitted. Remove rings to allow access without damaging seal grooves. 38. Warm rings and expander tool to aid assembly. Fit rings to expander, slide expander over valve and worm assembly. -
Page 253
STEERING Rack thrust pad and adjuster 43. Examine thrust pad for scores. 44. Examine adjuster for wear in pad seat. 45. Fit new sealing ring to rack adjuster. Reassemble NOTE: When fitting replacement oil seals lubricate with recommended fluid and ensure absolute cleanliness. -
Page 254
STEERING 67. Back off worm adjuster 1/4 turn. Turn in worm adjuster to increase reading by 0.21 — 0.34 Nm with locknut tight, 100 Nm (74 lbf/ft). Use worm adjusting wrench LRT-57-006and locknut wrench LRT-57-028. 61. Fit new worm adjuster sealing ring. Fitting rack and piston 68. -
Page 255
STEERING Fitting sector shaft cover 73. Fit new sealing ring to cover. 74. Align cover with casing. 75. Screw cover assembly fully on to sector shaft adjuster screw. 76. If necessary back off sector shaft adjuster screw. Tap cover in place to allow cover to joint fully with casing. -
Page 256
STEERING 84. Refit locknut and tighten. NOTE: It is important steering box is centralised before any adjustments are made. 85. Check maximum rolling torque one and a quarter turns either side of centre position, using a torque wrench and spline socket LRT-57-025. Rotate adjuster screw to obtain across centre torque of 0.34 Nm plus torque figure at one and a quarter turns. -
Page 257
STEERING Input shaft oil seal 92. Fit seal, lip side first, into housing. Use seal saver LRT-57-016 and seal installer LRT-57-026. Note that seal is fitted to a depth of 4.75 — 5.00 mm from face of box. 93. Secure seal with circlip. 94. -
Page 258
STEERING TORQUE VALUES NOTE: Torque wrenches should be regularly checked for accuracy to ensure that all fixings are tightened to the correct torque. Ball joint nuts ………………..Clamp bolt nuts ………………. Steering column bracket nuts …………..Steering wheel nut ………………Tie bar to mounting nut ……………. -
Page 259
FRONT SUSPENSION DESCRIPTION Two rubber bearing bushes, with retaining straps, secure the rear of the anti-roll bar to the chassis The front suspension design allows maximum wheel mountings, while bushed links support the front of the travel and axle articulation providing good ground bar to the front axle. -
Page 260
FRONT SUSPENSION SELF LOCKING NUTS RADIUS ARM WARNING: Where self locking nuts are Service repair no — 60.10.16. removed, they must be replaced with new nuts of same specification. Remove 1. Loosen road wheel retaining nuts. 2. Raise front of vehicle. Support chassis on stands and remove wheel. -
Page 261
FRONT SUSPENSION FRONT SHOCK ABSORBER Service repair no — 60.30.02. Remove 1. Loosen road wheel retaining nuts. 2. Support chassis on stands and remove road wheel. 3. Support axle weight with jack. 6. Remove fixings, radius arm to axle. 7. Lower radius arm front end to clear axle and remove from vehicle. -
Page 262
FRONT SUSPENSION Refit FRONT ROAD SPRING 11. Assemble shock absorber components. Service repair no — 60.20.11. 12. Position shock absorber, complete with bracket and secure with 4 fixings. Remove 13. Secure shock absorber lower fixing. 14. Fit road wheel, remove chassis stands and jack. 1. -
Page 263
FRONT SUSPENSION BUMP STOP ANTI-ROLL BAR Service repair no — 60.30.10. Service repair no — 60.10.01 Remove Remove 1. Mark for reassembly position of rubber bushes on anti-roll bar. 2. Remove 4 nuts, bolts and washers securing both anti-roll bar bush straps to chassis mounting brackets. -
Page 264
FRONT SUSPENSION ANTI-ROLL BAR LINKS Service repair no — 60.10.04. Remove 1. Remove 2 nuts, bolts, washers and rubber bushes from ball joint links. 2. Remove cotter pin and loosen castellated nut a few turns. 3. Release link joint using special tool 18G 1063A as shown. -
Page 265
FRONT SUSPENSION TORQUE VALUES NOTE: Torque wrenches should be regularly checked for accuracy to ensure that all fixings are tightened to the correct torque. Anti-roll bar — Strap nyloc nuts …………….- Ball link self lock nut ……………. — Castellated nut ……………. -
Page 266
REAR SUSPENSION DESCRIPTION A Boge Hydromat self levelling unit can be fitted, as an option, on 110/130 models to give additional The rear suspension design locates the rear axle with support when the vehicle is used to carry heavier two round section steel lower link arms and a forged loads. -
Page 267
REAR SUSPENSION REAR ROAD SPRING REAR SHOCK ABSORBER Service repair no — 64.20.01. Service repair no — 64.30.02. Remove Remove 1. Loosen rear road wheel retaining nuts. 1. Loosen road wheel retaining nuts. 2. Support chassis on stands and remove wheels. 2. -
Page 268
REAR SUSPENSION BUMP STOP SUSPENSION LINK — UPPER Service repair no — 64.30.15. Service repair no — 64.35.44. Remove Remove 1. Support rear of chassis on stands, allow axle to hang freely. 1. Remove fixings. 2. Remove bump stop. Refit 3. -
Page 269
REAR SUSPENSION Refit NOTE: Do no fully tighten fixings until all components are in position. 9. Secure link to frame bracket. 10. Fit upper link to pivot bracket. 11. Fit frame bracket to chassis mounting. 12. Fully tighten fixings to 176 Nm (130 lbf/ft). SUSPENSION LINK — LOWER Service repair no — 64.35.02. -
Page 270
REAR SUSPENSION ANTI-ROLL BAR Service repair no — 64.35.08 Remove Refit 1. Note for reassembly, position of rubber bushes 5. Position rubber bushes on anti-roll bar. Fit joint on anti-roll bar. towards axle. 2. Remove 4 nuts, bolts and washers securing both 6. -
Page 271
REAR SUSPENSION ANTI-ROLL BAR LINKS SELF LEVELLING UNIT Service repair no — 64.35.24. Service repair no — 64.30.09 Remove Remove 1. Remove 2 nuts, bolts, washers and rubber WARNING: The levelling unit contains bushes from links and lower anti-roll bar to clear pressurised gas and MUST NOT be links. -
Page 272
REAR SUSPENSION Refit 10. Ensure ball pin threads are clean and smear Loctite grade CVX on ball pin threads. 11. Fit upper ball joint to levelling unit and secure gaiter. 12. Fit top bracket complete with levelling unit to chassis and secure with 4 nuts and tighten to 47 Nm (35 lbf/ft). -
Page 273
REAR SUSPENSION TORQUE VALUES NOTE: Torque wrenches should be regularly checked for accuracy to ensure that all fixings are tightened to the correct torque. Anti-roll bar — Strap nyloc nuts …………….- Ball link self lock nut ……………. — Castellated nut ……………. -
Page 274
BRAKES DESCRIPTION A cable controlled parking brake operates a single drum brake mounted on the output shaft of the The mechanical components of the hydraulic braking transfer gearbox and is completely independent of the system consists of four piston caliper disc brakes at main braking system. -
Page 275
BRAKES OPERATION The servo unit provides controlled power assistance to to the brake pedal when pressure is applied. Power Master cylinder is obtained from a vacuum pump located on the RH side of the engine cylinder block. The vacuum is A tandem master cylinder, which is assisted by a light applied to both sides of a flexing diaphragm, and by weight, short, compact servo, is fed by a divided fluid… -
Page 276
BRAKES 90 Models 110/130 Models Hydraulic system 1. LH rear brake caliper 2. T connector A- Primary circuit 3. RH rear brake caliper B- Secondary circuit 4. Brake servo C- Pressure reducing valve (PRV) 5. Master cylinder and reservoir 6. LH front brake caliper 7. -
Page 277
BRAKES GENERAL BRAKE SERVICE PRACTICE FLUID LEVEL CHECK/TOP UP Brake fluid precautions WARNING: Clean reservoir body and filler cap before removing cap. Use only fluid WARNING: Do not allow brake fluid to from a sealed container. come into contact with eyes or skin. 1. -
Page 278
Land 8. Fit all bleed screw protection caps. Rover vehicles. The equipment manufacturer’s 9. Check/top-up fluid level when bleeding is instructions must be followed and the pressure must complete See Fluid Level Check/Top-Up . -
Page 279
BRAKES MASTER CYLINDER Service repair no — 70.30.08 Before starting repair refer to general brake service practice See General Brake Service Practice . Remove 1. Disconnect battery. 2. Place a container under the master cylinder to catch escaping brake fluid. 3. -
Page 280
BRAKES PRESSURE REDUCING VALVE (PRV) SERVO NON RETURN VALVE Service repair no — 70.25.21 Service repair no — 70.50.15 Remove Remove 1. Disconnect battery. 2. Clean area around reducing valve ports. 3. Place a container under valve to catch escaping brake fluid. -
Page 281
BRAKES SERVO ASSEMBLY Refit Service repair no — 70.50.01 9. Locate servo assembly and rubber washer to engine bulkhead and secure to pedal box. Remove Tighten fixings to 14 Nm (10 lbf/ft). 10. Fit brake pedal to servo push rod with clevis pin Before starting repair refer to general brake service and new split pin. -
Page 282
BRAKES BRAKE PEDAL Refit Service repair no — 70.35.01 — Brake pedal 9. Lubricate pedal pivot shaft and bushes with Service repair no — 70.35.03 — Pedal box general purpose grease. 10. Fit pedal to pedal box, insert pivot shaft and Remove secure with new split pin. -
Page 283
BRAKES FRONT BRAKE PADS — ALL MODELS Service repair no — 70.40.02 Remove 1. Remove front road wheels . 2. Clean exterior of calipers. Refit 8. Fit brake pads. 9. Fit pad retaining pins and anti-rattle springs. Secure with new split pins. 10. -
Page 284
BRAKES REAR BRAKE PADS Service repair no — 70.40.03 Service tool: Remove 1. Remove rear road wheels. 2. Clean exterior of calipers. 3. Remove pad retaining pins and anti-rattle springs. Note differences between 90 and 110/130 models. 4. Remove brake pads. 5. -
Page 285
BRAKES FRONT BRAKE CALIPER ASSEMBLY Key to caliper 1. Caliper 7. Piston 2. Bleedscrew 8. Wiper seal retainer 3. Anti-rattle springs 9. Wiper seal 4. Pad retaining pins 10. Fluid seal 5. Split pin 11. Brake disc 6. Friction pads REPAIR… -
Page 286
BRAKES FRONT BRAKE CALIPERS WARNING: Do not separate caliper halves Service repair no — 70.55.05 Service repair no — 70.55.16 7. Clean outer surfaces of caliper using aerosol brake cleaner. Before starting repair refer to general brake service practice See General Brake Service Practice . Remove 1. -
Page 287
BRAKES Assemble outboard pistons FRONT BRAKE DISCS 13. Coat new fluid seal with brake fluid. Ease seal Service repair no — 70.10.10. into groove in bore using only fingers, ensuring it is properly seated. Fluid seal and groove are not Remove same in section, so when seal is seated it feels raised to touch at edge furthest away from… -
Page 288
BRAKES REAR BRAKE CALIPER ASSEMBLY Key to rear caliper 1. Caliper 6. Wiper seal retainer 2. Bleed screw 7. Wiper seal 3. Pad retaining springs 8. Fluid seal 4. Brake pads 9. Retaining pins 5. Piston REPAIR… -
Page 289
BRAKES REAR BRAKE CALIPERS 4. Seal pipe ends to prevent ingress of dirt. 5. Remove retaining pins and springs and withdraw Service repair no — 70.55.06 pads. If same pads are to be refitted, identify Service repair no — 70.55.17 them for assembly in original positions. -
Page 290
BRAKES 15. Coat a new wiper seal with brake fluid and fit to REAR BRAKE DISC new seal retainer. Slide assembly, seal first, over protruding piston into bore recess. Service repair no — 70.10.11. 16. Using special tool LRT-70-500 — piston clamp, press home seal retainer and piston. -
Page 291
BRAKES TRANSMISSION BRAKE 1. Pin 13. Spring 2. Washer 14. Adjuster slide 3. ’C’ clip 15. Adjuster bolt 4. Brake shoe 16. Dished washer 5. Cable lever 17. Hold down spring 6. Hold down spring 18. Brake shoe 7. Dished washer 19. -
Page 292
BRAKES TRANSMISSION BRAKE SHOES Refit Service repair no — 70.45.18 11. Locate RH brake shoe in slide and secure brake shoe and lever assembly to backplate with hold Remove down pin, spring and dished washer. 12. Locate LH brake shoe in slide and fit abutment 1. -
Page 293
BRAKES HANDBRAKE CABLE Service repair no — 70.35.25 Remove 1. Park vehicle on level ground, chock road wheels and release handbrake. Alternatively, raise vehicle on ramp. Refit 9. Feed new cable through heelboard ensuring rubber grommet is correctly located. 10. Position cable over guide plate, insert through backplate and connect to cable lever. -
Page 294
BRAKES VACUUM PUMP Service repair no — 70.50.19 Remove NOTE: To ease pump removal set engine to T.D.C. on No.1 cylinder. 1. Disconnect battery. 2. Remove air cleaner See FUEL SYSTEM, Repair, Air cleaner . 3. Detach servo hose from vacuum pump. 4. -
Page 295
BRAKES Key to master cylinder 1. Water ingress seal 10. Washer 2. Transfer housing 11. Recuperating seal (primary cup) 3. Vacuum seal 12. Seal retainer 4. Guide ring 13. Springs 5. Retaining ring 14. Swirl tube 6. ’O’ ring seal 15. -
Page 296
BRAKES MASTER CYLINDER Service repair no — 70.30.09 Before starting overhaul procedure refer to general brake service practice See Repair, General brake service practice . Dismantling master cylinder 1. Disconnect battery and remove master cylinder from servo See Repair, Master cylinder . 2. -
Page 297
BRAKES 12. Clean all parts with Girling cleaning fluid or unused brake fluid and place cleaned parts on to a clean sheet of paper. Inspect cylinder bore and plungers for signs of corrosion, ridges and score marks. Provided working surfaces are in perfect condition, new seals from a Girling Service repair kit may be used. -
Page 298
BRAKES Assembling master cylinder 21. Fit a new retaining ring on outer surface of master cylinder ensuring that serrations of ring CAUTION: It is important that the following are facing mounting flange. instructions are carried out precisely, 22. Fit two new reservoir seals in their respective otherwise damage could be caused to new ports. -
Page 299
WHEELS AND TYRES TYPES OF WHEEL RIMS AND TYRES 1. Type of tyre construction — Radial Ply 2. Load index — 104 Description 3. Speed symbol — S or T 4. USA Tyre quality grading — Tread wear 160 Dependent on specification and model type, the Traction A temperature B vehicle is equipped with pressed steel or alloy wheel 5. -
Page 300
WHEELS AND TYRES TYRE WEAR CHART FAULT CAUSE REMEDY Rapid wear at Tyres under-inflated Inflate to correct pressure shoulders Worn suspension components Replace worn components i.e. ball joints, panhard rod bushes, steering damper Excessive cornering speeds Rapid wear at Tyres over-inflated Inflate to correct pressure centre of tread… -
Page 301
WHEELS AND TYRES FAULT — SYMPTOMS NOTE: In the event that any apparent vibration is not eliminated at this stage, go Vibration through steering wheel to steering Fault Diagnosis, Fault — Symptom (Steering vibration, road wheel 1. Check tyre pressures See Repair, Tyre shimmy/wobble) See STEERING, Fault diagnosis, Pressures . -
Page 302
WHEELS AND TYRES GENERAL INFORMATION TYRE INSPECTION WARNING: This is a multi-purpose vehicle Inspect tyres at weekly intervals to obtain maximum with wheels and tyres designed for both tyre life and performance and to ensure compliance on and off road usage. Only use wheels with legal requirements. -
Page 303
WHEELS AND TYRES When the indicators appear in two or more adjacent TYRE PRESSURES grooves, at three locations around the tyre, a new tyre must be fitted. Maximum tyre life and performance will be obtained only if tyres are maintained at the correct NOTE: DO NOT attempt to interchange pressures . -
Page 304
WHEELS AND TYRES WHEEL BALANCING CAUTION: It is essential that all wheel balancing is carried out off the vehicle. The use of on the vehicle balancing could cause component damage or personal injury and MUST NOT be attempted. NOTE: Before attempting to balance a wheel and tyre assembly clean all mud and dirt deposits from both inside and outside rims and remove existing balance weights. -
Page 305
WHEELS AND TYRES Static balance Dynamic balance Wheel tramp Wheel shimmy A — Heavy spot. A — Heavy spot. B — Add balance weights here. B — Add balance weights here. C — Centre line of spindle. C — Centre line of spindle. Static balance is the equal distribution of weight Dynamic balance is the equal distribution of weight on around the wheel. -
Page 306
WHEELS AND TYRES Off vehicle balancing CAUTION: Do not use tyre sealants that are injected through valve stem to repair Balance wheel assembly referring to equipment punctured tyres, they may produce wheel manufacturer’s instructions. corrosion and tyre imbalance. It is essential that the wheel is located by the centre Aluminium wheel rim bead seats should be cleaned hole NOT the stud holes. -
Page 307
WHEELS AND TYRES WHEELS 8. Tighten nuts as much as possible using a suitable wrench. Remove 9. Lower vehicle and finally tighten nuts to correct torque sequence shown. WARNING: The parking brake acts on Alloy wheels — 130 Nm (96 lbf/ft) transmission, not rear wheels, and may Steel wheels — 100 Nm (80 lbf/ft) not hold vehicle when jacking unless… -
Page 308
WHEELS AND TYRES WHEEL STUD Remove 1. Remove wheel See Wheels . 2. Drive stud out of driveshaft flange. Refit 3. Position stud in flange. 4. Install a suitable spacer over stud. 5. Using a M16 x 1.5 nut, a slave wheel nut is suitable, pull stud into flange until shoulder of stud abuts flange. -
Page 309
The chassis on all Defender variants are of the box fully guaranteed and to original equipment section, ladder type construction, manufactured from specification, fitted with Land Rover’s BS 5135 2 mm (14swg) steel and treated with zinc phosphate, welding standard. -
Page 310
CHASSIS AND BODY LAND ROVER 90 DESCRIPTION AND OPERATION… -
Page 311
CHASSIS AND BODY LAND ROVER 90 CHASSIS ALIGNMENT DIMENSIONS A — Front Datum B — Chassis Datum 10. 110 mm 24. 750,9 mm C — Front axle centre line 11. 2360mm — Wheelbase 25. 439,5 — 436,5 mm D — Rear axle centre line 12. -
Page 312
CHASSIS AND BODY LAND ROVER 110 DESCRIPTION AND OPERATION… -
Page 313
CHASSIS AND BODY LAND ROVER 110 CHASSIS ALIGNMENT DIMENSIONS A — Front Datum B — Chassis Datum 13. 488 — 483 mm 29. 290,5 mm C — Front axle centre line 14. 82 — 79,5 mm 30. 295,5 mm D — Rear axle centre line 15. -
Page 314
CHASSIS AND BODY LAND ROVER 130 DESCRIPTION AND OPERATION… -
Page 315
6. 2119,5 — 2117,3 mm 11. 149,7 — 146,7 mm reference dimension NOTE: The above dimensions are for the Land Rover 130 chassis frame. For additional measurements, refer to the Land Rover 110 chassis frame drawing and aligment dimensions. DESCRIPTION AND OPERATION… -
Page 316
CHASSIS AND BODY CHASSIS FRAME ALIGNMENT 3. Hold a plumb line against each of the measuring points in turn and mark the floor directly beneath With the vehicle assembled, a check for chassis the plumb-bob. squareness can be made as follows: 4. -
Page 317
CHASSIS AND BODY DOORS RH rear door lock mechanism RH front door lock mechanism REPAIR… -
Page 318
CHASSIS AND BODY DOOR TRIM CASING Service repair no — 76.34.01 — Front doors Service repair no — 76.34.04 — Rear doors Remove 1. Prise open finisher caps, remove 2 screws, and detach door pull. 5. Prise out window regulator handle centre finisher, remove retaining screw, and withdraw handle and bezel. -
Page 319
CHASSIS AND BODY WINDOW REGULATOR — REAR SIDE DOOR Service repair no — 76.31.45 Remove 1. Remove door trim casing See Door trim casing 2. Remove plastic sheet. 3. Temporarily fit handle, wind window up to its fullest extent and support glass with a length of timber, to prevent it falling when removing regulator. -
Page 320
CHASSIS AND BODY EXTERIOR HANDLE — REAR SIDE DOOR Service repair no — 76.58.02 Remove 1. Remove door trim casing See Door trim casing 2. Peel back sufficient of plastic sheet to gain access to handle mechanism. Refit 5. Insert lifting arm button into lifting channel. 6. -
Page 321
CHASSIS AND BODY SILL LOCKING BUTTON — REAR SIDE DOOR REMOTE CONTROL LEVER — REAR SIDE DOOR Service repair no — 76.37.30 Service repair no — 76.37.32 Remove Remove 1. Remove door trim casing See Door trim casing 1. Remove door trim casing See Door trim casing 2. -
Page 322
CHASSIS AND BODY 6. Remove 2 screws securing remote control lever DOOR LATCH — REAR SIDE DOOR to mounting panel. 7. Release control rods from plastic retaining clips Service repair no — 76.37.13. located in mounting panel. 8. Withdraw remote control lever and rods from Remove door. -
Page 323
CHASSIS AND BODY DOOR GLASS — REAR SIDE DOOR Service repair no — 76.31.02 Remove 1. Disconnect door check rod from door post. 2. Remove door trim casing See Door trim casing 3. Remove plastic sheet. 4. Remove window regulator assembly See Window regulator — rear side door . -
Page 324
CHASSIS AND BODY Refit 15. Fit lift channel to new glass, if necessary. 16. Insert glass into lower channels and carefully push glass up to top of frame. 17. Secure lower channels with 4 self-tapping screws. Ensure that screw heads are screwed down firmly below bottom of channels to prevent damage to glass. -
Page 325
CHASSIS AND BODY MOUNTING PANEL — FRONT DOOR Service repair no — 76.11.28 Remove 1. Remove door trim casing See Door trim casing and plastic sheet. Refit 6. Engage window regulator arm in mounting panel channel. 7. Connect remote control rod to latch mechanism and secure with clip. -
Page 326
CHASSIS AND BODY SILL LOCKING BUTTON — FRONT DOOR WINDOW REGULATOR — FRONT DOOR Service repair no — 76.37.29 Service repair no — 76.31.45 Remove Remove 1. Remove door trim casing See Door trim 1. Remove door trim casing See Door trim casing casing . -
Page 327
CHASSIS AND BODY REMOTE CONTROL LEVER — FRONT DOOR Refit Service repair no — 76.37.31 6. Feed control rod into position and loosely secure lever to mounting panel with 2 screws. Remove 7. Connect control rod to latch mechanism and secure with spring clip. -
Page 328
CHASSIS AND BODY EXTERIOR HANDLE — FRONT DOOR Refit Service repair no — 76.58.01 6. Fit handle to door ensuring that two bezels are in position — flat faces towards door, and secure Remove with 2 screws. 7. Connect rod to handle operating lever and 1. -
Page 329
CHASSIS AND BODY LATCH ASSEMBLY — FRONT DOOR Service repair no — 76.37.12 Remove 1. Remove mounting panel See Mounting panel and support glass with timber. 2. Disconnect control rod from handle operating lever. 3. Disconnect control rod from locking lever on handle. -
Page 330
CHASSIS AND BODY DOOR GLASS — FRONT DOOR Service repair no — 76.31.01 Remove 1. Remove mounting panel See Mounting panel — front door . 2. Remove window regulator. 3. Push glass up to top of its travel and support with a suitable length of timber. -
Page 331
CHASSIS AND BODY LOCKING BARREL — FRONT DOOR Service repair no — 76.37.39 Remove 1. Remove door trim casing See Door trim casing and plastic sheet. 2. Remove mounting panel See Mounting panel — front panel . Refit 8. Insert glass into runners at an angle as illustrated. -
Page 332
CHASSIS AND BODY 7. To remove barrel from plastic retaining sleeve, DOOR STRIKER — ADJUST depess spring loaded button and withdraw sleeve. Service repair no — 76.37.23 — front door Service repair no — 76.37.24 — rear door, 110/130 Adjust Refit NOTE: If a new barrel is being fitted, check that number on barrel coincides with… -
Page 333
CHASSIS AND BODY REAR SEAT CUSHION — 90 REAR SEAT SQUAB — 90 Service repair no — 78.10.18/99 Service repair no — 78.10.58/99 Remove Remove 1. Release seat cushion stowage strap and lower seat cushion. 1. Release seat cushion stowage strap. 2. -
Page 334
CHASSIS AND BODY REAR BENCH SEAT Service repair no — 78.10.57/99 Remove Refit 1. Remove rear bench seat cushion. 5. Position rear bench seat to body. 2. Remove 4 bolts securing seat frame to body and 6. Position bracket and spacers, and loosely fit collect spacers and brackets containing captive bolts securing front end of cushion frame to nuts. -
Page 335
CHASSIS AND BODY FRONT SEAT BELTS Service repair no — 76.73.13 Remove 5. Move rear carpet aside and remove bolt securing inertia reel to base of ’B’ post. 1. Remove plastic seat belt guide from side of front seat base. 2. -
Page 336
CHASSIS AND BODY REAR SEAT BELTS — 90/110 STATION WAGON, REAR SEAT BELTS — 110 INWARD FACING SEATS Service repair no — 76.73.18 Service repair no — 76.73.18 Remove Remove 1. Remove rear inward facing seats See Rear seat squab — 90 or See Rear bench seat . 2. -
Page 337
CHASSIS AND BODY Refit SIDE TRIM PANEL — 90 STATION WAGON 8. Secure seat belt straps to floor mounting. Service repair no — 76.13.70 Tighten bolt to 32 Nm (24 lbf/ft) and fit finisher cap. Remove 9. Feed belt straps between seat cushion and squab. -
Page 338
CHASSIS AND BODY Refit SIDE TRIM PANEL — 110 STATION WAGON 9. Fit new spring clips to the 3 brackets on top Service repair no — 76.13.70 edge of side trim panel. 10. Align trim panel, ensuring it is correctly Remove positioned around side window. -
Page 339
CHASSIS AND BODY REAR END TRIM PANEL — 90/110 STATION WAGON Service repair no — 76.13.71 Remove 9. Remove fixings securing bottom edge of trim panel to body side. 10. Release top edge of trim panel by striking 1. Pull edge of rear end trim panel firmly to release upwards with the hand to disengage 3 spring 2 spring retaining clips from vertical rail at door clips. -
Page 340
CHASSIS AND BODY CUBBY BOX — 90/110 STATION WAGON REAR GRAB HANDLE — 90/110 STATION WAGON Service repair no — 76.25.04 Service repair no — 76.58.35 Remove Remove 1. Remove radio/cassette player, if fitted. 1. Carefully prise top and bottom edges of finisher caps from grab handle and then hinge outwards to gain access to fixing screws. -
Page 341
CHASSIS AND BODY REAR END LINING — 90/110 STATION WAGON Service repair no — 76.64.12 Remove 1. Remove rear end trim panel See Rear end trim panel . 2. Remove rear grab handles See Rear grab handle . 3. Carefully prise out 6 trim studs securing rear end lining to mounting brackets. -
Page 342
CHASSIS AND BODY FRONT HEADLINING — 90 STATION WAGON 7. Carefully prise side trim panel cap fastener from ’B’ posts. Service repair no — 76.64.10 8. Carefully prise 2 cap fasteners, from both sides, securing headlining to body at door aperture. Remove 9. -
Page 343
CHASSIS AND BODY REAR HEADLINING — 90 STATION WAGON 5. Release front corners of headlining from cant rail, on both sides. Service repair no — 76.64.11 6. Pull headlining forwards sufficiently to clear rear end lining mounting brackets. Remove 7. Release rear corners of headlining from cant rail, on both sides. -
Page 344
CHASSIS AND BODY TAIL DOOR TRIM CASING TAIL DOOR LOCK Service repair no — 76.34.09 Service repair no — 76.37.16 Remove Remove 1. Remove door casing See Tail door trim casing . 1. Unscrew 2 bolts and remove grab handle from rear door. -
Page 345
CHASSIS AND BODY TAIL DOOR STRIKER — ADJUST Service repair no — 76.37.25 Adjust 1. Loosen striker securing screws. 2. Adjust striker and retighten screws. 3. Close door and check for correct latching with door lock. 4. Carry out further adjustment as necessary. If full adjustment cannot be achieved carry out following: 5. -
Page 346
CHASSIS AND BODY SUN ROOF 4. Remove sun roof. 5. Starting from centre rear, peel headlining finisher Service repair no — 76.83.01 from inner frame. 6. Remove 18 screws securing inner frame to outer Remove frame and detach inner frame. 7. -
Page 347
CHASSIS AND BODY INTERIOR MIRROR SUN VISORS Service repair no — 76.10.51 Service repair no — 76.10.47 Remove Remove 1. Raise sun visor. 2. Remove 2 screws and collect sun visor. 1. Prise interior mirror arm from mounting plate. Refit 2. -
Page 348
CHASSIS AND BODY BONNET LOCK BONNET RELEASE CABLE Service repair no — 76.16.21 Service repair no — 76.16.29 Remove Remove 1. Open bonnet. 1. Open bonnet. 2. Remove 8 screws securing grille. 3. Remove grille. 2. Mark position of guide plate and lock to bonnet platform. -
Page 349
CHASSIS AND BODY 17. Fit cable to lock and tighten clamping bolt. 18. Check operation of release cable and bonnet lock and adjust if necessary. 19. Fit grille and tighten screws. 20. Close bonnet. REPAIR… -
Page 350
— air distribution . 6. Remove 2 screws, withdraw switch panel from lower fascia and disconnect switch multi-plugs. 7. Prise out Land Rover decal and remove screw securing grab handle to crash pad. 8. Remove lower screw and lift grab handle from lower fascia panel. -
Page 351
CHASSIS AND BODY 20. Remove 2 screws and remove both footwell vents from lower fascia panel. 21. Remove single screw and detach door check strap cover from LH and RH doors. 15. If fitted, remove 2 screws, washers and nuts 22. -
Page 352
CHASSIS AND BODY 26. Release demist hose and lift parcel shelf from Refit lower fascia panel (heater duct). Feed main harness leads and plugs through aperture in 33. Position lower fascia panel to bulkhead, parcel shelf. reconnect RH speaker leads, if applicable, and 27. -
Page 353
53. Fit demister vents in crash pad. undertray. 54. Fit grab handle to lower fascia panel and secure to crash pad. Refit Land Rover decal. 55. Connect multi-plugs to rear screen, hazard and interior lamp switches and fit switch panel to fascia panel. -
Page 354
CHASSIS AND BODY Refit REAR UNDERTRAY 12. If applicable, fit acoustic pad to undertray. Service repair no — 76.11.80 — Rear undertray 13. Fit undertray in position, ensuring flanges are Service repair no — 76.11.82 — Acoustic pad correctly located in rear undertray. 14. -
Page 355
CHASSIS AND BODY ACCESS PANEL — FRONT UNDERTRAY ACCESS PANEL — REAR UNDERTRAY Service repair no — 76.11.85 — Access panel Service repair no — 76.11.84 Service repair no — 76.11.83 — Acoustic pad The access panel is provided in the rear undertray to The access panel is provided in the front undertray to enable fitment of the wading plug or timing tool enable fitment of the wading plug into the engine… -
Page 356
HEATING AND VENTILATION HEATING AND VENTILATION SYSTEM The heater assembly, comprising a matrix housed in a distribution unit and a variable speed blower motor, is Description located on one side of the engine compartment and attached directly to the fascia bulkhead. The heating and ventilation system is standard on all models. -
Page 357
HEATING AND VENTILATION HEATER OPERATION through a ducted vent on top of the vehicle front wing to the blower motor (volute) housing (4). The blower The heater matrix (3), located in the distribution unit motor (10) can be used to boost the air flow into the (1), see J6341, is connected to the engine cooling distribution unit. -
Page 358
HEATING AND VENTILATION Fresh air vents Two fresh air vents are fitted in the windscreen frame and are controlled independently of the vehicle heating system. Each vent is operated separately. To open the vents, push the lever to the right and then down to the required position. -
Page 359
HEATING AND VENTILATION HEATER UNIT Service repair no — 80.20.01 Remove 1. Remove bonnet and disconnect battery. 2. Remove radiator bottom hose at radiator union and drain cooling system See COOLING SYSTEM, Repair, Drain and refill cooling system . Refit 13. -
Page 360
HEATING AND VENTILATION BLOWER MOTOR HEATER MATRIX Service repair no — 80.20.15 Service repair no — 80.20.29 Remove Remove 1. Remove heater unit See Heater unit . 1. Remove heater unit See Heater unit . 2. Remove 3 nuts securing angled bracket to 2. -
Page 361
HEATING AND VENTILATION Refit RESISTOR UNIT 6. Fit foam rubber to heater matrix casing. Service repair no — 80.20.17 7. Position matrix in heater unit casing. 8. Check that both vent flaps operate correctly Remove without sticking. 9. Secure matrix top retaining plate. 1. -
Page 362
HEATING AND VENTILATION HEATER CONTROL CABLE — TEMPERATURE CONTROL Service repair no — 80.10.05 Remove 1. Disconnect battery. 2. Remove 4 screws securing instrument panel to fascia cowl. 3. Pull instrument panel away from fascia and disconnect speedometer cable to give easier access to control cable at bulkhead. -
Page 363
HEATING AND VENTILATION 16. Secure control cables to engine bulkhead and heater hoses with retaining clips. 17. With control lever in closed position, fit inner cable to lever clevis and fully tighten clevis grub screw. 18. Fit outer cable retaining clip and fully tighten securing bolt. -
Page 364
HEATING AND VENTILATION HEATER CONTROL CABLE — AIR DISTRIBUTION Service repair no — 80.10.12 Remove 1. Disconnect battery. 2. Remove steering wheel See STEERING, Repair, Steering wheel. 3. Remove steering column nacelle See STEERING, Repair, Steering column nacelle. 4. Remove instrument panel See INSTRUMENTS, Repair, Instrument panel. -
Page 365
HEATING AND VENTILATION Refit CONTROL CABLE AND BLOWER MOTOR SWITCH 14. Fit new control cable through heater duct cover Service repair no — 80.10.17 — Control cable and secure to vent flap trunnion. Bend over Service repair no — 80.10.22 — Blower motor switch cable end to fully secure. -
Page 366
HEATING AND VENTILATION 8. Release lever assembly and disconnect 3 blower motor leads, noting their positions. 9. Pull control cable through bulkhead grommet and out from instrument panel cowl. 10. Release retaining clip securing outer cable to lever assembly. 11. Release inner cable from lever peg. NOTE: If the blower motor switch is faulty the complete lever assembly will have to be renewed. -
Page 367
AIR CONDITIONING AIR CONDITIONING SYSTEM mounted in front of the radiator, and a receiver/drier (7) located to the right of the condenser. Description Ancillary components in the system comprise a blower motor (2), also housed in the heater/cooler unit, and Air conditioning is an optional system which provides condenser cooling fan motors (6), mounted on a fully integrated climate control for the vehicle interior. -
Page 368
AIR CONDITIONING Operation AIR CONDITIONING AND HEATER CONTROLS — LH DRIVE Evaporator unit and expansion valve 1. Temperature control High pressure liquid refrigerant is delivered to the expansion valve which is the controlling device for the Move the lever upwards (RED) to increase air air conditioning system. -
Page 369
AIR CONDITIONING 5. Blower motor fan speed control Move the lever to the right to progressively increase fan speed. Location of air vents — LH drive AIR CONDITIONING AND HEATER CONTROLS — 3. Air conditioning switch RH DRIVE Press the RH portion of the switch to activate the air 1. -
Page 370
AIR CONDITIONING 5. Air distribution control Push LH button — air to windscreen vents (also provides some air to the footwell). Push middle button — air to fascia vents (also provides some air to the footwell). Push RH button — air to footwell vents (also provides some air to the windscreen). -
Page 371
AIR CONDITIONING GENERAL PRECAUTIONS REMEDIAL ACTIONS The refrigerant used in the air conditioning system is 1. If liquid R134a strikes the eye, do not rub it. HFC (Hydrofluorocarbon) R134a. Gently run large quantities of eyewash over the eye to raise the temperature. If eyewash is not WARNING: R134a is a hazardous liquid available cool, clean water may be used. -
Page 372
AIR CONDITIONING SERVICING PRECAUTIONS Total quantity of refrigerant oil in system = 140ml Care must be taken when handling refrigeration A new compressor is sealed and pressurised with system components. Units must not be lifted by their Nitrogen gas, slowly release the sealing cap, gas hoses, pipes or capillary lines. -
Page 373
AIR CONDITIONING REFRIGERANT RECOVERY, RECYCLING, WARNING: Refrigerant must always be RECHARGING recycled before reuse, to ensure that the purity of the refrigerant is high enough for WARNING: The air conditioning system is safe use in the air conditioning system. Recycling charged with a high pressure, potentially should always be carried out with equipment toxic refrigerant. -
Page 374
AIR CONDITIONING 5. Operate the refrigerant recharging system LEAK TEST SYSTEM according to the manufactures instructions. Refrigerant to charge system is 1.1 kg. The following instructions refer to an electronic type 6. If the full charge has not been accepted by the Refrigerant Leak Detector for use with R134a, which system, start the engine and run it at 1500 is the safest and most sensitive. -
Page 375
AIR CONDITIONING AIR CONDITIONING SYSTEM — PERFORMANCE 4. Insert dry bulb thermometer into cold air outlet TEST and position dry and wet bulb thermometer close to outside air inlet. WARNING: R134a is hazardous See Do not spill water from the wet thermometer Repair, General Precautions (psychrometer). -
Page 376
AIR CONDITIONING SYSTEM TEST PRECAUTIONS IN HANDLING REFRIGERANT LINES 1. Place the vehicle in a ventilated, shaded area free from excessive draught, with the doors and WARNING: Wear eye and hand protection windows open. when disconnecting components 2. Check that the surface of the condenser is not containing refrigerant. -
Page 377
AIR CONDITIONING 11. All precautions must be taken to prevent PERIODIC MAINTENANCE damage to fittings and connections. Slight damage could cause a leak with the high Routine servicing, apart from visual checks, is not pressures used in the system. necessary. The visual inspections are as follows: 12. -
Page 378
AIR CONDITIONING COMPRESSOR Refit Service repair no — 82.10.20 9. If a new compressor is to be fitted first drain oil from new compressor. Drain and measure oil Remove from old compressor. Measure new oil equal to amount from old compressor, add 30 ml extra to 1. -
Page 379
AIR CONDITIONING COMPRESSOR DRIVE BELT Refit Service repair no — 82.10.02 6. Fit compressor drive belt. 7. Fit drive belt guard. Remove 8. Fit torque meter to centre of tensioner, apply and hold a torque of 35 Nm (26 lbf/ft). 1. -
Page 380
AIR CONDITIONING CONDENSER FAN AND MOTORS CONDENSER Service repair no — 82.15.08 Service repair no — 82.15.07 Remove Remove 1. Disconnect battery. 1. Disconnect battery. 2. Remove 6 screws and lift grille panel from 2. Recover refrigerant from air conditioning system vehicle. -
Page 381
AIR CONDITIONING 8. Remove 4 bolts and large packing washers Refit securing fan cowling brackets to wing sides. 9. Remove 4 nuts securing fan cowling to lower 17. Coat unions, threads and new ’O’ rings with mounting bracket and lift complete assembly refrigerant oil prior to reassembly. -
Page 382
AIR CONDITIONING RECEIVER/DRIER HEATER/COOLER UNIT — LH DRIVE Service repair no — 82.17.01 Service repair no — 82.25.21 Remove Remove 1. Disconnect battery. 1. Disconnect battery. 2. Recover refrigerant from air conditioning system 2. Recover refrigerant from air conditioning system See Adjustment, Refrigerant recovery, See Adjustment, Refrigerant recovery, recycling, recharging. -
Page 383
AIR CONDITIONING 9. Remove plug connector from resistor. 19. Lift heater/cooler unit clear of air duct seal and 10. Remove relay from connecting block to gain remove from vehicle. access to fixing screw. 20. Discard all pipe connection ’O’ rings. 11. -
Page 384
AIR CONDITIONING EVAPORATOR — LH DRIVE Service repair no — 82.25.20 Remove 1. Remove heater/cooler unit See Heater/cooler unit. 2. Suitably support unit on a bench to prevent damage to heater matrix pipes. 3. Release 3 nuts and remove mounting bracket from underneath unit casing. -
Page 385
AIR CONDITIONING Refit 18. Fit evaporator matrix in support frame. 19. Fit evaporator, heater matrix and support frame assembly in casing. Ensure studs for lower mounting bracket are located through bottom of casing. 20. Apply mastic sealant around heater matrix pipes to seal pipe apertures in casing. -
Page 386
AIR CONDITIONING EXPANSION VALVE — LH DRIVE Service repair no — 82.25.01 Remove 1. Remove heater/cooler unit See Heater/cooler unit. 2. Suitably support unit on a bench to prevent damage to heater matrix pipes. 9. Release 2 clips securing expansion valve sensor and lagging to low pressure pipe. -
Page 387
AIR CONDITIONING HEATER MATRIX — LH DRIVE BLOWER MOTOR ASSEMBLY- LH DRIVE Service repair no — 82.25.19 Service repair no — 82.25.14 Remove Remove 1. Remove evaporator See Evaporator. 1. Remove heater/cooler unit See Heater/cooler unit. 2. Leaving evaporator in place, remove single screw securing heater matrix pipe plate to base of support frame. -
Page 388
AIR CONDITIONING Refit 16. Secure support brackets to new blower motor. Do not fully tighten clip at this stage. 17. Insert motor into plastic mounting and fit impeller. 18. Locate spacing washers, side mounting bracket, and fit motor and mounting into motor housing. 19. -
Page 389
AIR CONDITIONING BLOWER MOTOR ASSEMBLY — RH DRIVE Refit Service repair no — 82.25.14 6. Secure impeller on new blower motor. 7. Fit blower motor assembly in main casing. Remove 8. Fit Lucar connector and earth eyelet to blower motor. 9. -
Page 390
AIR CONDITIONING HEATER/COOLER UNIT — RH DRIVE Service repair no — 82.25.21 Remove 1. Disconnect battery. 12. Disconnect blower motor wiring plugs and 2. Recover refrigerant from air conditioning system release harness retaining clip from housing. See Refrigerant recovery, recycling, 13. -
Page 391
AIR CONDITIONING Refit 19. Coat unions, threads and new ’O’ rings with refrigerant oil prior to reassembly. 20. Position heater/cooler unit in engine compartment and locate with air duct seal. 21. Secure unit top and bottom mounting brackets to bulkhead and support bracket to front of unit casing. -
Page 392
AIR CONDITIONING EVAPORATOR — RH DRIVE Service repair no — 82.25.20 Remove 1. Remove heater/cooler unit See Heater/cooler unit — RH drive. 2. Suitably support unit on a bench. 3. Remove sealant and release thermostat probe from low pressure pipe. Refit 15. -
Page 393
AIR CONDITIONING EXPANSION VALVE — RH DRIVE Service repair no — 82.25.01 Remove 1. Remove evaporator See Evaporator — RH drive. 2. Unscrew union securing pressure sensor to low pressure pipe. 3. Release spring clip securing temperature sensor to low pressure pipe. 4. -
Page 394
AIR CONDITIONING HEATER MATRIX — RH DRIVE Service repair no — 82.25.19 Remove 1. Remove heater/cooler unit See Heater/cooler unit — RH drive. 2. Suitably support unit on a bench. 3. Remove sealant and release thermostat probe from low pressure pipe. Refit 11. -
Page 395
AIR CONDITIONING RESISTOR, BLOWER MOTOR — LH DRIVE RESISTOR, BLOWER MOTOR — RH DRIVE Service repair no — 82.20.26 Service repair no — 82.20.26 Remove Remove 1. Remove multi-plugs from resistor. 2. Remove 2 screws securing resistor to wing mounted block. 3. -
Page 396
2. Remove wiper arms. NOTE: Operations 3 — 5 are for RH drive vehicles only. 3. Prise Land Rover decal from grab handle and remove screw. 4. Remove lower screw and lift handle from fascia. 5. Remove screw fixing finisher to wiper motor cover. -
Page 397
WIPERS AND WASHERS 16. Fully tighten tube nut and fit rubber sleeve. 17. Reconnect earth lead and multi-plug. 18. Before fitting cover and grab handle, fit wiper blades. Reconnect battery and test operation of wiper motor and drive assembly. If necessary, adjust position of wiper blades. -
Page 398
WIPERS AND WASHERS WIPER MOTOR AND DRIVE RACK — VEHICLE WITH AIR CONDITIONING, LH DRIVE Service repair no — 84.15.20 Remove 1. Disconnect battery. 2. Remove wiper arms. 3. Remove single screw and remove fascia side panel. 4. Remove 5 screws and withdraw instrument panel as far as possible without straining wires and cables. -
Page 399
WIPERS AND WASHERS Refit 15. Feed drive rack into drive tube until fully located in wheel boxes. 16. Finger tighten drive tube nut. 17. Position motor mounting pad, fit retaining strap, including earth tag and secure wiper motor assembly. 18. Fully tighten drive tube nut and fit rubber sleeve. 19. -
Page 400
WIPERS AND WASHERS WINDSCREEN WIPER ARMS WINDSCREEN WIPER/WASHER SWITCH Service repair no — 84.15.01 Service repair no — 84.15.34 Remove For remove and refit procedure See ELECTRICAL, Repair, Windscreen wiper/washer switch. 1. Pull wiper arm away from windscreen. 2. Using a small screwdriver, hold back spring clip which retains arm to spindle adaptor. -
Page 401
WIPERS AND WASHERS WINDSCREEN WIPER WHEEL BOXES — NON AIR CONDITIONED VEHICLES Service repair no — 84.15.25 Remove 1. Disconnect battery. 6. Remove steering column upper support fixing. 2. Remove wiper arms See Windscreen wiper 7. Slacken nuts to release back plates from LH and arms. -
Page 402
WIPERS AND WASHERS Refit NOTE: During reassembly all fixings related to wiper motor and wheelboxes are finger tightened only, until all components are correctly aligned. 12. Fit wheelboxes to bulkhead and secure with retaining nuts and washers. 13. Fit drive rack tubes to wheelboxes. 14. -
Page 403
WIPERS AND WASHERS WINDSCREEN WIPER WHEELBOXES — AIR CONDITIONED VEHICLES Service repair no — 84.15.25/20 Remove 1. Disconnect battery. 8. Release steering column upper and lower 2. Remove wiper motor and drive rack See Wiper support rods. motor and drive rack — air conditioned 9. -
Page 404
WIPERS AND WASHERS 13. Fit wheelboxes to bulkhead. REAR WIPER MOTOR 14. Fit drive tubes to wheelboxes. 15. Feed drive rack through tubes until fully seated Service repair no — 84.35.12 in both wheelboxes. 16. Secure drive tube nut to wiper motor. Remove 17. -
Page 405
WIPERS AND WASHERS Refit 8. Locate wiper motor drive spindle through aperture in rear door. 9. Position wiper motor mounting bracket and secure to rear door. Tighten bolt to 23 Nm (17 lbf/ft). 10. Reconnect harness multi-plug. 11. Secure drive spindle to door. 12. -
Page 406
WIPERS AND WASHERS WIPER MOTOR 11. Withdraw yoke and armature. 12. Remove brush gear assembly. Service repair no — 84.15.18. 13. Remove limit switch. Dismantle Inspection and test 1. Remove wiper motor from vehicle See Repair, 14. Check brushes for excessive wear, if they are Wiper motor and drive rack. -
Page 407
WIPERS AND WASHERS Assemble Use Ragosine Listate Grease to lubricate gear wheel teeth, armature shaft worm gear, connecting rod and pin, cable rack and wheelbox gear wheels. Use Shell Turbo 41 oil sparingly to lubricate bearing bushes, armature shaft bearing journals, gear wheel shaft and wheelbox spindles. -
Page 408
ELECTRICAL ELECTRICAL EQUIPMENT Do not disconnect battery cables while engine is running or damage to semi-conductor devices may Description occur. It is also inadvisable to break or make any connections in the generator charging and control The electrical system is Negative ground, and it is circuits while engine is running. -
Page 409
The following A sophisticated engine immobilisation and anti-theft symptoms will be noticed when the battery requires alarm system is offered on the Land Rover Defender replacement: 300 Tdi vehicle range, which incorporates the following features: 1. -
Page 410
ELECTRICAL Door and bonnet switches Engine immobilisation warning light Perimetric protection for the vehicle is provided by The engine immobilisation warning light is located on ECU inputs connected to the starter switch, bonnet the instrument panel, and provides a visual indication switch and door switches. -
Page 411
ELECTRICAL ALARM SYSTEM COMPONENT LOCATION COMPONENT LOCATION Electronic control unit (ECU) Under dash, LH and RH drive Anti-theft alarm indicator light Instrument panel Engine immobilisation warning light Instrument panel Immobilisation spider* Inside vehicle battery box Passive coil Over starter switch barrel Bonnet switch Engine compartment, LH and RH drive Door switches… -
Page 412
ELECTRICAL ALARM SYSTEM OPERATION Anti-theft alarm indicator light Arming alarm A RED indicator light on the instrument panel indicates the status of the alarm system. When the To arm the alarm, aim handset at vehicle and press alarm is armed successfully, the light flashes rapidly. the RH button (Padlock symbol). -
Page 413
ELECTRICAL ENGINE IMMOBILISATION Engine immobilisation is an important aspect of the vehicle’s security system, and occurs automatically whenever the alarm system is armed. The system also includes a feature known as ’passive immobilisation’, which is designed to safeguard thevehicle from theft should the driver forget to arm the alarm. -
Page 414
ELECTRICAL ALARM SYSTEM FUSES When the vehicle immobilisation and alarm system is fitted, three fuses are used to protect the circuit: Alarm system 15 amp fuse, main harness, located behind instrument binnacle. Alarm sounder 20 amp fuse No.10, located in main fuse box. -
Page 415
ELECTRICAL DESCRIPTION AND OPERATION… -
Page 416
ELECTRICAL IMMOBILISATION AND ALARM SYSTEM CIRCUIT DIAGRAM 1. Anti-theft alarm indicator light (LED) Key to cable colours 2. Engine immobilisation warning light 3. Alarm system fuse — 15 amp B-Black 4. Alarm sounder relay G-Green 5. Under bonnet lighting fuse K-Pink 6. -
Page 417
ELECTRICAL DESCRIPTION AND OPERATION… -
Page 418
ELECTRICAL IMMOBILISATION AND ALARM SYSTEM CIRCUIT DIAGRAM — WITH DDS 1. Anti-theft alarm indicator light (LED) Key to cable colours 2. Engine immobilisation warning light 3. Alarm system fuse — 15 amp B-Black 4. Alarm sounder relay G-Green 5. Under bonnet lighting fuse K-Pink 6. -
Page 419
ELECTRICAL VEHICLE ALARM SYSTEM BUILT-IN TEST Volumetric tests Press the LH (unlock) button or move the handset NOTE: The handset should be detached close to the starter switch to disable perimetric testing from the key to allow perimetric testing of and enable volumetric testing. -
Page 420
ELECTRICAL GENERAL INFORMATION TESTING IN POSITION Detailed information of electrical systems, component Charging circuit resistance test. locations and circuit diagrams are covered in the Defender Electrical Troubleshooting Manual. 1. Connect a low range voltmeter between generator terminal marked B+ and positive This section covers checks of the charging system. -
Page 421
ELECTRICAL ELECTRICAL PRECAUTIONS Battery disconnecting The following guidelines are intended to ensure the Before disconnecting the battery, switch off all safety of the operator whilst preventing damage to electrical equipment. electrical and electronic components fitted to the vehicle. Battery charging Polarity Recharge the battery out of the vehicle and keep the top well ventilated. -
Page 422
ELECTRICAL BATTERY Remove Service repair no — 86.15.01 WARNING: During battery removal or before carrying out any repairs or NOTE: If the vehicle is fitted with a battery maintenance to electrical components backed-up alarm sounder, disconnecting always disconnect negative lead first. If positive the vehicle battery will cause the alarm to lead is disconnected with negative lead in place, sound unless the following procedure is followed:… -
Page 423
ELECTRICAL ELECTRONIC CONTROL UNIT (ECU) Service repair no — 86.55.85 Remove 1. Remove LH front seat cushion. 2. Release retaining clip and remove battery access cover. 3. Slacken battery negative lead clamp bolt. 4. Turn starter switch ’on’. 5. Turn starter switch ’off’ and remove key. 6. -
Page 424
ELECTRICAL HANDSET BATTERY Refit Service repair no — 86.77.13 7. Fit new battery into handset retaining clip with positive side uppermost. Finger marks will Remove adversely affect battery life; if possible, avoid touching flat surfaces of battery and wipe clean 1. -
Page 425
ELECTRICAL PASSIVE COIL Service repair no — 86.77.35 Remove 1. Remove LH front seat cushion. 2. Release retaining clip and remove battery access cover. 3. Slacken battery negative lead clamp bolt. 4. Turn starter switch ’on’. 5. Turn starter switch ’off’ and remove key. 6. -
Page 426
ELECTRICAL IMMOBILISATION SPIDER Service repair no — 86.77.03 Remove 1. Remove LH front seat cushion. 2. Release retaining clip and remove battery access cover. 3. Slacken battery lead clamp bolts. 4. Turn starter switch ’on’. 5. Turn starter switch ’off’ and remove key. 6. -
Page 427
ELECTRICAL BONNET SWITCH ULTRASONIC SENSOR Service repair no — 86.55.89 Service repair no — 86.77.32 Remove Remove 1. Carefully prise ultrasonic sensor from cantrail trim. 2. Disconnect harness plug and remove sensor. NOTE: Position of sensor will change according to vehicle type. Refit 3. -
Page 428
ELECTRICAL ALARM SOUNDER Service repair no — 86.55.87 Remove 1. Remove LH front seat cushion. 2. Release retaining clip and remove battery access cover. 3. Slacken battery negative lead clamp bolt. 4. Turn starter switch ’on’. 5. Turn starter switch ’off’ and remove key. 6. -
Page 429
ELECTRICAL ALARM SOUNDER RELAY ANTI-THEFT ALARM INDICATOR LIGHT Service repair no — 86.77.09 Service repair no — 86.45.61 Remove Remove 1. Remove screw and lift off LH door check strap 1. Remove LH front seat cushion. cover. 2. Release retaing clip and remove battery access 2. -
Page 430
ELECTRICAL Refit ALARM SYSTEM FUSE 12. Fit alarm indicator light into fascia panel and Service repair no — 86.77.04 reconnect plug lead. 13. Reconnect speedometer cable and fit instrument Remove panel to fascia cowl. 14. Fit steering wheel See STEERING, Repair, 1. -
Page 431
ELECTRICAL Refit GENERATOR 12. Fit new fuse. Service repair no — 86.10.02 13. Position instrument panel to fascia cowl area and reconnect immobiliser warning light leads, Remove gearbox oil temperature lead, heated rear screen leads, alarm LED plug lead, main harness 1. -
Page 432
ELECTRICAL AUXILIARY DRIVE BELT STARTER MOTOR Service repair no — 86.10.03 Service repair no — 86.60.01 NOTE: If cast lines on tensioner arm and Remove tensioner spring case are aligned, a new drive belt must be fitted. 1. Disconnect battery. Remove 1. -
Page 433
ELECTRICAL HEADLAMP Service repair no — 86.40.02 Remove Refit 1. Remove screws retaining side and direction 9. Fit bulb to headlamp and retain with spring clip. indicator lamps. 10. Fit rubber cover and reconnect multi-plug. If 2. Withdraw lamp units and disconnect plugs. applicable, fit headlamp levelling unit plug See 3. -
Page 434
ELECTRICAL SIDE, TAIL AND DIRECTION INDICATOR LAMPS SIDE REPEATER LAMP Service repair no — 86.40.34 — Front side lamp Service repair no — 86.40.53. Service repair no — 86.40.45 — Tail lamp Service repair no — 86.40.42 — Front direction Remove indicator lamp Service repair no — 86.40.43 — Rear direction… -
Page 435
ELECTRICAL REAR NUMBER PLATE LAMP — BULB RENEWAL REAR NUMBER PLATE LAMP Service repair no — 86.40.85 Service repair no — 86.40.86 Remove Remove 1. Remove single screw securing lamp cover and lens to bulb holder. 2. Remove bulb/s from holder. 1. -
Page 436
ELECTRICAL REVERSE AND FOG GUARD LAMP — BULB REVERSE AND FOG GUARD LAMP RENEWAL Service repair no — 86.40.91 — Reverse lamp Service repair no — 86.40.90 Service repair no — 86.40.99 — Fog guard lamp Remove Remove 1. Remove two screws with sealing washers and 1. -
Page 437
ELECTRICAL INTERIOR LAMP — BULB REMOVAL INTERIOR LAMP Service repair no — 86.45.01 Service repair no — 86.45.02 Remove Remove 1. Prise lens from lamp unit. 2. Spread bulb holder contacts and release bulb. Refit 1. Prise lens cover from lamp unit. 3. -
Page 438
ELECTRICAL REVERSE LAMP SWITCH WARNING LAMP ASSEMBLY Service repair no — 37.27.01 Service repair no — 86.45.60 — Warning lamp assembly Remove Service repair no — 86.45.61 — Warning lamp bulb renewal The reverse lamp switch is located on the LH side of the gearbox extension housing and is accessible from Remove underneath the vehicle. -
Page 439
ELECTRICAL INSTRUMENT ILLUMINATION — BULB RENEWAL STARTER SWITCH Service repair no — 86.45.49 — Speedometer Service repair no — 86.65.03 Service repair no — 86.45.51 — Temperature gauge Service repair no — 86.45.52 — Fuel gauge Remove Remove 1. Remove instrument panel See INSTRUMENTS, Repair, Instrument panel. -
Page 440
ELECTRICAL WINDSCREEN WIPER/WASHER SWITCH DIRECTION INDICATOR/HEADLAMP/HORN SWITCH Service repair no — 84.15.34 Service repair no — 86.65.55 Remove Remove 1. Remove steering column nacelle See STEERING, Repair, Steering column nacelle. 1. Remove steering column nacelle See STEERING, Repair, Steering column nacelle. 2. -
Page 441
ELECTRICAL MAIN LIGHT SWITCH HEATED REAR SCREEN, REAR FOG LAMP AND HAZARD WARNING SWITCHES Service repair no — 86.65.10 Service repair no — 86.65.36 — Heated rear screen Remove Service repair no — 86.65.65 — Rear fog lamp Service repair no — 86.65.50 — Hazard warning 1. -
Page 442
ELECTRICAL CIGAR LIGHTER REAR SCREEN WIPER/WASHER SWITCH Service repair no — 86.65.60 Service repair no — 84.35.34 Remove Remove 1. Remove 2 screws and withdraw switch panel 1. Remove 2 screws and withdraw switch panel from lower fascia. from lower fascia. 2. -
Page 443
ELECTRICAL HEADLAMP LEVELLING SWITCH HEADLAMP LEVELLING UNIT Service repair no — 86.65.16 Service repair no — 86.41.16 Remove Remove 1. Remove headlamp See Headlamp. 1. Remove 2 screws and withdraw switch panel from lower fascia. 2. Disconnect headlamp levelling unit harness 2. -
Page 444
ELECTRICAL HEADLAMP BEAM ALIGNMENT On vehicles fitted with headlamp levelling units, check and adjust headlamp beam alignment as previously Service repair no — 86.40.17 described, with fascia mounted levelling switch at position ’0’. The headlamps can then be adjusted, Check according to load conditions, as follows:- Check main beam alignment using beam setting equipment. -
Page 445
ELECTRICAL DIGITAL DIESEL SHUT-OFF VALVE (DDS) 7. Remove protective cap retainer and release DDS valve clamp from behind fuel shut-off Service repair no — 86.77.00 solenoid. Remove Refit 1. Remove fuel injection pump See FUEL 8. Position DDS valve clamp behind fuel shut-off SYSTEM, Repair, Fuel injection pump. -
Page 446
INSTRUMENTS INSTRUMENT PANEL SPEEDOMETER Service repair no — 88.20.02 Service repair no — 88.30.01 Remove Remove 1. Disconnect battery. 1. Remove 4 screws securing instrument panel to fascia cowl. 2. Pull instrument panel away from fascia sufficent to disconnect speedometer cable. 2. -
Page 447
INSTRUMENTS FUEL AND TEMPERATURE GAUGE CLOCK — FASCIA PANEL Service repair no — 88.25.26 — Fuel gauge Service repair no — 88.15.07 Service repair no — 88.25.14 — Temperature gauge Remove Remove 1. Remove 4 screws securing instrument panel to 1. -
Page 448
INSTRUMENTS CLOCK — CENTRE DASH PANEL WARNING LIGHT PANEL Service repair no — 88.15.07 Service repair no — 88.20.18 Remove Remove 1. Remove 2 screws and withdraw warning light panel. 2. Disconect both multi-plugs. 3. Disconnect illumination bulb leads. 4. Remove warning light panel. Refit 1. -
Page 449
INSTRUMENTS PRINTED CIRCUIT — WARNING LIGHT PANEL FUEL GAUGE TANK UNIT — REAR FUEL TANK, 110/130 Service repair no — 88.20.20 Service repair no — 88.25.30 Remove WARNING: Ensure that fuel handling 1. Remove warning light panel See Warning light precautions given in Section 01 — panel . -
Page 450
INSTRUMENTS FUEL GAUGE TANK UNIT — SIDE FUEL TANK Service repair no — 88.25.31 WARNING: Ensure that fuel handling precautions given in Section 01 — Introduction are strictly adhered to when carrying out the following instructions. Remove 1. Disconnect battery. 2.