Замена автозапчастей
Все, что вы хотите узнать по теме Замена автозапчастей, вы найдете на wikiHow в категории Замена автозапчастей. Узнайте о таких темах, как Как снять тормозные барабаны, Как менять подшипники ступицы, Как урезать пружину амортизатора, а также о многих других из наших пошаговых инструкций с иллюстрациями и видео.
Нужная деталь уже сегодня
-
Комплектующие
-
ноутов
-
матрицы
-
клавиатуры
-
блоки питания и аккумуляторы
-
жесткие диски и SSD
-
модули памяти (ОЗУ)
-
микросхемы
-
видеокарты и видеочипы
-
мосты и хабы
-
корпусные детали
-
процессоры
-
посткарты
-
материнские платы
-
допплаты
-
приводы
-
системы охлаждения
-
шлейфы
-
разъемы
-
Apple запчасти
-
уценка
найти запчасть по модели –
выберите производителя :- Acer
- Acer Aspire
- Alienware
- AORUS
- Apple
- Aquarius
- Asus
- BENQ
- Bliss
- Clevo
- Compal
- COMPAQ
- Comstar
- Dell
- DEPO
- DEXP
- DNS
- eMachines
- FOXCONN
- Fujitsu
- Fujitsu-Siemens
- Gateway
- GigaByte
- Haier
- Hasee
- Honor
- HP
- Huawei
- IBM
- Irbis
- iRu
- Jumper
- Krez
- Lenovo
- LG
- MaxSelect
- Medion
- Microsoft
- MicroXperts
- MSI
- Nautilus
- NEC
- NOKIA
- Packard Bell
- Panasonic
- Prestigio
- Razer
- Rover
- RoverBook
- Samsung
- Schenker
- Siemens
- Sony
- TG
- Toshiba
- ViewSonic
- Xiaomi
- Zet
-
- планшетов
-
смартфонов
-
экраны
-
камеры
-
микрофоны
-
шлейфы и разъемы
-
аккумуляторы
-
микросхемы, платы
-
части корпуса
-
динамики и звонки
-
аксессуары
-
usb кабели
-
зарядные устройства
-
защитные плёнки и стёкла
-
внешние аккумуляторы
-
шлемы виртуальной реальности
-
карты памяти, флешки
-
салфетки
-
чехлы, автодержатели, моноподы
-
диагностика телефонов
-
наушники и гарнитуры
-
портативные колонки
-
audio, HDMI кабели
-
наборы ZeepDeep для Apple
-
уценка
найти запчасть по модели –
выберите производителя :- Acer
- Alcatel
- Apple
- Asus
- Blackview
- Bluboo
- DEXP
- DNS
- Doogee
- Elephone
- EXPLAY
- Explay
- Fly
- Highscreen
- HTC
- Huawei
- LEAGOO
- LeEco
- Lenovo
- LG
- Meizu
- Micromax
- Motorola
- NOKIA
- OnePlus
- OPPO
- Oukitel
- Prestigio
- Realme
- Samsung
- Sony
- Ulefone
- UMi
- Vkworld
- Wileyfox
- Xiaomi
- ZTE
- БиЛайн
- МТС
-
-
apple
-
MacBook
-
MacBook Pro
-
MacBook Air
-
iMac
-
iPad
-
iPhone
-
iPod
-
Watch
-
уценка
-
-
пк
-
блоки питания
-
жесткие диски и ssd
-
ибп
-
сетевые фильтры
-
кабели и шлейфы
-
модули памяти
-
наушники, гарнитуры, колонки
-
одноплатные компьютеры
-
охлаждение
-
приводы
-
процессоры
-
материнские платы
-
серверное оборудование
-
сетевое оборудование
-
софт
-
устройства ввода
-
чистящие средства
-
usb устройства, карты памяти
-
запчасти для фотоаппаратов
-
запчасти для телевизоров
-
запчасти для мониторов
-
сканеры штрих кодов
-
уценка
-
-
тв
-
светодиодные подсветки
-
светодиоды
-
кабели
-
уценка
-
платы для ТВ
-
скотч для подсветок
-
матрицы для телевизоров
найти запчасть по модели –
выберите производителя :- Acer
- Aiwa
- Akai
- Akira
- AMCV
- Amoi
- AOC
- Arcelik
- Arielli
- ASANO
- Baird
- BBK
- Beko
- Blaupunkt
- BQ
- Brandt
- Braun
- BRAVIS
- Bush
- Celcus
- CENTEK
- CHANGHONG
- Chuangwei
- Commander
- Continental Edison
- Crown
- Daewoo
- Dahua
- Daiko
- DEKO
- Dell
- DEX
- DEXP
- Digihome
- Digital
- Digma
- DNS
- Doffler
- Dreamstar
- E-motion
- ECON
- Elenberg
- Ergo
- Erisson
- Eurolux
- FINLUX
- First1
- FOX
- Frestec
- Funai
- FUSION
- Galatec
- Goldstar
- Grandin
- GRUNDIG
- Guanjie
- Haier
- HARPER
- Helix
- Hi
- Hisense
- Hitachi
- holleberg
- HORIZON
- Horizont
- Hyundai
- Insignia
- Irbis
- JAV
- JMB
- JPE
- JTC
- JVC
- Kiano
- Kivi
- Konka
- LEBEN
- LED TV
- Leff
- Lehua
- LG
- Liberton
- Liberty
- Logik
- Luxor
- Manta
- Medion
- Mitsai
- Mystery
- MYTV
- Navitech
- Nesons
- Nomi
- Nordmende
- NordStar
- OK
- Okira
- Orion
- Panasonic
- Panda
- Philips
- Pilot
- Pioneer
- Pixel
- Polar
- Polarline
- Polaroid
- Prestigio
- Proline
- Proscan
- RCA
- Rolsen
- Romsat
- Rubin
- Sakura
- Samsung
- Sanyo
- Saturn
- Selecline
- Sencor
- Sharp
- Shivaki
- Silver
- Skyline
- Skymaster
- Skywei
- SKYWORTH
- SMART
- Sony
- SOUNDMAX
- Spectrline
- Starlight
- STARWIND
- Sunny
- Supra
- Suzuki
- TCL
- TD SYSTEM
- TD Systems
- TECHNIKA
- Techwood
- TECO
- TELE System
- Telefunken
- Thomson
- Toshiba
- Uniontech
- Vekta
- VESTA
- Vestel
- ViewSonic
- Viore
- Vityas
- VIVAX
- VR
- Westinghouse
- Xiaomi
- Yuno
- АОС
-
-
бензоинструментов
-
запчасти к бензопилам
-
запчасти к бензокосам
-
запчасти к бензорезам
-
запчасти к виброплитам
-
запчасти к генераторам
-
запчасти к снегоуборщикам
-
запчасти к электроинструменту
-
запчасти к 4-х тактным двигателям
-
карбюраторы
-
поршневые кольца
-
поршневая группа
-
ремни для электроинструмента
-
свечи зажигания
-
стартеры
-
тросы
-
триммерные головки и ножи
-
масла и смазки
-
цепи для бензопил
-
шины
-
шкивы
-
щетки угольные
-
инструмент для бензоинструментов
найти запчасть по модели –
выберите производителя :- Bosch
- Briggs&Stratton
- Champion
- DeWalt
- Echo
- Ferm
- Greapo
- Hitachi
- Honda
- Husqvarna
- Makita
- Mitsubishi
- MTD
- Oleo-Mac
- Partner
- Rebir
- Robin
- SKIL
- Stern
- Stihl
- STURM
- Subaru
- Walbro
- Zenoah
- ДИОЛД
- ИНТЕРСКОЛ
-
-
ноутов
-
Аксессуары
-
кабели
-
кабели зарядки
-
аудио и видео кабели
-
переходники
-
-
защитные стекла и чехлы
-
защитные стёкла и плёнки
-
чехлы
-
-
зарядки
-
автомобильные зарядные устройства
-
сетевые зарядные устройства
-
беспроводные зарядные устройства
-
зарядки Mi Band
-
-
power bank
-
внешние аккумуляторы
-
батарейки (элементы питания)
-
-
звук
-
наушники и гарнитура
-
колонки
-
АКБ для портативных колонок
-
амбушюры
-
-
нужное
-
автодержатели
-
для блогеров
-
ремешки Apple Watch
-
ремешки Mi Band
-
зарядки Mi Band
-
фитнес браслеты
-
смарт-часы
-
автопарфюм Flappy
-
тачки
-
флешки и карты памяти
-
плоттеры
-
гирлянды
-
АКБ для фото-видео техники
-
стилусы
-
АКБ для радиоуправляемых моделей
-
-
кабели
-
КБТ
-
холодильников
-
уплотнители дверей
-
ручки дверей
-
терморегуляторы (термостаты)
-
панели ящиков
-
ящики
-
балконы дверей
-
таймеры и ТЭНы оттайки
-
датчики, термопредохранители, реле
-
корпусные детали (ремкомплекты, заглушки, полки, плафоны, кнопки)
-
компрессоры
-
фильтры
-
моторы, крыльчатки вентиляторов
-
пусковые конденсаторы
-
аксессуары для холодильников
-
бытовая химия
-
водяные фильтры и картриджи
-
лампочки
-
платы управления
-
холодильное оборудование и инструменты
-
расходные материалы для заправки
-
фреон
-
уценка холодильники
найти запчасть по модели –
выберите производителя :- AEG
- Ariston
- Bauknecht
- Beko
- Blomberg
- Bosch
- Candy
- Daewoo
- De Dietrich
- Electrolux
- Gaggenau
- Gorenje
- Hansa
- Hoover
- Hotpoint
- Hotpoint-Ariston
- Iberna
- IKEA
- Indesit
- Kuppersbusch
- Liebherr
- Miele
- Neff
- Samsung
- Siemens
- Smeg
- Stinol
- Whirlpool
- Zanussi
- Zerowatt
- Атлант
- Минск
-
-
стиралок
-
насосы (помпы)
-
трубчатые электронагреватели (ТЭНы)
-
щетки и датчики двигателя
-
манжеты люка
-
ремни приводные
-
подшипники барабана
-
сальники бака
-
смазка и клей
-
ручки и петли люка
-
замки люка (убл)
-
амортизаторы и пружины
-
клапаны подачи воды (кэн)
-
конденсаторы
-
суппорты барабана (опоры, фланцы)
-
крестовины и шкивы
-
фильтры и улитки насоса
-
корпусные детали (патрубки, бойники, уплотнители)
-
запчасти для сушилок
-
баки и барабаны
-
ремкомплекты бака
-
двигатели (моторы)
-
модули управления
-
реле уровня воды (прессостаты)
-
сетевые фильтры (фильтры радиопомех)
-
шланги и аквастопы
-
бытовая химия
-
водяные фильтры и картриджи
-
мешки для стирки
-
уценка стиральные машины
найти запчасть по модели –
выберите производителя :- AEG
- Ardo
- Ariston
- Asko
- Bauknecht
- Beko
- Blomberg
- Bosch
- Brandt
- Candy
- CREDA
- Daewoo
- Daewoo Electronics
- De Dietrich
- Electrolux
- Fagor
- Gaggenau
- Gorenje
- Haier
- Hansa
- Hoover
- Hotpoint
- Hotpoint-Ariston
- Iberna
- Ignis
- IKEA
- Indesit
- Kaiser
- Kuppersbusch
- LG
- Miele
- Neff
- Otsein
- Panasonic
- Pitsos
- Polar
- Privileg
- REX
- Rolsen
- Samsung
- Scholtes
- Siemens
- Siltal
- Smeg
- TEKA
- V-ZUG
- Vestel
- Whirlpool
- Zanussi
- Zerowatt
- Атлант
- Вятка
-
- плит
-
посудомоек
-
насосы (помпы)
-
тэны
-
корпусные детали
-
разбрызгиватели (импеллеры)
-
уплотнители
-
датчики
-
замки (УБЛ)
-
фильтры
-
шланги и аквастопы
-
пусковые конденсаторы
-
бытовая химия
-
водяные фильтры и картриджи
-
платы управления
-
уценка посудомойки
найти запчасть по модели –
выберите производителя :- AEG
- AEG Electrolux
- Ardo
- Ariston
- Bauknecht
- Baumatic
- Beko
- Blomberg
- Bosch
- Brandt
- Candy
- CREDA
- De Dietrich
- Electrolux
- Gaggenau
- Gorenje
- GRUNDIG
- Hansa
- Hoover
- Hotpoint
- Hotpoint-Ariston
- Ignis
- IKEA
- Indesit
- KitchenAid
- Korting
- Kuppersberg
- Kuppersbusch
- Mora
- Neff
- Samsung
- Scholtes
- Siemens
- Vestel
- Whirlpool
- Zanker
- Zanussi
- Zelmer
- Zerowatt
- Zigmund & Shtain
-
-
климатехники
-
аноды для водонагревателей
-
тэны для водонагревателей
-
тэн для печи саун
-
фильтры для вытяжек
-
двигатели (электромоторы) для вытяжек
-
термостаты и переключатели для водонагревателей
-
датчики кондиционеров
-
двигатели кондиционеров
-
клапаны для водонагревателей
-
клапаны для кондиционеров
-
запчасти для колонок и газовых котлов
-
компрессоры для кондиционеров
-
манометры давления
-
прокладки для водонагревателей
-
расходные материалы для заправки кондиционеров
-
трубки для кондиционеров
-
фреон
-
электронные модули для кондиционеров
-
водяные фильтры и картриджи
-
- кофемашин
-
холодильников
-
МБТ
- свч
- мясорубок
- хлебопечек
-
пылесосов
-
двигатели
-
фильтры и мешки
-
насадки и шланги
-
насосы
-
аккумуляторы для беспроводных и роботов-пылесосов
-
корпусные детали
-
уценка пылесосы
-
акссесуары для роботов-пылесосов
-
аксессуары и прочие комплектующие
найти запчасть по модели –
выберите производителя :- AEG
- AFC
- AFK
- AIRFLO
- AIRMATE
- Akira
- ALASKA
- ALFATEC
- Alpha
- Alpina
- Amibot
- AMSTRAD
- ANNOVI REVERBERI
- Ariete
- ARLETT
- ARNICA
- Atlanta
- AUTO CLEANER
- BAIYUN
- Bauknecht
- BAUMASTER
- Beko
- BESTRON
- BETRON
- BETRONIC
- BIMAR
- Bimatek
- Binatone
- black&decker
- Blomberg
- Bomann
- BOREAL
- Bork
- BORT
- Bosch
- Braun
- CALOR
- Cameron
- CARREFOUR
- CENTEK
- CHAO BAO
- Clatronic
- Cleanfix
- Cleanna
- Clever&Clean
- Columbus
- COMAC
- COMET
- Conti
- CURTISS
- Daewoo
- Daewoo Electronics
- DAREL
- De Longhi
- De Walt
- DELFIN
- DeLonghi
- Delphin
- DELTA
- DELVIR
- DeWalt
- Dexter
- Dibea
- Dirt Devil
- Dyson
- Ecovacs Deebot
- EIBENSTOCK
- einhell
- Eio
- ELDOM
- Electrolux
- Elekta
- Elenberg
- ELETTROZETA
- ELEXAVOX
- ELIN
- ELITECH
- ENTRONIC
- EROSON
- ETA
- EUROSTEK
- Evgo
- EWT
- EXCELLENT
- Fagor
- FAKIR
- FASTER TOOLS
- FAVOURITE
- FEIN
- FELISATTI
- FERRARI
- FESTO
- Festool
- FIMAP
- FINEPOWER
- FIORENTINI
- FIRSTLINE
- Flex
- FoxCleaner
- FRANGER
- FUBAG
- Funai
- Genio
- GHIBLI
- GISOWATT
- GOBLIN
- Goldstar
- Gorenje
- GRUNDIG
- H.Koenig
- Haier
- HAKO
- HAMMER
- HAMMERFLEX
- HANOVER
- HANSEATIC
- HIKOKI
- Hilti
- Hitachi
- Hoover
- HORIZON
- HORN
- Hotpoint-Ariston
- HUBERTH
- HUGIN
- Husqvarna
- Hyundai
- IBOTO
- ICLEBO
- IDELINE
- Indream
- INVEST
- IRIT
- iRobot
- JACOO
- Kaily
- KALORIK
- kambrook
- Karcher
- Kavity
- Kenwood
- Kirby
- KitFort
- Klarstein
- KNEISSEL
- KOLNER
- KRAFTMAN
- Krausen
- Kress
- Krups
- LAVOR
- LAVORWASH
- LG
- Liectroux
- Lindhaus
- LIV
- LORITO
- MAFELL
- Magnit
- Makita
- Mamirobot
- marta
- Melissa
- Metabo
- METEOR
- Midea
- Miele
- Milwaukee
- MINUTEMAN
- MIOSTAR
- MIRKA
- MOBILO
- MONIX
- Moulinex
- MyGenie
- National
- neoRobot
- NEUFUNK
- Nilfisk
- NILFISK-Alto
- Normann
- NOVAMATIC
- NSS
- Numatic
- OBH NORDICA
- OKAMI
- OMEGA
- OTTO
- P.I.T.
- Panasonic
- Panda
- Philips
- Phoenix
- Polar
- Polaris
- PORTOTECNICA
- Privileg
- PROFILO
- Profimaster
- PROGRESS
- PROTOOL
- QUELLE
- Redmond
- REDVERG
- RIDGID
- Robo-sos
- Robotic
- Robots
- Rolsen
- Roreland
- Rotel
- Rowenta
- Rubin
- Rupes
- Ryobi
- SALCO
- SALTON
- Samba
- Samsung
- Sanyo
- SATRAP
- Saturn
- Scarlett
- SEBO
- Severin
- Shivaki
- Shop-Vac
- Sichler
- SIDEX
- Siemens
- Sinbo
- Singer
- SMART
- Solac
- SORMA
- soteco
- SOTECO GREEN
- Sparky
- SPRINTUS
- Starmix
- STATUS
- Stihl
- STOMER
- STURM
- SUPERIOR
- Supra
- Taski
- TCL
- TEAM
- TECHNIKA
- Techno
- TECO
- Tefal
- TENNANT
- Termozeta
- Tesla
- Thomas
- Thomson
- TMB
- Toposun
- TOR
- TORNADO
- TRISA
- Tristar
- Trony
- TRUVOX
- Ufesa
- UNITEC
- Vax
- VICONTE
- Vigor
- VIPER
- VIRUTEX
- Vitek
- VOLTA
- VORTEX
- WELTSTAR
- Wisdom
- Xiaomi
- Xrobot
- Yoo Digital Iwip
- Z.W.T.
- Zanussi
- Zebot
- Zeco
- Zelmer
- Вихрь
- ДИОЛД
- ЗУБР
- ИНТЕРСКОЛ
- КАЛИБР
- КОРВЕТ
- КРАТОН
- ОБИ
- ПУЛЬСАР
- ПУМА
- СОЮЗ
- Тайфун
- Урал
- ФЕЯ
- ЦИКЛОН
-
- блендеров
-
очистки воды
-
системы обратного осмоса
-
-
Электрика
-
розетки, выключатели
-
розетки
-
выключатели
-
рамки
-
коробки монтажные, подрозетники
-
колодки, тройники
-
удлинители силовые
-
удлинители бытовые
-
-
автоматы, узо, щиты
-
автоматические выключатели
-
узо, дифф. автоматы
-
щиты распределительные
-
кросс модули
-
din-рейки
-
шины заземления и нейтрали
-
стабилизаторы напряжения
-
-
кабель, скс
-
кабель
-
стяжки
-
наконечники
-
клеммы
-
вилки
-
труба гофрированная
-
изолента
-
-
свет
-
светодиодные лампы
-
прожекторы
-
светильники встраиваемые
-
светильники настенно-потолочные
-
cветильники уличного освещения
-
гирлянды
-
светильники подвесные
-
фитолампы и светильники
-
-
розетки, выключатели
-
Инструмент
-
для авто
-
автосканеры
-
гаражное оборудование
-
измерительное для авто
-
чип тюнинг
-
-
ручной инструмент
-
отвертки
-
наборы отверток
-
наборы инструментов
-
инструменты для пайки
-
пинцеты
-
скальпели, лезвия, ножи, ножницы
-
кусачки, плоскогубцы, бокорезы
-
специальный инструмент
-
антистатика, хранение
-
линзы, лампы, микроскопы
-
станции для BGA
-
разбор сенсорных модулей
-
ультразвуковая очистка
-
электроинструмент
-
инструмент для монтажа
-
инструмент диэлектрический
-
наборы сверл
-
крепеж
-
перчатки рабочие
-
акб для электроинструментов
-
оборудование для ремонта дисплеев
-
уценка
-
- для пайки
-
для измерений
-
осциллографы
-
токовые клещи
-
мультиметры
-
щупы
-
источники питания
-
дальномеры
-
пост карты
-
УФ-лампы
-
уценка
-
-
программаторы
-
для микросхем
-
адаптеры для программаторов
-
уценка программаторы
-
-
для авто
-
Расходка
- мфу
-
для пайки
-
оплетка
-
флюсы и канифоль
-
трафареты BGA
-
шарики для BGA
-
припои
-
жала для паяльника
-
станции для BGA
-
-
для бытовухи
-
мешки для пылесосов
-
фильтры для пылесосов
-
бытовая химия
-
фреоны
-
фильтры и картриджи для воды
-
микрофильтры для вытяжки
-
боковые щетки для робота-пылесоса iRobot
-
фильтр воздушный для генератора
-
чехлы для генераторов
-
чехлы для бензокосы
-
чехлы для газонокосилок
-
сумки для бензопил
-
сумки для триммера
-
аксессуары для гладильных систем
-
-
термоматериалы
-
термопаста
-
терморезинки
-
термоскотч
-
отражающая лента
-
термоусадочные трубки
-
теплопроводный скотч
-
-
химия
-
очистители
-
охладители
-
для ультразвуковых ванн
-
клеи и скотч 3М
-
чистящие средства
-
масла и смазки
-
бытовая химия
-
технологические емкости
-
комплекты расходников
-
-
радиодетали
-
ШИМ-контроллеры
-
мультиконтроллеры
-
конденсаторы
-
сокеты
-
регуляторы напряжения
-
микроконтроллеры
-
микросхемы звука
-
контроллеры сетевые
-
контроллеры заряда батареи
-
память оперативная
-
MOSFET
-
память EEPROM
-
память Flash
-
логика
-
микросхемы для iPhone
-
микросхемы для Samsung
-
прочие микросхемы
-
резисторы
-
батарейки (элементы питания)
-
лампочки
-
диоды
-
диоды Шоттки
-
светодиоды
-
войти в кабинку
восстановление пароля,
через минуту снова с нами:
в корзине пока пусто
- Manuals
- Brands
- Segway Manuals
- Scooter
- Personal Transporter i2
- Parts replacement manual
-
Contents
-
Table of Contents
-
Bookmarks
Quick Links
Segway ® Personal Transporter
i2, x2, x2 Turf
Parts Replacement Guide
October 2008
21657-00000 Rev.aa
Related Manuals for Segway Personal Transporter i2
Summary of Contents for Segway Personal Transporter i2
-
Page 1
Segway ® Personal Transporter i2, x2, x2 Turf Parts Replacement Guide October 2008 21657-00000 Rev.aa… -
Page 2
RISK OF DEATH OR SERIOUS INJURY To replace parts on the Segway Personal Transporter, you must read and follow all instructions and warnings in the Segway Personal Transporter Parts Replacement Guide. Failure to do so could result in serious injury or death. -
Page 3
Those trademarks followed by ® are registered trademarks of Segway that have been registered in the United States and in other countries. All other marks are trademarks or common law marks of Segway. Failure of a mark to appear in this guide does not mean that Segway does not use the mark, nor does it mean that Segway products are not actively marketed or are not significant within their relevant markets. -
Page 4
This page intentionally left blank. -
Page 5: Table Of Contents
Customer Replaceable Kits and Technician Replaceable Parts….xiv Related User Materials ………………xiv i2/x2 Replacement Parts Diagram …………..xv LeanSteer™ Frame When to Replace………………..1‐3 Handlebar Removal and Installation …………. 1‐4 LeanSteer Frame Removal …………….1‐5 LeanSteer Frame Installation…………….1‐6 Wireless InfoKey™ Controller Removal and Installation ……1‐7 Wireless InfoKey Controller Dock Removal and Installation ….1‐8 Wireless InfoKey Controller Battery Removal and Installation….1‐9 Mats When to Replace………………..2‐2 Mat Removal and Installation…………….. 2‐3 Battery Packs When to Replace………………..3‐2 Battery Removal and Installation …………..3‐3 Segway® Personal Transporter i2, x2, x2 Turf Parts Replacement Guide…
-
Page 6
Fender Frame Removal and Installation, x2 ……….5‐5 Power Base Trim When to Replace………………..6‐2 Before Removing Fascias …………….. 6‐3 Fascia Removal and Installation …………..6‐4 Gearbox Trim Cover Removal and Installation ……….. 6‐5 Console Trim Removal or Installation …………6‐6 Serviceable Power Base ……………………..7‐3 Establishing a Serviceable Power Base …………7‐3 Gearbox When to Replace………………..8‐3 How to tell the difference …………….8‐3 Why does this matter?…………….8‐3 Gearbox Removal………………..8‐4 Gearbox Installation ………………8‐5 Segway® Personal Transporter i2, x2, x2 Turf Parts Replacement Guide… -
Page 7
When to Replace………………9‐16 10 Chassis Cover When to Replace………………..10‐2 Chassis Cover Removal and Installation…………. 10‐3 11 CU Board When to Replace………………..11‐2 CU Board Removal ………………11‐3 CU Board Installation………………11‐5 12 Balance Sensor Assembly When to Replace………………..12‐2 BSA Removal and Installation …………..12‐3 13 Motor When to Replace………………..13‐2 Motor Removal………………..13‐3 Motor Installation ………………. 13‐4 Elastomer Bushing Inspection, Removal, and Installation ……. 13‐5 Segway® Personal Transporter i2, x2, x2 Turf Parts Replacement Guide… -
Page 8
14 Power Base Chassis When to Replace………………..14‐3 Disassembling and Reassembling Chassis Components ……14‐4 Post-Service Tests …………..A-1 Start‐up Test…………………. A‐1 Standard Check ………………..A‐2 Operational Test ………………..A‐2 Parts List …………….. B-1 Fasteners …………….C-1 D Recommended Tools and Diagnostic Equipment ……D-1 Glossary ……………… G-1 viii Segway® Personal Transporter i2, x2, x2 Turf Parts Replacement Guide… -
Page 9: General Safety Precautions
Observe and follow all safety information on the warning label found on the battery pack. • Only charge the battery packs using charging devices approved by Segway. • Failure to adhere to these warnings could lead to serious injury or death or damage to property.
-
Page 10
Failure to follow ESD procedures could result in personal injury or damage to property. QUESTIONS If you have any questions about the instructions in this guide, please contact a Segway Service Representative to avoid confusion leading to serious injury or death or damage to property. Segway® Personal Transporter i2, x2, x2 Turf Parts Replacement Guide … -
Page 11: About This Guide
About This Guide Purpose The purpose of this guide is to provide instructions for servicing the 2 Generation (“Gen 2”) Segway Personal Transporter (Segway PT) models i2, x2, and x2 Turf. Audience Chapters 1 through 6 of this manual are written for either customers or Segway trained, certified service technicians working under agreement with Segway Inc. Chapters 7 through 14 of this manual are written for only Segway trained, certified service technicians working under agreement with Segway Inc. Certification Becoming a Segway certified technician involves a four‐level certification process. The service technician may be required to undergo training at each level. Upon satisfactory completion of this training, the service technician becomes certified to maintain the Segway PT parts and assemblies according to the following scheme: Maintenance Level Parts and Assemblies Certified to Maintain Instructions • Customer Replaceable Parts • LeanSteer Frame Chapter 1 • Mats Chapter 2 • Battery Packs Chapter 3 • Tire/Wheel Assembly Chapter 4 • Fender Chapter 5 • •…
-
Page 12: Organization
About This Guide Organization This manual organizes parts replacement instructions into two general categories: Instructions intended for either customers or service technicians (Chapter 1 through Chapter 6), and instructions intended for service technicians only (Chapter 7 through Chapter 14). The instructions in Chapter 8 through Chapter 14 describe procedures for replacing parts after having established a serviceable power base (which is described in Chapter 7). Chapter Description page ix Contains important safety information you must read before servicing the Segway PT. page xv Shows an exploded replacement parts diagram. Chapter 1 Describes removal and installation procedures for the LeanSteer frame. Chapter 2 Describes removal and installation procedures for the mats. Chapter 3 Describes troubleshooting, removal, and installation procedures for the Li‐ion batteries. Chapter 4 Describes removal and installation procedures for the tire/wheel assembly. Chapter 5 Describes removal and installation procedures for the fender. Chapter 6 Describes removal and installation procedures for the power base trim (fascia). Chapter 7 Describes procedure for establishing a serviceable power base. Chapter 8 Describes troubleshooting, removal, and installation of a gearbox assembly. Chapter 9 Describes removal and installation procedures for the console and related components. Chapter 10 Describes removal and installation procedures for the chassis cover. Chapter 11 Describes troubleshooting, removal, and installation procedures for the CU boards. Chapter 12 Describes removal, and installation procedures for the balance sensor assembly. Chapter 13 Describes removal and installation of a motor assembly. Chapter 14 Describes power base chassis.
-
Page 13: Safety Messages
About This Guide Safety Messages Standards Safety messages for this guide and product safety signs and labels are based on standards set forth by the American National Standards Institute for Product Safety Information in Product Manuals, Instructions, and Other Collateral Materials (ANSI). To assist in the communication of safety information across language barriers, some safety graphics are based on standards set forth by the International Standards Organization (ISO). Safety Alert Symbol This is the safety alert symbol. It is used to alert you to potential personal injury hazards. Obey all safety messages that follow this symbol to avoid possible injury or death. Signal Words WARNING indicates a hazardous situation which, if not avoided, could result in death or serious injury. CAUTION, used with the safety alert symbol, indicates a hazardous situation which, if not avoided, could result in minor or moderate injury. CAUTION, used without the safety alert symbol, is used to address practices not related to personal injury. NOTICE is used to address practices not related to personal injury. Terminology Throughout this guide, the term “model x2” refers to both the x2 and x2 Turf models unless otherwise noted. Segway® Personal Transporter i2, x2, x2 Turf Parts Replacement Guide xiii…
-
Page 14: Customer Replaceable Kits And Technician Replaceable Parts
About This Guide Customer Replaceable Kits and Technician Replaceable Parts Subassemblies qualified in this guide as Customer Replaceable may be installed by the customer. Otherwise, subassemblies are qualified as installable only by a Certified Service Technician. A subassembly that is available as a replaceable kit is shipped in a box and includes all parts and fasteners needed to install the subassembly. These kits are listed under the heading Replaceable Kits on the first page of each chapter. All parts included in a Replaceable Kit should be replaced. When individual parts of a subassembly are available for replacement, these parts are shipped without fasteners and are intended for installation only by a Certified Service Technician. These parts are listed under the heading Technician Replaceable Parts on the first page of each chapter. Related User Materials The following additional materials may be needed for reference during parts replacement procedures: Segway PT i2, x2 Reference Manual • Segway Personal Transporter (PT) i2, x2 Getting Started Manual • Please check the Segway website (www.segway.com) for updates to the Reference Guide and Getting Started Manual, or contact Segway to confirm you have on hand the most recently updated service publications. Segway® Personal Transporter i2, x2, x2 Turf Parts Replacement Guide…
-
Page 15: I2/X2 Replacement Parts Diagram
About This Guide i2/x2 Replacement Parts Diagram Segway® Personal Transporter i2, x2, x2 Turf Parts Replacement Guide…
-
Page 16
About This Guide This page intentionally left blank. Segway® Personal Transporter i2, x2, x2 Turf Parts Replacement … -
Page 17: Leansteer™ Frame
Segway PT from loss of control, collisions, and falls. Check the tightness of the joint between the LeanSteer frame •…
-
Page 18
Do not tighten or reuse any fastener except the screws used to • attach the battery packs, wheel nuts, and LeanSteer frame. Instead, when any other fastener is loose or removed, replace the fastener with a new Segway-approved fastener. See Appendix C, ”Fasteners” for more information. -
Page 19: When To Replace
Figure 1‐1 shows the components of the LeanSteer frame. Figure 1‐1: LeanSteer Frame Components Wedge, Threaded Side Outer Bar Clamp Grip Trim Upper LeanSteer Frame Lower LeanSteer Frame Handlebar Hub Trim Height Adjustment Knob M4 Threaded Rod Washer Height Adjustment Wedge Wedge, Counterbore Side Fastener, SHCS, M6 x 1.0 x 45, Hex Slide, Top, Spacer Upper Handlebar Stop Fastener, SHCS, M4x20 Handlebar Tube InfoKey and InfoKey Dock When to Replace You need to replace the LeanSteer frame if any part is bent or otherwise broken. Typically, you can replace one of its components. Segway® Personal Transporter i2, x2, x2 Turf Parts Replacement Guide 1‐3…
-
Page 20: Handlebar Removal And Installation
Handlebar Removal and Installation To remove handlebar from LeanSteer frame: To install handlebar on LeanSteer frame: 1. Make sure Segway PT is powered off and 1. Make sure Segway PT is powered off and unplugged. unplugged. 2. Use 3mm hex wrench to remove (3) 2. Place handlebar against LeanSteer frame fasteners. See Figure 1‐2. with the bevel facing backward and Segway logo facing up. See Figure 1‐2. 20306‐00001 3. Position handlebar clamp against handlebar. 4. Insert (3) fasteners (20306‐00001) through handlebar clamp into LeanSteer frame and tighten by hand. Handlebar Clamp 20046‐00001 Black Handlebar 20046‐00002 White 20955‐00001…
-
Page 21: Leansteer Frame Removal
LeanSteer Frame Removal If wedge clamps fall out or are removed during To remove LeanSteer frame: this procedure, put them aside in a safe place as you will need them to reattach LeanSteer frame 1. Make sure Segway PT is powered off and to pivot assembly. unplugged. Figure 1‐3: Loosen Fastener Holding LeanSteer Frame Figure 1‐5: Remove LeanSteer Frame from Pivot Assembly 2.
-
Page 22: Leansteer Frame Installation
LeanSteer Frame Installation To install LeanSteer frame: 1. Make sure Segway PT is powered off and unplugged. 2. Slide LeanSteer frame onto pivot assembly. See Figure 1‐6. Figure 1‐8: Tighten Fastener Holding LeanSteer Frame in Place 7. Move LeanSteer frame fully left and right, Figure 1‐6: Attach LeanSteer Frame to Pivot Assembly until it touches each fender, and ensure LeanSteer frame returns to a straight‐up 3. If wedge clamps are not installed, install position. If LeanSteer frame does not return each wedge clamp, curved side facing down to a straight‐up position, loosen wedge and inserted in either side of LeanSteer clamp fastener and return to Step 5. See frame base. See Figure 1‐7. Figure 1‐9. If LeanSteer frame makes a clunking or popping sound when moved, frame was not properly aligned when torqued.
-
Page 23: Wireless Infokey™ Controller Removal And Installation
Wireless InfoKey™ Controller Removal and Installation To remove Wireless InfoKey controller: To install Wireless InfoKey controller: 1. Press release tab at bottom of InfoKey 1. Make sure InfoKey Controller dock is Controller dock adapter. See 1 in Figure 1‐ installed (page 1‐8). 2. Place Wireless InfoKey controller onto dock 2. Slide Wireless InfoKey Controller out of adapter and slide into place until release tab Wireless InfoKey controller dock adapter. (1 in Figure 1‐10) is engaged. See 2 in Figure 1‐10. 3. Perform post‐service tests (page A‐1). InfoKey 21064 InfoKey Dock 20946-00001 Figure 1‐10: Remove Wireless InfoKey Controller Segway® Personal Transporter i2, x2, x2 Turf Parts Replacement Guide 1‐7…
-
Page 24: Wireless Infokey Controller Dock Removal And Installation
Wireless InfoKey Controller Dock Removal and Installation To remove Wireless InfoKey controller dock: To install Wireless InfoKey controller dock: 1. Make sure Segway PT is powered off and 1. Make sure Segway PT is powered off and unplugged. unplugged. 2. Using 3mm hex wrench, remove fastener 2. Place Wireless InfoKey controller dock that holds Wireless InfoKey controller dock against upper LeanSteer frame with release to LeanSteer frame. See Figure 1‐11. tab oriented at bottom. See Figure 1‐11. 3. Remove Wireless InfoKey controller dock. 3. Thread 3mm fastener (20306‐00003) through hole in top of Wireless InfoKey controller dock and into upper LeanSteer frame. 20306-00003 4.
-
Page 25: Wireless Infokey Controller Battery Removal And Installation
Wireless InfoKey Controller Battery Removal and Installation To remove battery: To install battery: 1. Make sure Segway PT is powered off and 1. Make sure Segway PT is powered off and unplugged. unplugged. 2. Rotate Wireless InfoKey controller 45 2. Verify that new battery is type CR2430, degrees counterclockwise and separate from available as part of Segway InfoKey kit dock adapter ring. See Figure 1‐12. (21064‐00001). 3. Insert Wireless InfoKey controller battery with positive (+) side showing. See Figure 1‐13. 4. Reattach the Wireless InfoKey controller’s back cover using a coin or flathead screwdriver. 5. Place Wireless InfoKey controller on dock adapter ring and rotate clockwise until the Wireless InfoKey controller is locked into position. (An audible click should be …
-
Page 26
This page intentionally left blank. 1‐10 Segway® Personal Transporter i2, x2, x2 Turf Parts Replacement Guide… -
Page 27: Mats
These mats protect the rider detect sensors located beneath them. Mats should be secured in place prior to riding. Failure to follow these instructions could interfere with the operation of the Segway PT leading to serious injury or death or damage to property. Segway® Personal Transporter i2, x2, x2 Turf Parts Replacement Guide…
-
Page 28: When To Replace
When to Replace Your Segway PT comes with two mats installed to the right and left of the console. Mats are a functional component of the Rider Detect feature; mats permit a wide range of foot positions to achieve rider detection. These mats protect the rider detect sensors located beneath them, and provide a comfortable surface on which to stand. Mats should be secured in place prior to riding. It is appropriate to replace a mat if any worn edges or tears are observed. 2‐2 Segway® Personal Transporter i2, x2, x2 Turf Parts Replacement …
-
Page 29: Mat Removal And Installation
Mat Removal and Installation To remove mat: To install mat: 1. Make sure Segway PT is powered off and 1. Make sure Segway PT is powered off and unplugged. unplugged. 2. Lift mat off power base. See Figure 2‐1. 2. Verify that top of power base and bottom of mat are clean, dry, and free of debris. rear tabs 3. Place mat on power base. 4. Fit mat’s rubber tabs into slots formed by gap between front and rear fascia and power front tabs base. See Figure 2‐1. 5. Tuck tabs in place around entire perimeter of mat while you press down. 6. Visually confirm that mat is properly aligned and all rubber tabs are tucked in prior to riding. 7. Perform post‐service tests (page A‐1). Figure 2‐1: Remove or Install Mats Segway® Personal Transporter i2, x2, x2 Turf Parts Replacement Guide…
-
Page 30
This page intentionally left blank. 2‐4 Segway® Personal Transporter i2, x2, x2 Turf Parts Replacement Guide… -
Page 31: Battery Packs
Do not tighten or reuse any fastener except the screws used to • attach the battery packs, wheel nuts, and LeanSteer frame. Instead, when any other fastener is loose or removed, replace the fastener with a new Segway-approved fastener. See Appendix C, ”Fasteners” for more information.
-
Page 32: When To Replace
• approved by Segway. Comply with all local and federal individual country laws when • disposing of and transporting Segway PT batteries. Failure to adhere to these warnings could lead to serious injury • or death or damage to property.
-
Page 33: Battery Removal And Installation
20878‐00001 To isolate a problem to a specific battery, swap front and rear battery packs to confirm that the error condition follows the problem battery. 20541‐00002 To remove batteries: 1. Make sure Segway PT is powered off and unplugged. Figure 3‐1: Remove or Install Battery 2. Position Segway PT on an angle or upside down so that bottom of chassis is exposed. To install batteries: See Figure 3‐1.
-
Page 34
Do not use power tool. Do not cross-thread or over-tighten fasteners. Tighten only to the prescribed torque. 7. Repeat Steps 3 through 5 for other battery. 8. Perform post‐service tests (page A‐1). Be sure to reinstall all four fasteners per battery. Segway approved fasteners should be used. If a fastener is missing, insert center fasteners first. 3‐4 Segway® Personal Transporter i2, x2, x2 Turf Parts Replacement … -
Page 35: Tire/Wheel Assembly
Included with kit: (1) x2 fender (1) x2 fender frame (2) Fender fasteners (3) Fender frame fasteners x2 Fender Frame kit (left side) (20959‐00001) Unplug the Read all Power off instructions. the Segway PT. Segway PT. Included with kit: (1) x2 fender Failure to do so Failure to follow Failure to follow (1) x2 fender frame could result in these instructions these instructions serious injury or…
-
Page 36: When To Replace
Do not tighten or reuse any fastener except the screws used to • attach the battery packs, wheel nuts, and LeanSteer frame. Instead, when any other fastener is loose or removed, replace Required Tools the fastener with a new Segway-approved fastener. See • Torque wrench, 3/8ʺ drive Appendix C, ”Fasteners”…
-
Page 37: Tire/Wheel Assembly Removal And Installation, I2 Only
Tire/Wheel Assembly Removal and Installation, i2 Only To install tire/wheel assembly: 1. Make sure Segway PT is powered off and Support your Segway PT by means other than unplugged. resting on its wheels. Support of the unit from below the batteries is recommended. As an 2. Place tire/wheel assembly on gearbox …
-
Page 38: Tire/Wheel Assembly Removal And Installation, X2 Only
Tire/Wheel Assembly Removal and Installation, x2 only To remove tire/wheel assembly: To install tire/wheel assembly: 1. Make sure Segway PT is powered off and 1. Make sure Segway PT is powered off and unplugged. unplugged. 2. Support unit or turn unit on its side. 2. Inspect wheel mounting surfaces; use alcohol wipes to clean off all debris. 3. If removing tire/wheel assembly and hub adapter, proceed to page 4‐6. 3. Place wheel over hub adapter with valve stem facing outward; align mounting holes. 4. Use 8mm hex wrench to remove (4) fasteners. See Figure 4‐2. 4. Place wheel trim on wheel; align mounting holes. See Figure 4‐2. 5. Thread (4) 8mm fasteners (20991‐00001) …
-
Page 39: Tire/Wheel Assembly Removal And Installation, X2 Turf Only
Tire/Wheel Assembly Removal and Installation, x2 Turf only To remove tire/wheel assembly: To install tire/wheel assembly: 1. Make sure Segway PT is powered off and 1. Make sure Segway PT is powered off and unplugged. unplugged. 2. Support unit or turn unit on its side. 2. Inspect wheel mounting surfaces; use alcohol wipes to clean off all debris. 3. If removing tire/wheel assembly and hub adapter, proceed to page 4‐6. 3. Place spacer over hub adapter; align mounting holes. See Figure 4‐3. 4. Use 8mm hex wrench to remove (4) 8mm fasteners. See Figure 4‐3. 4. Place wheel over hub adapter with valve stem facing outward; align mounting holes. 5. Place wheel trim on wheel; align mounting …
-
Page 40: Hub Adapter Removal And Installation, X2/X2 Turf
Hub Adapter Removal and Installation, x2/x2 Turf To remove hub adapter: To install hub adapter: 1. Make sure Segway PT is powered off and 1. Make sure Segway PT is powered off and unplugged. unplugged. 2. Remove tire/wheel assembly: 2. Inspect mounting surface; use alcohol wipes to clean off all debris. Model x2, page 4‐4 • Model x2 Turf, page 4‐5 • 3. Align three center holes in hub adapter or entire wheel assembly with lugs on gearbox. Seat hub adapter over lugs against gearbox NOTE: This step is not required if you are flange. See Figure 4‐4. removing entire wheel assembly from gearbox. 4. Thread (3) 13mm wheel nuts (20158‐00001) …
-
Page 41: Tire Tube Removal And Installation, I2
Tire Tube Removal and Installation, i2 To remove tire tube: 1. Make sure Segway PT is powered off and Carefully position clamp to avoid puncturing tire. unplugged. Insert clamp on tire wall, centering clamp at tire specification label. Wear safety glasses to avoid eye injury. Finger or Wear safety glasses.
-
Page 42
Improper placement of tire irons can result in pinching. Finger or hand hazard. Figure 4‐11: Extract Tube 7. Reminder: Wear safety glasses. 8. Insert a second tire iron under tire bead about 6ʺ away from first tire iron and pry If replacing tire, work outside bead over inside of that portion of tire over rim (Figure 4‐9). wheel to remove tire completely. Figure 4-12. Figure 4‐9: Insert Second Tire Iron 9. Pull first tire iron out and reinsert under bead about 6ʺ away from other tire iron. Figure 4‐12: Remove or Install Tire 4‐8 Segway® Personal Transporter i2, x2, x2 Turf Parts Replacement … -
Page 43
Use only Segway-approved tube (18911- 00001—single; 21193-00001—quantity five). The 90-degree bend in valve stem is necessary for proper clearance. To install new tire (use Segway part number 20543-00001), seat outside bead on wheel by hand before installing tube (Figure 4-12). -
Page 44
If tire is over-inflated from seating beads, release air until pressure reaches 15 psi. 8. Install tire/wheel assembly (page 4‐3). 9. Perform post‐service tests (page A‐1). Figure 4‐16: Use Tire Iron to Lift Remaining Bead To avoid pinching, keep hands and fingers away from bead during inflation. Finger or hand hazard. 7. Using air pump with Schrader valve attachment (or other source of forced air), inflate tire enough to seat tire beads (Figure 4‐17). It may be necessary to over‐ inflate tire to properly seat tire beads. When properly seated, tire and wheel will have an even, slight gap. Ensure tire stem is angled 45 degrees toward chassis. Figure 4‐17: Inflate Tire 4‐10 Segway® Personal Transporter i2, x2, x2 Turf Parts Replacement … -
Page 45: Fenders
(20961‐00001 Left • 20962‐00001 Right) (1) Fender (4) Fasteners, 18mm x2 Fender Frame (20959‐00001 Left • 20960‐00001 Right) (1) Fender frame (4) Fasteners, 18mm (3) Fasteners, 28mm Read all Unplug the Power off the Segway PT. Segway PT. instructions. Required Tools Failure to do so Failure to follow Failure to follow • Torque wrench, 3/8” drive could result in these instructions these instructions •…
-
Page 46: When To Replace
Do not tighten or reuse any fastener except the screws used to • attach the battery packs, wheel nuts, and LeanSteer frame. Instead, when any other fastener is loose or removed, replace the fastener with a new Segway-approved fastener. See Appendix C, ”Fasteners” for more information.
-
Page 47: Fender Removal And Installation, I2
Fender Removal and Installation, i2 To remove fender: To install fender: 1. Make sure Segway PT is powered off and 1. Make sure Segway PT is powered off and unplugged. unplugged. 2. Remove tire/wheel assembly (page 4‐3). 2. Orient and place fender on gearbox. Use T‐ 20 6‐lobe wrench to drive (4) button‐head 3. Using a T‐20 6‐lobe , remove (4) button‐head fasteners (20538‐00001) and torque to fasteners. See Figure 5‐1. 1.5 N‐m. See Figure 5‐1. 3. Install tire/wheel assembly (page 4‐3). Fender 20945-00001 4. Perform post‐service tests (page A‐2). 20538-00001 Figure 5‐1: Remove or Install Fender, i2 4. Lift fender and remove from gearbox. Segway® Personal Transporter i2, x2, x2 Turf Parts Replacement Guide 5‐3…
-
Page 48: Fender Removal And Installation, X2
Fender Removal and Installation, x2 To remove fender: To install fender: 1. Make sure Segway PT is powered off and 1. Make sure Segway PT is powered off and unplugged. unplugged. 2. Remove tire/wheel assembly (page 4‐4). 2. Orient and place left fender on left fender frame, and right fender on right fender 3. Using a 4mm wrench, remove (4) button‐ frame. head fasteners to detach fender from fender frame. See Figure 5‐2. 3. Ensure grommets are in place on fender. If grommets need to be installed use finger to push grommet into place. Note that grommets are bidirectional and can be Fender installed from either side of fender. 20961-00001 (left)/20962-00001 (right) 4. Using a 4mm wrench, drive (4) button‐head fasteners (20871‐00001) until seated. Tighten …
-
Page 49: Fender Frame Removal And Installation, X2
Fender Frame Removal and Installation, x2 To remove fender frame: To install fender frame: 1. Make sure Segway PT is powered off and 1. Make sure Segway PT is powered off and unplugged. unplugged. 2. Remove tire/wheel assembly: 2. Orient and place left and right fender frames on appropriate side of gearbox. Model x2, page 4‐4 • Model x2 Turf, page 4‐5 • Gearbox cover must be in place and properly 3. Remove fender (page 5‐4). seated.
-
Page 50
This page intentionally left blank. 5‐6 Segway® Personal Transporter i2, x2, x2 Turf Parts Replacement Guide… -
Page 51: Power Base Trim
(1) Front fascia Without Parking Stand: (4) Fasteners, 10mm With Parking Stand Mounted: (2) Outer fasteners, 10mm (2) Center fasteners, 14mm i2/x2 Power Base Rear Trim (Fascia) Kit Unplug the Read all Power off (20948‐00001) the Segway PT. Segway PT. instructions. (1) Rear fascia Failure to do so Failure to follow Failure to follow (4) Fasteners, 10mm could result in these instructions these instructions Console Cover Trim Kit, v1 …
-
Page 52: When To Replace
Do not tighten or reuse any fastener except the screws used to • attach the battery packs, wheel nuts, and LeanSteer frame. Instead, when any other fastener is loose or removed, replace the fastener with a new Segway-approved fastener. See Appendix C, ”Fasteners” for more information.
-
Page 53: Before Removing Fascias
Before Removing Fascias 1. Make sure Segway PT is powered off and unplugged. 2. Remove one tire/wheel assembly: Model i2, page 4‐3 • • Model x2, page 4‐4 Model x2 Turf, page 4‐5 • 3. Because of interference on the i2 and x2, you must remove the following: • (Model i2 only) Remove one fender (page 5‐3). • (Model x2 only) Remove both fenders (page 5‐4) and fender frames as a unit (page 5‐5). All PT models have been manufactured with one of two revisions of the console housing and trim. The revision is determined by the part number of the console trim, which is located on the forward part of the housing and is visible after the cover is removed. The part numbers for each revision of the console trim are as follows: First Revision: 20951‐00001 (Black) or 20951‐ • 00002 (White) Second Revision: 21281‐00001 (Black) or • 21281‐00002 (White) First-revision console housing cover parts are no longer manufactured or supported.
-
Page 54: Fascia Removal And Installation
Fascia Removal and Installation To remove front fascia: To install front fascia: 1. Make sure Segway PT is powered off and 1. Make sure Segway PT is powered off and unplugged. unplugged. 2. Use 4mm hex wrench to remove (4) 2. With fender (model i2 only) and tire/wheel fasteners from front fascia. See Figure 6‐1. assembly off, align front fascia tabs with holes beneath pivot base hub, and be sure pivot base they are free of debris and properly seated before threading fasteners. See Figure 6‐1. tabs TABS ARE DELICATE AND CAN BREAK EASILY IF NOT PROPERLY ALIGNED INTO PIVOT BASE HOLES.
-
Page 55: Gearbox Trim Cover Removal And Installation
Gearbox Trim Cover Removal and Installation To remove gearbox trim cover: To install gearbox trim cover: 1. Make sure Segway PT is powered off and 1. Make sure Segway PT is powered off and unplugged. unplugged. 2. (Model x2) Remove fender and frame 2. Align holes in gearbox trim cover with holes assembly (page 5‐5) and G‐box cover. in gearbox. 3. (Model i2) Using 4mm hex wrench, loosen 3. (Model x2 only) Install both fender and remove (3) button‐head fasteners from (page 5‐4) and frame assemblies (page 5‐5). gearbox trim cover. See Figure 6‐3. 4. Thread (3) button‐head fasteners (20553‐ Gearbox Cover 00001) through holes in gearbox trim cover …
-
Page 56: Console Trim Removal Or Installation
Console Trim Removal or Installation To remove console trim: To install console trim: 1. Make sure Segway PT is powered off and 1. Make sure Segway PT is powered off and unplugged. unplugged. 2. Pull up on front portion of trim and tilt it 2. Press rear portion of console trim over away from charge port. See Figure 6‐4. charge port. Console Trim 3. Tilt front portion of console trim to engage 21281-00001 Black 21281-00002 White with console. See Figure 6‐4. 21281-00005 Sage 4. Perform post‐service tests (page A‐1). Figure 6‐4: Remove or Install Console Trim Make sure IEC connector (charge) port remains clean and dry.
-
Page 57
The following sections in this guide are intended for use by Segway certified service technicians only. Segway does not recommend that non-certified individuals replace any of the components described in the following sections. Warranty will be void if components in any of the following sections are replaced by an individual other than a Segway certified service technician. -
Page 58
This page intentionally left blank. 6‐8 Segway® Personal Transporter i2, x2, x2 Turf Parts Replacement Guide… -
Page 59: Serviceable Power Base
Segway PT. Figure 7‐1 illustrates a serviceable power base. i2, x2, x2 Turf The following warnings apply to the instructions in this Qualifications Section 7 regarding the Serviceable Power Base: Certified Service Technician Unplug the Read all Power off the Segway PT. Segway PT. instructions. Failure to do so Failure to follow Failure to follow could result in these instructions these instructions serious injury or could lead to could lead to death.
-
Page 60
Do not tighten or reuse any fastener except the screws used to • attach the battery packs, wheel nuts, and LeanSteer frame. Instead, when any other fastener is loose or removed, replace the fastener with a new Segway-approved fastener. See Appendix C, ”Fasteners” for more information. -
Page 61: Establishing A Serviceable Power Base
Figure 7‐1: Serviceable Power Base In many cases, the serviceable power base will be used as a replaceable module. Note that the unit serial number and Wireless InfoKey controller are associated with the serviceable power base. Establishing a Serviceable Power Base The serviceable power base is the launch point for many service procedures. Throughout this guide, you will be instructed to “establish a serviceable power base,” which means to remove (or reassemble) the following components from the Segway PT: • LeanSteer frame (qty 1) (page 1‐5) • Mat (qty 2) (page 2‐3) • Battery packs (qty 2) (page 3‐3) • Tire/wheel assembly (qty 2): Model i2, page 4‐3 Model x2, page 4‐4 Model x2 Turf, page 4‐5 • Fender (qty 2) — Model i2 (page 5‐2) — Model x2 (page 5‐4) • Power base trim (qty 2) — Front and rear fascia (page 6‐4) — Gearbox cover trim (page 6‐5) •…
-
Page 62
This page intentionally left blank. 7‐4 Segway® Personal Transporter i2, x2, x2 Turf Parts Replacement Guide… -
Page 63: Gearbox
T‐45 6‐lobe socket wrench, 3/8” drive • Socket extension, 3‐in. 3/8” drive • Hex wrench, 4mm • Hex wrench, 5mm Unplug the Read all Power off • Rubber mallet the Segway PT. Segway PT. instructions. • Scraper (to remove RTV silicone sealant) Failure to do so Failure to follow Failure to follow • Razor blade could result in these instructions…
-
Page 64
Do not tighten or reuse any fastener except the screws used to • attach the battery packs, wheel nuts, and LeanSteer frame. Instead, when any other fastener is loose or removed, replace the fastener with a new Segway-approved fastener. See Appendix C, ”Fasteners” for more information. -
Page 65: When To Replace
Replacement gearboxes shipped from Segway are backward compatible with all i2 and x2 How to tell the difference models. Gearbox spacers with a 10‐digit part number __________________________________________ stamped on the top and bottom were assembled with a gasket. Gearbox spacers that do not have a 10‐digit part number were assembled using Field reinstallation of RTV silicone sealant is RTV silicone sealant. See Figure 8‐1. neither recommended nor supported by Segway. Warranty will be void if this restriction is not followed. Segway® Personal Transporter i2, x2, x2 Turf Parts Replacement Guide 8‐3…
-
Page 66: Gearbox Removal
Gearbox Removal Gearbox might separate from gearbox spacer. If Support your Segway PT by means other than resting on its wheels. Support of unit from below this occurs, remove battery pack (page 3-3) to batteries is recommended. As an alternative, the gain access to bottom inside edge of spacer.
-
Page 67: Gearbox Installation
Gearbox Installation To install gearbox: 4. Completely remove thread lock compound from gearbox fastener holes. Use cotton 1. Make sure Segway PT is powered off and swabs to thoroughly clean excess thread unplugged. lock compound from internal threads. First use window cleaner, then isopropyl alcohol, 2. Inspect motor coupling and elastomer to remove thread lock compound. See bushing. Replace elastomer bushing if it is Figure 8‐4. worn out. See page 13‐5. 3. If RTV silicone sealant is present on chassis, use razor blade or utility knife blade (set at 90‐degree angle to the chassis surface) to carefully and gently scrape away all RTV sealant residue from chassis mating surface. Do not scratch machined surface. Always work in downward direction to prevent contaminants from falling into motor cavity. See Figure 8‐3. To prevent contamination, cover motor cavity. Machined surfaces of gearbox and chassis can be sharp.
-
Page 68
Figure 8‐4: Remove Thread Lock Compound from Fastener Holes Figure 8‐6: Align Couplings and Gearbox Housing Roll Pins with Chassis Ensure gasket is present (see ”When to Replace” on page 8‐3) and oriented properly 7. Check to ensure both gaskets are in good in groove of gearbox spacer gasket. See condition and properly located. Figure 8‐5. 8. Inspect roll pins to ensure they are in place on the chassis and free of residue. 9. Using rubber mallet, gently tap gearbox outer cover at locations indicated by arrows in Figure 8‐7 to seat gearbox against chassis until mating surfaces are flush. Alternate strike points from side to side for even seat. DO NOT STRIKE THE FLANGE OR GEARBOX! Gearbox Spacer 21367-00001 Figure 8‐5: Align Gearbox Spacer Gasket 6. Align couplings and gearbox housing roll pins with chassis. (Roll pin on right not pictured.) See Figure 8‐6. 8‐6 Segway® Personal Transporter i2, x2, x2 Turf Parts Replacement … -
Page 69
Do not use gearbox fasteners to seat gearbox to chassis. Make sure gearbox and spacer are completely seated prior to tightening gearbox to specified torque. Failure to do so could result in stripped chassis holes. 10. Install (3) new gearbox fasteners (20537‐ 00002). Thread in by hand, and then torque to 40 N‐m using T‐45 6‐lobe wrench with 3/ 8”‐drive socket. See Figure 8‐8. Gearbox 20919-00001 20537-00002 Figure 8‐8: Install Gearbox Fasteners 11. Reinstall fascia trim (page 6‐4). Segway® Personal Transporter i2, x2, x2 Turf Parts Replacement Guide 8‐7… -
Page 70
This page intentionally left blank. 8‐8 Segway® Personal Transporter i2, x2, x2 Turf Parts Replacement Guide… -
Page 71: Console
T‐27 6‐lobe wrench • T‐30 6‐lobe wrench • Hex wrench, 2mm • Hex wrench, 2.5mm Unplug the Read all Power off • Hex wrench, 3mm the Segway PT. Segway PT. instructions. • Hex wrench, 5mm Failure to do so Failure to follow Failure to follow • Loctite 20‐gauge taper tip could result in these instructions these instructions •…
-
Page 72: When To Replace
Do not tighten or reuse any fastener except the screws used to • attach the battery packs, wheel nuts, and LeanSteer frame. Instead, when any other fastener is loose or removed, replace the fastener with a new Segway-approved fastener. See Appendix C, ”Fasteners” for more information.
-
Page 73: Before Servicing The Console
AS A RESULT, IF ANY FIRST-REVISION CONSOLE HOUSING, GASKET, OR COVER IS DAMAGED, THE COVER, GASKET, HOUSING, AND TRIM MUST ALL BE REPLACED USING THE CURRENT (SECOND) REVISION. Segway® Personal Transporter i2, x2, x2 Turf Parts Replacement Guide 9‐3…
-
Page 74: Console Cover Removal And Installation
Figure 9‐3: UIC Cover Extraction Tool (21813‐00001) To remove console cover: 1. Make sure Segway PT is powered off and unplugged. Because console cover was installed using RTV 2. Remove console cover trim (page 6‐6). sealant, cover strongly adheres to console. Take care to pry cover loose slowly from console to avoid damaging cover and gasket.
-
Page 75
RTV sealant must cure for at least 24 hours prior to exposure to a wet environment. To install console cover: 5. Perform post‐service tests (page A‐1). 1. Make sure Segway PT is powered off and unplugged. 2. To prevent gasket from falling out when cover is tipped during installation, apply even bead of Loctite 127864XB RTV sealant only into gasket channel in cover, using a 20‐ gauge (0.32in. / 0.8mm) tip. Lay gasket into … -
Page 76: Emi Shield Removal And Installation
EMI Shield Removal and Installation It is necessary to remove the electromagnetic interference (EMI) shield to gain access to the diagnostic interface connectors on the console radio board. When replacing the user interface console (UIC), the replacement UIC will include the EMI shield. There should be no reason to replace the EMI shield alone. To remove EMI shield: 1. Make sure Segway PT is powered off and unplugged. 2. Remove console cover (page 9‐4). 3. Remove the radio’s antenna by lifting up while twisting gently until it unseats from the radio board. 4. Depending upon revision, use a 2mm or 2.5mm wrench to remove the four (4) M3 x 6 button head cap screws holding the electromagnetic interference (EMI) shield to the UIC. See Figure 9‐6. Figure 9‐7: Connect Diagnostic Equipment to Connectors on Console Radio EMI Shield 20110-00001 To install EMI shield: 20203-00002 1.
-
Page 77: Radio Board Removal And Installation
Radio boards are electronically bound to the reused. Place radio board in ESD bag or on serial number of the PT and must be ordered clean ESD work surface. from Segway, pre-programmed for the specific serial number of the PT that is being serviced; 20243-00001 otherwise, the InfoKey will not start the unit.
-
Page 78
5. Install console cover (page 9‐4). 6. Install battery packs (page 3‐3). 7. Perform post‐service tests (page A‐1). 9‐8 Segway® Personal Transporter i2, x2, x2 Turf Parts Replacement … -
Page 79: User Interface Console (Uic) Removal And Installation
If no Hi-Pot and Ground Bond Tester is available, the removal and installation of the UIC should not be performed as the consequence of not charge port being able to test could lead to serious injury, death, and/or damage to the Segway PT. locator pin When to Replace Replace the UIC when directed to do so by a Figure 9‐9: Remove or Install UIC Segway Service Representative.
-
Page 80
To install UIC: 6. Lift UIC straight up until clear of locator pin (refer to 1 in Figure 9‐10). 1. Make sure Segway PT is powered off and unplugged. Inspect harnesses for damage to insulation or kinks. Ensure connector locking mechanism is intact. If harness wires are pinched or exhibit insulation damage or the connector is damaged so as to prevent positive locking upon installation, the harness must be replaced. -
Page 81: Hi-Pot And Ground Bond Test Operation
Ground Bond test equipment is not available, these components should not be 10. Inspect the gasket at inside of charge port replaced. (Figure 9‐9) to ensure it is not damaged. If damaged, replace console housing. Hi‐Pot and Ground Bond tests must be performed after installation of UIC. For more 11. Thread (2) SHCS, M3 0.5 10, self‐sealing, information, see Segway Hi‐Pot Tester document hex screws (20477‐00001) through UIC into 21172‐00001, Section 5. rear of console housing. Inspect for gasket at screw head to shank. If damaged or missing, 1. Verify testers’ parameter settings are replace fastener. See Figure 9‐9. configured correctly. 2. Connect line cord (Internal Electric Technical commission (IEC) cable from Damaged gasket could lead to ingress, shock tester) to device under test (DUT) and attach …
-
Page 82: Emi Filter Removal And Installation
EMI Filter Removal and Installation When to Replace Replace the electromagnetic interference (EMI) chassis and secures EMI filter to bottom of filter when directed to do so by the Segway PT i2, console housing. See Figure 9‐14. x2 Diagnostics Guide, or as advised by a Segway Service Representative. To remove EMI filter: 1. Make sure Segway PT is powered off and unplugged. 2. Remove console cover and set aside (page 9‐4). EMI Filter 20375-00001 3. Lift off UIC and place in ESD bag or on clean ESD work surface (page 9‐9). 4. Disconnect (2) steering sensor harness connectors at top of EMI filter. Keep retention putty for reuse during installation. While pressing connector locking tabs, Figure 9‐14: Remove or Install EMI Filter Screw gently remove connectors to disconnect. Do not strain harnesses. See Figure 9‐13. bosses Figure 9‐13: Disconnect or Connect Steering Sensor …
-
Page 83
6. Using T‐30 6‐lobe wrench, drive each screw and torque to 11.0 N‐m. 7. Perform post‐service tests (page A‐1). Figure 9‐15: Disconnect or Connect Balance Sensor Assembly Harness Connectors 7. Unseat BSA harnesses from plastic positioning clips. 8. Set aside EMI filter and place in ESD bag or on clean ESD work surface. To install EMI Filter: 1. Make sure Segway PT is powered off and unplugged. 2. Any PT without ferrite cores must be retrofitted with ferrites upon reassembly. One small ferrite core (21270‐00001) is placed on each BSA harness between chassis cover and EMI filter. One large ferrite core (21271‐00001) is placed on B side CU hardness (10‐pin connector) between chassis cover and UIC. Ferrite cores can physically impede installation of new UIC. Take special care to correctly place ferrite cores and route cables to avoid damage or pinching when installing UIC. -
Page 84: Pivot Base Assembly Removal And Installation
Replace the pivot base assembly when directed See Figure 9‐17. to do so by a Segway Service Representative. The pivot base assembly components are not field serviceable. If you determine that the pivot Pivot Base Assembly base assembly is either defective or damaged, 21249-00001 the entire pivot base assembly must be replaced as a unit. 20205-00001 To remove pivot base assembly: 1. Make sure Segway PT is powered off and unplugged. 2. Establish a serviceable power base (page 7‐1). 3. Remove console cover and set aside (page 9‐4). Figure 9‐17: Remove Pivot Base Assembly (with Console Housing Attached) 4. Remove UIC and set aside (page 9‐9). 9. Feed harnesses down through holes in pivot 5. Remove EMI filter and set aside (page 9‐12). base to remove console housing. 6. Use T‐30 6‐lobe wrench to remove (2) screws 10. Inspect gasket to ensure it is clean and in …
-
Page 85
To install pivot base assembly: 1. Make sure Segway PT is powered off and unplugged. 2. Install console housing (page 9‐16). 3. With pivot base angled straight up, guide (4) harness connectors through bottom of base plate. See Figure 9‐17. 4. Thread (2) SHCS, M6 1 20, 6‐lobe screws (20205‐00001) through base plate and chassis cover into chassis. 5. Inspect harnesses to ensure proper alignment. 6. Using T‐30 6‐lobe wrench, drive each screw and torque to 11.0 N‐m. 7. Install EMI filter (page 9‐13). 8. Any PT without ferrite cores must be retrofitted with ferrites upon reassembly. One small ferrite core (21270‐00001) is placed on each BSA harness between chassis cover and EMI filter. One large ferrite core (21271‐00001) is placed on B side CU harness (10‐pin connector) under UIC. Ferrite cores can physically impede installation of new UIC. -
Page 86: Console Housing Removal And Installation
Console Housing Removal and Installation To install console housing: The console housing contains the UIC and EMI filter. 1. Make sure Segway PT is powered off and unplugged. When to Replace 2. Thread (6) SHCS, M4 0.7 16, 6‐lobe Replace the console housing if (including and screws (20203‐00002) through base plate into without limitation): console housing. See Figure 9‐18. It is cracked or otherwise physically • damaged. 3. Using a T‐20 6‐lobe wrench, drive each The charge port gasket is damaged. • screw and torque to 1.0 N‐m. To remove console housing: 4. Perform post‐service tests (page A‐1). 1. Make sure Segway PT is powered off and …
-
Page 87: Chassis Cover
20540‐00001 Chassis Cover Fastener ( (12) Chassis fasteners Required Tools Unplug the Read all Power off • T‐27 6‐lobe wrench the Segway PT. Segway PT. instructions. Failure to do so Failure to follow Failure to follow could result in these instructions these instructions serious injury or…
-
Page 88: When To Replace
Do not tighten or reuse any fastener except the screws used to • attach the battery packs, wheel nuts, and LeanSteer frame. Instead, when any other fastener is loose or removed, replace the fastener with a new Segway-approved fastener. See Appendix C, ”Fasteners” for more information.
-
Page 89: Chassis Cover Removal And Installation
Chassis Cover Removal and Installation To remove chassis cover: To install chassis cover: 1. Make sure Segway PT is powered off and unplugged. Make sure motor and BSA harnesses are seated in notches in chassis and cable router so that 2. Establish a serviceable power base they cannot be pinched when cover is installed.
-
Page 90
4. Ensure that wires are correctly routed • Right side: 12‐pin connector and a through BSA cable router. Feed up CU and smaller connector with orange wires. BSA harnesses through holes in cover. See See Figure 10‐4. Figure 10‐2. Figure 10‐4: Cable Connections 7. Install cover and thread (12) new BHCS, M6 Figure 10‐2: BSA Cable Orientation x 1.0 5×14, 6‐lobe screws (20540‐00001) through chassis cover into chassis. See 5. Reinstall ferrite cores. See Figure 10‐3.. Figure 10‐1. 8. Using a T‐27 6‐lobe wrench, drive each screw and torque to 6.0 N‐m. 9. Perform post‐service tests (page A‐1). Figure 10‐3: Ferrite Core 6. Viewing from the rear of the chassis, the cable connections should be as follows: • Left side: 10‐pin connector and a smaller connector with purple wires. 10‐4 Segway® Personal Transporter i2, x2, x2 Turf Parts Replacement … -
Page 91: Cu Board
Required Tools • T‐10 torque wrench • T‐10 6‐lobe wrench • Small flathead screwdriver Unplug the Read all Power off the Segway PT. Segway PT. instructions. Failure to do so Failure to follow Failure to follow could result in these instructions these instructions serious injury or…
-
Page 92: When To Replace
Do not tighten or reuse any fastener except the screws used to • attach the battery packs, wheel nuts, and LeanSteer frame. Instead, when any other fastener is loose or removed, replace the fastener with a new Segway-approved fastener. See Appendix C, ”Fasteners” for more information.
-
Page 93: Cu Board Removal
CU Board Removal 7. Disconnect balance sensor assembly harness and CU harness from CU board by squeezing plastic tab on connector and To remove CU board: gently pulling connector. See Figure 11‐3. 1. Make sure Segway PT is powered off and 8. Use a T‐10 6‐lobe torque wrench to remove unplugged. 14 self‐tapping screws that mount the CU board to the chassis. See Figure 11‐4. Establish a serviceable power base (page 7‐ DISCARD FASTENERS AFTER REMOVAL! DO NOT REUSE! 3. Remove pivot base assembly (page 9‐14). 4. Remove chassis cover (page 10‐3). 5. Disconnect (2) CU motor harnesses from motors (one per motor). See Figure 11‐1. connector tab Figure 11‐3: Disconnect Harnesses from CU Board Figure 11‐1: Disconnect CU Motor Harness from Motor 9. Grasp CU board on edge of heat sink and lift from chassis. See Figure 11‐4.
-
Page 94
10. Using proper ESD practices, place CU board in static bag for return shipment pursuant to terms and conditions of Segway PT warranty or other established procedures. 11‐4 Segway® Personal Transporter i2, x2, x2 Turf Parts Replacement … -
Page 95: Cu Board Installation
2. Inspect and verify that chassis is clear of CU board (front). debris. 3. Make sure mating surface (underside of heat to UIC sink) is clean. While handling CU board by its edges, position board in chassis and securely seat board against chassis. to BSA 4. Thread (14) M3 0.5 8 (20973‐00001) through CU board into chassis. See Figure 11‐5. For installation, use only Segway approved fasteners Grasp board by edges when installing Figure 11‐6: Connect Harnesses to CU Board 20567‐00001 7. Connect (2) CU motor harnesses to motors (one per motor). Rotate each harness as you insert connector so that smaller gauge wires are beneath larger gauge wires. Make sure clip locks over mating feature on motor connector. See Figure 11‐7. Figure 11‐5: Install CU Board 5. Using T‐10 6‐lobe wrench, drive each screw …
-
Page 96
Make sure motor and BSA harnesses are seated in notches in chassis and cable router so that they cannot be pinched when cover is installed. Figure 11‐8: Place Wires in Abrasion Protection Sleeves 9. Perform post‐service tests (page A‐1). 11‐6 Segway® Personal Transporter i2, x2, x2 Turf Parts Replacement … -
Page 97: Balance Sensor Assembly
Fasteners not included Balance Sensor Assembly Fastener (20566‐00001) (4) Fasteners, pan‐head, self‐tapping, M3 0.5 12 Required Tools Unplug the Read all Power off the Segway PT. Segway PT. instructions. • T‐10 torque wrench Failure to do so Failure to follow Failure to follow • T‐10 6‐lobe wrench could result in these instructions…
-
Page 98: When To Replace
Do not tighten or reuse any fastener except the screws used to • attach the battery packs, wheel nuts, and LeanSteer frame. Instead, when any other fastener is loose or removed, replace the fastener with a new Segway-approved fastener. See Appendix C, ”Fasteners” for more information.
-
Page 99: Bsa Removal And Installation
7. Use T‐10 6‐lobe wrench to remove (4) pan‐ cable router. See Figure 12‐1. head, M3 0.5 12, self‐tapping screws that attach balance sensor assembly to chassis. 3. Thread (4) pan‐head, M3 0.5 12, non‐self‐ tapping screws (20972‐00001) through DISCARD FASTENERS AFTER REMOVAL! DO NOT REUSE! balance sensor assembly mounting tabs and into chassis. See Figure 12‐2. 8. Lift balance sensor assembly from chassis. For installation, use only Segway approved Avoid touching circuit board located on fasteners. bottom of balance sensor assembly. 4. Using T‐10 6‐lobe wrench, drive each screw (20972‐00001) and torque to 1.6 N‐m. 5. Insert and seat (2) balance sensor assembly harnesses into A and B headers on CU board. See Figure 12‐2. Segway® Personal Transporter i2, x2, x2 Turf Parts Replacement Guide 12‐3…
-
Page 100
6. Perform post‐service tests (page A‐1). 7. Start machine before finishing assembly. 12‐4 Segway® Personal Transporter i2, x2, x2 Turf Parts Replacement … -
Page 101: Motor
Fasteners not included. Fasteners (20536‐00001) (4) Fasteners, SHCS, M5 0.8 12 Drive Hub (21090‐00001) Elastomer Bushing (21091‐00001) Unplug the Read all Power off Required Tools the Segway PT. Segway PT. instructions. • T‐25 torque wrench Failure to do so Failure to follow Failure to follow • T‐20 6‐lobe wrench could result in these instructions…
-
Page 102: When To Replace
Do not tighten or reuse any fastener except the screws used to • attach the battery packs, wheel nuts, and LeanSteer frame. Instead, when any other fastener is loose or removed, replace the fastener with a new Segway-approved fastener. See Appendix C, ”Fasteners” for more information.
-
Page 103: Motor Removal
Motor Removal To remove motor: 1. Make sure Segway PT is powered off and unplugged. 2. Establish a serviceable power base (page 7‐1). 3. Remove gearbox on same side of machine as motor that you want to remove (page 8‐4). 4. Remove pivot base assembly (page 9‐14). 5. Remove chassis cover (page 10‐3). Figure 13‐2: Disconnect CU Motor Harness from Motor 6. Use small flathead screwdriver and gently 7. Use T‐25 6‐lobe wrench to remove (2) SHCS, lift tab on connector (see Figure 13‐1) from M5 0.8 12, 6‐lobe screws that attach back of motor, and then carefully pull on motor to chassis. See Figure 13‐3. both connectors to unseat. See Figure 13‐2. Motor with Coupling 21089-00001 20536-00001 connector tab Figure 13‐3: Remove Motor 8. Pull motor straight out of side of chassis. Figure 13‐1: Pry Connector Tab Segway® Personal Transporter i2, x2, x2 Turf Parts Replacement Guide…
-
Page 104: Motor Installation
Motor Installation To install motor: Motor with Coupling 1. Make sure Segway PT is powered off and 21089-00001 unplugged. 2. Clean motor well. 3. Completely remove thread lock compound from motor fastener holes. Use cotton swabs to thoroughly clean excess thread lock 20536-00001 compound from internal threads. First use window cleaner, then isopropyl alcohol, to remove thread lock compound. 4. Slide motor into chassis. It will fit only one way. Fit is snug. Figure 13‐4: Install Motor Make sure motor harness does not block motor as it is inserted into chassis. Motor will not seat properly if connector is pinched between motor and BSA.
-
Page 105: Elastomer Bushing Inspection, Removal, And Installation
Elastomer Bushing Inspection, Removal, and Installation To inspect elastomer bushing: To install elastomer bushing: Check to see if elastomer bushing is worn or 1. Make sure Segway PT is powered off and damaged. Presence of excessive particles of unplugged. elastomer material indicates replacement is necessary. See Figure 13‐6. 2. Making sure tabs on elastomer bushing go on first, align new elastomer bushing with coupling, and slide on until seated. See Figure 13‐7. Figure 13‐6: Inspect Elastomer Bushing To remove elastomer bushing: coupling 1. Make sure Segway PT is powered off and unplugged. Elastomer Bushing 21091-00001 2. Pull elastomer bushing off motor coupling.
-
Page 106
This page intentionally left blank. 13‐6 Segway® Personal Transporter i2, x2, x2 Turf Parts Replacement Guide… -
Page 107
Qualifications regarding the Power Base Chassis: Certified Service Technician Technician Replaceable Parts Power Base Chassis (17124‐00003) Unplug the Read all Power off the Segway PT. Segway PT. instructions. Failure to do so Failure to follow Failure to follow could result in these instructions these instructions serious injury or… -
Page 108
Do not tighten or reuse any fastener except the screws used to • attach the battery packs, wheel nuts, and LeanSteer frame. Instead, when any other fastener is loose or removed, replace the fastener with a new Segway-approved fastener. See Appendix C, ”Fasteners” for more information. -
Page 109
Figure 14‐1 illustrates the power base chassis. Rear Front Figure 14‐1: Power Base Chassis The inset in Figure 14‐1 enlarges the numeral 2 and arrow stamped on the chassis to indicate the front of the chassis. When to Replace Replace the chassis when diagnostic testing or inspection determines the assembly is defective. For diagnostic procedures, contact a Segway Service Representative. The Segway PT chassis is serialized and may only be replaced with permission from Segway. A new serial number may be issued, and the serialized replacement chassis may be shipped to order from Segway Service Headquarters. You should replace a power base chassis under any of the following conditions, including, without limitation: Stripped screw holes • Cracks are visible • Ingress of moisture or dirt is evident • • Battery vent is damaged Segway® Personal Transporter i2, x2, x2 Turf Parts Replacement Guide 14‐3… -
Page 110: Disassembling And Reassembling Chassis Components
Disassembling and Reassembling Chassis Components To disassemble chassis components: To reassemble chassis components: Remove components from damaged chassis by Install components onto replacement chassis by following procedures for individual Segway PT following procedures for individual Segway PT components: components: 1. Make sure Segway PT is powered off and 1. Make sure Segway PT is powered off and unplugged. unplugged. 2. Establish a serviceable power base 2. Install motor (qty 2) (page 13‐4). (page 7‐1). 3. Install balance sensor assembly 3. Remove gearbox (qty 2) (page 8‐4). (page 12‐3). Use self‐tapping fasteners. 4. Remove pivot base assembly (page 9‐14). 4. Install CU board (qty 2) (page 11‐5). Use self‐ tapping fasteners.
-
Page 111: Post-Service Tests
A. Post-Service Tests This chapter describes standard tests to perform after servicing the Gen 2 Segway PT. The following warnings apply to instructions in this Section A regarding Post‐Service Tests. Failure to do so could result in serious injury or death. Read all instructions. ESD PROCEDURES Any time repair involves opening the console or chassis cover, best- practice electrostatic discharge (ESD) control procedures must be followed.
-
Page 112: Standard Check
1. Check that fasteners are in place, secure, and torqued correctly. 2. Check wheels for wear, tightness, and tire pressure. 3. Check that mats are intact, secure, and free of debris. 4. Check LeanSteer frame for tightness; make sure LeanSteer frame returns to center. 5. Check to make sure that no part is damaged or loose. Operational Test To perform an operational test, do the following: 1. Check for obstruction under mats. 2. Check LeanSteer frame for tightness and centered orientation. 3. Turn on and power off machine twice. 4. Confirm adequate battery levels. 5. Turn on machine to test rider detect. (Make sure that display does not indicate that rider detect button is on at start‐up.) Tilt unit back and press on each rider detect button. 6. While holding machine platform level, tap mat with your foot to enter balance mode. 7. Step on and ride machine. a. Move forward and backward. b. Turn 360 degrees to the left and to the right. Segway® Personal Transporter i2, x2, x2 Turf Parts Replacement …
-
Page 113: Parts List
Includes front trim (fascia) (1), fasteners (4) 20948‐00001 i2/x2 Power Base Rear Trim (Fascia) Kit Includes rear trim (fascia) (1), fasteners (4) 20950‐00001 i2/x2 Wedge and Bolt Kit Includes wedge set and bolt 20949‐00001 i2/x2 Standard Mat Kit Includes mats (2) 20951‐00001 i2/x2 Console Cover Trim Kit, v1, Black Includes black console cover (1) 20951‐00002 i2/x2 Console Cover Trim Kit, v1, White Includes white console cover (1) 20959‐00001 x2 Fender Frame Kit (Left) Includes left fender frame (1) and fasteners 20960‐00001 x2 Fender Frame Kit (Right) Includes right fender frame (1) and fasteners 20961‐00001 x2 Fender Kit (Left) (1) Includes left fender (1) and fasteners 20962‐00001 x2 Fender Kit (Right) Includes right fender (1) and fasteners 20963‐00001 x2 Wheel Hub Adapter Includes hub (1) and fasteners 20964‐00001 x2 Tire and Wheel Kit (hub not included) Includes tire/rim (1) and fasteners 20965‐00001 x2 Wheel Trim Kit Includes trim (1) and fasteners Segway® Personal Transporter i2, x2, x2 Turf Parts Replacement Guide B‐1…
-
Page 114
Includes UIC circuit board (1) 19457‐00002 Balance Sensor Assembly Includes balance sensor (1) 20055‐00002 Console Housing, v1 Includes console housing (1) 20110‐00001 Console EMI Shield Includes EMI shield (1) 20130‐00001 Includes UIC (1) 20152‐00002 Includes gearbox cover (1) Gearbox Cover 20169‐00001 Console Antenna (holder not included) Includes console antenna (1) 20249‐00001 Li‐ion Battery Fasteners Includes fasteners (50) 20316‐00001 Chassis Cover Includes i2 chassis cover with warning label (1) 20375‐00002 EMI Filter Includes EMI filter (1) 20536‐00001 Motor Fasteners Includes fasteners (4) 20537‐00001 Gearbox Fasteners Includes fasteners (3) 20550‐00001 Console Antenna Holder Includes holder for console antenna (1) 20566‐00001 Balance Sensor Assembly Fasteners Includes fasteners (4) Segway® Personal Transporter i2, x2, x2 Turf Parts Replacement … -
Page 115
CU Board Includes Gen 2 controller board (1) 20925‐00002 Console Housing, v2 Includes console housing (1) 20928‐00001 Console Cover Gasket Includes console cover gasket (1) 20929‐00001 Console Cover Includes console cover (1) 20934‐00001 Console Trim, v2 Black 20934‐00002 Console Trim, v2 White 20934‐00003 Console Trim, V2 Metallic Sage 21089‐00001 Motor with Coupling Kit Includes motor with coupling (2) 21091‐00001 Elastomer Bushing Includes elastomer bushing (1) 21249‐00001 Pivot Base Includes pivot base (1) 21270‐00001 Ferrite Core Includes small ferrite core (1) 21271‐00001 Ferrite Core Includes large ferrite core (1) 21813‐00001 UIC Cover Extraction Tool Includes tool (1) Segway® Personal Transporter i2, x2, x2 Turf Parts Replacement Guide B‐3… -
Page 116
Fasteners, 20mm (3) 20954‐00002 i2 Handlebar Clamp Kit, White Clamp Fasteners, 20mm 20954‐00003 x2 Handlebar Clamp Kit, Silver Clamp Fasteners, 20mm 20955‐00001 i2 / x2 Handlebar with Grips Kit Handlebar with grips 20957‐00001 i2 Upper LeanSteer Frame Kit, Black Slide, top, spacer Upper handlebar stop Upper LeanSteer frame Outer bar clamp 20957‐00002 i2 Upper LeanSteer Frame Kit, White Slide, top, spacer Upper handlebar stop Upper LeanSteer frame Outer bar clamp 20957‐00003 i2 Upper LeanSteer Frame Kit, Silver Slide, top, spacer Upper handlebar stop Upper LeanSteer frame Outer bar clamp 20956‐00001 i2 Lower LeanSteer Frame Kit, Black Lower LeanSteer frame 20956‐00002 i2 Lower LeanSteer Frame Kit, White Lower LeanSteer frame 20958‐00001 x2 Lower LeanSteer Frame Kit, Black Lower LeanSteer frame Segway® Personal Transporter i2, x2, x2 Turf Parts Replacement … -
Page 117
20751‐00001 20751‐00001 20751‐00001 Height adjustment wedge 20042‐00001 20042‐00001 20042‐00001 20042‐00001 Wedge, counterbore side 21067‐00001 21067‐00001 21067‐00001 21067‐00001 Fastener, SHCS, M6x1.0x45, Hex 20631‐00001 20631‐00001 20631‐00001 20631‐00001 Slide, top, spacer 20040‐00001 20040‐00001 20040‐00001 20040‐00001 Upper handlebar stop 20041‐00001 20041‐00001 20041‐00001 20041‐00001 Fastener, SHCS, M4x20 20306‐00001 20306‐00001 20306‐00001 20306‐00001 Handlebar tube 20045‐00001 20045‐00001 20045‐00001 20045‐00001 Segway® Personal Transporter i2, x2, x2 Turf Parts Replacement Guide B‐5… -
Page 118
This page intentionally left blank. B‐6 Segway® Personal Transporter i2, x2, x2 Turf Parts Replacement … -
Page 119: Fasteners
Do not tighten or reuse any fastener except the screws used to attach the battery packs, wheel nuts, and • LeanSteer frame. Instead, when any other fastener is loose or removed, replace the fastener with a new Segway-approved fastener. See Appendix C, ”Fasteners” for more information.
-
Page 120
Qty/Unit Drive (N-m) 20540‐00001 Chassis Cover T‐27 20537‐00002 Gearbox T‐45 40.0 20205‐00001 Pivot Base Assembly, T‐30 11.0 Front and Rear 20539‐00001 Pivot Base Assembly, T‐30 11.0 Center 20158‐00001 Wheels (i2) 13mm 30.0 20203‐00002 UIC (top and cover) 8 each T‐20 20203‐00002 Console Housing T‐20 20243‐00001 Radio Board 2.5 mm 0.8 ‐ 1.0 M3 x 6 20477‐00001 UIC (Rear) 2.5mm Segway® Personal Transporter i2, x2, x2 Turf Parts Replacement … -
Page 121
Table C-1: Fasteners (Continued) Torque Part Number Application Qty/Unit Drive (N-m) 20538‐00001 Fender (i2) T‐20 20541‐00002 Battery Packs SHCS, M4 x 0.7 x 30, self‐sealing 20553‐00001 Gearbox Trim (i2) 20553‐00002 x2 Fender Frame 20554‐00001 Fascias 10mm, for installation without parking stand 20554‐00003 Fascias/Parking Stand 14mm, for installation with parking stand 20631‐00001 LeanSteer Frame Clamp 11.0 20306‐00001 Handlebar Clamp SHCS, M4 x 20, 3mm drive 20306‐00003 InfoKey Dock SHCS, M4 x 16, 3mm drive 20871‐00001 Fender (x2) Segway® Personal Transporter i2, x2, x2 Turf Parts Replacement Guide C‐3… -
Page 122
Table C-1: Fasteners (Continued) Torque Part Number Application Qty/Unit Drive (N-m) 20991‐00001 x2 Wheel/Hub Adapter 35.0 20991‐00002 x2 Turf Wheel/Hub Adapter 35.0 Segway® Personal Transporter i2, x2, x2 Turf Parts Replacement … -
Page 123: D Recommended Tools And Diagnostic Equipment
Do not tighten or reuse any fastener except the screws used to attach the battery packs, wheel nuts, and • LeanSteer frame. Instead, when any other fastener is loose or removed, replace the fastener with a new Segway-approved fastener. See Appendix C, ”Fasteners” for more information.
-
Page 124
Table D‐2: Equipment List TOOL DESCRIPTION Multi‐meter Capable of measuring both voltage and resistance as called out in Segway PT i2, x2 Diagnostics Guide Mallet Plastic or rubber, 20 oz. or 24 oz. Ratchet 3/8” drive Blade (razor or utility knife) For removal of room temperature vulcanizing (RTV) silicone sealant (not all models) Six‐lobe bits Recommend (2) each of the following sizes: T‐20, T‐45 Six‐lobe wrenches T‐10, T‐20, T‐25, T‐27, T‐30, T‐45 Socket extension 3‐in. 3/8” drive Socket Hex, 13mm; 6‐point is preferred Tire pump Air pump with Schrader valve attachment Tire iron (qty 2) Approximately 14ʺ long, motorcycle type Trigger‐style bar clamp 12” bar‐clamp (measured by the maximum opening) Torque wrenches Adapter to fit the following hex and 6‐lobe bits: 3/8” drive torque limiting ratchet (40‐50 N‐m minimum range) ¼” drive torque limiting ratchet (5‐13.5 N‐m minimum range) ¼” drive torque limiting screwdriver (0.3‐1.6 N‐m minimum range) UIC cover extraction tool Specially designed tool for removing UIC cover without damaging brass inserts. Order from Segway (part number 21813‐00001). Segway Personal Transporter (PT) i2, x2, x2 Turf Parts Replacement … -
Page 125: Glossary
Glossary 6‐lobe wrench (torx) flange A wrench with a star‐shaped head that Triangular plate with three wheel mounting fits the socket of a 6‐lobe fastener. The studs affixed to the end of the gearbox output Segway PT uses 6‐lobe fasteners in shaft. places, such as the chassis, that should harness be accessed only by a Certified Service A group of cables bound together to form one Technician. assembly, typically with connectors that plug or balance sensor assembly (BSA) snap into place. The central monitoring unit, found in hex wrench the center of the platform, which A hexagonal wrench that fits the socket of a hex accounts for variable terrain and fastener. communicates with the controller boards and the motors to balance the IEC (International Electrotechnical Segway PT. Commission) connector This is the location where the Segway PT is console electronics plugged in to charge (charge port). See user interface console (UIC). LeanSteer frame control unit (CU) boards Comprises all of components in the steering The two integrated circuit boards assembly (upper and lower frame, handlebars, located in the platform. The CU board in height adjustment knob, wedges) that attach to the front is often referred to as the “A” …
-
Page 126
Comprises the following components: chassis, cover, gearboxes, motors, CU boards, BSA, pivot base, console electronics. The Wireless InfoKey controller is bound to the serviceable power base. The serviceable power base can only be serviced by a trained, authorized Segway technician. torque wrench A wrench that measures the amount of turning and twisting force applied in tightening a nut or bolt. user interface console (UIC) Comprises the battery charger power supply, the console radio (used for communicating with the Wireless InfoKey controller), and the user interface LEDs. Wireless InfoKey controller Operates and monitors the Segway PT. The Wireless InfoKey controller has four buttons around the outer edge and a display in the center. G‐2 Segway® Personal Transporter i2, x2, x2 Turf Parts Replacement Guide…
![]()
Видео инструкции по замене запчастей!
Представляем образовательный проект AMD! Видео инструкции для самостоятельной установки запчастей AMD на автомобили!
Первые выпуски будут посвящены автомобилю Hyundai Solaris, где простым и доступным языком, а главное очень наглядно можно ознакомиться с подробной видео инструкцией по замене деталей, и самостоятельно заниматься ремонтом своего Хендай Соляриса.
Новый выпуск каждую неделю!
Подписывайтесь на НАШ YOUTUBE КАНАЛ или ЗАХОДИ В РАЗДЕЛ ВИДЕО НА САЙТЕ!

Делаем сложное – просто! Вместе!


Существует множество автомобильных пылесосов, но мы выбрали лучшие автомобильные пылесосы на российском рынке на основании рейтингов и отзывов.

Коды автомобильных номеров — это комбинации цифр и букв на автомобильных номерах, которые присваиваются автомобилям при их регистрации в транспортном управлении.
Замена натяжителя цепи toyota corolla Замена цепи грм на Тойота Королла 1zr fe: советы экспертов Цепь ГРМ в Toyota Corolla 120 и 150 является очень

Выбор и замена антифриза в автомобилях Тойота Королла своими руками Главная … Ремонт и обслуживание Антифриз — это жидкость, которая осуществляет отвод излишнего тепла при работе двигателей внутренн…
Замена термостата опель астра j Замена термостата и шланга системы охлаждения «тройника».
Когда нужно менять фильтр салона Форд Фокус 3, период замены, признаки засоренности, как выбрать новый элемент, порядок замены
Замена ламп подсветки номера Mitsubishi ASX С завода в подсветке номерного знака Mitsubishi ASX устанавливается лампа T10 (W5W) 12v/5W. В среднем срок службы данной лампы составляет около 50-60
Достаточно частая проблема — шум топливного насоса на Octavia A7 последних нескольких лет производства. Бороться с этим можно и нужно. Шум бензонасоса в
Пошаговая инструкция с фото и видео по замене салонного фильтра в автомобиле Митсубиси ACX. Советы по выбору фильтра и его установке.
Руководство по замене батарейки в ключе автомобилей Ниссан. На страницах нашего интернет издания мы уже не раз выкладывали руководство с помощью которого любой желающий может поменять батарейку в

Самостоятельно заменить фары на Мазда СХ-5, следуя подробной инструкции, просто. После монтажа новой оптики важно провести регулировку так, чтобы лучи светоприборов освещали дорожное полотно надлежащим образом
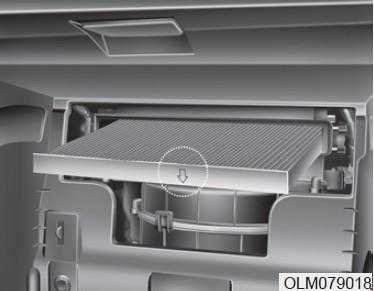
Как поменять салонный фильтр на хендай ix35 Снятие и замена салонного фильтра Hyundai ix35 Инструменты: Отвертка плоская средняя (при необходимости)
Периодичность ручной замены воздушного фильтра составляет 45 000 км или каждые три года с проверками каждые 15 000. Если автомобиль используется в пыльной
Пошаговая инструкция в фотографиях по замене задних тормозных колодок Hyundai ix35, полезные советы и рекомендации для автовладельцев
Руководство по замене батарейки в ключе автомобилей Hyundai. Представьте ситуацию. Вы припарковали автомобиль возле торгового центра. Затем несколько часов делали различные покупки и затем пришли к

Виды фильтров Замена воздушного фильтра Замена салонного фильтра Компактный городской кроссовер Mitsubishi ASX (Active Sport X-over) с первых дней своего
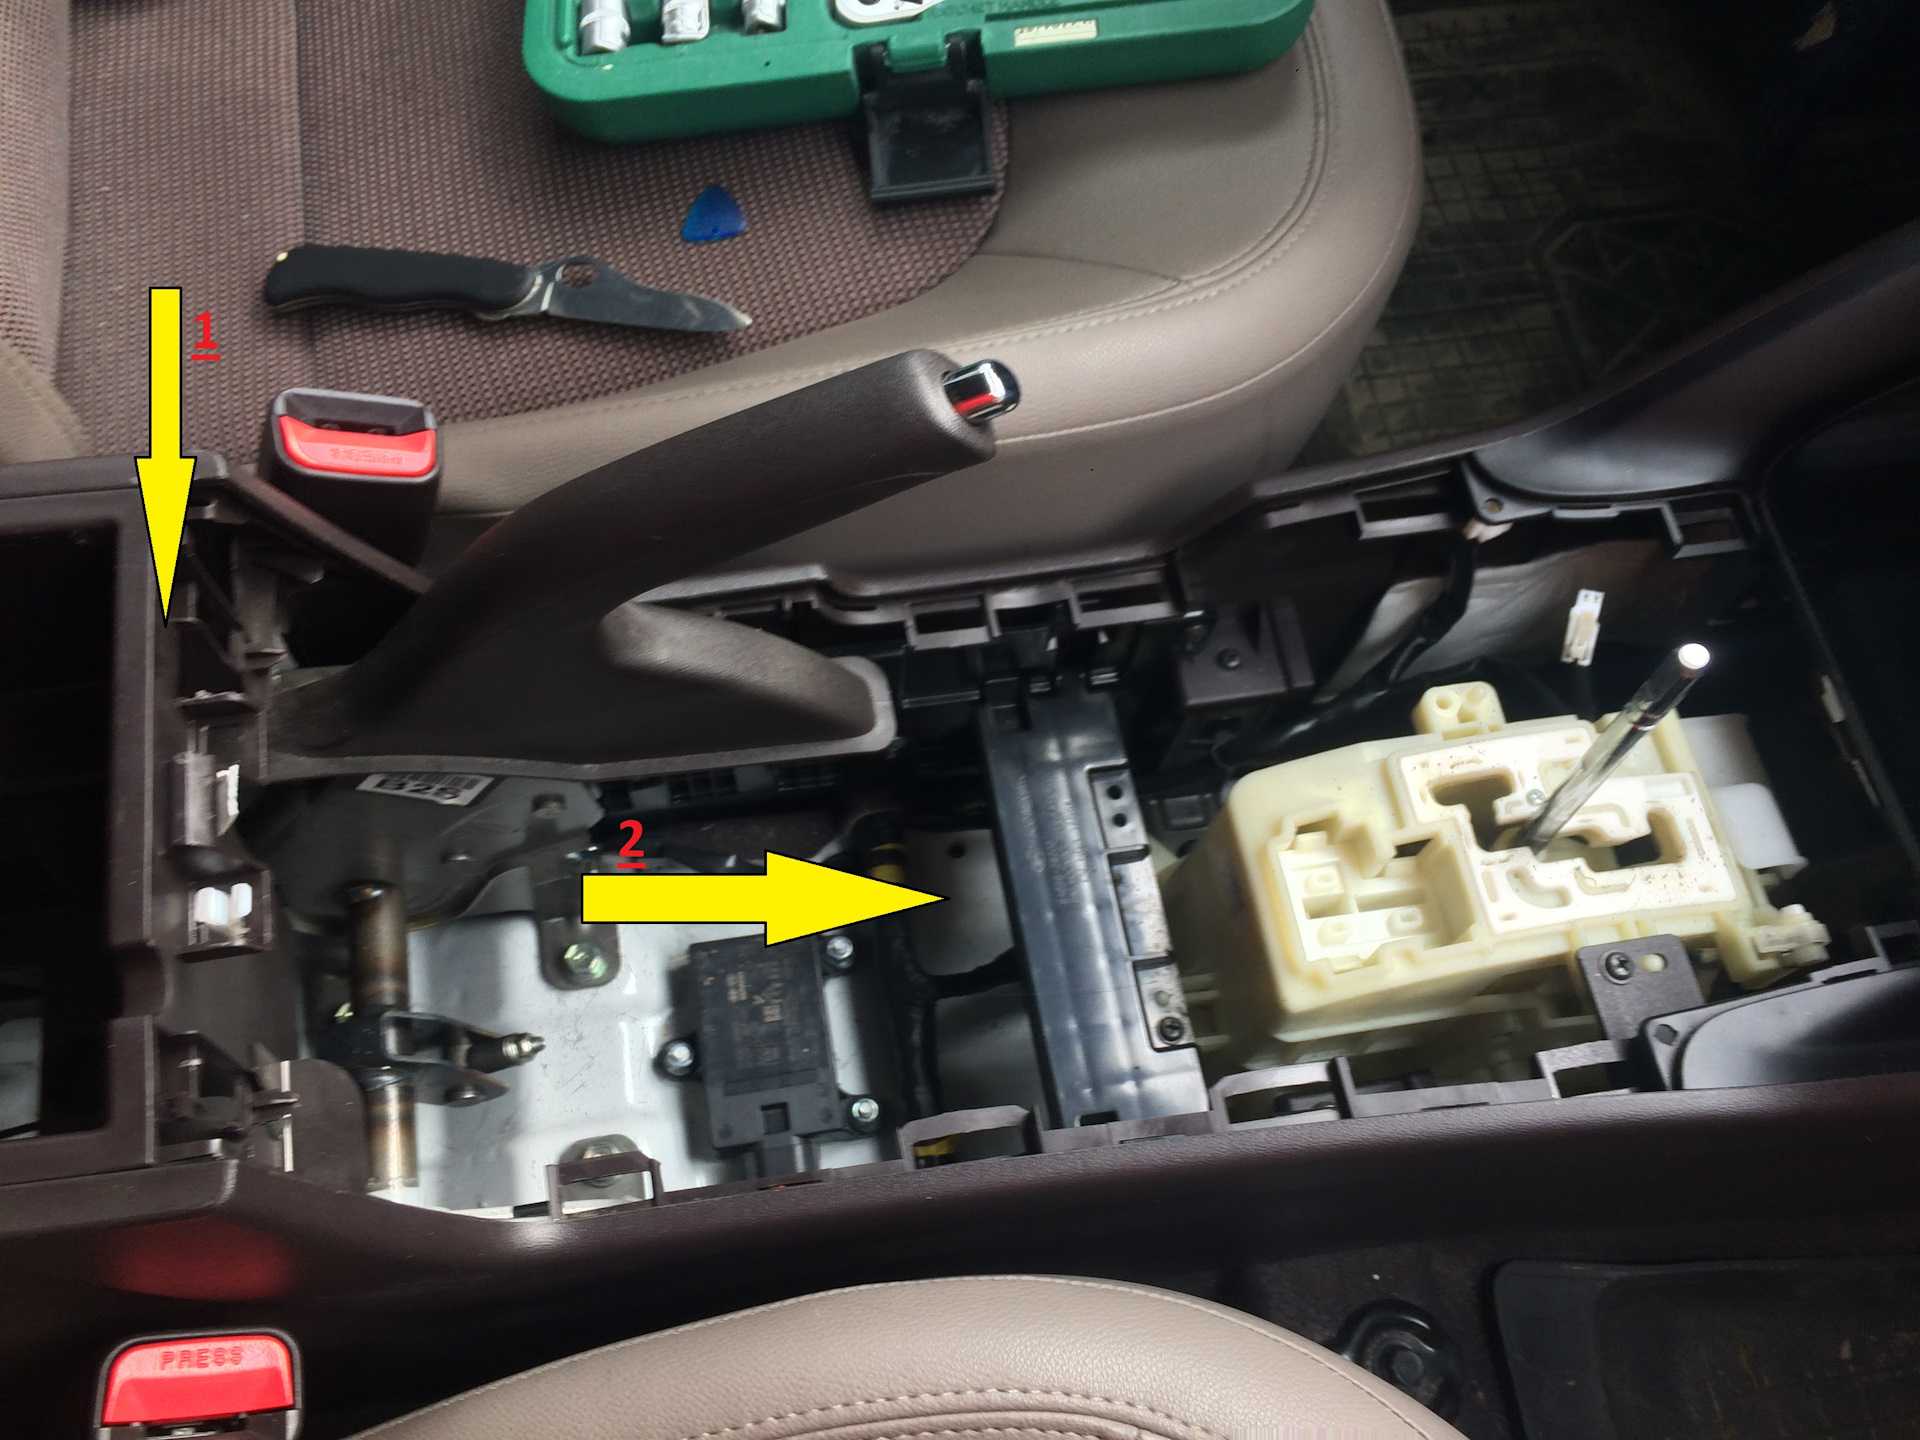
Ремонт Hyundai ix35 своими руками. Делай все сам в автомобиле!
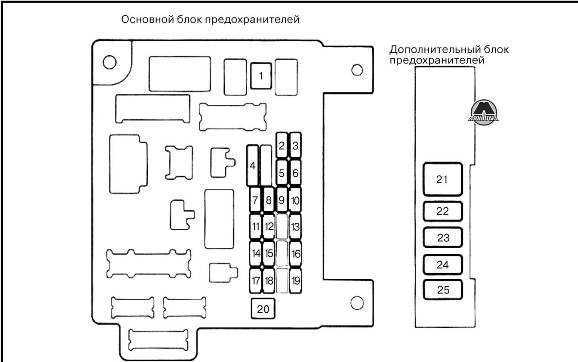
Предохранители и реле Mitsubishi ASX
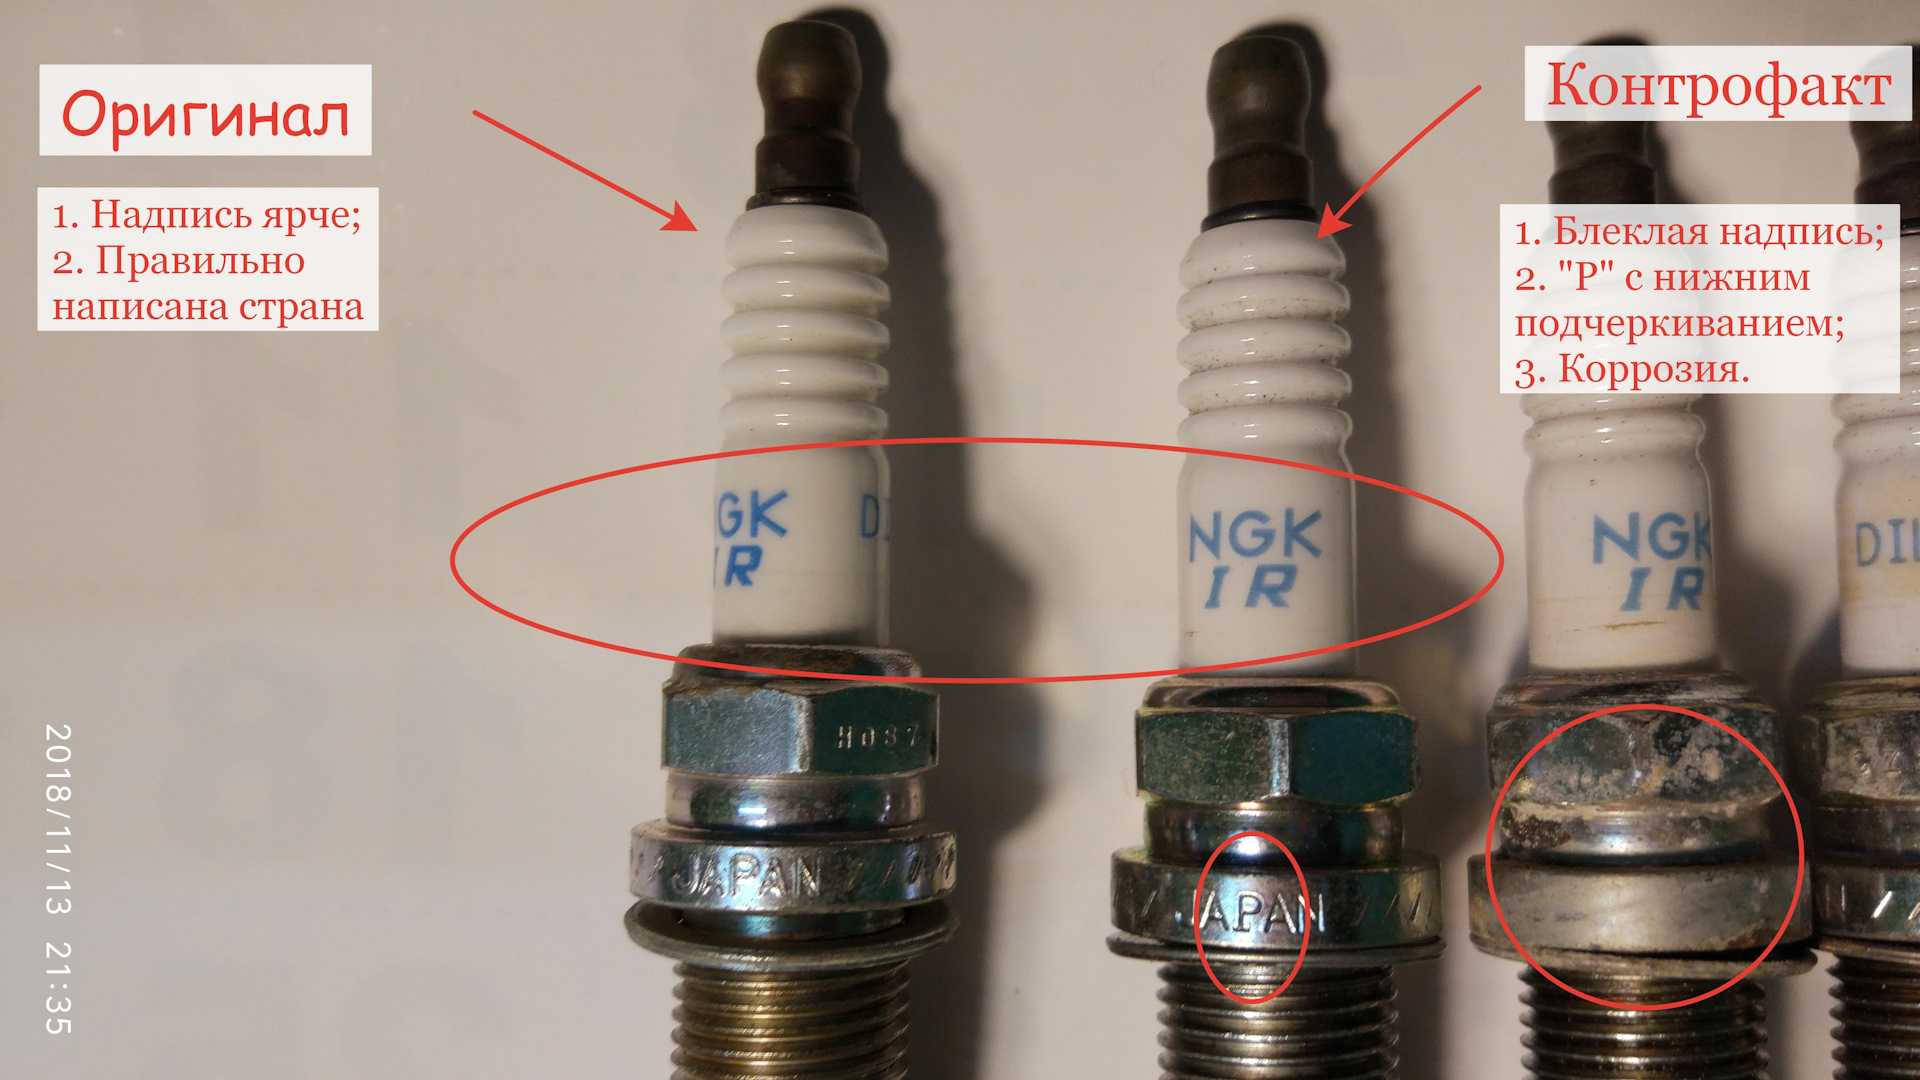
Если вы обслуживаете свой автомобиль самостоятельно, данная статья будет очень полезна для вас. Ниже, я расскажу как произвести замену свечей зажигания на Mitsubishi ASX. Процесс этот не сложный,…
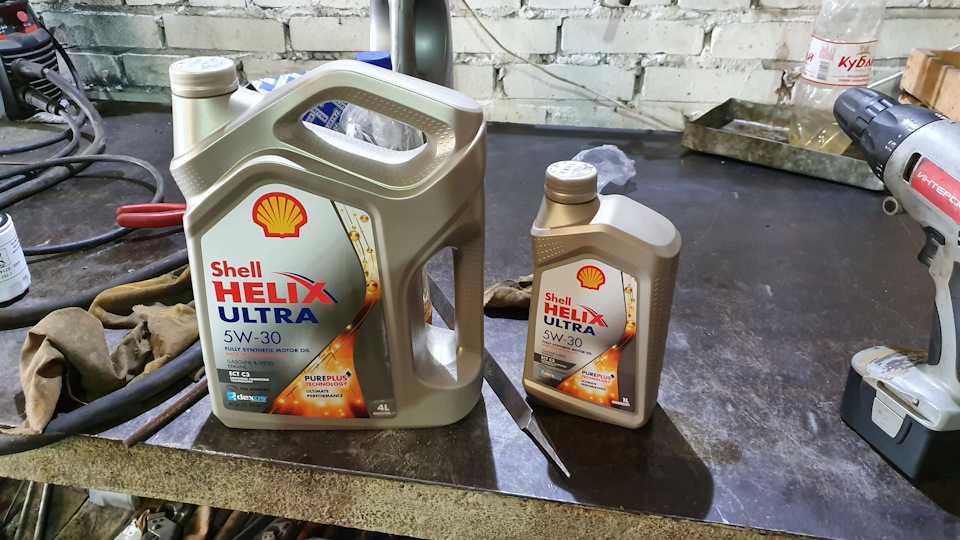
Как правильно выбрать масло для двигателя автомобиля Mazda 6. Требуемый объём жидкости. Этапы самостоятельной процедуры замены моторной смазки в Мазде.
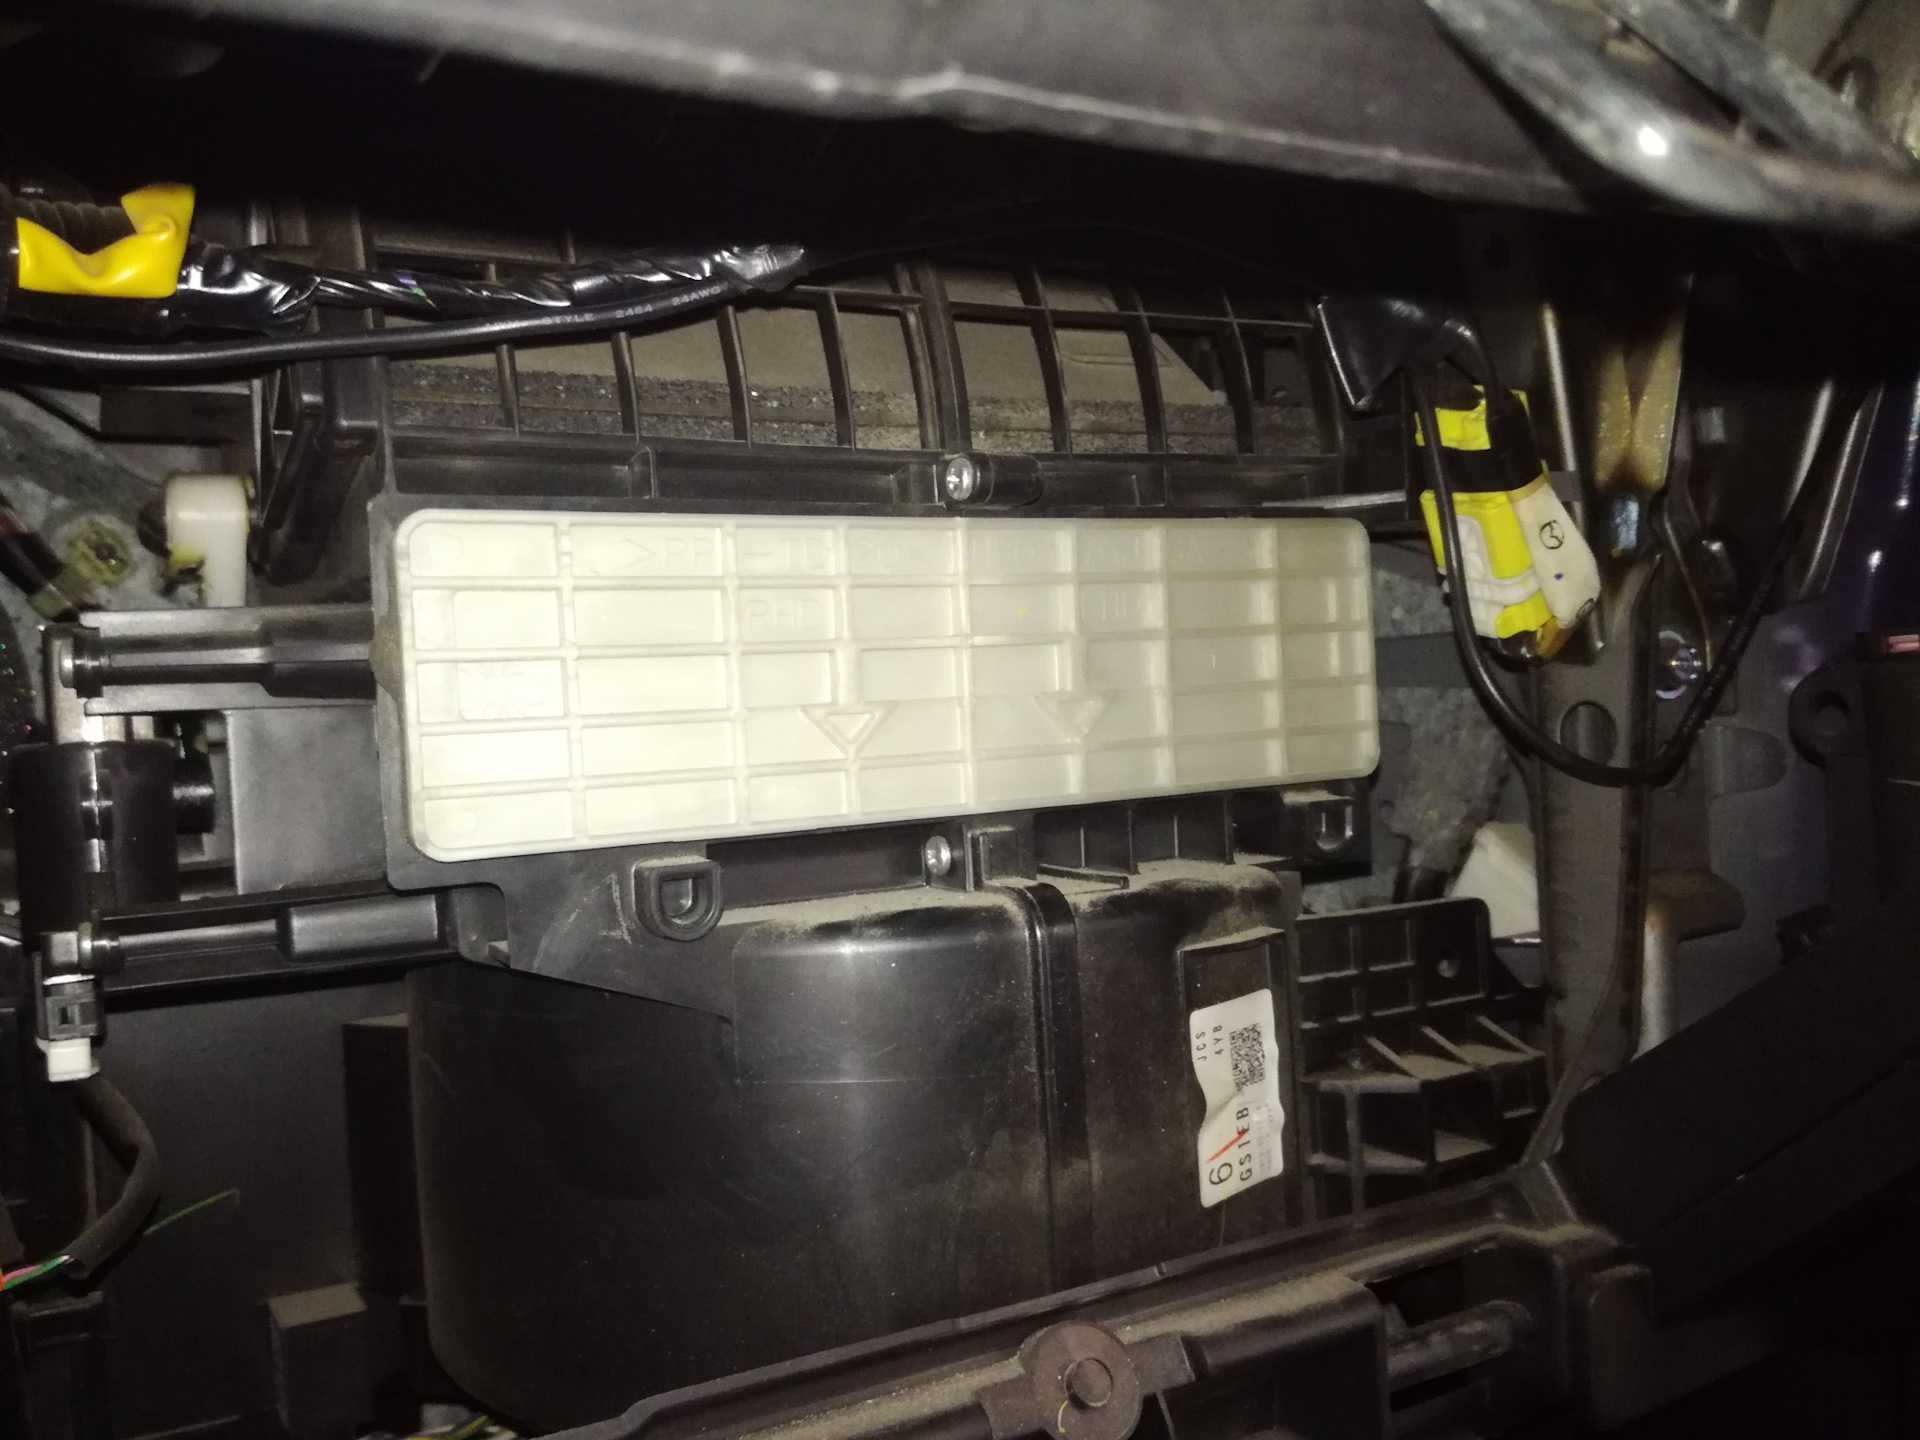
Периодичность замены фильтра салона Мазда 6 2016 года (3-е поколение) укладывается в каждые 30,000 км пробега. Вместе с тем, разумно проверять и чистить фильтр на 15,000.
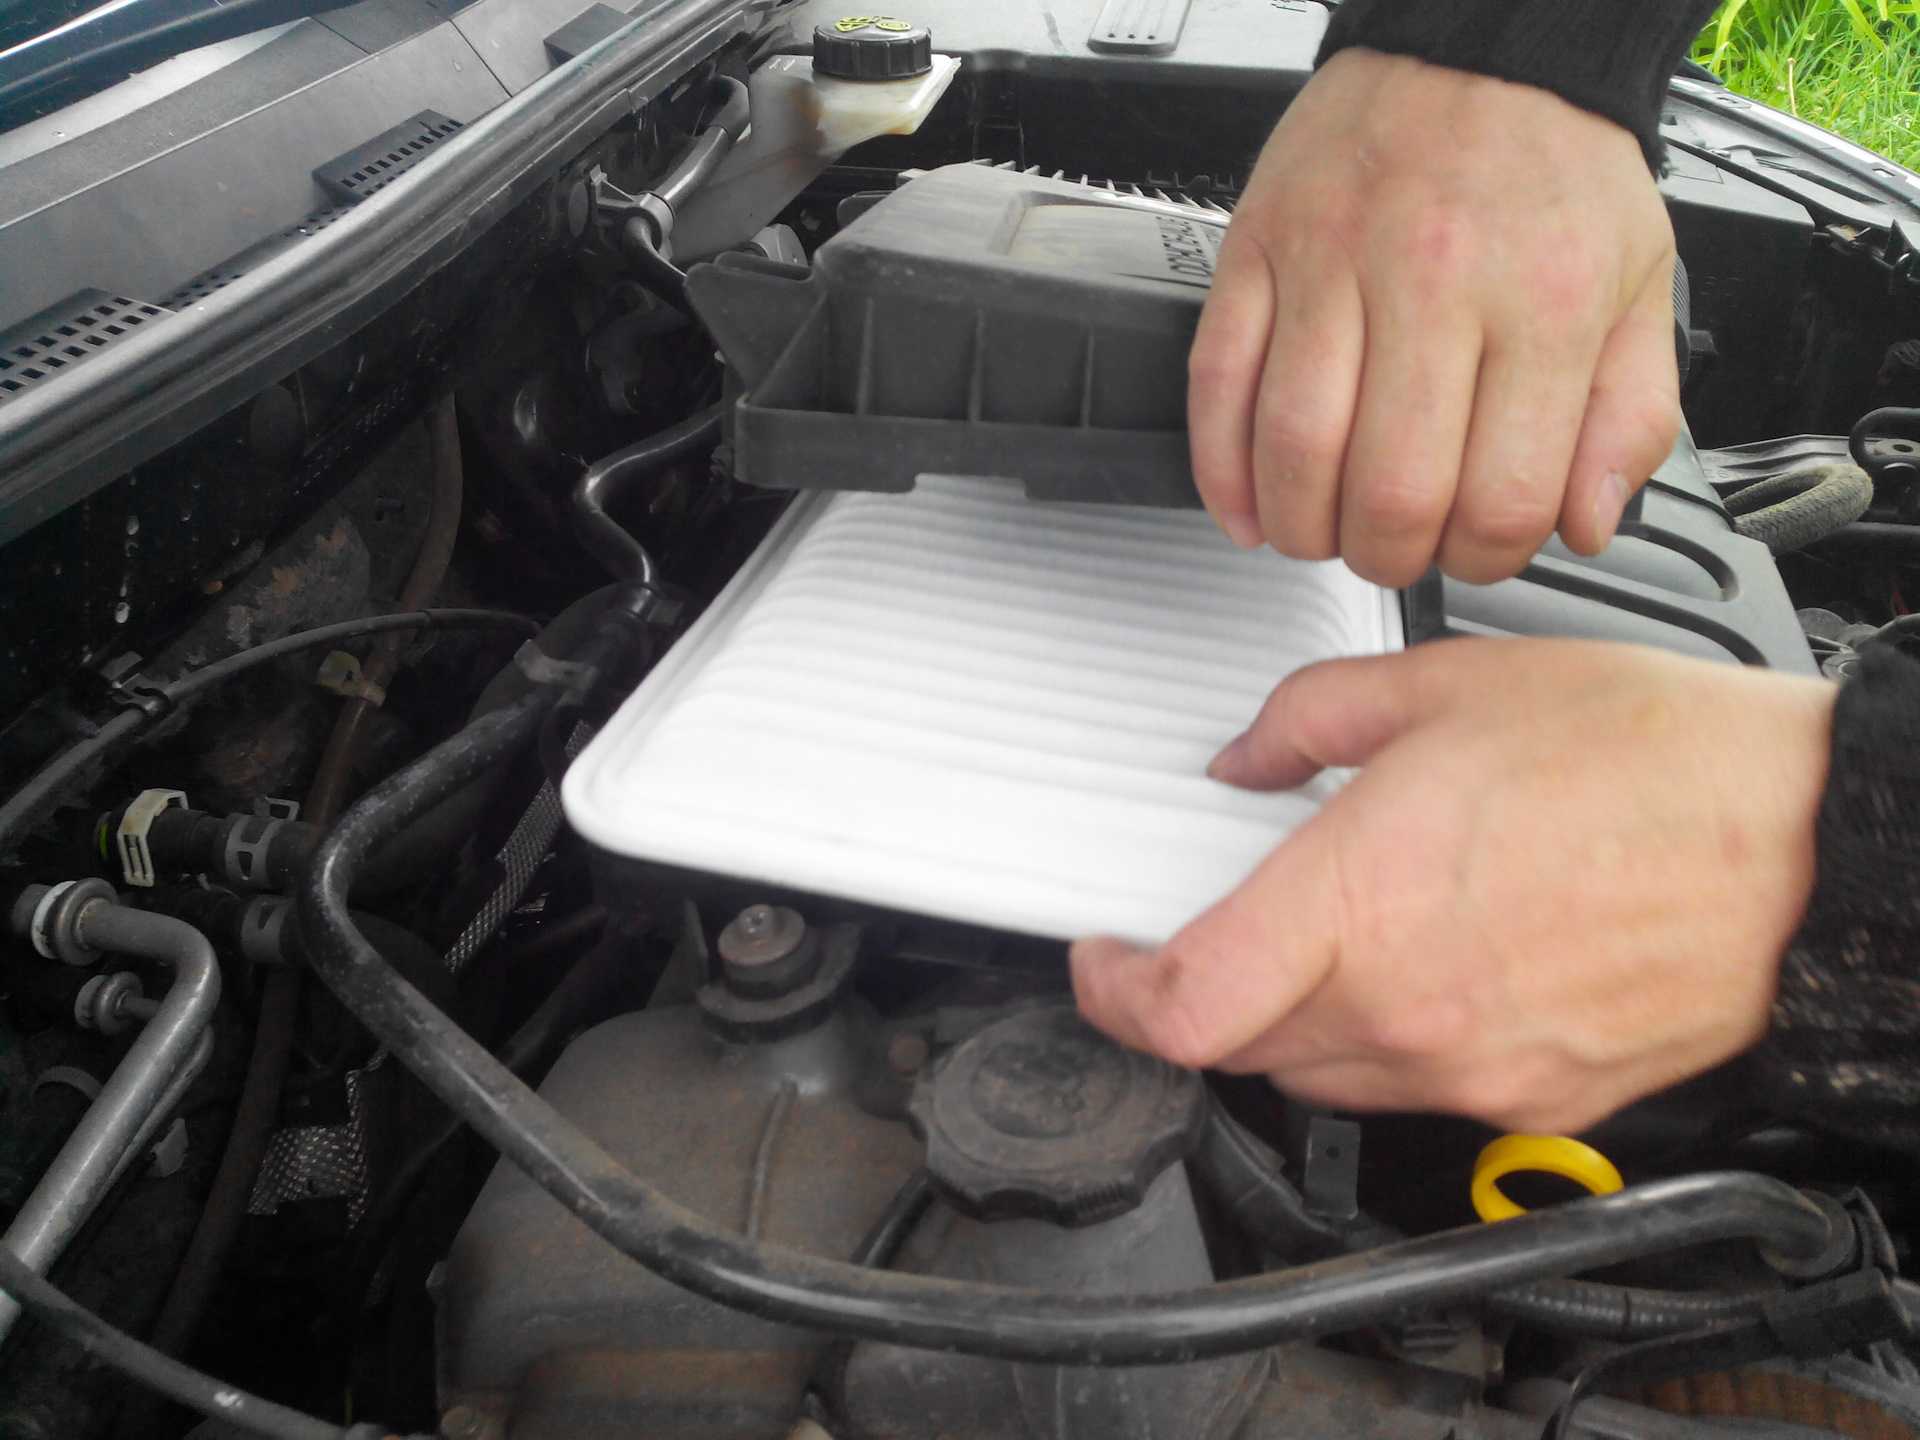
Пошаговая инструкция по замене воздушного фильтра на Мазда 6 (Mazda 6) своими руками. Видео и фото, выбор фильтра и установка.
В данной заметке речь идет о замене масла в двигателе автомобиля Форд Фокус 2 дв. 1.8-2.0 л своими силами,какие инструменты и каое масло …
Функциональность ключа Астры Н зависит от комплектации приобретенного Опеля, своевременное обслуживание детали избавит от неприятных сюрпризов.
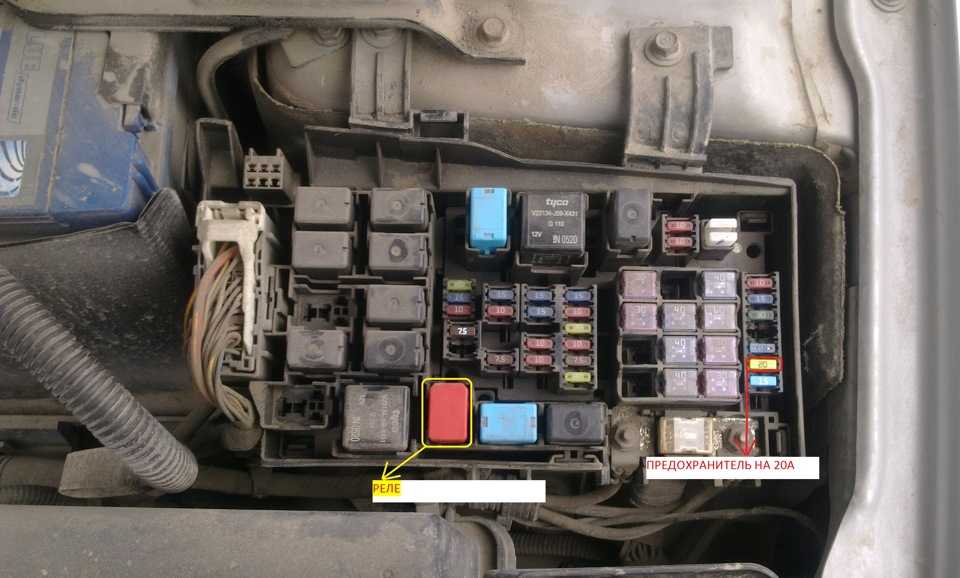
Примечания: При замене перегоревших предохранителей на Мазда 6, всегда используйте только оригинальн
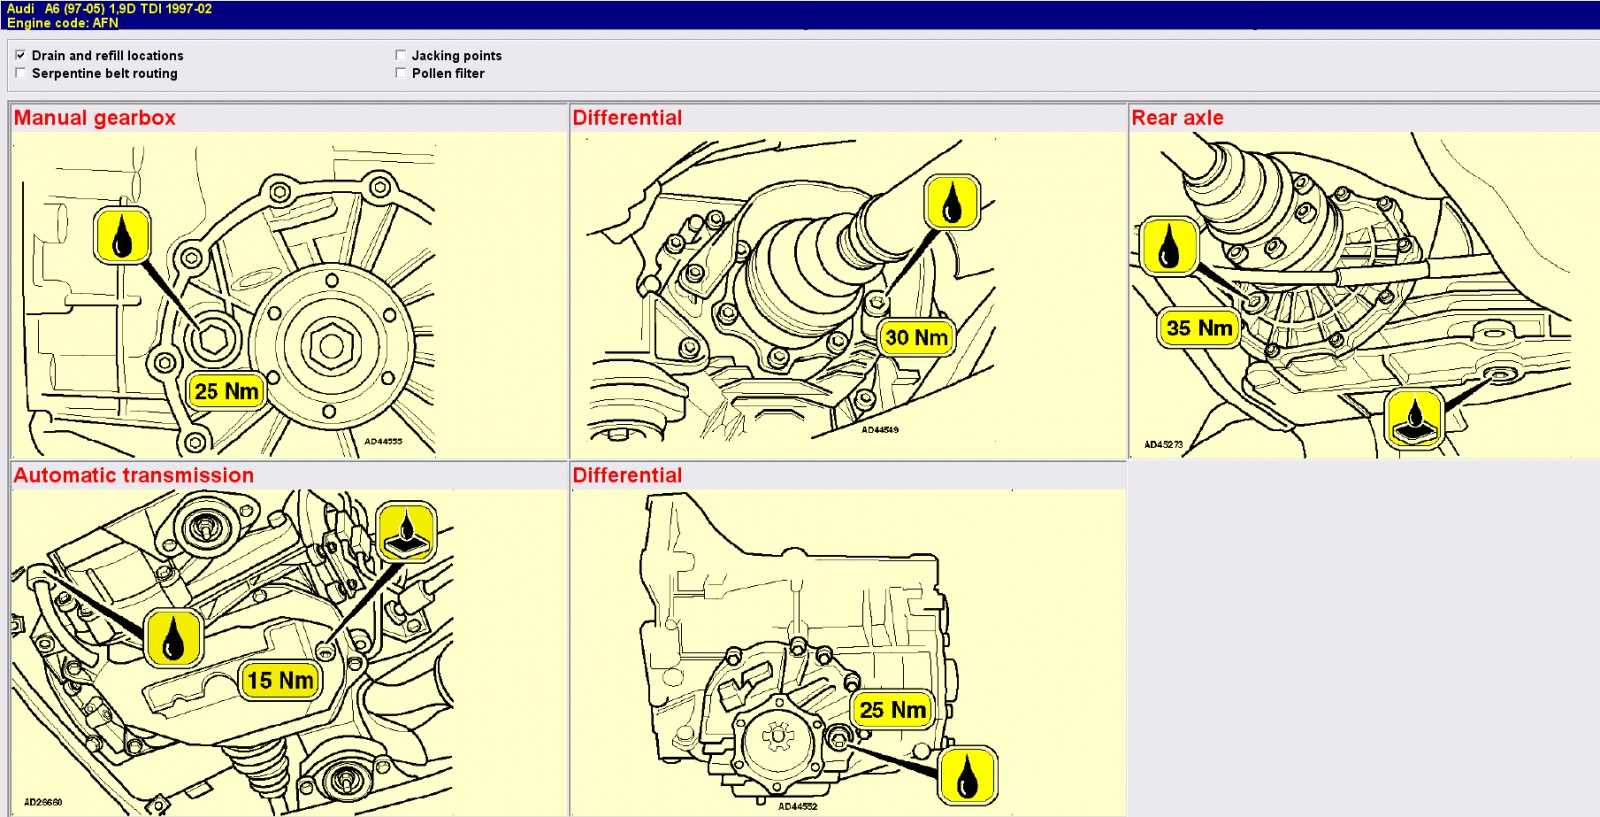
Периодичность замены масла в двигателе 2.0 (дизель) Ауди А6 С6 составляет 15,000 км пробега или раз в год. Вместе с маслом меняется и масляный фильтр.
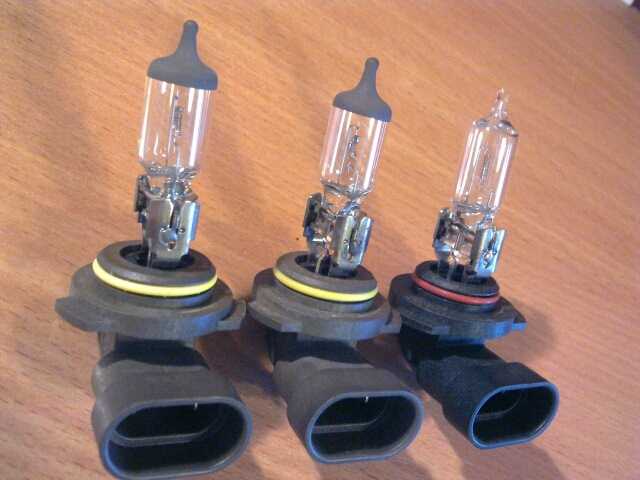
Светодиодные и галогенные лампы ближнего света для Митсубиши лансер 10. Ближний свет HB4 (9006) , дальний свет HB3 (9005)

Замена подсветки номера лансер 10 Лампа ближнего света Митсубиси Лансер 10 Lancer X На Mitsubishi Lancer X продаваемом в России, в ближний свет
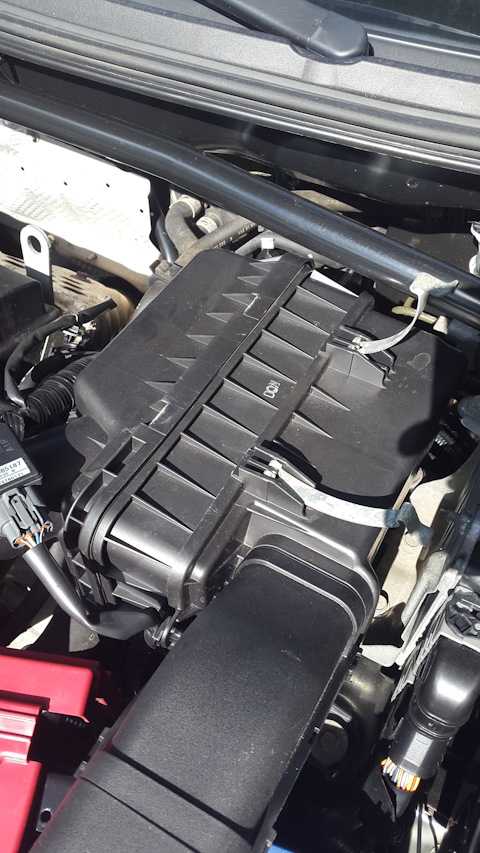
Порядок работ по замене вентилятора печки на Audi A6 С4 без снятия отопителя салона