Основные элементы и базовые операции
Названия составных элементов
* Количество элементов зависит от версии Insta360 ONE R. Пожалуйста, обратитесь к комплектной инструкции купленного издания.
Ядро (процессор, дисплей)

Модуль 4K Wide Angle

Модуль Dual-Lens 360

Аккумуляторная база

Сборка экшн-камеры

Шаги сборки:
1. Совместите разъем на боковой стороне объектива с разъемом на ядре и сожмите их вместе, пока они не будут плотно соединены.
2. Совместите уже собранные моды ядра и объектива с коннектором аккумуляторной базы. Затем сожмите две части вместе, пока они не будут прочно соединены.
* Профессиональный совет
- Избегайте разборки или хранения ONE R с разобранном виде в условиях повышенной влажности, так как устройство может быть повреждено.
- Чтобы отсоединить батарею, потяните фиксатор вправо, затем снимите блок.

Перед началом эксплуатации
Примечание. В последующих инструкциях в качестве примера используется широкоугольный 4K-мод.
1. Убедитесь, что батарея подсоединена правильно. Пожалуйста, подключите прилагаемый зарядный кабель к Insta360 ONE R в случае низкого уровня заряда.
Примечание. Для зарядки экшн-камеры используйте адаптер питания 5В/2А. Вы также можете использовать фирменную док-станцию Fast Charge Hub для подзарядки (продается отдельно).
2. Перед использованием откройте защитную крышку и вставьте карту microSD.

Примечания:
- Для обеспечения нормальной записи используйте карты памяти microSD формата exFAT класса скорости UHS-I и V30 (минимум). Максимальный поддерживаемый объем памяти составляет 256 ГБ.
- Обязательно полностью закройте защитную крышку, чтобы сохранить гидроизоляцию. Совместите индикационные метки треугольника, как показано ниже. Желтая отметка рядом с замком должна быть закрыта.

3. Установите монтажный кронштейн перед использованием ONE R для съемки динамичных сцен. Это укрепит соединения между собранными модами, обеспечивая дополнительную защиту.

Знайте свою Insta360 ONE R
Включение/выключение
Когда экшн-камера выключена, нажмите кн. питания, чтобы включить её.
В режиме ожидания нажмите кн. питания, чтобы выключить/включить сенсорный экран.
В режиме ожидания нажмите и удерживайте кн. питания в течение 2 секунд, чтобы выключить устройство.
Использование сенсорного экрана


Свайп вниз
Открывает контекстное меню: настройка яркости экрана, включение/выключение сенсора, включение/выключение светодиода, предупреждение о передержке, гистограмма, голосовое управление и настройки.


Свайп вправо
Открывает медиа-галерею. Последний отснятый материал отображается по умолчанию. Кликните на значок альбома в верхнем левом углу, чтобы войти в галерею и просмотреть все.
Примечание. ONE R не поддерживает HDR-фото, серийное и интервальное фото, ночное фото и видео в режиме Timelapse. Пожалуйста, проверьте после подключения к приложению.


Свайп влево
Открывает настройки камеры (баланс белого, EV и т.д.).


Нажатие на значок в левом нижнем углу
Выбор режима захвата:
- Фото: стандартное, HDR, интервальная или серийная съемка, ночная съемка.
- Видео (режимы отличаются в зависимости от установленного объектива):
- 4K Wide Angle: стандартный, HDR, Timelapse, Timeshift
- Dual-Lens 360: стандартный, HDR, Timelapse, Bullet Time
- 1-Inch Wide Angle: стандартный, Timelapse, Timeshift


Нажатие на значок в правом нижнем углу
Установка настроек разрешения.
Начало съемки
После того, как вы выбрали режим и отрегулировали необходимые настройки, просто нажмите кнопку записи один раз, чтобы начать, а затем снова, чтобы остановить.
Активация
Примечания:
- Убедитесь, что уровень заряда Insta360 ONE R превышает 10% перед началом активации.
- Пожалуйста, держите телефон подключенным к Интернету во время активации.
1. Подключите экшн-камеру к смартфону. Как подключиться?
2. Если Вы впервые пользуетесь ею, в приложении появится уведомление об активации.
3. Следуйте инструкциям на экране, чтобы активировать устройство.
Изменение режимов съемки
1. Включите Insta360 ONE R.
2. Коснитесь левого нижнего угла экрана, чтобы выбрать режим фото/видео/предустановленный.

3. В категории фотосъемки Вы можете переключаться между подрежимами: стандартный, HDR-фото, серийная, интервальная или ночная съемка. В категории видео Вы можете переключаться между подрежимамами, которые отличаются в зависимости от установленного модуля объектива.
4. Войдите в интерфейс съемки и проведите справа налево, чтобы настроить параметры захвата. Как настроить параметры съемки?
Примечания:
- При использовании ONE R в воде заблокируйте сенсор, чтобы избежать случайных нажатий. После блокировки Вы можете использовать кнопку питания для изменения режимов.
- Видео Bullet Time можно снимать только с Dual-Lens 360 Mod.
Настройка предустановок
1. Перейдите в режим съемки, который Вы хотите предварительно настроить и отрегулируйте его параметры.
2. Нажмите в левом нижнем углу экрана и выберите предустановку. Вы можете перезаписать сохраненный или создать новый предустановленный режим.
Примечание. Поддерживается до 5 предустановок. Стандартные режимы съемки не могут быть отменены.
Регулировка параметров съемки
1. Нажмите кнопку питания, чтобы включить Insta360 ONE R.
2. Кликните на значок в левом нижнем углу сенсорного дисплея, чтобы выбрать режим съемки и войти в интерфейс его настройки.
3. Проведите пальцем влево, чтобы настроить параметры.
4. Нажмите в правом нижнем углу на экране захвата, чтобы установить соотношение сторон кадра, время, разрешение.
Ниже приведены параметры, которые можно установить в каждом режиме захвата.
4K Wide Angle
| Режим съемки | Режим экспозиции | Параметры |
|---|---|---|
| Стандартное фото | Автоэкспозиция | EV, WB |
| Ручная | Затвор, WB, ISO | |
| Приоритет ISO | EV, WB, ISO | |
| Приоритет затвора | Затвор, EV, WB | |
| Настройка файлов | JPG/RAW, FOV | |
| HDR-фото | Автоэкспозиция | Количество снимков, компенсация экспозиции, WB |
| Настройка файлов | JPG/RAW, FOV | |
| Серийная фотосъемка | Автоэкспозиция | EV, WB |
| Ручная | Затвор, WB, ISO | |
| Приоритет ISO | EV, WB, ISO | |
| Приоритет затвора | Затвор, EV, WB | |
| Настройка файлов | JPG/RAW, FOV | |
| Интервальная фотосъемка | Автоэкспозиция | EV, WB |
| Ручная | Затвор, WB, ISO | |
| Приоритет ISO | EV, WB, ISO | |
| Приоритет затвора | Затвор, EV, WB | |
| Настройка файлов | JPG/RAW, FOV | |
| Ночная фотосъемка | Автоэкспозиция | EV, WB |
| Настройка файлов | JPG/RAW, FOV | |
| Стандартное видео | Автоэкспозиция | EV, WB, ISO |
| Ручная | Затвор, WB, ISO | |
| Настройка файлов | Спорт, LOG, FOV | |
| HDR-видео | Настройка файлов | FOV |
| Timelapse | Автоэкспозиция | EV, WB |
| Ручная | Затвор, WB, ISO | |
| Приоритет ISO | EV, WB, ISO | |
| Настройка файлов | Интервал, спорт, LOG, FOV | |
| Timeshift | Автоэкспозиция | EV, WB |
| Ручная | Затвор, WB, ISO | |
| Настройка файлов | Cпорт, LOG, FOV |
Dual-Lens 360
| Режим съемки | Режим экспозиции | Параметры |
|---|---|---|
| Стандартное фото | Автоэкспозиция | EV, WB |
| Ручная | Затвор, WB, ISO | |
| Приоритет ISO | EV, WB, ISO | |
| Приоритет затвора | Затвор, EV, WB | |
| Настройка файлов | JPG/RAW | |
| HDR-фото | Автоэкспозиция | Количество снимков, компенсация экспозиции, WB |
| Настройка файлов | JPG/RAW | |
| Серийная фотосъемка | Автоэкспозиция | EV, WB |
| Ручная | Затвор, WB, ISO | |
| Приоритет ISO | EV, WB, ISO | |
| Приоритет затвора | Затвор, EV, WB | |
| Настройка файлов | JPG/RAW | |
| Интервальная фотосъемка | Автоэкспозиция | EV, WB |
| Ручная | Затвор, WB, ISO | |
| Приоритет ISO | EV, WB, ISO | |
| Приоритет затвора | Затвор, EV, WB | |
| Настройка файлов | Интервал, JPG/RAW | |
| Ночная фотосъемка | Автоэкспозиция | WB |
| Настройка файлов | JPG/RAW | |
| Стандартное видео | Автоэкспозиция | EV, WB |
| Ручная | Затвор, WB, ISO | |
| Настройка файлов | Спорт, LOG | |
| Timelapse | Автоэкспозиция | EV, WB |
| Ручная | Затвор, WB, ISO | |
| Приоритет ISO | EV, WB, ISO | |
| Настройка файлов | Интервал, спорт, LOG | |
| Bullet Time | Автоэкспозиция | EV, WB |
| Ручная | Затвор, WB, ISO | |
| Приоритет ISO | EV, WB, ISO | |
| Настройка файлов | Cпорт, LOG |
Подключение к смартфону
Wi-Fi-соединение
1. Включите WiFi и Bluetooth на Вашем телефоне.
2. Включите Insta360 ONE R.
3. Откройте приложение на смартфоне, коснитесь значка камеры в нижней части домашней страницы и выберите «Подключиться сейчас» на панели Wi-Fi. Затем следуйте инструкциям на экране для подключения устройства.
4. После успешного подключения экшн-камеры Вы можете делать фотографии или снимать видео через приложение.
Примечания:
- Радиус соединения Wi-Fi составляет 20 метров в оптимальных условиях без помех.
- Кабельное соединение также поддерживается. Официальные совместимые кабели продаются отдельно.
Кабельное соединение
Официальный кабель для проводного подключения можно приобрести отдельно.
1. Включите устройство.
2. Проведите пальцем вниз на дисплее, чтобы отобразить ярлыки, перейдите на вторую страницу, выберите Настройки -> Основные -> Режим USB.


3. Выберите режим iOS/Android в соответствии с операционной системой Вашего смартфона.
4. Затем подключите экшн-камеру Insta360 к телефону с помощью специального кабеля. После успешного подключения, Вы можете делать фотографии или снимать видео через приложение.
Подключение к Apple Watch
1. Включите action-камеру посредством кнопки питания.
2. На Apple Watch найдите соответствующее ранее установленное приложение.
3. Нажмите «Подключиться сейчас» и следуйте инструкциям на экране для подключения.
Примечание. Радиус подключения Wi-Fi составляет 20 метров в оптимальных условиях без помех.
Подключение к пульту GPS Smart Remote
Обзор

Значки статусов

1. Состояние GPS-сигнала. Три точки – не найдено сигнала, лесенка – найдено, работает.
2. Уровень заряда пульта.
3. Уровень заряда аккумулятора камеры.
4. Статус Wi-Fi камеры.
5. Дисплей синхронизирован с экраном камеры.
6. Переподключение к экшн-камере.
Синхронизация пульта с камерой
1. Убедитесь, что прошивка и версия приложения обновлены до последних официальных версий.
2. Включите action-камеру.
3. Нажмите и удерживайте кнопку питания, чтобы включить пульт. Когда индикатор переключается между синим и зеленым, ваш пульт начал сопряжение.
4. Свайпните вниз на сенсорном дисплее Insta360 ONE R, чтобы открыть контекстное меню. Выберите Настройки -> Bluetooth-пульт и выберите пульт Insta360. Когда на экране пульта отображается «Подключено», это укажет на успешное сопряжение.


* Важно:
- После первого подключения GPS Smart Remote может автоматически подключаться к камере в пределах его эффективного диапазона без повторения шагов в приложении. Если впоследствии Вы захотите подключить его к другому устройству, нужно одновременно нажать две кнопки на пульте ДУ, чтобы сбросить предыдущее соединение, а затем подключить пульт и камеру в приложении.
- Пульт можно использовать на расстоянии до 10 метров в оптимальных условиях.
Индикатор состояния
| Состояние | Индикатор |
|---|---|
| Подзарядка (при выключенном пульте) | Красный |
| Полностью заряжено (при выключенном пульте) | Зеленый |
| Bluetooth-соединение | Чередование синего и зеленого цвета |
| Подключено к камере | Соответствует индикатору экшн-камеры |
Как пользоваться
Сфотографировать
Нажмите кнопку затвора/ввода, чтобы сделать фото.
Снимать видео
Нажмите кнопку питания/переключения, чтобы перейти в режим видео, а затем кнопку затвора/ввода, чтобы начать/остановить запись видео.
Выключить
Нажмите и удерживайте кнопку питания/переключения, чтобы выключить камеру и пульт дистанционного управления.
Сброс настроек
Нажмите и удерживайте кнопку питания/переключения около 9 секунд для сброса и перезагрузки пульта дистанционного управления.
Монтаж
Способ 1: установка на селфи-палку.
Прилагаемый крепежный зажим поможет разместить GPS Smart Remote на моноподе (диаметр: 25 мм).

Способ 2: крепление на запястье с помощью ремешка.
Входящий в комплект ремешок и резиновый чехол помогут разместить аксессуар на запястье, рюкзаке, лыжной палке, велосипедной раме и т.д. Крепление на запястье показано на примере ниже.
- Поместите GPS Smart Remote в резиновый чехол.

- Проденьте ремешок через прорези на задней части чехла до положения, показанного на рисунке ниже.
- Закрепите ремешок на запястье.


Функция GPS
Чтобы находить сильный сигнал GPS, используйте девайс на улице и обязательно держите или устанавливайте его дисплеем вверх. Для установления сигнала может потребоваться до минуты (без помех или препятствий).
Безопасное использование
Предупреждение:
Несоблюдение этих инструкций по безопасности может привести к пожару, поражению электрическим током или другим травмам, повреждению устройства и другого имущества.
Обращение:
GPS Smart Remote содержит чувствительные компоненты. Не роняйте, не разбирайте, не открывайте, не сгибайте, не деформируйте, не измельчайте, не подвергайте действию микроволновых волн, не сжигайте, не окрашивайте и не вставляйте в изделие посторонние предметы, не используйте, если он был поврежден.
Держите дисплей в чистоте.
Использование:
Избегайте резких изменений температуры или влажности при использовании GPS Smart Remote, поскольку на изделии или внутри него может образоваться конденсат.
Когда Вы используете или заряжаете аксессуар, он может нагреваться.
Обновление прошивки
Важно:
1. Перед обновлением убедитесь, что осталось более 10% заряда.
2. Не вынимайте батарею или SD-карту во время обновления.
Обновление через приложение
1. Подключите Insta360 ONE R к телефону и откройте приложение. Как подключиться?
2. Если есть обновление, приложение сообщит Вам о нём.
3. Следуйте инструкциям на экране, чтобы загрузить и обновить прошивку камеры. В процессе индикатор будет мигать зеленым, и ONE R автоматически перезагрузится по завершению.
4. Вы можете проверить текущую версию прошивки с помощью анимации включения на дисплее экшн-камеры.
Обновление через microSD-карту
1. Загрузите прошивку на официальном сайте Insta360.
2. Подключите камеру к компьютеру через комплектный USB-кабель. Теперь у Вас есть прямой доступ к файловой системе девайса.
3. Скопируйте файл InstaOneRFW.bin на Insta360 ONE R.
Примечание. Убедитесь, что Вы удалили старый файл .bin и оставили имя файла только что загруженной прошивки без изменений. В противном случае система не сможет автоматически определить последнюю версию прошивки, что приведет к проблемам при обновлении.
4. Отключите ONE R от компьютера и нажмите кнопку питания, чтобы включить её.
5. Устройство проверит прошивку и автоматически обновится; индикатор будет мигать зеленым во время обновления.
6. Девайс перезапустится автоматически по завершению.
7. Вы можете проверить текущую версию прошивки с помощью анимации включения на дисплее экшн-камеры.
Голосовое управление
Insta360 ONE R поддерживает английское и китайское голосовое управление.
Настройки
1. Включите экшн-камеру.
2. Проведите пальцем вниз по экрану, чтобы открыть контекстное меню, и проведите пальцем влево, чтобы перейти на вторую страницу, включите «Голосовое управление», затем выберите Настройки -> Голосовое управление.


3. Вы можете выбрать свой язык управления и проверить голосовые команды здесь:

Голосовые команды
- Start Recording (начать запись)
- Stop Recording (остановить запись)
- Take a photo (сфотографировать)
- Shut Down Camera (выключить камеру)
- Mark That (отметить это; укажите, чтобы автоматически отслеживать людей, автомобили и собак, когда Вы наводите верхнюю часть камеры на объект съемки; поддерживается только с модулем Dual-Lens 360)
Форматирование карты microSD
Через камеру
1. Вставьте microSD-карту в устройство.
2. Включите action-камеру.
3. Проведите пальцем вниз, чтобы открыть меню, проведите пальцем влево до второй страницы, выберите Настройки -> SD-карта -> Форматирование.

Через приложение на смартфоне
1. Вставьте SD-карту в ONE R и подключитесь к телефону. Как подключиться?
2. Откройте приложение, перейдите в Настройки -> Хранилище.
3. Затем выберите «Форматировать» для форматирования вашей SD-карты.
Калибровка гироскопа
1. Нажмите кнопку питания, чтобы включить Insta360 ONE R.
2. Проведите пальцем вниз, чтобы вывести меню на экран, и проведите пальцем влево, чтобы перейти на вторую страницу, затем выберите Настройки -> Общие настройки -> Калибровка гироскопа.
3. Следуйте инструкциям на экране и поместите экшн-камеру на горизонтальную поверхность, как показано на изображении, чтобы начать калибровку. Индикатор будет мигать зеленым и синим во время калибровки.
4. По завершению, камера автоматически перезапустится.

Проверка серийного номера
1. Подключите ONE R к приложению. Как подключиться?
2. Войдите в Настройки -> О Insta360, чтобы проверить серийный номер Вашей action-камеры.
Insta360 X3
Insta360 X3
1. Загрузите приложение Insta360

Insta360 App
Приложение для управления камерой
Загрузка
2. Видеоруководство по Insta360 X3
![]()
3. Текстовое руководство по Insta360 X3
Текстовое руководство по Insta360 X3
Внешний вид
перейти к содержанию
Insta360 ONE X2 Водонепроницаемая экшн-камера 360 Руководство пользователя
Названия частей

- объектив
- Микрофон
- Индикатор состояния
- Крышка замка USB (съемная)
- Пряжка с USB-замком
- Порт USB типа C
- Пряжки замка батареи
- Стандартная точка крепления 1/4 дюйма
- Сенсорный экран
- Динамик
- Кнопка питания/функции
- Кнопка спуска затвора
Прежде чем ты начнешь
- Убедитесь, что батарея полностью заряжена. Пожалуйста, подключите прилагаемый зарядный кабель к ONE X2 в случае низкого или разряженного аккумулятора.

Примечание:
Вы также можете использовать официальный концентратор быстрой зарядки Insta360 ONE X2 (продается отдельно). - Вставьте карту Micro SD
- Сначала извлеките аккумулятор. Сожмите пряжки замка батареи, как показывают две маленькие стрелки, после чего батарея автоматически выскочит.

- Вставьте карту Micro SD
(Наклейка обращена наружу к сенсорному экрану)
Поддерживаемые карты Micro SD:
Пожалуйста, используйте карты MicroSD формата exFAT классов скорости UHS-I и V30 для обеспечения нормальной записи. Максимальный поддерживаемый объем памяти составляет 1 ТБ.
- Сначала извлеките аккумулятор. Сожмите пряжки замка батареи, как показывают две маленькие стрелки, после чего батарея автоматически выскочит.
- Обязательно полностью закройте крышку замка батареи и крышку замка USB (желтые индикаторные метки должны быть закрыты), чтобы не нарушить гидроизоляцию.


Знай свой Insta360 ONE X2
- Включение / выключение питания
Когда камера выключена, нажмите кнопку Power/Function, чтобы включить ее.
В режиме ожидания нажмите кнопку питания/функции, чтобы включить или выключить подсветку сенсорного экрана.
В режиме ожидания нажмите и удерживайте кнопку питания/функции в течение 2 секунд, чтобы выключить его. - Использование сенсорного экрана
Управление через WiFi
- Отсканируйте QR-код справа (https://www.insta360.com/download/insta360-onex2) или выполните поиск «Insta360 ONE X2» в App Store / Google Play, чтобы загрузить сопутствующее приложение. При первом использовании следуйте инструкциям на экране, чтобы активировать приложение.

- Включите WiFi и Bluetooth вашего мобильного устройства.
- Когда камера выключена, нажмите кнопку Power/Function, чтобы включить ее.
- После установки приложения коснитесь значка камеры
 в нижней части главной страницы приложения и выберите «Подключиться сейчас» на панели WiFi.
Затем следуйте инструкциям на экране, чтобы подключить устройство.
При первом подключении к камере через WiFi следуйте инструкциям на экране, чтобы подтвердить подключение.
После успешного подключения камеры вы можете делать фотографии или снимать видео через приложение.
Примечание:
Диапазон подключения WiFi составляет 10 метров (33 фута) в оптимальных условиях без помех.

 * Для получения дополнительной информации о продукте посетите https://www.insta360.com/support/product-support
Араши Вижн Инк.
Добавить: Центр жизни Foresea, Башня 2, 11F, 1100 Xingye Road, Haiwang
Сообщество, улица Синьань, район Баоань, Шэньчжэнь, Китай
Web: www.insta360.com
Теl 400-833-4360 +1 800 6920 360
Эл. почта: service@insta360.com
Документы / Ресурсы
- Manuals
- Brands
- Insta360 Manuals
- Digital Camera
- Pro2
- User manual
-
Contents
-
Table of Contents
-
Bookmarks
Quick Links
Related Manuals for Insta360 Pro2
Summary of Contents for Insta360 Pro2
-
Page 1
Pro2 User Manual English… -
Page 2
2.3.4 [Advanced] Color matching and modification of Photoshop panorama 2.4 Distribution 2.4.1 [Beginner] Fast acquisition of real-time stitching images and sent to SNS 2.4.2 [Beginner] Insta360 Player 2.4.3 Introduction of VR helmet for photo playback (about VR glasses) 2.4.4 Create simple VR roaming (about platform presentation) Chapter 3 Video Recording 3.1 Preparation before shooting… -
Page 3
3.3.11 [Advanced] Erasing Tripod for Ground Shoot 3.3.12 [Advanced] Introduction of other stabilization methods 3.4 Distribution 3.4.1 [Beginner] Insta360 Player 3.4.2 [Beginner] Introduction of CrystalView 8K, the panorama player 3.4.3 [Beginner] Introduction to other players (Gopro VR Player & PotPlayer) 3.4.4 [Advanced] Upload to various VR platforms… -
Page 4
6.2 [Advanced] Customize and template Chapter 7 Common Problems 7.1 Common camera problems 7.2 Common problems for Insta Pro app 7.3 Common problems for Insta360 Pro Stitcher 7.4 Other common problems 7.5 Error message summary 7.6 O icial technical support and Forum… -
Page 5
1 Di erence in appearance and interface 1. Compared to the Pro 1, the Pro 2 adds a AP (WiFi) antenna and a GPS antenna to the top. The stable communication distance of Pro 2 AP signal is twice as long as that of Pro 1. Di erent from Pro 1, which needs to purchase additional accessories in order to use GPS module, Pro 2 has integrated GPS module in the camera itself. -
Page 6
2. A new USB2.0 port, a 3.5mm port, and a 1/4 tapped hole are added to the top of the Pro 2 to make it easier for users to use some external USB or 3.5mm microphones and hold them directly above the camera. It is especially suitable for panoramic acoustic microphones that must be placed in the center of the camera for recording. -
Page 7
Farsight system support Pro 2 carries Farsight, which is the latest invented graph transmission system by Insta360, which can achieve smooth manipulation of long distance. Communication distance is as long as 300 meters in the ground-to-ground open environment without shelter and 1 km in the air-to-air environment without shelter. -
Page 8
3 Comparison of detailed functional parameters Pro 2 Weight 1550g 1228g Diameter φ143mm φ143mm Material aluminum alloy aluminum alloy Lens 200°6 x F2.4 fish-eye lens 200°6 x F2.4 fish-eye lens real-time stitching: real-time stitching: 7680 x 7680(8K 3D) 7680 x 7680(8K 3D) 7680 x 3840(8K 2D) 7680 x 3840(8K 2D) Photo… -
Page 9
Supported Not supported Antenna Ethernet Port Supported Supported Insta360 Farsight provides ground-to-ground Insta360 Farsight provides ground-to-ground Video range of up to 300 meters and ground-to-air range of up to 300 meters and ground-to-air Transmission range of up to 1000 meters, with 30 FPS preview. -
Page 10
Pro 2 Stitching OpticalFlow / Template OpticalFlow / Template Exposure 12 stop 12 stop Range Control Windows / Mac / iOS / Android Windows / Mac / iOS / Android So ware 1.1.1 Know the camera… -
Page 11
Specification parameter Specification Parameter… -
Page 12
Specification Parameter Lenses 6 * 200°F2.4 fish-eye lenses Maximum resolution of single-path 4000 * 3000 photograph Real-time Stitching/ Post-Processing Stitching, 7680 * 3840 (8K) at the 360°panoramic photo shooting maximum. Real-time Stitching in the camera, 3840 * 1920@30fps (4K) at the 360°panoramic video recording maximum. -
Page 13
Note: according to international aviation regulations, if you check in your luggage, please remove lithium batteries and carry them around. -
Page 14
1.1.3 Selection and formatting of storage media 6 TF (MicroSD) cards and one SD card must be inserted to use Insta360 Pro 2 to shoot. -
Page 15
Selection and notes for storage devices Both TF (MicroSD) cards and SD card required by Insta360 Pro 2 needs to reach the read-write speed level of V30 memory card. It is recommended to purchase SanDisk SD card (JD.com purchase link, Amazon purchase link) and TF (MicroSD) card (JD.com purchase link, Amazon purchase link). -
Page 16
Pro 2 does not have maximum capacity limits on SD card / TF (MicroSD) card Note for removing storage card As the file directory structure is more complex in Pro 2, please make sure to turn o the camera before pulling out storage cards. -
Page 17
About card speed test Insta360 Pro 2 use multi-card mechanism to store files and the single video rate in each storage card is up to 120Mbps, so Pro 2 has high standards on storage card’s write speed and stability. Please use storage card which meets our o icial recommended standards. -
Page 18
Lens protection and cleaning Insta360 Pro 2 is a six-eye panorama camera, whose fish-eye wide-angle lens is parallel to one lap of the camera itself. Because of protruding shape, please be careful during use and shooting lest and avoid grinding or unnecessary damage. -
Page 19
Power adapter: The camera adopts12V 5A power adapter with DC interface. Battery type and duration: The camera uses 5100 mAh replaceable battery. Without WiFi, the battery life is about 50 min. To fully charge a battery takes about 2.5 hours. Charging with power o : When the camera is not fully charged, the red power indicating lamp will go on;… -
Page 20
About real-time stitching and stitching calibration Insta360 Pro 2 has an accurate stitching parameter which can be used in most shooting scenarios. The stitching e ect shown on the preview screen is based on this default stitching parameter. However, the stitching e ect may vary due to di erences between specific shooting scenes. -
Page 21
Gyro calibration can be performed for the first time using cameras which ensures that camera functions are as accurate as possible. Please first place Insta360 Pro on horizontal desktop or ground, on the function navigation menu, click settings on the lower right to find «Gyro calibration», and complete operation based on prompt (as shown… -
Page 22
1.1.5 Connection mode of camera Insta360 Pro 2 provides a variety of camera connection modes, which can be divided into three types, namely, Farsight, wired connection, and Wi-Fi connection. It can be connected to a computer, iPad or mobile phone, for the remote control of the camera. -
Page 23
3. Turn on the camera and Farsight transmitter. It takes 15 seconds to start a er transmitter is on. 4. Connect the transmitter with Pro 2 camera via network cable. Waiting for the display of IP address of 192.168.100.XXX on top of camera screen, which represents a successful connection between camera and Farsight transmitter. If no required IP shows a er waiting for a long time, please replug the cable until the displayed IP address meets the requirement. -
Page 24
If the receiver connects to a computer, you can also complete the connection by inputting the IP address displayed at the top of the camera screen in the connection interface of the camera’s controlling client Insta360 Pro so ware. -
Page 25
7. Compatibility List of Farsight receiver (devices added continuously) Device System Huawei P9 Android 7.0+ Huawei P10 Android 7.0+ Huawei Mate9 Android 8.0+ Huawei Mate10 Android 8.0+ Huawei Honor V10 Android 8.0+ Samsung Galaxy S8 Android 8.0+ Samsung Galaxy S9 Android 8.1.0+ Google Pixel 2 Android 8.1.0+… -
Page 26
1. Enter the settings menu of Pro 2, set Ethernet to DHCP mode. 2. Connect Pro 2 to router through network cable, and the router’s allocation mode needs to be DHCP, and the computer connects to router’s LAN. 3. Ensure camera and computer are inside the same LAN, open the controlling client so ware on the computer, and input IP address displayed on top of the camera screen. -
Page 27
(IP configuration Interface for Windows) (IP configuration Interface for Mac OS) 3. A er completing the above configuration, enter 192.168.1.188 on client operation so ware, and then connect. WiFi connectivity — connecting client devices to camera’s AP hotspot… -
Page 28
1. click on WiFi logo on homepage of camera screen, and the camera will open its own AP hotspot. 2. open your client device (phone, tablet, laptop) to search nearby WiFi hotspots, and find the hotspots of «Insta360-Pro 2-XXXXXX». Click to input 88888888 (repeat eight for 8 times) to connect. -
Page 29
Insta360 Pro Camera control app The controlling app of professional panoramic camera, Insta360 Pro, helps you remotely control Pro/Pro 2 via WiFi connection to realize the shooting, recording and live streaming function of the camera. Moreover, you can adjust various parameters settings, look back filming materials, stitching calibration, viewing information etc. -
Page 30
Insta360 Pro STITCHER Use Insta360 Stitcher to quickly and easily stitch camera footage taken by Insta360 Pro/Pro 2. What computer configuration can run Stitcher’s stitching function smoothly? According to Stitcher’s requirements for hardware coding and decoding ability, it is recommended to use computers… -
Page 31
Insta360 Pro 2 FIRMWARE Camera firmware The Insta360 Pro camera firmware ensures that the Insta360 Pro 2 runs e iciently. Please update to the latest version for the optimal experience. How to upgrade firmware? Insta360 Moment CrystalView 8K Player Insta360 Moment supports the playback of all videos and photos from Insta360 apps and files in CrystalView format. -
Page 32
content with certain vertical angles, we must require tripod to assist especially during night, sunrise, sunset and in weak light environments, or we need to shoot with long exposure, delay etc. , in which cases, one cannot hold cameras. Here are suggestions for choosing a tripod matching Pro 2. -
Page 33
Do not select tripod with handle 7. When shooting panoramic view, we should try to reduce the area of bottom bracket as much as possible for convenient post editing. In this sense, Manfrotto series products, which are relatively safe, portable, convenient, and easy to operate, can be used as purchase reference for shooting support. -
Page 34
http://shop.nodalninja.com/carbon-fiber-poles/ 1.1.8 Import from multiple storage cards Compared with Pro 1, the largest change in Pro 2 is the addition of six TF (Micro SD) cards. The original files are stored in multiple storage cards. It’s more complex to manage all the files in Pro 2. In order to simplify the importing process, we’ve provided reading storage devices function in the camera. -
Page 35
2. Open Stitcher go to “Pro 2 File Manager» page. Click the «Import» button below method 1. Choose the root directory from any one of the inserted SD cards. -
Page 36
3. It takes a while to load all the contents in SD cards. Please wait for loading process to complete. -
Page 37
If the camera shows «Loading failed» a er entering this mode, please restart the camera. 2. Enter192.168.1.188 pro2 in the address bar of the file manager, and visit the directory to read the contents of all the current storage devices of the camera. You can copy the contents to the same directory and merge the folders… -
Page 38
4. Open Stitcher go to “Pro 2 File Manager» page. Click the «Import» button below method 2. Enter “\192.168.1.188Pro2” in the address bar of select folder. Access this directory and choose a root directory from any one of your SD cards. -
Page 39
You can also map a network drive for Pro 2 directory under server address: \192.168.1.188. In this way, you don’t have to type its network address each time. -
Page 40
5. It takes a while to load all the contents in SD cards. Please wait for loading process to complete. 6. A er all the files are loaded, click the button «Import contents to local drive» at the bottom. Then all the selected contents will be imported to local drive. -
Page 41
Import Pro 2 files to computer in MacOS: Import method 1: Use the USB Hub and the SD card reader 1. Please use our o icial SD card reader and USB Hub. Insert the SD card and six MicroSD cards into the Hub, then connect the Hub to your computer. -
Page 42
3. It takes a while to load all the contents in SD cards. Please wait for loading process to complete. 4. A er all the files are loaded, click the button «Import contents to local drive» at the bottom. Then all the selected contents will be imported to local drive. -
Page 43
1. Go to the Pro 2’s home menu, select the fi h function and start storage device reading mode. Wait until the camera displays «Reading storage devices…». If the camera shows «Loading failed» a er entering this mode, please restart the camera. 2. -
Page 44
3. Enter smb://192.168.1.188, in the Server Address bar and click “Connect”. 4. Select “Guest” in the pop-up window and click “Connect”. 5. In the next pop-up window, select «pro2″ and click “OK» to connect. -
Page 45
Stitcher’s one-click import tool. 7. Open Stitcher go to “Pro 2 File Manager» page. Click the «Import» button below method 2. Choose the root directory from any SD card under server address: 192.168.1.188pro2. -
Page 46
8. It takes a while to load all the contents in SD cards. Please wait for loading process to complete. -
Page 47
9. A er all the files are loaded, click the button «Import contents to local drive» at the bottom. Then all the selected contents will be imported to local drive. Please note that a er you have put your camera in storage device reading mode, and your computer has direct access to the directories of multiple storage cards, you can drag the folders in your SD card (not MicroSD) directly to Stitcher for use. -
Page 48
Calibration methods for stitching are described in detail in 1.1.4. You can manipulate cameras by Insta360 Pro client terminal that supports all the platforms, and the connection operations are described in detail in 1.1.5. -
Page 49
http://shop.nodalninja.com/carbon-fiber-poles/ 2.1.3 [Advanced] Selection of advanced accessories for photographing Base support. Pro 2 has a weight of 1550 g. Please select base with large suction force for single-lens camera, which is relatively more stable and reliable. -
Page 50
2.1.4 [Advanced] Preparation of special photographing scene (aerial photography) Aerial panoramic photos: Unmanned aerial vehicles choose unmanned aerial vehicles with large load capacity, such as DJI S 900, M 600, Inspire 2 etc. No stabilizer is needed for shooting so you can select a straight bar to connect Pro 2. You can select unipod straight bar with changeable length or a short rod with fixed length. -
Page 51
2.2.1 [Beginner] Shooting mode screen and settings Standalone Use 1.Shooting Mode Screen 2.Operation Instructions (1) Select the shooting mode from the camera menu, press the POWER key to confirm entering such mode. A er the camera completes the preparation, the Ready state will be displayed. -
Page 52
(2) When the shooting mode is in Ready state, press UP and DOWN keys to switch over the sizes for shooting. (3) When the shooting mode is in Ready state, press POWER key and you can take a photo as per the current size. If the real-time stitching level is needed a er the photo is taken, the camera will enter the processing state. -
Page 53
Photos shot in normal, AEB3 or Burst mode are stored in SD card. In Timelapse mode, when photo is stored in jpg ② format, the minimum interval length can be set to 2s. When photo is stored in raw+jpg formats, the minimum interval length is 4s due to the limit of write speed. -
Page 54
from le to right are: Gyroscope for stabilization: with the function on, photos stored through camera’s real-time stitching function can be ① automatically corrected according to gyroscope data. Note that this feature cannot take e ect when recording 3D real- time stitching content or 3D live-streaming. -
Page 55
General (Basic settings for photo): General Level Notice 1. All photo modes can store images from 6 lens. Each photo has a resolution of 4000 * 3000. RAW photo format is DNG. Panoramic / 3D images with maximum resolution of 8K can be synthesized in Stitcher. Normal Burst 2. -
Page 56
General Level Notice 1. Under Normal mode, real-time optical flow takes time to stitch a 360 ° Pano or 360 ° Opening: use 3D photo and save 6-lens original images simultaneously. The whole real-time optical flow stitching process takes certain time (camera state is Processing) to complete. A er Optical algorithm. -
Page 57
Exposure: Exposure Auto It can adjust EV, white balance In the Normal shooting mode, the range of EV is-5 ~ 5. ISO range: 100 ~ 6400 Shutter speed range: 1/2s ~ 1/8000s for ordinary Shutter, 1s ~ Manual 55s for Long Shutter WB levels: Auto(auto white balance), 2700K, 3200K, 4000K, 5000K, 6500K, 7500K… -
Page 60
Property Property -255 ~ Note: Property settings generally do not modify, especially sharpness, which may cause Brightness noise increase a er modification. Saturation Contrast Reset… -
Page 61
A er shooting the desired contents using the mobile app, you can go to the camera storage album through the shortcut entry in the lower le corner, to access the file folders containing the contents shot just now and from history. Except for photos in the Auto Exposure Bracket (HDR), Burst or Timelapse mode, all the materials may be previewed, which is helpful for the user to locate a material quickly. -
Page 62
With the storage management function, you can view the capacity of the storage device currently configured to the camera. (2) Precautions for shooting In mobile AP connection, it may cause unstable connection due to crowd density, and shelter, etc. Pro 2 is not waterproof so it cannot be photographed underwater nor does it recommend photographing in rainy weather. -
Page 63
2.2.2 [Advanced] Shooting in special format (Raw, AEB, Timelapse, Burst, super-resolution) Raw Shooting A er opening Raw shooting, photos will be stored simultaneously in Raw (dng format) and jpg format while taking photos. The following illustration shows the e ect of a jpg photo. Raw is to store photos shot by 6 lenses to be the most primitive DNG images, which can be synthesized into 8K / 3D panoramic photos later, saving the details of images to the maximum. -
Page 64
Please note that in Stitcher, color correction function only takes e ect for stitched photo in jpg format. Photo in dng format (Raw) can be stitched only. Please use Photoshop to adjust color for Raw photo. AEB (Automatic Surround Exposure) Auto Exposure Bracket (AEB) mode continuously takes 3, 5, 7, 9 groups of photos of di erent exposures, to synthesize one photo with relatively high latitude (which is widely known as HDR high dynamic range photo). -
Page 65
For example, this is an ordinary jpg photograph taken in the shade of a tree, the part of the sky where the sun has been exposed in order to get the details of the shade. Choose Auto Exposure Bracket mode to take 9 groups of photos with di erent exposure, and then synthesize them into one photo through Stitcher, which can greatly improve the photo tolerance. -
Page 66
Burst is to shoot 10 groups of photos. The continuous capture is carried out based on the camera shutter speed, so the shutter speed is 1 / 10s to the minimum. 10 continuous captured photos can be exported. This mode can be used in taking group photos and static scenes. -
Page 67
Photos are stored in jpg or dng format. The jpg photos are all stored in the SD card, and if you choose to shot in RAW+JPG dual format, only the dng (raw) photos in Timelapse mode will be stored on the six MicroSD cards. All the rest of the photo mode’s jpg and dng are stored in the SD card. -
Page 68
Pro’s o icial forum is shown at the bottom le , which provides latest so ware information, tutorials, technical discussions, feedback and suggestions to Insta360. In the middle is real time monitor window, supporting the playback of the file in any lens. -
Page 69
Import a picture folder Content Type can be Monoscopic, Stereo (Le Eye on Top), Stereo (Right Eye on Top), Stereo (Distinguish two eyes). For Stitching Mode, you can select new optical flow and optical flow to calculate new template according to current picture. -
Page 70
As for Sampling Type, if the camera is still static then three sampling types are not very di erent from each other. If the camera is moving, sampling with slower speed can obtain better image quality which is commonly used in video stitching. -
Page 71
Resolution can be customized in output settings except the preset ones. Output directory path and output file name can be set. When setup completes, you can add to batch list for pending processing or stitch immediately. -
Page 72
Progress is shown in taskbar. A er stitching completes, you can open folder to view stitched photos. 4. Stitching of special shots RAW+JPG: *. DNG is an image taken with RAW+JPG, and it saves the most original information, which gives lots of room for post-production. -
Page 73
Methods for creating HDR images by using Photoshop:… -
Page 75
Timelapse image sequence stitching Photos taken by Insta360 Pro 2 are saved in a folder named PIC_* in the form of a photo group sequence. Insta360 Stitcher can be used to splice up a panoramic image sequence of 8K at maximum. -
Page 76
adjust level, save and apply the current e ect. Open Adobe Premiere CC2018, import by sequence. Create a new sequence and set the resolution to 7680*3840… -
Page 77
Because it is processing timelapse project with higher-resolution, which has high requirement on computer configuration. Occurring lag during the process is normal. If the screen flashes, other so ware can be used to remove flicker in timelapse photo, such as LRT (Lightroom Timelapse);… -
Page 78
This will diminish the possibility of moving objects creating undesirable stitching e ects or shadows. Steps: 1. Import the burst photos in to Insta360 Stitcher. The «Super Resolution» option will be shown in the sidebar on the right. -
Page 79
2. Choose the «Super Resolution» option, and the highest resolution will increase by two grades, 8.2K for the best GearVR e ect and the other 12K. The default Super Resolution is 8.2K. 3. If the super resolution function is used for the first time, the setting of origin photos for super resolution is required. Please select an appropriate number of origin photos. -
Page 80
4. Save the intended value in «super resolution setting». Create a task to export (original photos are the 8K bursts), and one 12K resolution photo will be produced. Compared to the 8K original photo on the le , the 12K super resolution photo on the right shows details with greater sharpness. -
Page 81
Tips: To attain the best super resolution image results, please make sure photos be taken in stationary. The more static the camera stays during shooting, the more clear the image will be. It has been proved that photo shot in an environment with minimal interruptive movement will achieve great image quality. -
Page 82
2.3.3 [Advanced] Stitching by third party so ware, such as PTgui, etc. The original images of 6 lens are saved for every shoot, so we can put them together with third party stitching so ware, taking PTgui, Autopano Giga, Mistika VR as examples here. 1. -
Page 83
Click Align images for stitching analysis Adjust level in Panorama Editor, adjust pictures accurately, etc. Detailed method refers to PTgui o icial tutorial. -
Page 84
«File-Save as templates» is to save it as pts template files for subsequent use; «Create panorama» can export jpg panorama images. 2. Autopano Giga Open Autopano Giga, click icon to import original images of 6 lens. -
Page 85
Analyze images, click icons to open «Image settings», modify «Lens type» to be «Fisheye», «Focal» for 10.57mm, click on «OK» to confirm. Select «Detect» icon on upper le corner to analyze stitching, select «Edit» a er analysis, enter the editing interface. Details can be adjusted in editing interface. -
Page 86
3. Mistika VR stitching panorama Since the resolution of Mistika VR rendering is consistent with settings in engineering Project, you should set the required resolution beforehand in Project. Here we chose to build a project of 8K. Choose original pictures of 6 lens to import, select to import as individual picture Select Files Per Segment as 6. -
Page 87
Select «Import Stich» in Stitch drop-down box to find the picture folder, import pro.prj files, refer to Insta360 Pro’s engineering description file to automatically stitch into a panorama picture. Select improve o sets and improve angles in the Position drop-down box to enhance stitching. -
Page 88
We found that there were characters whose heads were not perfectly stitched so we chose to edit edge points to avoid header stitching. In this case we add «Edge Point» to camera 5, camera 1 , camera 3, avoiding header stitching of five characters. -
Page 89
2.3.4 [Advanced] Color matching and modification of Photoshop panorama The latest version of Photoshop cc 2018 has supported panoramic editing. Here is a brief introduction to the basic workflows. Open Photoshop, select Spherical Panorama from top menu bar, import panorama. Confirm height and width pixels to be 7680 * 3840. -
Page 90
You can drag mouse to view from di erent angles in 3D interface. The angle value can be modified in the camera property of 3D and change field angle size. 8 millimeters is the view angle of panoramic view on Facebook by default. So we can easily modify picture details at a specific point of view. -
Page 91
Adjust view to bottom, use imitation seal, patch, stain wipe tools, to remove tripod at the bottom. Because filters can only apply to visible parts, if you want to modify the overall color, you can use «adjust» in the camera workspace, to directly modify picture’s overall exposure, color etc. -
Page 92
Another way is to double click on filename, to open smart layer, convert polar coordinates into spherical shape, and then use Camera RAW to mix color to avoid producing transition seams. -
Page 93
Open camera raw filter for color grading… -
Page 94
Once again, we apply polar coordinate e ect to return to the rectangular of 2:1. -
Page 95
Back to the workspace of spherical panoramic images, we see that images have shown perfect color correction results. You can also automatically adapt text into 360 sphere automatically by adding text into image, adding new text layer, applying «merge down». -
Page 96
SNS Insta360 Pro 2 can choose real-time stitching while shooting, to stitch into panorama picture of 360 degrees. Through app or Insta360 Pro desktop control terminal, you can download stitched panorama, quickly upload to Facebook, Weibo platform, etc. -
Page 97
Normal photos and 8K 2D panoramic photos captured by Pro 2 can be shared to the community via Insta360 apps like ONE. However, 3D photos and videos are not supported in the community currently. Please note that the files shared to the community should be 2D contents. -
Page 98
Next, directly release, and you can see panoramic images on timeline. Weibo doesn’t support uploading panoramic images from PC end, but the app for Insta360 panoramic camera supports uploading panoramic images to Weibo. Take Insta360 Nano app as an example. -
Page 99
2:1, supporting various platforms. Take Windows v2.3.6 as an example. The desktop version of Insta360 Player supports photos and videos in insp, insv, mp4, jpg formats. Currently, videos only support those of 2:1 and general panorama videos below 4K. -
Page 100
Import a panorama, you can drag mouse to view panoramic view. Preview small window is at the upper right corner. -
Page 101
Playback mode can choose Little Planet, Perspective, Crystal Ball, Flat, Default (fish eye). View Mode and Type of Contents can be set in Settings. Files in navigation menu bar can choose to play streaming media, and streaming media support viewing panoramic live. -
Page 102
2.4.3 Introduction of VR helmet for photo playback (about VR glasses) Almost all the VR helmets currently support panoramic photos and videos. A few VR helmets can view panoramic live via specific players. We will illustrate how to import panoramic content into these devices by using three di erent types of VR head devices, including Oculus Ri CV1, GearVR+S9, Oculus Go. -
Page 103
The default photo path for 360 Photo is «C: Users Username Pictures OculusPhotos», so you can import the panorama photos to be played below this path. Wearing Oculus Ri CV1, open Oculus Video and Oculus 360 Photos in the screen displayed, and see videos and photos imported just now in the My Videos and My Photos categories respectively. -
Page 104
(3) Currently there is no application that supports broadcasting rtmp streaming on this platform. Import content in GearvR machine (1) Install Oculus applications in matched Samsung mobile phone with GearVR. And install download Oculus 360 Photos, Oculus Video on this application platform. -
Page 105
(2) Import the panorama photos and videos you want to play in your phone’s storage directory under / Oculus / Pictures / or / Oculus / Movies/. (3) Insert mobile phone into GearVR to watch, operate GearVR helmet to open 360 Photos or 360 Video in VR and finds My Photos or My Videos menu to watch what has just been imported. -
Page 106
Import content in Oculus Go (1) Install Oculus applications on your phone with Oculus Go account settings. Download and install Oculus 360 Photos, Oculus Video on this application platform. A er downloading, these two applications will be installed directly into Oculus Go. (2) Connect Oculus Go to your computer and import your panorama photos and videos into Oculus Go storage directory under / Pictures / or / Movies /. -
Page 107
2. Once logged in, you will enter the edit management interface and click «ADD PROJECT» to create a new project. 3. Platforms o er many initial templates that can be selected such as roaming around to enjoy landscapes, watching auto show and roaming around in rooms etc. 4. -
Page 108
You can add multiple Scenes on the upper le , namely each scene in roaming. A er adding a scene, specify upload panorama photos or panoramic videos for this scenario, and complete settings such as background color, basic texture, etc. 5. -
Page 109
In one scene, you can operate on element panel below at bottom le , to add text, image, video, scene link, static banner, starting position, BG audio and other additional elements. 6. A er adding di erent elements to di erent scenarios, connect these scenarios with jump links. A er completion, click «release»… -
Page 110
Generally, it can be operated around 10 meters. You can manipulate the camera by Insta360 Pro client terminal that supports all the platforms, and connect methods are described in detail in 1.1.5. -
Page 111
Certainly, you can also record videos without connecting to other devices. Enter video interface, a er it displays Ready, click on confirmation button to begin recording, click on it again to end recording. 3.1.2 [Beginner] Selection of accessories for shooting We should try to reduce the area of bottom bracket as much as possible, to make it convenient for post production. -
Page 112: Video Recording
http://shop.nodalninja.com/carbon-fiber-poles/ Independent straight camera pole. A straight camera pole can be used to li the camera in motion shot so as to extend shooting angle, achieving low-altitude aerial e ect and overlooking attribute. The pole of unipod or straight camera pole series of Manfrotto can be selected.
-
Page 113
Mobile shooting cars. Video shooting cars are generally expensive. You can rent one, which is relatively cost e ective. Body-worn pole,panoramic selfie tool that free hands. -
Page 114
3.1.4 [Advanced] Recording equipment Although Insta360 Pro 2 can record panoramic sounds, external audio devices are still needed if it requires higher sound quality or wireless audio recording. Here we’d like to explain the application of two devices. Accessories, magic arm, connecting accessories Zoom Handy Recorder H2n. -
Page 115
Video tutorial:https://www.youtube.com/watch?v=njep5CO3w3g Recorded panoramic sound will be consistent with Pro 2 itself, both following Ambisonic standard. It can be exported via Stitcher, uploaded to Facebook, Youtube and other platforms supporting this standard, so as to experience panoramic sound attribute. Method of recording panoramic sound by using H2N 1. -
Page 116
MENU->REC->REC FORMAT->WAV48kHz/24bit; MENU->REC->Spatial Audio->ON, to open spatial audio SONY UTX-B03+URX-P03 wireless mic package+sound card Connect tuner to Pro and install the transmitter on recording people. -
Page 117
3.1.5 [Advanced] Introduction of stabilizer MOZA Guru 360 Air https://www.youtube.com/watch?v=e0hL9VqhHwQ&t=38s WenPod Tarzan-G… -
Page 118
Inspire series has high risk. Because camera must be kept stable as much as possible to record, although Insta360 Pro 2 has gyroscope stability, it still needs us to debug the equipment before shooting and make sure to hold the camera still. -
Page 119
Insta360 Pro 2 can output image signals via mini HDMI OUTPUT interface and connect to Farsight of UAV so that real-time images of Pro 2 can be transmitted to remote controller for monitoring. Moreover, if hardware devices allow, panoramic aerial live broadcast can be realized. -
Page 120
Pro 2 can also be used for aerial photography with panoramic stable pan-tilt, such as MOZA Guru 360 Air, WenPod Tarzan- 3.1.7 [Advanced] Create and set logo for real time stitching Please enable ‘Bottom Logo’ in camera setting. Name the Logo as «_logo.png» and save it to current SD card or mobile hard disk. -
Page 121
Turn on the camera to view the preview or take a real-time stitching content, the logo you saved will automatically be cut into round shape to cover the watermark at the bottom. The aspect ratio of «_logo.png» should be less than 50%. With the width fixed, the radius of the bottom logo will increase as you increase its height. -
Page 122
Distort — Polar Coordinates — Polar to Rectangular. Image Rotation – 180°… -
Page 123
Note: 6 MicroSD cards and one SD card must be inserted to use Insta360 Pro 2 to shoot, so the speed test is required to be proceeded among 7 cards in same time. SD card is used to store photos in jpg format and low-resolution proxy… -
Page 124
videos. 6 MicroSD cards are used to store Raw photos in dng format and original high-resolution videos shot on 6 lens. If your SD card’s write speed does not meet the recording requirement but the 6 MicroSD cards do, video recording can still proceed but the low-resolution proxy video stored on the SD card may skip frames, which may a ect the preview of video through Premiere plugin. -
Page 125
Open app and make video settings: General (basic settings for recording) General Options Note High frame rate mode, because of Binning technology, its Normal(normal shooting) quality is slightly inferior than ordinary shooting video. Mode High FPS(Binning, high-frame rate In aerial shooting mode, besides recording the video, there mode) is a signal stream up to 1080 HDMI to access UAV’s own image transmission system. -
Page 126
Optical flow stitching can be done via Exposure windows and indoor scenes, bright stages but darker seats Insta360 Stitcher later, which enables in the audience. smooth transitions for color di erence between each lens. -
Page 127
Property Options Note Note: screen attribute settings generally do not modify, especially sharpness, modification Saturation 0 ~ 255 may cause noise increase. Note: screen attribute settings generally do not modify, especially sharpness, modification Contrast 0 ~ 255 may cause noise increase. Reset 3. -
Page 128
2. Connect H2N with Pro 2 via USB cable to set up USB panoramic sound recording mode of H2N, then operate Pro 2 for normal video recording and broadcast live. Before you use it, please ensure that the firmware of the H2N program has been updated to the latest version. -
Page 129
3. A er successful setup, the interface displays SPACIAL AUDIO, and then press red function key to begin recording. LED screen shows real-time sound waveform, silver control knob on the right can adjust gain. 3.2.3 [Advanced] High FPS Mode When shooting High FPS video of high frame rate, because it is the implementation of Binning technology, the image quality is slightly inferior than ordinary shooting video. -
Page 130
During panoramic aerial photography, smooth flight is required and the aircra itself should reduce unnecessary cornering and shi ing speed. Through HDMI, you can use Farsight monitor to check real-time pictures. Panoramic aerial photography usually uses 2D screen, because 3D video has no obvious e ect when the distance is relatively far. Panoramic aerial photography is chosen under sunlight or when sunrise or sunset light is better. -
Page 131
Pro’s o icial forum is shown at the bottom le , which provides latest so ware information, tutorials, technical discussions, feedback and suggestions to Insta360. In the middle is real time monitor window, supporting the playback of the file in any lens. -
Page 132
A er testing, results for computer performance will be provided for your reference. Stitching step Import a video folder… -
Page 133
Content types include Monoscopic, Stereo (Le Eye on Top) and Stereo (Right Eye on Top). For Stitching Mode, you can select new optical flow and optical flow to calculate new template according to current picture. Optical Flow: basic optical flow algorithm, general stitching speed. New Optical Flow: an increase of nearly 3 times of stitching speed on original basic optical flow but few scenes can achieve less stitching e ect than basic optical flow. -
Page 134
the camera is moving, sampling with slower speed can obtain better image quality which is commonly used in video stitching. Blender Type is generally automatically chosen by the computer. CUDA: if the computer use NVIDIA graphics cards, you have to select NVIDIA CUDA technology to enable hardware acceleration. -
Page 135
Setting reference frame in video stitching is especially important. Stitcher applies the stitching parameters of the selected reference frame to to the whole stitching process.Therefore, when selecting a reference frame, one should select the frame in time interval of output time which should be at important moment of the video, such as the moment when the camera is at the closest distance between characters, or setting one frame as key frame in high- proportion scene, like scenery shooting. -
Page 136
is convenient for post editing. Resolution can be customized except for preset resolutions. Stitcher supports coding of both H264 and H265. H265 encoding has better quality and need less storage space, but it is not well supported by many VR player and editing so ware. Especially when editing the video, H265 encoding has high requirements on hardware. -
Page 137
Previously, exported video retained its original framerate, and did not allow any manual framerate changes in the Insta360 Stitcher. For example, a video shot with 8K at 30fps must be exported as 30fps. If framerate changes were needed, users were required to use third-party so ware to process. Now insta360 Stitcher supports videos being exported… -
Page 138
We have provided a «output framerate» option for optical flow interpolation, which allows the framerate to be increased by two times during video export. For example, a 120fps video can be exported as a 240fps video, while 60fps can be exported as a 30fps video as well. -
Page 139
The new sequence is set to 3840 * 3840, which is to edit 4K3D project, so resolution should be set to 1:1. If it is 2D panorama video, the ratio should be set to 2:1, typically 3840 * 1920 resolution in majority. Set the video as VR Video, and select layout to be upper and lower 3D mode. -
Page 140
Select «keep existing settings» when you encounter setup mismatch warning. For fluent preview, the recommended preview definition is 1/4. Among shortcut buttons, there is a VR mode that can preview panoramic images quickly. -
Page 141
Clip material on timeline; Immersive video e ects are built into Premiere CC 2018, with 11 e ects available in E ects-Immersive Video. -
Page 142
One of the most commonly used is the VR Rotate Sphere, which can change the direction of the panoramic X, Y, Z axis, so as to adjust the center and level of the screen. VR Plane to Sphere, can add plane text, pictures, video, etc., to the panoramic video, and automatically adapt to spherical distortion. -
Page 143
Create a new text title, apply the VR Plane to Sphere e ect, copy 2 layers, adjust the attribute, and you can put the text in all directions inside the sphere. Video Transition-Immersive Video, has 8 kinds of transition attributes. Only dissolved transition field in Premiere can be applied in the panorama, and the other transition attributes cannot be adapted to suture at both ends. -
Page 144
Add transitions to the middle of the three pieces of material, you can see that the entire picture is excessive, the two ends of the suture also fit well. When editing is complete, you can export the video. Please note here that, due to the resolution limitations of the H264 encoding, you can only export panoramic MP4 videos up to 4096 * 2048, or panoramic 3D videos up to 2304 * 2304. -
Page 145
3.3.4 [Beginner] Introduction to FCPX Editing Versions a er Final cut Pro 10.4 have started optimizing support for VR clips and adding some panoramic attributes, while the current version only supports 4K panoramic and 4K3D panoramic clips. Open FCPX to create a new repository, or create an event in an existing repository, and you can directly select 360 video format, and there are two options for resolution, including 3840 * 1920 and 4096 * 2048. -
Page 146
The projection type has two options, including 360° Monoscopic and 360° Stereoscopic. If you choose to establish 3D panorama, namely 360 stereoscopic, you have two options for resolution, including 3840 * 3840 and 4096 * 4096. A er creating a 3840 * 1920 event, select Import Resource File. -
Page 147
In the FCPX section, three panoramic videos are imported, with panoramic attribute icons in the upper le corner of the video. The upper-right item property shows that this is a 360-degree video project. Add video clips to the timeline for editing, and you can see some of the FCPX built-in 360 attributes in the attributes bar on the right. -
Page 148
The use of attribute 360 patching allows for a simple patching, which is a very practical attribute. In addition, there are some panoramic video halo, blur, sharpening and other attributes that can be added according to you own needs. -
Page 149
On the main clip display window, right-click for reposition, which changes the main view of the panoramic video. Press and drag the mouse to center the characters, and can add key frames, so that the screen can freely change the angle of view according to the event. -
Page 150
A 360 basic 3D caption is added to the position of the starting segment, MY360 WEDDING. You can modify the font size in the caption property, and so on. Open the display of 360 Viewer, you can press and drag in video window in the le to preview from any angle. -
Page 151
In the settings you can turn on the output to the VR header display, such as HTC VIVE, for a more vivid real-time view. Put any graphic, still image, or video in a 360-degree project, add a flat material, such as an logo signature, to the timeline, and you can see that the 360 transform is turned on automatically. -
Page 152
In addition, in non-360 projects, you can also add 360 panoramic material, activate the direction, and you can set the X, Y, Z axis and view size in direction window in the right to record the screen, turning the panorama into 2D images. Finally export. -
Page 153
3.3.5 [Beginner] Quick editing of o icial plugins on Premiere Premiere plugin can be installed for Insta360 Stitcher version 1. 7. 0 and above. The plugin can help directly import Pro video to edit and export in Premiere. It supports Premiere CC Pro 2017 / 2018. -
Page 154
Top)». The current version only supports importing video files, not images. Note that the folder path should be the disk path, not the shortcut path. For Insta360 Pro video material, material from the original single-lens with proportion of 16:9 can only choose Monoscopic when imported, material from the original single-lens with proportion of 4:3 can choose any one from three when imported. -
Page 155
Click Import to import an 8K video folder. The source material area at the bottom le of Premiere will immediately show the original video material with the stitched attribute. Add this video material to the timeline, and the button for associated proxy video will be turned on by default when playing the video. -
Page 156
As a result, panoramic video is processed e iciently, multiple video folders can be imported in batches, and we use Premiere for quick editing and export. In accordance with methods described in 3.3.3, we can create a new sequence of clips and edit the video directly on the timeline. -
Page 157
According to the methods described in 3.3.3, we can also add transition, text and so on. When we export the video, it will automatically render and stitch the video at the same time, which greatly saves the stitching time. 3.3.6 [Beginner] Application of LUT For videos shot in i-Log mode, you can use Premiere, DaVinci and other post-so ware to load this default LUT please go to Pro 2 download page and download the third so ware in Stitcher). -
Page 158
A er the video automatically loads the LUT, the color adjustment is automatically restored. On this basis, we can further carry out color matching, to obtain satisfactory results. -
Page 159
3.3.7 [Advanced] Stitching by third-party so ware of Mistika VR, AutoPano Video Mistika VR video stitching Mistika VR o icial tutorial https: //vimeo.com/channels/1242739 Mistika VR purchase link https: //www.sgo.es/mistika-vr/ Open Project manager to select New manager, all the resolution of Mistika VR must be set in advance in the project. In this way, it will allow you to export at the desired resolution. -
Page 160
As for the method of file selection, File Per Segment can be set to 6 because this is the material of six lens. You can also choose «Use Default Preset» , to use preset quick stitching, and find the appropriate shooting settings of Insta360Pro_3200x2400.grp in the folder, because the material was shot in 6K3d mode, with a resolution of 3200 *… -
Page 161
2160 for each shoot. If the material is shot in 8K mode, you should select Insta360Pro_3200x2400.grp. File import method 2: Select six-lens material directly from the folder and drag them to Mistika VR’s main interface. As for the method of file selection, File Per Segment can be set to 6 because this is the material of six lens. -
Page 162
A er the import, you can quickly stitch by using Stitch->Use Insta360Pro Calibrate. Import Stitch can also be used to import pro.prj files saved when shooting the material for fast stitching. -
Page 163
This is the result of quick stitching. The following describes the functionality and settings of the various windows at the bottom. Optimize the parameters of stitching in Positions. Generally, choose «Improve O sets» and «Improve Angles» once for each. Add boundary protection points in Edge Points to avoid stitching of key objects and people. Click once on «Stabilize»… -
Page 164
Convergence means parallax. In 3D mode, the parallax should be set to 60. Generally a er these steps, most of the material can be stitched well and exported. But there are also times when you come across a handful of tricky material, such as people’s face. So we add Edge Points, to o set the stitching edges to protect the characters. -
Page 165
Look at the lens and stitching edges. In addition, you can add options in Optical Flow to adjust the depth of optical flow stitching. Use the time interval for sequence settings of edit in and out tool, so that the segment exported is corresponding to the selected time interval. -
Page 166
AutoPano Video stitching Open AutoPano Video, import videos. -
Page 167
Select Stitch for quick stitching. Press Stitch button, set Lens properties, 10.57 for focal length, Fisheye for lens type. -
Page 168
Adjust the lens in Realtime preview. You can also turn on the Auto pano Giga for more detailed tuning. -
Page 169
3.3.8 [Advanced] Other panoramic plugins and their attribute applications Mocha VR Used for tracking stabilization, removing aircra , etc., image matting. Gopro VR Plug-ins Gopro VR Plug-ins promoted by Gopro is a plugin application available for Adobe premiere and A er E ect. It supports to import panoramic video, edit it by 360 degrees, or record panoramic video on the screen. -
Page 170
https: //fxfactory.com/info/360e ects/ https: //fxfactory.com/info/revolve360/ Skybox 360/VR Tools https: //www.mettle.com/product/skybox-360vr-tools/ 3.3.9 [Advanced] Post production of panoramic sound… -
Page 171
The introduction of YouTube’s requirements on the panoramic audio and video format standards. https: //support.google.com/youtube/answer/6395969?co=GENIE.Platform%3DDesktop&hl=en The panoramic sound files shot by Insta360 Pro directly support this requirement. Open Premiere CC 2018, create a new sequence, and select the preset with the Ambisonics option under VR, as explained in NOTE on the right: For editing monoscopic equirectangular VR files at 3840h x 1920v 2: 1 video at 29.97 frames per second 48 kHz (16 bits) -
Page 172
Note that the Insta360 Stitcher allows you to choose to export the WAV sound file with panoramic sound when exporting, so that it can apply Ambisonics e ect and be edited in a separate sound track using Premiere. Import video file and audio file (Spatial audio file of H2N or sound file exported by Insta360 Stitcher) respectively, synchronize, complete synchronization and then proceed to the next step. -
Page 173
Open the Audio Track Mixer Open Binauralizer-Ambisonics to preview the sound e ect, make sure that the direction of the sound matches the orientation of the video screen. Please note that the e ect must be turned o when exporting the video. Rotate the angle and preview the video to make sure the sound matches the image. -
Page 174
If you encounter a mismatch, you can use the sound direction editing e ect, Panner-Ambisonics, to add the e ect to the panoramic sound track. When you turn on the sound e ect, you can adjust the three directions, Pan, Tilt and Roll. A er adjusting and matching video direction, remember to turn o Binauralizer-Ambisonics before exporting the video. -
Page 175
Press Ctrl+M to export. Make preset conform to the video project in the export interface, in which case is the VR Monoscopic Match Source Ambisonics. Check whether the other settings are consistent with the sequence settings, H264 encoding. -
Page 176
Select appropriate bitrate based on the resolution. 4K video is recommended to use bitrate above 40 Mbps. Confirm to select «Video is VR» and “Monoscopic”. AAC format is confirmed in Audio. Sample Rate is 48000 Hz, 4.0 for Channels, 512 kpbs for Bitrate. Select «Audio is Ambisonics». -
Page 177
3.3.10 [Advanced] Mending Sky for Aerial Photography Use Mocha VR, UAV basically fixed position for aerial photography. Open AE, create new composition, and copy a video layer. In the previous layer video, add Mocha VR e ect and pre-synthesize this layer as Drone1.mp4 Comp1. Check «move all attributes into the new composition»… -
Page 178
Enter new pre-comp, Drone1.mp4 Comp1, set Mocha VR, open Render, select Module as Lens: Undistort, modify Lens Latitude and FOV, allowing drones to zoom into appropriate sizes in the window. Wipe o drones using seal tools. The method is the same with PS. -
Page 179
A er erasing, copy this Mocha VR e ect to the Pre Comp1. Modify Module as Lens; Distort. This has completed simple drone remove. -
Page 180
If you need to stabilize simultaneously, Pre Comp1 should be pre-composited and Mocha VR should be added. Since many attributes and composition have been added earlier, the calculation speed of this step will be slower. 3.3.11 [Advanced] Erasing Tripod for Ground Shoot Move to wipe balance car at the bottom. -
Page 181
Open Mocha VR, Open 360 mode, move perspective to balancing car at the bottom. Use pen tool to create two tracking layers, one is balance car, named camera remove, to loop balance car, and another named BG track, to circle a larger square area. -
Page 182
Move the BG layer behind the Camera remove layer. Both layers must be selected to track and finally select None for «Link to Track» . Clicking on «Render current frame» below preview window to view the e ects of current frame. -
Page 183
A er saving, render and then export. The rendering time is related to computer configuration and the resolution and duration of video clip. And finally viewing e ect in panoramic player. 3.3.12 [Advanced] Introduction of other stabilization methods Mocha VR stabilization Open Premiere to create a new sequence for video that needs to be stabilized. -
Page 184
View video e ects, click MochaVR icon to enter mocha VR interface, and open 360 mode to observe screen from various angles. At position 1, use pen tools to select tracking objects, where 1-3 more visible buildings are checked here. In other scenarios, select appropriate tracking objects and numbers according to actual conditions. -
Page 185
A er box selection completes, select three tracking layers and click «Track Forwards» . Waiting for the completion of calculations, the calculation requires some time, which depends on computer configuration, video resolution and length. Open «View Horizon» and «show control» in Reorient to observe and adjust horizontal lines. The blue circle of Control to allow horizontal line to coincide with the ground line. -
Page 186
Click «Save» icon, save, and then close mocha VR. Back to the e ect, open Render and check for real-time rendering. Selecting Reorient in Model to apply the previous stability e ect in Mocha. Then you can preview the e ect on timeline and export it at last. Mistika VR stabilization Open Mistika VR, in lower le function area, «Stabilize»… -
Page 187
A er computing completion, click QuickView to quickly view the e ect. Close optical flow stitching option to speed The value of «Follow Heading A er x Frames» can be modified to further optimize front-body stability. Click «Reapply Stabilize» for application. A er stabilization, S-Yaw, S-Pitch, and S-Roll in Output Camera become green, with a value for each frame, which is the data a er reapplying stabilization. -
Page 188
If the line image is tilted overall, you can correct it by adding key frames and changing the Yaw, Pitch, and Roll of output images. Mistika VR’s stability attribute is suitable for ground movement, and the stabilization of video type with jitter. Although the stabilization e ect cannot reach FlowState level, because it doesn’t need to track object, the operation is relatively simple, which is a convenient and e icient choice. -
Page 189
Synth Eyes stabilization SynthEyes is a post-production so ware. Open Synth Eyes, File->Open, Open video files that need stabilization, which supports only 360 videos, not 3D panoramic video. The resolution is unlimited, but processing speed is related to computer configuration. Typically, just use default settings. -
Page 190
During import, you will be prompted for saving your project files. Select «Feature» above window. Click «Advanced» . Open feature point to for the window settings. -
Page 191
Modify «minimum Trakers / Frame» to be around 50, «Maximum tracker Count» to be around 500. -
Page 192
When setup completes, close back to «Summary» , click «Run Auto-tracker» , and the so ware starts automatically calculating tracking points. The computing time is related to computer configuration and video duration. A er calculation, each frame will appear many green tracking points. Next, we need to hold down «shi » key, select the track point near ground line, drag timeline, ensure that it is along with time schedule, and tracking points should be all checked. -
Page 193
A er calculation completes, red progress bar disappears, and you can preview stability e ect. If the horizontal tilt is found, you can press «P» key again to enter the setting panel, and set adjustment parameter in «Adjust» . Finally, output, open Output, click «Save Sequence» , and then you can export video. -
Page 194
In export settings, you can select di erent formats, and set coding rate in «Compression Settings» . Click Start to start rendering and export. -
Page 195
3.4.1 [Beginner] Insta360 Player Insta360 Player supports playing all the videos recorded by Insta360 cameras, and also supports all standard 2:1 360 videos and images with a 2:1 ratio. Take macOS High Sierra as an example. The desktop version of Insta360 Player supports photos and videos in insp, insv, mp4, jpg formats. Currently, video playback only supports those of 2: 1, panorama videos below 4K, and does not support 3D videos. -
Page 196
Playback mode can choose Little Planet, Perspective, Crystal Ball, Flat, Default (fish eye). View Mode and Type of Contents can be set in Play Settings. -
Page 197
Currently, the maximum video resolution that mobile phones can play is 4K, while CrystalView player is a brand-new playing technology launched by Insta360, which can play panoramic video with up to 8K resolutions on mobile phones. You need to convert video into special CyrstalView format via Stitcher, and then import it into CrystalView player to watch super high resolution panoramic video. -
Page 198
3. Import the converted videos into players supporting playback in CrystalView format. Supported players include Insta360 Moment player on Android and iOS platform, and Insta360 Player on GearVR and Oculus Insta platform. Here are ways for each player to import content: Android Insta360 Moment player: 1. -
Page 199
3. Connect your Samsung phone and computer by using tools such as Android Transfer to import converted vrb files on the computer into your Samsung phone under the directory of Insta360Moment/. 4. Click on Insta360 Moment in Oculus Home, insert Samsung phone according to hints and install it into GearVR to play. Oculus Go Insta360 Moment: 1. -
Page 200
Player & PotPlayer) Since Insta360 Player has resolution limits, it can only play general panorama video of H264 encoding below 4K. If panoramic video is exported to be other formats, other players need to be used to play. Currently, desktop player of Gopro Player PotPlayer and PotPlayer support panoramic video well. -
Page 201
Windows can also use PotPlayer to play. -
Page 202
http: //potplayer.daum.net/?lang=zh_CN 3.4.4 [Advanced] Upload to various VR platforms Currently most video platforms have supported uploading panoramic videos, including Youku iQIYI, Tencent video , and VR content platform, UtoVR, VeerVR, etc. However, it is worth noting that some platforms do not support 3D video, and some have requirement on the video minimum resolution. -
Page 203
Facebook upload instructions: https: //www.facebook.com/help/828417127257368 To upload panoramic videos onto personal homepage of Facebook, you write Metadata including panoramic information in the videos in advance. If you have already exported the video by using the VR mode in the editing so ware, you can upload the panoramic video like other videos. -
Page 204
Vimeo can upload panoramic videos with Metadata the same as Youtube, and can have 360 settings a er upload. There are also more humanized functions such as setting up fov, first view etc. -
Page 205
3.4.5 [Advanced] Introduction of VR headset for photo playback (about VR glasses) Almost all the VR headsets currently support panoramic photos and videos. A few VR headsets can view panoramic live via specific players. We will illustrate how to import panoramic content into these devices by using three di erent types of VR head devices, including Oculus Ri CV1, GearVR+S9, Oculus Go. -
Page 206
A er installing two applications, create a new «Videos» folder under the Oculus apps installation directory /So ware/oculus-oculus-video, and copy the panorama video you want to play to this folder directory. The default photo path for 360 Photo is «C: Users Username Pictures OculusPhotos» , so you can import the panorama photos to be played below this path. -
Page 207
Wearing Oculus Ri CV1, open Oculus Video and Oculus 360 Photos in the screen displayed, and see videos and photos imported just now in the My Videos and My Photos categories respectively. Currently there is no application that supports broadcasting rtmp streaming on this platform. Import content in GearvR machine Install Oculus Home applications in matched Samsung mobile phone with GearVR. -
Page 208
Import the panorama photos and videos you want to play in your phone’s storage directory under / Oculus / Pictures / or / Oculus / Movies/. -
Page 209
Insert mobile phone into GearVR to watch, operate GearVR headset to open 360 Photos or 360 Video in VR and finds My Photos or My Videos menu to watch what has just been imported. Currently, GearVR supports panoramic video with resolution less than 4096×2048 and 3D panoramic video of 4000×4000. -
Page 210
1. Choice of tripod: recommend to use tripod special for VR with 1/4 port. 2. Recording equipment: H2N, 3.5 mm port microphone, USB port microphone, mixer, wireless microphone. 3. Manipulating device: computers with cable interface or adapter cable interface, phones installed with Insta360 Pro app. -
Page 211
① 2 will not appear as either 0.0.0.0 or 192.168.43.1, otherwise, the connection fails). Connect a mobile phone or computer via WIFI to the 4G Wireless card that has connected to Insta360 Pro 2. Input ID ② address displayed on Pro 2 for connection. -
Page 212
Please be one meter away from the camera within 5 seconds a er entering this function, so that stitching calibration a er countdown can be achieved to the best result. Or use «Stitching Calibration» function on computer: (1) Click «Stitching Calibration»… -
Page 213
(2) Click «Start» (3) A er stitching calibration, select the option you need. If there’s no problem, click «Done». -
Page 214
Use «Calibration» function on mobile phone: (1) Click «Calibration» a er connecting Pro 2 to the mobile phone. -
Page 215
(2) Click «Start»… -
Page 217
(3) A er stitching calibration, select the option you need. If there’s no problem, click «Done». -
Page 218
4.1.4 [Intermediate] Preparation of 4G network Live- streaming (Outdoor live-streaming) 1. Connect 4G wireless card via network cable to Pro 2. 2. If the connection succeeds, the IP address on Pro 2 does not appear as either 192.168.43.1 or 0.0.0.0. 3. -
Page 219
7. Click «Start» to successfully push. 4.1.5 [Intermediate] OBS Computer forwarding push for live-streaming 1. Connect Pro 2 and router with cable to obtain IP address. 2. Start stitching calibration, refer to: 4.1.3. 3. Before live-streaming, please adjust the resolution and bitrate of live-streaming first. 4. -
Page 220
4.1.6 [Advanced] How to add or edit logo for live- streaming Please enable ‘Bottom Logo’ in camera setting. Name the Logo as «_logo.png» and save it to current SD card or mobile hard disk. Turn on the camera to view the preview or take a real-time stitching content, the logo you saved will automatically be cut into round shape to cover the watermark at the bottom. -
Page 221
Image-Trim, select transparent pixels, cut o redundant pixels. Distort — Polar Coordinates — Polar to Rectangular. -
Page 222
Image Rotation – 180° Image-Image Size, modified to 2000 * 150. Save as _ logo.png and store it in the root directory of the SD card. 4.2.1 [Beginner] Live Interface and parameter setting Mode selection: (1) Build-in Server: push for local player. (2) Custom Rtmp Server: fill out Rtmp server address provided by live platform. -
Page 223
Choose panoramic (360) or 3D panoramic (360 3D) views based on requirements Select Live-stream Format (1) RTMP (Real Time Messaging Protocol) RTMP is an open protocol developed by Adobe Systems for audio, video and data transmission between Flash players and servers. (2) RTSP (Real Time Streaming Protocol) RTSP defines how one-to-many applications can e iciently transmit multimedia data via the IP network. -
Page 224: Hdmi Output
Resolution, frame rate, bitrate setting Select the desired resolution based on your choice of live platform. If the settings have no desired resolution, click «Customize» to set your desired resolution (resolution cannot be greater than 3840 * 3840). Note: when viewing with mobile phone, the recommended encoding rate should be 4Mbps. If there’s video lag, you should first exclude whether it is caused by phone lag, if not, please select lower bitrate ( in many cases the reason for video lag is because upload bandwidth isn’t enough).
-
Page 225
4.2.3 [Beginner] Live-streaming while storing Check according to your own needs 4.2.4 [Beginner] External audio setting Refer to 3.1.4. Audio mixer sounds can also be imported into Pro 2 via a 3.5 mm port 4.2.5 [Intermediate] Indoor live-streaming scheme Preliminary preparations: 1. -
Page 226
Live-streaming phase: Refer to: 4.1.4 4.3.1 [Beginner] YouTube live-streaming 1. Connect the camera and apply stitching calibration, refer to 4.1.3. 2. Create a live stream event on YouTube, address » https: //www.youtube.com/my_live_events » 3. In Advanced Settings, select “This live stream is 360°” option. 4. -
Page 227
4.3.3 [Beginner] Weibo live-streaming 1. Connect to the camera and apply stitching calibration, refer to 4.1.3. 2. Open » http: //tools.insta360.com/live » to begin live-streaming. 3. Binding Weibo (note: blue V users need to apply to Weibo for live-streaming) 4. Select «Custom RTMP Server» and copy paste RTMP URL and stream names. -
Page 228
Scenario 1: fill in RTMP address in insta360 pro o icial control so ware. Fill the first part into the column of push address in the above sequence number 1. Fill in the stream key column in sequence number 2 with the second part. -
Page 229
We fill the first part into the column of URL column in the above sequence number 1. Fill in the stream name column with in the second part in the above sequence number 2. Note: if you find a push fails, please first check whether your local network connection is normal and whether the trial time for the push address expires. -
Page 230
3. Fix Pro 2 camera with extra accessories on street view vehicles or tripod. 5.1.2 Introduction of shooting accessories for special street view Except for the most basic GPS accessories, if there is a need to take street view on a vehicle, you need to prepare suction mount, tilt pan or small tripod to fix Pro 2. -
Page 231
As shown below, use mobile phone app to connect to camera, enter video function interface, and set single-lens resolution to 8K@5F (6 * 3840×2160). 3. Then, press «record» , to shoot street view video that can be finally composited into 8K resolution, with 5 frames per second. -
Page 232
3. Log into your google account in the popup menu window. As shown below, your uploaded clean content needs to meet google requirements before you pass the auditing: The shooting content must contain GPS information. Panoramic photo specifications need to be 3840×1920 and above resolution, with screen proportion of 2: 1. Panoramic video specifications need to be 3840×1920 and above resolution, with screen proportion of 2: 1, and video shooting does not allow segmentation (Video Seg should be O before shooting), and does not allow FlowState stabilization through Stitcher. -
Page 233
It the produced Google street view content meets above conditions, click «Upload» to submit, and wait for upload progress completed. If uploaded video is of 8K@5FPS, it will automatically be parsed into consecutive street view photos by Google. 5.4.1 Watch street view content via Stitcher 1. -
Page 234
3. If consecutive shooting lines are taken, blue lines will appear in street view maps. If they are separate locations, there will be blue dots in street view maps. If what you took were continuous shooting lines but what appear on maps were points, there may be two reasons: 1. -
Page 235
As an addition to exposure parameters, this function can adjust the intensity of brightness in di erent parts in detail. Note that there is no need to use curve functions when shooting RAW photos or i-Log videos. Curve parameters can be saved to camera parameter templates for later use. -
Page 236
A er naming and saving the current parameter template, you can select the stored parameter template to quickly set parameters in later use. The original function to save parameters to camera custom options is adjusted to the right side of the parameter template option. -
Page 237
If you need to modify parameters for a parameter template, please adjust the parameters you want under the state of using this template. Once you have adjusted, a «Save» button will appear below the parameter template name in use at the lower right corner. -
Page 238
Note that the use of parameter templates takes e ect only for the current shooting mode. This means once you switch the mode (e.g. switching from photographing to recording or live-streaming) or reenter into shooting interface a er exiting camera interface, parameter template at the right corner will become an option without selection. Resetting parameter templates simply changes the status to «unselected»… -
Page 239
If fan closed mode is not on, or fans do not rotate during non-shooting period, it is likely caused by fan fault and it is recommended to contact technical support. 7.1.5 USB 3.0 port cannot be identified First please ensure that equipment is compatible, and then test multiple compatible devices. If all of them are not identified, it may be USB port failures, and you are recommended to contact technical support. -
Page 240
Cameras and control ends can be placed in the environment with less interference or use network cable for wired connections. 7.2.4 How to upload camera logs for problem analysis If cameras encounter problems while using, upload camera logs for technical support test. Ethernet: DHCP mode to ensure Pro can be connected to networks, and connect Pro to router’s Wi-Fi or connect to router directly through network cable. -
Page 241
HDMI outputs a video of 4K/60 fps. Please ensure that the collection device supports processing 4K/60 fps; if not supported, Pro will automatically reduce to other resolution specifications with frame rate of 60 fps. 7.3 Common problems for Insta360 Pro Stitcher 7.3.1 Installation failure First, please confirm that your computer configuration specification is above 64bit win7 system;… -
Page 242
If folder files are not missing and internal filenames are not modified, please check whether the so ware is correctly installed. You can also try to solve the problem by install the Stitcher again. 7.3.3 No reaction a er turning on Generally it is due to improper installation, and it is recommended to install it again. -
Page 243
3. Please make sure that you have deleted the previous firmware bin file, and keep the file name (Insta360_Pro2_Update.bin) of newly downloaded firmware unchanged; otherwise the system may not be able to automatically identify the latest firmware and thus cannot upgrade regularly. 4. -
Page 244
damage the machine and make it unavailable. 7.4.3 Insu icient card speed and overheating during filming Frequent recording of high-resolution video will lead to accumulation of data fragments generated by multiple files, a ecting the card speed. So, it is recommend to periodically format storage devices, especially before important shooting. -
Page 245
write-protection. 4. Pro 2 camera can format 6 MicroSD cards together at the same time. Choose any one of the MicroSD cards and proceed to the next step. There will be two selections for you to choose: format this card to exFat or format all devices to exFat. -
Page 246
Timelapse photography uses gyro corrections, which will cause jitter; if gyro correction is not used, please verify whether it is due to floor jitter or tripod instability. 7.5 Error message summary 7.5.1 Common Error Codes Error Code Meaning Solution Check if all the MicroSD cards are usable and inserted in the MicroSD card not inserted camera. -
Page 247
Error Code Meaning Solution 1. Turn o the camera, take out the battery and leave it for about 5 mins; then restart the camera. Failed to open lens module 2. If you are using H2N or other similar external audio devices, please be sure to follow the order: unplug H2N, start and set H2N;… -
Page 248
When the camera operates, the work indicating lamp will be in the same color as the power indicating lamp. 7.6 O icial technical support and Forum If none of these instructions solve any problems encountered, visit website forums to obtain more technical guidance or contact o icial technical support to solve problems. -
Page 249
Shenzhen Arashi Vision Company Limited (+86) 400-833-4360 EMAIL service@insta360.com www.insta360.com 6/F, Building A, Logan Century Center, 23 Haixiu Road, Bao’an District, Shenzhen, China…
В настоящее время вы находитесь на странице с руководствами . Выберите одну из категорий продуктов, чтобы быстро найти нужное руководство . Не удалось найти нужный продукт ? Тогда попробуйте вбить в строку поиска и модель, чтобы найти нужное руководство . На ManualsPDF.ru в настоящее время имеется 8 руководств , разделенных на 4. Самые популярные категории продуктов :
- Спортивные камеры
- Видеокамеры
- Дроны
Самые популярные продукты из на сегодня:
- Insta360 One R
- Insta360 Go
- Insta360 Pro 2
Как обновить прошивку?
Перед началом работы обязательно обновите прошивку до актуальной!
Во-первых, подключите карту MicroSD к компьютеру через кардридер или любым другим способом. Важно иметь доступ к карте памяти посредством файлового менеджера / проводника Windows / Finder’а Mac Os. Скопируйте в корневую директорию карты памяти файл актуальной прошивки. Скачать последнюю прошивку рекомендуем с сайта производителя (раздел Camera firmware). Следующим шагом вставьте карту памяти в MicroSD слот камеры на нижней части корпуса и перезагрузите Insta360 4k (выкл-вкл удержанием кнопки питания) — обновление прошивки пройдет в автоматическом режиме.
Для корректной работы камеры важно использовать актуальное программное обеспечение для компьютера и мобильных гаджетов (скачать по ссылке выше).
«Слепой» режим съемки
Под «слепым» режимом подразумевается отсутствие подключения камеры к любым гаджетам посредством Wi-Fi. В данном режиме пользователь не имеет возможности управлять съемкой в режиме реального времени со смартфона или планшета.
Удерживайте кнопку включения в течение 3 секунд, пока на экране камеры не отобразится экран приветствия и загорятся синий и красный индикаторы.
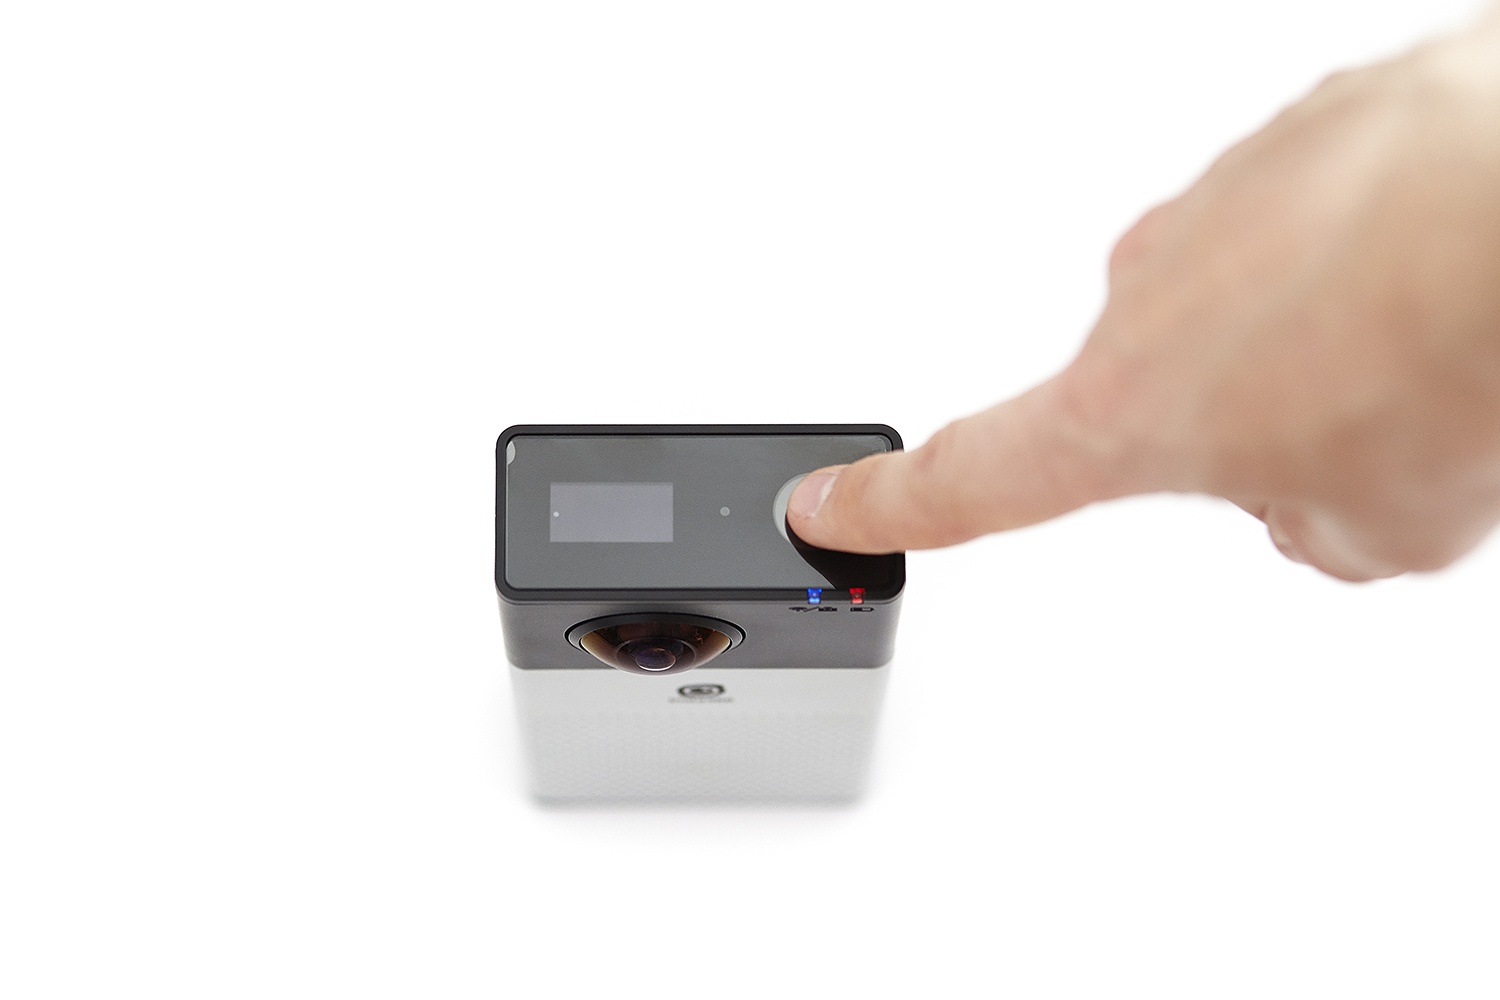
Когда зеленый индикатор загорится и на экране появится надпись «Ready» — камера готова к съемке. Нажмите на кнопку питания (сверху) для начала съемки. Для остановки записи еще раз нажмите на кнопку питания, после чего зеленый индикатор погаснет.
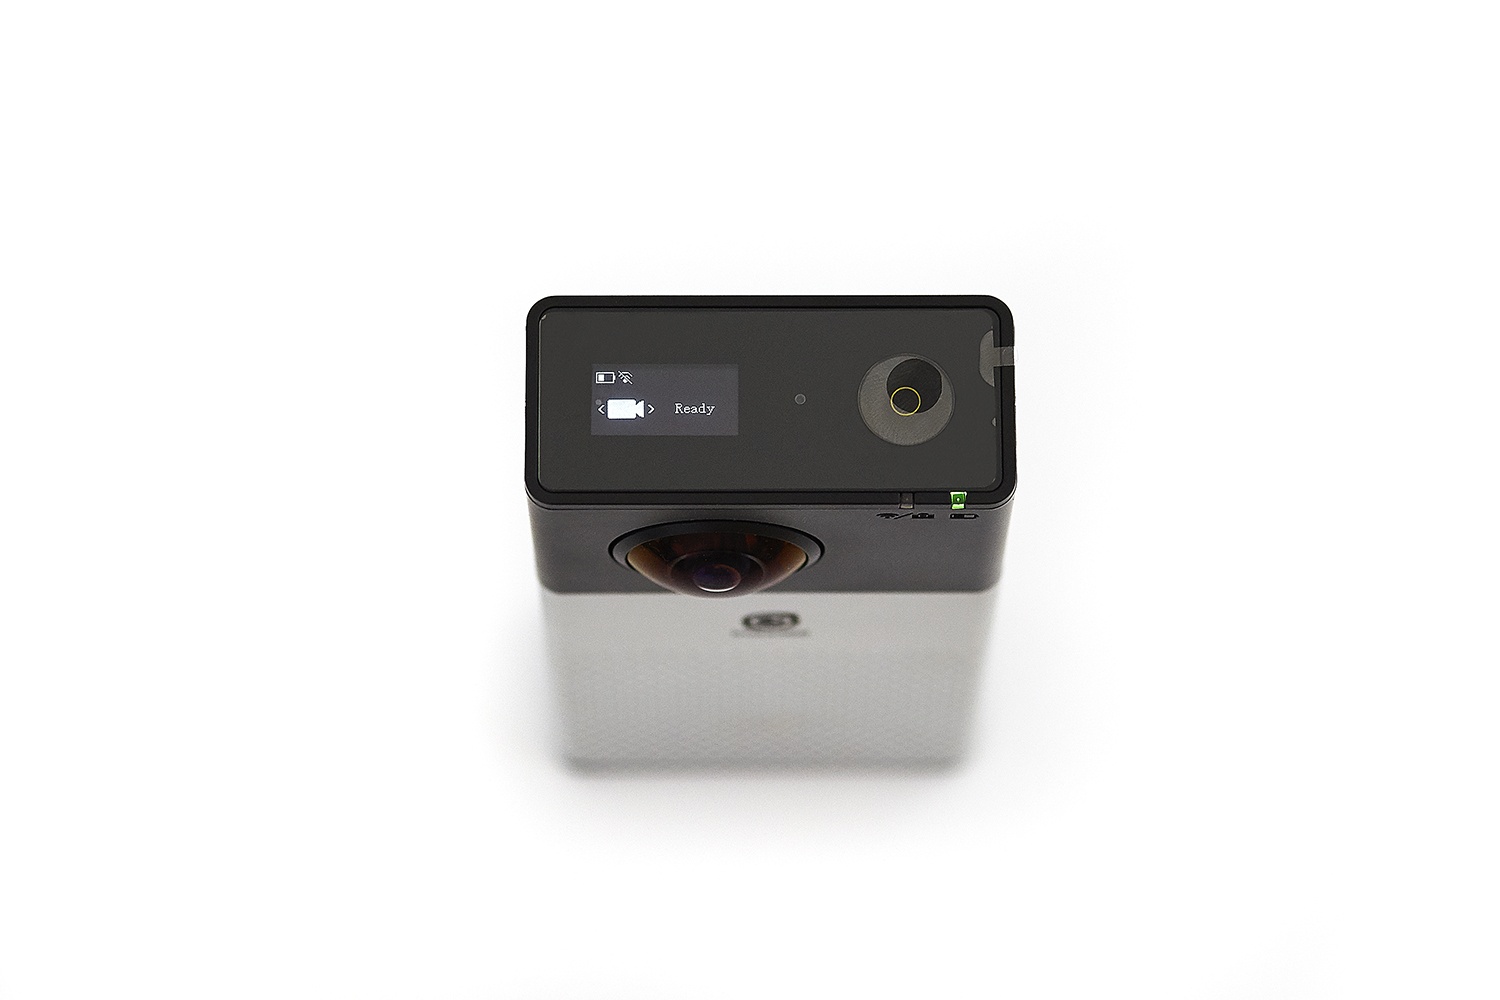
Во время записи видео, синий индикатор мигает непрерывно, информируя о процессе съемки. На дисплее отображается время записи, текущий объем ролика и свободное место на карте памяти. По окончанию съемки, синий индикатор перестает мигать и загорается постоянно.
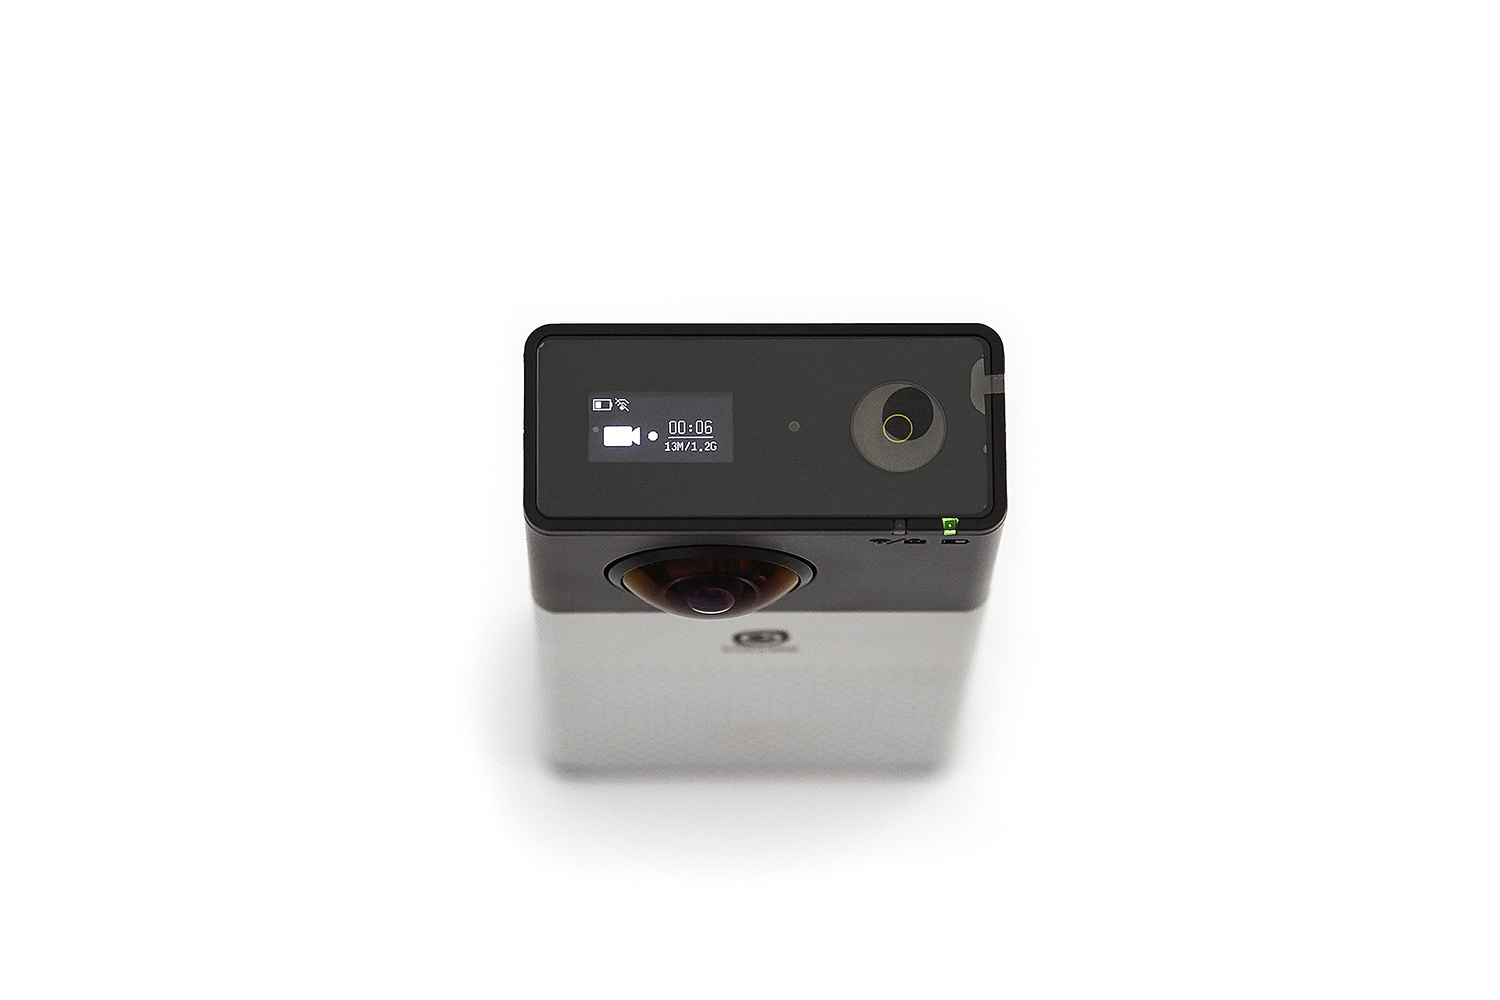
Переключение между активными режимами (фото, видео, настройки) производится нажатием кнопок «вверх/вниз» на боковой стороне камеры.
Съемка фотографий осуществляется аналогично, по нажатию на кнопку питания. После нажатия кнопки, синий индикатор перестает гореть — это говорит о начале процесса «сшивания» изображений с двух линз.
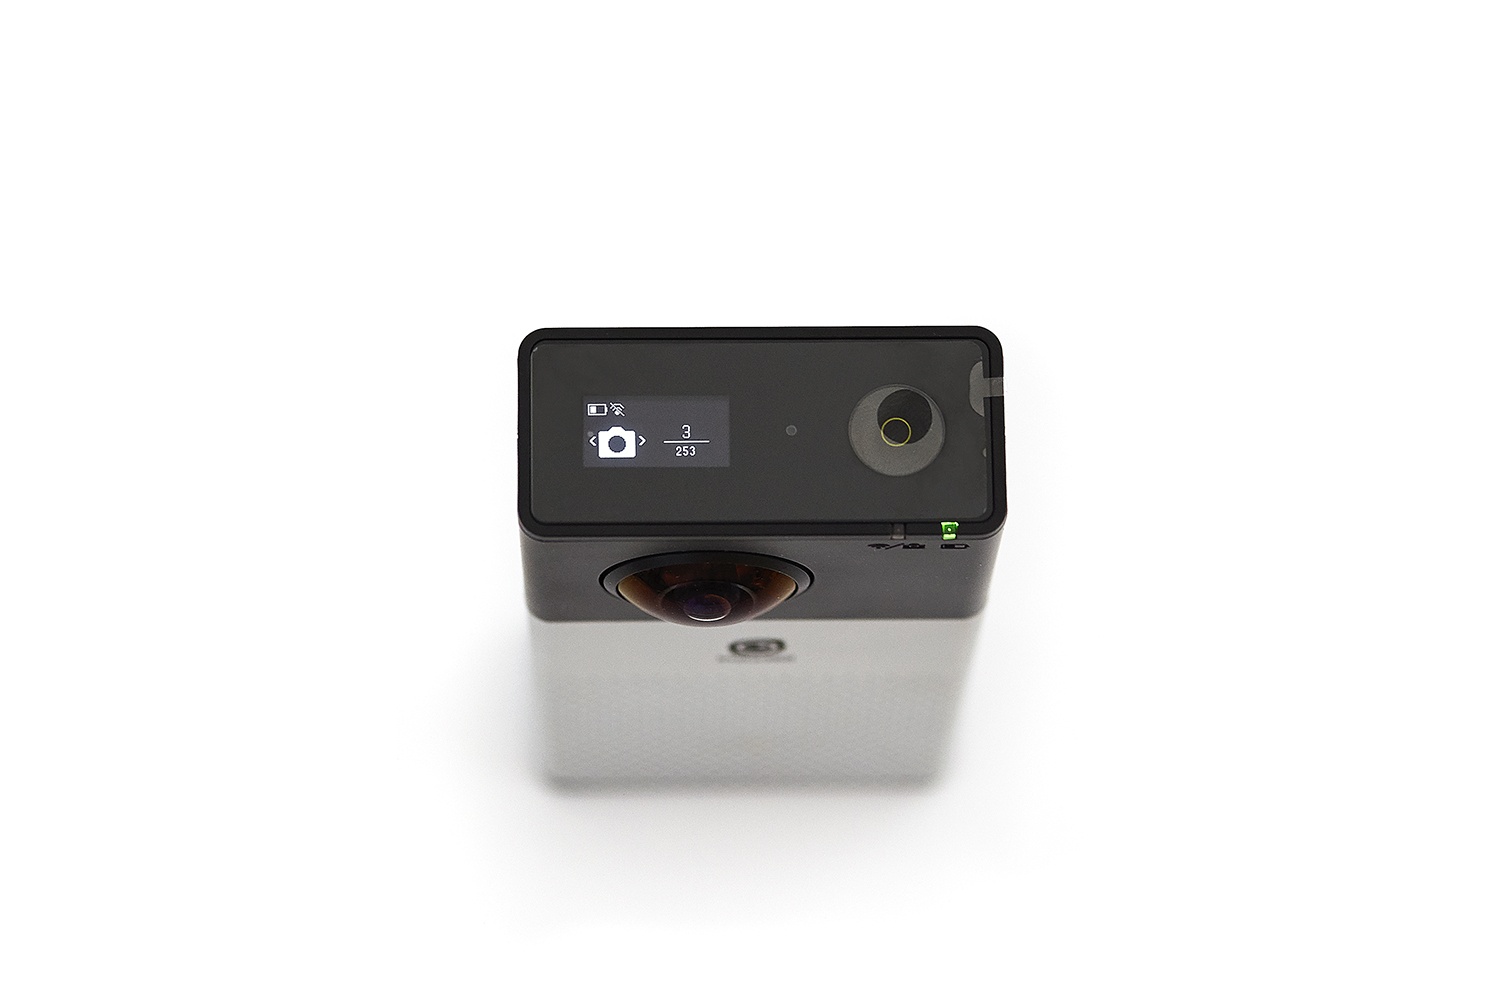
Удаленное управление камерой
Управлять Insta360 4k возможно удаленно с помощью гаджета (смартфона или планшета), подключенного к камере по Wi-Fi с использованем приложения Insta360 Explorer (доступны для iOS и Android). Дистанция между устройствами не должна превышать 20 метров.
После активации модуля Wi-Fi, загорается синий индикатор и в верхней области дисплея камеры отображается IP адрес камеры.
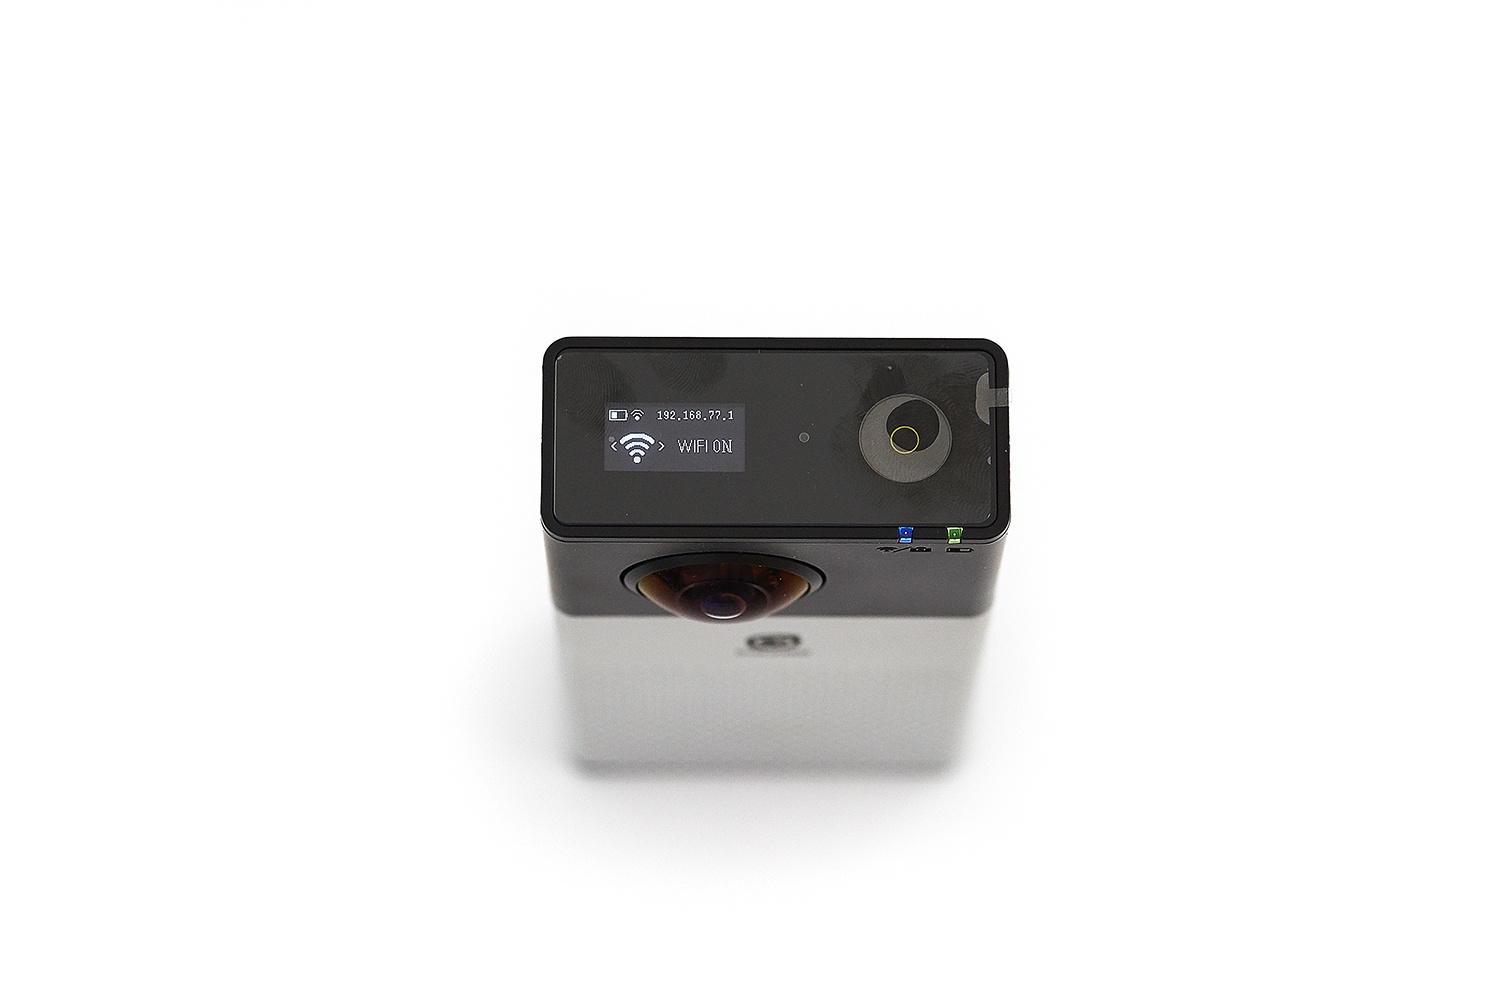
Обратите внимание! Версии прошивки камеры и мобильного приложения должны быть актуальны! По умолчанию, пароль Wi-Fi — Insta360 (первая буква I заглавная).
В комплекте с камерой
В комплект Insta360 4k включен ассортимент полезных аксессуаров.
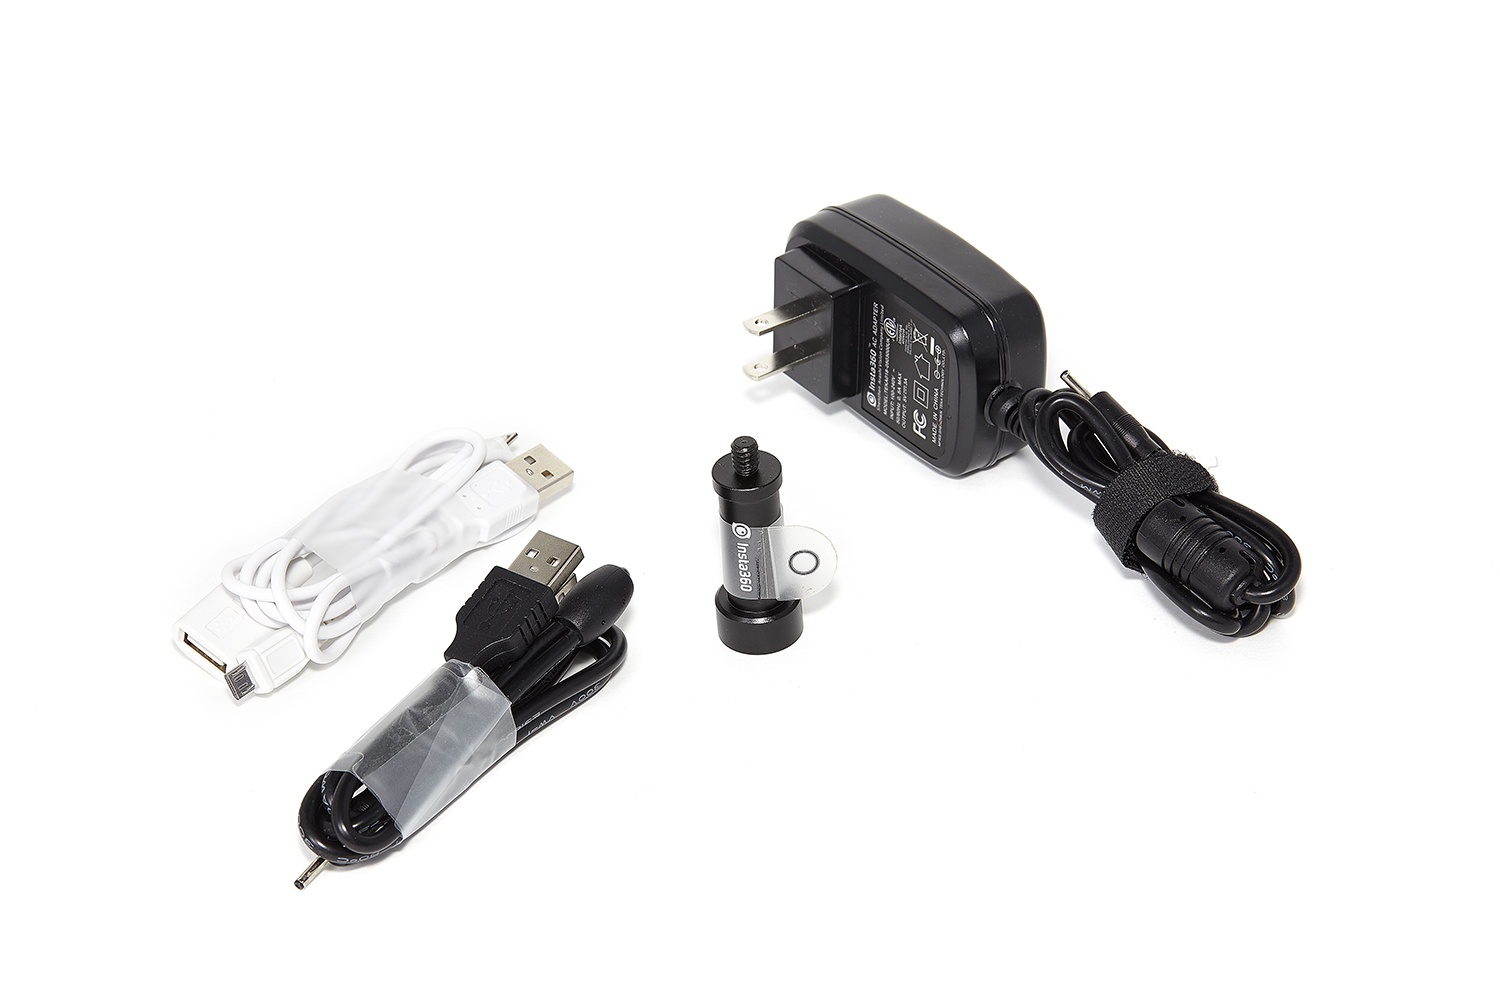
Адаптер для штатива
Адаптер или «удлинитель» позволяет фиксировать камеру на расстоянии 4.5 см от штатива. Благодаря данному решению, подключение кабелей питания и USB возможно во время расположении камеры на штативе.
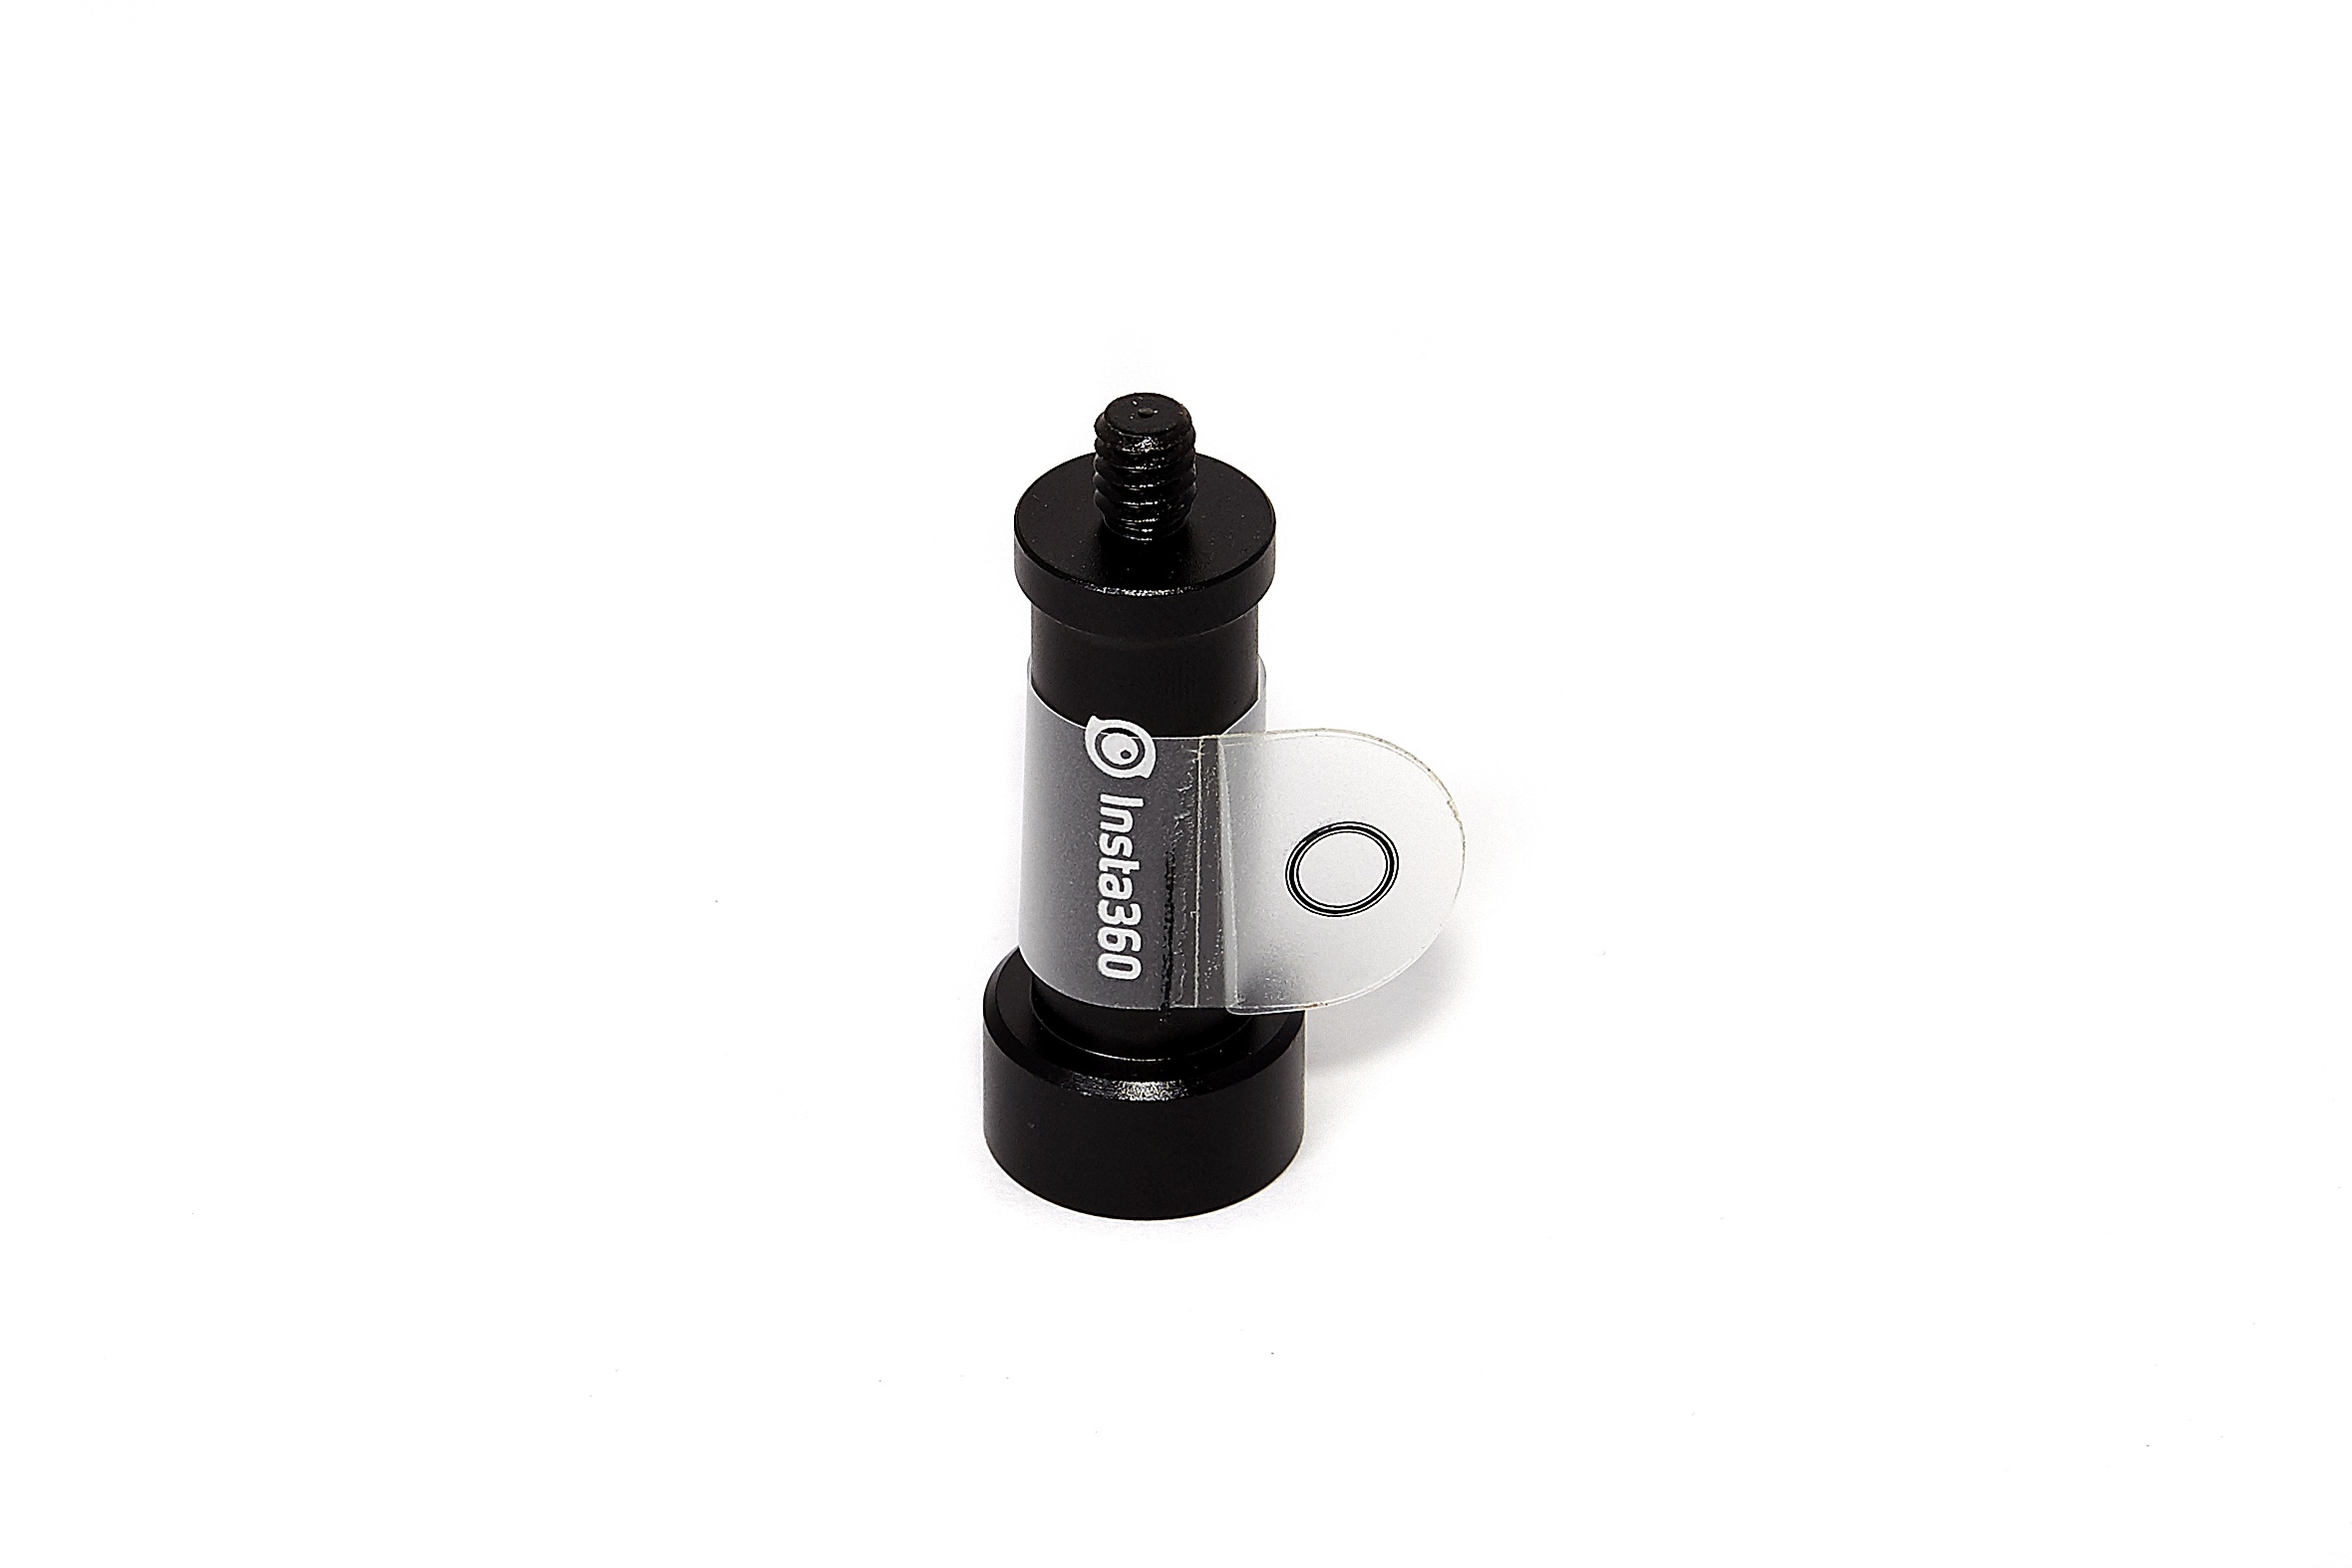
Зарядный кабель с двумя USB коннекторами
Кабель используется для заряда камеры при помощи компьютера, power bank или любого другого устройства с USB входом.
Поскольку для полноценного заряда камеры требует 3А, мощности power bank может быть недостаточно (обычно это 1А или 2А) и разработчиком предусмотрено одновременное использование 2х портативных источников питания.
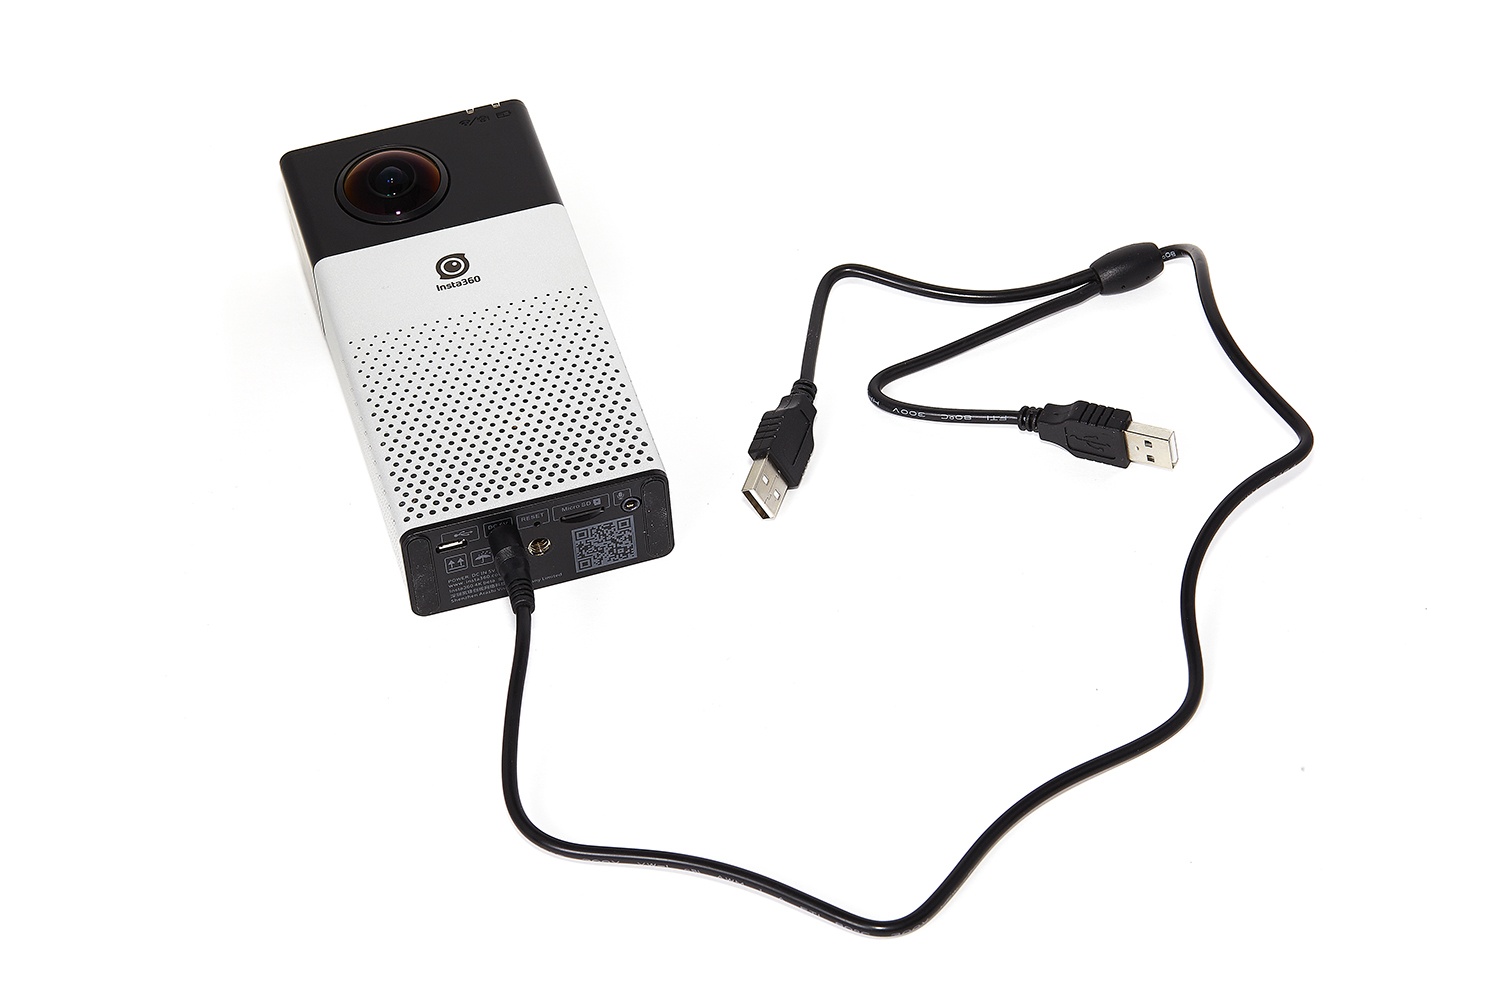
Универсальный Micro-USB/USB адаптер и кабель
USB кабель позволяет синхронизировать камеру с компьютером, а дополнительный адаптер дает возможность работать с контентом камеры напрямую со смартфона.
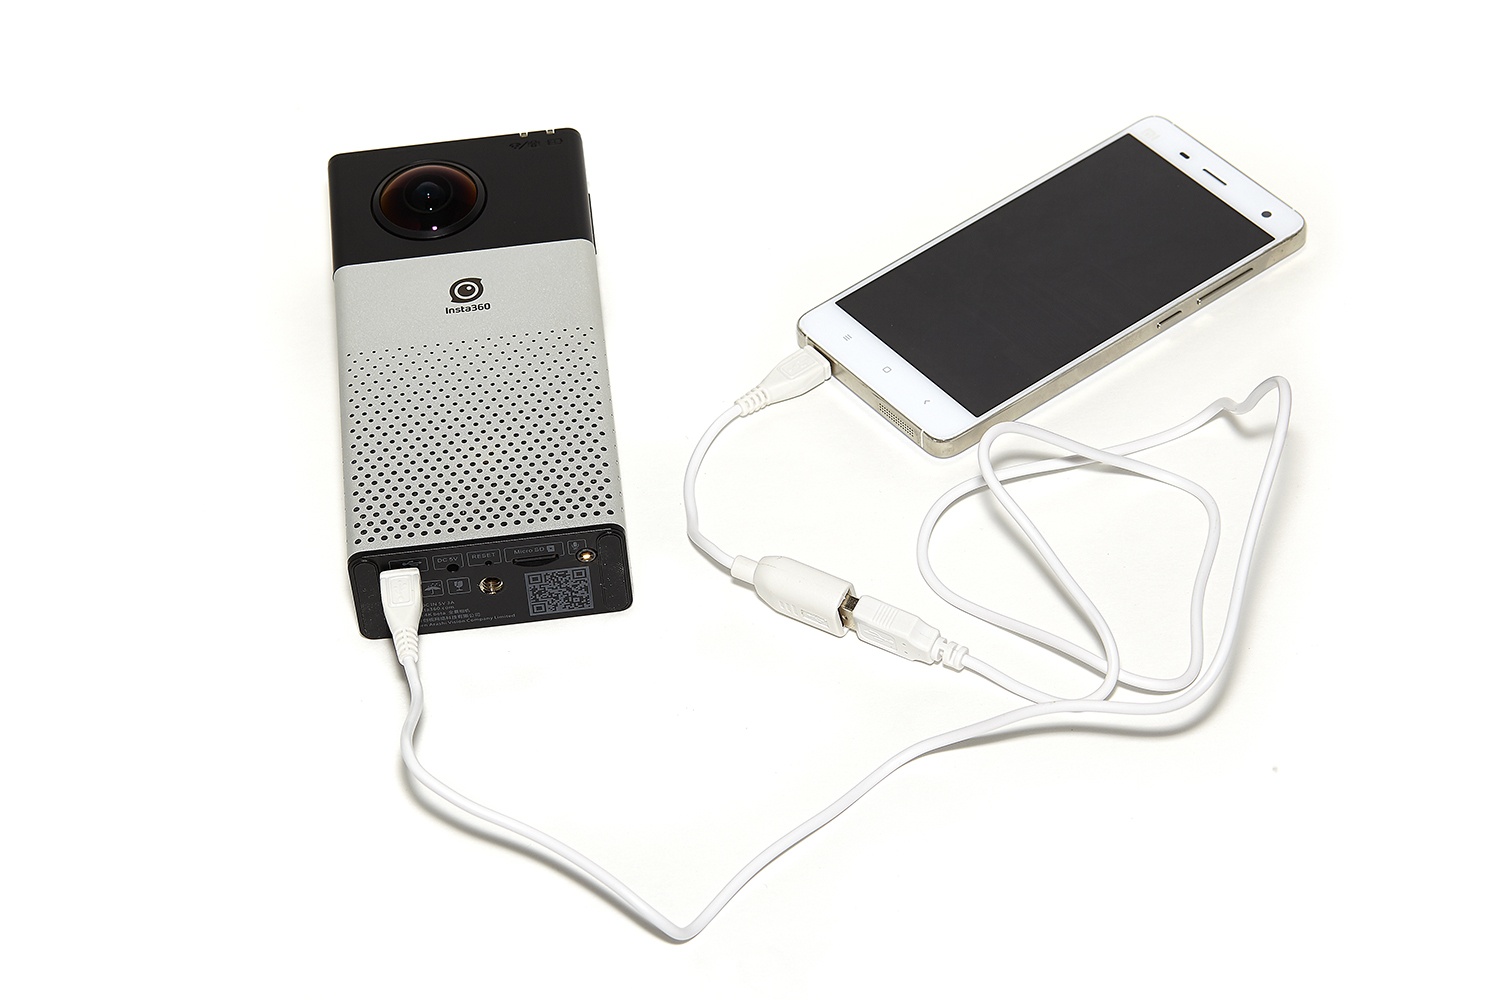
Стикеры для калибровки
Для улучшения качества 360 градусных панорам, перед началом съемки рекомендуется провести калибровку линз. Наклеив стикеры на огранку линз, установите камеру в хорошо освещенном помещении. Далее, в разделе «Setting» выберете опцию «automatic calibration» для запуска автоматической калибровки.
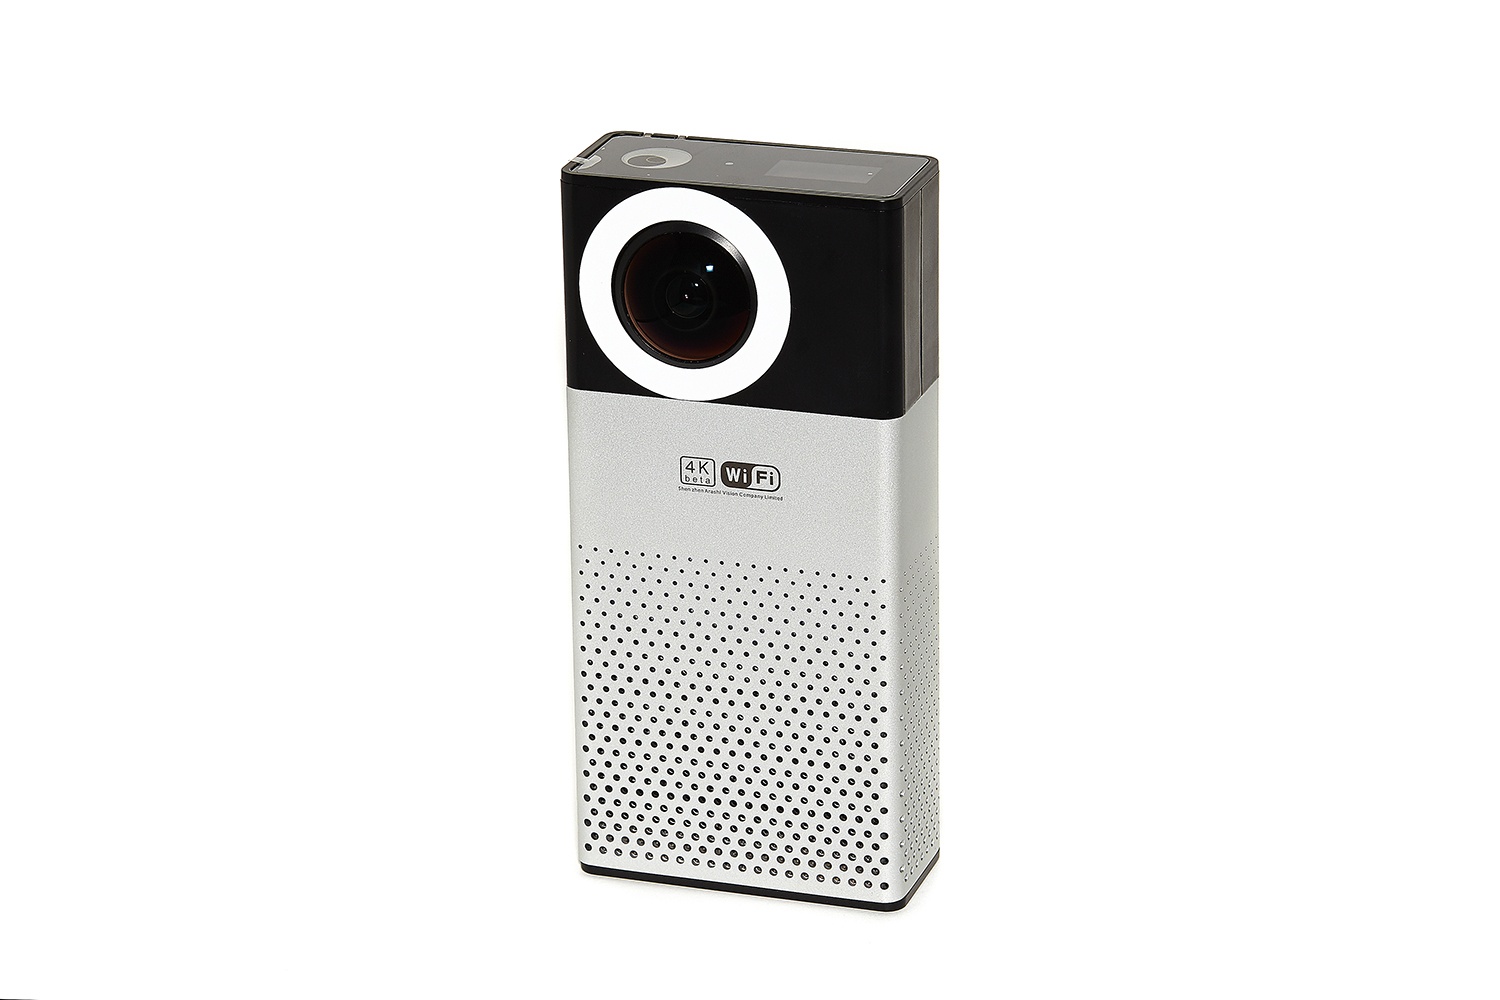
Важно!
- Камера не ударопрочна! Избегайте падений устройства с высоты
- Камера не водонепроницаема. Хранение камеры допускается в условии низкой и средней влажности
- Для протирки линз, пользуйтесь тканью, комплектуемой с камерой. Не прикасайтесь руками к линзам и не ставьте камеру на бок во избежания контакта линз с твердой поверхностью
- Стандартное время заряда камеры от сетевого источника питания — 3 часа
- Хранение камеры допускается в кейсе или неосвещенном помещении
Советы для создания панорам
- Снимая панорамы на открытом воздухе, для получения качественного изображения, рекомендуется устанавливать камеру на неподвижный штатив
- Убедитесь, что во время съемки пространство вокруг достаточно освещено. В противном случае используйте ручные настройки экспозиции.
- Устанавливайте камеру во время съемки максимально вертикально
Подписаться. Без рекламы
Последние события из мира панорамных технологий: анонсы, рейтинги, слухи, аналитика, новости сопутствующих технологий и все что связанно с 360.
Подписывайтесь в Telegram, Вконтакте, Facebook и YouTube!

Представленные на нашем сайте руководства по эксплуатации экшн-камер компании Insta360 помогут Вам разобраться со всеми тонкостями настройки устройств.
Бумажное руководство, даже если имеется, не всегда удобно в использовании, поэтому мы собрали некоторое количество инструкций на нашем сайте. Вы можете абсолютно бесплатно скачать любую из инструкций в формате pdf или воспользоваться просмотром в браузере.
Инструкции по моделям

Вернуться

Insta360