-
Contents
-
Table of Contents
-
Bookmarks
Quick Links
Repair Instructions
Compressed Air Disc Brake
SAF SBS 2220 H0
SAF SBS 1918 H0
XL-SA30000RM-en-DE Rev A • 02.2016
Translation of the original repair instructions
Summary of Contents for SAF SBS 2220 H0
-
Page 1
Repair Instructions Compressed Air Disc Brake SAF SBS 2220 H0 SAF SBS 1918 H0 XL-SA30000RM-en-DE Rev A • 02.2016 Translation of the original repair instructions… -
Page 2
The information contained in this manual neither represents ensured characteristics of the product nor a guarantee. SAF-HOLLAND GmbH reserves the right to make changes in the interest of technical progress without prior notice. -
Page 3: Table Of Contents
Tightening torques ……… 38 4.3.8 Checking the actuation interface ..18 6.2.1 General ……….38 4.3.9 Checking the guide pin bellows ..19 6.2.2 SAF SBS 2220/SBS 1918 H0 …. 38 XL-SA30000RM-en-DE Rev A • 02.2016 • Errors and changes excluded © SAF-HOLLAND…
-
Page 4
SAF special tool for SBS 2220 H0 ..38 8 Fault finding ……….39 General fault finding instructions … 39 Inspection intervals ……. 39 Spare parts and repair kit list …… 40 XL-SA30000RM-en-DE Rev A • 02.2016 • Errors and changes excluded © SAF-HOLLAND… -
Page 5: Introduction
Chapter «9. Components list» lists and shows what spare part components are available for the SAF SBS 2220 / SBS 1918 H0 compressed-air disc brake. XL-SA30000RM-en-DE Rev A • 02.2016 • Errors and changes excluded © SAF-HOLLAND…
-
Page 6: Functional Description
Marking for special user tips and other particularly sure that they are always read and adhered to before useful and important information for efficient work working with the product. and economical use. XL-SA30000RM-en-DE Rev A • 02.2016 • Errors and changes excluded © SAF-HOLLAND…
-
Page 7: Setting The Control System/Valves
Caution! If the venting holes remain closed, the brake cham- ber and disc brake may not operate correctly. XL-SA30000RM-en-DE Rev A • 02.2016 • Errors and changes excluded © SAF-HOLLAND…
-
Page 8: Cleaning
● The vehicle manufacturer’s safety precautions ments covered in this service manual. must be followed when working on the vehicle! ● Local safety precautions must be observed! XL-SA30000RM-en-DE Rev A • 02.2016 • Errors and changes excluded © SAF-HOLLAND…
-
Page 9: Removing The Wheel
«8. Fault finding» on what action to take. 2. Remove the reset shaft protective plug (item A), see ► Fig. 8 Fig. 6 — Securing with the extraction tool 3. Release the parking brake XL-SA30000RM-en-DE Rev A • 02.2016 • Errors and changes excluded © SAF-HOLLAND…
-
Page 10
Torx 55 will suddenly stop rotating. If in doubt, rotate the Torx 55 anti-clockwise 180 degrees and then press the brake pedal again to check. XL-SA30000RM-en-DE Rev A • 02.2016 • Errors and changes excluded © SAF-HOLLAND… -
Page 11: Final Procedure
Fig. 11 — Correctly fitting the protective plug Note: The SAF guarantee of competence shall be made void in the event of improper fitting of the reset shaft protective plug and resulting damage. XL-SA30000RM-en-DE Rev A • 02.2016 • Errors and changes excluded © SAF-HOLLAND…
-
Page 12
Work performed must always be completed with a function test (► chapter 3.3) and a test drive in order to ensure that the brakes are functioning correctly. ► chapter 3.3 XL-SA30000RM-en-DE Rev A • 02.2016 • Errors and changes excluded © SAF-HOLLAND… -
Page 13: Inspection Procedures
– – – – ► chapter 4.3.9 Thrust plate bellows – – – – – ► chapter 4.3.10 Slide function – – – – – ► chapter 4.3.11 XL-SA30000RM-en-DE Rev A • 02.2016 • Errors and changes excluded © SAF-HOLLAND…
-
Page 14: Inspections
Note: Step 1 in this procedure only indicates the brake pad wear of the outer brake pad! For a full examination, complete all steps. XL-SA30000RM-en-DE Rev A • 02.2016 • Errors and changes excluded © SAF-HOLLAND…
-
Page 15: General Brake Pad Clearance Check
5. The normal clearance is between 0.7 mm and 1.1 mm. If the measurement is outside of the nor- mal running condition then continue with chapter „8.2 Inspection intervals“. XL-SA30000RM-en-DE Rev A • 02.2016 • Errors and changes excluded © SAF-HOLLAND…
-
Page 16: Checking The Brake Disc
1. Read and follow „3.2 Initial procedure“ prior to in- specting the protective plugs and protective caps. 2. Remove dirt from surfaces if necessary. 3. Check for signs of excessive heat exposure, dis- colouration, debris, etc. XL-SA30000RM-en-DE Rev A • 02.2016 • Errors and changes excluded © SAF-HOLLAND…
-
Page 17: Checking The Thrust Plate Guide Pins
If the housing seal (B) is removed, it will void the warranty and compromise the disc brake! The nut (D) must not be adjusted, see ► Fig. 21. XL-SA30000RM-en-DE Rev A • 02.2016 • Errors and changes excluded © SAF-HOLLAND…
-
Page 18: Checking The Actuation Interface
► Fig. 23. 3. Release the parking brake, see ► chapter 3.2.1. XL-SA30000RM-en-DE Rev A • 02.2016 • Errors and changes excluded © SAF-HOLLAND…
-
Page 19: Checking The Guide Pin Bellows
For instructions on how to replace the bellows, read and follow chapter „4.3.11 Checking 13. Check that the external seal flange (B) is correctly the slide function“. seated, intact and undamaged. XL-SA30000RM-en-DE Rev A • 02.2016 • Errors and changes excluded © SAF-HOLLAND…
-
Page 20: 4.3.10 Checking The Thrust Plate Bellows
4. If the bellows are damaged then they must be replaced. For instructions on how to replace the bellows, read and follow chapter „5.4 Replacing the adjustment screw bellows“. XL-SA30000RM-en-DE Rev A • 02.2016 • Errors and changes excluded © SAF-HOLLAND…
-
Page 21: 4.3.11 Checking The Slide Function
3. If the movement is restricted in any way, the cause 2. Clean the measuring point and place the dial must be determined, see chapter „8.2 Inspection gauge on the support (arrow). intervals“. XL-SA30000RM-en-DE Rev A • 02.2016 • Errors and changes excluded © SAF-HOLLAND…
-
Page 22
Fig. 35 — Brake calliper bearing The floating bearing consists of a soft composite. If a metallic sound is produced by the floating bearing, it must be replaced. XL-SA30000RM-en-DE Rev A • 02.2016 • Errors and changes excluded © SAF-HOLLAND… -
Page 23: Replacement Procedure
Doing so could damage the inter- nal components of the mechanism! The maxi- SBS 1918 H0 SBS 2220 H0 mum torque is 20 Nm. Fig. 38 — Removing the brake pad components XL-SA30000RM-en-DE Rev A • 02.2016 • Errors and changes excluded © SAF-HOLLAND…
-
Page 24: Installing The Brake Pads
2. Check that the contact surfaces on the carrier, brake calliper and thrust plate are free from dirt and corrosion. Clean the thrust plate as required. XL-SA30000RM-en-DE Rev A • 02.2016 • Errors and changes excluded © SAF-HOLLAND…
-
Page 25: Final Procedure
5.3.1 Initial procedure Read and follow chapter prior to removing the spring brake chambers. Fig. 43 — Mating surfaces of the brake chamber and brake calliper XL-SA30000RM-en-DE Rev A • 02.2016 • Errors and changes excluded © SAF-HOLLAND…
-
Page 26: Installing The Brake Chamber
Take care when using chemicals and/or cleaning Caution! tools (e.g. knives, brushes, etc.). This to avoid damage or displacement of hoses, seals and other Do not mix up the hoses! components. XL-SA30000RM-en-DE Rev A • 02.2016 • Errors and changes excluded © SAF-HOLLAND…
-
Page 27: Final Procedure
Read and follow the chapters below prior to removing the adjustment screw bellows. 1. „3.2 Initial procedure“ 2. „5.2.2 Removing the brake pads“ 3. „5.3.2 Removing the brake chamber“ XL-SA30000RM-en-DE Rev A • 02.2016 • Errors and changes excluded © SAF-HOLLAND…
-
Page 28: Cleaning
Clean the thrust plate, the adjustment screw and the adjustment screw bellows mating surfaces in the brake calliper. Ensure that the components are free from dirt, dust, debris, moisture and corrosion. XL-SA30000RM-en-DE Rev A • 02.2016 • Errors and changes excluded © SAF-HOLLAND…
-
Page 29: Final Procedure
3. „5.3.3 Installing the brake chamber“ 4. „3.3 Function test“, to ensure that the disc brake is working correctly. Fig. 53 — Pressing in the thrust plate bellows 5. „3.4 Final procedure“ XL-SA30000RM-en-DE Rev A • 02.2016 • Errors and changes excluded © SAF-HOLLAND…
-
Page 30: Replacing The Slide Function Assembly
Fig. 57 — Removing the guide pin bolts 3. Using a long drive 14 mm Allen wrench, remove both bolts (B), see ► Fig. 57. The bolts must not to be re-used. XL-SA30000RM-en-DE Rev A • 02.2016 • Errors and changes excluded © SAF-HOLLAND…
-
Page 31
(H), see ► Fig. 61. Fig. 59 — Removing the guide pins 5. By hand, push out the fixed bearing (C) and float- ing bearing (D), see ► Fig. 59. XL-SA30000RM-en-DE Rev A • 02.2016 • Errors and changes excluded © SAF-HOLLAND… -
Page 32: Cleaning
Fig. 63 — Removing the composite bushing 10. The composite bushing (H) on the floating bearing Caution! should be removed by hand. Where indicated, use an SAF special tool only. XL-SA30000RM-en-DE Rev A • 02.2016 • Errors and changes excluded © SAF-HOLLAND…
-
Page 33
► Fig. 66. 3. Once fitted correctly, rotate the threaded tool clockwise, which will pull into position the two bearing bushings (F) and the spacer (G). XL-SA30000RM-en-DE Rev A • 02.2016 • Errors and changes excluded © SAF-HOLLAND… -
Page 34
11. Use a 14 mm Allen wrench to screw in and tighten the bolts (B). The tightening torque is defined in chapter „6.2.2 SAF SBS 2220/SBS 1918 H0“. Fig. 70 — Inserting the guide pins XL-SA30000RM-en-DE Rev A • 02.2016 • Errors and changes excluded © SAF-HOLLAND… -
Page 35: Final Procedure
7. Remove the reset shaft protective plug (A). angle. This may cause damage and impair the 8. Insert SAF special tool P/N 4 434 3885 00 and pull slide function of the brake. out the reset shaft (B) with complete x-ring, see 14.
-
Page 36: Final Procedure
Finally, slide the pad retainer under the brake calliper seal until the spring of the pad retainer engages in the locking position. XL-SA30000RM-en-DE Rev A • 02.2016 • Errors and changes excluded © SAF-HOLLAND…
-
Page 37: Final Procedure
► Fig. 76 The direction of the arrow indicates the direction of rotation of the wheel. Fig. 76 — Direction-oriented installation of SAF SBS 2220/SBS 1918 XL-SA30000RM-en-DE Rev A • 02.2016 • Errors and changes excluded © SAF-HOLLAND…
-
Page 38: Wear Limits
SAF special tool for SBS 2220 H0 The listed tools are part of the SAF Universal Toolbox for disc brakes P/N 3 434 3328 01 or available as an addi- tional set P/N 3 434 3335 00 for the existing SAF Universal Toolbox.
-
Page 39: Fault Finding
First time on commissioning. Check indicator lamp. – – – First time on commissioning. Check pressure pipes through adjustment of system pressure. – – – First time on commissioning. XL-SA30000RM-en-DE Rev A • 02.2016 • Errors and changes excluded © SAF-HOLLAND…
-
Page 40: Spare Parts And Repair Kit List
9 Spare parts and repair kit list Spare parts and repair kit list Spare parts and repair kits for compressed-air disc brake SAF SBS 2220/SBS 1918 H0. Fig. 77 — Spare part illustration XL-SA30000RM-en-DE Rev A • 02.2016 • Errors and changes excluded © SAF-HOLLAND…
-
Page 41
80.3 Bushing cannot be ordered individually 80.4 Bellows cannot be ordered individually 81.2 Guide pin cannot be ordered individually 83.1 Protective cap cannot be ordered individually XL-SA30000RM-en-DE Rev A • 02.2016 • Errors and changes excluded © SAF-HOLLAND… -
Page 42
Emergency hotline +49 6095 301-247 Customer Service +49 6095 301-602 +49 6095 301-259 service@safholland.de www.safholland.com SAF-HOLLAND GmbH Hauptstraße 26 D-63856 Bessenbach…
Fig. 58 — Removing the carrier
4. Remove the carrier from the brake calliper by gen-
tly rocking the carrier to release it from the guide
pins and bellows. Once released, press the guide
pins back enough to be able to lift out the carrier,
see ► Fig. 58.
Caution!
Where indicated, use an SAF special tool only.
D
C
Fig. 59 — Removing the guide pins
5. By hand, push out the fixed bearing (C) and float-
ing bearing (D), see ► Fig. 59.
XL-SA30000RM-en-DE Rev A • 02.2016 • Errors and changes excluded © SAF-HOLLAND
Fig. 60 — Removing the bellows and guide pins
6. Remove both guide pin bellows (E), see ► Fig.
60. If necessary, use a small screwdriver in order
to lever them out. Be careful not to damage the
guide pin bellows sealing surfaces if using a tool to
lever out the bellows!
H
F
G
F
Fig. 61 — Removing the slide bearings and side composite bushing
7. Carefully follow the steps below, ► step 8 and ►
step 9, to remove the two leading bearings (F) and
the spacer (G) as well as the trailing composite
bushing (H), see ► Fig. 61.
5 Replacement procedure
E
31
- Home
- Brands
- SAF
- Other
- SBS 2220 H0
- Repair Instructions
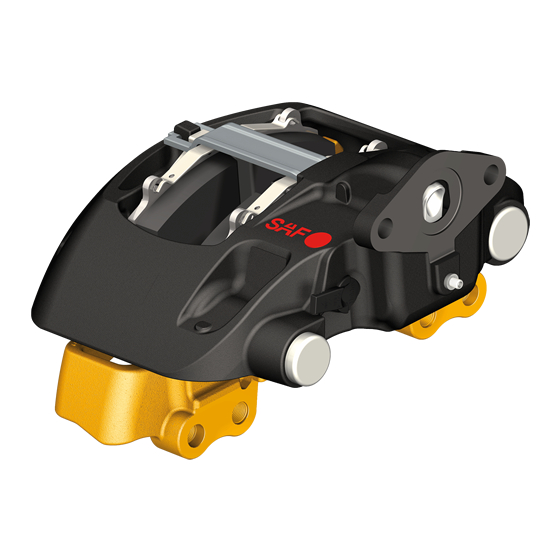
Manual for SAF SBS 2220 H0 Other (42 pages)
Specifications:
|
SAF SBS 2220 H0: Read PDF Manual Online
Accompanying Data:
SAF SBS 2220 H0 Other PDF Repair Instructions (Updated: Monday 7th of November 2022 04:44:44 PM)
Rating: 4.2 (rated by 75 users)
Compatible devices: 50S15, ANA DIGI BIGTIC, HHP-230, SU-Z65 — SERVICE, T.B.APOLLISH, GMS-2Pro, CK11A, aquarius 30.
Recommended Documentation:
SAF SBS 2220 H0: Text of Manual, Repair Instructions
(Ocr-Read Version Summary of Contents, UPD: 07 November 2022)
-
14, 4 Inspection procedures 14 en XL-SA30000RM-en-DE Rev A • 02.2016 • Errors and changes excluded © SAF-HOLLAND 4.3 Inspections 4.3.1 Daily visual inspection Danger! Contact the Service Workshop immediately if there is any sign of reduced performance or if the brakes do not work properly. 1. Check that the brakes function properly before driving and that the…
-
25, 5 Replacement procedure 25 en XL-SA30000RM-en-DE Rev A • 02.2016 • Errors and changes excluded © SAF-HOLLAND A A OK OK B B OK OK OK OK A A B B SBS 2220 H0 SBS 1918 H0 Fig. 41 — Install the brake pad components 6. Fit the new pad springs (A) and the pad re- tainer (B). The pad retainer is secured by rst locating it in the housing end in the brake calliper aperture. The pad springs are…
-
20, 4 Inspection procedures 20 en XL-SA30000RM-en-DE Rev A • 02.2016 • Errors and changes excluded © SAF-HOLLAND 17. Once the inspection is completed satisfactorily, conclude by reading and following chapter „5.3.3 Installing the brake chamber“ and „5.3.4 Final procedure“. 4.3.10 Checking the thrust plate bellows Danger! Wear respiratory protection in order to avoid inh…
-
4, 4 en XL-SA30000RM-en-DE Rev A • 02.2016 • Errors and changes excluded © SAF-HOLLAND 7 Tools …………………………………………………….. 38 7.1 SAF special tool for SBS 2220 H0 …….. 38 8 Fault nding ………………………………………….. 39 8.1 General fault nding instructions ……….. 39 8.2 Inspection intervals .…
-
17, 4 Inspection procedures 17 en XL-SA30000RM-en-DE Rev A • 02.2016 • Errors and changes excluded © SAF-HOLLAND B A Fig. 20 — Two protective plugs 4. The following plugs and protective caps must be in place and intact: ● The reset shaft protective plug (A) and brake calliper seal (B), see ► Fig. 20, ● The housing seal (b) must not be removed. C C D…
-
26, 5 Replacement procedure 26 en XL-SA30000RM-en-DE Rev A • 02.2016 • Errors and changes excluded © SAF-HOLLAND Thoroughly clean around the mating surfaces of the brake chamber (A) and brake calliper (B) to ensure that dirt does not get into the mechanism area when removing the brake chamber, see ► Fig. 43. D A E B C F Fig. 44 — Removing the brake chamber components 3. …
-
36, 5 Replacement procedure 36 en XL-SA30000RM-en-DE Rev A • 02.2016 • Errors and changes excluded © SAF-HOLLAND OK OK OK “CLICK” Fig. 74 — Installing the reset shaft 3. Push the reset shaft into position by hand. No impact or high forces are required as they may damage the reset shaft. The reset shaft will click into its position when fully engaged, see ►…
-
3, 3 en XL-SA30000RM-en-DE Rev A • 02.2016 • Errors and changes excluded © SAF-HOLLAND 1 Introduction ………………………………………….. 5 1.1 General information …………………………. 5 1.1.1 Type plate ……………………………………. 5 1.1.2 Spare parts ………………………………….. 5 1.2 Functional description ……………..…
-
31, 5 Replacement procedure 31 en XL-SA30000RM-en-DE Rev A • 02.2016 • Errors and changes excluded © SAF-HOLLAND Fig. 58 — Removing the carrier 4. Remove the carrier from the brake calliper by gen- tly rocking the carrier to release it from the guide pins and bellows. Once released, press the guide pins back enough to be able to lift out the carrier, see ► …
-
32, 5 Replacement procedure 32 en XL-SA30000RM-en-DE Rev A • 02.2016 • Errors and changes excluded © SAF-HOLLAND Fig. 62 — Remove the trailing slide bearing 8. To remove both bearings (F) and the spacer (G) on the leading side, assemble in sequence SAF special tools P/N 4 434 3884 00, P/N 4 434 3837, P/N 4 434 3848 0, P/N 4 434 3841 0; P/N 4 434 3890 0 and P/N 4 434…
-
42, SAF-HOLLAND GmbH Hauptstraße 26 D-63856 Bessenbach Emergency hotline +49 6095 301-247 Customer Service +49 6095 301-602 Fax +49 6095 301-259 [email protected] www.safholland.com XL-SA30000RM-en-DE Rev A • 02.2016 • Errors and changes excluded © SAF-HOLLAND
…
DOC-d98d706a:
SAF SBS 2220 H0: Recommended Instructions
DPX-8030MD, 2004 Forester, EOB5751BA, 413742-001, MG6250


-
Effective March 1, 2006INTERCOM PRODUCTS 5|INTERCOM DEALER PRICE LISTProject ________________________________________ City ________________________________ State __________ Bid Date __________c Airport c Correctional c Educational c Parking Garage c Retirement Center c Security c OtherSYSTEM COMPON …
AD-1210P 1
-
P/N 07.04.431.00 © 2020 Hatco CorporationHeated Glass ShelvesPlaques chauffantes en vitrocéramiqueHBG and HBGB Series/SérieInstallation and Operating ManualManuel d’installation et d’utilisationhatcocorp.comRegister Online!(see page 2)S’inscrire en ligne!(voir page 15)Do not operate this equipment unless you have read and understood the contents of this manua …
HBG Series 28
-
ENGDEUFRAESPITARUSSWENEDPOLGarantie-UrkundePassivlautsprecher mit WandmontageBEDIENUNGSANLEITUNGOPERATING INSTRUCTIONS INSTRUCTIONS D‘UTILISATIONINSTRUCCIONES DE USOISTRUZIONI D’USOBRUKSANVISNINGGEBRUIKSAANWIJZINGINSTRUKCJA OBSŁUGI …
PASSIV WALL 20
-
IR54 Information andInstallation Guide Infrared Connection ModuleKnoll Systems dealers to be free from defects in materials and workmanship.The warranty extends for two full years from the date of purchase by theoriginal consumer. Any products returned within the warranty period will berepaired or replaced at Knoll Systems option, …
IR54 1
-
1Philips Flat TV software upgrade withUSB portable memoryPhilips offers software upgrade capability for your TV using USB portable memory.After you have completed a software upgrade, your TV will typically perform better.What improvements are made depends on the upgrade software you are using as well as the softwareyour TV contained befo re the upgrade.You can execute the software upgrade pro c …
32HF7543-37B 4
-
VS 990User manualManuel d’utilisationBedienungsanleitungManuale di utilizzazioneManual de utilizaciónManual de utilizaçãoGebruiksaanwijzingBruksanvisningBrukerhåndbokNávod k použitíHasználati kézikönyvInstrukcja obsługiPyководство по пpименениюEγχειρίδιο χρήσησ 00_covVS990 15/11/05 17:56 Page 1 (PANTONE 405 CV film) …
VS 990 64
-
FRANCAIS — COURS DE CONDUITE « Pouet Pouet » Livre des colis comme Oui-Oui derrière le volant de ton taxi jaune et rouge ! Ton volant Oui-Oui reste toujours allumé lorsque des piles sont insérées. Appuie sur n’importe quelle touche pour commencer à jouer. 1 – Le démarreur : tourne la clé de contact dans le sens des aiguilles d’une montre pour démarrer le moteur. 2 – L’a …
IT600NO 1
-
300W iPod/iPhone 2.1 Soundbar Docking Systemwith Aux-In and Video Outputwww.pyleaudio.comiPhone Docking Systemwww.pyleaudio.comIMPORTANT: Pack carefully in original package if possible.We are notresponsible for damage incurred in returning items for repair, A letterstating your exact street addres,daytime phone number,and the problemyou are experiencing should be included. You must also en …
PSB90I 6
-
MODEL G05333HP DRY SPRAY BOOTHOWNER’S MANUALCOPYRIGHT © DECEMBER, 2005 BY GRIZZLY INDUSTRIAL, INC. REVISED APRIL, 2007 (BL).WARNING: NO PORTION OF THIS MANUAL MAY BE REPRODUCED IN ANY SHAPE OR FORM WITHOUT THE WRITTEN APPROVAL OF GRIZZLY INDUSTRIAL, INC. #BL5685 PRINTED IN TAIWAN …
G0533 32
-
Article MicrowaveArticle-Nr. MW 7809 / EAN-No. 4008146780905Dimensions 453 mm (W)263 mm (H)313 mm (D)Description • 700 W• interior capacity 17 l• heat insulated housing, coated• interior coated• 6 different power settings,<br />defrost inclusive• 30 minute timer with acoustic signal• removable turnable, dia. approx. 24.5 cm• size (W) 455 x (D) 315 x (H) 262 mmUVP* …
MIKROWELLE MW 7809 WEIß 17 L 1
Additional Information:
Popular Right Now:
Operating Impressions, Questions and Answers:
Контактная информация
+7 (499) 450-83-23г. Москва МКАД 32 км, автогипермаркет «ТРАКТ», п.2.5 (2 этаж)
+7 (499) 490-09-13г. Москва МКАД 31 км, комплекс «АВТО-31», п. А-2-9/3
+7 (499) 322-43-11М.О., д. Грибки, Дмитровское шоссе, 48
+7 (499) 302-22-80 М.О., г. Химки, кв-л. «Кирилловка», вл.2, стр.1, п.26
+7 (499) 450-85-95г. Подольск, ТК «Львовский», ул. Московская, 52, п.Г18
+7 (499) 110-71-51г. Балашиха, ш. Энтузиастов, 1Алит6В, ТЦ «М7», п.10 (1этаж)
+7 (495) 477-58-70г. Одинцово, ул. Внуковская, 11, ТК «АКОС», п. 19/7
+7 (812) 565-37-10г. Санкт-Петербург, п. Шушары, ул. Поселковая, 12Д
+7 (812) 565-37-40г. Санкт-Петербург, п. Бугры, ул. Шоссейная, 1Д
+7 (863) 322-22-51г. Ростов-на-Дону, ул.Доватора, 144/30
+7 (863) 322-22-05г. Ростов-на-Дону, ул.Доватора, 148
+7 (863) 322-33-72г. Аксай, ул. Западная, 6А
+7 (861) 201-86-89 г. Краснодар, ул. Уральская, 126/4, п.9-10
zakaz@truckdrive.ru Отдел по работе с интернет-заказами
sales@truckdrive.ru Отдел розничных продаж
opt@truckdrive.ru Отдел оптовых продаж
zakupki@truckdrive.ru Отдел закупок