- Manuals
- Brands
- Samsung Manuals
- PBX
- NX-308
- Programming & installation manual
-
Contents
-
Table of Contents
-
Bookmarks
Quick Links
Related Manuals for Samsung NX-308
Summary of Contents for Samsung NX-308
-
Page 2
Samsung Telecoms reserves the right without prior notice to revise information in this publication for any reason. Samsung Telecoms also reserves the right without prior notice to make changes in design or components of equipment as engineering and manufacturing may warrant. -
Page 3: Table Of Contents
Contents Introduction General Description System Overview Specifications Installation Installation Requirements Site planning Electrical specifications Installation Procedure Mounting the KSU Grounding the KSU Connecting keysets Connecting single line telephones Internal music source External music source connections External system paging connections Connecting door phone and lock control Connecting PSTN lines Power Failure Transfer AC power connection…
-
Page 4
This page is intentionally blank… -
Page 5
I n s t r o d u c t i o n… -
Page 6
This page is intentionally blank… -
Page 7: General Description
GENERAL DESCRIPTION…
-
Page 8: System Overview
System Overview System Operation NX-308 system is a stored-program-controlled electronic key/hybrid telephone system ready to use as soon as it is turned on. A powerful 8031 microprocessor operating at 11.059 MHz digitally controls all speech paths and system functions. The operating program with default memory is stored in non- volatile ROM, 27512.
-
Page 9
Two types of telephone sets can be connected to the NX-308 system: proprietary electronic keysets and conventional single line telephone sets. The NX-308 24 Button Display keyset has the following standard features plus a large, easy to read, one-line, 16-character liquid crystal display. -
Page 10
Convenient pull-out tray under keyset for directory information. All Samsung handsets are fully hearing aid compatible. Conventional Telephones Any industry-approved single line telephone using one pair (two wire) tip and ring circuitry may be connected to a single line station port in the system. The ringer equivalency of any such phone must… -
Page 11: Specifications
Specifications System Capacity 3 C.O./PBX Lines (Loop Start) 8 Stations: — up to eight keysets — up to six single line telephones 3 Internal Speech Paths 1 Audio Channel for System Tones 1 Audio Channel for Music (Internal Melody or External Source) 1 Door Phone with Lock Release Contact Automatic Power Failure Transfer Circuits, 2 Telephone Lines 1 External Page…
-
Page 12
Audible and Visual Indications LED Indications L E D Status Line Status C.O. line red Idle (green/red) Flashing green every 0.5s On hold your station Flashing red every 0.5s On hold other station Flashing green every 0.1s Incoming call Steady red In use other station Steady green In use your station… -
Page 13: Installation
INSTALLATION…
-
Page 14: Installation Requirements
Installation Requirements Site Planning Select a KSU location that has enough space for easy installation, is well ventilated and has adequate lighting. Select a KSU location to minimise station cable lengths. Maximum cable length is 400 metres using AWG 24 cable for telephones. …
-
Page 15
Figure 1 — KSU Layout… -
Page 16: Installation Procedure
Installation Procedure Mounting the KSU Select a wall that is strong enough to support the weight of the KSU (maximum 4.5 kg). Select hardware that will support the system when it is mounted. It is recommended that the KSU be mounted on a plywood backboard no less than 1.5 mm thick.
-
Page 17
Figure 2 — KSU Dimensions (mm) -
Page 18
Connection Table The NX-308 system is equipped with a standard Amphenol connector, and its connections are shown in the following table. All the necessary Station connections may be accomplished through this connector. The PSTN lines are connected to a customer-supplied LJU via the line cords supplied with the system. -
Page 19: Connecting Keysets
Connecting Keysets Four wires (two pair) twisted cable with a double-sided modular plug and a terminal block are recommended for a keyset connection to the KSU. One end of the terminal block is connected to the MDF via a 50-pin cable, and the other end of the terminal block is connected to a keyset via a double- sided modular plug line (two pair).
-
Page 20: Pin 2
Figure 4 — Base Board Switch Locations Cabling terminal block Pin 1 reserved Pin 2 Tip or Ring Pin 3…
-
Page 21: Internal Music Source
These are marked on the board. The switch location is shown in Figure 4. Internal Music Source NX-308 system is equipped with a melody chip containing six melodies which run continuously: “La Reine Deo Saba” “For Elise” “Santa Lucia”…
-
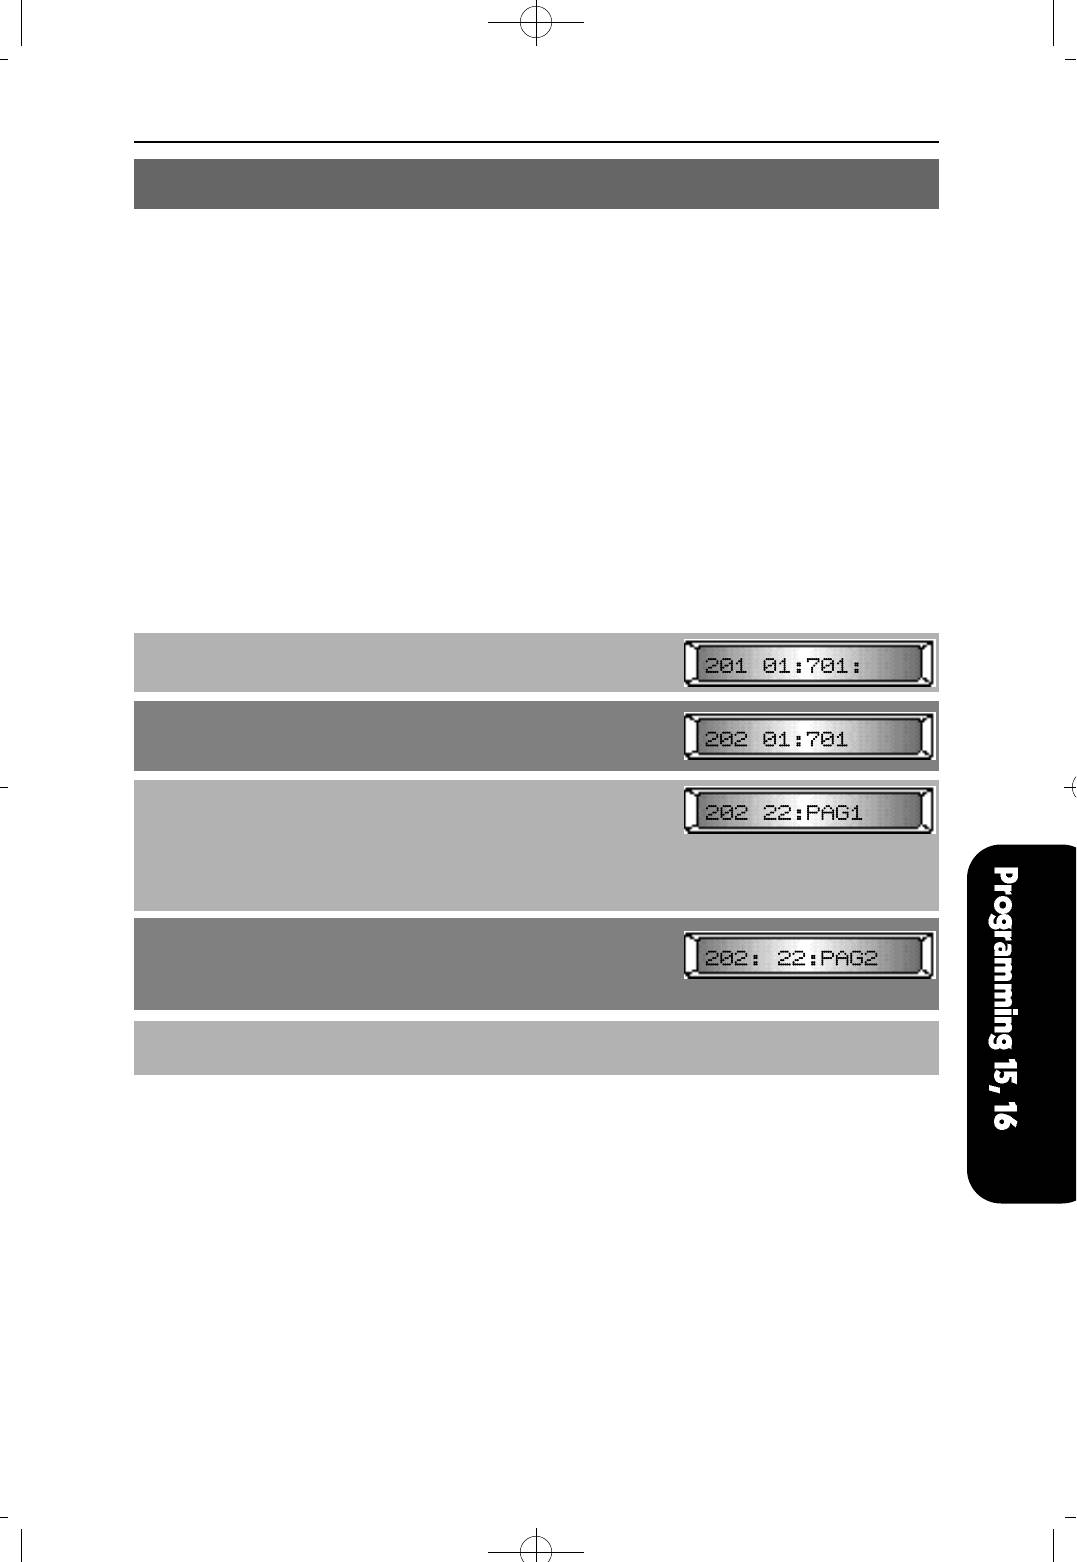
Page 22: External System Paging Connections
The system has two music sources which may be selected by the related shunt pin, J37, on the base board (Figure 4). Near shunt pin J37 are two identifying marks INT and EXT: INT position Selection for Internal Music Source EXT position Selection for External Music Source.
-
Page 23: Connecting Pstn Lines
Power Failure Transfer NX-308 system transfers two C.O. lines to the related single line telephones automatically during AC power failure. The first trunk line and the second trunk line are transferred to the 7th station and 8th station respectively only when the stations are assigned to single line telephones.
-
Page 24: Connecting System Back-Up Battery
The system operates with 220 VAC and is equipped with two fuses: AC Fuse 1 AMP, 250 VAC. slow acting Battery Fuse 3 AMP, 250 VAC, slow acting If failure occurs, replace only with same type and rating of fuse. Connecting System Back-up Battery NX — 308 system will continue full operation during AC power failure (or “brown-outs”) when a 24V battery supply is connected.
-
Page 25
Before switching the power on, ensure that: The KSU is reassembled correctly. All cables are correctly connected and that twisted pair cables are used. The system is grounded adequately. AC power is settled in a valid range. … -
Page 26
This page is intentionally blank… -
Page 27: System Programming
SYSTEM PROGRAMMING Levels of Programming…
-
Page 28: User (Customer)
This section describes technician- and user-level programming. Station programming is described in the NX-308 Keyset User Guide. Features operate when the system is turned on because they are factory programmed with default data. You may use the features as factory programmed (default) or change them.
-
Page 29
External call forwarding Date and time Assign headset operation Technician Programming The technician-level password allows access to all programming procedures including station and customer programs. Number Function Enable/disable technician programming Change technician password Software version display System initialisation Night mode dialling classes Class of service C.O. -
Page 30: Programming Procedures
LCR Class Of Service Assign PIN Code (Authorisation Code) LCR Inter Digit Time Dial Delay Time Network Code PIN Code Call Cost Code Dial Start Time Programming Procedures # 04 Enable/Disable User Programming Sets the system into programming enable or disable mode for user-level access. (See the list of programs above.) Press …
-
Page 31
# 10 Auto Answer Selection See NX-308 Keyset User Guide. # 11 Station Call Forwarding See NX-308 Keyset User Guide. # 17 Ringing Line Preference See NX-308 Keyset User Guide. # 20 Enable/Disable Technician Programming Sets the system into programming enable or disable mode for technician-level access. This enables you to access user programs also. -
Page 32
Enter new password. Press key. (Press HOLD key to clear entry and enter new data.) Note: A 4-digit password is composed of any of 0-9 on the dial keys and 1-6 on the DSS keys. DSS keys 1-6 represent A, B, C, D, E and F, respectively. Loss of RAM memory will reset the password to default value 1234. -
Page 33
Dial 26. NIGHT TOLL is displayed and then the current data indicating class of dialling. Enter technician-level password. Enter digit. 0 = Same as day mode operation 1 = All stations class B 2 = All stations class C 3 = All stations class D 4 = All stations class E Press … -
Page 34
Display shows extension number followed by three digits indicating allow or deny status for each line.* Enter 0 or 1 for each line. One digit must be entered for each of the three C.O. lines: 0 = Deny 1 = Allow Press … -
Page 35
# 34 Allow Codes for Class of Service B Defines what leading digits in a dialling plan are to be allowed. There are 10 line entries (0-9) which define up to 12 digits per entry. Press key. PROGRAMMING is displayed. Dial 34. -
Page 36
(Press HOLD key to clear entry and enter new data.) Toll Restriction Examples NX-308 programming provides for all eight stations to be assigned an individual class of dialling. There are five classes (see program # 30). Because class A has no restrictions and class E cannot make outside calls, these require no additional programming. -
Page 37
Entry 3=976 Example 2 : Class of service C phones need to dial 1 + A/C + 7 digits, 1-800, and local calls. They are to be denied 1-900, 976, 1-A/C-976, 0 + calls, and 411 calls. You would program this as follows: # 35 Deny Class C # 36 Allow Class C Entry 0=0… -
Page 38
Enter new data for all three lines. 0 = Not in group 1 = In group Press # key. (*Default: 000) Note: A line cannot be in more than one group. # 41 C.O. Line Incoming/Outgoing Assignment Assigns the C.O. lines as incoming only, or incoming and outgoing. Press # key. -
Page 39
PROGRAMMING is displayed. Dial 44. Display shows C.O. or PBX TRUNK followed by three digits, each of which indicates current status of each line.* Enter 0 or 1 for all three outside lines. 0 = PBX line 1 = C.O. line Press # key. -
Page 40
Press # key. PROGRAMMING is displayed. Dial 47. DIAL 9 GROUP is momentarily displayed followed by three digits representing the status of all three C.O. lines.* Enter new data for all three lines. 0 = Not in group 1 = In group Press # key. -
Page 41: Station
Press # key. PROGRAMMING is displayed. Dial 51. PBX FLASH TIME is displayed, then ‘xxxx MSEC’ is displayed.* Enter four digits of new flash time. Press # key. (*The PBX line flash time (xxxx) ranges from 0 ms to 5000 ms (in 100 ms steps). If the entered data is over 5000 ms, 5000 ms is entered into memory.
-
Page 42
Defines the duration of the ringing signal when using alarm feature. Press # key. PROGRAMMING is displayed. Dial 54. Display shows ALARM RING TIME and then preset alarm time duration is displayed.* Enter three digits of new alarm ring time. Press # key. -
Page 43
Display shows CO/CO CALL TIME and three digits of timer length.* Enter three digits of time duration. Press # key. (* Default: 000 minutes. If set at 000, the system requires a DISCONNECT CLEAR signal from the line provider to clear the lines after a call is terminated. It is recommended that an 800 msec clear signal is provided.) Note: Recalls to operator will be automatically disconnected if not answered before this timer expires. -
Page 44
An incoming line will ring the first non-busy station in the order defined in program # 61 for night mode and program # 62 for day mode. If all stations are busy, off-hook ringing is sent to the first station programmed for the line ringing group (refer to programs # 61 and # 62). Conditional ring mode: An incoming line will ring all stations that are idle for that line ringing group. -
Page 45
Defines which stations will ring when the door phone button is pushed. Press # key. PROGRAMMING is displayed. Dial 63. Display shows DOOR RING ASSIGN and current data is displayed.* Press DSS button of stations to receive door phone ringing. (Maximum of eight stations). Press # key. -
Page 46
Used to enable LCR. When LCR is enabled, a valid trunk group access code (9 or 80) must be entered in MMC47 and 40. The NX-308’s LCR system provides a means to automatically route calls over specific trunk groups according to the digits dialled. -
Page 47
MMC on a trunk by trunk base. NX-308 provides a “fake” dial tone to the station user as a signal to begin dialling. The digits are dialled but are not immediately sent to the C.O.; they are stored in a buffer for analysis by LCR Digit Table. -
Page 48
0345 01426 01459 0800 0941 Related items : MMC 902 LCR Route Table MMC902 LCR Route Table LCR Route Table is responsible for selecting a specific trunk group in the completion of an outward bound call. This table works in conjunction with LCR Digit Table and LCR Modify Digit Table. After the user dials a valid digit string, the system uses LCR Route Table to select a specific predetermined trunk group. -
Page 49
Route Trunk Group Modify Table Index Related items : MMC904 LCR Class of Service MMC901 LCR Digit Table MMC903 LCR Modify Digit Table MMC903 LCR Modify Digit Table This program entry is also referred to as Outdial Rules. The system has the ability to add or delete a digit string or single digit. -
Page 50
Assigns the LCR class of service allowed for a station on a per-station basis. There are eight classes which may be assigned. Action Display Press CONF key and 904 LCR CLASS Press MSG key to select station 21:CLASS 0 : Dial 0-7 to select class type 21:CLASS 0 :6 Press MSG key to continue… -
Page 51
Enter new time (e.g. six (06) seconds) 04SEC:06 Press CONF key to store and exit. Default data : 04 MMC907 Dial Delay Time This timer is used to select the waiting time after secondary network access code 131. This delay time is used only when the call is routed to 131 network. -
Page 52
Press CONF key and 909 PIN CODE: Press MSG key to make selection Enter the desired access code via dial keypad 0: 123 (up to 10 digits) Press CONF key to store and exit. (If you want to delete any item, press HOLD key in any state.) Default date : None Related items:… -
Page 53: Mmc Index
MMC Index Number Function Page Enable/disable user programming Change user password Enable/disable technician programming Change technician password Software version display System initialisation Night mode dialling classes Class of service C.O. line access Internal paging Deny codes class of service “B” Allow codes class of service “B”…
NX-SERIES Technical Manual NX-308 NX-820 NX-1232
PUBLICATION INFORMATION SAMSUNG ELECTRONICS Co. reserves the right to revise information in this publication for any reason without prior notice. SAMSUNG ELECTRONICS Co. also reserves the right to make changes in equipment design or components as engineering and manufacturing may warrant without
NX-SERIES NX-308 NX-820 NX-1232 ELECTRONIC KEY/HYBRID TELEPHONE SYSTEM TECHNICAL MANUAL INCLUDES : GENERAL DESCRIPTION SECTION INSTALLATION SECTION FEATURE SECTION PROGRAMMING SECTION APPENDIX SECTION BACK-UP DATA SHEETS
GENERAL DESCRIPTION SECTION
NX-SERIES HYBRID KEY SYSTEM GENERAL DESCRIPTION SECTION TABLE OF CONTENTS GENERAL DESCRIPTION NX-SERIES GENERAL SYSTEM DIAGRAM . . . . . . . . . . . . . . . . . 1-1 1. SYSTEM OVERVIEW . . . . . . . . . . . . . . . . . . . . . . . . . . . . . . . . 1-2 1.1 NX-308 SYSTEM . . . . . . . . . . . . . . .
NX-SERIES HYBRID KEY SYSTEM GENERAL DESCRIPTION SECTION 5.3 ENVIRONMENTAL LIMITATIONS . . . . . . . . . . . . . . . . . . . . . . . 1-8 5.4 CABLE REQUIREMENTS . . . . . . . . . . . . . . . . . . . . . . . . . . . . . 1-8 5.5 SYSTEM TONES AND RINGS . . . . . . . . . . . . . . . . . . . . . . . . .
NX-SERIES HYBRID KEY SYSTEM GENERAL DESCRIPTION SECTION NX-SERIES GENERAL SYSTEM DIAGRAM 1-1
NX-SERIES HYBRID KEY SYSTEM GENERAL DESCRIPTION SECTION 1. SYSTEM OVERVIEW The NX-series hybrid key system accomodates three kinds of Key Station: NX-308, NX-820 and NX-1232. 1.1 NX-308 SYSTEM The NX-308, with a maximum capacity of three telephone C.O. lines and eight stations, is an analog
NX-SERIES HYBRID KEY SYSTEM GENERAL DESCRIPTION SECTION 2. NX-SERIES LAYOUT 2.1 TOP VIEW “POWER” LED “MONITOR” LED “IDLE” LCD 2.2 SIDE VIEW MDF Cable Path External Battery Connector Fuse Holder Power Switch Power Cable 1-3
NX-SERIES HYBRID KEY SYSTEM GENERAL DESCRIPTION SECTION 3. SYSTEM CONFIGURATION 3.1 NX-308 SYSTEM The basic KSU (Key Service Unit) comes equipped to operate three telephone lines and eight stations. Station #1 is assigned to be used with a keyset and stations #2 through #8 are assigned as keysets
NX-SERIES HYBRID KEY SYSTEM GENERAL DESCRIPTION SECTION 3.3 NX-1232 SYSTEM The basic KSU (Key Service Unit) comes equipped to operate eight telephone lines and sixteen stations. Stations #1 through #8 are assigned to be used with keysets or single line telephones, and stations #9 through #16 are
NX-SERIES HYBRID KEY SYSTEM GENERAL DESCRIPTION SECTION 4. HARDWARE DESCRIPTION 4.1 KSU (Key Service Unit) The KSU of the NX-series is a single cabinet, wall mounted, metal cased unit, containing the following: Power Supply Processing, switching, and customer memory for all ports. Internal music
NX-SERIES HYBRID KEY SYSTEM GENERAL DESCRIPTION SECTION 4.3 STATION EQUIPMENT Keyset with 24 buttons (NX-24E, NX-24B) Built-in speakerphone 24 programmable soft keys (12 with tri-colored LEDs) and 10 fixed-function keys UP/DOWN buttons for digital control of speaker, handset, and ringer volumes.
NX-SERIES HYBRID KEY SYSTEM GENERAL DESCRIPTION SECTION 5. SPECIFICATIONS 5.1 ELECTRICAL SPECIFICATIONS AC INPUT POWER CONSUMPTION MAX CURRENT DRAW AT 220 VAC RING GENERATOR BATTERY BACKUP SUPPLY 110/220 VAC, 50/60 Hz NX-308 NX-820 NX-1232 NX-308 NX-820 NX-1232 AC 80 Vrms, 25 Hz 50 WATTS MAX 55
NX-SERIES HYBRID KEY SYSTEM GENERAL DESCRIPTION SECTION 5.5 SYSTEM TONES AND RINGS DIAL TONE : A steady tone that indicates dialing may begin CONTINUOUS RING-BACK TONE : Indicates the station dialed is ringing. 400 ON / 200 OFF/ 400 ON / 3000 OFF BUSY TONE: Indicates the station dialed is busy. 500
NX-SERIES HYBRID KEY SYSTEM GENERAL DESCRIPTION SECTION STATION RING: Indicates an intercom call is ringing on your station. 400 ON / 200 OFF / 400 ON / 3000 OFF DOORPHONE RING: Indicates a doorphone call is ringing on your station. 500 ON / 500 OFF / 500 ON / 500 OFF ALARM RING: Indicates an alarm
INSTALLATION SECTION
NX-SERIES HYBRID KEY SYSTEM INSTALLATION SECTION 4 MDF CABLING . . . . . . . . . . . . . . . . . . . . . . . . . . . . . . . . . . . 2-9 4.1 Clip type MDF Cabling . . . . . . . . . . . . . . . . . . . . . . . . . . . . . . . 2-19 4.2 Using to Cable tie . . . . . . . . . . . . . . . . . . . . . . .
NX-SERIES HYBRID KEY SYSTEM INSTALLATION SECTION FIGURE 2-1 MOUNTING THE KSU 2.3 AC Power Selection ( See FIGURE 2-2 ) Before pluging in the KSU, set the AC power selection connector. The Power board of each system has three power connectors. One is for 0V (Ground) and the rest are for 110V/220V
NX-SERIES HYBRID KEY SYSTEM INSTALLATION SECTION 3. INSTALLATION EXPANSION CARDS & OPTION BOARDS Unpack and inspect each card before installing. Check for signs of physical damage. If any damage is detected, do not attempt to install. 3.1 NX-2TRK Card ( See FIGURE 3 — 1 ) Insert the NX-2TRK Card
NX-SERIES HYBRID KEY SYSTEM INSTALLATION SECTION 3.8 NX-SMDR/R-MMC Board ( See FIGURE 3 — 7 ) Install the NX-SMDR/R-MMC board on the bottom of the base board. 3.9 NX-DPH/PAGING Board ( See FIGURE 3 — 8 ) Install the NX-DPH/PAGING board on the middle of the base board. FIGURE 3-7 NX-SMDR/R-MMC BOARD
NX-SERIES HYBRID KEY SYSTEM INSTALLATION SECTION 3.13.2 NX-820 SYSTEM ( See FIGURE 3-13) NX-820 system can have up to three expansion cards under the base board. And NX-SMDR/R-MMC, NX-DPH/PAGING, NX-MPD and NX-PRS option boards are installed on the surface of Base board. NX-MPD or NX-PRS Board.
NX-SERIES HYBRID KEY SYSTEM INSTALLATION SECTION 50 PIN CHAMP P1 CONNECTOR PIN NO. 1 26 2 27 3 28 4 29 5 30 6 31 7 32 8 33 9 34 10 35 11 36 12 37 13 38 14 39 15 40 16 41 17 42 18 43 19 44 20 45 21 46 22 47 23 48 24 49 25 50 COLOR BL-W W-BL O-W W-O GN-W W-GN BR-W W-BR S-W W-S BL-R R-BL O-R R-O GR-R
NX-SERIES HYBRID KEY SYSTEM INSTALLATION SECTION 50 PIN CHAMP P1 CONNECTOR PIN NO. 1 26 2 27 3 28 4 29 5 30 6 31 7 32 8 33 9 34 10 35 11 36 12 37 13 38 14 39 15 40 16 41 17 42 18 43 19 44 20 45 21 46 22 47 23 48 24 49 25 50 COLOR MDFB-C BL-W W-BL O-W W-O GN-W W-GN BR-W W-BR S-W W-S BL-R R-BL O-R
NX-SERIES HYBRID KEY SYSTEM INSTALLATION SECTION 50 PIN CHAMP P1 CONNECTOR PIN NO. COLOR 1 26 2 27 3 28 4 29 5 30 6 31 7 32 8 33 9 34 10 35 11 36 12 37 13 38 14 39 15 40 16 41 17 42 18 43 19 44 20 45 21 46 22 47 23 48 24 49 25 50 BL-W W-BL O-W W-O GN-W W-GN BR-W W-BR S-W W-S BL-R R-BL O-R R-O GR-R
NX-SERIES HYBRID KEY SYSTEM INSTALLATION SECTION 50 PIN CHAMP 2 TRK CONNECTOR PIN NO. COLOR 1 26 2 27 3 28 4 29 5 30 6 31 7 32 8 33 9 34 10 35 11 36 12 37 13 38 14 39 15 40 16 41 17 42 18 43 19 44 20 45 21 46 22 47 23 48 24 49 25 50 BL-W W-BL O-W W-O GN-W W-GN BR-W W-BR S-W W-S BL-R R-BL O-R R-O
NX-SERIES HYBRID KEY SYSTEM INSTALLATION SECTION MDF Pin No. Champ Pin No. MDF Pin No. Champ Pin No. 1 26 21 36 2 1 22 11 3 27 23 37 4 2 24 12 5 28 25 38 6 3 26 13 7 29 27 39 8 4 28 14 9 30 29 40 10 5 30 15 11 31 31 41 12 6 32 16 13 32 33 42 14 7 34 17 15 33 35 43 16 8 36 18 17 34 37 44 18 9 38 19
NX-SERIES HYBRID KEY SYSTEM INSTALLATION SECTION 5. CONNECTING TELEPHONE LINES 5.1 SAFETY PRECAUTIONS To limit the risk of personal injury, always follow these precautions before connecting to TELCO circuits: Never install telephone wiring during a lightning storm. Never install telephone jacks in
NX-SERIES HYBRID KEY SYSTEM INSTALLATION SECTION 6.2.1 NX-308 — Related Switch Location (FIGURE 6-3) To connect the single line telephone to the any station from #2 to #8 of basic KSU, the related DIP switches should be set as follows. Station No. STN 2 STN 3 STN 4 STN 5 STN 6 STN 7 STN 8 Releated
NX-SERIES HYBRID KEY SYSTEM INSTALLATION SECTION Music Source Selection shunt pin PFT selection switch Hybrid station selection switches Memory Back-up enable shunt pin Hybrid Station Configuration KTS : SLT : FIGURE 6-3 NX-308 KSU SWITCH LOCATIONS 2 — 24
NX-SERIES HYBRID KEY SYSTEM INSTALLATION SECTION Music Source Selection shunt pin Memory Back-up enable shunt pin Hybrid station selection switches Hybrid Station Configuration KTS : SLT : FIGURE 6-5 NX-1232 KSU SWITCH LOCATIONS 2 — 26
NX-SERIES HYBRID KEY SYSTEM INSTALLATION SECTION 7.3 DOORPHONE AND DOOR LOCK RELEASE (See FIGURE 7-3) System users have the capability of communicating with an optional door phone when the NX-DPH/PAGING board is installed. A maximum of two door phones may be installed per system. To connect the
NX-SERIES HYBRID KEY SYSTEM INSTALLATION SECTION R-MMC (9 PIN) PC (9 PIN) RXD 2 TXD 3 DTR 4 SGND 5 CTS 8 2 RXD 3 TXD 4 DTR 5 SGND NOTE : If the CTS pin is not connected, the system cannot check the printer (MODEM) status (power ON/OFF, paper empty, etc.) FIGURE 7-4 SMDR & REMOTE PROGRAMMING
NX-SERIES HYBRID KEY SYSTEM INSTALLATION SECTION FIGURE 7-5 CONNECTING EXTERNAL BATTERY 8. BEFORE POWER UP During initial installation, it is best to verify proper system operation before plugging in any amphenol-type cables to the MDF. If you have already plugged the cables in, unplug them. Verify
NX-SERIES HYBRID KEY SYSTEM INSTALLATION SECTION 9-3 HOW TO REMOVE THE HANDSET CORD FROM THE HANDSET Driver Insert the sharp-edged one (ex:driver, pincette,…) into the slight gap of handset. Line holder Slightly push the driver, and lift up the line holder from handset. Now, you have removed the
FEATURES SECTION
NX-SERIES HYBRID KEY SYSTEM FEATURES SECTION TABLE OF CONTENTS FEATURES 1. FEATURE DESCRIPTIONS . . . . . . . . . . . . . . . . . . . . . . . . . . . . 3-1 1.1 SYSTEM FEATURES . . . . . . . . . . . . . . . . . . . . . . . . . . . . . . . . 3-1 1.2 STATION FEATURES . . . . . . . . . . . . . . . . .
NX-SERIES HYBRID KEY SYSTEM FEATURES SECTION NOTICE this manual describes stadard setting. Some features, MMC Codes and default data may be different from those shown depending on the country.
NX-SERIES HYBRID KEY SYSTEM FEATURES SECTION 1. FEATURE DESCRIPTION 1.1 SYSTEM FEATURES LIVE SYSTEM PROGRAMMING ACCOUNT CODE (Voluntary) ALL CALL VOICE PAGE ATTENTION TONE AUTHORIZATION CODES (Voluntary) AUTOMATIC HOLD BACKGROUND MUSIC BATTERY BACKUP (Memory Protection) BATTERY BACKUP (System) CALL
NX-SERIES HYBRID KEY SYSTEM FEATURES SECTION ACCOUNT CODE (Voluntary) Station users may enter an account code of up to seven (7) digits before hanging up a call. This account code will appear in the last column of the SMDR for that call record. Keyset users may enter this code using the ACC button
NX-SERIES HYBRID KEY SYSTEM FEATURES SECTION BATTERY BACKUP (Memory Protection) In the event that power is lost to the system, all customer data contained in memory is backed up by a base board Ni/Cd battery sufficient for at least seven (7) days continuous loss of system power. When power is
NX-SERIES HYBRID KEY SYSTEM FEATURES SECTION CALL HUNT If this feature is enabled on a station, an intercom call while busy will be transferred to another station in the same station group. ➥ MMC 22 CUSTOMER ON/OFF HUNT: ON CALL METERING/PRS You may charge for making outside calls by this feature,
NX-SERIES HYBRID KEY SYSTEM FEATURES SECTION CHAIN DIALING Station users may manually dial additional digits following a Speed-Dial call, or chain together as many Speed-Dial numbers as required. CLASS OF SERVICE System programming may assign any of six outgoing call restriction levels. Refer to
NX-SERIES HYBRID KEY SYSTEM FEATURES SECTION DIRECT TRUNK SELECTION Any station can directly select a specific C.O. line by simply pressing the appropriate button to either originate or answer a call. DIRECTORY NAMES Each station and C.O. line may be assigned a unique directory name. ➥ ➥ MMC 14
NX-SERIES HYBRID KEY SYSTEM FEATURES SECTION EXECUTIVE BARGE-IN (Override) The feature allows specially-programmed stations to override the automatic privacy of another station. Programming provides three options: No Barge-in, With Tone, and Without Tone. When programmed without tone, the
NX-SERIES HYBRID KEY SYSTEM FEATURES SECTION line, trunk group, or Speed-Dial number whenever the station goes off-hook. A hot line delay time of 1 to 9 seconds can be programmed to allow sufficient time to make a different call. ➥ MMC 25 HOT/WARM LINE IN GROUP / OUT OF GROUP Individuals assigned
NX-SERIES HYBRID KEY SYSTEM FEATURES SECTION passcode, and can assign Customer level access to MMCs as needed. CUSTOMER LEVEL This level requires the Customer level passcode and allows access to MMCs assigned by the Technician level in MMC 90. ➥ MMC 90 CUSTOMER USE MMC STATION LEVEL All keysets can
NX-SERIES HYBRID KEY SYSTEM FEATURES SECTION Automatic Night Service Automatic Night Service allows the system to automatically go into and out of Night Service according to system clock time. This feature can be overridden by the Night Service button. ➥ MMC 56 ASSIGN AUTO NIGHT TIME OFF PREMISES
NX-SERIES HYBRID KEY SYSTEM FEATURES SECTION PORT STATUS CHECK Users can view their port status on the LCD. Any one of sixteen (16) status items (IDLE, BUSY, CALLBACK, PROGRAM, etc) may be displayed. ➥ MMC 92 PORT STATUS POWER FAILURE TRANSFER In the event of commercial power loss, the first two
NX-SERIES HYBRID KEY SYSTEM FEATURES SECTION database from a remote location via a customer-provided modem to make programming changes and view traffic reports as a troubleshooting aid. A customer PC can also be connected directly to the Base board for on-site programming. ➥ MMC 80 IO PARAMETER
NX-SERIES HYBRID KEY SYSTEM FEATURES SECTION STATION HUNT GROUPS System programming allows for up to 20 station groups. Four ring patterns are available for each group: SEQUENTIAL, DISTRIBUTE, CONDITION and UNCONDITION. Each group may contain a maximum 8 stations, and a station may be associated
NX-SERIES HYBRID KEY SYSTEM FEATURES SECTION TOLL RESTRICTION There are 250 allow and 250 deny entries of 11 digits each. Each of these entries can apply to dialing classes B, C, D and E. Class A stations have no dialing restrictions and class F stations cannot make outside calls. ➥ ➥ ➥ ➥ MMC 30
NX-SERIES HYBRID KEY SYSTEM FEATURES SECTION at the end of each day or week. The report can also be printed on demand. A customer-provided printer must be connected to the SMDR or R-MMC port in order to print this report. ➥ ➥ MMC 80 IO PARAMETERS MMC 83 CALL TRAFFIC TRANSFER System operation
NX-SERIES HYBRID KEY SYSTEM FEATURES SECTION 1.2 STATION FEATURES ADD-ON MODULE (AOM) APPOINTMENT REMINDER AUTOMATIC HOLD AUTOMATIC PRIVACY BACKGROUND MUSIC BUSY STATION CALLBACK BUSY STATION INDICATION (BLF) DIRECT STATION SELECTION (DSS) DO NOT DISTURB (Programmable) DOOR LOCK RELEASE EXCLUSIVE
NX-SERIES HYBRID KEY SYSTEM FEATURES SECTION AUTOMATIC PRIVACY All conversations on outside lines and intercom calls are automatically private. The privacy feature can be turned off on a per-line basis. BACKGROUND MUSIC While the keyset is on-hook, the HOLD button alternately turns background music
NX-SERIES HYBRID KEY SYSTEM FEATURES SECTION EXECUTIVE / SECRETARY HOT LINES A hands-free communication link is established when the EXECUTIVE/SECRETARY button is pressed. When the EXECUTIVE is in DND mode, all calls are forwarded to the SECRETARY and only the SECRETARY can call the EXECUTIVE. This
NX-SERIES HYBRID KEY SYSTEM FEATURES SECTION LINE QUEUING WITH CALLBACK When the desired outside line is busy, the user can press the CALLBACK key or dial the access code to place his/her station in the queue awaiting that particular line. The user will be called back when the line becomes
NX-SERIES HYBRID KEY SYSTEM FEATURES SECTION the feature key applies to. ➥ MMC 72 STATION KEY PROGRAMMING PROTECTION FROM BARGE-IN Each station can be programmed as either secure or not secure. Secure stations cannot be barged-in on. A not secure station talking to a secure station cannot be
NX-SERIES HYBRID KEY SYSTEM FEATURES SECTION through the speaker. Ring Mode Calls are answered by pressing the SPEAKER button or by lifting the handset. Auto Answer Mode The keyset will automatically answer calls via the speakerphone. Voice Announce Mode Keyset users can hear the caller’s voice,
NX-SERIES HYBRID KEY SYSTEM FEATURES SECTION VACANT STATION MESSAGES Any keyset may select one of twenty messages to be displayed at a calling party’s keyset. Ten messages are fixed, and the remaining ten can be customized by the system administrator (16 character maximum). 01 02 03 04 05 IN A
NX-SERIES HYBRID KEY SYSTEM FEATURES SECTION CALL FOR GROUP IDENTIFICATION When a call is made to a station group, the display will show the called group number. These calls can be answered with a different greeting than calls to the user’s extension number. CALL PROCESSING INFORMATION During
NX-SERIES HYBRID KEY SYSTEM FEATURES SECTION IDENTIFICATION OF RECALLS Hold and Transfer recalls are identified differently. Hold recalls show [HOLD RECALL 203] and Transfer recalls show [RECALL FROM 204]. IDENTIFICATION OF TRANSFERS The display identifies who has transferred a call to the user
NX-SERIES HYBRID KEY SYSTEM FEATURES SECTION 2. FEATURE ID TABLE FEATURE Operator Group Hold Pickup Pickup Page Hold Direct Pickup Hold Call Secretary Call Boss Open Doorphone Call Doorphone Direct Open Doorphone Forced Auto Answer Program Personal Speed-Dial Speed-Dial Saved Number Redial Voice
NX-SERIES HYBRID KEY SYSTEM FEATURES SECTION < Sample SMDR printout > For more detailed SMDR information refer to Page 3-13, STATION MESSAGE DETAIL RECORDING(SMDR). SMDR REPORT FOR [ ] 01/08/96 15:19 ============================================================================ EXT TRK MM:DD STT.TIME
PROGRAMMING SECTION
NX-SERIES HYBRID KEY SYSTEM PROGRAMMING SECTION TABLE OF CONTENTS PROGRAMMING 1. INTRODUCTION TO PROGRAMMING ………………………….. 4-1 1.1 PROGRAMMING OVERVIEW …………………………………………… 4-1 1.2 PROGRAMMING LEVELS
NX-SERIES HYBRID KEY SYSTEM PROGRAMMING SECTION NOTICE this manual describes stadard setting. Some MMC Codes and default data may be different from those shown depending on the country.
NX-SERIES HYBRID KEY SYSTEM PROGRAMMING SECTION 1. INTRODUCTION TO PROGRAMMING 1.1 PROGRAMMING OVERVIEW The system arrives from the factory with default data entered. Connect it to trunks, stations, and power, turn the system on and it is fully operational. The only thing left to do is customize
NX-SERIES HYBRID KEY SYSTEM PROGRAMMING SECTION 1.3 PROGRAM KEYS 1.3.1 NX-keyset with LCD 1X16 LCD Display Programmable Butterns KEYPAD Used to enter data VOLUME (+) or (-) : Used to scroll through stations or trunks. MUTE or MESSAGE : Usually used to select data. TRANSFER : Used to enter the
NX-SERIES HYBRID KEY SYSTEM PROGRAMMING SECTION 1.3.2 Other LCD keysets When the using other types of LCD keysets, such as the AS-30 or 816, programming key assignments will differ from the NX model, as shown in the box below. AS-Keyset NX-keyset 816 keyset TRSF/ALM TRANSFER AUTO RDL N/A SPEED
NX-SERIES HYBRID KEY SYSTEM PROGRAMMING SECTION 2. PROGRAMMING PROCEDURES 2.1 PROGRAM LIST IN NUMERICAL ORDER 00: STATION LOCK 01: CHANGE STATION PASSCODE 45: 46: TRUNK GROUP ASSIGN DISA LINE 10: 11: 12: 13: 14: 15: 16: 17: SET ANSWER MODE CALL FORWARD STATION ON/OFF SET RING FREQUENCY STATION
NX-SERIES HYBRID KEY SYSTEM PROGRAMMING SECTION 2.2 PROGRAM LIST IN ALPHABETICAL ORDER ALARM REMINDER 26 LANGUAGE SELECTION 93 ASSIGN ADD-ON MODULE 37 MAKE/BREAK RATIO 54 ASSIGN AUTO NIGHT TIME 56 OPEN PROGRAMMING 20 ASSIGN BARGE-IN 24 OVERRIDE TABLE 64 ASSIGN BOSS/SECRETARY 36 PAGE ZONE 23 ASSIGN
NX-SERIES HYBRID KEY SYSTEM PROGRAMMING SECTION 2.3 PROGRAM PROCEDURES The following instructions for each MMC assume that you have already opened programming. To open SYSTEM (CUSTOMER) PROGRAMMING: Technician Passcode (default:4321) OR Customer Passcode (default:1234) When finished programming
NX-SERIES HYBRID KEY SYSTEM MMC 00 PROGRAMMING SECTION STATION LOCK Use this MMC to lock or unlock stations in order to control others using your station. UNLOCK LOCKED1 LOCKED2 Normal status Prohibit another user from making outside call. Prohibit another user from dialing or receiving any calls.
NX-SERIES HYBRID KEY SYSTEM MMC 01 PROGRAMMING SECTION CHANGE STATION PASSCODE This MMC is used to reset any keyset’s passcode to its default value of ‘1234’,and cannot display station passcodes. Keyset users can set or change their individual passcodes, which are used to lock or unlock the keyset
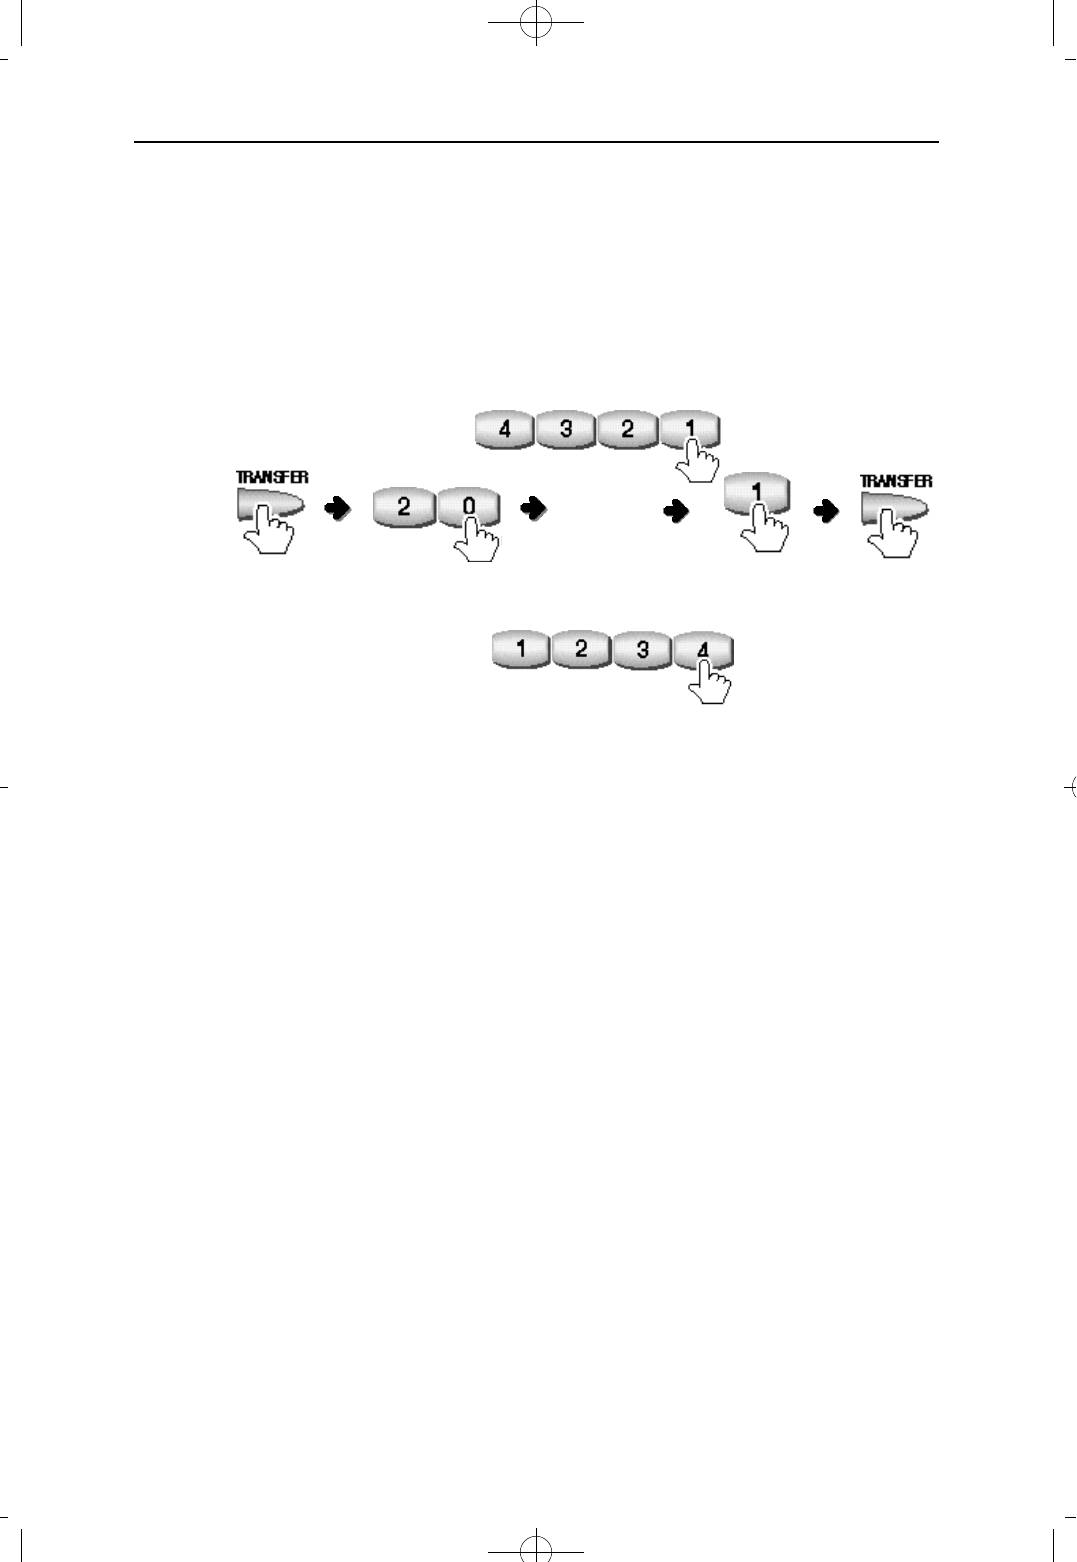
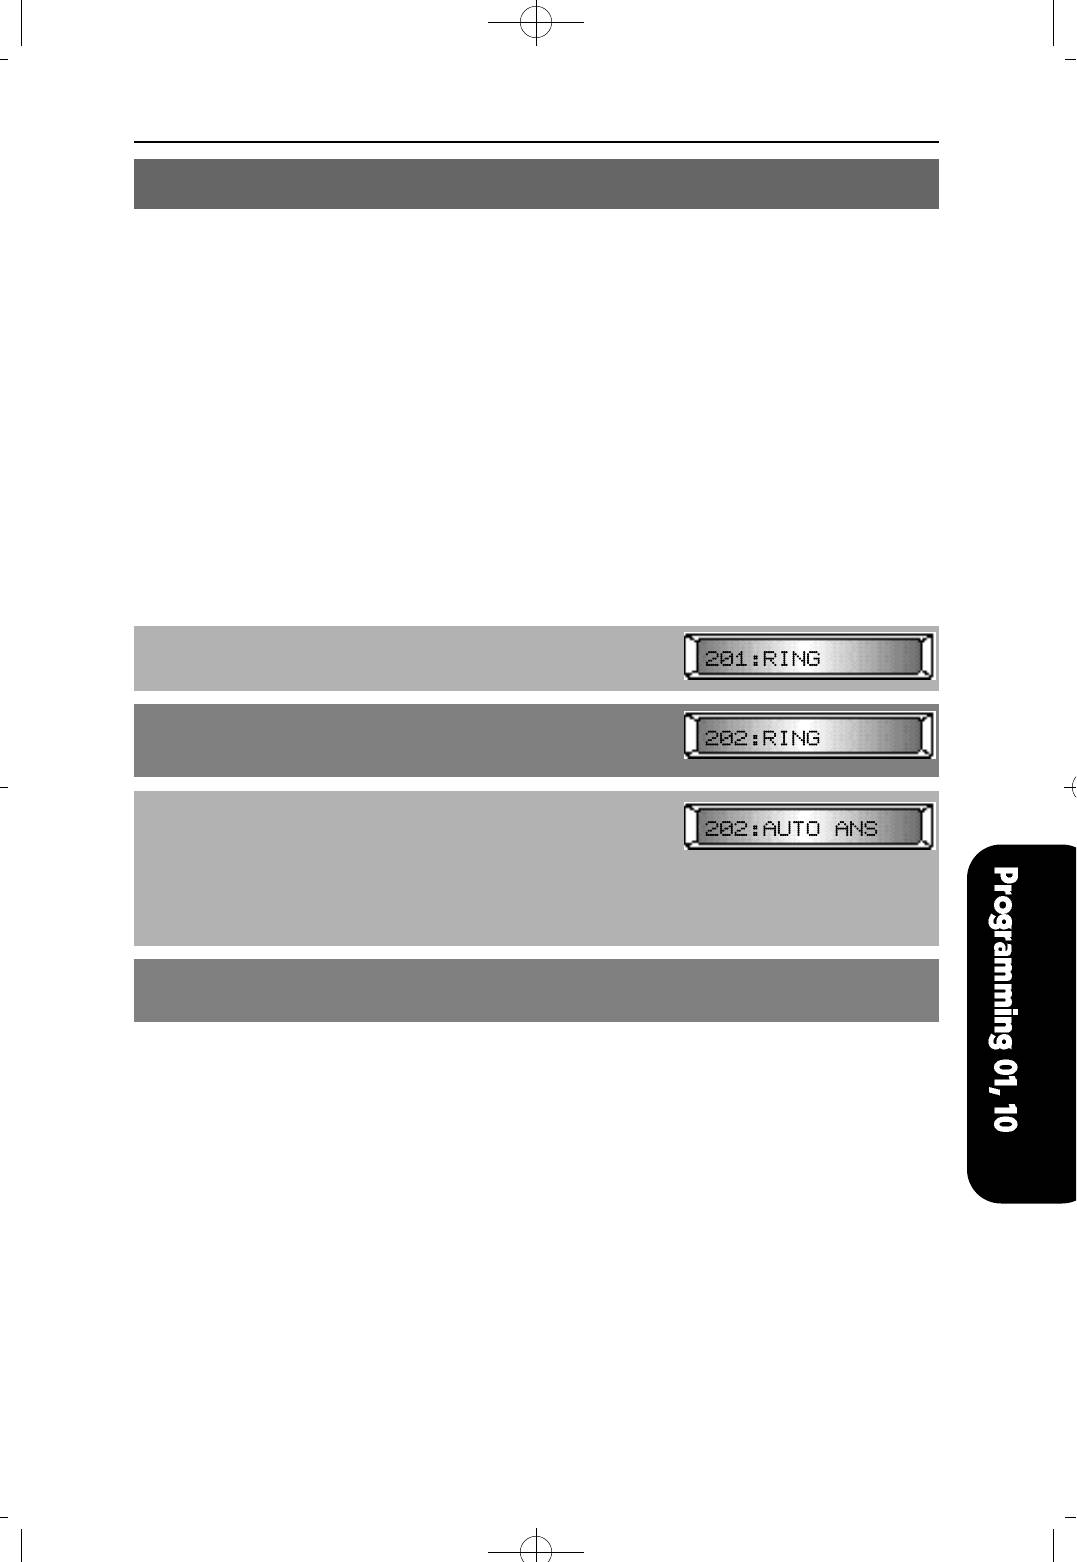
NX-SERIES HYBRID KEY SYSTEM MMC 10 PROGRAMMING SECTION SET ANSWER MODE This MMC is used to change the answer mode of any station to one of the following options: 1 RING The keyset will ring. Calls are answered by pressing [SPEAKER], or by lifting the handset. 2 AUTO ANSWER After a short attention
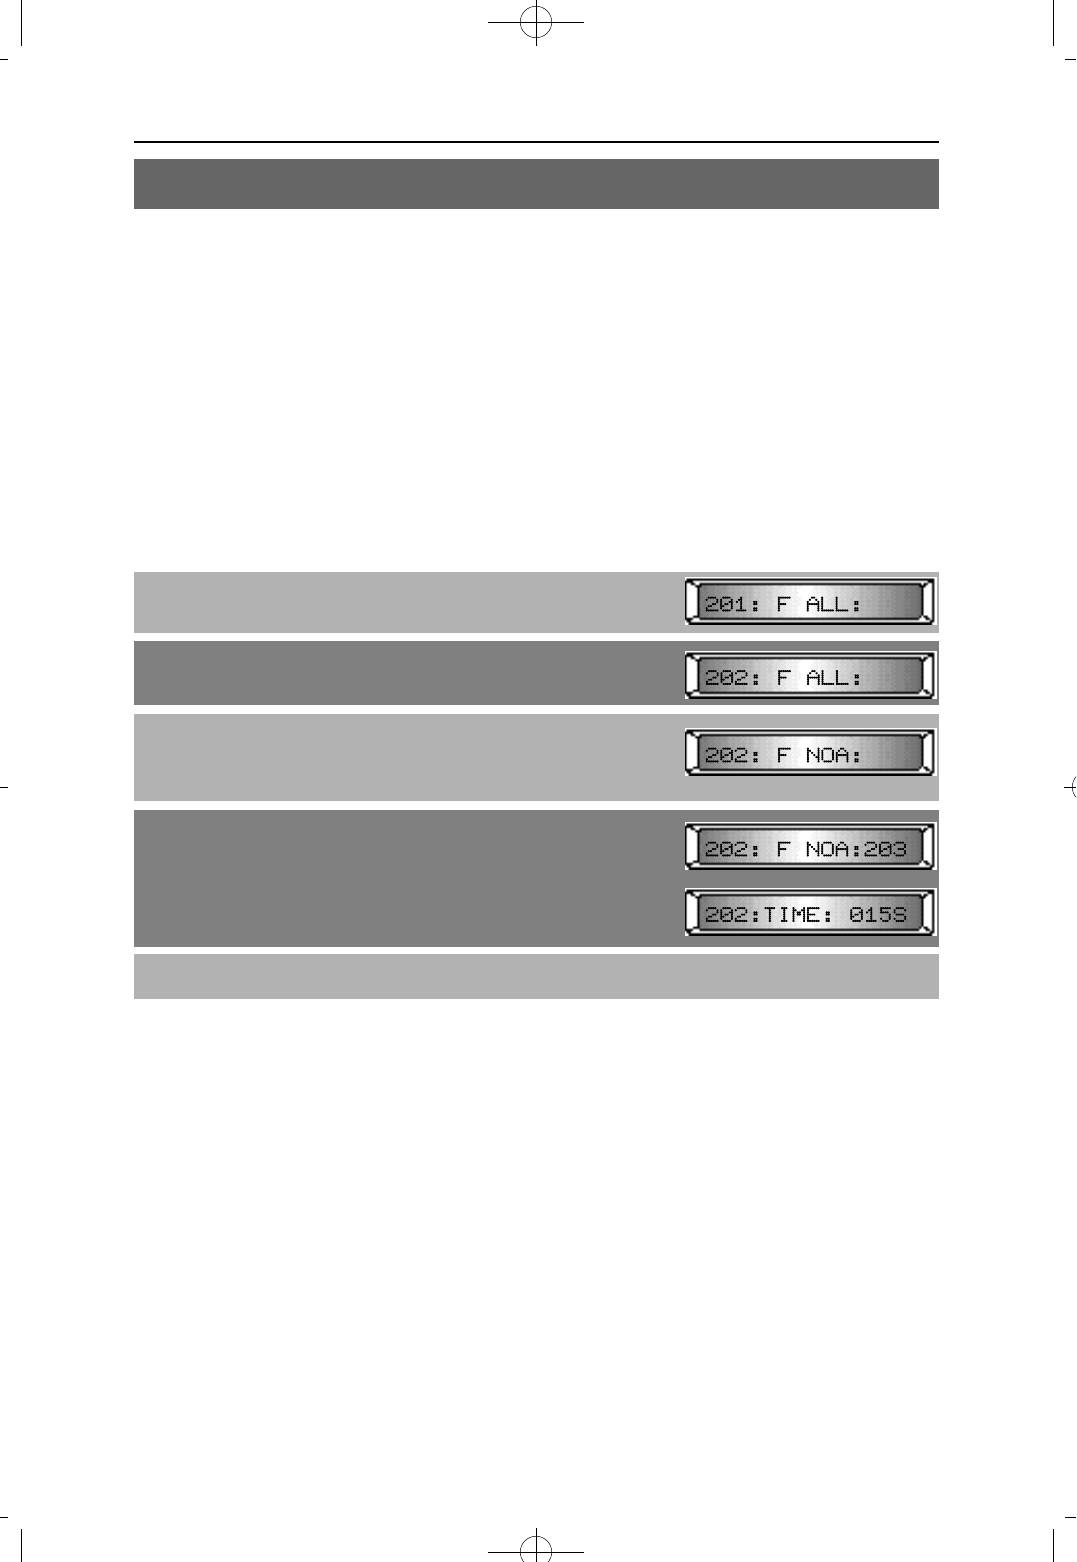
NX-SERIES HYBRID KEY SYSTEM MMC 11 PROGRAMMING SECTION CALL FORWARD This MMC is used to program the call forwarding destination for each station and to set the time for FORWARD NO ANSWER. Each station can forward calls under the following condition. FORWARD ALL FORWARD BUSY FORWARD NO ANSWER NO
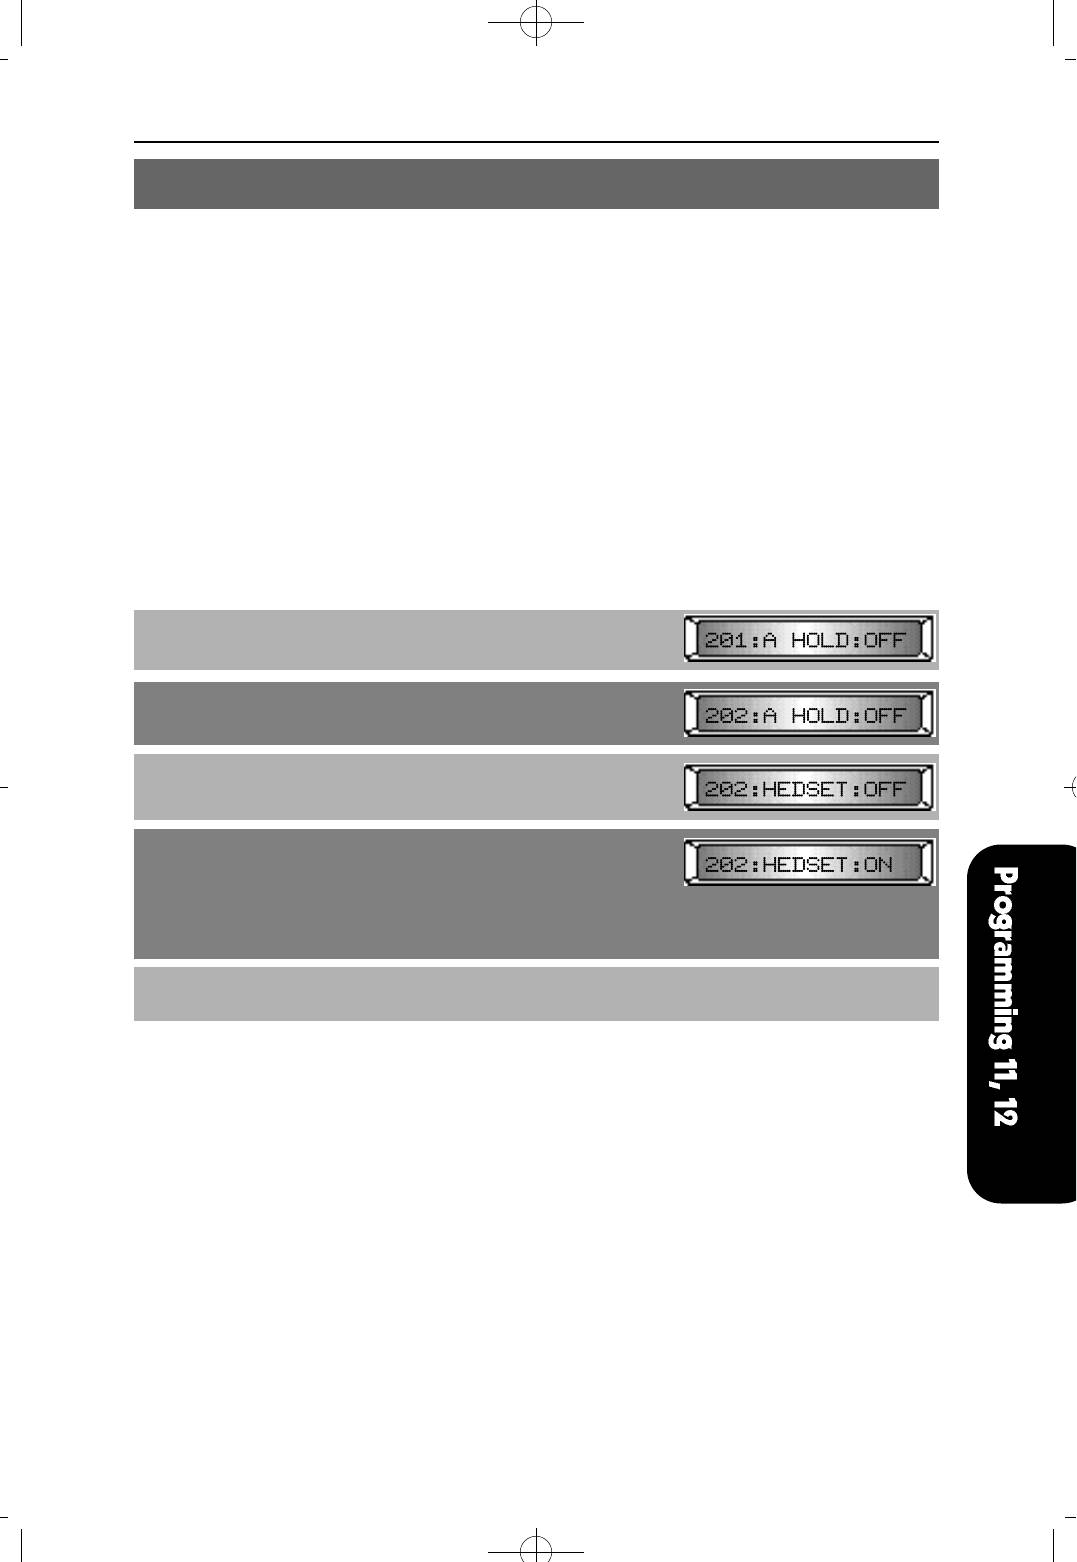
NX-SERIES HYBRID KEY SYSTEM MMC 12 PROGRAMMING SECTION STATION ON/OFF This MMC allows the keyset user to set the following features: AUTO HOLD AUTO TIMER HEADSET USE HOT KEYPAD KEY TONE RING PREFERENCE Places an existing C.O. call on hold if another trunk key (C.O. button) is pressed during that
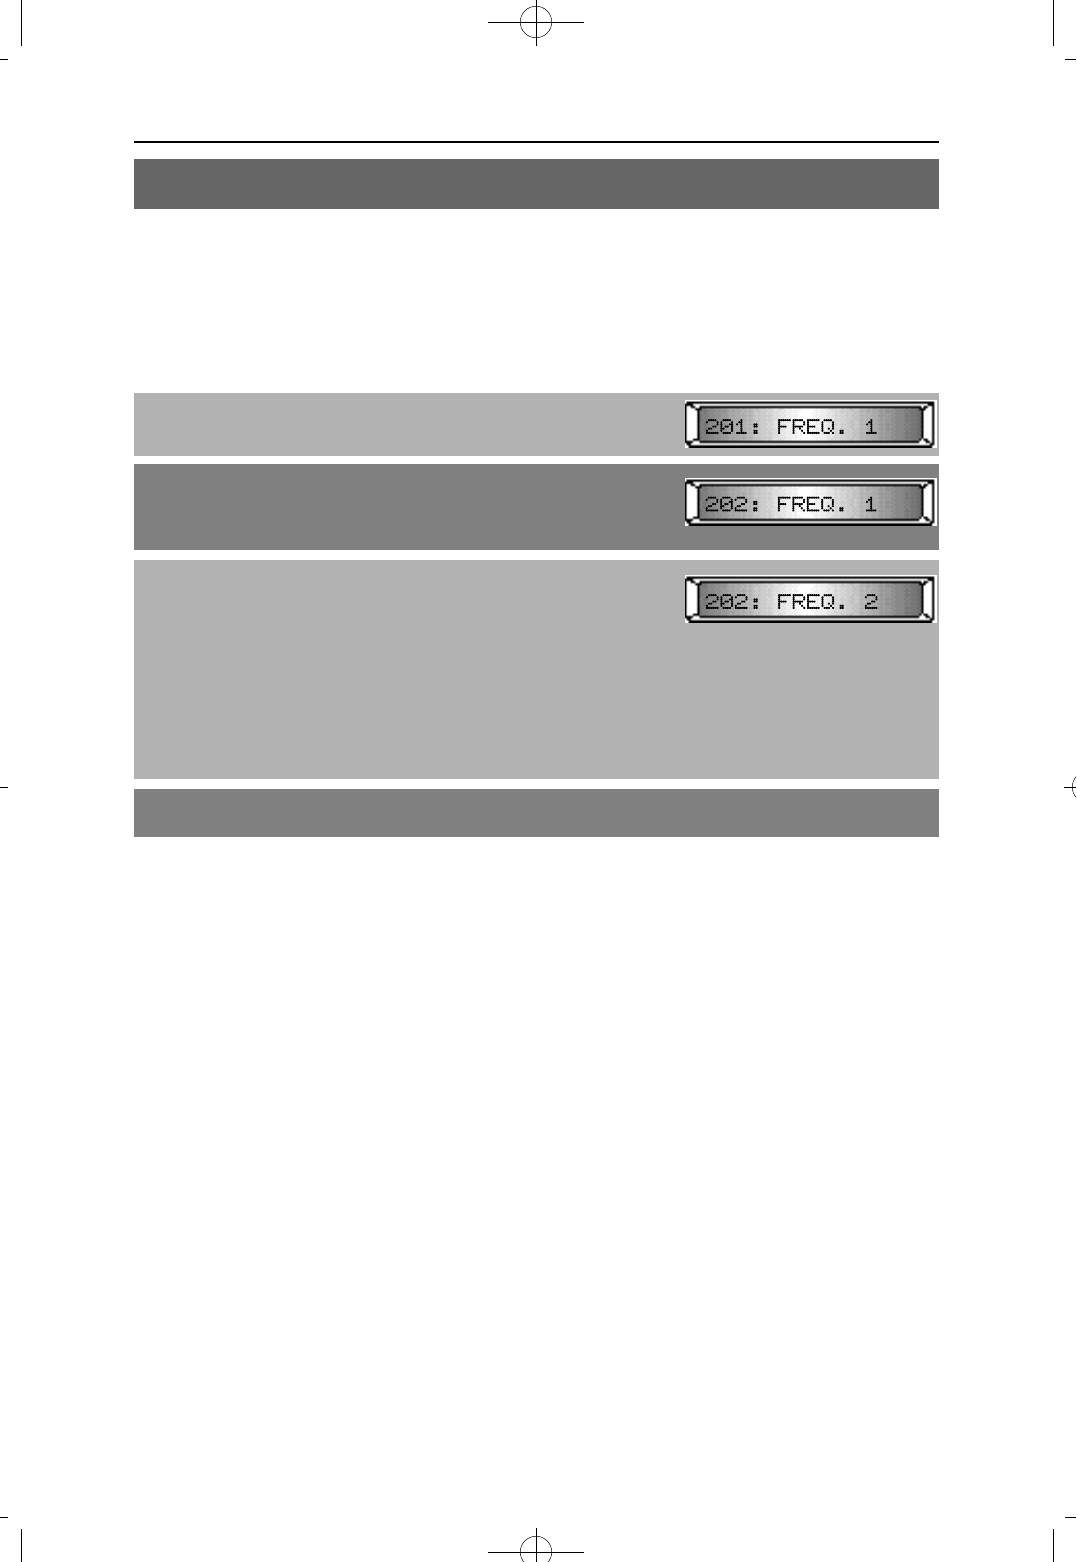
NX-SERIES HYBRID KEY SYSTEM MMC 13 PROGRAMMING SECTION SET RING FREQUENCY This MMC is used to select the ring frequency at each keyset. There are four types of ring frequency available at each keyset. A sample of the selection can be heard when a dial key pad is pressed. PPROCEDURE 1. Press
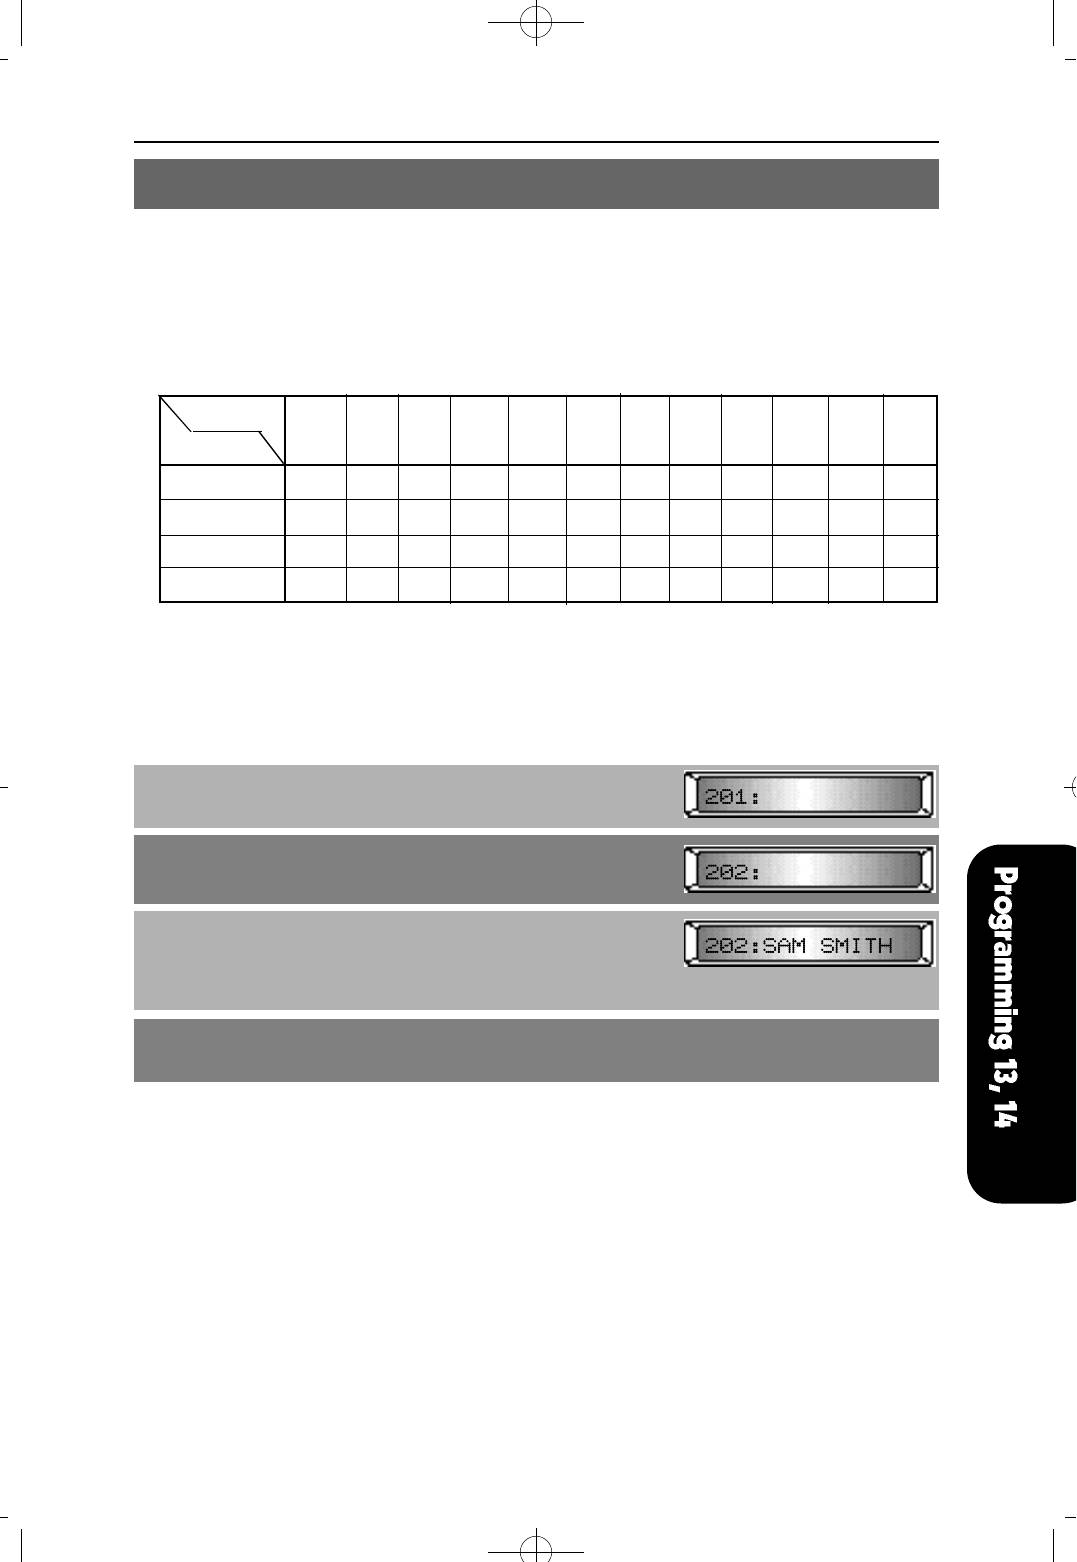
NX-SERIES HYBRID KEY SYSTEM PROGRAMMING SECTION MMC 14 STATION NAMES This MMC is used to enter a name of up to twelve (12) characters to identify an individual station. Names are entered via the keypad. Each press of a key will select a character. Pressing a different key will advance the cursor to
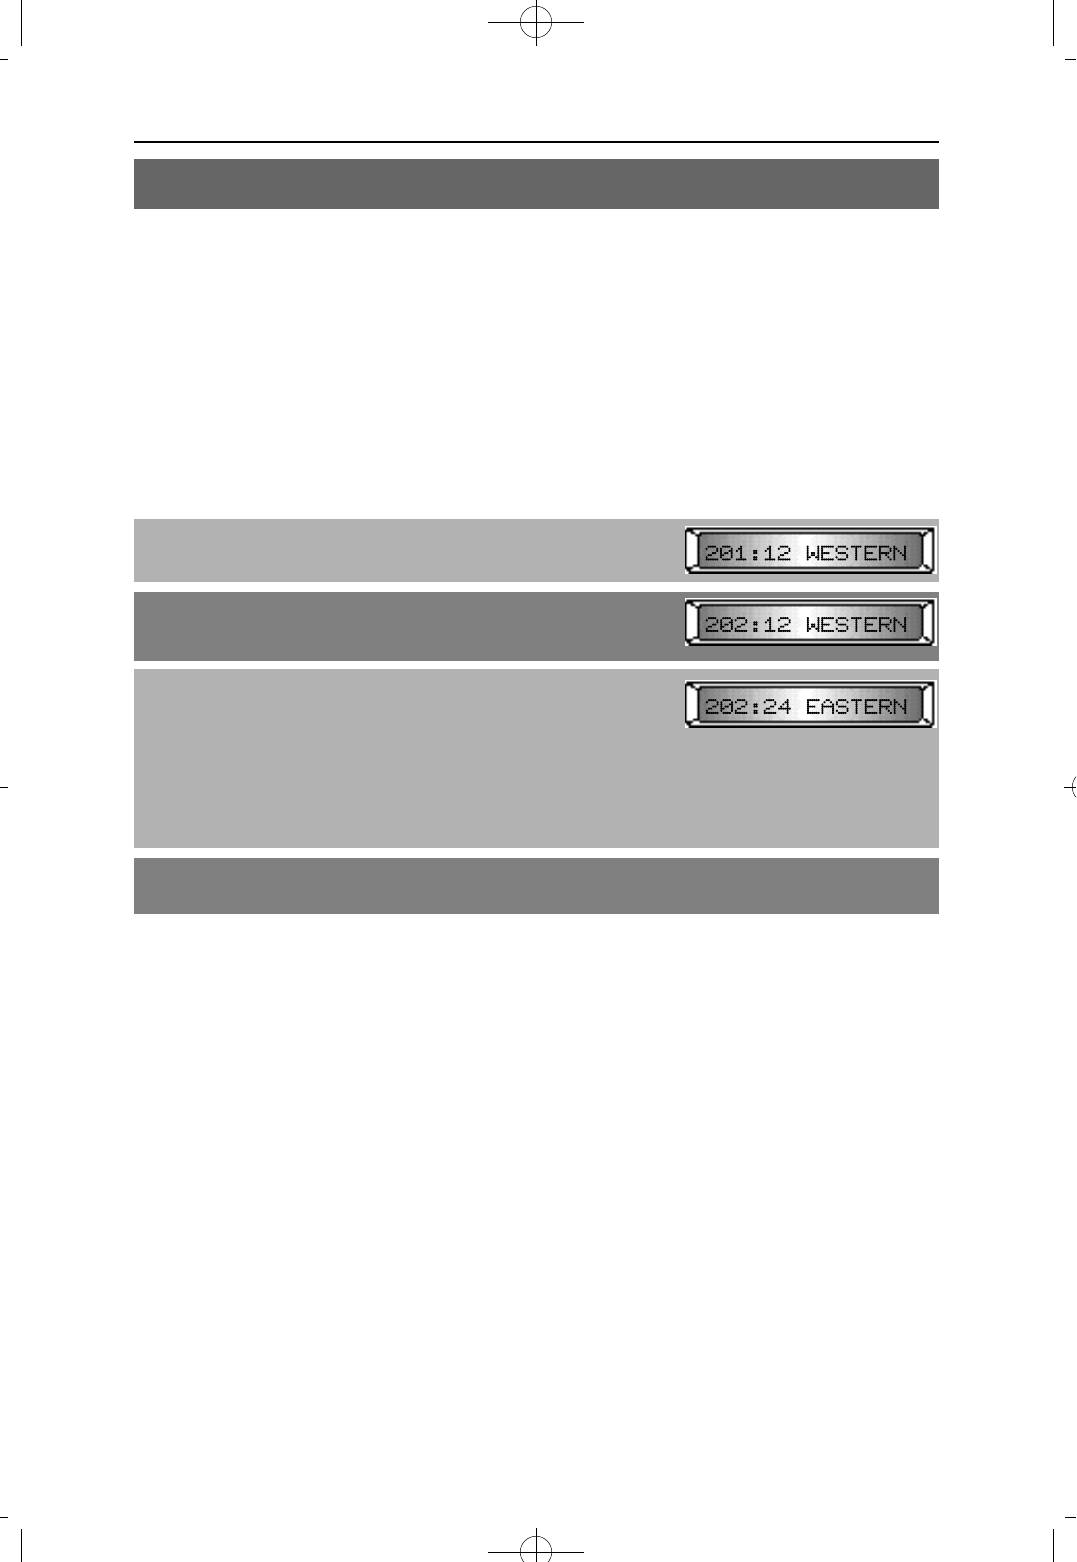
NX-SERIES HYBRID KEY SYSTEM MMC 15 PROGRAMMING SECTION DATA DISPLAY This MMC is used to change date display mode of each stations. Following date display mode are available. NOTE: AS-30S and SKP-816 model keysets display Western format only. 1 2 3 4 24 12 24 12 WESTERN WESTERN EASTERN EASTERN WED
NX-SERIES HYBRID KEY SYSTEM MMC 16 PROGRAMMING SECTION KEY EXTENDER This MMC is used to view the programmable keys assigned to a keyset station. It also allows the system administrator to assign key extenders to some keys to make a feature key more specific. The feature keys accept extenders are:
NX-SERIES HYBRID KEY SYSTEM MMC 17 PROGRAMMING SECTION STATION SPEED-DIAL This MMC is used to program the personal dial memory assigned to a station. Each station may have up to 20 memory locations, numbered 00 to 19. Each dial number consists of a trunk or trunk group access code followed by a
NX-SERIES HYBRID KEY SYSTEM MMC 20 PROGRAMMING SECTION OPEN PROGRAMMING This MMC is used to open or close Customer or Technician level programming. If programming is not opened and an attempt is made to access a system MMC, the error message [NOT PERMIT] will be displayed. A four-digit Customer
NX-SERIES HYBRID KEY SYSTEM MMC 21 PROGRAMMING SECTION CHANGE PASSCODE Use this MMC to change the passcode allowing access to MMC 20 ‘Open Programming’. NOTE: The passcode is four digits long. A digit may be 0 to 9. The current (old) passcode is required for this MMC. NOTE: Press [HOLD] to reset
NX-SERIES HYBRID KEY SYSTEM PROGRAMMING SECTION MMC 22 CUSTOMER ON/OFF This MMC is used to allow the system administrator to set any of the following keyset features: BGM DND DOOR HUNT MIKE PAGE USE PAGE RECEIVE SMDR When ON, allows the user to hear background music. When ON, allows the user to set
NX-SERIES HYBRID KEY SYSTEM MMC 23 PROGRAMMING SECTION PAGE ZONE This MMC is used to assign a keyset to one (or none) of the four internal paging zones. NOTE: Number 5 is external paging and ‘ ✱ ‘ assigns to all internal and external paging zones. PROCEDURE LCD DISPLAY 1. Press [TRANSFER] and dial
NX-SERIES HYBRID KEY SYSTEM PROGRAMMING SECTION MMC 24 ASSIGN BARGE-IN This MMC is used to set the type of barge-in permitted at a particular station. After the barge-in type is set, the barge-in class can be set. The barge-in class allows or disallows the user to barge-in on another station.
NX-SERIES HYBRID KEY SYSTEM PROGRAMMING SECTION MMC 25 HOT/WARM LINE This MMC is used to assign a hot line/prime line destination to a station. The destination may be any of the following: Station Number Station Group Number Trunk Number Trunk Group Number Speed-Dial location (00 to 99) The Warm
NX-SERIES HYBRID KEY SYSTEM MMC 26 PROGRAMMING SECTION ALARM REMINDER This MMC allows the system administrator or technician to set or change the alarm clock/appointment reminder feature for any station. Three alarms may be set for each station, and each alarm may be defined as a «DAY» alarm or as
NX-SERIES HYBRID KEY SYSTEM MMC 27 PROGRAMMING SECTION VACANT MESSAGE The system provides up to 20 vacant messages that can be selected by any display keyset user. Messages 01 through 10 are pre-programmed, as shown below. Messages 11 through 20 may be customized via this MMC. The selected message
NX-SERIES HYBRID KEY SYSTEM MMC 28 PROGRAMMING SECTION CALL DISC Used to assign the incoming and outgoing call disconnection per station. There are four different option. 0 1 2 3 No Disconnection Out Only In Only Both PROCEDURE LCD DISPLAY 1. Press [TRANSFER] and dial 28 2. Using [VOLUME (-) or
NX-SERIES HYBRID KEY SYSTEM PROGRAMMING SECTION MMC 30 STATION TOLL CLASS This MMC is used to assign any of the 6 different day and/or night class of service to each station, as per the table below: DIAL DIGIT 1 2 3 4 5 6 TOLL CLASS A B C D E F DESCRIPTIONS No restriction Follow allow/deny table
NX-SERIES HYBRID KEY SYSTEM MMC 31 PROGRAMMING SECTION EXT/TRK USE This MMC is used to allow trunks the ability to answer incoming calls, to dial out, or to do both, on a per-station basis. Those abilities are displayed as Y or N for each action (e.g. NY: disallow dialing out and allow answering
NX-SERIES HYBRID KEY SYSTEM MMC 32 PROGRAMMING SECTION INTERCOM USE This MMC is used to allow/disallow station intercom calls. PROCEDURE 1. Press [TRANSFER] and dial 32 2. Use [VOLUME (-) or (+)], to select a station (e.g. 202) To select all stations, press [VOLUME (-)] first 3. Press [REDIAL] or
NX-SERIES HYBRID KEY SYSTEM MMC 33 PROGRAMMING SECTION ASSIGN DOOR RING This MMC is used to designate which devices (station or station group) will ring when a door box button is pressed. PROCEDURE LCD DISPLAY 1. Press [TRANSFER] and dial 33 Display shows designated stations or station groups for
NX-SERIES HYBRID KEY SYSTEM MMC 34 PROGRAMMING SECTION ASSIGN PICKUP GROUP This MMC is used to allow the assignment of stations to call pickup groups. There may be a maximum 10 pickup groups (0~9). An unlimited number of members can belong to each group. Stations can be in only one pickup group at
NX-SERIES HYBRID KEY SYSTEM MMC 35 PROGRAMMING SECTION ASSIGN STATION GROUP This MMC is used to assign members of a station group. There are several options that can be selected for ringing, overflow, group transfer and overflow destination, and group type. There may be a maximum twenty (20)
NX-SERIES HYBRID KEY SYSTEM PROGRAMMING SECTION MMC 35 4d. To assign the overflow port, enter the station or station group number. 4e. Press [MUTE] or [MESSAGE] to select the station group type OR Using KEYPAD, 1 for NORMAL GROUP 2 for VMAA GROUP 4f. To assign amember to the station group, enter
NX-SERIES HYBRID KEY SYSTEM MMC 36 PROGRAMMING SECTION ASSIGN BOSS/SECRETARY This MMC is used to assign BOSS keysets to SECRETARY keysets. One SECRETARY station may include two (2) BOSS stations. PROCEDURE LCD DISPLAY 1. Press [TRANSFER] and dial 36 2. Using [VOLUME (-) or (+)], select the
NX-SERIES HYBRID KEY SYSTEM MMC 37 PROGRAMMING SECTION ASSIGN ADD-ON MODULE This MMC is used to assign an add-on module (AOM) to a station. PROCEDURE 1. Press [TRANSFER] and dial 37 Display shows the first AOM port If there is no AOM port, display shows: 2. Press [VOLUME (-) or (+)], to select the
NX-SERIES HYBRID KEY SYSTEM MMC 38 PROGRAMMING SECTION SLT DIALING TYPE This MMC is used to define the dial type of phone connected to each SLT port. Keysets are not affected by this MMC. There are two dialing types: DIALING TYPES 1 2 DTMF PULSE Dual Tone Multi-Frequency (Touch Tone) Dial Pulse
NX-SERIES HYBRID KEY SYSTEM MMC 39 PROGRAMMING SECTION DATA LINE Used to assign SLT ports to be used for data transmission. VOICE DATA — The station will be used for voice communication. All intrusion and warning tones will be heard during conversation. — The station will be used for data
NX-SERIES HYBRID KEY SYSTEM MMC 40 PROGRAMMING SECTION C.O./PBX LINE This MMC is used to select the mode of the C.O. line. If the PBX mode is chosen, the PBX access code can be recognized allowing more complete toll restrictions. This mode is assigned on a per-trunk basis. PROCEDURE 1. Press
NX-SERIES HYBRID KEY SYSTEM MMC 41 PROGRAMMING SECTION TRUNK DIALING TYPE This MMC is used to set the dial type of each C.O. line. There are two options: DTMF : Dual Tone Multi Frequency (Touch Tone) PULSE : Pulse dial (rotary). PROCEDURE 1. Press [TRANSFER] and dial 41 2. Using [VOLUME (-) or
NX-SERIES HYBRID KEY SYSTEM PROGRAMMING SECTION MMC 42 TRUNK ON/OFF This MMC is used to assign trunk options on a per-trunk basis. OPTION 1A2 EMULATION TRUNK FORWARD RING OVER PAGE TOLL CHECK FREE VOICE MSG TRK DISC DESCRIPTION Trunk override call Allow trunk to be forwarded Allow ring over
NX-SERIES HYBRID KEY SYSTEM MMC 43 PROGRAMMING SECTION ASSIGN TRUNK RING A trunk may have a maximum 16 members(station or station group) assigned to ring. PROCEDURE LCD DISPLAY 1. Press [TRANSFER] and dial 43 2. Using [VOLUME (-) or (+)], select the trunk you want (e.g., 703) 3. Press [REDIAL] or
NX-SERIES HYBRID KEY SYSTEM PROGRAMMING SECTION MMC 44 TRUNK NAMES This MMC is used to assign a name of up to twelve (12) characters to identify a particular trunk. Names are written using the keypad. Each press of a key will select a character. Pressing a different key moves the cursor to the next
NX-SERIES HYBRID KEY SYSTEM MMC 45 PROGRAMMING SECTION TRUNK GROUP This MMC is used to set the free trunk selection type to a specific trunk, trunk group, or to several trunk groups. There are eleven (11) trunk groups: 9 and 80 through 89, and three types of selecting a free trunk line in the
NX-SERIES HYBRID KEY SYSTEM PROGRAMMING SECTION MMC 46 ASSIGN DISA LINE This MMC is used to allow the system the ability to have Direct Inward System Access (DISA). There are four 4 DISA. If a trunk is set to DISA, the voice announcement feature may be used when the VOICE MSG option is enabled in
NX-SERIES HYBRID KEY SYSTEM MMC 50 PROGRAMMING SECTION SYSTEM TIMERS This MMC is used to adjust individual timers as necessary. All available timers are described in the TABLE OF TIMERS AND VALUES. NOTE: Seconds are shown as ‘SEC’, milliseconds as ‘MS’, and minutes as ‘MIN’. PROCEDURE LCD DISPLAY
NX-SERIES HYBRID KEY SYSTEM PROGRAMMING SECTION MMC 50 DISPLAY DOR R OFF (Door Ring OFF time) FIRST DGT (First Digit wait time) HOOK OFF (Hook OFF time) DESCRIPTION controls the duration of ringing at the door ring destination before canceling DEFAULT RANGE 030SEC 1~250SEC controls how long the
NX-SERIES HYBRID KEY SYSTEM MMC 51 PROGRAMMING SECTION TONE/RING CADENCE This MMC is used to customize the tone cadence on a system-wide basis to any one of the eight available selections. Call Technical Support before changing any cadences, as some systems may require default settings. PROCEDURE
NX-SERIES HYBRID KEY SYSTEM MMC 52 PROGRAMMING SECTION SYSTEM WIDE COUNTER This MMC is used to set the values of the system counters. The counters and descriptions are listed below: OPTIONS DESCRIPTION ALM COUNTER (ALARM REMINDER COUNTER) This is the number of times (1 to 99) that an alarm reminder
NX-SERIES HYBRID KEY SYSTEM MMC 53 PROGRAMMING SECTION TRUNK WIDE TIMER This MMC is used to changed trunk timer values. It is not advisable to change these values, with exception of trunk flash time, without assistance from Technical Support. The available options are and listed below: DISPLAY
NX-SERIES HYBRID KEY SYSTEM PROGRAMMING SECTION MMC 54 MAKE/BREAK RATIO This MMC is used to allow the ability to change the duration of the make/break time of pulse (rotary) dial trunks. PROCEDURE LCD DISPLAY 1. Press [TRANSFER] and dial 54 2. Enter the MAKE/BREAK ratio on the KEYPAD (e.g. MAKE:40
NX-SERIES HYBRID KEY SYSTEM MMC 56 PROGRAMMING SECTION ASSIGN AUTO NIGHT TIME This MMC is used to automatically place the system in Night mode. A Night key is not needed, as the system switches automatically, but it is helpful to have a dedicated button so the status can be changed manually. ‘D’ in
NX-SERIES HYBRID KEY SYSTEM PROGRAMMING SECTION MMC 57 CALL COST This MMC is used to program the unit cost of the metering pulse generated by the Central Office. If the MPD card is installed, it will detect the metering pulse provided by Central Exchange and determine the call cost by the number of
NX-SERIES HYBRID KEY SYSTEM MMC 61 PROGRAMMING SECTION TOLL ALLOW TABLE/APPLY This MMC enables you to define which leading digit(s) in a dialing plan are to be allowed and which class(es) should be applied in this allow table. Each entry can define up to 11 digits. PROCEDURE LCD DISPLAY 1. Press
NX-SERIES HYBRID KEY SYSTEM MMC 63 PROGRAMMING SECTION AUTHORIZATION TABLE This MMC is used to list all allowable authorization codes. An authorization code must be four digits long. There are 50 codes allowed in this table. Duplications or number conflicts are not permitted. Each authorization
NX-SERIES HYBRID KEY SYSTEM MMC 64 PROGRAMMING SECTION OVERRIDE TABLE This MMC is used to enter up to five exceptions to toll restriction. These exceptions can be accessed by any class in both Day and Night modes, and are useful to allow access to emergency numbers. Caution should be used regarding
NX-SERIES HYBRID KEY SYSTEM PROGRAMMING SECTION MMC 65 ASSIGN WILD CHARACTER Provides flexibility to toll restriction when a specific numbering plan is desired. There are only three entry tables, but more than one digit can be assigned per table if necessary. PROCEDURE LCD DISPLAY 1. Press
NX-SERIES HYBRID KEY SYSTEM MMC 66 PROGRAMMING SECTION SYSTEM SPD-DIAL TOLL RESTRICTION Enables you to define whether the system allows or denies long distance numbers in system Speed-Dialing to override toll restriction. BYPASS TOLL Any station can use system speed dial numbers without
NX-SERIES HYBRID KEY SYSTEM MMC 67 PROGRAMMING SECTION ASSIGN SYSTEM SPEED-DIAL This MMC is used to store up to eighty (80) system Speed-Dial numbers. The system Speed-Dial number is composed of 2 digits (20 to 99) and a maximum 30-digit telephone number can be stored at each Speed-Dial number.
NX-SERIES HYBRID KEY SYSTEM MMC 70 PROGRAMMING SECTION DIAL NUMBERING PLAN This MMC provides the access codes and dialing plan needed for operation of features and programs. The system comes with a wide range of acceptable numbering plans set as default, and the option to customize the dialing
NX-SERIES HYBRID KEY SYSTEM PROGRAMMING SECTION MMC 70 DPC EXC FAT FLS FWA FWB FWC FWN GPC GPS HED HLD IOG LNR MPG MSA MSC MSL OPR PAG REC SDI SGR SNR SPD STN TRK TGR UPC VAC : 10 : 12 : 14 : 49 : 61 : 62 : 60 : 63 : 66 :✱ : 69 : 11 : 53 : 19 : 56 : 43 : 42 : 41 :0 : 55 : 18 : 15 : 500-519 : 17 :
NX-SERIES HYBRID KEY SYSTEM MMC 71 PROGRAMMING SECTION SYSTEM KEY PROGRAMMING This MMC allows for the customizing of programmable keys system-wide. PROCEDURE LCD DISPLAY 1. Press [TRANSFER] and dial 71 2. Using [VOLUME (-) or (+)], select the type of keyset There are 7 keyset types: NX 24, NX 12,
NX-SERIES HYBRID KEY SYSTEM PROGRAMMING SECTION MMC 71 SKP-816 09: 201 10: 202 11: 203 12: 204 13: 205 14: 206 15: 207 16: 208 17: 209 18: 210 19: 211 20: 212 21: 213 22: 214 23: 215 24: 216 NX-AOM 01: NONE 02: NONE 03: NONE 04: NONE 05: NONE 06: NONE 07: NONE 08: NONE 09: NONE 10: NONE 11: NONE
NX-SERIES HYBRID KEY SYSTEM MMC 72 PROGRAMMING SECTION STATION KEY PROGRAMMING This program allows customizing programmable keys on specific electonic keysets on the system. The program also provides a tool for duplicating data to other keysets to have the same key format structure. Copy source and
NX-SERIES HYBRID KEY SYSTEM PROGRAMMING SECTION MMC 73 KEY TEST This program allows you to check whether each key works properly. PROCEDURE 1. Press [TRANSFER] and dial 73 All LEDs light and station rings. Display sets show the full matrix pattern for 16 characters. All tri-color LEDs light amber
NX-SERIES HYBRID KEY SYSTEM PROGRAMMING SECTION MMC 80 SYSTEM I/O PARAMETERS This MMC provides a means of setting parameters for the serial I/O ports to work with SMDR and Remote MMC. Programming is accomplished easily with the tables below to customize either I/O port. PARAMETER TYPE OF SERVICE
NX-SERIES HYBRID KEY SYSTEM PROGRAMMING SECTION MMC 81 SMDR OPTIONS This MMC allows the system administrator to select information to be printed on the SMDR report. OPTIONS DESCRIPTIONS PAGE HEADER This option determines whether a page header will print at the top of each page. Normally turned off
NX-SERIES HYBRID KEY SYSTEM MMC 83 PROGRAMMING SECTION CALL TRAFFIC REPORT This MMC is used to print a traffic report and select options. Four types of printing are available, each with has two options. These are listed below: NO. 0 1 2 3 TYPE NO NOW DAILY WEEKLY DESCRIPTION No print Printed on
NX-SERIES HYBRID KEY SYSTEM MMC 90 PROGRAMMING SECTION CUSTOMER USE MMC Allows the station user access to certain MMCs. For example, it is advised that the user have access to MMC11 Call Forward, but not MMC60 Toll Deny. PROCEDURE LCD DISPLAY 1. Press [TRANSFER] and dial 90. 2. Press [VOLUME (-) or
NX-SERIES HYBRID KEY SYSTEM MMC 91 PROGRAMMING SECTION SYSTEM VERSION This MMC provides display of the current software version of the KSU and the KEYSET, and the date the product was made. This is a READ ONLY MMC. PROCEDURE LCD DISPLAY 1. Press [TRANSFER] and dial 91 2. Press [VOLUME (-) or (+)]
NX-SERIES HYBRID KEY SYSTEM MMC 93 PROGRAMMING SECTION LANGUAGE SELECTION Used to select one of three (3) languages to display in keyset LCDs. Choose an entry number from the table below: ENTRY NUMBER 1 2 3 LANGUAGE ENGLISH SPANISH PORTUGUESE NOTE : English is displayed while in MMC mode. PROCEDURE
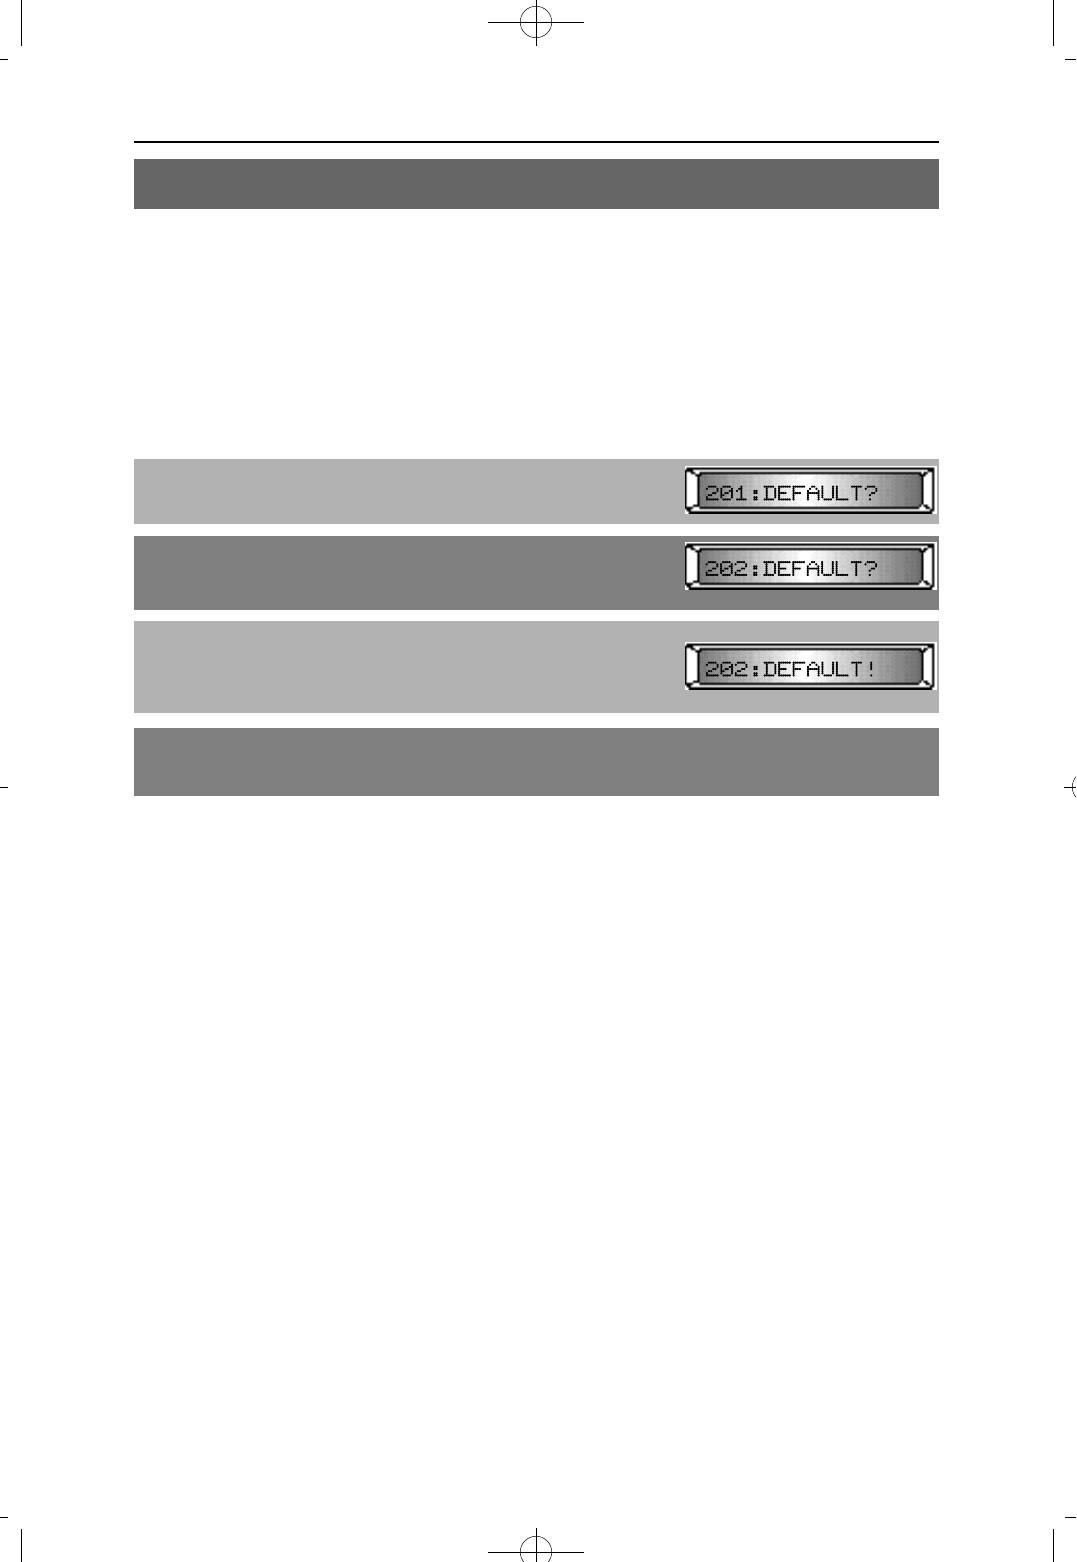
NX-SERIES HYBRID KEY SYSTEM MMC 94 PROGRAMMING SECTION HALT PROCESS Use only in the event that all data processing must be stopped. The four-digit Technician Passcode is required to access this MMC. This MMC will not interfere with any call in progress, but attempting a new call will result in a
NX-SERIES HYBRID KEY SYSTEM MMC 95 PROGRAMMING SECTION SYSTEM RESTART Provides two methods of restarting the system. OPTIONS DESCRIPTION RESET SYSTEM CLEAR MEMORY Restart the system only. Restart the system and clear all memory and set all functions to their default values. Extreme care should be
NX-SERIES HYBRID KEY SYSTEM PROGRAMMING SECTION
APPENDIX SECTION A. REMOTE PROGRAMMING B. DATABASE DOWNLOAD C. DISA VOICE ANNOUNCEMENT
NX-SERIES HYBRID KEY SYSTEM APPENDIX A APPENDIX A REMOTE PROGRAMMING REMOTE PROGRAMMING Remote programming capability has been incorporated in the NX-SERIES via the R-MMC serial port on the SMDR/R-MMC board option mounted on the base unit. This port is configured as a programming port only. The
NX-SERIES HYBRID KEY SYSTEM APPENDIX A REMOTE PROGRAMMING 1.3 BEGIN PROGRAMMING Dial the customer modem number and establish a communication link with the customer site. Once communication is established, press the TAB key on the PC keyboard to receive the NX-SERIES system header display (below).
NX-SERIES HYBRID KEY SYSTEM APPENDIX A REMOTE PROGRAMMING 2. ON-SITE PROGRAMMING VIA PC TERMINAL On-site programming via a PC terminal has been incorporated in the NX-SERIES via serial communication port R-MMC of the SMDR/R-MMC board mounted on the Base board. This port is configured as a
NX-SERIES HYBRID KEY SYSTEM APPENDIX A REMOTE PROGRAMMING open programming and begin the on-site programming session. NOTE: The header will display CUSTOMER and the name assigned in MMC 81. 2.3 PROGRAMMING PROTOCOL The NX-SERIES will only recognize keystrokes on the PC keyboard that have been
NX-SERIES HYBRID KEY SYSTEM APPENDIX B APPENDIX B DATABASE DOWNLOAD DATABASE DOWNLOAD 1. Introduction To Database Download Programming A database download programming capability has been incorporated into the NXSERIES via the communication (serial) SMDR port of the optional SMDR/R-MMC card mounted
NX-SERIES HYBRID KEY SYSTEM APPENDIX B DATABASE DOWNLOAD 3) Enter the DATABASE DOWNLOAD directory. 4) Double-click on the icon that was created by the install program in the Windows -«NX_DOWN» 5) You will see Windows shown below. Figure 1.1 Main Window 3. 2 Setup Of Database Downloading Program
NX-SERIES HYBRID KEY SYSTEM APPENDIX B DATABASE DOWNLOAD 6) Choose Download / Serial Port*** 7) Check COM port in the Select serial port check box  Select OK button. Figure 1.3 Port dialog box 4. Using database downloading program 4.1 Downloading 1) Choose DOWNLOAD / Download to File***. 2) Input
NX-SERIES HYBRID KEY SYSTEM APPENDIX B DATABASE DOWNLOAD Figure 1.6 MMC page tab 4.3 Save file This option saves the downloaded file with another name with the save file option. 4.4 Print file This option prints the database file that you downloaded 4.5 Help This option shows the program version
NX-SERIES HYBRID KEY SYSTEM APPENDIX C APPENDIX C DISA VOICE ANOUNCEMENT DISA VOICE ANOUNCEMENT 1. DISA AUTOMATIC ANSWER The system answers automatically an incoming DISA (Direct Inward System Access) call and sends the message: «This is XXX company. Extension number, please». This facilitates
NX-SERIES HYBRID KEY SYSTEM APPENDIX C DISA VOICE ANOUNCEMENT Start to record through handset or speaker phone. After recording, you can hear automatically the recorded message. NOTE In case of first Power on, record phrase 1 to phrase 4 in sequence. 3.3 Monitoring Dial ’18’ and the customer
BACK-UP DATA SHEETS
NX- _____________ SYSTEM DATABASE FORMS CUSTOMER NAME : ADDRESS : TELEPHONE NUMBER : DATABASE CONTAINS _____________SHEETS
SYSTEM CONFIGURATION SYSTEM EXPANSION Bd. STATION DATA STATION LOCK ANSWER NO. (00) MODE (10) STATION ON / OFF (12) AUTO AUTO HOLD TIMER COPY AS NEEDED HEADSET HOT USE KEY KEYPAD TONE RING FREQ. NAME TOLL (14) CLASS (30) SHEET _____ OF_______
MMC 11 CALL FORWARD STATION NO. FORWARD ALL MMC 17 STATION SPEED-DIAL DESTINATION FORWARD BUSY STATION NO. ENTRY NO. MMC 21 FORWARD NO ANSWER NO ANSWER TIME SPEED-DIAL NO. CHANGE PASSCODE PASSCODE MMC 22 STATION NO. MMC 23 CUSTOMER ON/OFF BGM DND DOOR HUNT MIKE PAGE USE PAGE RECEIVE SMDR PAGE ZONE
MMC 24 OPTION BARGE-IN : STATION NO. MMC 25 BARGE-IN CLASS HOT / WARM LINE STATION NO. MMC 26 DESTINATION ALARM REMINDER STATION NO. MMC 27 ALARM NO. ALARM TIME DAY/DALY VACANT MESSAGE MESSAGE NO. MMC 31 WARM LINE DELAY TIME MESSAGE TRUNK USE STATION NO. COPY AS NEEDED TRUNK NO. DIAL ANSWER SHEET
MMC 32 INTERCOM USE STATION NO. MMC 33 DESTINATION STATION ASSIGN DOOR RING DOOR NO. MMC 34 USE DAY NIGHT PICKUP GROUP GROUP NO. MEMBER ID STATION NO. PICKUP GROUP NO. : MAXIMUM NUMBER OF PICKUP GROUPS IS 10. MMC 35 STATION GROUP STATION GROUP NO. : RING OVEFLOW TIME TRSF. TIME OVERFLOW PORT TYPE
MMC 37 AOM ADD-ON MODULE MASTER MMC 38 AOM MASTER AOM MASTER SLT DIALING TYPE STATION NO. MMC 39 TYPE STATION NO. TYPE STATION NO. VOICE / DATA TRUNK NO. CO/PBX DATA LINE STATION NO. MMC 40 VOICE / DATA C.O. PBX LINE TRUNK NO. CO/PBX TRUNK LINE DATA TRUNK NO. DIAL TYPE (41) COPY AS NEEDED TRUNK ON
MMC 45 MODE TRUNK GROUP : GROUP NO. : MEMBER : MAXIMUM NUMBER OF TRUNK GROUPS IS 11. MMC 46 ASSIGN DISA LINE TRUNK NO. MMC 50 DISA OPTION VOICE MSG (42) SYSTEM TIMERS TIMER RANGE DEFAULT ALM R INT 1~250 sec 025 sec ALM R DUR 1~250 sec 010 sec ARDL INT 1~250 sec 045 sec ARDL REAL 1~250 sec 045 sec
SMDR PULAS 1~250 sec 030 sec SMDR DRMF 0~250 sec 015 sec TRK DISC 1~250 min 030 min MMC 51 TONE / RING CADENCE TONE/RING ON MMC 52 OFF ON SYSTEM WIDE COUNTER OPTION COUNTER MMC 53 TRUNK WIDE TIMER TIMER RANGE DEFAULT CLEARING 1~25 sec 00 sec CO SUPV 100~2500 ms 0000 ms F DGT DLY 100~2500 ms 1000 ms
MMC 57 CALL COST UNIT COST : MMC 60 TOLL DENY TABLE / APPLY ENTRY APPLY B MMC 61 C ENTRY D E APPLY B C D E TOLL ALLOW TABLE / APPLY ENTRY APPLY B C ENTRY D MMC 62 PBX ACCESS CODE PBX NO. CODE COPY AS NEEDED E APPLY B PBX NO. C D E CODE SHEET _____ OF_______
MMC 63 NO. AUTHORIZATION CODE CODE MMC 64 NO. CLASS NO. CLASS CODE NO. CODE WILD CHARACTER X : Y : Z : MMC 67 ASSIGN SYSTEM SPEED-DIAL NO. SPEED DIAL NO. MMC 70 DIAL NUMBERING PLAN ENTRY CODE OVERRIDE TABLE CODE MMC 65 NO. ACCESS CODE ENTRY NO. ACCESS CODE SPEED-DIAL NO. ENTRY ACCESS CODE MMC 71 /
AS-30 01: 07: 13: 19: 25: SKP-816 09: 10: 11: 12: 13: 14: 15: 16: 02: 08: 14: 20: 26: 03: 09: 15: 21: 27: 17: 18: 19: 20: 21: 22: 23: 24: 01: 05: NX-AOM 01: 02: 03: 04: 05: 06: 07: 08: 09: 10: 11: 12: 13: 14: 15: 16: 17: 18: 19: 20: 21: 22: 23: 24: MMC 80 IO PARAMETERS COM1 COM2 XON OFF COM1 MMC 81
CODE: GA68-60655A Edition : 05 DN April 1999 Printed In Korea

PROGRAMMING
SECTION
4Programming 1999.9.15 12:42 PM 페이지1

4Programming 1999.9.15 12:42 PM 페이지2
NX-SERIESHYBRID KEY SYSTEM PROGRAMMING SECTION
TABLE OF CONTENTS
PROGRAMMING
1. INTRODUCTION TO PROGRAMMING …….……….…….…….. 4-1
1.1 PROGRAMMING OVERVIEW …………………………………………… 4-1
1.2 PROGRAMMING LEVELS………………………………………………… 4-1
1.3 PROGRAM KEYS ……………………………………………………………. 4-2
1.3.1 NX keyset with LCD ………………………………………………………………….. 4-2
1.3.2 Other LCD keysets …………………………………………………………………… 4-3
2. PROGRAMMING PROCEDURES…….…….……….…….…….…. 4-4
2.1 PROGRAM LIST IN NUMERICAL ORDER………………………….. 4-4
2.2 PROGRAM LIST IN ALPHABETICAL ORDER…………………….. 4-5
2.3 PROGRAM PROCEDURES ……………………………………………… 4-6
4Programming 1999.9.15 12:42 PM 페이지3

4Programming 1999.9.15 12:42 PM 페이지4
NX-SERIESHYBRID KEY SYSTEM PROGRAMMING SECTION
NOTICE
this manual describes stadard setting. Some MMC Codes and
default data may be different from those shown depending on
the country.
NX-SERIESHYBRID KEY SYSTEM PROGRAMMING SECTION
1. INTRODUCTION TO PROGRAMMING
1.1 PROGRAMMING OVERVIEW
The system arrives from the factory with default data entered. Connect it to
trunks, stations, and power, turn the system on and it is fully operational. The
only thing left to do is customize the data to fit the customer’s needs. This is
called programming the system.
MMC stands for Man Machine Code, and each program is assigned a different
two digit code. MMCs are used to view, create, or change customer data.
Programming is simply deciding what needs to be done and knowing which
MMC is used to do it.
System programming may be done from any NX-24E or NX-12E keyset (Refer to
1.3.1) or any keyset with LCD (Refer to 1.3.2). The first thing to is open system
programming. As a security measure, a passcode must be known to do this.
1.2 PROGRAMMING LEVELS
There are three levels of programming: SYSTEM, CUSTOMER and STATION.
System and Customer levels are under passcode protection while station
programming does not require a passcode.
To prevent conflicting data from being entered, only one person at a time can
enter programming with the technician or customer passcode. While
programming is in progress, normal system operation is not affected.
SYSTEM LEVEL
This level is entered via MMC 20 and requires the Technician Level passcode.
It allows access to all system, station, and maintenance programs.
CUSTOMER LEVEL
This level is entered via MMC 20 and requires the Customer passcode. It allows
access to station and system programs assigned by the Technician Level in
MMC 90. When using the customer passcode to access station programs, data
for all stations can be viewed or changed.
STATION LEVEL
All keysets can access station programs 10 through 17 without using a
passcode. Each user can only change data for his/her own keyset.
4 — 1
4Programming 1999.9.15 12:42 PM 페이지5

4Programming 1999.9.15 12:42 PM 페이지6
NX-SERIESHYBRID KEY SYSTEM PROGRAMMING SECTION
1.3 PROGRAM KEYS
1.3.1 NX-keyset with LCD
1X16 LCD
Display
P r o g r a m m a b l e
Butterns
KEYPAD
Used to enter
data
VOLUME (+) or (-) : Used to scroll through stations or trunks.
MUTE or MESSAGE : Usually used to select data.
TRANSFER : Used to enter the programming mode.
Also used to save changes and exit the program.
SPEAKER : Used to save changes and advance to the next
program.
HOLD : Usually used to clear previous data.
4 — 2
NX-SERIESHYBRID KEY SYSTEM PROGRAMMING SECTION
1.3.2 Other LCD keysets
When the using other types of LCD keysets, such as the AS-30 or 816,
programming key assignments will differ from the NX model, as shown in
the box below.
AS-Keyset NX-keyset 816 keyset
TRSF/ALM TRANSFER AUTO RDL
N/A SPEED ALM/SD
RD REDIAL RD
FLASH FLASH BOSS/SECR
N/A CALLBACK CONF
PAGE PAGE PAGE
FUNC/DND MUTE MUTE/DND
MSG MESSAGE MSG
SPK SPEAKER SPK
HOLD HOLD HOLD
▼ VOLUME▲ VOLUME (-)/(+) TIMER/AUTO ANS
4 — 3
4Programming 1999.9.15 12:42 PM 페이지7
4Programming 1999.9.15 12:42 PM 페이지8
NX-SERIESHYBRID KEY SYSTEM PROGRAMMING SECTION
2. PROGRAMMING PROCEDURES
2.1 PROGRAM LIST IN NUMERICAL ORDER
00: STATION LOCK 45: TRUNK GROUP
01: CHANGE STATION PASSCODE 46: ASSIGN DISA LINE
10: SET ANSWER MODE 50: SYSTEM TIMERS
11: CALL FORWARD 51: TONE/RING CADENCE
12: STATION ON/OFF 52: SYSTEM WIDE COUNTER
13: SET RING FREQUENCY 53: TRUNK WIDE TIMERS
14: STATION NAMES 54: MAKE/BREAK RATIO
15: DATE DISPLAY 55: CURRENT DATE AND TIME
16: KEY EXTENDER 56: ASSIGN AUTO NIGHT TIME
17: STATION SPEED-DIAL 57: CALL COST
20: OPEN PROGRAMMING 60: TOLL DENY TABLE/APPLY
21: CHANGE PASSCODE 61: TOLL ALLOW TABLE/APPLY
22: CUSTOMER ON/OFF 62: PBX ACCESS CODE
23: PAGE ZONE 63: AUTHORIZATION TABLE
24: ASSIGN BARGE-IN 64: OVERRIDE TABLE
25: HOT/WARM LINE 65: ASSIGN WILD CHARACTER
26: ALARM REMINDER 66: SYSTEM SPD-DIAL TOLL RESTRICTION
27: VACANT MESSAGE 67: ASSIGN SYSTEM SPEED-DIAL
28: CALL DISC RESTRICTION
30: STATION TOLL CLASS 70: DIAL NUMBERING PLAN
31: EXT/TRK USE 71: SYSTEM KEY PROGRAMMING
32: INTERCOM USE 72: STATION KEY PROGRAMMING
33: ASSIGN DOOR RING 73: KEY TEST
34: ASSIGN PICKUP GROUP
35: ASSIGN STATION GROUP 80: SYSTEM I/O PARAMETERS
36: ASSIGN BOSS/SECRETARY 81: SMDR OPTIONS
37: ASSIGN ADD-ON MODULE 83: CALL TRAFFIC
38: SLT DIALING TYPE
39: DATA LINE 90: CUSTOMER USE MMC
91: SYSTEM VERSION
40: C.O./PBX LINE 92: PORT STATUS
41: TRUNK DIALING TYPE 93: LANGUAGE SELECTION
42: TRUNK ON/OFF 94: HALT PROCESS
43: ASSIGN TRUNK RING 95: SYSTEM RESTART
44: TRUNK NAMES
4 — 4

NX-SERIESHYBRID KEY SYSTEM PROGRAMMING SECTION
2.2 PROGRAM LIST IN ALPHABETICAL ORDER
ALARM REMINDER 26 LANGUAGE SELECTION 93
ASSIGN ADD-ON MODULE 37 MAKE/BREAK RATIO 54
ASSIGN AUTO NIGHT TIME 56 OPEN PROGRAMMING 20
ASSIGN BARGE-IN 24 OVERRIDE TABLE 64
ASSIGN BOSS/SECRETARY 36 PAGE ZONE 23
ASSIGN DISA LINE 46 PBX ACCESS CODE 62
ASSIGN DOOR RING 33 PORT STATUS 92
ASSIGN PICKUP GROUP 34 SET ANSWER MODE 10
ASSIGN STATION GROUP 35 SET RING FREQUENCY 13
ASSIGN SYSTEM SPEED-DIAL 67 SLT DIALING TYPE 38
ASSIGN TRUNK RING 43 SMDR OPTIONS 81
ASSIGN WILD CHARACTER 65 STATION KEY PROGRAMMING 72
AUTHORIZATION TABLE 63 STATION LOCK 00
C.O./PBX LINE 40 STATION NAMES 14
CALL COST 57 STATION ON/OFF 12
CALL DISC 28 STATION SPEED-DIAL 17
CALL FORWARD 11 STATION TOLL CLASS 30
CALL TRAFFIC 83 SYSTEM I/O PARAMETERS 80
CHANGE PASSCODE 21 SYSTEM KEY PROGRAMMING 71
CHANGE STATION PASSCODE 01 SYSTEM RESTART 95
CURRENT DATE AND TIME 55 SYSTEM SPD-DIAL TOLL RESTRICTION 66
CUSTOMER ON/OFF 22 SYSTEM TIMERS 50
CUSTOMER USE MMC 90 SYSTEM VERSION 91
DATA LINE 39 SYSTEM WIDE COUNTER 52
DATE DISPLAY 15 TOLL ALLOW TABLE/APPLY 61
DIAL NUMBERING PLAN 70 TOLL DENY TABLE/APPLY 60
EXT/TRK USE 31 TONE/RING CADENCE 51
HALT PROCESS 94 TRUNK DIALING TYPE 41
HOT/WARM LINE 25 TRUNK GROUP 45
INTERCOM USE 32 TRUNK NAMES 44
KEY EXTENDER 16 TRUNK ON/OFF 42
KEY TEST 73 TRUNK WIDE TIMERS 53
VACANT MESSAGE 27
4 — 5
4Programming 1999.9.15 12:42 PM 페이지9
4Programming 1999.9.15 12:42 PM 페이지10
NX-SERIESHYBRID KEY SYSTEM PROGRAMMING SECTION
2.3 PROGRAM PROCEDURES
The following instructions for each MMC assume that you have already opened
programming.
To open SYSTEM (CUSTOMER) PROGRAMMING:
Technician Passcode
(default:4321)
OR
Customer Passcode
(default:1234)
When finished programming MMCs 00 through 95 and have other programming
to do, press [SPEAKER] to exit the MMC and stay in the programming mode.
Then perform one of the following operations:
1) Dial another MMC code directly and continue programming.
2) Press [VOLUME](+) and (-) keys to scroll through all MMC codes. When the
desired MMC code is reached, press [SPEAKER] and continue programming.
Pressing [ T R A N S F E R ] will always save changes and exit the programming
mode.
4 — 6

NX-SERIESHYBRID KEY SYSTEM PROGRAMMING SECTION
MMC 00 STATION LOCK
Use this MMC to lock or unlock stations in order to control others using your
station.
UNLOCK Normal status
LOCKED1 Prohibit another user from making outside call.
LOCKED2 Prohibit another user from dialing or receiving any calls.
PROCEDURE LCD DISPLAY
1. Press [TRANSFER] and dial 00
2. Using [VOLUME (-) or (+)], select a station (e.g. 202)
To select all stations, press [VOLUME (-)] first
3. Press [MUTE] or [MESSAGE] to make selections
OR
Using KEYPAD, dial
0 for UNLOCKED
1 for LOCKED1
or 2 for LOCKED2
4. Press [TRANSFER] to save and exit
DEFAULT DATA
UNLOCKED
RELATED MMC
MMC 01 CHANGE USER PASSCODE
4Programming 1999.9.15 12:42 PM 페이지11
4Programming 1999.9.15 12:42 PM 페이지12
NX-SERIESHYBRID KEY SYSTEM PROGRAMMING SECTION
MMC 01 CHANGE STATION PASSCODE
This MMC is used to reset any keyset’s passcode to its default value of ‘1234’,and cannot
display station passcodes.
Keyset users can set or change their individual passcodes, which are used to lock or
unlock the keyset and to access the WALKING CLASS of service and DISA calls.
NOTE : Users must enter unique passcodes for using the STATION LOCK, DISA, and
WALKING CLASS of service. The default passcode does not apply.
PROCEDURE LCD DISPLAY
1. Press [TRANSFER] and dial 01
2. Using [VOLUME (-) or (+)], select a station (e.g. 202)
To select all stations, press [VOLUME (-)] first
3. Press [HOLD] to reset the selected station’s
passcode to default data ‘1234’
If you forget passcode, use this MMC
4. Press [TRANSFER] to save and exit
DEFAULT DATA
1234
RELATED MMC
MMC 00 STATION LOCK
MMC 46 ASSIGN DISA LINE
NX-SERIESHYBRID KEY SYSTEM PROGRAMMING SECTION
MMC 10 SET ANSWER MODE
This MMC is used to change the answer mode of any station to one of the following
options:
1 RING The keyset will ring. Calls are answered by pressing [SPEAKER],
or by lifting the handset.
2 AUTO ANSWER After a short attention tone, the key set will automatically answer
calls via speakerphone. When a C.O. line is transferred to a
keyset in Auto Answer Mode, the keyset will ring until pressing
[SPEAKER], or lifting the handset.
3 VOICE ANNOUNCE The keyset will not ring. After a short attention tone, caller can
make an announcement but [SPEAKER] button or handset must
be used to respond to the caller.
PROCEDURE LCD DISPLAY
1. Press [TRANSFER] and dial 10
2. Using [VOLUME (-) or (+)], select a station (e. g. 202)
To select all stations, press [VOLUME (-)] first
3. Press [MUTE] or [MESSAGE] to make selection
OR
Using KEYPAD, dial
1 for RING
2 for AUTO ANSWER
or 3 for VOICE ANNOUNCE (e.g. 2)
4. Press [TRANSFER] to save and exit
DEFAULT DATA
RING
RELATED MMC
NONE
4Programming 1999.9.15 12:42 PM 페이지13
4Programming 1999.9.15 12:42 PM 페이지14
NX-SERIESHYBRID KEY SYSTEM PROGRAMMING SECTION
MMC 11 CALL FORWARD
This MMC is used to program the call forwarding destination for each station and to set
the time for FORWARD NO ANSWER.
Each station can forward calls under the following condition.
FORWARD ALL All calls are forwarded to destination station
FORWARD BUSY If the station is busy, calls are forwarded to destination
station.
FORWARD NO ANSWER If the station doesn’t answer within the ‘no answer’ time,
calls are forwarded to destination.
NO ANSWER TIME Used to set ‘no answer’ time. This time is also used for
External Call Forward.
PROCEDURE LCD DISPLAY
1. Press [TRANSFER] and dial 11
2. Using [VOLUME (-) or (+)], select station (e. g. 202)
3. Press [REDIAL] or [FLASH] to select the forwarding
method described above
(e.g. FORWARD NO ANSWER)
4. Enter the destination station To clear the data,
press [HOLD]
If your selection is NO ANSWER TIME,
enter a 3 digit time in seconds
5. Press [TRANSFER] to save and exit
DEFAULT DATA
FORWARD TYPE : NONE
NO ANSWER TIME : 015 SEC
RELATED MMC
NONE
NX-SERIESHYBRID KEY SYSTEM PROGRAMMING SECTION
MMC 12 STATION ON/OFF
This MMC allows the keyset user to set the following features:
AUTO HOLD Places an existing C.O. call on hold if another trunk key (C.O.
button) is pressed during that call.
AUTO TIMER Automatically starts stopwatch timer during a C.O. call.
HEADSET USE When ON, this feature disables the hook switch, allowing a
headset user to answer calls by pressing [SPEAKER]
HOT KEYPAD When ON, this feature allows the user to dial directory numbers
without having to first lift the handset or press the [SPEAKER] button.
KEY TONE When ON, this feature allows the user to hear a slight tone when
pressing keypad numbers on their set.
RING PREFERENCE When OFF, requires the user to press the fast flashing button to
answer a ringing call after lifting the handset.
PROCEDURE LCD DISPLAY
1. Press [TRANSFER] and dial 12
2. Using [VOLUME (-) or (+)], select a station (e. g. 202)
To select all stations, press [VOLUME (-)] first
3. Press [REDIAL] or [FLASH] to select the keyset features
described above (e.g. HEADSET USE)
4. Press [MUTE] or [MESSAGE] to make a selection
OR
Using KEYPAD, dial
0 for OFF
or 1 for ON (e.g. 1)
5. Press [TRANSFER] to save and exit
DEFAULT DATA
AUTO HOLD : OFF
AUTO TIMER : ON
HEADSET : OFF
HOT KEYPAD : ON
KEY TONE : ON
RING PREFERENCE : ON
RELATED MMC
NONE
4Programming 1999.9.15 12:42 PM 페이지15
4Programming 1999.9.15 12:42 PM 페이지16
NX-SERIESHYBRID KEY SYSTEM PROGRAMMING SECTION
MMC 13 SET RING FREQUENCY
This MMC is used to select the ring frequency at each keyset. There are four types of ring
frequency available at each keyset. A sample of the selection can be heard when a dial
key pad is pressed.
PPROCEDURE LCD DISPLAY
1. Press [TRANSFER] and dial 13
Display shows current ring frequency
2. Using [REDIAL] or [FLASH], select the station you
want (e.g. 202)
To select all stations, press [REDIAL] first
3. Press [MUTE] or [MESSAGE] to make selection.
A sample of selected frequency will be heard
OR
Using keypad, dial
1 for FREQUENCY 1
2 for FREQUENCY 2
3 for FREQUENCY 3
4 for FREQUENCY 4 (e.g. 2)
4. Press [TRANSFER] to save and exit
DEFAULT DATA
FREQUENCY 1
RELATED MMC
NONE
NX-SERIESHYBRID KEY SYSTEM PROGRAMMING SECTION
MMC 14 STATION NAMES
This MMC is used to enter a name of up to twelve (12) characters to identify an individual
station.
Names are entered via the keypad. Each press of a key will select a character.
Pressing a different key will advance the cursor to the next position.
For example if the station name is «SAM SMITH», press the number «7» four times to get
the letter «S». The characters programmed by each dial pad are listed below:
Dial 1 2 3 4 5 6 7 8 9 0 ✱ #
C o u n t
1 Q A D G J M P T W : ?
2 Z B E H K N R U X . & [
3
▩
C F I L O S V Y ! $ ]
4 1 2 3 4 5 6 7 8 9 0 ✱ #
NOTE : When the character you want appears on the same dial pad key as the previous
character, press [FLASH] to move the cursor to right.
PROCEDURE LCD DISPLAY
1. Press [TRANSFER] and dial 14
2. Using [VOLUME (-) or (+)], select a station (e.g. 202)
To select all stations, press [VOLUME (-)] first
3. Referring to the above list, the enter station name.
Use [FLASH] to advance cursor to the right
(up to 12 digits)
4. Press [TRANSFER] to save and exit
DEFAULT DATA
Model name
RELATED MMC
NONE
4Programming 1999.9.15 12:42 PM 페이지17
4Programming 1999.9.15 12:42 PM 페이지18
NX-SERIESHYBRID KEY SYSTEM PROGRAMMING SECTION
MMC 15 DATA DISPLAY
This MMC is used to change date display mode of each stations. Following date display
mode are available.
NOTE: AS-30S and SKP-816 model keysets display Western format only.
1 24 WESTERN WED 21 JUN 17:37
2 12 WESTERN WED 21 JUN 05:37
3 24 EASTERN 06/21 WED 17:37
4 12 EASTERN 06/21 WED 05:37
PROCEDURE LCD DISPLAY
1. Press [TRANSFER] and dial 15
2. Using [VOLUME (-) or (+)], select a station (e.g. 202)
To select all stations, press [VOLUME (-)] first
3. Press [MUTE] or [MESSAGE] to make selection
OR
Using the KEYPAD, dial
1 for 24 WESTERN
2 for 12 WESTERN
3 for 24 EASTERN
or 4 for 12 EASTERN (e.g. 3)
4. Press [TRANSFER] to save and exit
DEFAULT DATA
12 WESTERN
RELATED MMC
MMC 55 CURRENT DATE AND TIME
NX-SERIESHYBRID KEY SYSTEM PROGRAMMING SECTION
MMC 16 KEY EXTENDER
This MMC is used to view the programmable keys assigned to a keyset station.
It also allows the system administrator to assign key extenders to some keys to make a
feature key more specific. The feature keys accept extenders are:
FEATURE KEY EXTENDER
FWE External Call Forward(00~99)
SPEED Dial (00~99)
VAC Vacant messages (01~20)
PAG Page (0~5,✱)
DOR Door & Door Lock control (1~4)
EXC Boss and Secretary (1~2)
DPC Direct Pickup (station / trunk-line number)
GPC Group Pickup (0~9)
PROCEDURE LCD DISPLAY
1. Press [TRANSFER] and dial 16
2. Using [VOLUME (-) or (+)], select a station (e.g. 202)
3. Press [REDIAL] or [FLASH] to select a feature key
button (e.g. 22)
OR
Press the button you want to extend if it is already
programmed.
4. Dial the extender according to the above table.
A previous extender will be overwritten
To clear the extended key, press [HOLD]
5. Press [TRANSFER] to save and exit
DEFAULT DATA
Key extender is set to STATION KEY PROGRAMMING (MMC 72) data.
RELATED MMC
MMC 71 SYSTEM KEY PROGRAMMING
MMC 72 STATION KEY PROGRAMMING
4Programming 1999.9.15 12:42 PM 페이지19
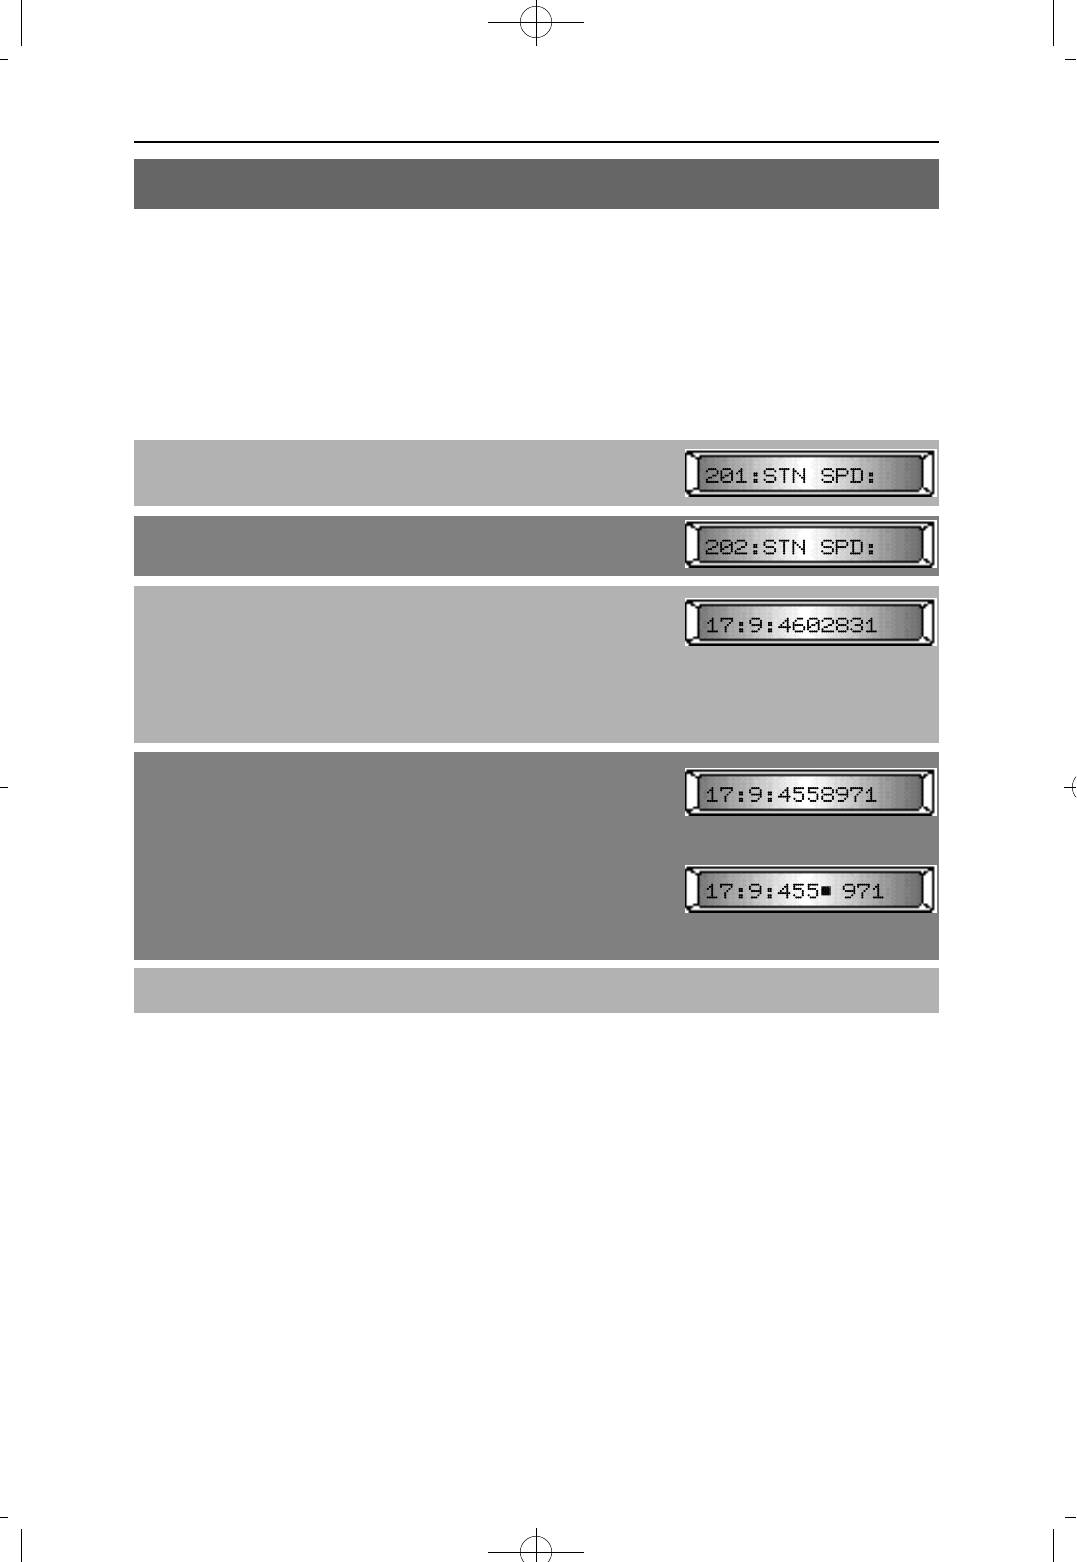
4Programming 1999.9.15 12:42 PM 페이지20
NX-SERIESHYBRID KEY SYSTEM PROGRAMMING SECTION
MMC 17 STATION SPEED-DIAL
This MMC is used to program the personal dial memory assigned to a station.
Each station may have up to 20 memory locations, numbered 00 to 19. Each dial number
consists of a trunk or trunk group access code followed by a separator ( : ) and up to 30
digits to be dialed. If you dial a valid trunk or trunk group access number, it will
automatically insert the separator.
PROCEDURE LCD DISPLAY
1. Press [TRANSFER] and dial 17
2. Using [VOLUME (-) or (+)], select a station (e.g. 202)
3. Press [REDIAL] or [FLASH] to select the entry.
OR
Dial the entry number (e.g.17)
If the data exceeds 13 digits, press [SPEED] to verify
the undisplayed data.
Display entry moves left 1 digit at a time
4. Enter station Number, Telephone number, or trunk
access code (e.g. 9), followed by the number to be
dialed (e.g. 4558971)
OR
Press [HOLD] to clear an entry
To make a digit invisible, press [MUTE] + digit + [MUTE].
▩
(e.g. 9 + 455 [MUTE] 8 [MUTE] 971)
The digit will display as ‘ ▩ ‘
5. Press [TRANSFER] to save and exit
DEFAULT DATA
NONE.
RELATED MMC
NONE

NX-SERIESHYBRID KEY SYSTEM PROGRAMMING SECTION
MMC 20 OPEN PROGRAMMING
This MMC is used to open or close Customer or Technician level programming.
If programming is not opened and an attempt is made to access a system MMC, the error
message [NOT PERMIT] will be displayed. A four-digit Customer passcode is required to
access Customer level programming allocated in MMC 90 (Customer MMC Number). Or
a four-digit Technician level passcode is required to open all the MMCs.
PROCEDURE LCD DISPLAY
1. Press [TRANSFER] and dial 20
2. Enter passcode
Default passcodes:
1234 for customer level programming
4321 for technician level programming
3. Press [MUTE] or [MESSAGE] to select DISABLE or
ENABLE
OR
Dial 0 to select DISABLE
or 1 for ENABLE
4. Press [TRANSFER] to save and exit
DEFAULT DATA
DISABLE
RELATED MMC
CUSTOMER PROGRAMMING: Refer to MMC 90
TECHNICIAN LEVEL PROGRAMMING : ALL MMCs
4Programming 1999.9.15 12:42 PM 페이지21
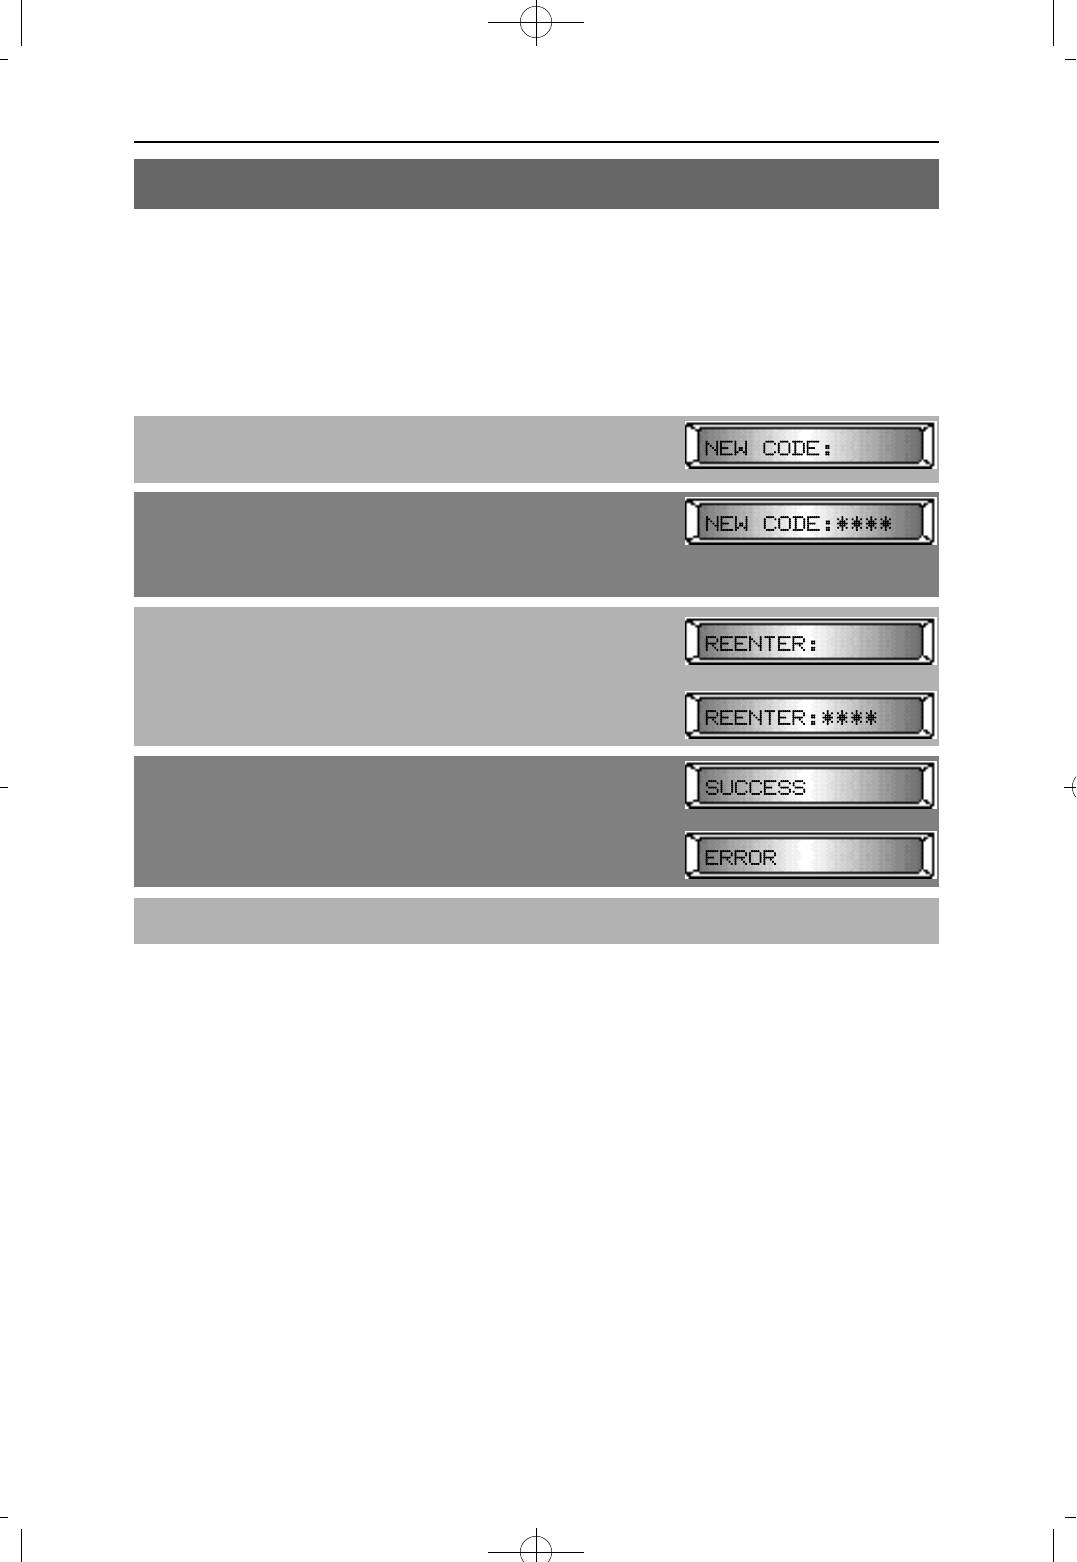
4Programming 1999.9.15 12:42 PM 페이지22
NX-SERIESHYBRID KEY SYSTEM PROGRAMMING SECTION
MMC 21 CHANGE PASSCODE
Use this MMC to change the passcode allowing access to MMC 20 ‘Open Programming’.
NOTE: The passcode is four digits long. A digit may be 0 to 9.
The current (old) passcode is required for this MMC.
NOTE: Press [HOLD] to reset passcode to default value ‘1234’.
PROCEDURE LCD DISPLAY
1. Press [TRANSFER] and dial 21
2. Enter new passcode via KEYPAD(maximum four digits)
To change customer passcode, first enable the customer
program To change technician passcode, you first
enable your technician program
3. Display shows
Enter new passcode via KEYPAD
4. If reentered passcode is valid, display will show
«SUCCESS»
OR
If invalid, display will show «ERROR»
5. Press [TRANSFER] to save and exit
DEFAULT DATA
Customer passcode : 1234
Technician passcode : 4321
RELATED MMC
MMC 20 OPEN PROGRAMMING
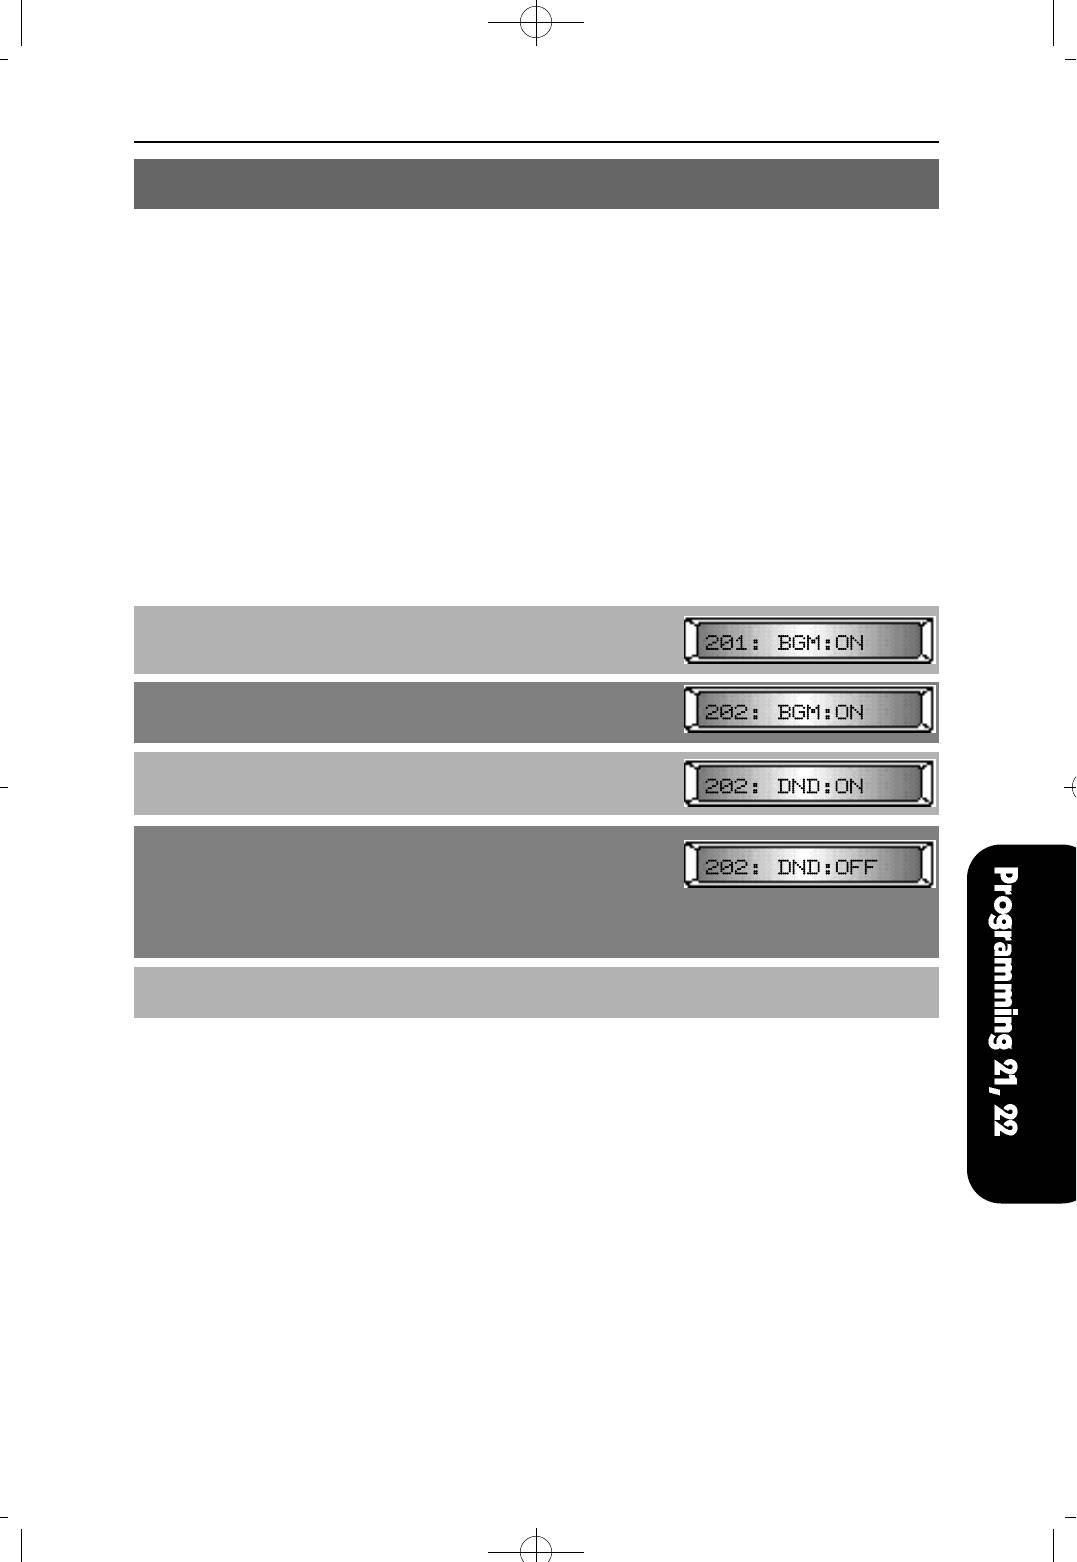
NX-SERIESHYBRID KEY SYSTEM PROGRAMMING SECTION
MMC 22 CUSTOMER ON/OFF
This MMC is used to allow the system administrator to set any of the following keyset
features:
BGM When ON, allows the user to hear background music.
DND When ON, allows the user to set the Do Not Disturb feature.
DOOR When ON, allows the user to open the door
HUNT When ON, an intercom call will be forwarded to the next station of
station group to which the station belongs.
MIKE When ON, the station can activate the speakerphone.
PAGE USE When ON, the station can page.
PAGE RECEIVE When ON, the station will receive the paging announcements.
SMDR When OFF, information related to the station will not print on the
SMDR report.
PROCEDURE LCD DISPLAY
1. Press [TRANSFER] and dial 22
2. Using [VOLUME (-) or (+)], select a station
To select all stations, press [VOLUME (-)] first
3. Press [REDIAL] or [FLASH] to select keyset features
listed above
4. Press [MUTE] or [MESSAGE] to select data
OR
Using KEYPAD, dial
0 for OFF
or 1 for ON
5. Press [TRANSFER] to save and exit
DEFAULT DATA
BGM : ON
DND : ON
DOOR : ON
HUNT : OFF
MIKE : ON
PAGE USE : ON
PAGE RECEIVE : ON
SMDR : ON
RELATED MMC
HUNT : MMC 35 ASSIGN STATION GROUP
PAGE USE, PAGE RECEIVE : MMC 23 PAGE ZONE
SMDR : MMC 81 SMDR OPTION
4Programming 1999.9.15 12:42 PM 페이지23
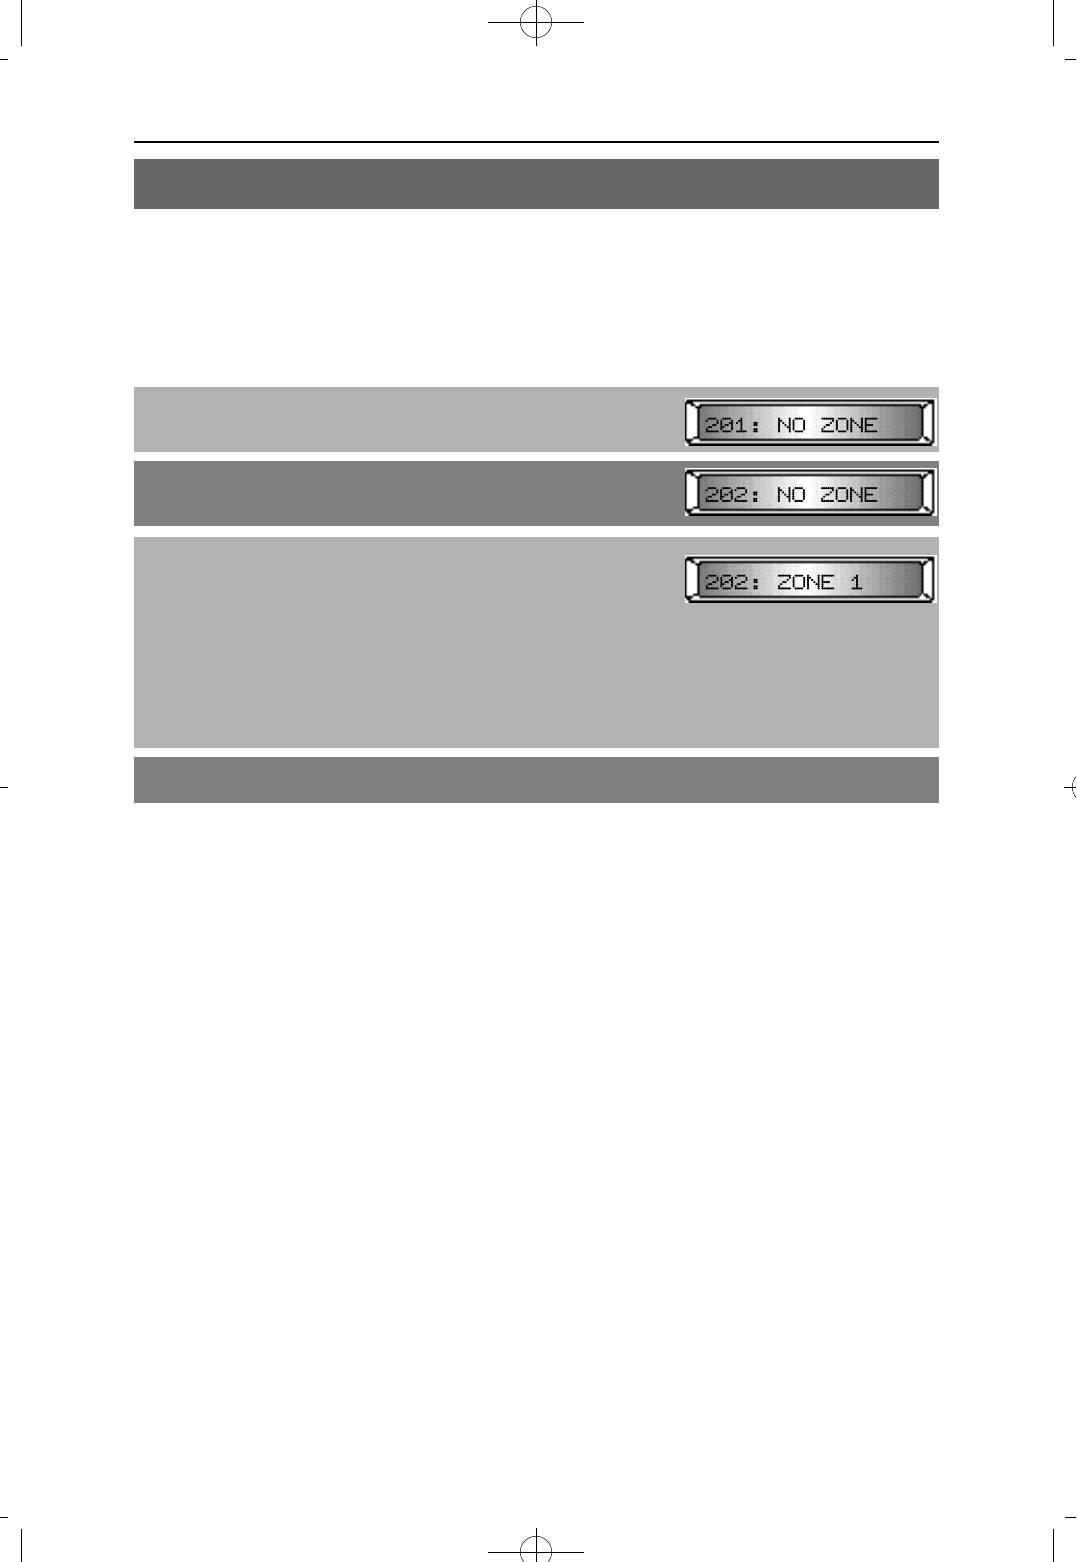
4Programming 1999.9.15 12:42 PM 페이지24
NX-SERIESHYBRID KEY SYSTEM PROGRAMMING SECTION
MMC 23 PAGE ZONE
This MMC is used to assign a keyset to one (or none) of the four internal paging zones.
NOTE: Number 5 is external paging and ‘ ✱ ‘ assigns to all internal and external paging
zones.
PROCEDURE LCD DISPLAY
1. Press [TRANSFER] and dial 23
2. Using [VOLUME (-) or (+)], select a station (e.g. 202)
To select all stations, press [VOLUME (-)] first
3. Press [MUTE] or [MESSAGE] to select
OR
Using KEYPAD, dial
0 for NO ZONE
1 for ZONE 1
2 for ZONE 2
3 for ZONE 3
or 4 for ZONE 4 (e.g. ZONE 1)
4. Press [TRANSFER] to save and exit
DEFAULT DATA
NO ZONE
RELATED MMC
MMC 22 CUSTOMER ON/OFF
PAGE USE
PAGE RECEIVE
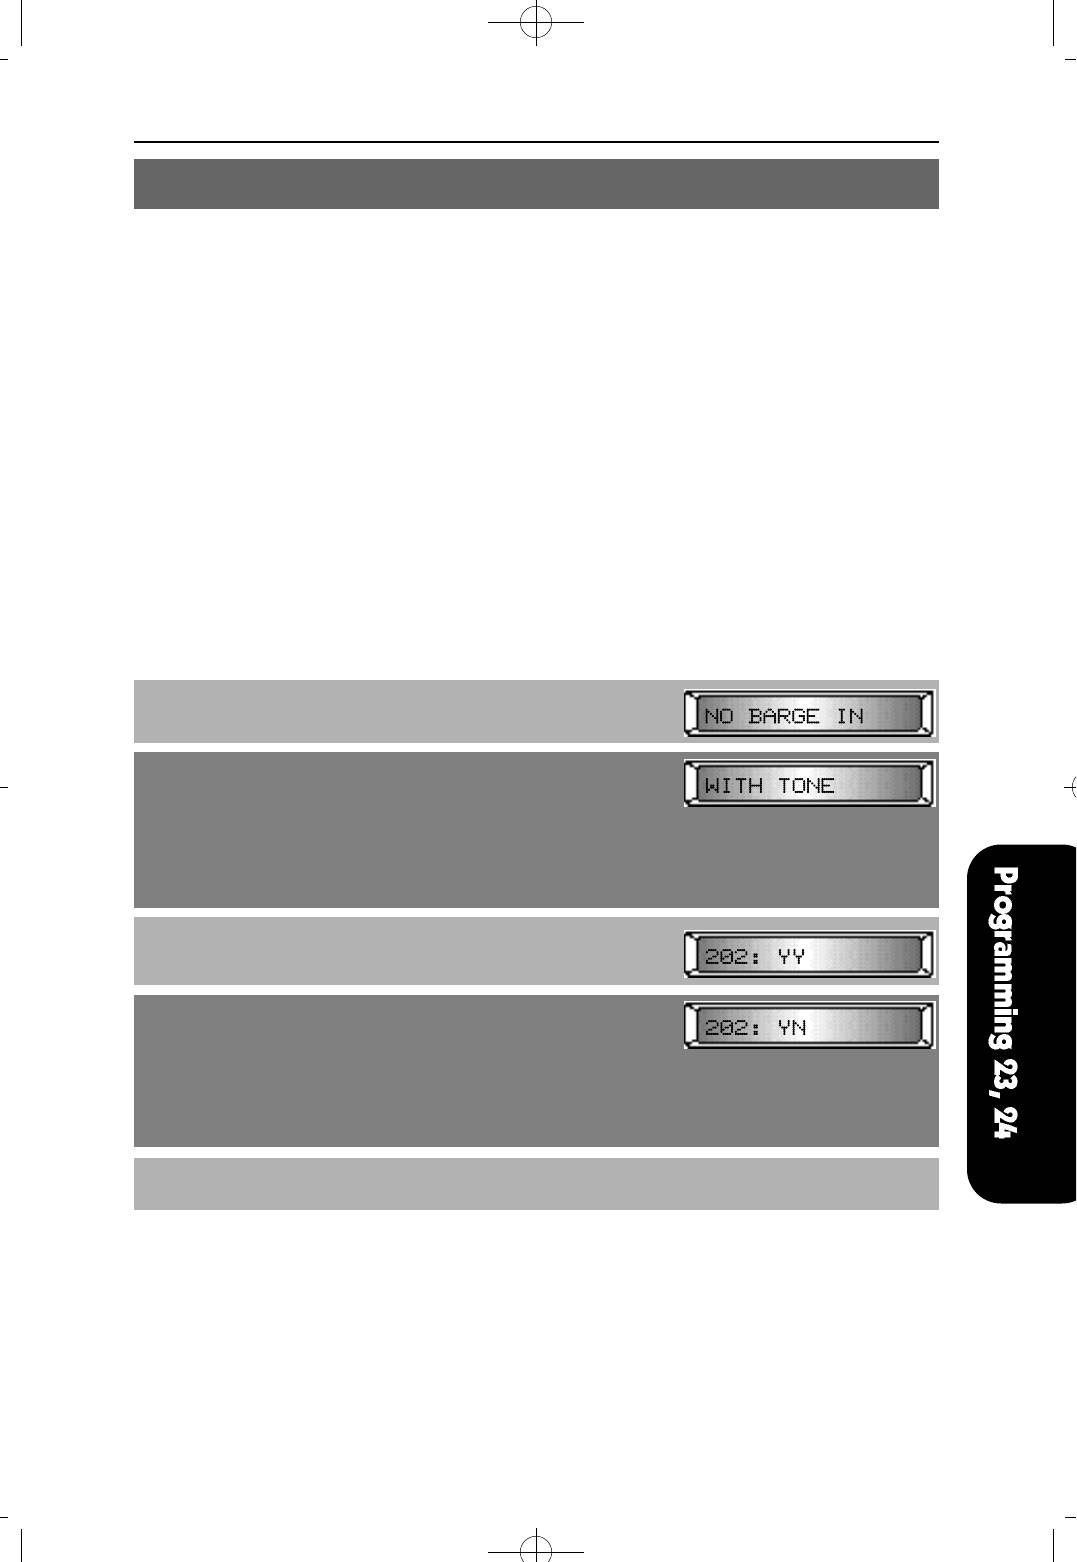
NX-SERIESHYBRID KEY SYSTEM PROGRAMMING SECTION
MMC 24 ASSIGN BARGE-IN
This MMC is used to set the type of barge-in permitted at a particular station.
After the barge-in type is set, the barge-in class can be set. The barge-in class allows or
disallows the user to barge-in on another station.
OPTION BARGE-IN TYPE DESCRIPTION
0 NO BARGE-IN Barge-in feature is unavailable regardless of a
station’s barge-in status.
1 WITH TONE Barge-in will produce an intrusion tone and
display at the barged-in on station.
2 WITHOUT TONE Barge-in is allowed. There is no barge-in tone
and no display at the barged-in station, and the
barge-in station will be muted.
OPTION BARGE-IN CLASS DESCRIPTION
00 NN You cannot barge-in. / Nobody can barge-in on you.
01 NY You cannot barge-in. / Others can barge-in on you.
10 YN You can barge-in. / Nobody can barge-in on you.
11 YY You can barge-in. / Others can barge-in on you.
PROCEDURE LCD DISPLAY
1. Press [TRANSFER] and dial 24
2. Pressing [MUTE] or [MESSAGE] to select barge-in type
OR
Using KEYPAD, dial
0 for NO BARGE IN
1 for WITH TONE
or 2 for WITHOUT TONE
3. Using [VOLUME (-) or (+)], select a station (e.g. 202)
To select all stations, press [VOLUME (-)] first
4. Using KEYPAD, dial
00 for NN
01 for NY
10 for YN
or 11 for YY
You can select barge-in closs (NN, NY, YN, YY)
5. Press [TRANSFER] to save and exit
DEFAULT DATA
BARGE-IN TYPE : NO BARGE IN
BARGE-IN CLASS : NN
RELATED MMC
NONE
4Programming 1999.9.15 12:42 PM 페이지25
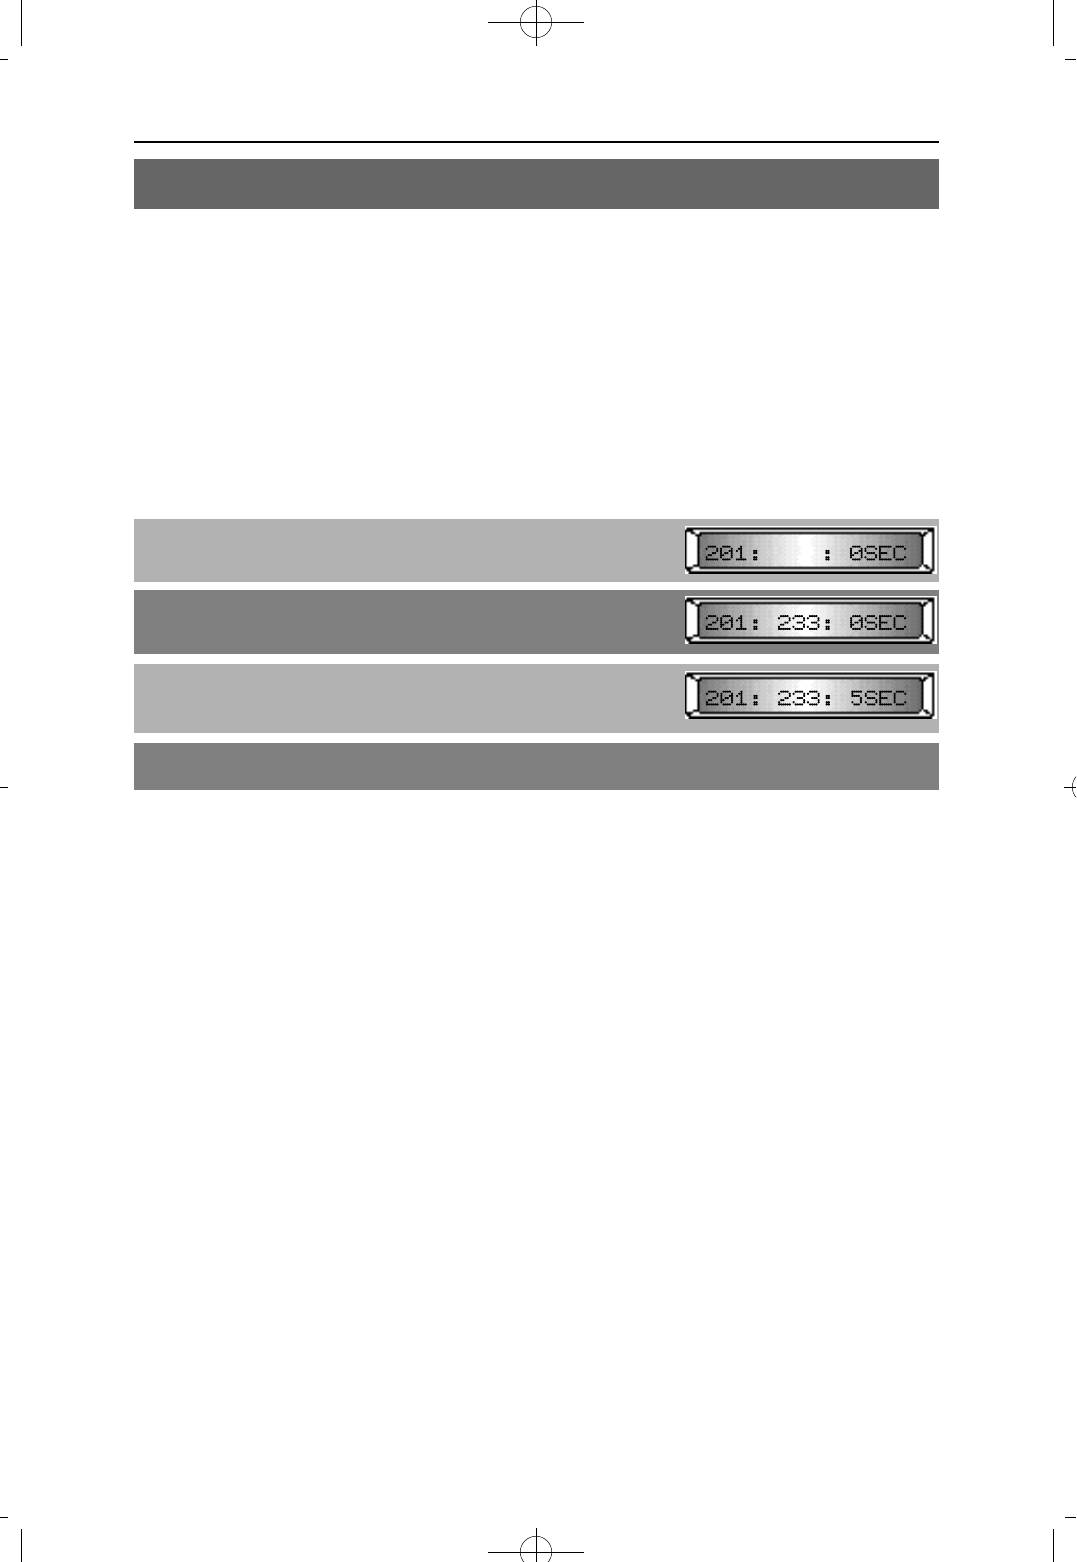
4Programming 1999.9.15 12:42 PM 페이지26
NX-SERIESHYBRID KEY SYSTEM PROGRAMMING SECTION
MMC 25 HOT/WARM LINE
This MMC is used to assign a hot line/prime line destination to a station.
The destination may be any of the following:
Station Number
Station Group Number
Trunk Number
Trunk Group Number
Speed-Dial location (00 to 99)
The Warm Line Delay Time is also assigned by this MMC.
PROCEDURE LCD DISPLAY
1. Press [TRANSFER] and dial 25
2. Using KEYPAD, select the destination (e.g. 233)
3. Enter a single digit for the Warm Line Delay Time
(0 — 9 Sec)
4. Press [TRANSFER] to save and exit
DEFAULT DATA
DESTINATION : NONE
WARM LINE DELAY TIME : 0 SEC
RELATED MMC
NONE
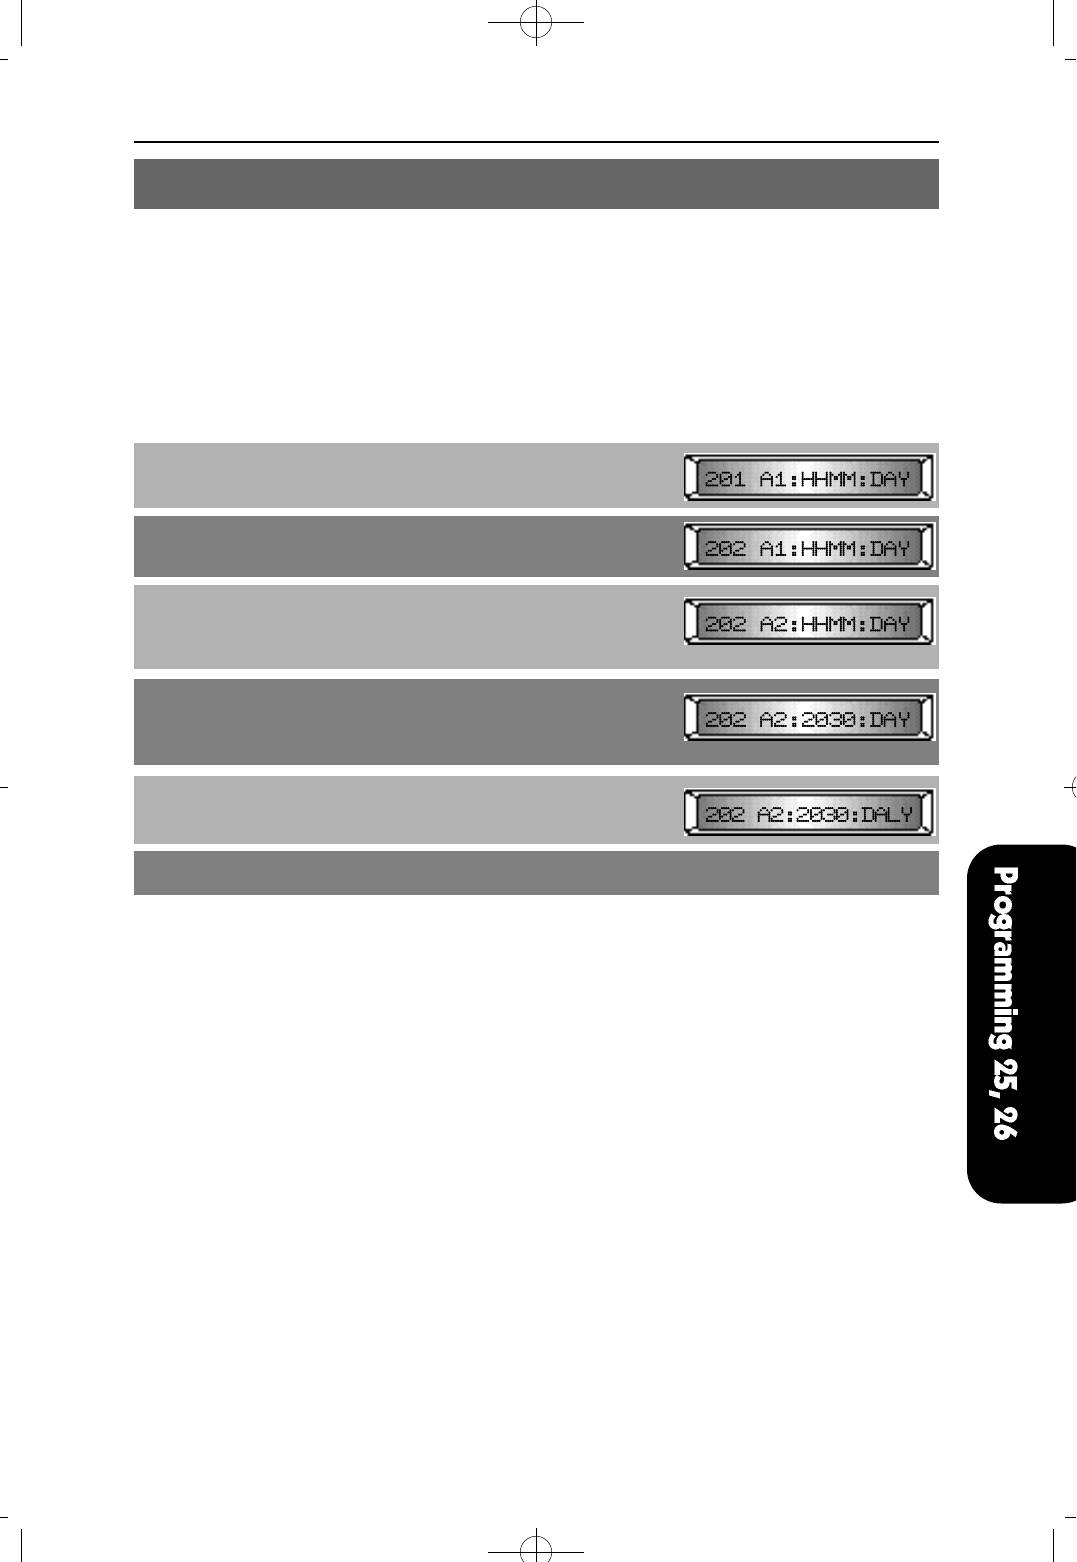
NX-SERIESHYBRID KEY SYSTEM PROGRAMMING SECTION
MMC 26 ALARM REMINDER
This MMC allows the system administrator or technician to set or change the alarm
clock/appointment reminder feature for any station. Three alarms may be set for each
station, and each alarm may be defined as a «DAY» alarm or as a «DAILY» alarm. The
DAY alarm is automatically canceled after it rings, while the DAILY alarm rings every day
at the same time.
PROCEDURE LCD DISPLAY
1. Press [TRANSFER] and dial 26
2. Use [VOLUME (-) or (+)], select a station (e.g. 202)
3. Press [REDIAL] or [FLASH] to select an alarm
number (1~3).
4. Dial the alarm time. The time is entered in 24 hour
format (0000 is 12:00 midnight)
To clear alarm data, press [HOLD]
5. Press [MUTE] or [MESSAGE] to select an alarm mode
6. Press [TRANSFER] to save and exit
DEFAULT DATA
ALARM MODE : DAY MODE
ALARM1 : HHMM DAY
ALARM2 : HHMM DAY
ALARM3 : HHMM DAY
RELATED MMC
MMC 55 CURRENT DATE AND TIME
4Programming 1999.9.15 12:42 PM 페이지27
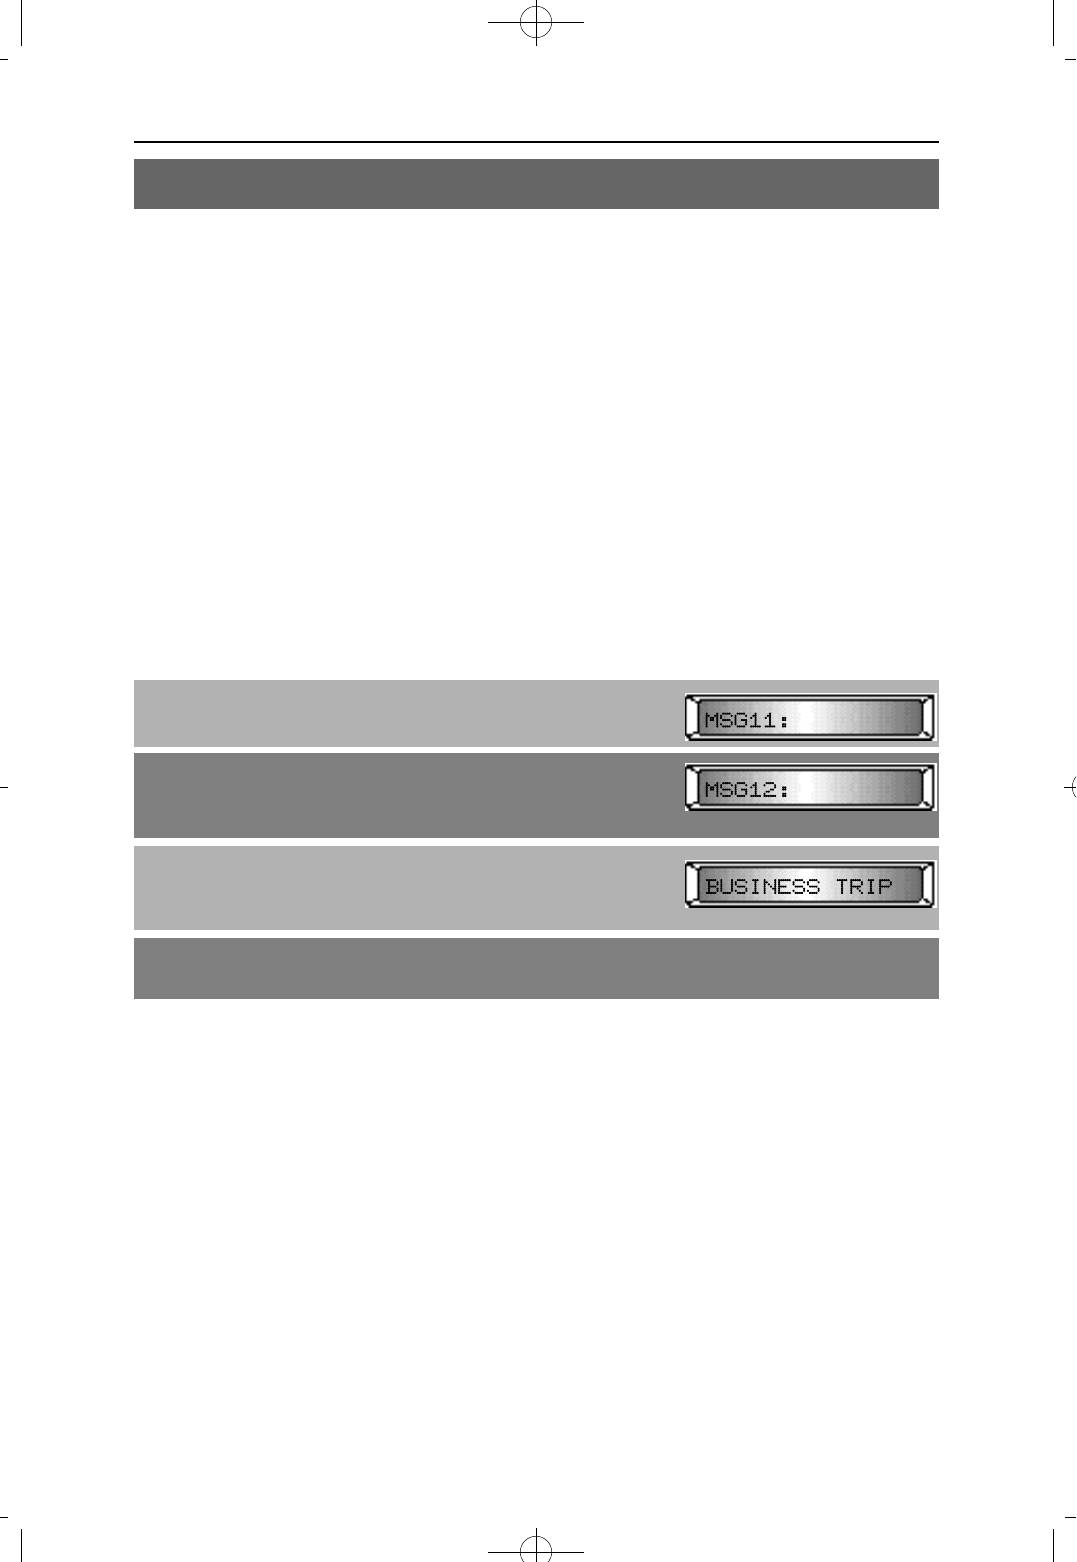
4Programming 1999.9.15 12:42 PM 페이지28
NX-SERIESHYBRID KEY SYSTEM PROGRAMMING SECTION
MMC 27 VACANT MESSAGE
The system provides up to 20 vacant messages that can be selected by any display
keyset user. Messages 01 through 10 are pre-programmed, as shown below. Messages
11 through 20 may be customized via this MMC. The selected message will appeared in
the display of any calling station.
NO. MESSAGE
01 IN A MEETING
02 OUT ON A CALL
03 OUT TO LUNCH
04 LEAVE A MESSAGE
05 PAGE ME
06 OUT OF TOWN
07 IN TOMORROW
08 RETURN AFTERNOON
09 ON VACATION
10 GONE HOME
PROCEDURE LCD DISPLAY
1. Press [TRANSFER] and dial 27
2. Use [VOLUME (-) or (+)] to select the desired message
number (11-20)
3. Enter the message text
Refer to MMC 14
4. Press [TRANSFER] to save and exit
DEFAULT DATA
NONE
RELATED MMC
MMC 14 STATION NAMES
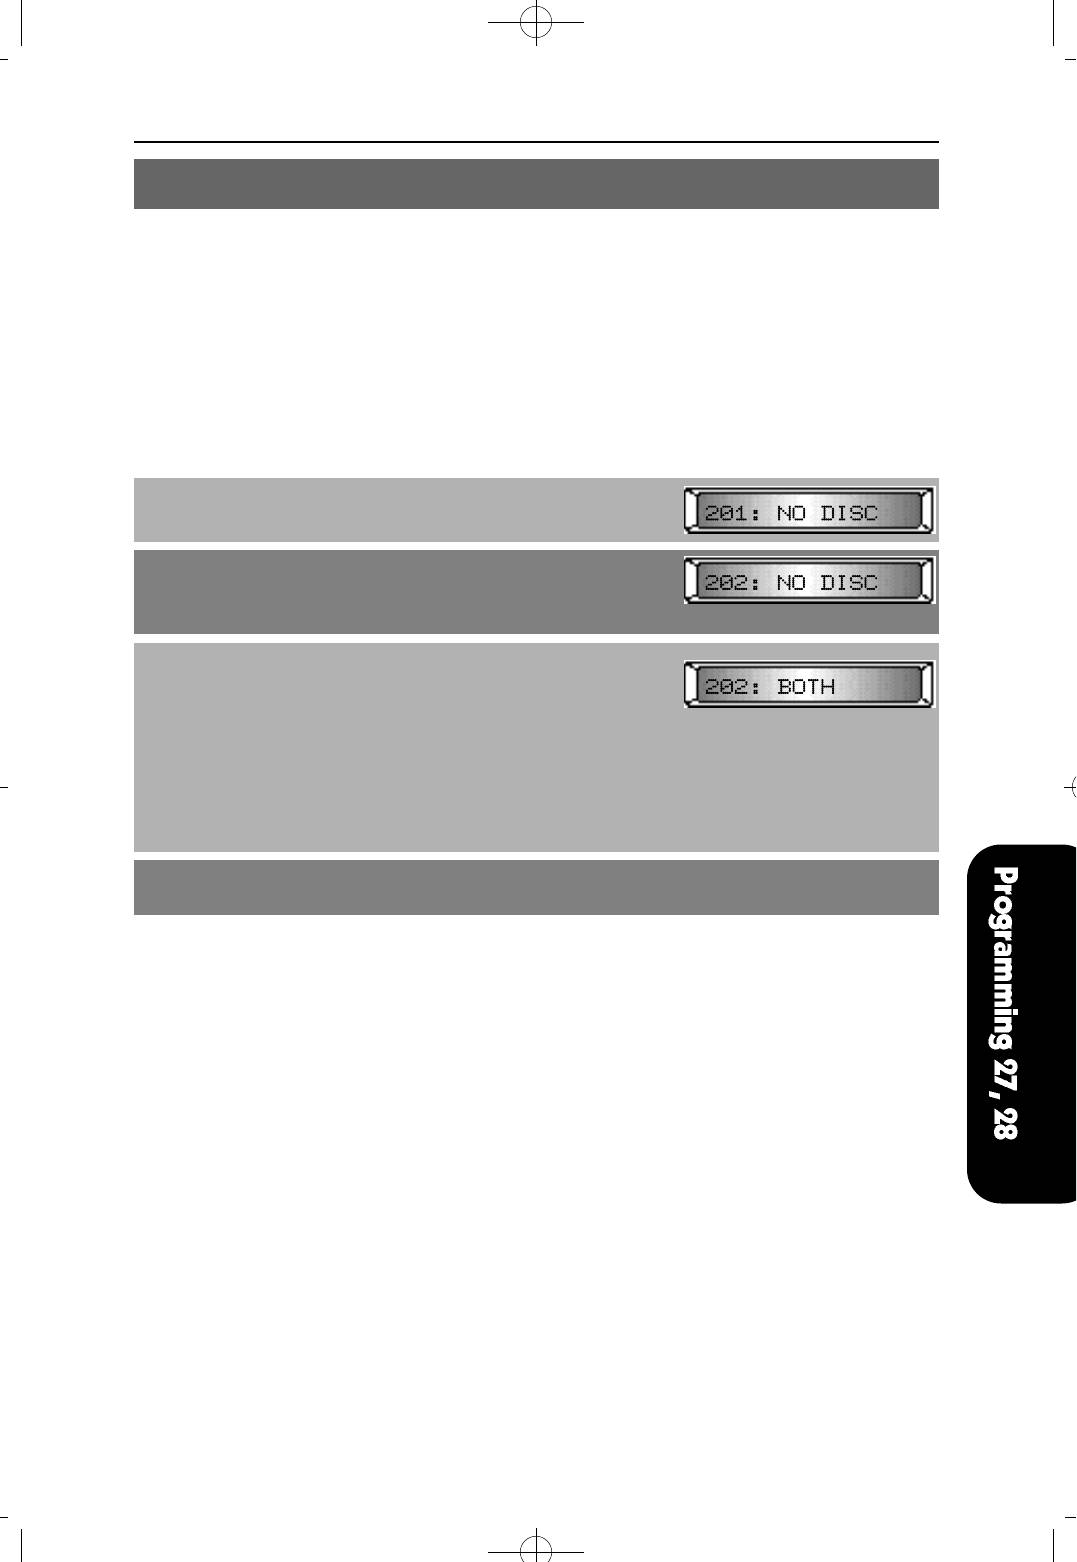
NX-SERIESHYBRID KEY SYSTEM PROGRAMMING SECTION
MMC 28 CALL DISC
Used to assign the incoming and outgoing call disconnection per station.
There are four different option.
0 No Disconnection
1 Out Only
2 In Only
3 Both
PROCEDURE LCD DISPLAY
1. Press [TRANSFER] and dial 28
2. Using [VOLUME (-) or (+)], select the station you want
(e.g. 202)
If you want to select all station, press [VOLUME (-)] first.
3. Press [MUTE] or [MASSAGE] in several times,
you can make selection
OR
Using KEYPAD, dial
0 for No Disconnection
1 for Out Only
2 for In Only
or 3 for both(e.g., 3)
4. Press [TRANSFER] to save and exit
DEFAULT DATA
NO DISC
RELATED MMC
MMC 50 SYSTEM TIMERS
TRK DISC
MMC 42 TRUNK ON/OFF
TRK DISC
4Programming 1999.9.15 12:42 PM 페이지29
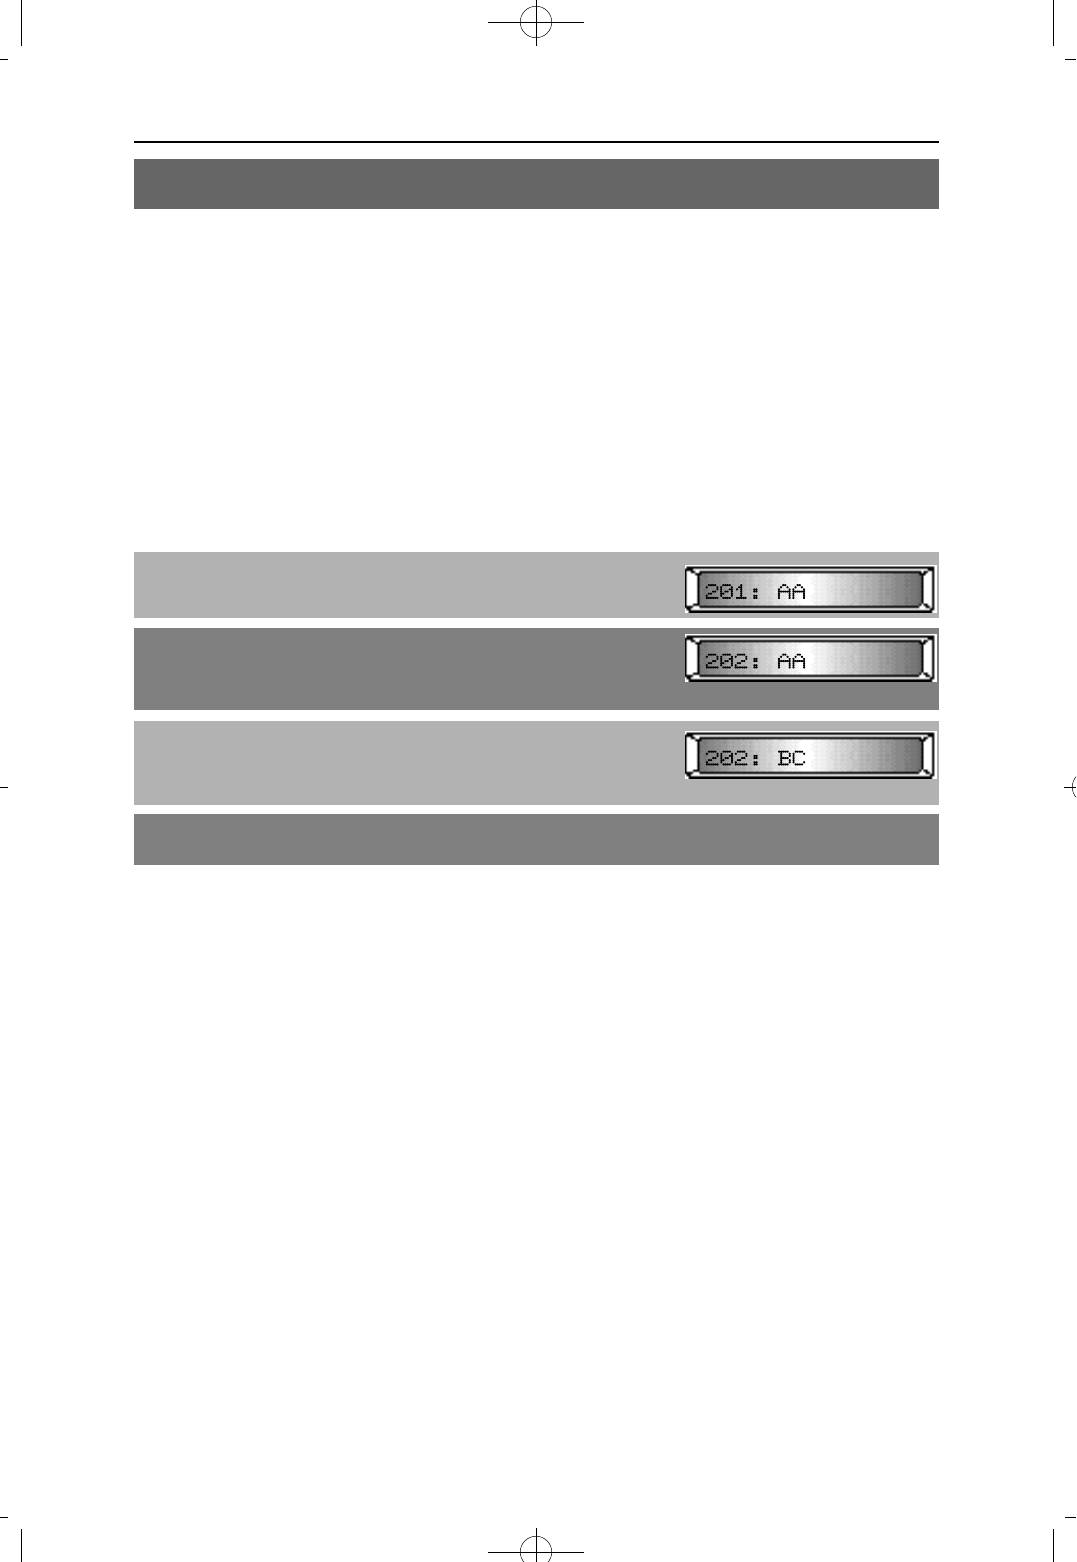
4Programming 1999.9.15 12:43 PM 페이지30
NX-SERIESHYBRID KEY SYSTEM PROGRAMMING SECTION
MMC 30 STATION TOLL CLASS
This MMC is used to assign any of the 6 different day and/or night class of service to each
station, as per the table below:
DIAL DIGIT TOLL CLASS DESCRIPTIONS
1 A No restriction
2 B Follow allow/deny table for each class
3 C Follow allow/deny table for each class
4 D Follow allow/deny table for each class
5 E Follow allow/deny table for each class
6 F Intercom call only
PROCEDURE LCD DISPLAY
1. Press [TRANSFER] and dial 30
2. Using [VOLUME (-) or (+)], select a station (e.g. 202)
To select all stations, press [VOLUME (-)] first
3. Dial 1~6 (e.g. 2 3) (two digits, the first for Day and the
second for Night class), to select A~F class as per table
above. Display shows A~F class
4. Press [TRANSFER] to save and exit
DEFAULT DATA
DAY CLASS : A
NIGHT CLASS : A
RELATED MMC
MMC 60 TOLL DENY TABLE/APPLY
MMC 61 TOLL ALLOW TABLE/APPLY
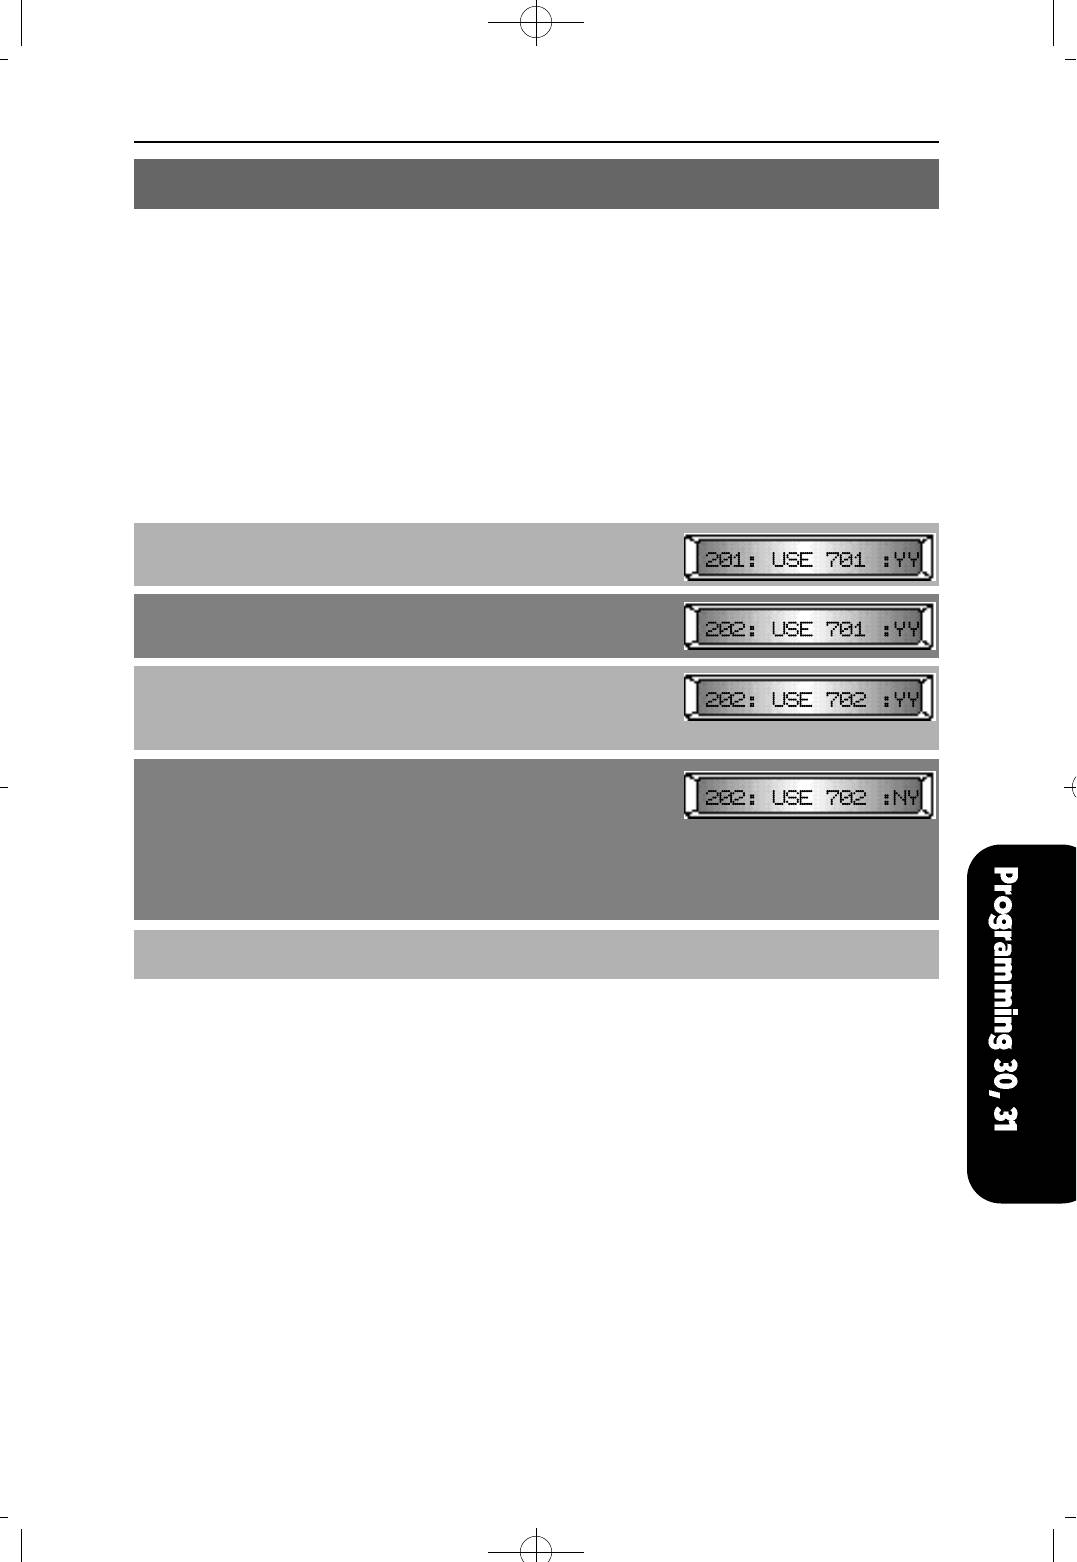
NX-SERIESHYBRID KEY SYSTEM PROGRAMMING SECTION
MMC 31 EXT/TRK USE
This MMC is used to allow trunks the ability to answer incoming calls, to dial out, or to do
both, on a per-station basis. Those abilities are displayed as Y or N for each action
(e.g. NY: disallow dialing out and allow answering incoming calls).
DIAL DIGIT TRK USE DESCRIPTION
00 NN You cannot either dial and answer
01 NY You cannot dial but can answer
10 YN You can dial but cannot answer
11 YY You can both dial and answer
PROCEDURE LCD DISPLAY
1. Press [TRANSFER] and dial 31
2. Using [VOLUME (-) or (+)], Select a station (e.g. 202)
To select all stations, press [VOLUME (-)] first
3. Select trunk number by pressing [REDIAL] or [FLASH]
repeatedly
To select all trunks, press [REDIAL] first
4. You can select NN, NY, YN or YY stations (e.g., NY)
Using KEYPAD,
0 for deny the action
1 for allow the action
(Two digits must be dialed. First digit for dialing out,
and second for answering incoming calls.)
5. Press [TRANSFER] to save and exit
DEFAULT DATA
ALL TRUNK : YY
RELATED MMC
NONE
4Programming 1999.9.15 12:43 PM 페이지31

4Programming 1999.9.15 12:43 PM 페이지32
NX-SERIESHYBRID KEY SYSTEM PROGRAMMING SECTION
MMC 32 INTERCOM USE
This MMC is used to allow/disallow station intercom calls.
PROCEDURE LCD DISPLAY
1. Press [TRANSFER] and dial 32
2. Use [VOLUME (-) or (+)], to select a station (e.g. 202)
To select all stations, press [VOLUME (-)] first
3. Press [REDIAL] or [FLASH] to select call station
(e.g. ALL)
To select all stations, press [REDIAL] first
4. Press [MUTE] or [MESSAGE] to select the
allow/disallow option (e.g. disallow all intercom calls)
OR
Using KEYPAD, dial
0(N) for disallow intercom call
1(Y) for allow intercom call
If you set N, intercom calls are not possible,
calling the operator is possible
5. Press [TRANSFER] to save and exit.
DEFAULT DATA
CALL ALL : Y
RELATED MMC
NONE
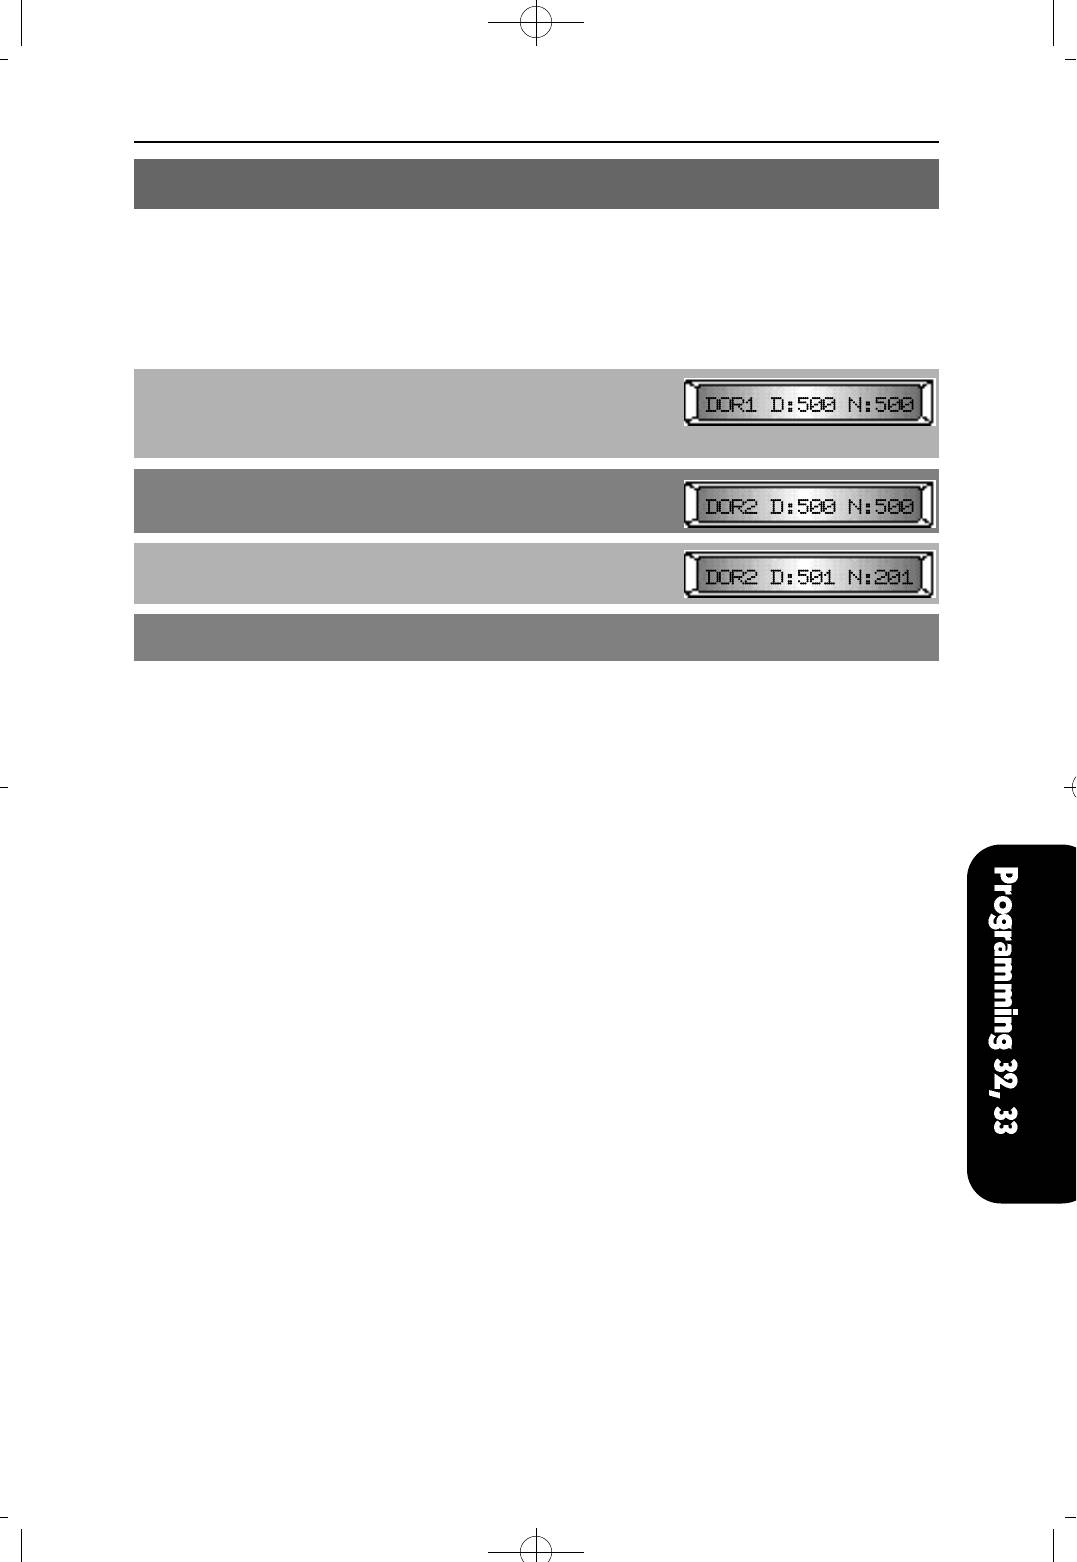
NX-SERIESHYBRID KEY SYSTEM PROGRAMMING SECTION
MMC 33 ASSIGN DOOR RING
This MMC is used to designate which devices (station or station group) will ring when a
door box button is pressed.
PROCEDURE LCD DISPLAY
1. Press [TRANSFER] and dial 33
Display shows designated stations or station
groups for DOOR1 (day and night)
2. Press [VOLUME (-) or (+)] to select DOOR 1 or
DOOR 2
3. Enter new DAY/NIGHT selection via dial keypad
(e.g. 501 for day, and 201 for night)
4. Press [TRANSFER] to save and exit.
DEFAULT DATA
DOOR1: DAY: 500 NIGHT: 500
DOOR2: DAY: 500 NIGHT: 500
RELATED MMC
NONE
4Programming 1999.9.15 12:43 PM 페이지33

4Programming 1999.9.15 12:43 PM 페이지34
NX-SERIESHYBRID KEY SYSTEM PROGRAMMING SECTION
MMC 34 ASSIGN PICKUP GROUP
This MMC is used to allow the assignment of stations to call pickup groups.
There may be a maximum 10 pickup groups (0~9). An unlimited number of members can
belong to each group. Stations can be in only one pickup group at any given time.
PROCEDURE LCD DISPLAY
1. Press [TRANSFER] and dial 34
Display shows the first member of pickup group 0
2. Using [VOLUME (-) or (+)], select a pickup group
number (e.g. GPC1)
3. Press [REDIAL] or [FLASH] to scroll through the
members of the selected pickup group
4. Dial station number
If dialed number is the member of another pickup
group, the station number will removed from the
previous group automatically.
Dialed number overwrites the previous number.
5. Press [TRANSFER] to save and exit
DEFAULT DATA
[GPC0] : All stations
[GPC1]~[GPC9] : NONE
RELATED MMC
NONE
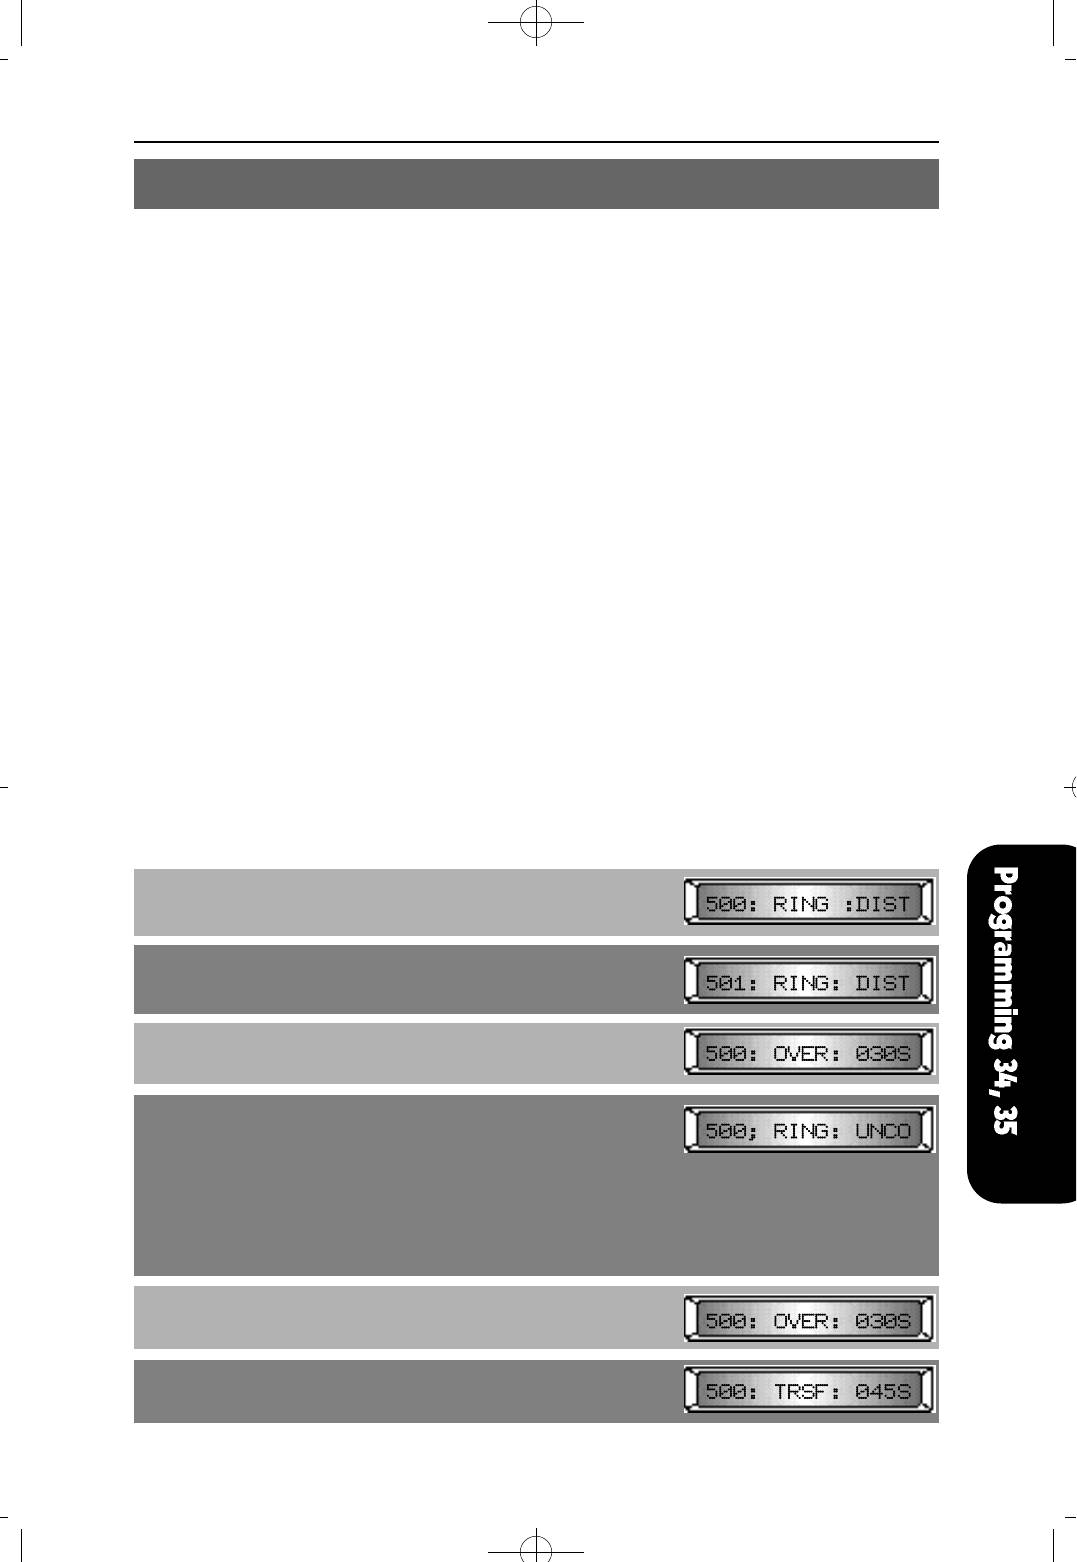
NX-SERIESHYBRID KEY SYSTEM PROGRAMMING SECTION
MMC 35 ASSIGN STATION GROUP
This MMC is used to assign members of a station group. There are several options that
can be selected for ringing, overflow, group transfer and overflow destination, and group
type. There may be a maximum twenty (20) groups.
OPTIONS DISPLAY RANGE
Ring mode RING
Overflow time OVER 000 ~ 250 sec
Group transfer time TRSF 000 ~ 250 sec
Overflow port NEXT
Group types TYPE
RING MODES DESCRIPTION
1 SEQUENTIAL The first idle station listed in the group will ring. If the first is busy,
the next idle station will ring.
2 DISTRIBUTE The first call will ring the first station listed in the group.
The next call will ring the next station listed in the group.
3 CONDITION All the stations but non-busy stations listed in the group will ring.
4 UNCONDITION All the stations listed in the group will ring. Busy stations will
receive off-hook ring.
GROUP TYPES
1 NORMAL GROUP
2 VMAA GROUP
PROCEDURE LCD DISPLAY
1. Press [TRANSFER] and dial 35
Display shows ring mode of Operator group 500.
2. Using [VOLUME (-) or (+)], select a station group
number (500~519).
3. Press [REDIAL] or [FLASH] to select options
(RING, OVER, TRSF, NEXT, TYPE, MEMBER)
4a. Press [MUTE] or [MESSAGE] to select ring mode
OR
Dial
1 for SEQUENTIAL
2 for DISTRIBUTE
3 for CONDITION
or 4 for UNCONDITION
4b. To change the OVERFLOW TIME, enter 3 digits of
OVERFLOW TIME
4c. To change the GROUP TRANSFER TIME, dial 3 digits
of GROUP TRANSFER TIME
4Programming 1999.9.15 12:43 PM 페이지35
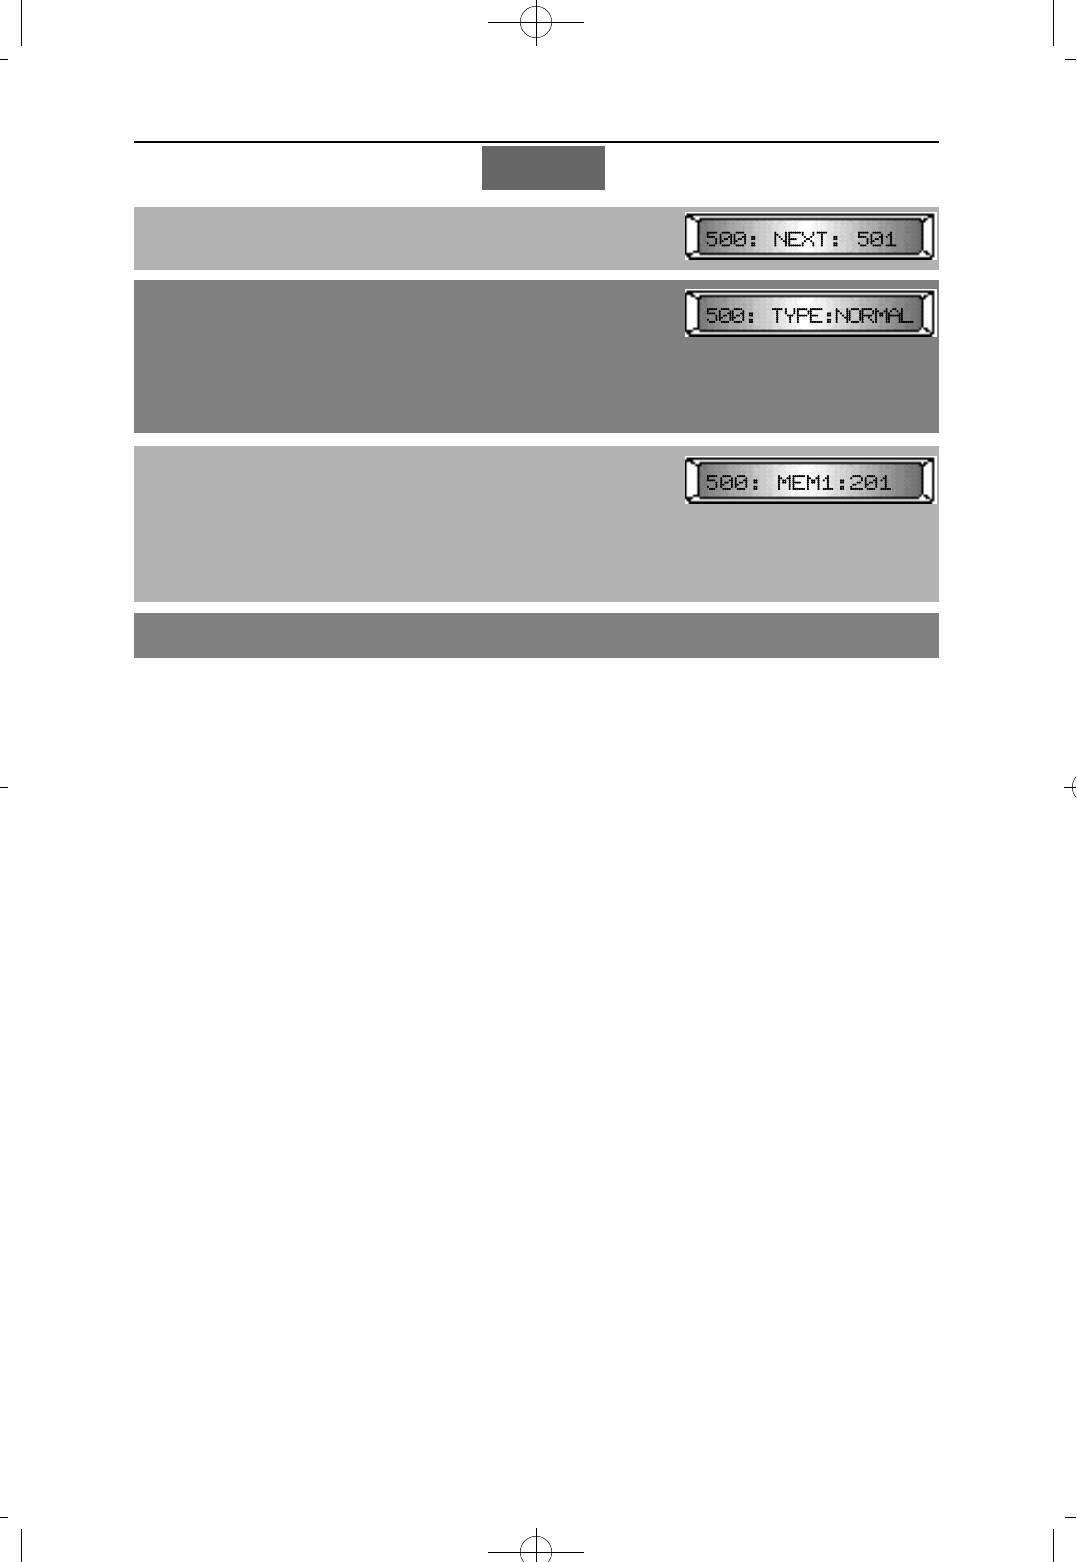
4Programming 1999.9.15 12:43 PM 페이지36
NX-SERIESHYBRID KEY SYSTEM PROGRAMMING SECTION
MMC 35
4d. To assign the overflow port, enter the station or station
group number.
4e. Press [MUTE] or [MESSAGE] to select the station
group type
OR
Using KEYPAD,
1 for NORMAL GROUP
2 for VMAA GROUP
4f. To assign amember to the station group, enter the
station number.
If dialed number is the member of another station group,
the station number will removed from the previous group
automatically.
Dialed number overwrites the previous number.
5. Press [TRANSFER] to save and exit
DEFAULT DATA
RING : DIST
OVERFLOW : 030 SEC
TRANSFER TIME : 045 SEC
TYPE : NORMAL GROUP
MEMBER : 201
GROUP : 500
OTHER GROUP : NONE
RELATED MMC
MMC 22 CUSTOMER ON/OFF
HUNT
NX-SERIESHYBRID KEY SYSTEM PROGRAMMING SECTION
MMC 36 ASSIGN BOSS/SECRETARY
This MMC is used to assign BOSS keysets to SECRETARY keysets. One SECRETARY
station may include two (2) BOSS stations.
PROCEDURE LCD DISPLAY
1. Press [TRANSFER] and dial 36
2. Using [VOLUME (-) or (+)], select the SECRETARY
station (e.g. 202)
Display shows the BOSS stations
3. Enter the BOSS stations
(e.g. BOSS1: 220, BOSS2: 230)
4. Press [TRANSFER] to save and exit
DEFAULT DATA
BOSS1: NONE BOSS2: NONE
RELATED MMC
NONE
4Programming 1999.9.15 12:43 PM 페이지37
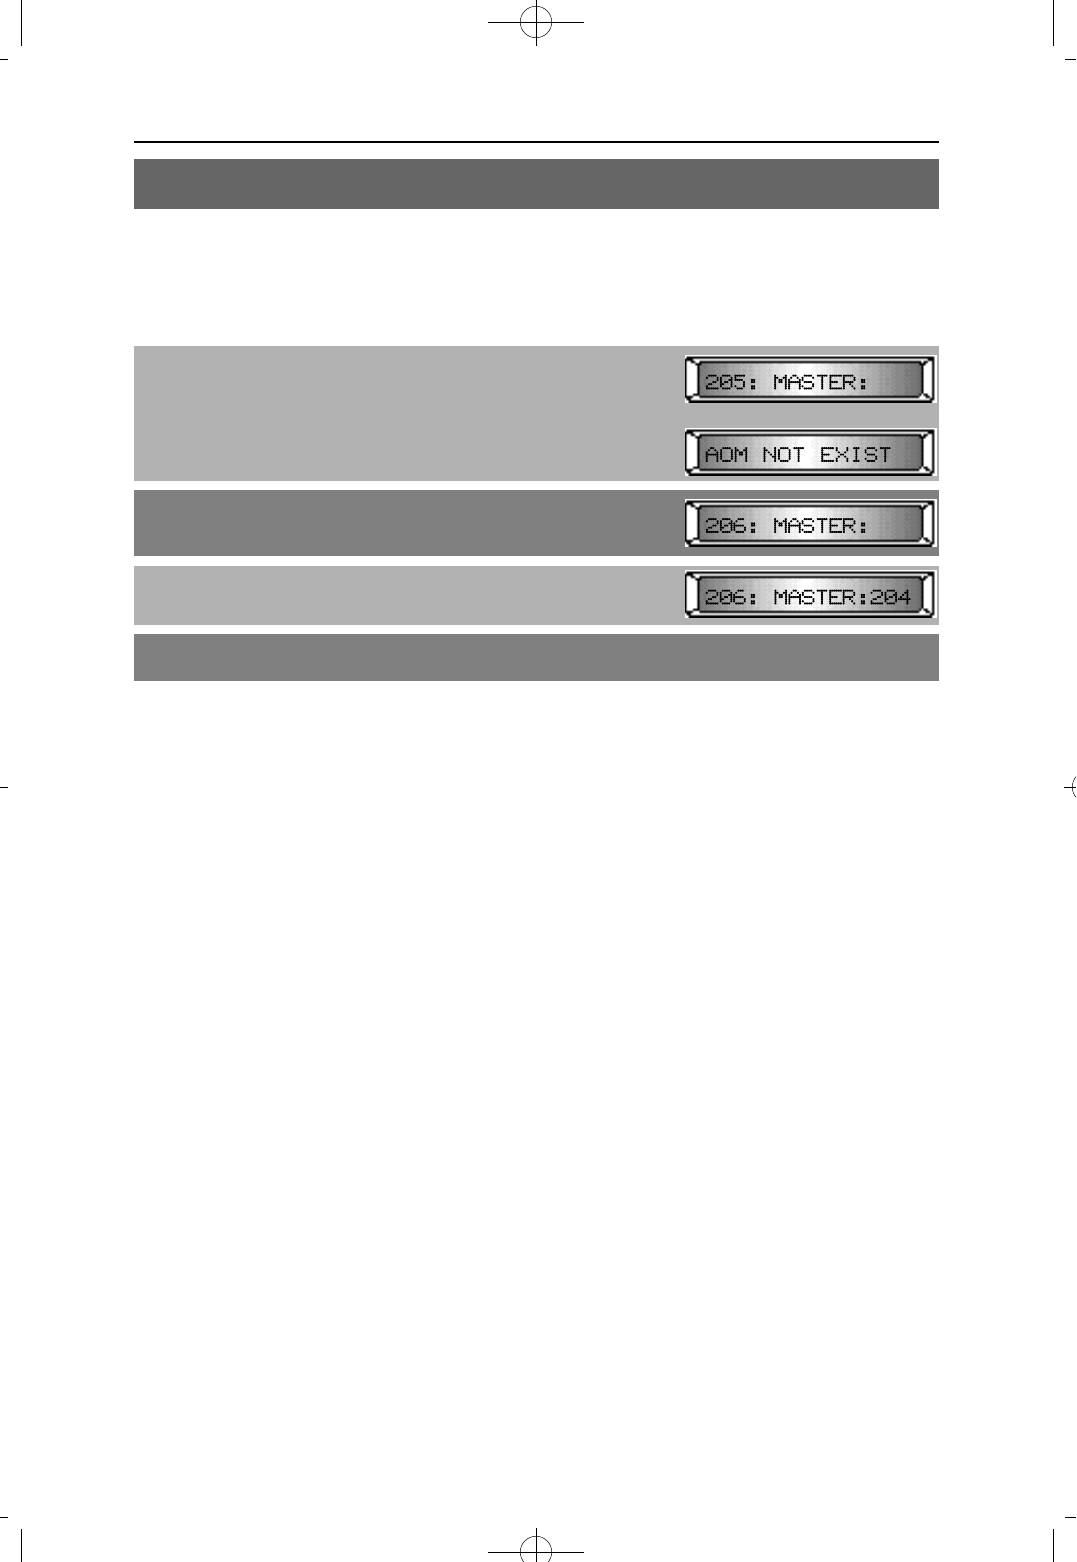
4Programming 1999.9.15 12:43 PM 페이지38
NX-SERIESHYBRID KEY SYSTEM PROGRAMMING SECTION
MMC 37 ASSIGN ADD-ON MODULE
This MMC is used to assign an add-on module (AOM) to a station.
PROCEDURE LCD DISPLAY
1. Press [TRANSFER] and dial 37
Display shows the first AOM port
If there is no AOM port, display shows:
2. Press [VOLUME (-) or (+)], to select the AOM port
To clear any previous entry, press [HOLD]
3. Enter master station number
4. Press [TRANSFER] to save and exit
DEFAULT DATA
NONE
RELATED MMC
NONE

NX-SERIESHYBRID KEY SYSTEM PROGRAMMING SECTION
MMC 38 SLT DIALING TYPE
This MMC is used to define the dial type of phone connected to each SLT port.
Keysets are not affected by this MMC.
There are two dialing types:
DIALING TYPES
1 DTMF Dual Tone Multi-Frequency (Touch Tone)
2 PULSE Dial Pulse (rotary)
PROCEDURE LCD DISPLAY
1. Press [TRANSFER] and dial 38
Display shows the SLT port (e.g. 217)
If there is no SLT port, display shows
2. Using [VOLUME (-) or (+)], select the SLT port number
To select all stations, press [VOLUME (-)] first
3. Press [MUTE] or [MESSAGE] to select the SLT type.
OR
Using KEYPAD, dial
1 for DTMF
or 2 for PULSE
4. Press [TRANSFER] to save and exit
DEFAULT DATA
DTMF
RELATED MMC
NONE
4Programming 1999.9.15 12:43 PM 페이지39
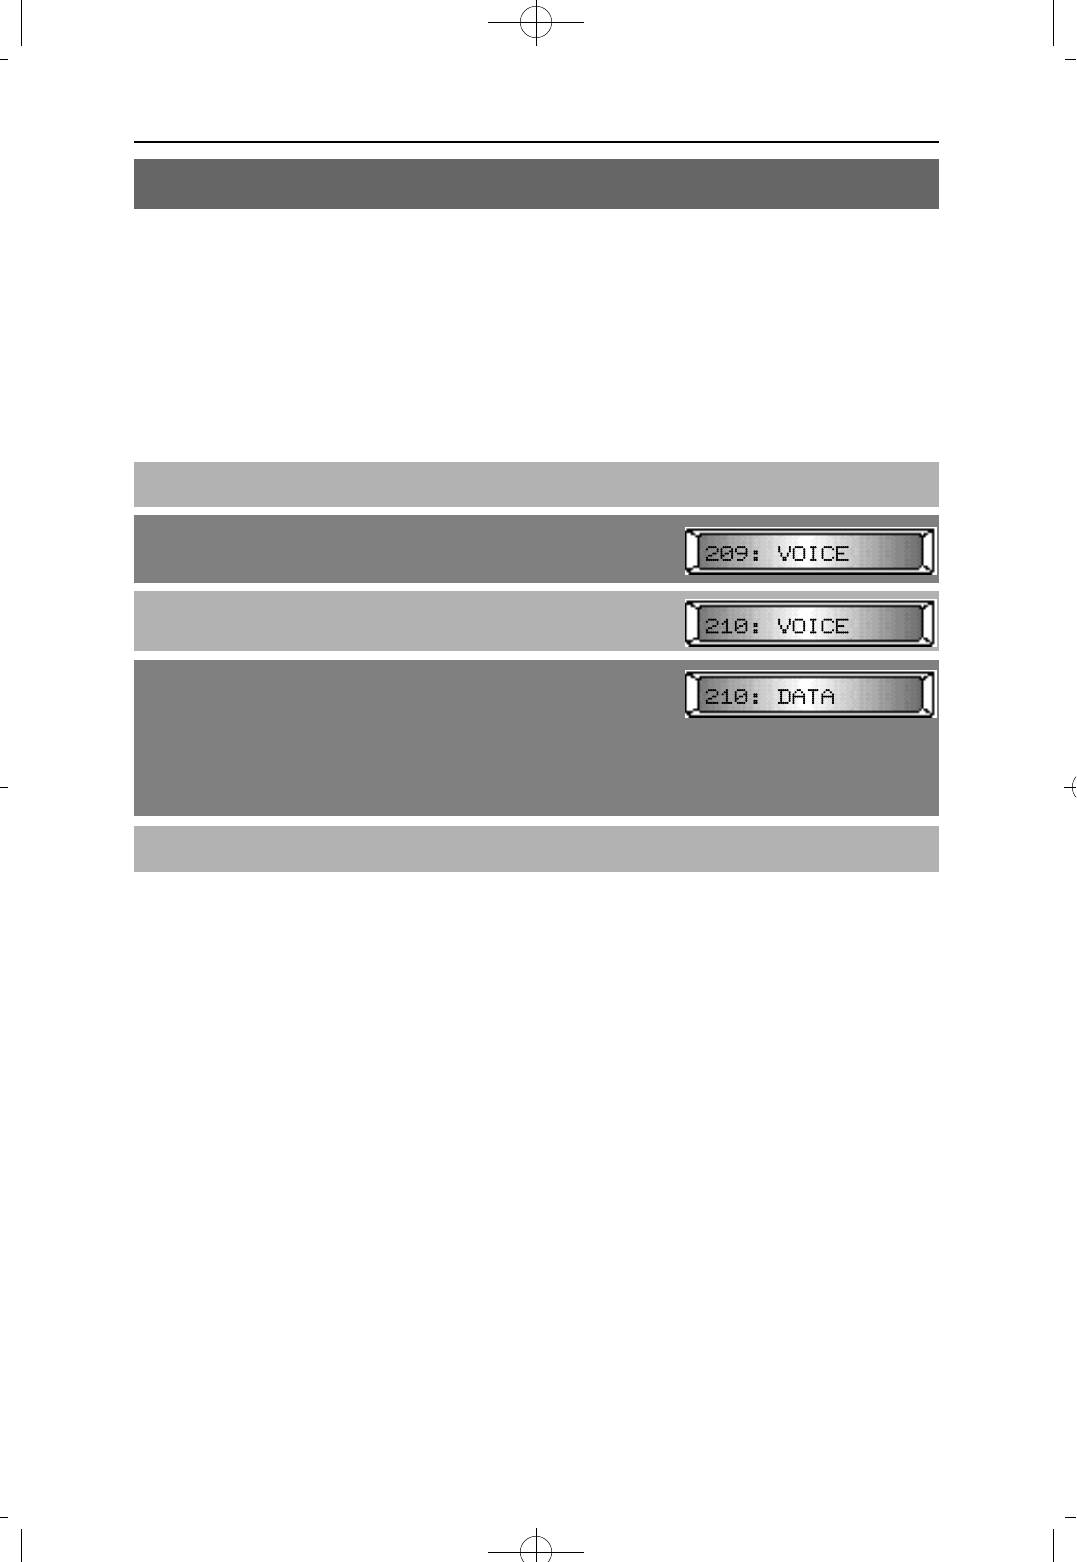
4Programming 1999.9.15 12:43 PM 페이지40
NX-SERIESHYBRID KEY SYSTEM PROGRAMMING SECTION
MMC 39 DATA LINE
Used to assign SLT ports to be used for data transmission.
VOICE — The station will be used for voice communication. All intrusion and
warning tones will be heard during conversation.
DATA — The station will be used for data communication. No intrusion or warning
tones will occur during data transmission.
PROCEDURE LCD DISPLAY
1. Press [TRANSFER] and dial 39
2. Display shows.(e.g. 209 is SLT port)
3. Using [VOLUME (-) or (+)], select the SLT port number.
To select all SLT ports, press [VOLUME (-)] first
4. Press [MUTE] or [MESSAGE] to select VOICE or DATA
The port is set to DATA line.
OR
Dial
1 for VOICE
or 2 for DATA
5. Press [TRANSFER] to save and exit
DEFAULT DATA
VOICE line
RELATED MMC
NONE
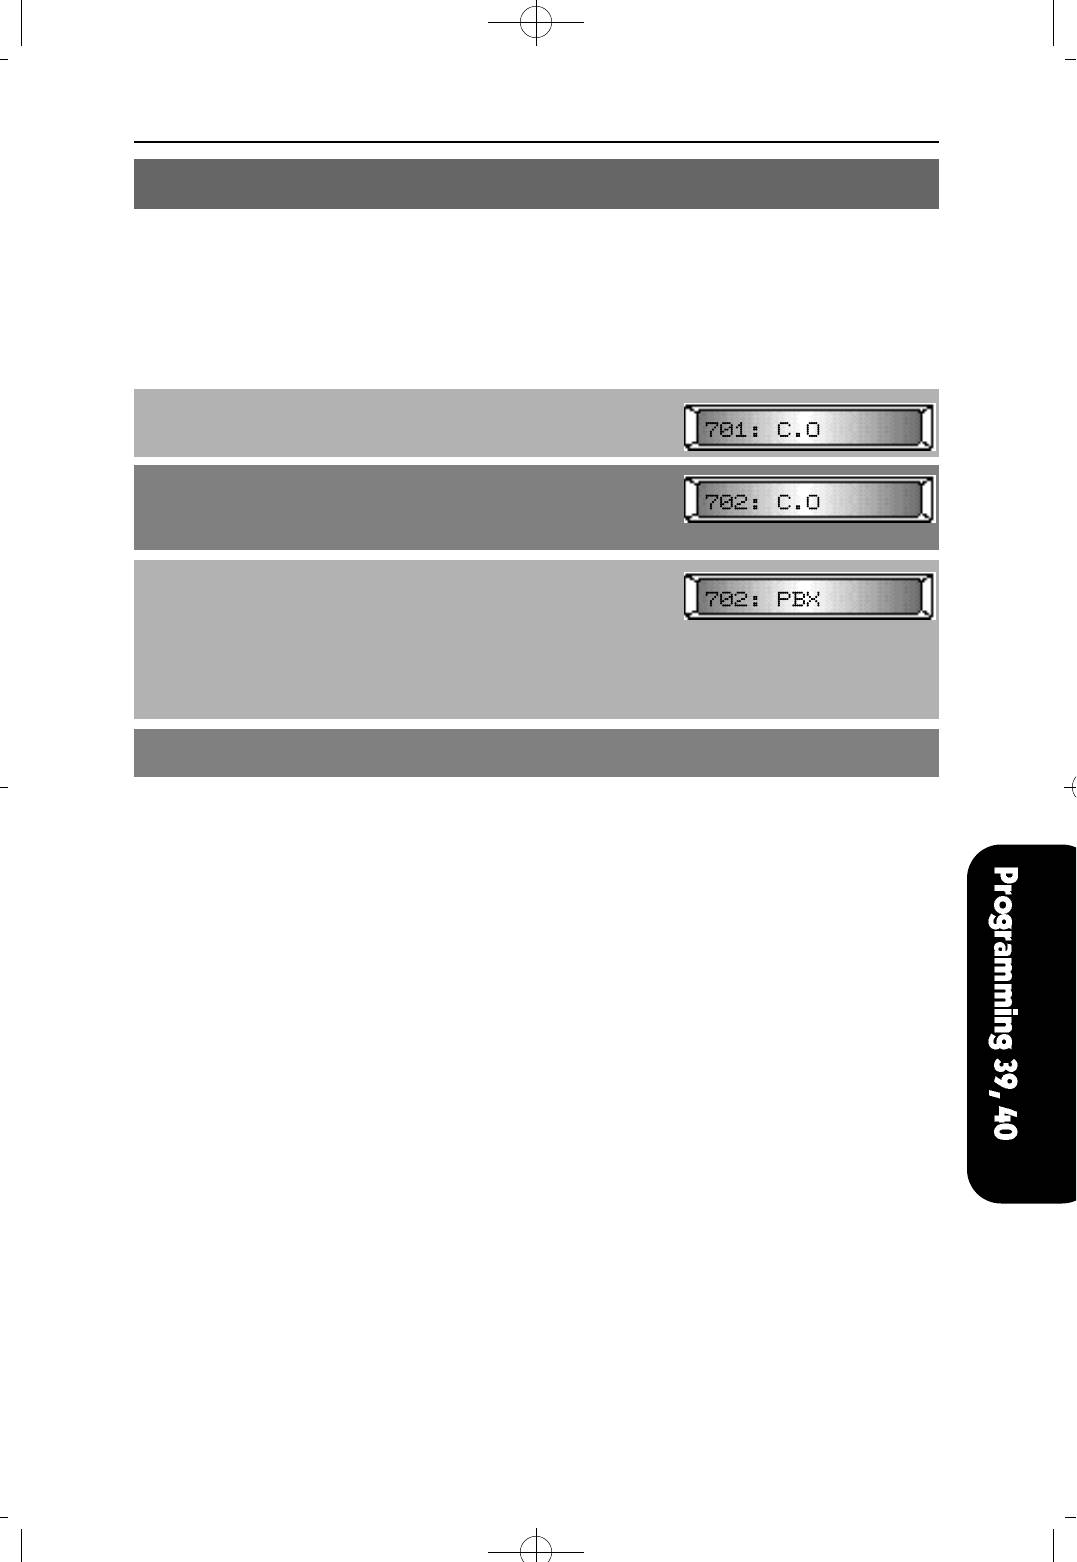
NX-SERIESHYBRID KEY SYSTEM PROGRAMMING SECTION
MMC 40 C.O./PBX LINE
This MMC is used to select the mode of the C.O. line. If the PBX mode is chosen, the
PBX access code can be recognized allowing more complete toll restrictions.
This mode is assigned on a per-trunk basis.
PROCEDURE LCD DISPLAY
1. Press [TRANSFER] and dial 40
2. Using [VOLUME (+) or (-)], select the trunk number
(e.g. 702)
To select all trunk lines, press [VOLUME (-)] first
3. Pressing [MUTE] or [MESSAGE], you can set the
trunk to C.O. or PBX line
OR
Using KEYPAD, dial
1 for C.O line
or 2 for PBX line
4. Press [TRANSFER] to save and exit
DEFAULT DATA
C.O. LINE
RELATED MMC
NONE
4Programming 1999.9.15 12:43 PM 페이지41
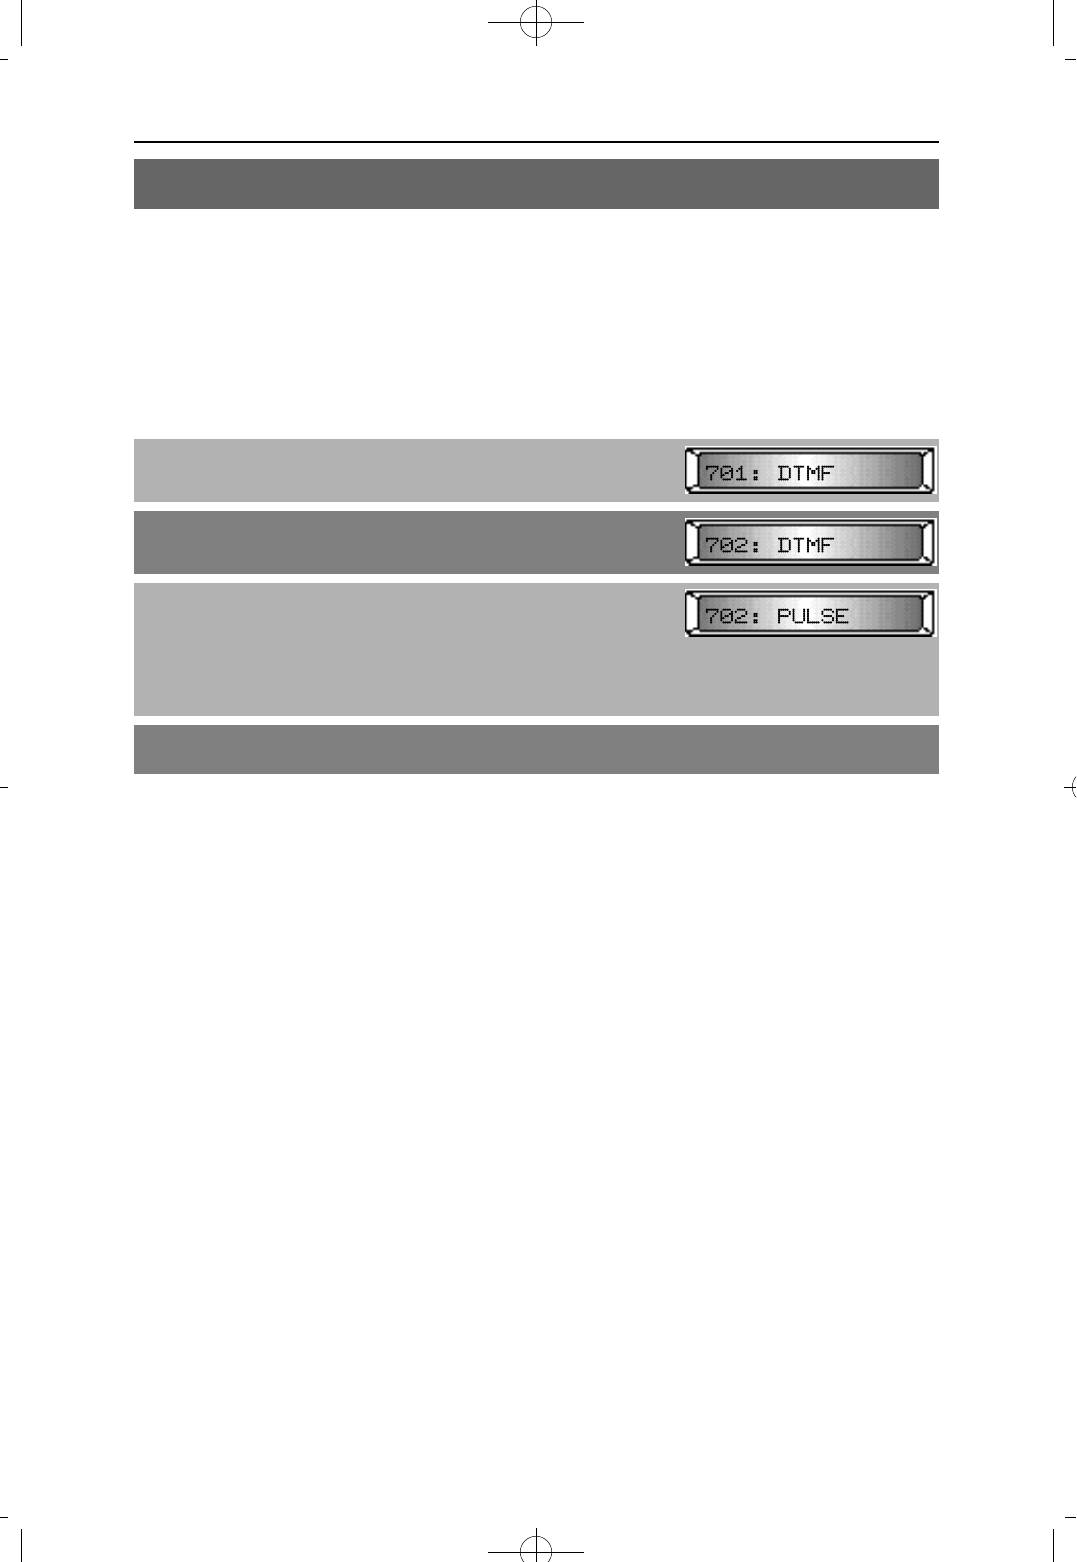
4Programming 1999.9.15 12:43 PM 페이지42
NX-SERIESHYBRID KEY SYSTEM PROGRAMMING SECTION
MMC 41 TRUNK DIALING TYPE
This MMC is used to set the dial type of each C.O. line.
There are two options:
DTMF : Dual Tone Multi Frequency (Touch Tone)
PULSE : Pulse dial (rotary).
PROCEDURE LCD DISPLAY
1. Press [TRANSFER] and dial 41
2. Using [VOLUME (-) or (+)], select the trunk number
To select all trunk lines, press [VOLUME (-)] first
3. Press [MUTE] or [MESSAGE] to select the trunk dial type
OR
Using KEYPAD, dial
1 for DTMF
or 2 for PULSE
4. Press [TRANSFER] to save and exit
DEFAULT DATA
DTMF
RELATED MMC
MMC 53 TRUNK WIDE TIMER
MMC 54 MAKE/BREAK RATIO

NX-SERIESHYBRID KEY SYSTEM PROGRAMMING SECTION
MMC 42 TRUNK ON/OFF
This MMC is used to assign trunk options on a per-trunk basis.
OPTION DESCRIPTION
1A2 EMULATION Trunk override call
TRUNK FORWARD Allow trunk to be forwarded
RING OVER PAGE Allow ring over external page
TOLL CHECK FREE C.O. lines to follow or bypass toll restriction
VOICE MSG Voice announcement on DISA line
TRK DISC Allows trunk to be discnnected
PROCEDURE LCD DISPALY
1. Press [TRANSFER] and dial 42
2. Using [VOLUME (-) or (+)], select trunk number
To select all trunks, press [VOLUME(-)] first
3. Using [REDIAL] or [FLASH], select an option
described above
4. Press [MUTE] or [MESSAGE] to select ON or OFF.
OR
Using the KEYPAD, dial
0 for OFF
or 1 for ON
5. Press [TRANSFER] to save and exit
DEFAULT DATA
1A2 EMULATION : OFF TRUNK FORWARD : OFF
RING OVER PAGE : OFF TOLL CHECK FREE : OFF
VOICE MSG : OFF TRK DISC : OFF
RELATED MMC
TRUNK FORWARD : MMC 11 CALL FORWARD
VOICE MSG : MMC 46 ASSIGN DISA LINE
TRK DISC : MMC 50 SYSTEM TIMER(TRK DISC)
MMC 28 CALL DISC
4Programming 1999.9.15 12:43 PM 페이지43
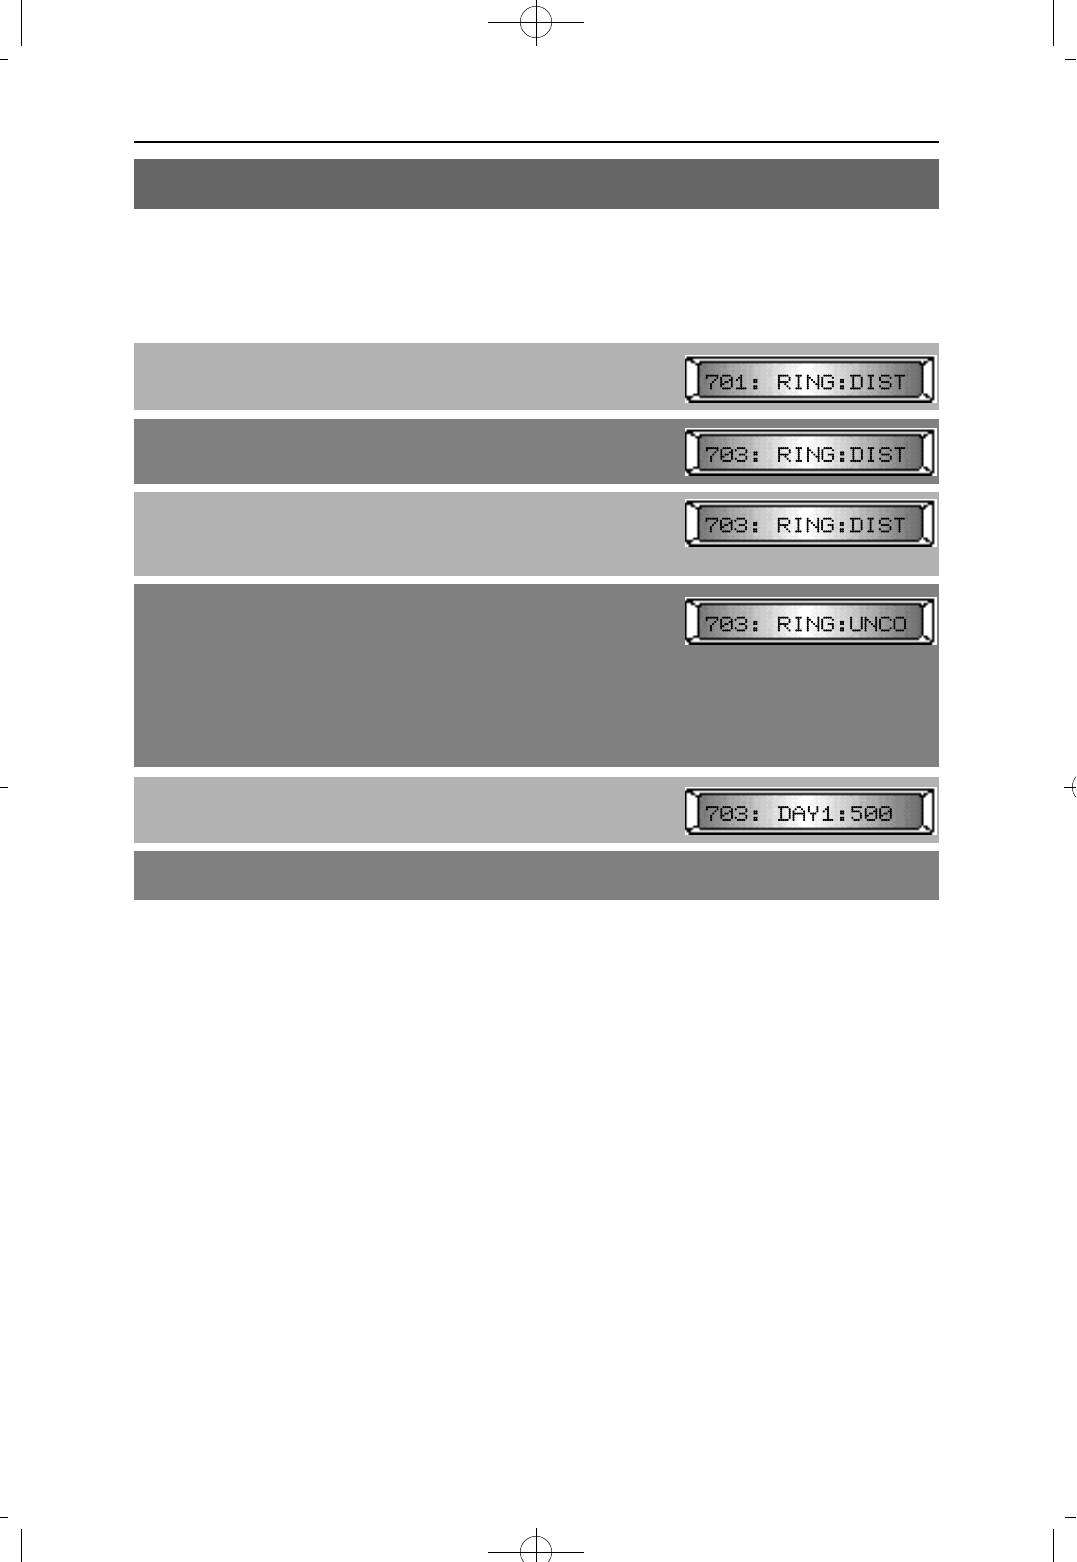
4Programming 1999.9.15 12:43 PM 페이지44
NX-SERIESHYBRID KEY SYSTEM PROGRAMMING SECTION
MMC 43 ASSIGN TRUNK RING
A trunk may have a maximum 16 members(station or station group) assigned to ring.
PROCEDURE LCD DISPLAY
1. Press [TRANSFER] and dial 43
2. Using [VOLUME (-) or (+)], select the trunk you want
(e.g., 703)
3. Press [REDIAL] or [FLASH], select the options
(RING MODES, DAY MEMBERS or NIGHT
MEMBERS) (e.g., RING MODES)
4a. Press [MUTE] or [MESSAGE], to select ring mode
OR
Dial 1 for SEQUENTIAL
2 for DISTRIBUTE
3 for CONDITION
or 4 for UNCONDITION
(e.g., UNCONDITION)
4b. Dial the station or station group number that will be
ringing to(e.g., 500 for the first memver of Day mode)
5. Press [TRANSFER] to save and exit
DEFAULT DATA
All trunks Day1 :500
Night1 :500
RELATED MMC
MMC 35 ASSIGN STATION GROUP
MMC 56 ASSIGN AUTO NIGHT TIME
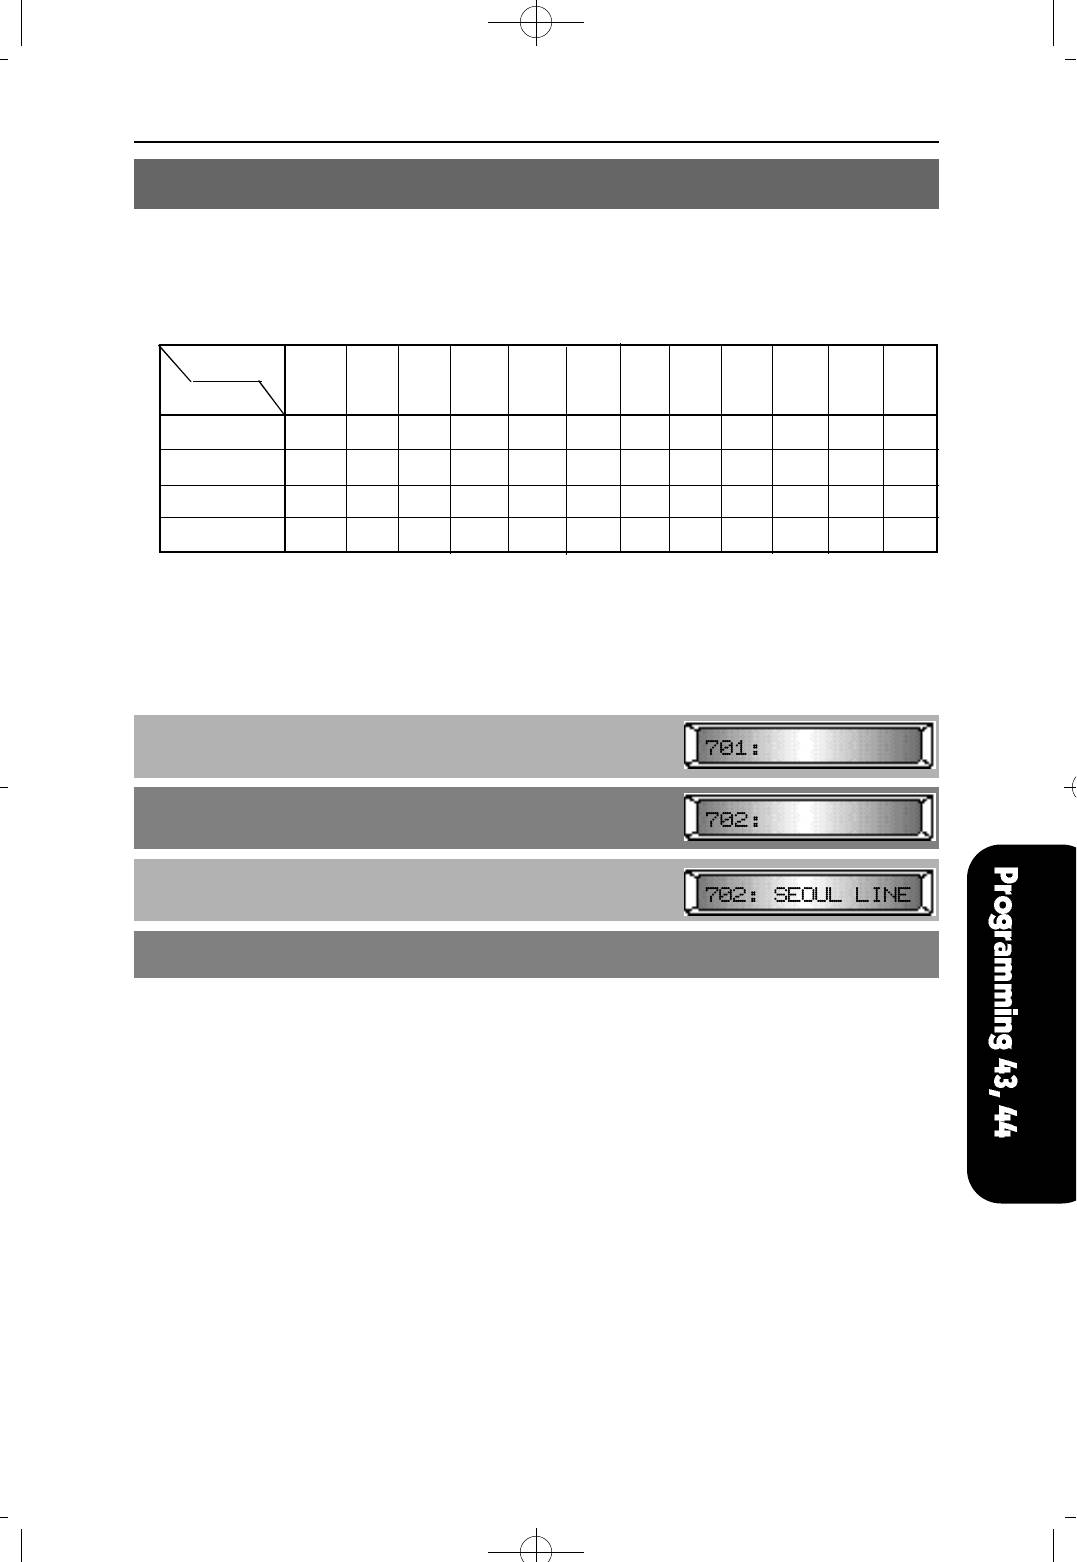
NX-SERIESHYBRID KEY SYSTEM PROGRAMMING SECTION
MMC 44 TRUNK NAMES
This MMC is used to assign a name of up to twelve (12) characters to identify a particular
trunk.
Names are written using the keypad. Each press of a key will select a character.
Pressing a different key moves the cursor to the next position.
Dial 1 2 3 4 5 6 7 8 9 0 ✱ #
C o u n t
1 Q A D G J M P T W : ?
2 Z B E H K N R U X . & [
3
▩
C F I L O S V Y ! $ ]
4 1 2 3 4 5 6 7 8 9 0 ✱ #
NOTE : When the next character appears on the same dial pad key as the current
character, press [FLASH] to move the cursor to the right, or to enter a space.
PROCEDURE LCD DISPLAY
1. Press [TRANSFER] and dial 44
2. Press [VOLUME (-) or (+)] to select the trunk to name
3. Enter the trunk name(refer to above chart)
4. Press [TRANSFER] to save and exit
DEFAULT DATA
NONE
RELATED MMC
NONE
4Programming 1999.9.15 12:43 PM 페이지45
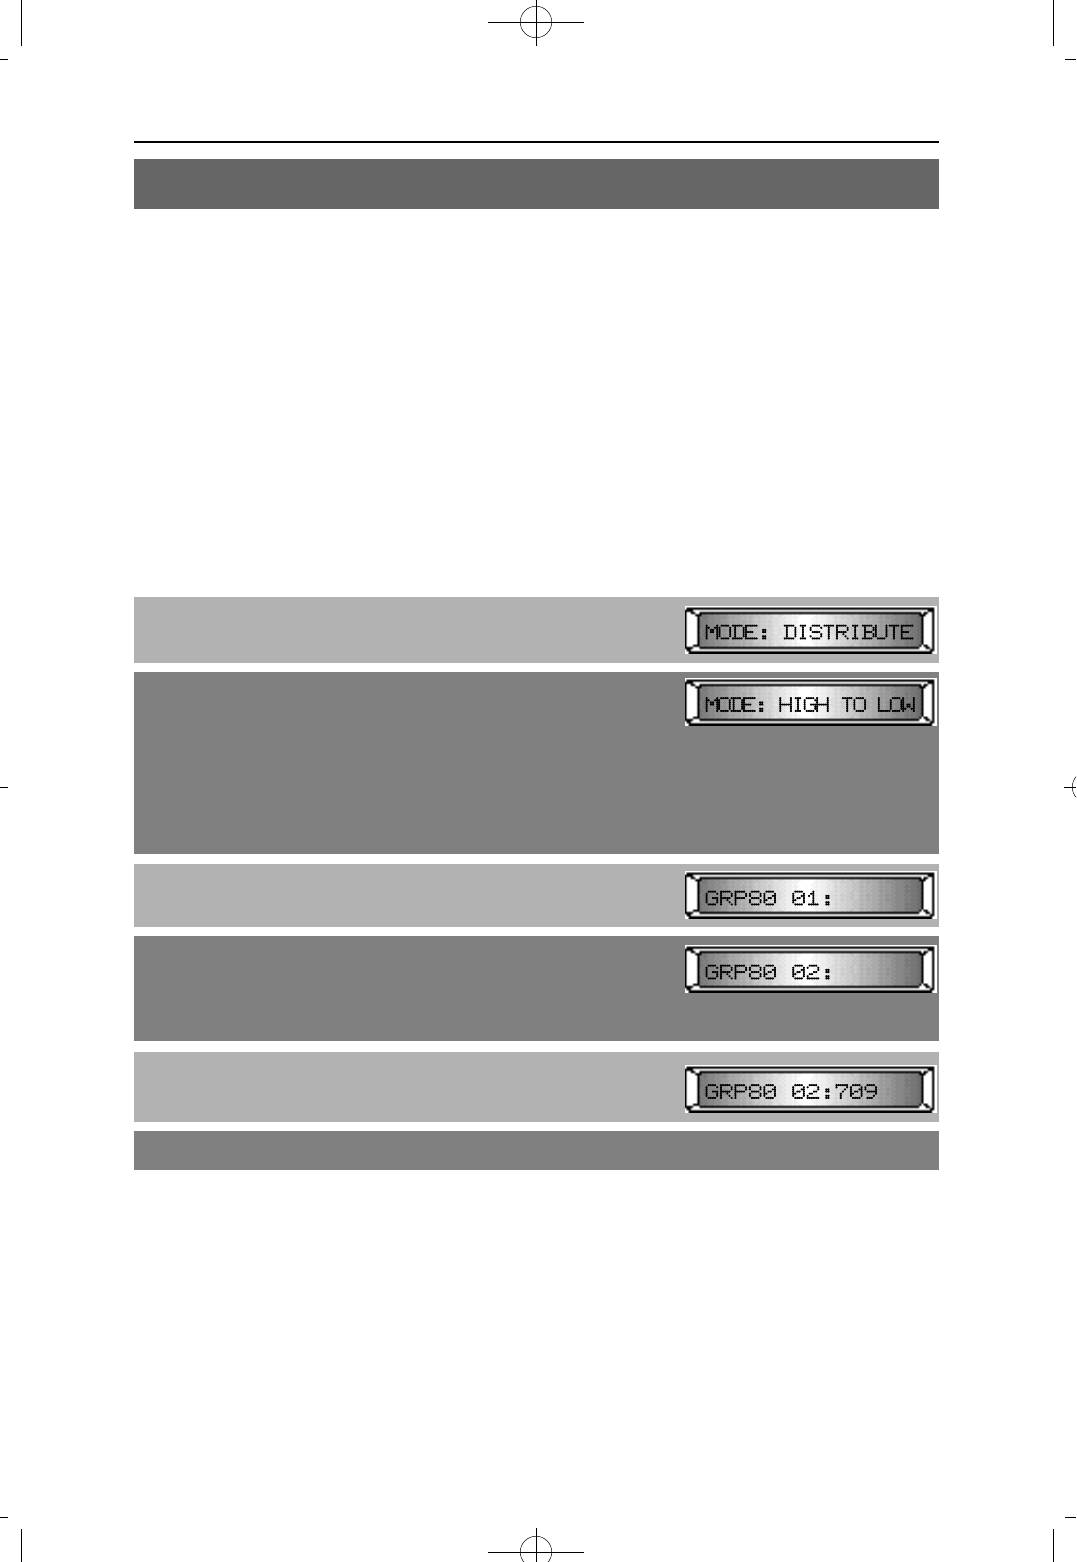
4Programming 1999.9.15 12:43 PM 페이지46
NX-SERIESHYBRID KEY SYSTEM PROGRAMMING SECTION
MMC 45 TRUNK GROUP
This MMC is used to set the free trunk selection type to a specific trunk, trunk group, or to
several trunk groups.
There are eleven (11) trunk groups: 9 and 80 through 89, and three types of selecting a
free trunk line in the group.
MODE DESCRIPTION
DISTRIBUTE Searches the trunk group in circular order. Each time the group is
accessed, the next available trunk in the group is selected.
High to Low Searches the trunk group last to first trunk in the group. If a trunk
is busy, the previous available trunk in the group is selected.
Low to High Searches the trunk group. If the first trunk in the group is busy,
the next iavailable trunk in the group is selected.
PROCEDURE LCD DISPLAY
1. Press [TRANSFER] and dial 45
Display shows the first free trunk selection type
2. Using [MUTE] or [MESSAGE], select the free trunk
selection mode
OR
Using KEYPAD, dial
1 for DISTRIBUTE
2 for High to Low
or 3 for Low to High.
3. Using [VOLUME (-) or (+)], select the trunk group
4. Press [REDIAL] or [FLASH] to scroll through the group
If dialed number is the member of another trunk group,
the trunk number will removed from the previous group
automatically. Dialed number overwrites the previous number.
5. Enter a valid trunk number
6. Press [TRANSFER] to save and exit
DEFAULT DATA
GROUP 9 : All trunk lines
GROUP 80~89 : NONE
RELATED MMC
NONE

NX-SERIESHYBRID KEY SYSTEM PROGRAMMING SECTION
MMC 46 ASSIGN DISA LINE
This MMC is used to allow the system the ability to have Direct Inward System Access
(DISA). There are four 4 DISA. If a trunk is set to DISA, the voice announcement feature
may be used when the VOICE MSG option is enabled in MMC 42 TRUNK ON/OFF.
OPTIONS DESCRIPTION
0 NO DISA LINE No DISA service
1 DISA IN NIGHT MODE In night mode, DISA is available
2 DISA IN DAY MODE In day mode, DISA is available
3 DISA BOTH NIGHT AND DAY In day and night mode, DISA is available
PROCEDURE LCD DISPLAY
1. Press [TRANSFER] and dial 46
Display shows
2. Using [VOLUME (-) or (+)], select the trunk you want
(e.g. 702)
To select all trunks, press [VOLUME (-)] first
3. Press [MUTE] or [MESSAGE] to select
OR
Using KEYPAD, dial
0 for NO DISA LINE
1 for DISA IN NIGHT MODE
2 for DISA IN DAY MODE
3 for DISA BOTH NIGHT AND DAY
(e.g. 1)
4. Press [TRANSFER] to save and exit
DEFAULT DATA
All trunks : NO DISA
RELATED MMC
MMC 42 TRUNK ON/OFF ⇒ VOICE MSG
4Programming 1999.9.15 12:43 PM 페이지47
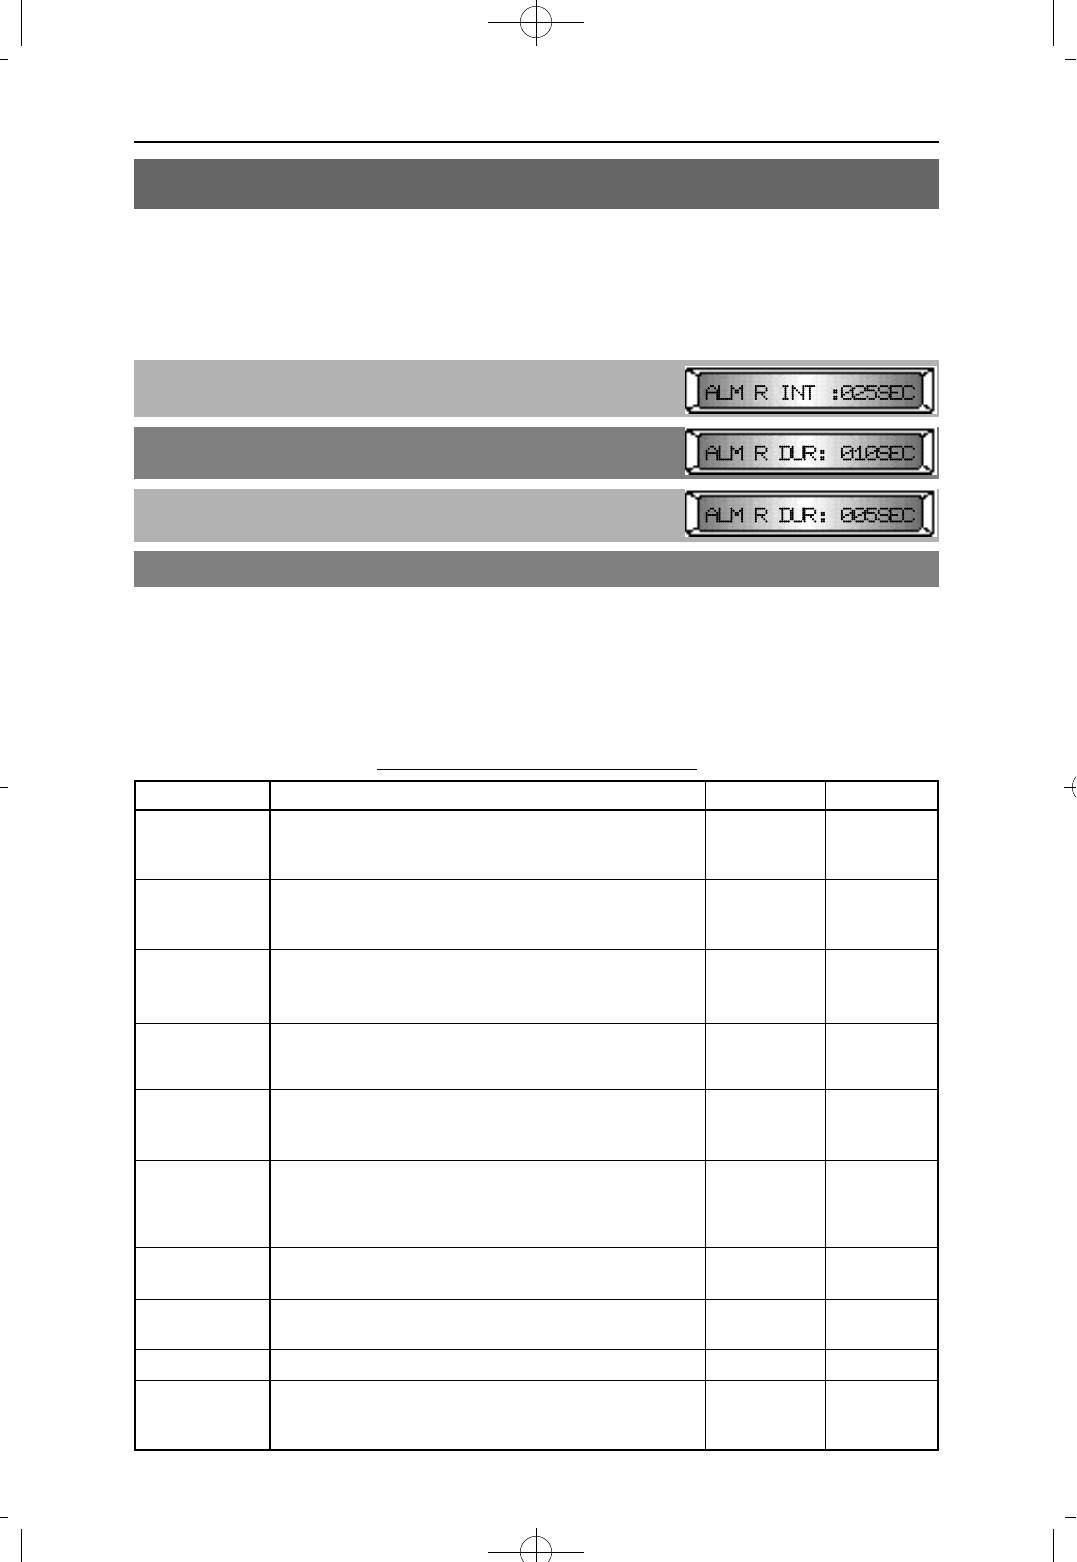
4Programming 1999.9.15 12:43 PM 페이지48
NX-SERIESHYBRID KEY SYSTEM PROGRAMMING SECTION
MMC 50 SYSTEM TIMERS
This MMC is used to adjust individual timers as necessary. All available timers are
described in the TABLE OF TIMERS AND VALUES.
NOTE: Seconds are shown as ‘SEC’, milliseconds as ‘MS’, and minutes as ‘MIN’.
PROCEDURE LCD DISPLAY
1. Press [TRANSFER] and dial 50
2. Press [VOLUME (-) or (+)] to select a timer
(e.g. ALM R DUR)
3. Enter new value using KEYPAD
4. Press [TRANSFER] to save and exit
DEFAULT DATA
See TABLE OF TIMERS AND VALUES
RELATED MMC
NONE
TABLE OF TIMERS AND VALUES
DISPLAY DESCRIPTION DEFAULT RANGE
ALM R INT controls the time length between ring attempts 025SEC 250SEC
(Alarm ring at a station when alarm reminder is set.
interval)
ALM R DUR controls the length of ring cycle duration when 010SEC 1~250SEC
(Alarm ring alarm reminder is set at a station.
duration)
ARDL INT controls the time between attempts after Auto 045SEC 1~250SEC
(Auto Redial Redial is set ‘ON’ at a station.
interval)
ARDL RELS controls the duration of a Ring No Answer 045SEC 1~250SEC
(Auto Redial condition on an auto-redial number dialed
release time) before auto redial is canceled.
CBACK NOA controls the time before the callback is canceled 030SEC 1~250SEC
(Callback no when a callback detects Ring No Answer
answer time)
CO CO DIS monitors the duration of an unsupervised 010MIN 1~250MIN
(CO to CO conference, external call forward, or DISA call.
disconnect upon expiring, both trunks are disconnected.
time)
DISA F DG controls how long the system will wait for 025SEC 1~250SEC
dialing to begin the DISA incoming call.
DISA I DG controls the grace period between dialing valid 025SEC 1~250SEC
digits before dropping the call to DISA user.
DISA RING controls no answer time for DISA internal calling. 030SEC 1~250SEC
DOOR RELS controls the duration of time before the door 1500MS 100~
(Door release lock relay deactivates. 2500MS
time)
NX-SERIESHYBRID KEY SYSTEM PROGRAMMING SECTION
MMC 50
DISPLAY DESCRIPTION D E F A U L T RANGE
DOR R OFF controls the duration of ringing at the door 030SEC 1~250SEC
(Door Ring ring destination before canceling
OFF time)
FIRST DGT controls how long the system will wait for 025SEC 1~250SEC
(First Digit dialing to begin before dropping the dial tone
wait time) and initiating an error tone.
HOOK OFF controls the time before dial tone is sent to a 0200MS 100~
(Hook OFF single-line station. 2500MS
time)
INTER DGT controls the grace period between dialing 025SEC 1~250SEC
(Inter Digit valid digits before dropping the call and
duration) returning the user back to an error tone.
MMC OUT controls the grace period between programming 030SEC 1 0 ~ 2 5 0 S E C
(MMC actions while in a programming session, before
session time) returning system to secure programming status.
OFF R INT controls the duration of time between ring 015SEC 1~250SEC
(Off hook bursts to a user who has a camped-on call.
Ring Interval)
PAGE MAX controls the allowed duration of a page 020SEC 1~250SEC
(Page duration) announcement.
RCAL DISC this is the time an attendant recall will 002MIN 1~250MIN
(Recall ring before being disconnected.
Disconnect
time)
RCAL RING this is the length of time a transfer recall 015SEC 0~250SEC
(Recall Ring will ring at a station before recalling the
length) operator
RCAL WAIT after a transferred call is recalling at the transferring 015SEC 0~250SEC
(Recall station and the station is busy, this timer will expire
Waiting time) and transfer the call to the operator.
This only applies to trunk calls.
RCAL HOLD determines the time calls can be left on hold 045SEC 0~250SEC
(Recall Hold before recalling back to the holding station.
time)
RCAL TRSF determines the time transferred calls ring 045SEC 0~250SEC
(Recall before recalling.
Transfer time)
SLT F MIN monitors the duration of a hookswitch flash to ensure that 0350MS 100~
(minimum SLT the flash is valid and not a line transient or accidental 2500MS
Flash time) hookswitch bounce. It is the minimum time of single-line station.
SLT F MAX maximum time of hookswitch flash of a 0800MS 100~
(maximum SLT single-line station. 2500MS
flash time)
SMDR PULS this grace period timer starts SMDR recording 030SEC 1~250SEC
(SMDR start for pulse (rotary) dialing and controls the
time for rotary LCD duration timer on the keysets.
dialing)
SMDR DTMF this grace period timers starts SMDR recording 015SEC 1~250SEC
(SMDR start for DTMF (Touch Tone) dialing and controls
time for touchtone the LCD duration timer on the keysets.
dialing)
TRK DISC controls the duration of an outside call 030MIN 1~250MIN
4Programming 1999.9.15 12:43 PM 페이지49
4Programming 1999.9.15 12:43 PM 페이지50
NX-SERIESHYBRID KEY SYSTEM PROGRAMMING SECTION
MMC 51 TONE/RING CADENCE
This MMC is used to customize the tone cadence on a system-wide basis to any one of
the eight available selections.
Call Technical Support before changing any cadences, as some systems may require
default settings.
PROCEDURE LCD DISPLAY
1. Press [TRANSFER] and dial 51
Display shows
2. Press [VOLUME (-) or (+)] to select a tone
3. Press [MUTE] or [MESSAGE] to set dial tone to
continuous or interrupted tone
Interrupt tone default data is: 1000 0250 1000 0250 ms
4. Dial new interrupt value for interrupt time,
(ON/OFF/ON/OFF) in 50 ms steps.
Each field is 3 digits (UNIT: 10 ms)
(e.g. 100/030/100/030 = 1000 ms [100× 10]
‘ON’ and 300 ms [030× 10] ‘OFF’ time)
5. Press [TRANSFER] to save and exit
DEFAULT DATA
TONE NAME DISPLAY DATA
DIAL TONE (DT) CONTINUOUS TONE
RING BACK TONE (RBT) 1000 2000 1000 2000 ms
BUSY TONE (BST) 0500 0500 0500 0500 ms
TRSF TONE (TT) 0200 0200 0200 0200 ms
ERROR TONE (ERT) 0500 0250 0500 0250 ms
CO LINE RING (COR) 1000 3000 1000 3000 ms
STATION RING (STR) 0400 0200 0400 3000 ms
RELATED MMC
NONE
NX-SERIESHYBRID KEY SYSTEM PROGRAMMING SECTION
MMC 52 SYSTEM WIDE COUNTER
This MMC is used to set the values of the system counters.
The counters and descriptions are listed below:
OPTIONS DESCRIPTION
ALM COUNTER This is the number of times (1 to 99) that an alarm
(ALARM REMINDER reminder will ring a station before canceling.
COUNTER)
ARDL COUNTER This is the number of times (1 to 99) the system will redial
(AUTO REDIAL COUNTER) an outside number after the auto redial feature has been
activated.
PROCEDURE LCD DISPLAY
1. Press [TRANSFER] and dial 52
Display shows:
2. Press [VOLUME (-) or (+)] to select a counter
3. Use keypad to enter new data as a two-digit number
(e.g. 5 = 05)
4. Press [TRANSFER] to save and exit
DEFAULT DATA
ALM COUNTER : 3
ARDL COUNTER : 10
RELATED MMC
NONE
4Programming 1999.9.15 12:43 PM 페이지51
4Programming 1999.9.15 12:43 PM 페이지52
NX-SERIESHYBRID KEY SYSTEM PROGRAMMING SECTION
MMC 53 TRUNK WIDE TIMER
This MMC is used to changed trunk timer values. It is not advisable to change these
values, with exception of trunk flash time, without assistance from Technical Support.
The available options are and listed below:
DISPLAY DESCRIPTION RANGE
CLEARING The interval for reuse of trunk after disconnecting a call. 0~25sec
(clearing time)
CO SUPV C.O. checking 00~9000
(CO supervision time) msec
F DGT DLY After seizing a trunk line, system sends the first digit 1 0 0 ~ 2 5 0 0
(first digit delay time) after this time. ms
FLASH PBX The duration of a flash when connected to a C.O. 1 0 0 ~ 2 5 0 0
(PBX flash time) ms
MFS ON TM The duration of DTMF Sender ‘ON’ status when 1 0 0 ~ 2 5 0 0
(MF sender on time) sending DTMF signal. ms
MF OFF TM The interval of DTMF Sender ‘OFF’ when system 1 0 0 ~ 2 5 0 0
(MF sender off time) sends DTMF signal. ms
MPD DETCT The minimum duration of MPD signal when the 40~500
(MPD detect time) signal is incoming. msec
NEW CALL The duration of a flash sent to the central office to 100~9900
(New Call time) disconnect the line. ms
NO RING if an incoming call is detected and is disconnected without 1~25sec
(no ring time) call processing, the system and releases the C.O line.
PAUSE TM This is a dialing pause duration timer. A pause is an 1~25sec
(pause time) instruction for the system to wait.
RNG DETCT Must be set shorter than the ‘ON’ cycle of a C.O. ring to prevent 100~2500
(ring detect time) transient noise on the C.O. line from triggering a false ring. ms
NOTE : Seconds shown as ‘sec’, milliseconds as ‘ms’, and minutes as ‘mi’.
PROCEDURE LCD DISPLAY
1. Press [TRSF/ALM] and dial 53
Display shows
2. Press [VOLUME (-) o r( + ) ] to select a timer (e.g. CO SUPV)
3. Dial new time data(e.g. 0500)
4. Press [TRSF/ALM] to save and exit
DEFAULT DATA
CLEARING : 00 SEC CO SUPV : 0000 MSEC
F DGT DLY : 1000 MSEC FLASH PBX : 0600 MSEC
MFS ON TM : 0100 MSEC MF OFF TM : 0100 MSEC
MPD DETCT : 0060 MSEC NEW CALL : 2000 MS
NO RING : 05 SEC PAUSE TM : 03 SEC
RNG DETCT : 0200 MSEC
RELATED MMC NONE
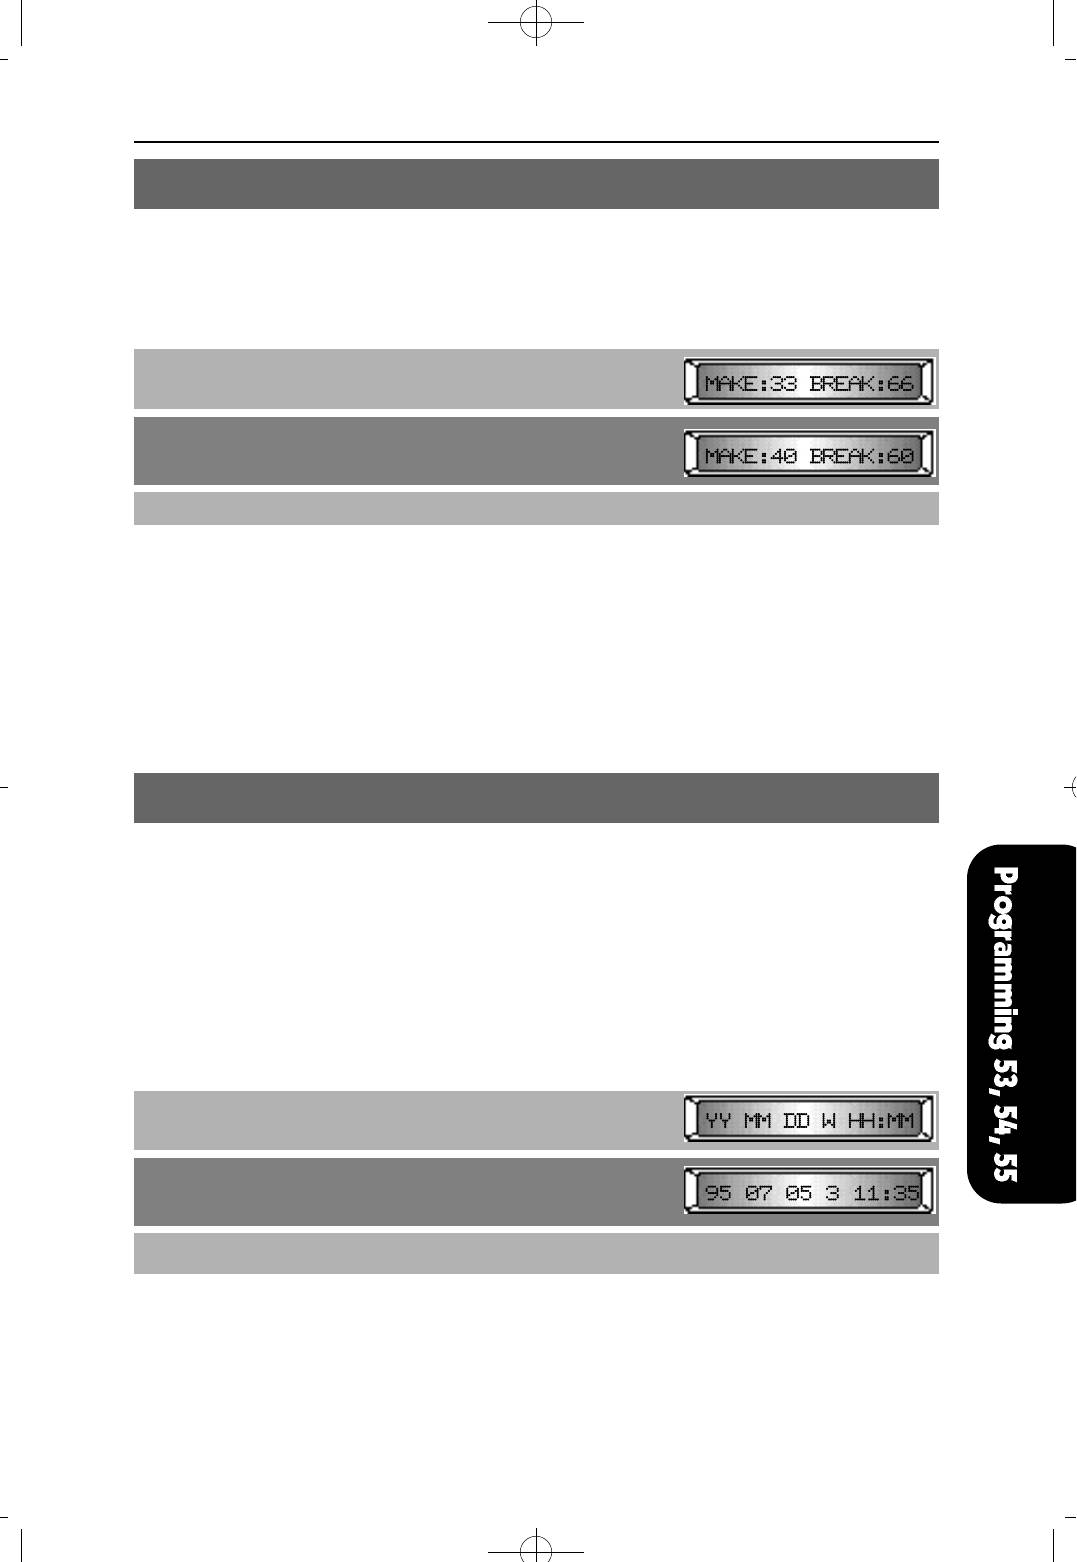
NX-SERIESHYBRID KEY SYSTEM PROGRAMMING SECTION
MMC 54 MAKE/BREAK RATIO
This MMC is used to allow the ability to change the duration of the make/break time of
pulse (rotary) dial trunks.
PROCEDURE LCD DISPLAY
1. Press [TRANSFER] and dial 54
2. Enter the MAKE/BREAK ratio on the KEYPAD
(e.g. MAKE:40 BREAK:60)
3. Press [TRANSFER] to save and exit
DEFAULT DATA
MAKE : 33
BREAK : 66
RELATED MMC
MMC 41 TRUNK DIALING TYPE
MMC 55 CURRENT DATA AND TIME
This MMC is used to set the system date and time on the system-wide clock.
YY Year 00~99 (e.g. 1995 = 95)
MM Month 01~12
DD Date 01~31
W Day 0~6 (0:SUN 1:MON 2:TUE 3:WED
4:THU 5:FRI 6:SAT)
HH Hour 00~23
MM Minute 00~59
PROCEDURE LCD DISPLAY
1. Press [TRANSFER] and dial 55
Display shows
2. Enter current date and time using above table
display = 1995. 7. 5. Wednesday, 11:35
3. Press [TRANSFER] to save and exit
DEFAULT DATA
SAT 01 JAN 12:00
RELATED MMC
MMC 15 DATE DISPLAY
4Programming 1999.9.15 12:43 PM 페이지53
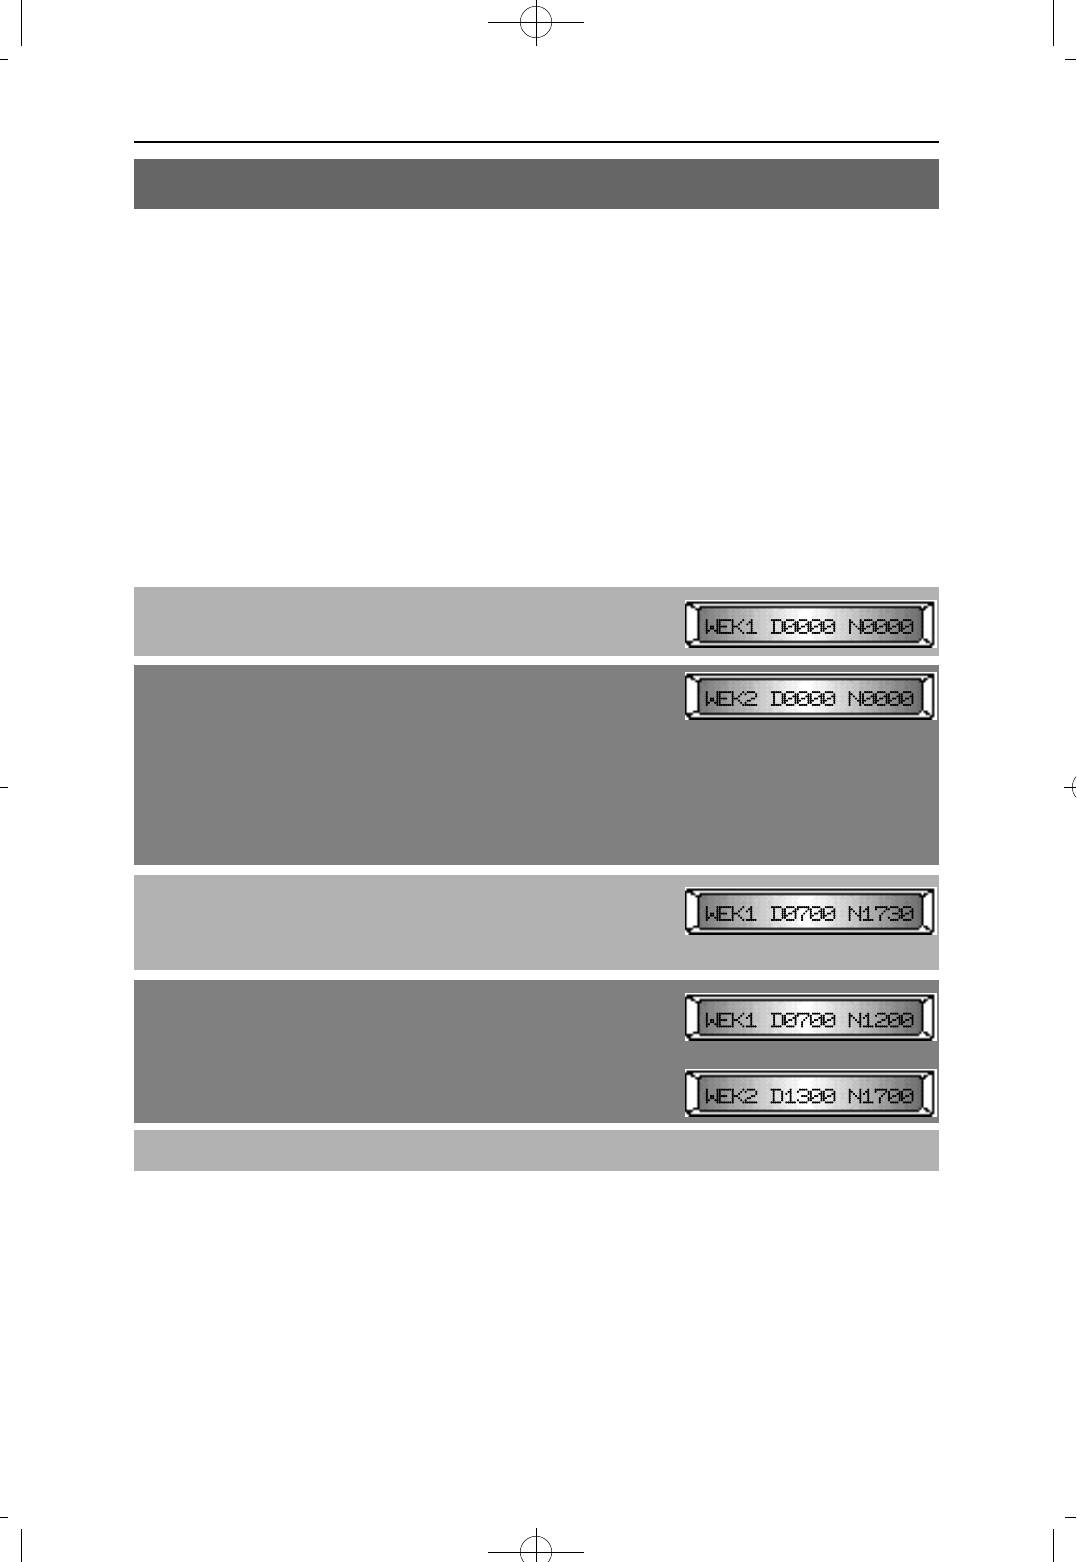
4Programming 1999.9.15 12:43 PM 페이지54
NX-SERIESHYBRID KEY SYSTEM PROGRAMMING SECTION
MMC 56 ASSIGN AUTO NIGHT TIME
This MMC is used to automatically place the system in Night mode. A Night key is not
needed, as the system switches automatically, but it is helpful to have a dedicated button
so the status can be changed manually. ‘D’ in the display is the time the system will
switch from Night to Day service and ‘N’ is the time the system will switch from Day to
Night service. There are three types of automatic Night timetables (WEEK, SATURDAY,
SUNDAY), each composed of two time settings.
Table type Description
WEEK Monday through Friday
SATURDAY Saturday
SUNDAY Sunday
PROCEDURE LCD DISPLAY
1. Press [TRANSFER] and dial 56
Display shows
2. Press [VOLUME (-) or (+)] to select a timetable
There are six tables available (WEEK1, WEEK2, SAT.1,
SAT.2, SUN.1, SUN.2)
To switch to Night mode twice a day, you must enter both
times in related tables. (e.g. WEEK1 and WEEK2; SAT.1
and SAT.2)
If it is not, the system will switch to the night mode once
a day.
3. Enter the Day mode start time, then the Night mode start time.
Eight digits must be entered. If there are less than eight
digits, data will not change.
3a. To switch twice a day, you must enter data in both
related tables (e.g. WEEK1 and WEEK2)
A N D
4. Press [TRANSFER] to save and exit
DEFAULT DATA
DAY : 0000
NIGHT : 0000
RELATED MMC
NONE

NX-SERIESHYBRID KEY SYSTEM PROGRAMMING SECTION
MMC 57 CALL COST
This MMC is used to program the unit cost of the metering pulse generated by the Central
Office. If the MPD card is installed, it will detect the metering pulse provided by Central
Exchange and determine the call cost by the number of metering pulses and unit cost
programmed via this MMC. The unit cost is a four (4)digit number, and is measured in the
minimum money denomination in the country of use.
PROCEDURE LCD DISPLAY
1. Press [TRANSFER] and dial 57
Display shows
2. Enter the 4-digit unit cost.
If you don’t enter 4 digits, the existing data will not be
changed.
3. Press [TRANSFER] to save and exit
DEFAULT DATA
UNIT COST : 0000
(The range of the CALL COST is 0001 ~ 9999)
RELATED MMC
NONE
MMC 60 TOLL DENY TABLE/APPLY
This MMC enables you to define which leading digit(s) in a dialing plan are to be restricted and
which class(es) should be applied in this toll deny table. Each entry can define up to 11 digits.
PROCEDURE LCD DISPLAY
1. Press [TRANSFER] and dial 60
2. Press [MUTE] or [MESSAGE] select the search class
(search class = NEW, ALL, B,C,D,E)
3. Press [VOLUME (-) or (+)], to find the desired entry or
an empty entry
4. Enter the dial number to be restricted and press [ C A L L B A C K ]
to assign the toll restriction apply class And dial four(4) digits,
0 for NO 1 for YES
5. Press [TRANSFER] to save and exit
DEFAULT DATA
NONE
RELATED MMC
MMC 30 STATION TOLL CLASS
MMC 61 TOLL ALLOW TABLE/APPLY
MMC 65 ASSIGN WILD CHARACTER
4Programming 1999.9.15 12:43 PM 페이지55
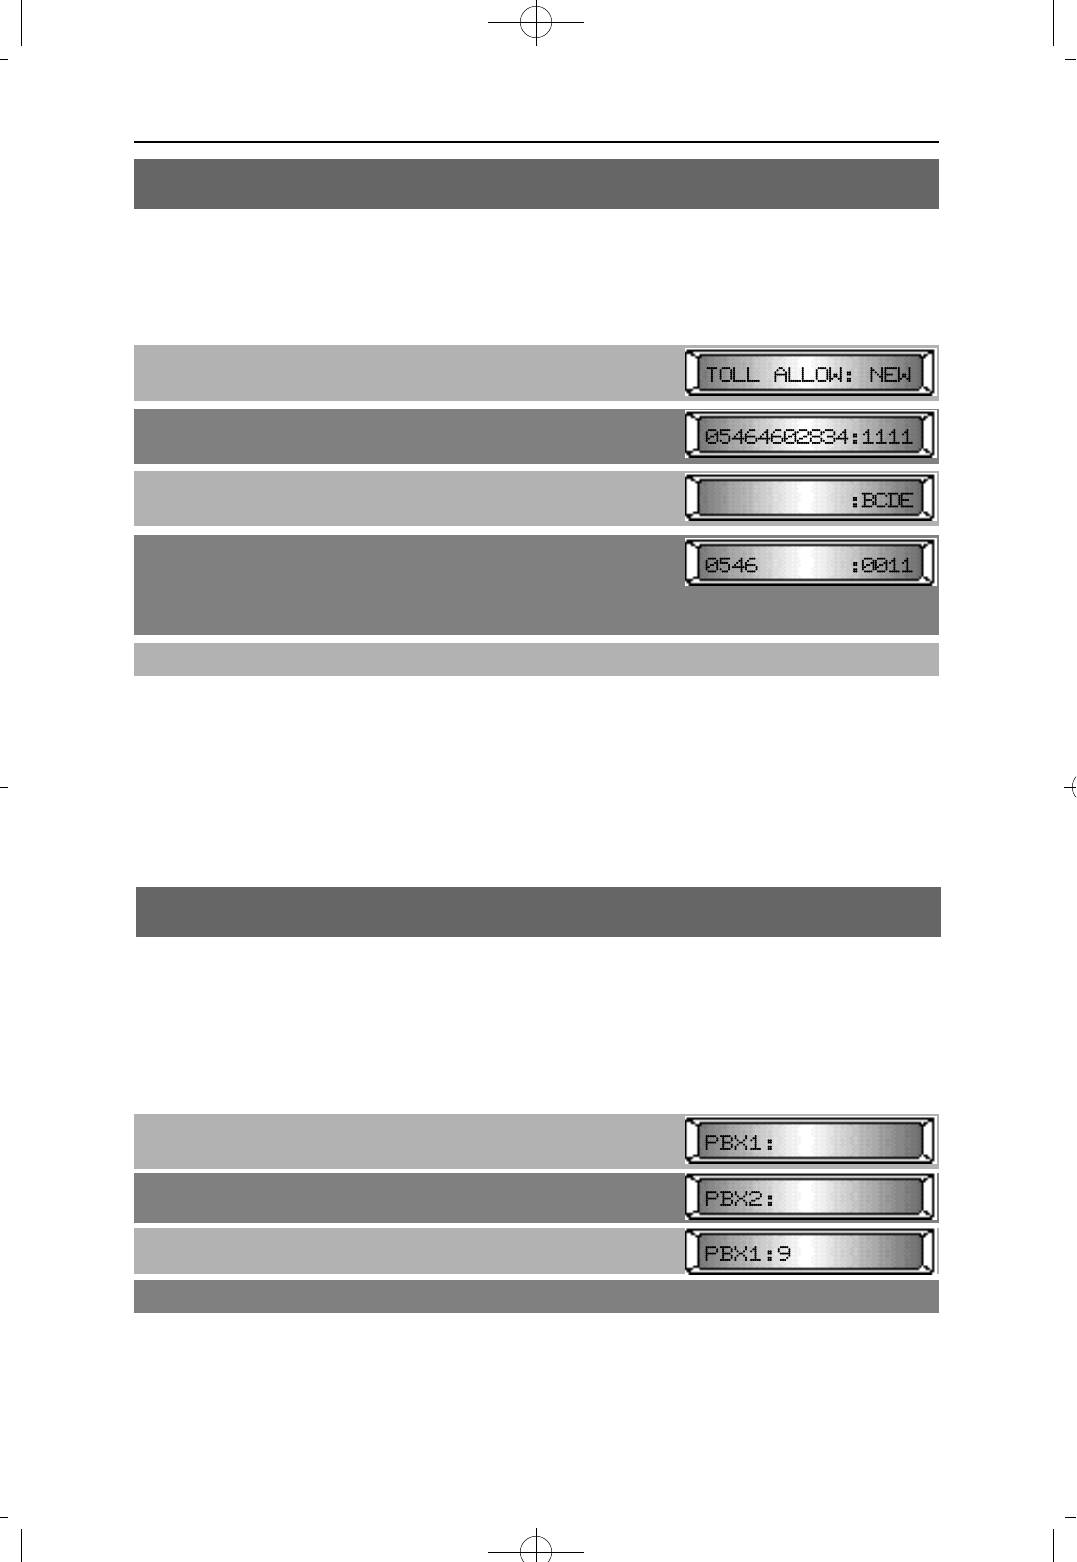
NX-SERIESHYBRID KEY SYSTEM PROGRAMMING SECTION
MMC 61 TOLL ALLOW TABLE/APPLY
This MMC enables you to define which leading digit(s) in a dialing plan are to be allowed
and which class(es) should be applied in this allow table.
Each entry can define up to 11 digits.
PROCEDURE LCD DISPLAY
1. Press [TRANSFER] and dial 61
2. Press [MUTE] or [MESSAGE] select search class
3. Pressing [VOLUME (-) or (+)], you can find the desired
entry or empty entry
4. Enter the dial number to be allowed and press
[ C A L L B A C K ] to assign the toll class And dial four(4) digits,
0 for NO
1 for YES
5. Press [TRANSFER] to save and exit
DEFAULT DATA
NONE
RELATED MMC
MMC 30 STATION TOLL CLASS
MMC 60 TOLL DENY TABLE/APPLY
MMC 65 ASSIGN WILD CHARACTER
MMC 62 PBX ACCESS CODE
This MMC is used to identify PBX access codes for toll restriction purposes. When a PBX line is
accessed, the dial tone originates in the PBX and extention numbers on that switch can be dialed.
To get an outside line, an access code must be dialed. If this access code appears in this list, it is
ignored and the toll restrition plan examines the digits following the PBX access code which has
five entries numbered 1 through 5. There is a maximum of four digits for each entry.
PROCEDURE LCD DISPLAY
1. Press [TRANSFER] and dial 62
2. Press [VOLUME (-) or (+)] to select the entry
3. Enter new PBX access code(e.g. 9) (maximum 4 digits)
4. Press [TRANSFER] to save and exit
DEFAULT DATA
NONE
RELATED MMC
NONE
4Programming 1999.9.15 12:43 PM 페이지56
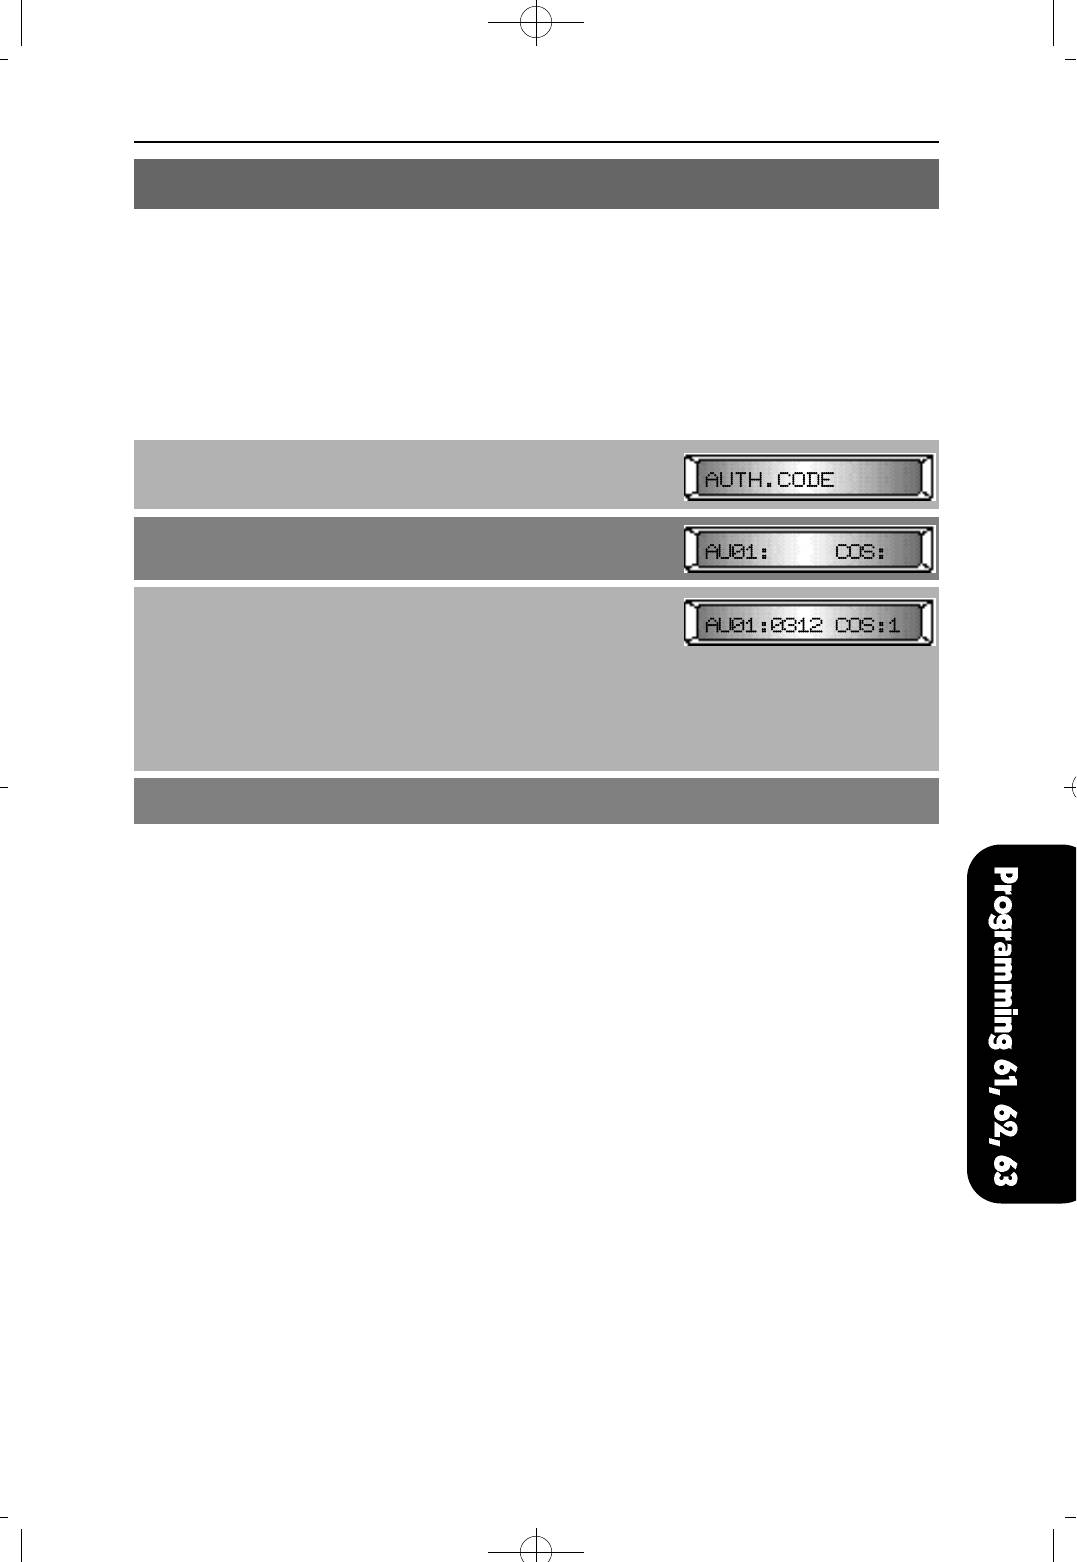
NX-SERIESHYBRID KEY SYSTEM PROGRAMMING SECTION
MMC 63 AUTHORIZATION TABLE
This MMC is used to list all allowable authorization codes. An authorization code must be four
digits long. There are 50 codes allowed in this table. Duplications or number conflicts are not
permitted. Each authorization code has an associated dialing class of service. When the code is
entered, the dialing class of service is changed to that of the authorization code.
PROCEDURE LCD DISPLAY
1. Press [TRANSFER] and dial 63
2. Enter two digits (01~50), or press [VOLUME (-) or (+)]
to select the entry
3. Enter four digit code and dialing class (e.g. 1207 and 1)
There are five dialing class
1 : A CLASS
2 : B CLASS
3 : C CLASS
4 : D CLASS
5 : E CLASS
4. Press [TRANSFER] to save and exit
DEFAULT DATA
NONE
RELATED MMC
MMC 46 ASSIGN DISA LINE
4Programming 1999.9.15 12:43 PM 페이지57
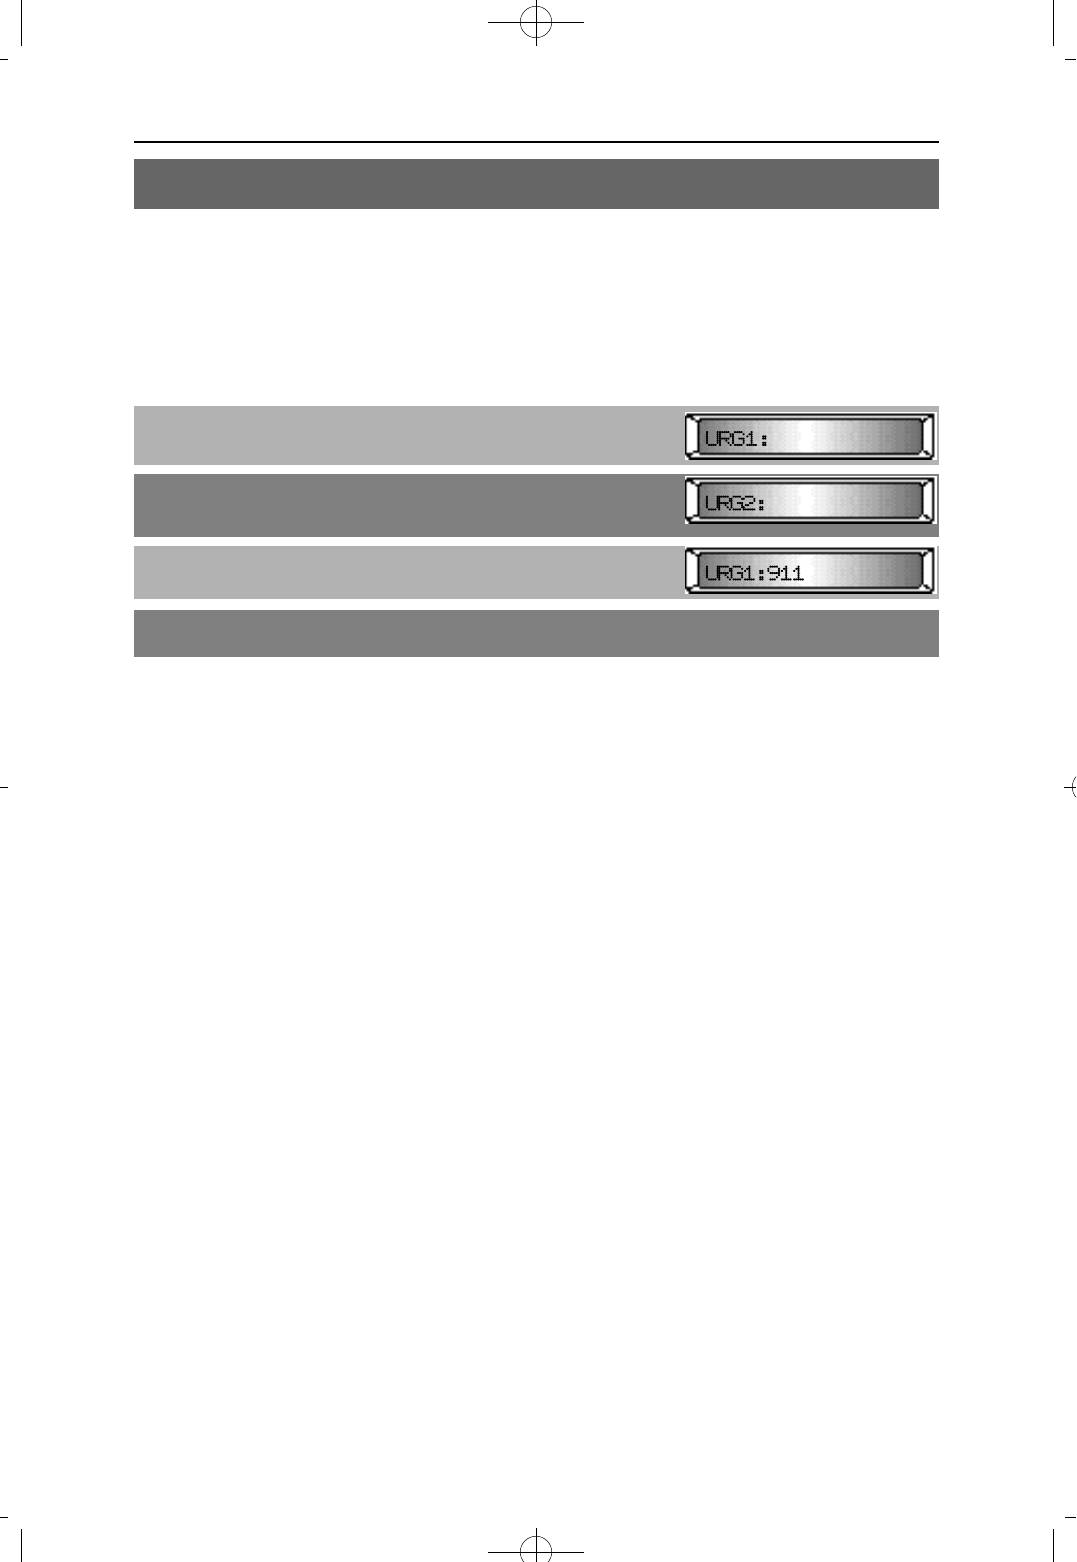
4Programming 1999.9.15 12:43 PM 페이지58
NX-SERIESHYBRID KEY SYSTEM PROGRAMMING SECTION
MMC 64 OVERRIDE TABLE
This MMC is used to enter up to five exceptions to toll restriction. These exceptions can
be accessed by any class in both Day and Night modes, and are useful to allow access to
emergency numbers. Caution should be used regarding the entries of this table because
they will not be blocked for outgoing calls.
PROCEDURE LCD DISPLAY
1. Press [TRANSFER] and dial 64
2. Press [VOLUME (-) or (+)] to select the urgent code
number that you want
3. Enter the number to allow(e.g. 911)
4. Press [TRANSFER] to store and exit
DEFAULT DATA
NONE
RELATED MMC
NONE
NX-SERIESHYBRID KEY SYSTEM PROGRAMMING SECTION
MMC 65 ASSIGN WILD CHARACTER
Provides flexibility to toll restriction when a specific numbering plan is desired. There are
only three entry tables, but more than one digit can be assigned per table if necessary.
PROCEDURE LCD DISPLAY
1. Press [TRANSFER] and dial 65
2. Press [VOLUME (-) or (+)] to select the wild character
(X,Y or Z)
3. Enter 0 in the desired digit position. Twelve (12) digits
must be entered. If there are less than twelve digits,
data will not be changed
4. Press [TRANSFER] to save and exit
DEFAULT DATA
1 2 3 4 5 6 7 8 9 0 ✱ #
X : 1 1 1 1 1 1 1 1 1 1 1 1
Y : 1 1 1 1 1 1 1 1 1 1 1 1
Z : 1 1 1 1 1 1 1 1 1 1 1 1
RELATED MMC
MMC 60 TOLL DENY TABLE/APPLY
MMC 61 TOLL ALLOW TABLE/APPLY
4Programming 1999.9.15 12:43 PM 페이지59
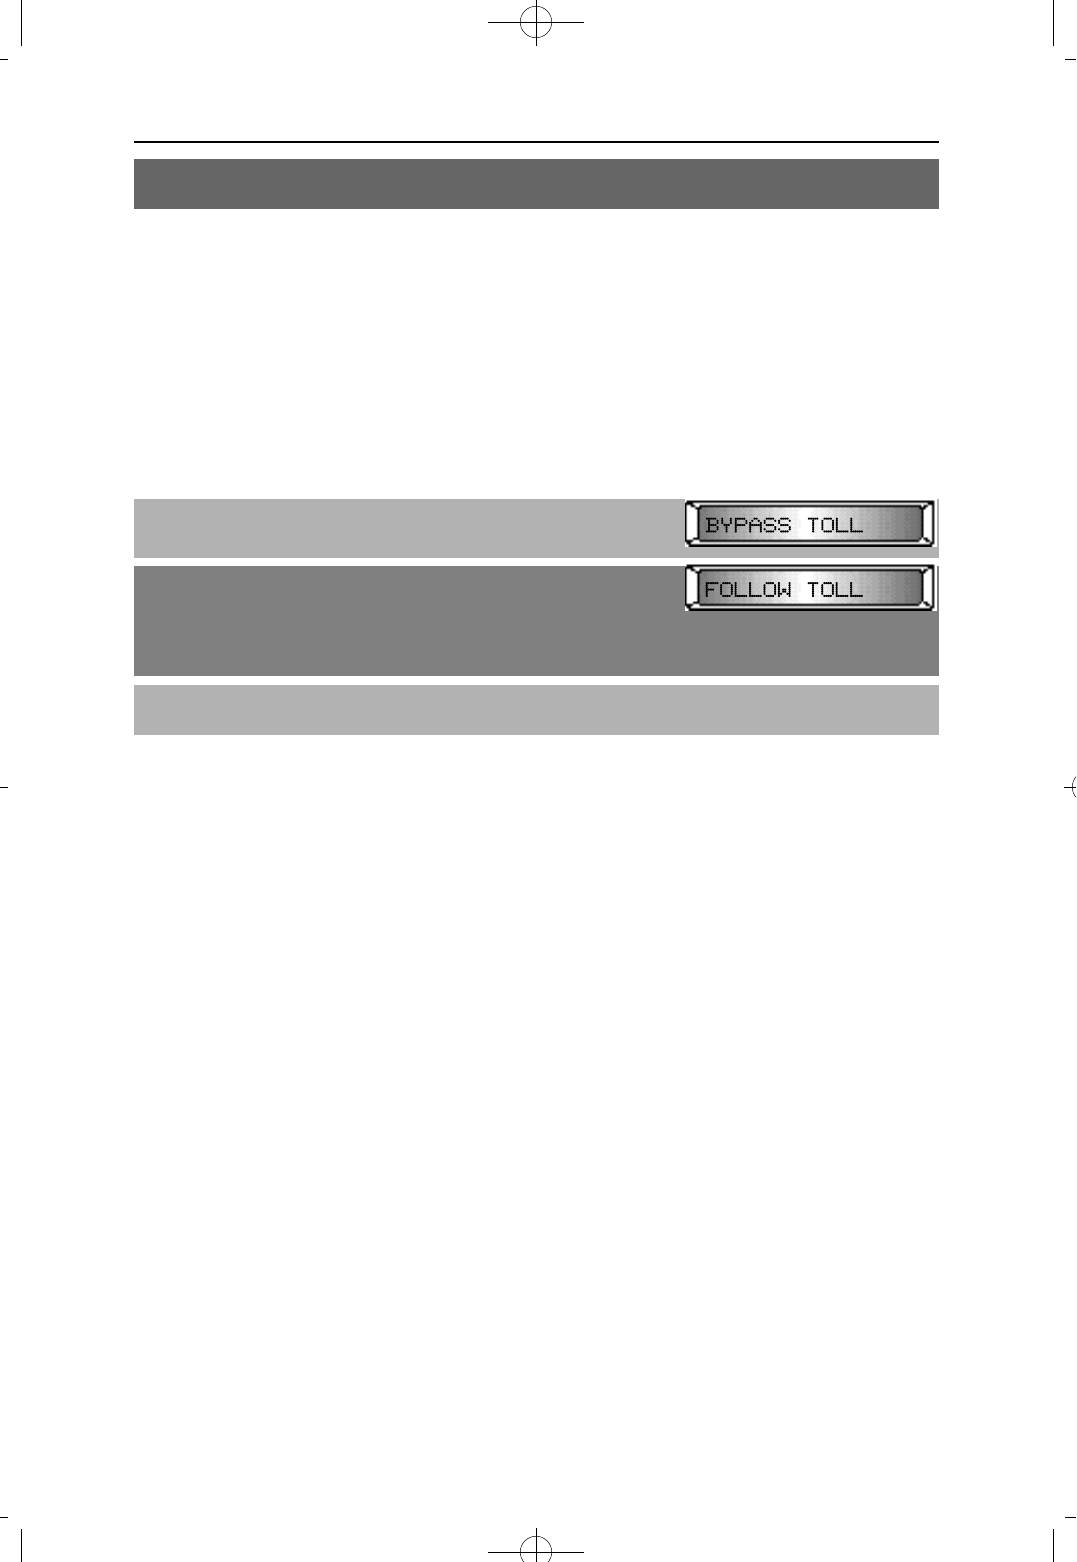
4Programming 1999.9.15 12:43 PM 페이지60
NX-SERIESHYBRID KEY SYSTEM PROGRAMMING SECTION
MMC 66 SYSTEM SPD-DIAL TOLL RESTRICTION
Enables you to define whether the system allows or denies long distance numbers in
system Speed-Dialing to override toll restriction.
BYPASS TOLL Any station can use system speed dial numbers without
restriction, regardless of class
FOLLOW TOLL The system checks all the system Speed-Dialings according
to the station class and deny/allow table.
PROCEDURE LCD DISPALY
1. Press [TRANSFER] and dial 66
2. Press [MUTE] or [MESSAGE] to select data
OR
Dial 1 for BYPASS TOLL
or 2 for FOLLOW TOLL
3. Press [TRANSFER] to save and exit
DEFAULT DATA
BYPASS TOLL RESTRICTION
RELATED MMC
MMC 30 STATION TOLL CLASS
MMC 60 TOLL DENY TABLE/APPLY
MMC 61 TOLL ALLOW TABLE/APPLY
MMC 67 ASSIGN SYSTEM SPEED DIAL
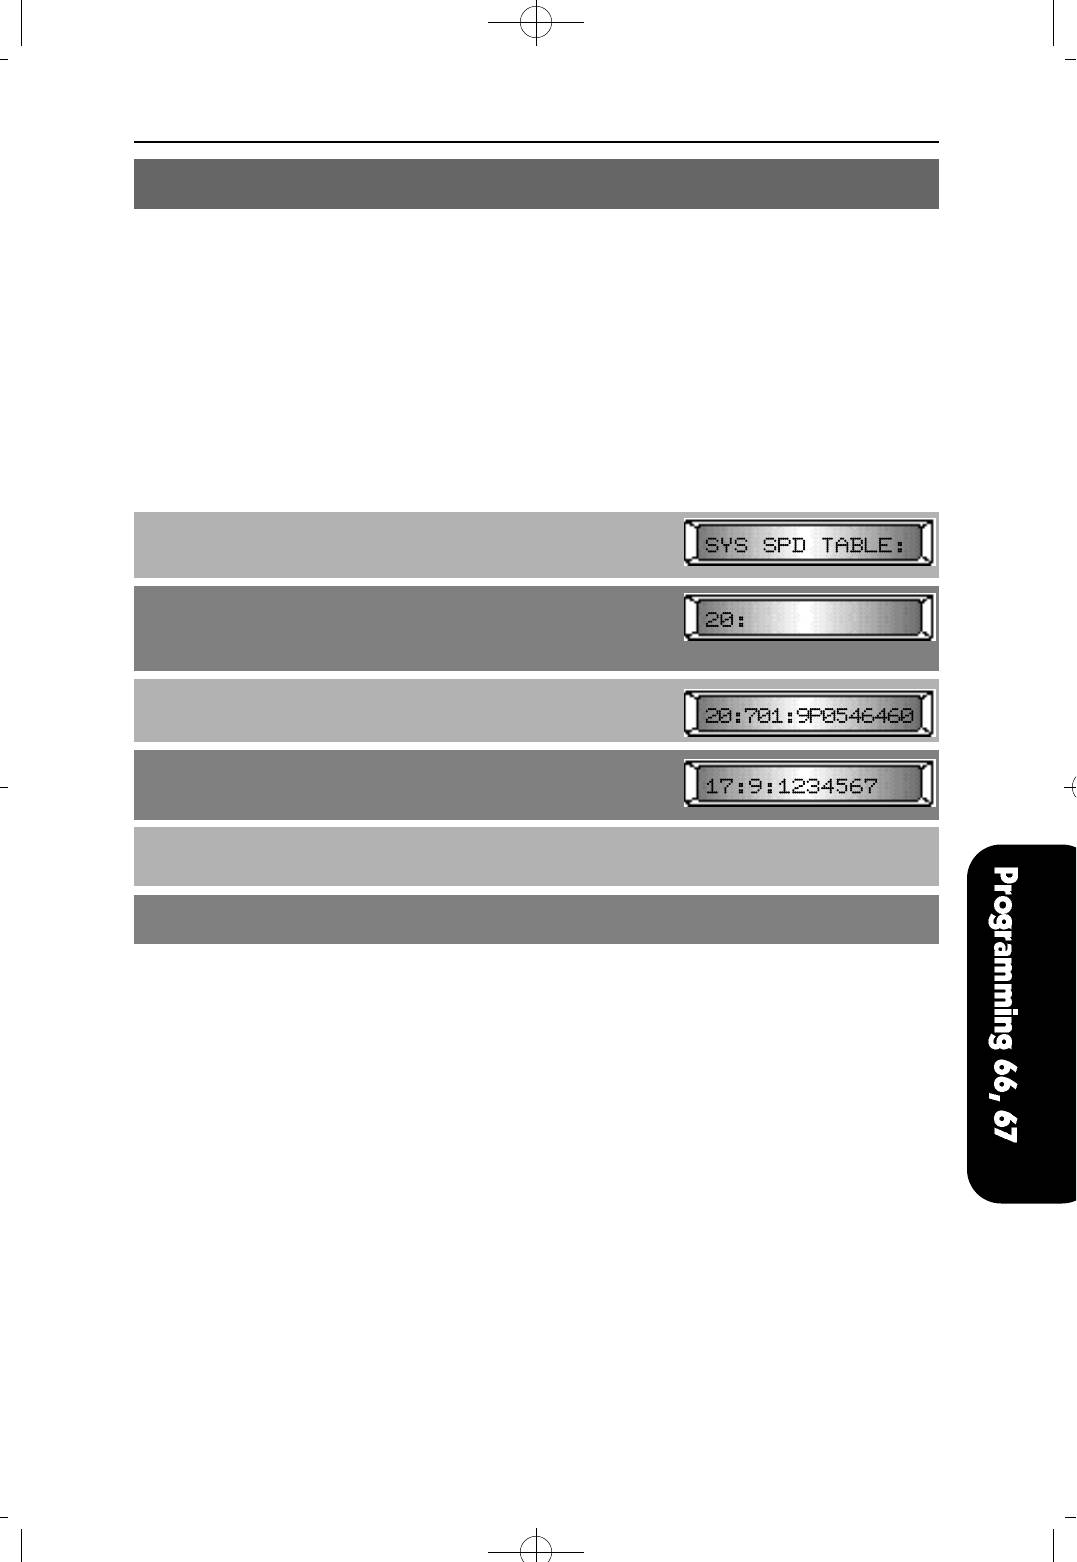
NX-SERIESHYBRID KEY SYSTEM PROGRAMMING SECTION
MMC 67 ASSIGN SYSTEM SPEED-DIAL
This MMC is used to store up to eighty (80) system Speed-Dial numbers. The system
Speed-Dial number is composed of 2 digits (20 to 99) and a maximum 30-digit telephone
number can be stored at each Speed-Dial number. Eighty (80) system Speed-Dial
numbers are available to every station and the toll restriction is determined by MMC 66. A
Speed-Dial number consists of an access code and the telephone number to be dialed.
The access code can be any trunk group, individual trunk, station group, or individual
station. Dialing a valid trunk, trunk group, station or station group access number
automatically inserts the separator character (:).
PROCEDURE LCD DISPLAY
1. Press [TRANSFER] and dial 67
2. Using [VOLUME (-) or (+)], select the entry
OR
Dial the entry number (20~99)
3. Enter the speed dial number of up to 30 digits.
4. Enter trunk access code (e.g. 9) followed by the number
to be dialed (e.g. 1234567)
5. Press [VOLUME (-) or (+)] to enter another speed dial
number and return to step 3
6. Press [TRANSFER] to save and exit
DEFAULT DATA
NONE
RELATED MMC
NONE
4Programming 1999.9.15 12:43 PM 페이지61
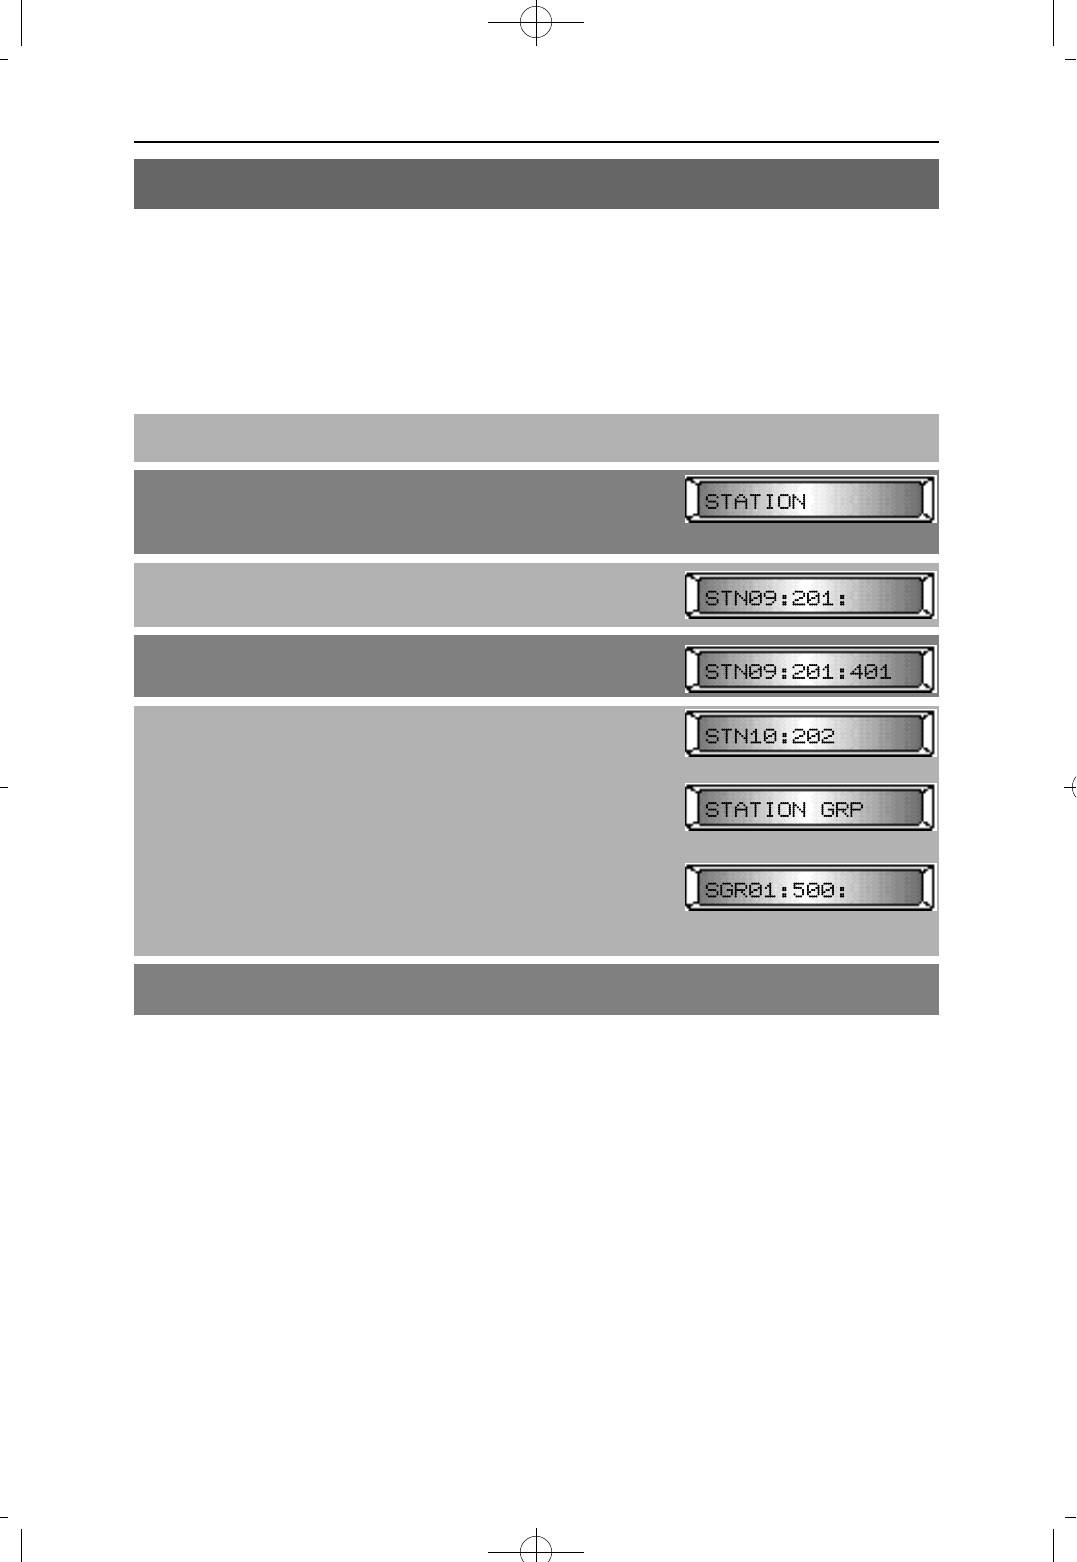
4Programming 1999.9.15 12:44 PM 페이지62
NX-SERIESHYBRID KEY SYSTEM PROGRAMMING SECTION
MMC 70 DIAL NUMBERING PLAN
This MMC provides the access codes and dialing plan needed for operation of features
and programs. The system comes with a wide range of acceptable numbering plans set
as default, and the option to customize the dialing plan. There is also a confirm message
provided due to the chance of duplicating an access or feature code.
PROCEDURE LCD DISPLAY
1. Press [TRANSFER] and dial 70
2. By pressing [MUTE] or [MESSAGE], select the
desired numbering plan group (STATION, STATION
GRP, TRUNK, TRUNK GRP or FEATURE)
3. Search the desired numbering plan entry by pressing
[VOLUME (-) or (+)]
4. Enter digits via the dial keypad (Max 3digits)
5. Press [VOLUME (-) or (+)] to enter change and
continue to make changes
OR
Press [MUTE] or [MESSAGE] to enter change and
continue to selecting numbering plan groups in step 2
If confirm message appears indicating duplication of
access code, dial
0 for no change
1 for change
6. Press [TRANSFER] to save and exit
DEFAULT DATA
ACC : 47 : ACCOUNT CODE
ALM : 58 : ALARM
AMD : 68 : ANSWER MODE
ATH : 65 : AUTHORIZATION CODE
BRG : 40 : BARGE-IN
CBK : 44 : CALL BACK
CMP : 45 : CAMP-ON
CNF : 46 : CONFERENCE
COS : 59 : CLASS OF SERVICE
CPS : 54 : CHANGE PASSCODE
DND : 64 : DO NOT DISTURB
DOR : 13 : DOOR

NX-SERIESHYBRID KEY SYSTEM PROGRAMMING SECTION
MMC 70
DPC : 10 : DIRECT PICKUP
EXC : 12 : EXECUTIVE / SECRETARY
FAT : 14 : FORCED AUTO ANSWER
FLS : 49 : FLASH
FWA : 61 : CALL FORWARD ALL
FWB : 62 : CALL FORWARD BUSY
FWC : 60 : CALL FORWARD CANCEL
FWN : 63 : CALL FORWARD NO ANSWER
GPC : 66 : GROUP PICK UP
GPS : ✱ : SELF GROUP PICK UP
HED : 69 : HEADSET
HLD : 11 : HOLD
IOG : 53 : IN / OUT GROUP
LNR : 19 : LAST NUMBER REDIAL
MPG : 56 : MEET ME PAGE
MSA : 43 : MESSAGE ANSWER
MSC : 42 : MESSAGE CLEAR
MSL : 41 : MESSAGE LEFT
OPR : 0 : OPERATOR
PAG : 55 : PAGE
REC : 18 :DISA VOICE RECORDING
SDI : 15 : SPEED DIAL INSERTION
SGR : 500-519 : STATION GROUP
SNR : 17 : SAVED NUMBER REDIAL
SPD : 16 : SPEED
STN : 2XX : STATION NUMBER
TRK : 7XX : TRUNK NUMBER
TGR : 9, 80~89 : TRUNK GROUP
UPC : 67 : UNIVERSAL NIGHT ANSWER
VAC : 48 : VACANT MESSAGE
RELATED MMC
ALL PROGRAMS AND FEATURES
4Programming 1999.9.15 12:44 PM 페이지63
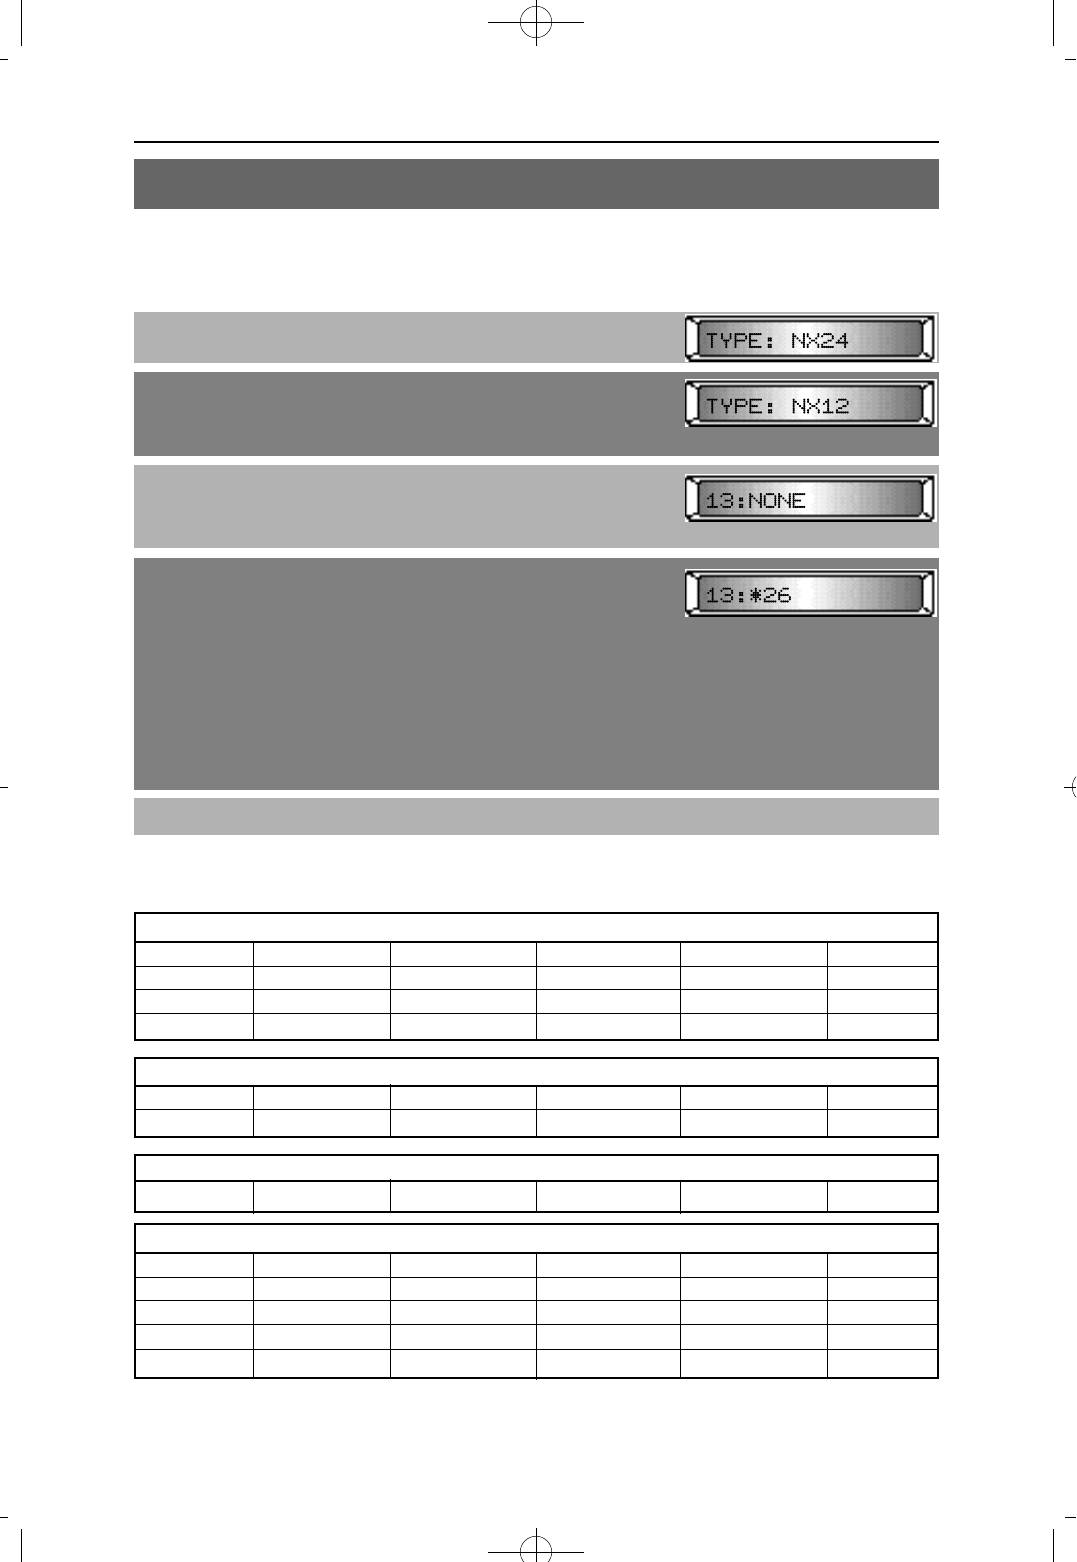
4Programming 1999.9.15 12:44 PM 페이지64
NX-SERIESHYBRID KEY SYSTEM PROGRAMMING SECTION
MMC 71 SYSTEM KEY PROGRAMMING
This MMC allows for the customizing of programmable keys system-wide.
PROCEDURE LCD DISPLAY
1. Press [TRANSFER] and dial 71
2. Using [VOLUME (-) or (+)], select the type of keyset
There are 7 keyset types: NX 24, NX 12, NX 6,
SKP 816, AS 30, AS 12S, NX AOM.
3. Press the desired key
OR
Press [ R E D I A L ]or [ F L A S H ] to select desired key. (e.g. 13)
4. Enter the key programming via keypad.
Trunk number, Trunk Group number, Station number,
Station Group number, or feature number can be
programmed into the keys.
If you want to program a feature key, enter ✱ before ther
feature key ID (e.g. NIT : *26). Press [MUTE] or
[MESSAGE] to scroll the feature Programmable key
assignments are listed below. To change another key, return to step 3.
5. Press [TRANSFER] to save and exit.
DEFAULT DATA
NX-24E/NX-24B
19: 207 20: 208 21: 209 22: 210 23: 211 24: 212
13: 201 14: 202 15: 203 16: 204 17: 205 18: 206
07: 707 08: 708 09: NONE 10: NONE 11: NONE 12: NONE
01: 701 02: 702 03: 703 04: 704 05: 705 06: 706
NX-12E/NX-12B
07: 201 08: 202 09: 203 10: 204 11: 205 12: 206
01: 701 02: 702 03: 703 04: 704 05: 705 06: 706
NX-6B
01: 701 02: 702 03: 703 04: 704 05: 705 06: 706
AS-30
01: 701 02: 702 03: 703 04: 704 05: 705 06: 706
07: 707 08: 708 09: 709 10: 710 11: 711 12: 712
13: 201 14: 202 15: 203 16: 204 17: 205 18: 206
19: 207 20: 208 21: 209 22: 210 23: 211 24: 212
25: 213 26: 214 27: 215 28: 216 29: 217 30: 218

NX-SERIESHYBRID KEY SYSTEM PROGRAMMING SECTION
MMC 71
SKP-816
09: 201 17: 209 01: 701 02: 702 03: 703 04: 704
10: 202 18: 210 05: 705 06: 706 07: 707 08: 708
11: 203 19: 211
12: 204 20: 212
13: 205 21: 213
14: 206 22: 214
15: 207 23: 215
16: 208 24: 216
NX-AOM
01: NONE 13: NONE
02: NONE 14: NONE
03: NONE 15: NONE
04: NONE 16: NONE
05: NONE 17: NONE
06: NONE 18: NONE
07: NONE 19: NONE
08: NONE 20: NONE
09: NONE 21: NONE
10: NONE 22: NONE
11: NONE 23: NONE
12: NONE 24: NONE
Programmable Key Assignment
✱00 : ACC Account code ✱18 : GPC Group Pickup
✱01 : ALM Set Alarm ✱19 : HED Headset mode
✱02 : AMD Answer Mode ✱20 : IOG Group In/Out
✱03 : ARD Auto Redial ✱21 : LNR Last Number Redial
✱04 : BRG Barge-In ✱22 : LSN Group Listening
✱05 : CBK Callback ✱23 : MPG Meet Me Page
✱06 : CMP Camp-on ✱24 : MSG Message
✱07 : CNF Conference ✱25 : MUT Mute
✱08 : DND Do Not Disturb ✱26 : NIT Night mode
✱09 : DOR Door ✱27 : OPR Operator group
✱10 : DPC Direct Pickup ✱28 : PAG Page
✱11 : EXC Boss/Secretary ✱29 : PSE Pause Dialing
✱12 : FAT Forced Auto Answer ✱30 : SNR Saved Number Redial
✱13 : FLS Flash ✱31 : SPD Speed Dialing
✱14 : FWA Call Forward All ✱32 : TMR Timer
✱15 : FWB Call Forward Busy ✱33 : TRN Transfer
✱16 : FWE External Call Forward ✱34 : UPC UNA Pickup
✱17 : FWN Call Forward No answer ✱35 : VAC Vacant Message
NOTE : The SPD, VAC, PAG, DOR, EXC, DPC, GPC keys can be assigned with
extenders. Refer to MMC 16 KEY EXTENDER.
RELATED MMC
MMC 16 KEY EXTENDER
MMC 72 STATION KEY PROGRAMMING
4Programming 1999.9.15 12:44 PM 페이지65
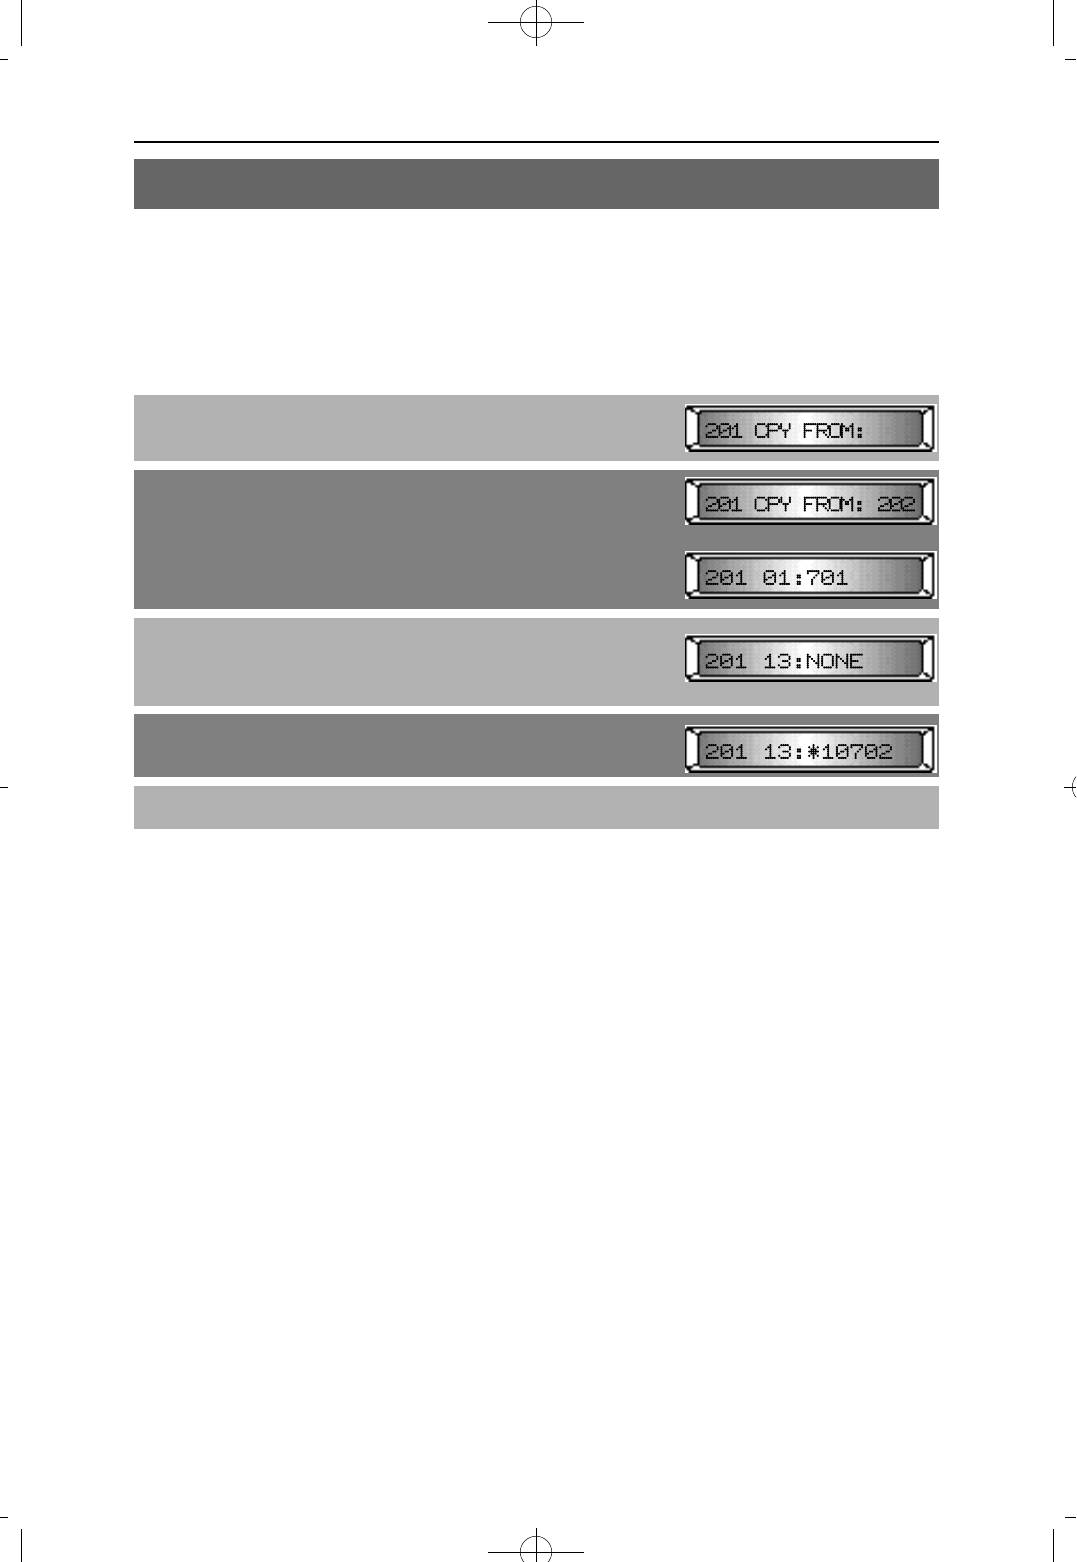
4Programming 1999.9.15 12:44 PM 페이지66
NX-SERIESHYBRID KEY SYSTEM PROGRAMMING SECTION
MMC 72 STATION KEY PROGRAMMING
This program allows customizing programmable keys on specific electonic keysets on the
system. The program also provides a tool for duplicating data to other keysets to have the
same key format structure. Copy source and target sets must be same type keyset.
PROCEDURE LCD DISPLAY
1. Press [TRANSFER] and dial 72
2. If you want to copy from another station key
assignment, enter the station number
OR
Press [VOLUME (-) or (+)] to select the station
3. Press the desired key
OR
Press [REDIAL] or [FLASH] to select desired key
4. Press dial pad key number to make selection.
If you want to change another key, return to step 3
5. Press [TRANSFER] to save and exit
DEFAULT DATA
Same as MMC 71
RELATED MMC
MMC 16 KEY EXTENDER
MMC 71 SYSTEM KEY PROGRAMMING
NX-SERIESHYBRID KEY SYSTEM PROGRAMMING SECTION
MMC 73 KEY TEST
This program allows you to check whether each key works properly.
PROCEDURE LCD DISPLAY
1. Press [TRANSFER] and dial 73
▩ ▩ ▩ ▩ ▩ ▩ ▩ ▩ ▩ ▩ ▩ ▩ ▩ ▩ ▩ ▩
All LEDs light and station rings. Display sets show
the full matrix pattern for 16 characters.
All tri-color LEDs light amber
2. Press each function button and dial pad key to test its
operation. Display sets will show the corresponding
key name. Buttons with LEDs will turn OFF and stay
OFF when pressed
3. Lift the handset to end testing
DEFAULT DATA
NONE
RELATED MMC
NONE
4Programming 1999.9.15 12:44 PM 페이지67
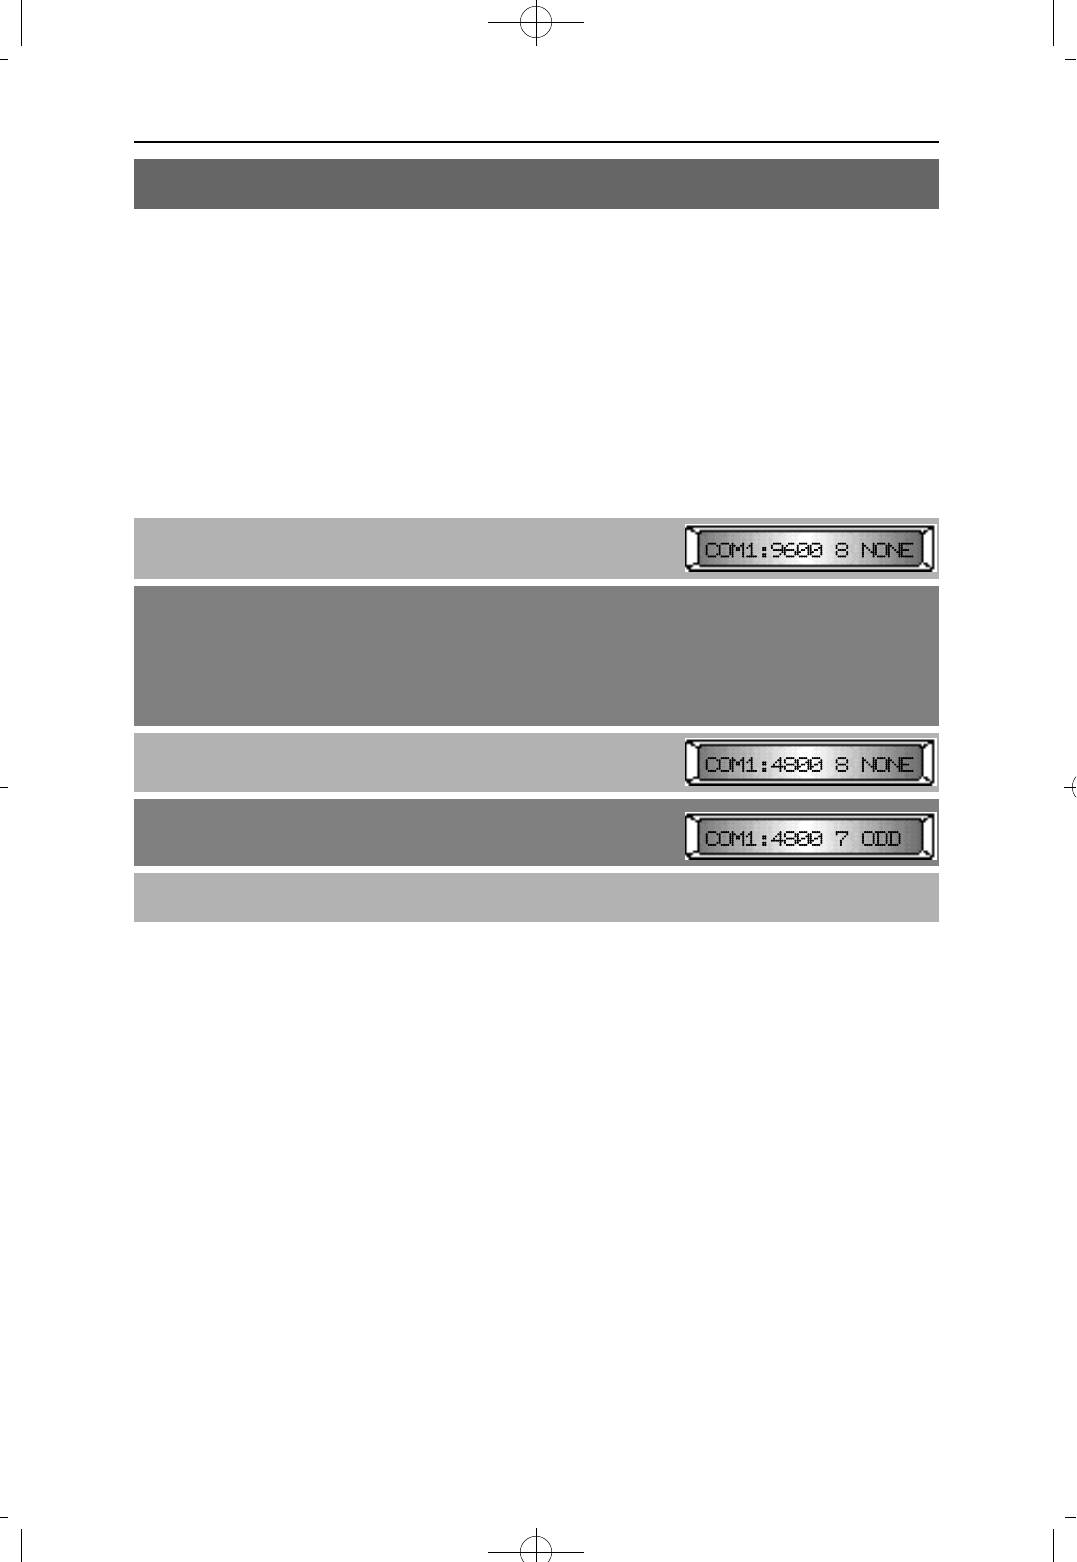
4Programming 1999.9.15 12:44 PM 페이지68
NX-SERIESHYBRID KEY SYSTEM PROGRAMMING SECTION
MMC 80 SYSTEM I/O PARAMETERS
This MMC provides a means of setting parameters for the serial I/O ports to work with SMDR and
Remote MMC. Programming is accomplished easily with the tables below to customize either I/O port.
PARAMETER OPTIONS
TYPE OF SERVICE SMDR, REMOTE, TRAFFIC
REMOTE STN REMOTE only
BAUD RATE 300, 600, 1200, 2400, 4800, 9600 BPS
CHARACTER LENGTH 7 BIT, 8 BIT
PARITY NONE, EVEN, ODD
STOP BIT 1
PROCEDURE LCD DISPLAY
1. Press [TRANSFER] and dial 80
Display Shows
2. Press [VOLUME (-) or (+)] to select the serial port
(COM1, COM2) COM1 and COM2 may be found on
SMDR/R-MMC card. COM1 is SMDR and COM2 is
R-MMC. COM1 is used for SMDR or TRAFFIC port and
COM 2 is used for Remote Programming.
3. Press [REDIAL] or [FLASH] to select the parameters
4. Press [MUTE] or [MESSAGE] to select data
5. Press [TRANSFER] to save and exit
DEFAULT DATA
COM1 : 9600 8 NONE
COM2 : 9600 8 NONE
COM1 : XON OFF : ON
COM2 : XON OFF : ON
SMDR : COM1
TRAFFIC : COM1
REMOTE : COM2 STN : NONE
NOTE: “XON OFF” means whether the system checks the CTS pin of the serial
port or not ‘REMOTE STN’ means the port displaying the Remote MMC procedure.
RELATED MMC
NONE
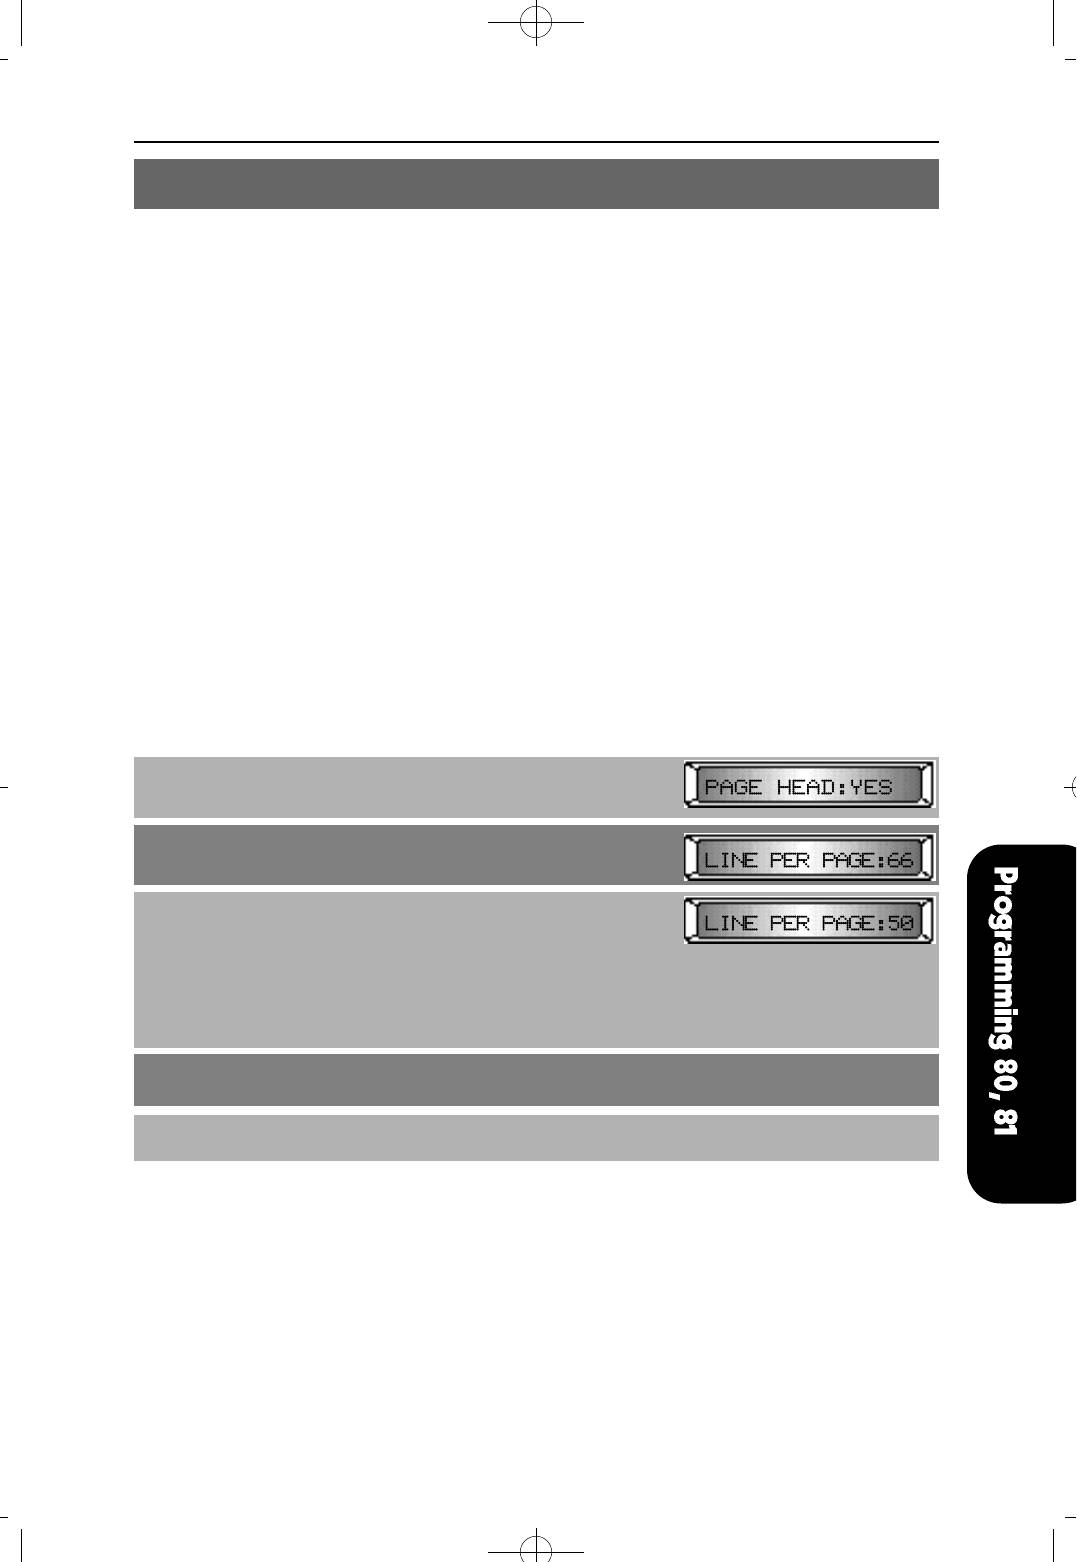
NX-SERIESHYBRID KEY SYSTEM PROGRAMMING SECTION
MMC 81 SMDR OPTIONS
This MMC allows the system administrator to select information to be printed on the SMDR report.
OPTIONS DESCRIPTIONS
PAGE HEADER This option determines whether a page header will print at the top
of each page. Normally turned off if SMDR is sent to a call
accounting machine.
LINE PER PAGE This option selects the length of each page to determine where to print the
SMDR header. The number of lines may be in the range 10 through 99.
INCOMING CALL This option determines whether or not incoming calls will print on SMDR.
AUTHORIZE CODE This option determines whether or not the table of authorization
codes will print on SMDR.
LESS START TIME This option determines whether or not valid calls will include the
minimum call time in total call duration.
ALARM This option determines whether or not stations receiving an alarm
reminder call will print on SMDR.
COMPANY NAME This option allows the system administator to enter a 16 character
name which will appear in the SMDR header.
PROCEDURE LCD DISPLAY
1. Press [TRANSFER] and dial 81
2. Press [VOLUME (-) or (+)] to select the parameter
3. Press [MUTE] or [MESSAGE] to select data
OR
Using KEYPAD, dial
0 for NO
1 for YES
In case of LINE PER PAGE, enter the line number (17~99)
4. In case of COMPANY NAME, refer to MMC 14
(STATION NAME)
5. Press [TRANSFER] to save and exit
DEFAULT DATA
PAGE HEADER : YES LINE PER PAGE : 66
INCOMING CALL : NO AUTHORIZE CODE : YES
LESS START TIME : NO ALARM : NO
COMPANY NAME : NONE
RELATED MMC
MMC 80 IO PARAMETER
4Programming 1999.9.15 12:44 PM 페이지69
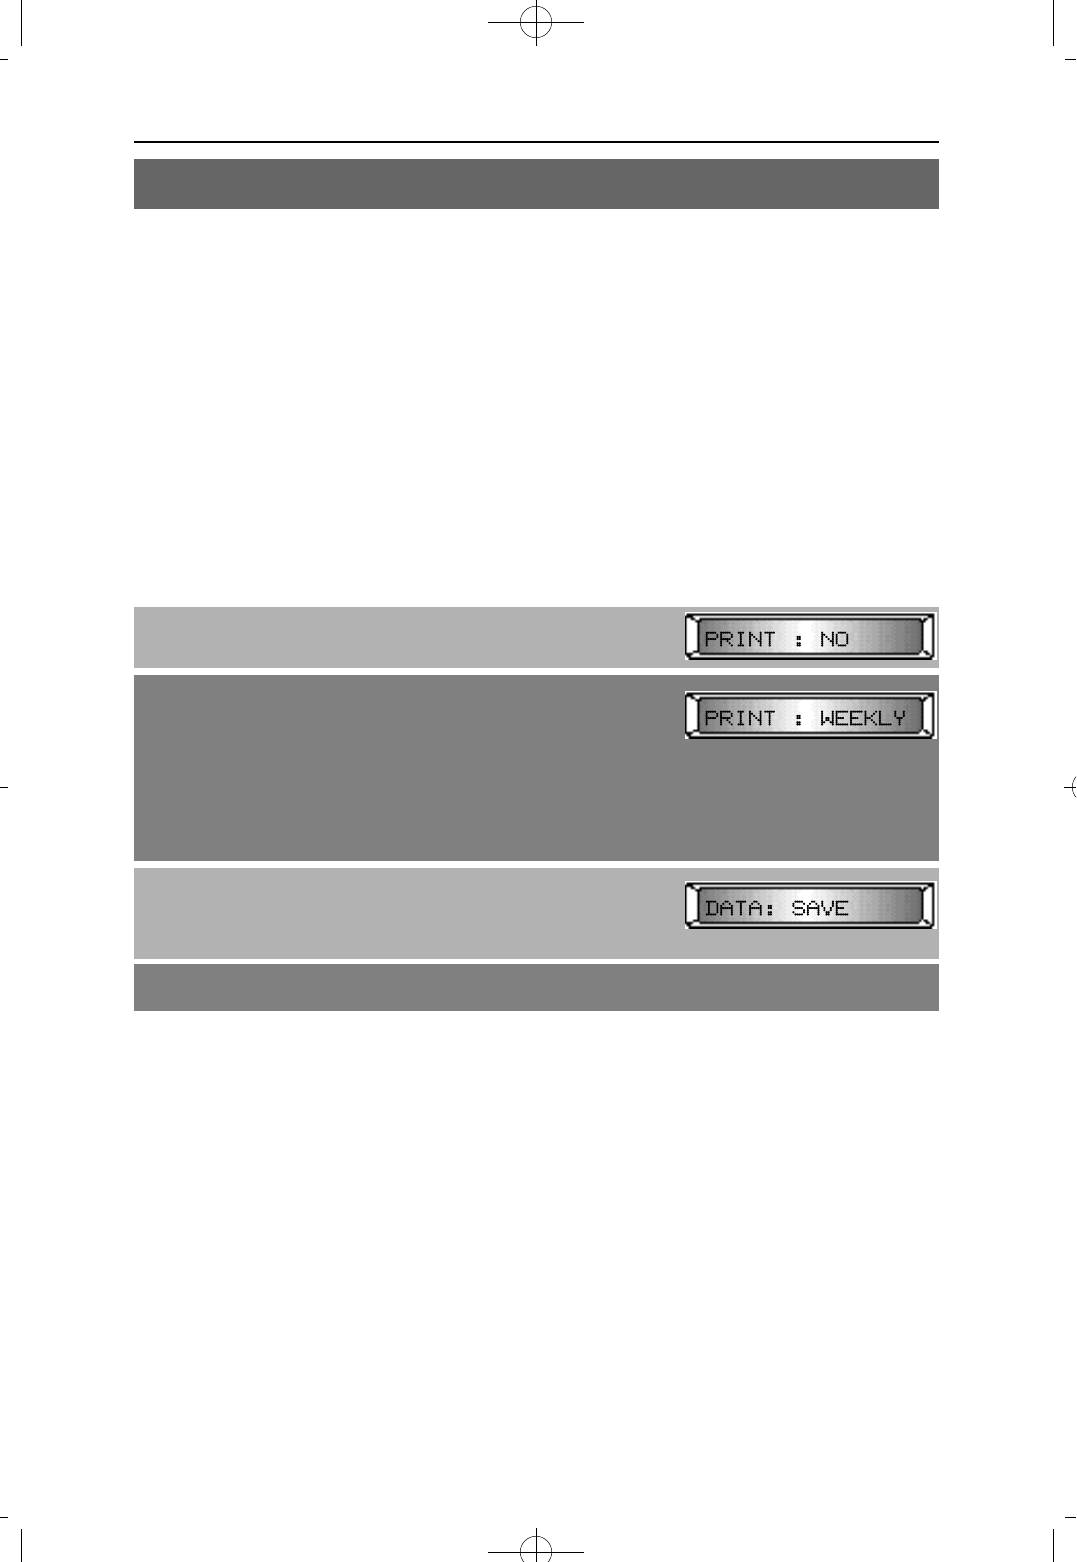
4Programming 1999.9.15 12:44 PM 페이지70
NX-SERIESHYBRID KEY SYSTEM PROGRAMMING SECTION
MMC 83 CALL TRAFFIC REPORT
This MMC is used to print a traffic report and select options. Four types of printing are
available, each with has two options. These are listed below:
NO. TYPE DESCRIPTION
0 NO No print
1 NOW Printed on demand
2 DAILY Printed at the end of day automatically (PM 12:00)
3 WEEKLY Printed at the end of week automatically(PM 12:00 on Saturday)
NO. OPTIONS DESCRIPTION
0 CLEAR A report is printed and all totals are reset to 0
1 SAVE A report is printed and all totals are saved
PROCEDURE LCD DISPLAY
1. Press [TRANSFER] and dial 83
2. Press [MUTE] or [MESSAGE] to select type
OR
Using KEYPAD, dial
0 for NO
1 for NOW
2 for DAILY
or 3 for WEEKLY
3. Press [VOLUME] and dial 0 for CLEAR, or 1 for SAVE
You have to select one of the types in step 2 and also
one selection in step 3 to print the traffic report
4. Press [TRANSFER] to save and exit
DEFAULT DATA
PRINT : NO
DATA : SAVE
RELATED MMC
MMC 80 IO PARAMETER
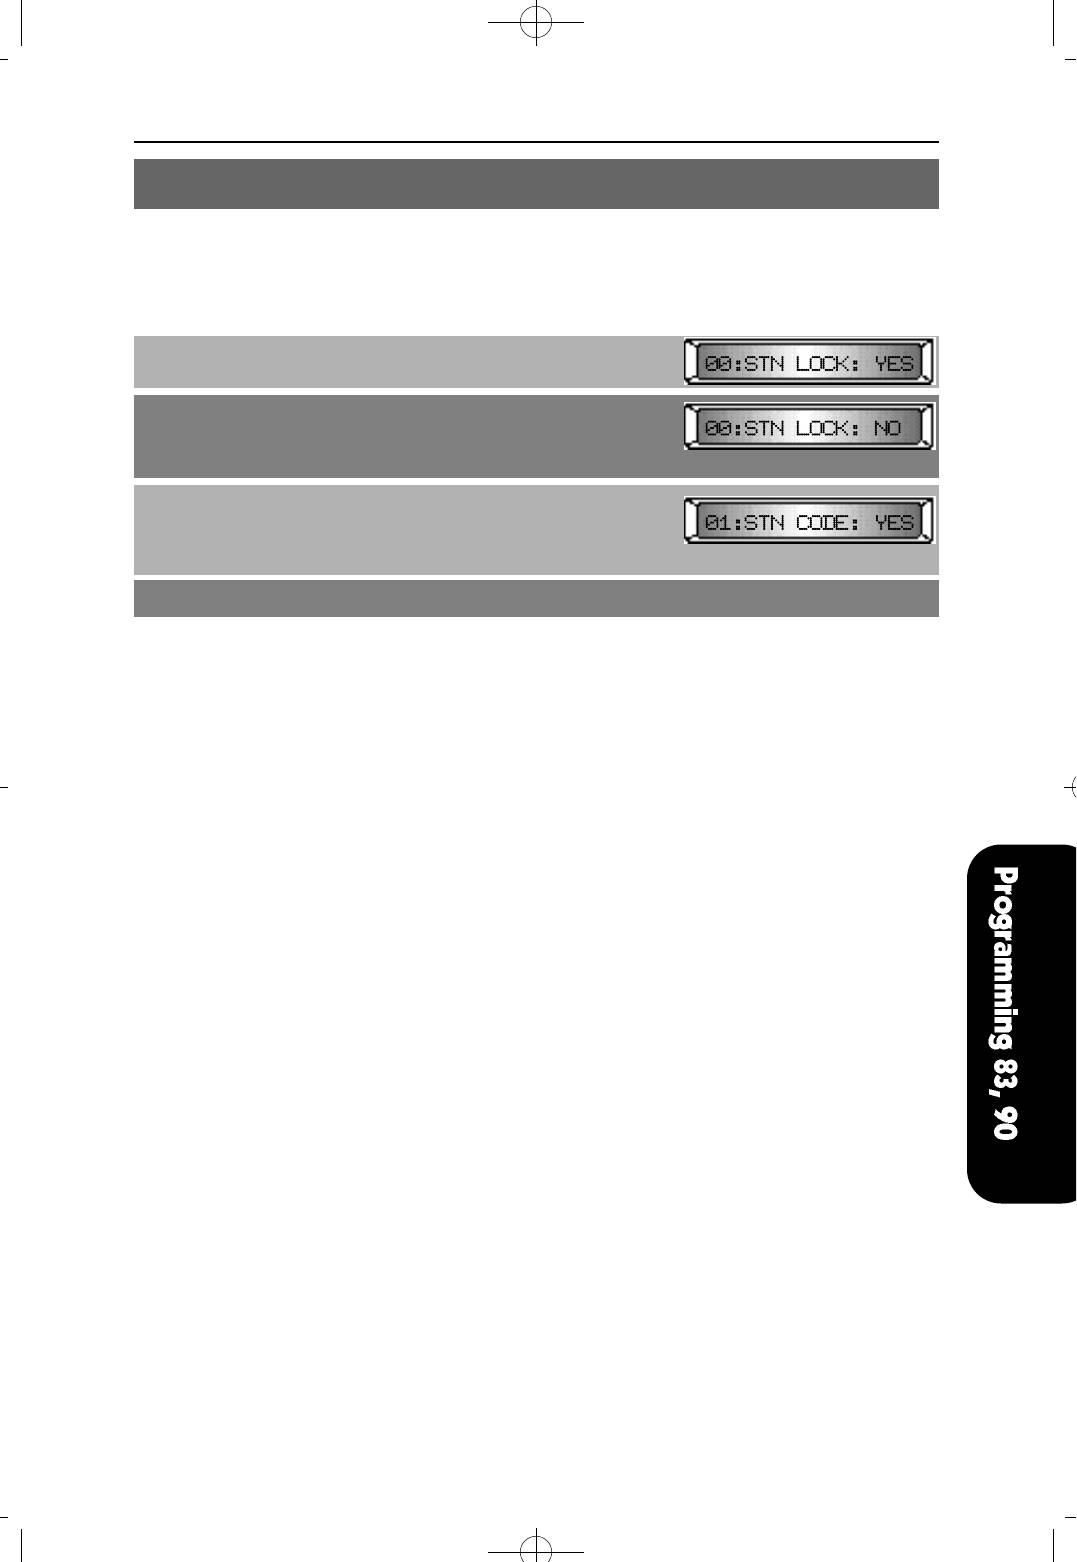
NX-SERIESHYBRID KEY SYSTEM PROGRAMMING SECTION
MMC 90 CUSTOMER USE MMC
Allows the station user access to certain MMCs. For example, it is advised that the user
have access to MMC11 Call Forward, but not MMC60 Toll Deny.
PROCEDURE LCD DISPLAY
1. Press [TRANSFER] and dial 90.
2. Press [VOLUME (-) o r ( + ) ] to select the MMC you want.
OR
Using KEYPAD, enter the desired MMC number.
3. Press [MUTE] or [MESSAGE] to make selection.
NO : Customer cannot access the MMC.
YES : Customer can access the MMC.
4. Press [TRANSFER] to save and exit.
DEFAULT DATA
00:STN LOCK :YES 41:TRK DIAL :NO
01:STN CODE :YES 42:TRK MISC :NO
10:ANS MODE :YES 43:TRK RING :NO
11:CALL FWD :YES 44:TRK NAME :NO
12:STN MISC :YES 45:TRK GRP :NO
13:RING FREQ :YES 46:DISA LINE :NO
14:STN NAME :YES 50:SYS TIME :NO
15:DATE FORM :YES 51:TONE CADE :NO
16:KEY EXTEN :YES 52:SYS CNTR :NO
17:STN SPD :YES 53:TRK TIME :NO
20:PGM MODE :NO 54:MAKE RATE :NO
21:PGM CODE :YES 55:DATE TIME :YES
22:CUS MISC :YES 56:NITE TIME :YES
23:PAGE ZONE :NO 57:CALL COST :NO
24:BARGE IN :NO 60:TOLL DENY :NO
25:HOT WARM :YES 61:TOLL ALOW :NO
26:ALM CLK :YES 62:PBX CODE :NO
27:VAC MSG :YES 63:AUTH CODE :NO
28:CALL DISC :NO 64:URGENT CD :NO
30:STN COS :NO 65:WILD CHAR :NO
31:TRK USE :NO 66:SPD TOLL :NO
32:INTERCOM :NO 67:SYS SPD :YES
33:DOOR RING :NO 70:NUM PLAN :NO
34:PICK GRP :NO 71:SYS KEY :NO
35:STN GRP :NO 72:STN KEY :NO
36:BOSS SECR :YES 73:KEY TEST :NO
37:SET AOM :NO 80:IO PARA :NO
38:SLT TYPE :NO 81:SMDR OPT :NO
39:DATA LINE :NO 83:TRFC RPT :YES
40:PBX LINE :NO
RELATED MMC
NONE
4Programming 1999.9.15 12:44 PM 페이지71
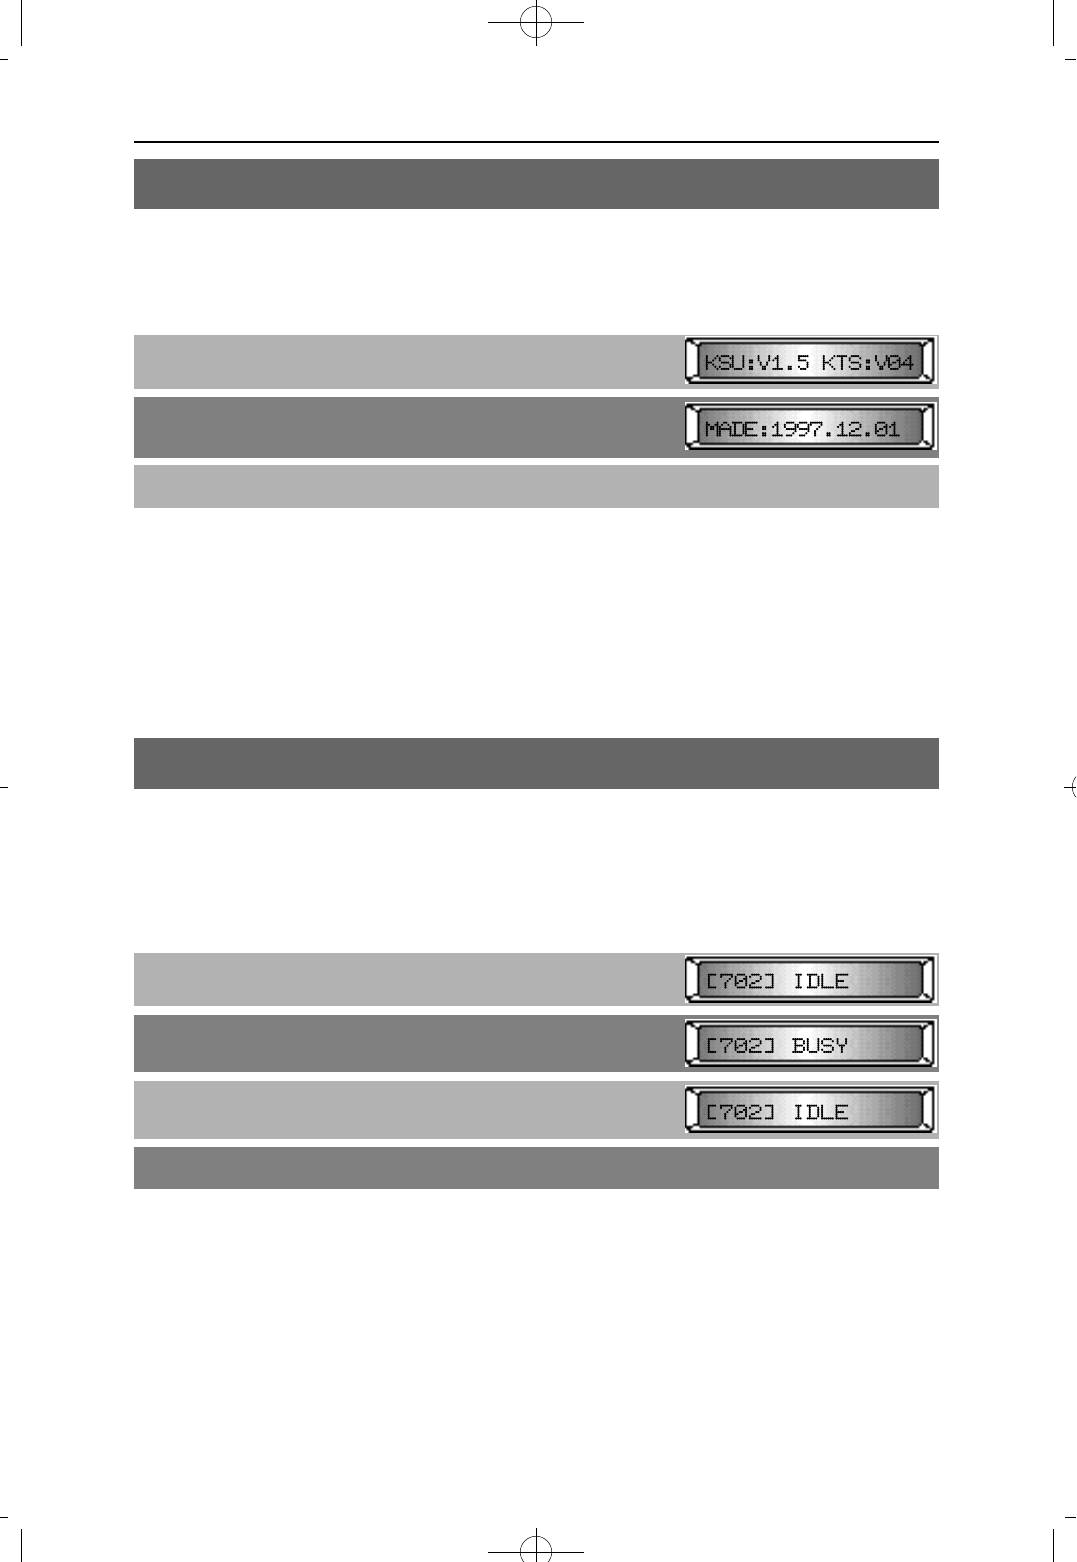
4Programming 1999.9.15 12:44 PM 페이지72
NX-SERIESHYBRID KEY SYSTEM PROGRAMMING SECTION
MMC 91 SYSTEM VERSION
This MMC provides display of the current software version of the KSU and the KEYSET,
and the date the product was made. This is a READ ONLY MMC.
PROCEDURE LCD DISPLAY
1. Press [TRANSFER] and dial 91
2. Press [VOLUME (-) or (+)] to select a display
3. Press [TRANSFER] to and exit.
DEFAULT DATA
RELATED MMC
NONE
MMC 92 PORT STATUS
This MMC displays the sixteen(16) port attributes:
IDLE, BUSY, CALLBACK, DOOR RING, TRK RING, STN RING, GRP RING, RCL RING, PROGRAM,
ON T HOLD, ON S HOLD, ON E HOLD, IS PAGED, IS SEIZED, WRAP UP, OFF HOOK.
PROCEDURE LCD DISPLAY
1. Press [TRANSFER] and dial 92
2. Press [VOLUME (-) or (+)] and to see the port status.
3. To clear the port status, press [HOLD]
4. Press [TRANSFER] to save and exit.
DEFAULT DATA
IDLE
RELATED MMC
NONE
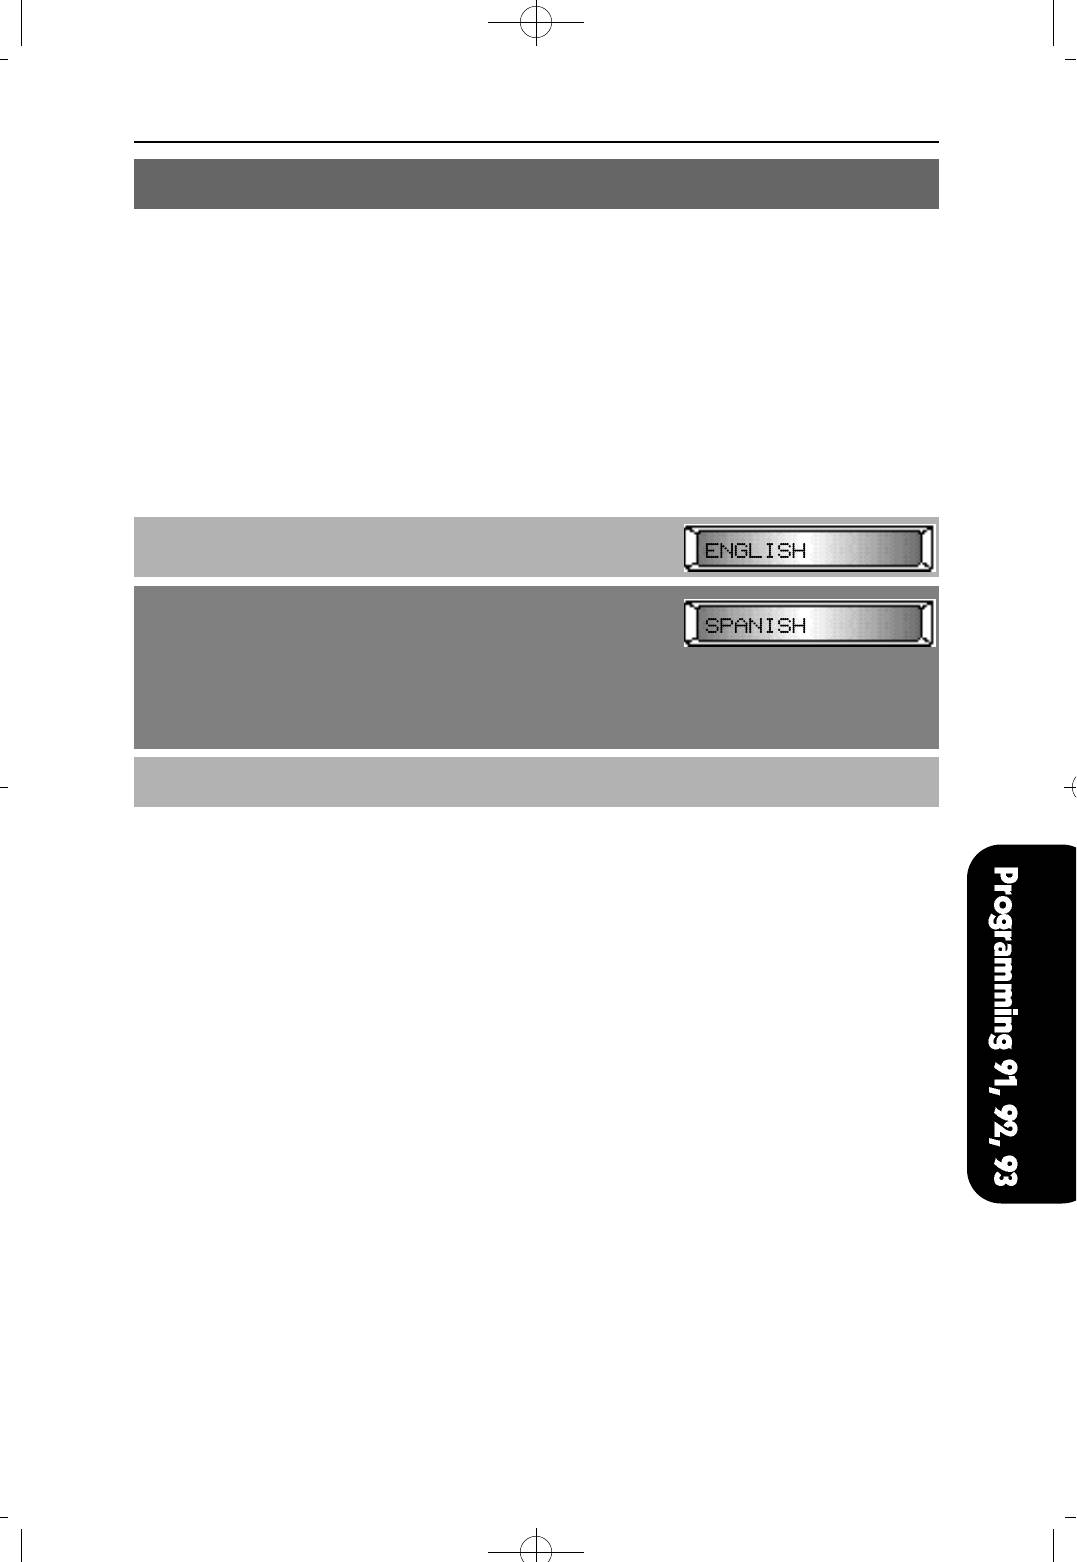
NX-SERIESHYBRID KEY SYSTEM PROGRAMMING SECTION
MMC 93 LANGUAGE SELECTION
Used to select one of three (3) languages to display in keyset LCDs.
Choose an entry number from the table below:
ENTRY NUMBER LANGUAGE
1 ENGLISH
2 SPANISH
3 PORTUGUESE
NOTE : English is displayed while in MMC mode.
PROCEDURE LCD DISPLAY
1. Press [TRANSFER] and dial 93
Display shows…
2. Press [MUTE] or [MESSAGE] to select a language.
OR
Using KEYPAD, dial
1 for ENGLISH
2 for SPANISH
or 3 for PORTUGUESE
3. Press [TRANSFER] to save and exit.
DEFAULT DATA
ENGLISH
RELATED MMC
NONE
4Programming 1999.9.15 12:44 PM 페이지73
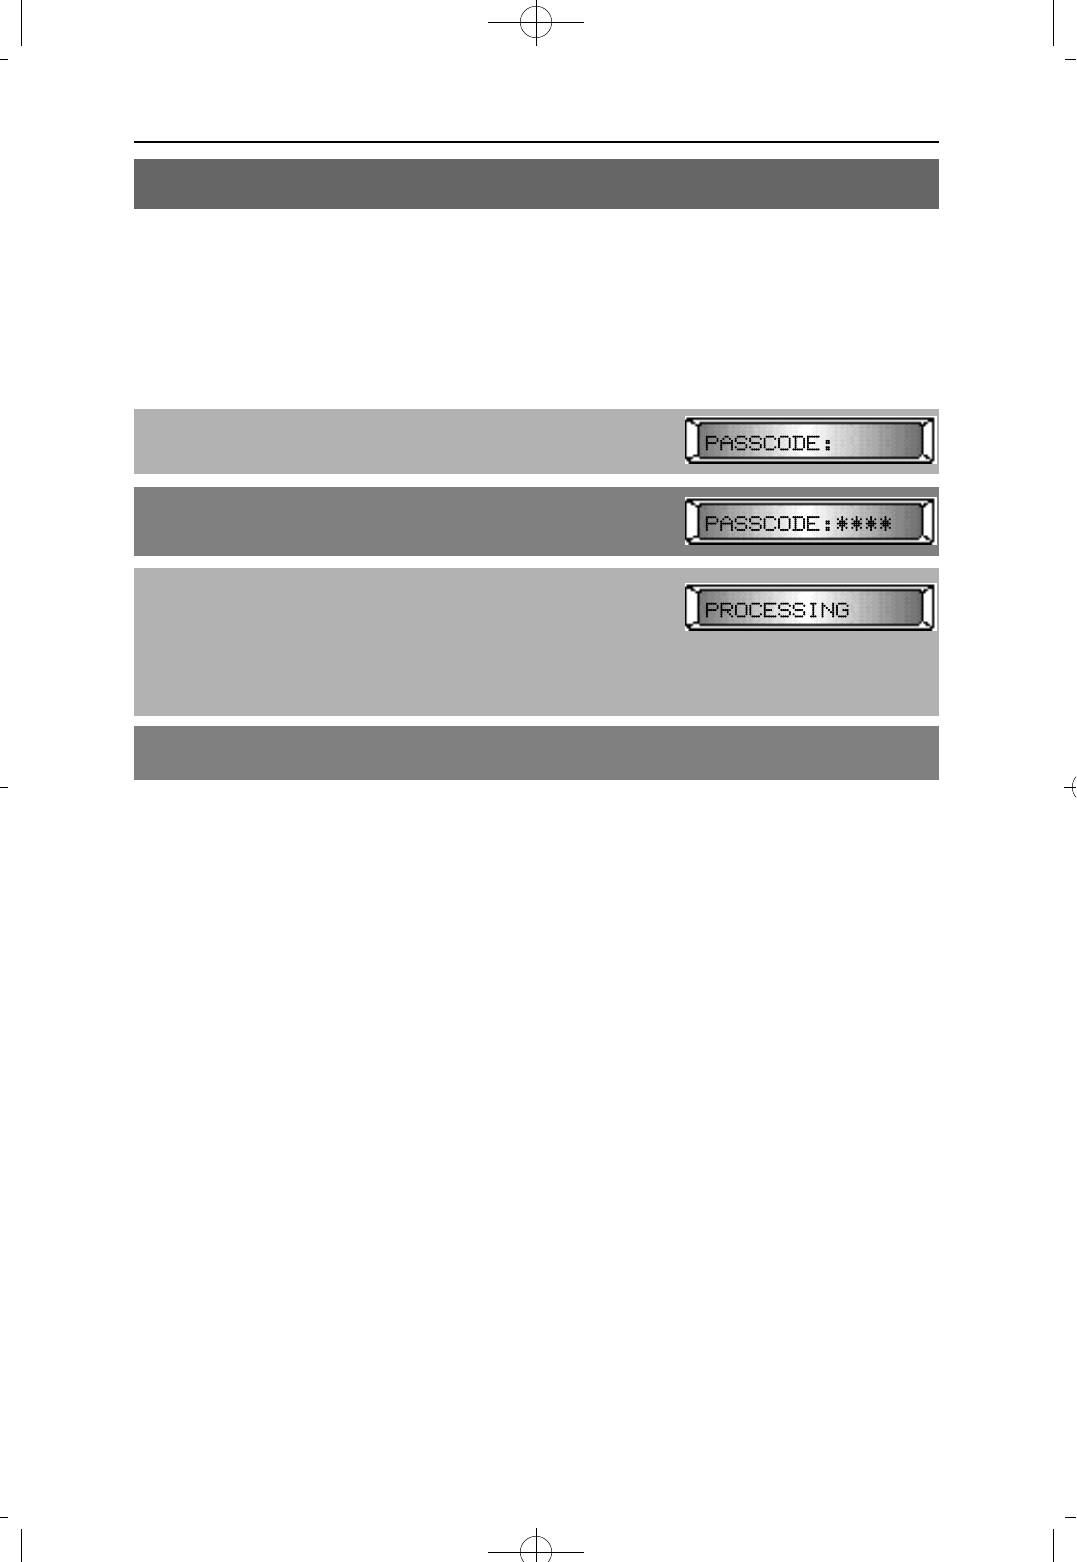
4Programming 1999.9.15 12:44 PM 페이지74
NX-SERIESHYBRID KEY SYSTEM PROGRAMMING SECTION
MMC 94 HALT PROCESS
Use only in the event that all data processing must be stopped.
The four-digit Technician Passcode is required to access this MMC. This MMC will not
interfere with any call in progress, but attempting a new call will result in a busy tone.
PROCEDURE LCD DISPLAY
1. Press [TRANSFER] and dial 94
2. Enter Technician passcode.
3. Press [MUTE] or [MESSAGE] to select data.
OR
Using KEYPAD, dial
0 for PROCESSING
1 for HALT
4. Press [TRANSFER] to save and exit.
DEFAULT DATA
PROCESSING
RELATED MMC
NONE
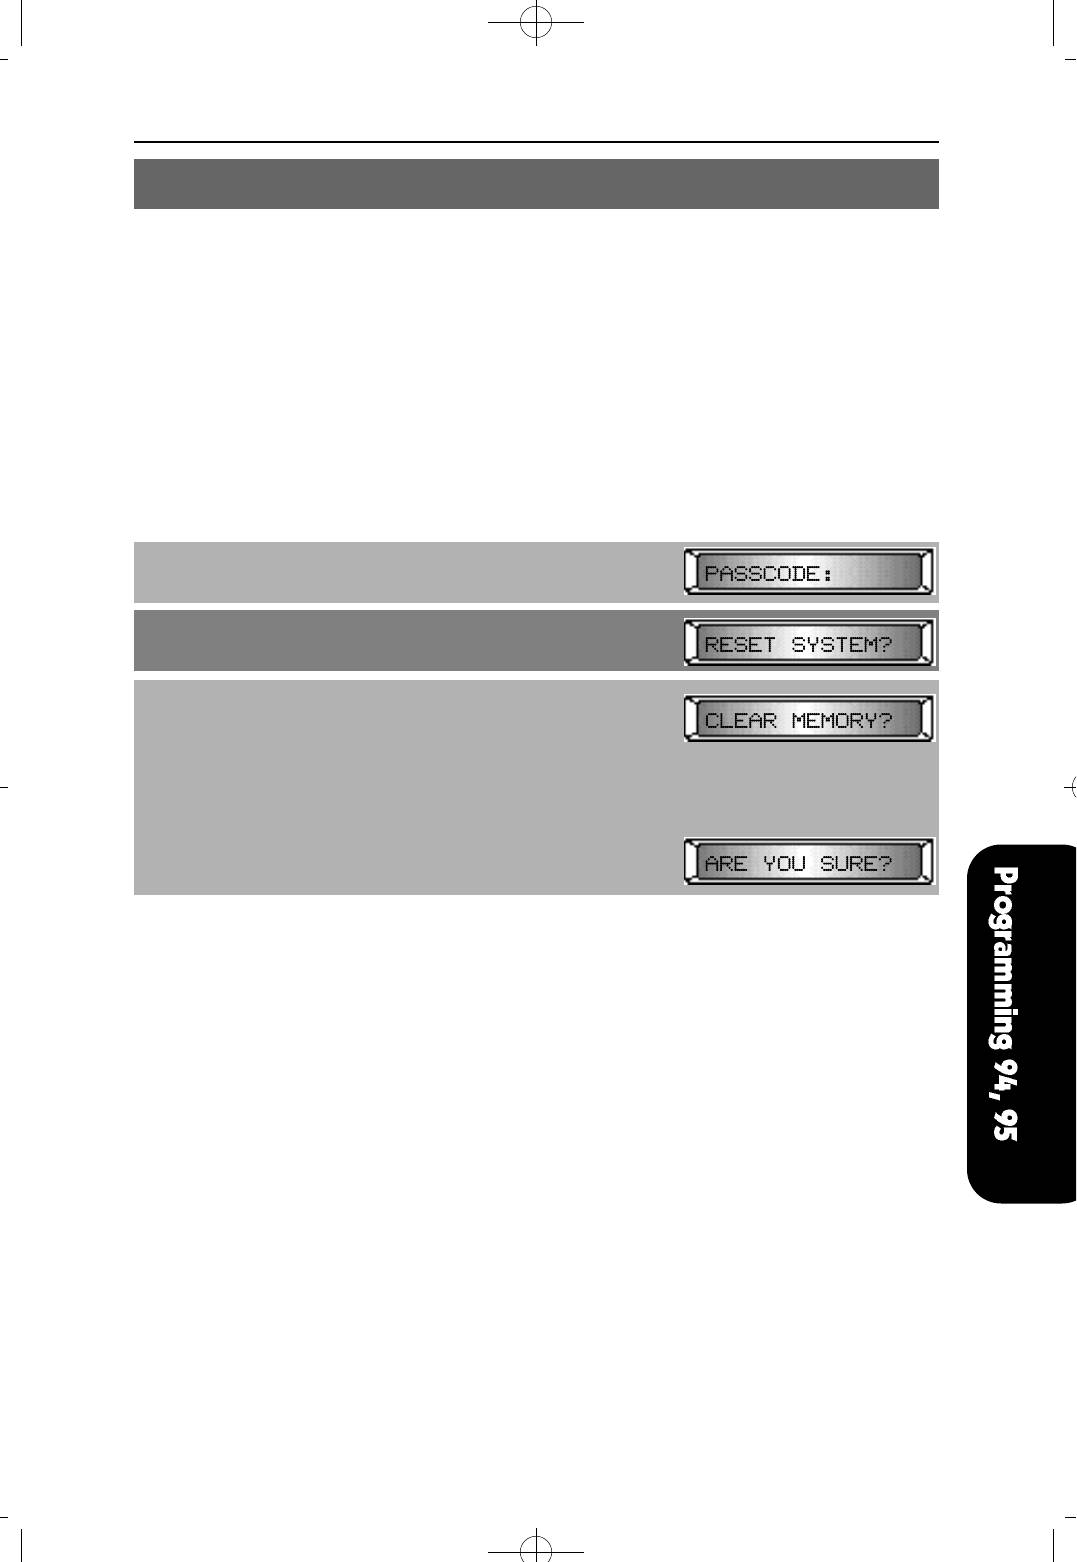
NX-SERIESHYBRID KEY SYSTEM PROGRAMMING SECTION
MMC 95 SYSTEM RESTART
Provides two methods of restarting the system.
OPTIONS DESCRIPTION
RESET SYSTEM Restart the system only.
CLEAR MEMORY Restart the system and clear all memory and set all
functions to their default values.
Extreme care should be taken when using this MMC. If the system is restarted, all
voice/data connections are dropped. Clearing memory will delete all customer data and
system returns to default status.
PROCEDURE LCD DISPLAY
1. Press [TRANSFER] and dial 95
2. Enter the technician passcode.
3. Press [VOLUME (-) or (+)] to select the option.
OR
Using KEYPAD, dial
0 for NO
or 1 for YES.
If case of CLEAR MEMORY, dial 0 for NO or 1
for YES to remind you of your choice.
DEFAULT DATA
NONE
RELATED MMC
NONE
4Programming 1999.9.15 12:44 PM 페이지75

4Programming 1999.9.15 12:44 PM 페이지76
NX-SERIESHYBRID KEY SYSTEM PROGRAMMING SECTION
Страницы и текст этой инструкции
 Инструкция атс Samsung NX-308
 Информация отображена на картинке
 Информация отображена на картинке
 Информация отображена на картинке
 Информация отображена на картинке
Как использовать наш сайт инструкций OnlineManuals.ru
Наша цель состоит в том, чтобы предоставить вам быстрый доступ к содержанию инструкции для атс Samsung NX-308.
С помощью онлайн просмотра, Вы можете быстро просмотреть содержимое инструкции и найти решение проблемы с атс Samsung NX-308.
Для Вашего удобства
Если листать руководство пользователя атс Samsung NX-308 прямо на сайте, не очень удобно для Вас, есть два возможных решения:
• Просмотр в полноэкранном режиме — легко просмотреть руководство пользователя (без загрузки его на свой компьютер), Вы можете использовать режим полноэкранного просмотра.
Для просмотра инструкции пользователя атс Samsung NX-308 на полном экране, используйте кнопку «Открыть в Pdf-viewer».
• Загрузка на компьютер — Вы можете также скачать Инструкция атс Samsung NX-308 на свой компьютер и сохранить его в файлах.
Многие люди предпочитают читать документы не на экране, а в печатной версии.
Возможность печати руководства пользователя также была предусмотрена на нашем сайте,
и вы можете использовать ее, нажав на иконку «печать» в Pdf-viewer.
Нет необходимости печатать все руководство атс Samsung NX-308, можно выбрать только нужные страницы инструкции.
- Инструкции →
- Офисная оргтехника →
- АТС →
- Samsung →
- Samsung NX-308
Модель, к которой подходит эта инструкция: Samsung NX-308
Скачать инструкцию к Samsung NX-308 (5.2 Мб)
Данная инструкция написана на русском языке
Вопросы и отзывы о Samsung NX-308
Пожалуйста, если у вас есть вопрос или отзыв, напишите пару строк в форме ниже.
Если вы скачали инструкцию, но не смогли разобраться, как пользоваться той или иной функцией прибора,
напишите свой вопрос, наши специалисты постараются найти ответ на ваш вопрос.