- Manuals
- Brands
- Lynx Manuals
- Offroad Vehicle
- 5900
- Operator’s manual
-
Contents
-
Table of Contents
-
Troubleshooting
-
Bookmarks
Quick Links
Related Manuals for Lynx 5900
Summary of Contents for Lynx 5900
-
Page 2
OPERATOR’S MANUAL LYNX 2006 5900 6900 ST 550 F/600 Forest Fox Yeti V-1300 Yeti V-800 Yeti 600 SDI Ranger 550 F/600 Safari 400 F… -
Page 3: Table Of Contents
CONTENT SAFETY MEASURES …………..5 WARRANTY …………….6 HOW TO IDENTIFY YOUR SNOWMOBILE ……. 9 Serial Numbers …………………. 9 CONTROLS / INSTRUMENTS ……….10 1. Throttle lever ………………..13 2. Brake lever ………………… 13 3. Parking brake lever ………………13 4.
-
Page 4
Suspension troubleshooting36 In deep snow ………………….36 FUEL AND OIL …………….. 36 Recommended fuel ………………..36 Recommended oil ………………..37 COLD WEATHER CARBURETION MODIFICATIONS …. 37 BREAK-IN PERIOD …………..38 Engine ……………………38 Drive belt ………………….38 10 hour inspection ………………..PRE-OPEARATION CHECK ………… -
Page 5
Brake adjustment ………………..60 Rear suspension condition ……………… 60 Suspension stopper strap condition …………..60 Track condition ………………..60 Track tension and alignment …………….60 Steering and front suspension mechanism …………61 Wear and condition of skis and runners …………. 62 Exhaust system ……………….. -
Page 6: Safety Measures
Safety measures * For vehicle with a parking brake always engage brake when snowmobile is not in use. * Throttle mechanism should be checked for free movement before starting engine. * The snowmobile can be stopped by activating the emergency cut-out switch, pulling the tether cord or turning off the ignition key (if equipped).
-
Page 7: Warranty
All genuine LYNX parts and accessories, installed by an authorized BRP distri- butor/dealer (as hereinafter defined) at the time of delivery of the 2006 LYNX snowmobile, carry the same warranty as that of the snowmobile.
-
Page 8
BRP’s obligations under this warranty are limited to, at its sole discretion, repai- ring parts found defective under normal use, maintenance and service, or repla- cing such parts with new genuine LYNX parts without charge for parts and labor, at any authorized BRP distributor/dealer during the warranty coverage period. -
Page 9
TIAL DAMAGES ARE EXCLUDED FROM COVERAGE UNDER THIS WARRAN- TY. SOME STATES/ PROVINCES DO NOT ALLOW FOR THE DISCLAIMERS, LIMITATIONS AND EXCLUSIONS IDENTIFIED ABOVE, AS A RESULT, THEY MAY NOT APPLY TO YOU. THIS WARRANTY GIVES YOU SPECIFIC RIGHTS, AND YOU MAY ALSO HAVE OTHER LEGAL RIGHTS WHICH MAY VARY FROM STATE TO STATE, OR PROVINCE TO PROVINCE. -
Page 10: How To Identify Your Snowmobile
These numbers are required by the Lynx dealers to complete warranty claims properly. No warranty will be allowed by BRP if the engine serial number or VIN is removed or mutilated in any way.
-
Page 11: Controls / Instruments
Controls / Instruments Safari 400, Ranger 550 F, ST 600, ST 550 F, 5900 FCE/6900 FCE, Forest Fox S Yeti V-1300, Yeti V-800, Yeti 600 SDI, Ranger 600 1. Engine Management System (EMS) pilot lamp 2. Oil pressure pilot lamp 3.
-
Page 12
Multi-display Note! Multi-display instrument is found in following models as standard: Yeti V-1300 and Yeti 600 SDI. Operation When the vehicle is powered up will the multi-display run a short start up test of two second by illuminating all segments of the display. At the end of the test the vertical lines (3.) in the upper part of the display will indicate the fuel level while the clock will show up on the main display. -
Page 13: Fuel Indicator
Timer operation NOTE! Before the timer is set must the vehicle be power up After having selected the timer by pressing the “MODE” key (power on of the “TIMER” writing on the on the left side of the display) it is possible to start timing the hours, minutes and seconds by pressing the “SET”…
-
Page 14: Throttle Lever
1. Mode 2. Set 3. Vertical line 1. Throttle lever Located on the right side of handlebar. When compressed, it controls the engine speed and the engagement of the transmission. When released, engine speed returns automatically to idle. 2. Brake lever Located on the left side of handlebar.
-
Page 15: Brake/Parking Brake/Low Oil Level Pilot Lamp (Red)
Step 1: Squeeze and hold Step 2: Fully pull Hydraulic brake To engage mechanism, squeeze brake lever and maintain while pulling locking lever with a finger. Brake lever in picture 1 is compressed 25% of applying brakes and in picture 2 is compressed 50% of applying brakes. To release mechanism, squeeze brake lever.
-
Page 16
Shifting procedure NOTE! Shift the gear only when engine is running at idle and the speed is below 20 km/h. Come to complete stop before selecting reverse gear. Do not force lever. If unable to shift, apply throttle to move snowmobile. Stop vehicle, then try again. -
Page 17: Reverse Indicator Lamp
The handlebar controls the steering of the snowmobile. As the handlebar is rota- ted to right or left, the skis are turned right or left to steer the snowmobile. Handlebar height is adjustable. See an authorized Lynx dealer. 8. Holding strap Holding strap provides a grip for driver when side-hilling.
-
Page 18
Manual Starting To start the engine, turn the key to ON position, then pull rewind starter grip, To stop the engine, turn the key to OFF position. Electric Starting To start engine, turn key to START position and hold until engine has started. See illustration above. -
Page 19: Tether Cut-Out Switch
This system is digitally encoded to provide you and your snowmobile with the equivalent security as a conventional lock key. The tether cord cap provided with your snowmobile contains an electronic chip in which a unique digital code is permanently memorized. You authorized Lynx…
-
Page 20: Dess Pilot Lamp
Additional Tether Cord Caps The MPEM/ECU of your snowmobile can be programmed by your authorized Lynx dealer to accept 8 different key codes (tether cord caps). DESS Pilot Lamp Codes DESS pilot lamp blinking slowly (one time per 1,5 second) means that a bad connection has been detected.
-
Page 21: Headlamp Dimmer Switch
1. ON 2. OFF All operators of the snowmobile should familiarize themselves with the function of this device by using it several times on first outing and whenever stopping the engine there-after. This engine cut-out procedure will become a reflex and will prepare operators for emergency situations requiring its use 13.
-
Page 22: Rewind Starter Handle
Low battery voltage pilot lamp This lamp will light up to indicate a low battery voltage condition. See an authori- zed Lynx dealer as soon as possible. Engine Management System (EMS) pilot lamp This lamp will light up to indicate a trouble. Refer to ”TROUBLESHOOTING” for trouble code meaning and remedy.
-
Page 23: Primer
Warm engine starting Start the engine without any choke. If the engine will not start after two pulls of the rope or two 5 second attempts with the electric starter move choke lever to posi- tion 1. Start the engine without activating the throttle lever. As soon as the engine starts move the choke lever to OFF.
-
Page 24
Electronic speedometer 1. Mode button Some liquid-cooled models: These models are equipped with electronic spee- dometer. It shows the speed either in kilometres or miles per hour. Electronic speedo- and tachometer Records total distance travelled until it is reset. Mode button Depress the mode button to change display. -
Page 25: Fuel Tank Cap/Gauge
Resetable hourmeter Records engine running time in hours and minutes since it has been reset. All models: Push and hold mode button for 2 seconds to reset the resetable hourmeter. Electronic display code If your speedometer shows “SCALE” in the display, it means that the display selector button is stuck in the down position or depressed when the electrical system was activated.
-
Page 26: Engine Overheating Warning Lamp (Red)
23. Engine overheat warning light (Red) If this lamp glows; reduce snowmobile speed and run snowmobile in loose snow or stop engine immediately. 24. Heating grip switch It is a three –position switch. Select the desired position to keep your hands at a comfortable temperature.
-
Page 27: Electric Power Outlet
27. Power outlet A 12-volt electric appliance may be connected to that jack connector. Electric current is supplied when ever engine is running. See FUSES for electric power outlet fuse location. 28. Fuse To remove fuse from holder, pull fuse out. Check if filament is melted. 1.
-
Page 28: Front Bumper
1. Fuse description decal 2. Fuse remover/installer 3. Spare fuses 1. Fuse remover/installer 29. Front grab handle/ front bumper To be used whenever front of snowmobile requires manual lifting. 1. Front grab handles NOTE: Do not use skis to pull or lift snowmobile.
-
Page 29: Storage Compartment
30. Storage compartment Depending on model, storage compartment situates either under the seat or inside of the seat. 31. Rear rack Some models: Always readjust suspension according to the load. The capacity of this rack is limited. Ride at very low speed when loaded. Avoid speed over bumps.
-
Page 30: Seat Strap
34. Seat strap Seat strap provides a grip for the passenger. 35. Hitch The hitch can be used to pull most equipment. Use a rigid tow bar. NOTE! Remember to lock the hitch locking latch with a lock pin. Following picture shows how much load is allowed and to transport and to pull. This decal is found at end of rear racket on your own vehicle.
-
Page 31: Guidelines To Adjust Suspension
Guidelines to adjust suspension The best way to set up suspension, is to start from factory settings then customi- ze each adjustment one at a time. Adjustments 2 through 6 are interrelated. It may be necessary to to readjust center spring after adjusting front springs for instance.
-
Page 32
Too hard of adjustment 1. From the highest position, turn adjuster to select lowest position then, turn adjuster to the desired position 2. Suspended Extension Adjustment Suspended extension can be adjusted according to the load and snow condi- tions. For better deep snow performance or to increase reverse performance in deep snow;… -
Page 33
1. Horse shoe washer(s) 2. Nut 3. Lock nut 4. Center Spring — Steering Behavior Ride at moderate speed on a trail. If handlebar is felt too hard to turn, adjust centre spring accordingly. Good adjustment at moderate speed 1. Handlebar easy to turn – neutral steering attitude Too soft of adjustment 1. -
Page 34
Too hard of adjustment — too much preload 1. Handlebar is very easy to turn – understeering attitude 1. Use adjuster wrench provided in tool kit to decrease preload 5. Stopper Strap — Weight Transfer Ride at low speed then fully accelerate. Note steering behavior. Adjust stopper strap length accordingly. -
Page 35
Too short strap 1. Heavy steering 1. Screw or unscrew knob to vary strap length 1. Bolt stopper strap to a different hole 6. Front Springs — Handle Ride at moderate speed and check for proper handling. Adjust front springs ac- cordingly. -
Page 36
Too soft of adjustment 1. Bad handling 1. Increase spring preload Too hard of adjustment 1. Steering hard to turn 1. Decrease spring preload… -
Page 37: In Deep Snow
SUSPENSION TROUBLESHOOT In deep snow When operating the snowmobile in deep snow, it may be necessary to vary ex- tension adjustment, stopper strap and/or riding position, to change the angle at which the track rides on the snow. Operator’s familiarity with the various adjust- ments as well as snow conditions will dictate the most efficient combination.
-
Page 38: Recommended Oil
Cold weather carburetion modifications All vehicles has been calibrated for — 20°C. They can be operated at warmer winter temperatures without problems. CAUTION: For colder temperatures than — 20°C, carburetor(s) must be recalibra- ted to avoid engine damage. Refer to an authorized Lynx dealer.
-
Page 39: Break-In Period
We suggest that after the first 10 hours of operation— 500 km — or 30 days after the purchase, whichever comes first, your snowmobile be checked by an autho- rized Lynx dealer. NOTE! The 10 hour inspection is at expense of the snowmobile owner.
-
Page 40: Operation Instructions
* Check fuel and injection oil for levels and leaks. Replenish as necessary and see an authorized Lynx dealer in case of any leaks. * Verify that air filter(s) is free of snow, if so equipped. * Make certain your snowmobile is pointed away from people or objects before you start it.
-
Page 41
Primer equipped vehicles Starting the engine: To prime, activate button until a pumping resistance is felt. From this point, pump 2 or 3 times to inject fuel in intake manifold. After priming, ensure that primer button is pushed back. NOTE: In very cold temperature, it is recommended to rotate primer button 3 — 4 turns prior to pull it. -
Page 42: Manual Starting
4-tec models Initial cold starting and warm engine starting Use the electric starter. CAUTION: 4-tec model: If the battery is empty, engine cannot be started. Charge the battery or replace it if necessary. Warm engine starting Start the engine without any choke. If the engine will not start after two pulls of the rope or two 5 second attempts with the electric starter move choke lever to posi- tion 1.
-
Page 43
WARNING! Do not apply throttle while starting. WARNING! Do not use electric starter for more than 10 seconds. A rest period should be observed between the cranking cycles to let electric starter cool down. Using electric starter when engine has started could damage electric starter mechanism. -
Page 44
Attach the other end of emergency rope to the starter clip supplied in the tool kit. Hook up clip on drive pulley. Wind the rope tightly around drive pulley. When pulled, pulley must rotate coun- terclockwise. 1. Knot on this side 1. -
Page 45: Shutting Off The Engine
Pull the rope using a sharp, crisp pull so the rope comes free of the drive pulley. Start the engine as per usual manual starting. When starting the snowmobile in an emergency situation, using drive pulley, do not reinstall the belt guard and return slowly to have snowmobile repaired. Shutting down the engine Release throttle lever and wait until engine has returned to idle speed.
-
Page 46: Special Operations
Reduce snowmobile speed and run snowmobile in loose snow or stop engine immediately. Check for adequate coolant level. See an authorized Lynx dealer. Low Battery (only 4-tec models): When overheating pilot lamp light up does the fan starts to rotate, this usually takes down the voltage level under its working level from this point will EMS (Engine Management System) increase the idle speed to 1500 RPM.
-
Page 47: Fluid Levels
Fluid levels WARNING! It is recommended that the assistance of an authorized Lynx dealer be perio- dically obtained on other components/systems not covered in this guide. Un- less otherwise specified, engine must be cold and not running. The tether cord cap must be removed for all maintenance procedures.
-
Page 48: Chain Case Oil Level/Gearbox Oil Level
1. Dipstick 2. Oil level 3. Level between marks Gear box models: To check, pull dipstick. Oil should reach level mark. NOTE: Before initial start-up, the oil level may be higher than the full mark. After first outing, oil level will decrease as the upper oil cavity fills with oil. NOTE: Do not use unrecommended other types of oil when servicing.
-
Page 49
Engine oil level Yeti V-1300: Make sure engine is at operating temperature. Snowmobile must be on a level surface. Leave engine running at idle for 30 seconds. Stop engine and wipe off the oil from the dipstick. Dipstick must be completely screwed in before checking oil level. -
Page 50: Oil Injection System
Injection oil system Always maintain a sufficient amount of recommended injection oil in the injection oil reservoir. NOTE: Never allow oil reservoir to be almost empty. WARNING! Check level and refill every time you are refuelling vehicle. Wipe off any spilla- ge.
-
Page 51: Cooling System
NOTE: When checking level at low temperature it may be slightly lower than mark. If additional coolant is necessary or if entire system has to be refilled, refer to an authorized Lynx dealer. 1. COLD LEVEL line 1. Coolant tank 2. COLD LEVEL line…
-
Page 52
1. Coolant tank 2. COLD LEVEL line 4-TEC MODELS Yeti V-800-Expansion tank near the muffler 1. Max level 2. Min level 3. Coolant expansion tank 4. Coolant filling tank Yeti V-1300- Expansion tank near the muffler 1. Max level 2. Min level… -
Page 53: Battery
Battery Removal WARNING! Battery BLACK negative cable must always be disconnected first and con- nected last. WARNING! Never charge or boost battery while installed. Battery electrolyte contains sulfuric acid which is corrosive and poisonous. In case of contact with skin, flush with water and call a physician immediately.
-
Page 54: Belt Guard Removal And Installation
Clean sheaves of both pulleys using BOMBARDIER Pulley flange cleaner (P/N 413 711 809). Inspect the hood and repair any damage. Touch up all metal spots where paint has been scratched off. Spray all metal parts including shock chromed rods with BOMBARDIER LUBE (P/N 293 600 016). Wax the hood and the painted portion of the frame fro better protection.
-
Page 55
1. Tighten to open pulley 1. Guard 2. Retaining pins Stop engine using tether cord. Open hood. Pull out clip then, open pin retainer. Remove belt guard. 1. Pin retaining Screw tool in the threaded hole and tighten to open the pulley. Remove belt. 1. -
Page 56
NOTE: Belt guard is purposely made slightly oversize to maintain tension on its pins and retainers preventing undue noise and vibration. It is important that this tension be maintained when reinstalling. Typical Drive belt installer/remover 1. Push tab down and pull panel out of bottom pan Pull panel out of bottom pan… -
Page 57
1. Tighten to open pulley Turn sliding half clockwise then, pull on drive belt to open driven pulley. Follow instruction on decals for belt removal and installation. 1. Turn sliding half clockwise 2. Pull belt to open driven pulley Slip the belt over the top edge of the sliding half, as shown. Installation The maximum drive belt life span is obtained when the belt has the proper rotation direction. -
Page 58: Drive Chain Tension
CAUTION: Do not force or use tools to pry the belt into place, as this could cut or break the cords in the belt. Clean sheaves of both pulleys using BOMBARDIER Parts Cleaner (P/N 413 711 809). To install the drive belt, first place belt between drive pulley sheaves. Then, bet- ween driven pulley sheaves, finishing with bottom.
-
Page 59: Tra Drive Pulley Adjustment
TRA Drive pulley adjustment The drive pulley is factory calibrated to transmit maximum engine power at a predefined RPM. refer to TECHNICAL DATA at the end of this guide. Factors such as ambient temperature, altitude or surface condition may vary this critical engi- ne RPM thus affecting snowmobile efficiency.
-
Page 60: Drive Belt Condition
Always reinstall belt guard. Do not operate engine with hood open or belt guard removed. Improper servicing, modification or poor adjustment may affect drive pulley performance and belt life. Refer to an authorized Lynx dealer. Drive belt condition Inspect belt for cracks, fraying or abnormal wear (uneven wear, wear on one side, missing cogs, cracked fabric).
-
Page 61: Brake Adjustment
Brake adjustment Mechanical brake: The brake mechanism is self-adjusting type. Hydraulic brake: No adjustment is provided for hydraulic brake. See an authori- zed Lynx dealer if any problems. Rear suspension condition Visually inspect all suspension components including slider shoes, springs, wheels, etc.
-
Page 62
If correct tension is unattainable, contact an authorized Lynx dealer. WARNING! Do not try to check the tension with engine on. Turn ignition switch to OFF. Do not touch rotating track, it may cause injuries. Alignment… -
Page 63: Steering And Front Suspension Mechanism
(steering arms, control arms and links, tie rods, ball joints, ski coupler bolts, etc.) If necessary, contact an authorized Lynx dealer. Wear and condition of skis and runners Check the condition of the skis, ski runners and ski runner carbides. If worn, contact an authorized Lynx dealer.
-
Page 64
1. Air filter Removal of filter from its grill Secondary filter installed on air silencer 1. Air filter installed on top of air silencer Check that the air silencer is clean and dry and properly reinstall the filter. CAUTION: Snowmobile have been calibrated with the filter installed. Opera- ting the snowmobile without it may cause engine damage. -
Page 65: Headlight
Bulb replacement Always check light operation after bulb replacement. CAUTION: Never touch glass portion of an halogen bulb with bare fingers, it shortens its operating life. If glass is touched, clean it with isopropyl alcohol which will not leave a film on the bulb. Some models: If headlamp bulb is burnt: Remove headlight moulding and wind- shield, unplug the connector from the bulb, remove the protector cap and bulb retainer clips.
-
Page 66
1. Locking ring Unplug burnt bulb connector. Remove the rubber boot. 1. Bulb connector 2. Rubber boot Turn bulb locking ring counter clockwise to remove it. Detach the bulb and repla- ce. Properly reinstall parts. 1. Locking ring If taillight bulb is burnt, expose the bulb by removing the red plastic lens. To remove, unscrew the 2 lens screws. -
Page 67: Storage And Preseason Preparation
Storage and preseason preparation WARNING! Have an authorized LYNX dealer inspect fuel and oil systems integrity as specified in PERIODIC MAINTENANCE CHART. Storage It is during summer, or when a snowmobile is not in use for more than one month that proper storage is a necessity.
-
Page 68: Troubleshooting
Troubleshooting Monitoring beeper coded signals:…
-
#201
Bic написал(а):
Nikitoss_13 написал(а):
Приветствую всех форумчан!!!
Друзья, если у кого есть мануал к линксу 5900, скиньте пожалуйста на kekis_06@mail.ru . Заранее благодарен!
Воздушник. 1994 г.в.Отправил!!!!!
 Приветствую всех форумчан!!!
 Благодарен!!!!
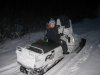
Принимайте в ряды! LYNX 5900 GLX 1994г.в. Пробег 6 тыс.км. По проблемам — долго стоял в сарае до нашего рукоприкладства, Чистили топливную систему, замена свеч, купили запасной ремень вариатора, расширители лыж новые, не тронутые. Вчера опробовали — идет как надо! это наш первый снеж (с отцом и братом). Впечатлений масса! уйма! тысяча! )))) Страшно бывает частенько. Теперь мануал есть(СПАСИБО!!!). Надо проверять все — гусянку, ремешки, масло поменять в коробочке. Морда разбитая (похоже на переворот или дерево). Теперь главная проблема в поле — это ветер. Как на зло — в городе не могу найти оргстекло. Ищем, думаю все получится. Всем форумчанам привет
P.S. бываю в сети редко, по возможности всегда загляну на форумю
-
67,4 KB
Просмотры: 1.885

-
#202
Всем привет, отпишу в двух темах сразу, на днях приобрел сей замечательный аппарат, скиньте пож. мануал на rusgaz.gazrus@mail.ru, если у кого есть.
-
#203
КАРИБУ написал(а):
дима! это ж машина лихих девяностых. хрен на нее что живого найдешь. на моторесте заказал. говорят. что помогут моему горю. но не быстро. еще и вин требуют. а на моем старичке ни одного шильдика давно нет
з.ы. про коробку на 800 случилось все. как ты и говорил — воткнули. поехало. но свистит ремень. а как юстировать ты мне говорил. но я забыл. хоть и не пью

Володя, если что по part number для з/ч требуется — то мне так твой WIN без нужды 
-
#204
Здраствуйте! Хотелось бы узнать как точно настраивать ремень вариатора на Lynx 5900 GLX 1989 года! Делаю размер 35 и 37мм, но ремень и вариатор всё равно греется) Первый раз пользуюсь этим агрегатом) Заранее спасибо
-
#205
Nikitoss_13 написал(а):
Bic написал(а):
Nikitoss_13 написал(а):
Друзья, если у кого есть мануал к линксу 5900, скиньте пожалуйста на kekis_06@mail.ru . Заранее благодарен!
Воздушник. 1994 г.в.Отправил!!!!!
Принимайте в ряды! LYNX 5900 GLX 1994г.в. Пробег 6 тыс.км. По проблемам — долго стоял в сарае до нашего рукоприкладства, Чистили топливную систему, замена свеч, купили запасной ремень вариатора, расширители лыж новые, не тронутые. Вчера опробовали — идет как надо! это наш первый снеж (с отцом и братом). Впечатлений масса! уйма! тысяча! )))) Страшно бывает частенько. Теперь мануал есть(СПАСИБО!!!). Надо проверять все — гусянку, ремешки, масло поменять в коробочке. Морда разбитая (похоже на переворот или дерево). Теперь главная проблема в поле — это ветер. Как на зло — в городе не могу найти оргстекло. Ищем, думаю все получится. Всем форумчанам привет
P.S. бываю в сети редко, по возможности всегда загляну на форумю
Поздравляю с приобретением! Стекло можно и орегинал найти вроде 2.5 стоит. Если надо адрес найду.
-
#206
Bic скинь тоже мануал пожалуйста. Люди сообщите емкость бака, тут в поход собираюсь, нужно топливо подсчитать))).
rusgaz.gazrus@mail.ru
-
#207
приветствую всех владельцев 5900. подскажите почему у меня снизу два ремня оба стягивают валы катков. передний понятно была тайга да линкса так он там один. или ток у меня их два???
-
#208
а второй в задней части для чего?? и передние пружины похожи на рысевские подойдут ли??
-
#210
Какушонок написал(а):
а второй в задней части для чего?? и передние пружины похожи на рысевские подойдут ли??
Передние 100%подойдут от рыси!остальные надо смотреть!но по виду очень похожи
-
#211
Bic, спасибо! Пока стеклышко хотим своими силами. Если не получится, обращусь!
-
#212
Nikitoss_13 написал(а):
Bic, спасибо! Пока стеклышко хотим своими силами. Если не получится, обращусь!
Не за что :)") .обращайся!
.обращайся!

FIRS
Активный участник
-
#213
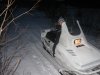
открыл сезон
-
3,5 MB
Просмотры: 1.739

-
#214
Здравствуйте! С конца весны тоже являюсь обладателем такого снегохода.(после 20-ти летней эксплуатации «Буранов»). Проехал около 1000 км., на одометре 9800, но думаю, что не фактический пробег. Снегоходом доволен пока-поломок серьёзных не было.Расход бензина устраивает-около 20/100 в не тяжёлых условиях. Восстановил раздельную смазку-пока всё работает в пределах нормы. Предстоит замена гусеницы-хочу от «Тайги», смотрю, кое кто переделывал уже, поделитесь пожалуйста опытом.
-
#215
atabkjd написал(а):
Здравствуйте! С конца весны тоже являюсь обладателем такого снегохода.(после 20-ти летней эксплуатации «Буранов»). Проехал около 1000 км., на одометре 9800, но думаю, что не фактический пробег. Снегоходом доволен пока-поломок серьёзных не было.Расход бензина устраивает-около 20/100 в не тяжёлых условиях. Восстановил раздельную смазку-пока всё работает в пределах нормы. Предстоит замена гусеницы-хочу от «Тайги», смотрю, кое кто переделывал уже, поделитесь пожалуйста опытом.
точил хороший токарь.Длину вала брали родную, родной подшипник справой стороны.В редуктор нарезали шлицы по родному валу.Звёздочки тайговские выставляли по тайговским размерам.Я когда покупал на ходовой уже взади стояли вместо звёздочек катки от тайги.Сама гусеница подошла без проблем.
-
#216
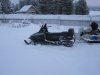
сегодня немножко прокатились.
-
1,7 MB
Просмотры: 1.604
-
#217
и ещё.
-
1,8 MB
Просмотры: 1.618
-
#218
Приветствую всех участников форума!
В 90-м году к на в район завезли 50 штук (GLX) таких аппаратов. У многих из-за отсутствия хорошего масла быстро полетели движки, ставили бурановский и ездили дальше, с ним он тоже шустро бегает. У кого был доступ к маслу ( МС-20 ) до сих пор ездят. У товарища родная гусянка 30 тыс. прошла! Потом поставил от тайги, только на заднем валу надо звездочки срезать. В основном была проблема с пружинами, грели,подгибали и ставили от рыси, но не на долго. Некоторые ребята выкинули все пружины и поставили 3 аммортизатора, ходят по 2-3 года. Еще коробки часто летели, кто как мог заказывал на разные заводы, вытачивали,ставили. Странно но на них стояли редуктора 2 видов, один с щупом,другой нет. На одном (наверное скоросной) паразитные шестерни маленькие, подобрать невозможно, на другом оди в оди подходят от тайги. Поршня,цилиндры подходят от тайги. Отличная техника, новый с удовольствием сейчас купил бы. Два соседа по гаражу активно ездят на них, довольны ремонтобильностью этого снегохода.
С уважением, Олег.
-
#219
FIRS написал(а):
БЛЯСТИТ!!!!! Состояние радует!!!!
Присоединяюсь! Сезон открыт!!!!
-
#220
Охотник на оленя написал(а):
Приветствую всех участников форума!
В 90-м году к на в район завезли 50 штук (GLX) таких аппаратов. У многих из-за отсутствия хорошего масла быстро полетели движки, ставили бурановский и ездили дальше, с ним он тоже шустро бегает. У кого был доступ к маслу ( МС-20 ) до сих пор ездят. У товарища родная гусянка 30 тыс. прошла! Потом поставил от тайги, только на заднем валу надо звездочки срезать. В основном была проблема с пружинами, грели,подгибали и ставили от рыси, но не на долго. Некоторые ребята выкинули все пружины и поставили 3 аммортизатора, ходят по 2-3 года. Еще коробки часто летели, кто как мог заказывал на разные заводы, вытачивали,ставили. Странно но на них стояли редуктора 2 видов, один с щупом,другой нет. На одном (наверное скоросной) паразитные шестерни маленькие, подобрать невозможно, на другом оди в оди подходят от тайги. Поршня,цилиндры подходят от тайги. Отличная техника, новый с удовольствием сейчас купил бы. Два соседа по гаражу активно ездят на них, довольны ремонтобильностью этого снегохода.
С уважением, Олег.
Редуктор как сказали ещё стоит родной.Разбирал свой в прошлом году всё как новое редуктор без щупа по поводу пружин,переделал всё под тайговские.по поводу трёх амортизаторов сильно жостко и высоко.Центр тяжести меняется скакать на нём устанеш.
-
3,2 MB
Просмотры: 1.597
-
#221
Господа обладатели, подскажите. Есть возможность приобрести Lynx 5900 84ого года с пробегом 3200 из Финляндии. Дилер заверяет что состояние хорошее. Снежик нужен для заготовки леса, т.е. таскать на нем надо будет много и постоянно. Сани около 100кг + лес кг на 500. Такое возможно на 5900? Справиться он? P.S. Были планы на Викинг, но провалились.
-
#222
DedTs написал(а):
Господа обладатели, подскажите. Есть возможность приобрести Lynx 5900 84ого года с пробегом 3200 из Финляндии. Дилер заверяет что состояние хорошее. Снежик нужен для заготовки леса, т.е. таскать на нем надо будет много и постоянно. Сани около 100кг + лес кг на 500. Такое возможно на 5900? Справиться он? P.S. Были планы на Викинг, но провалились.
Приветствую всех участников форума!
Таскает он нормально, с такой работой справиться. 3200 для него вообще не пробег, почти новый. Сколько за него просят? Рыбачил в бригаде на озере Таймыр, с лунок таскали рыбу в большой карабушке по 500-700 кг. пер нормально, главное тронуться и потом до конца не останавливаться. Пружины ломались в сильный мороз, когда тоскали много груза, поставили тогда сами амморт-тор к задним пружинам, болячка прошла. Хорошый, надежный снегоход. А техники которая вообще не ломается если на ней работаешь не существует.
С уважением, Олег.
-
#223
Олег, спасибо за развернутый ответ! Просят 1000 евро и торг уместен.
-
#224
И подскажите, Lynx GL 3900 чем отличается от 5900 ? Только объемом двигателя?
-
#225
Это совершенно другой снегоход на узкой базе (гусеница на 38 см шириной). Я бы сказал что его было бы корректнее сравнить с Lynx Forest Fox. Это его предшественник. А так тоже лёгкий утилит.
Смотреть руководство для Lynx 5900 (2006) ниже. Все руководства на ManualsCat.com могут просматриваться абсолютно бесплатно. Нажав кнопку «Выбор языка» вы можете изменить язык руководства, которое хотите просмотреть.

MANUALSCAT | RU
Вопросы и ответы
У вас есть вопрос о Lynx 5900 (2006), но вы не можете найти ответ в пользовательском руководстве? Возможно, пользователи ManualsCat.com смогут помочь вам и ответят на ваш вопрос. Заполните форму ниже — и ваш вопрос будет отображаться под руководством для Lynx 5900 (2006). Пожалуйста, убедитесь, что вы опишите свои трудности с Lynx 5900 (2006) как можно более детально. Чем более детальным является ваш вопрос, тем более высоки шансы, что другой пользователь быстро ответит на него. Вам будет автоматически отправлено электронное письмо, чтобы проинформировать вас, когда кто-то из пользователей ответит на ваш вопрос.
Задать вопрос о Lynx 5900 (2006)
- Бренд:
- Lynx
- Продукт:
- Без категории
- Модель/название:
- 5900 (2006)
- Тип файла:
- Доступные языки:
- английский
Сопутствующие товары Lynx 5900 (2006)
Посмотреть инструкция для Lynx 5900 (2006) бесплатно. Руководство относится к категории Без категории, 1 человек(а) дали ему среднюю оценку 7.8. Руководство доступно на следующих языках: английский. У вас есть вопрос о Lynx 5900 (2006) или вам нужна помощь? Задайте свой вопрос здесь
Не можете найти ответ на свой вопрос в руководстве? Вы можете найти ответ на свой вопрос ниже, в разделе часто задаваемых вопросов о Lynx 5900 (2006).
Инструкция Lynx 5900 (2006) доступно в русский?
Не нашли свой вопрос? Задайте свой вопрос здесь
Руководство по эксплуатации и техническому обслуживанию снегоходов Lynx 1996 года выпуска.
- Год издания: —
- Страниц: 70
- Формат: PDF
- Размер: 8,9 Mb
Сборник руководств по эксплуатации и техническому обслуживанию снегоходов Lynx 49 Ranger 2011-2013 годов выпуска.
- Год издания: 2010/2011/2012
- Страниц: 96/112/114/156
- Формат: PDF
- Размер: 44,8 Mb
Сборник руководств по эксплуатации и техническому обслуживанию снегоходов Lynx 69 Ranger 2013-2014 годов выпуска.
- Год издания: 2012/2013
- Страниц: 123/112
- Формат: PDF
- Размер: 20,3 Mb
Сборник руководств по эксплуатации и техническому обслуживанию снегоходов Lynx Adventure 2010-2014 годов выпуска.
- Год издания: 2009-2013
- Страниц: —
- Формат: PDF
- Размер: 118,3 Mb
Сборник руководств по эксплуатации и техническому обслуживанию снегоходов Lynx Rave 2010-2014 годов выпуска.
- Год издания: 2009-2013
- Страниц: —
- Формат: PDF
- Размер: 92,7 Mb
Сборник руководств по эксплуатации и техническому обслуживанию снегоходов Lynx Rex 2012-2014 годов выпуска.
- Год издания: 2011/2013
- Страниц: 146/164/107
- Формат: PDF
- Размер: 47,6 Mb
Сборник руководств по эксплуатации и техническому обслуживанию снегоходов Lynx Xtrim 2010-2014 годов выпуска.
- Год издания: 2009-2013
- Страниц: —
- Формат: PDF
- Размер: 160,2 Mb
Сборник руководств по эксплуатации и техническому обслуживанию снегоходов Lynx Yeti 2010-2014 годов выпуска.
- Год издания: 2009-2013
- Страниц: —
- Формат: PDF
- Размер: 70,7 Mb