❗❗❗Внимание❗❗❗
Перед тем как открыть нужную Вам ссылку, пролистайте запись до конца, в случае, если ссылка не работает, в конце есть ссылка на изначальный источник, где вы можете задать вопросы. Спасибо.
Также рекомендую зайти на страницу Официалов ⓈⓊⒷⒶⓇⓊ по ссылке ☞subaru.ru/service/manuals и там, очень удобно можно найти документацию.
Руководство владельца Subaru Forester I (SF) — файл pdf
disk.yandex.ru/i/DtLIPRMqvXHX4g
Руководство по сервисному обслуживанию Subaru Forester I (SF) 1997-2001 MY — zip-архив
(Мультимедийная книга Subaru Forester с 1997 г.)
disk.yandex.ru/d/2LtfvY0NzRmzww
Subaru Forester с 1997 г. выпуска. Устройство Обслуживание Ремонт (Переработанное издание) — файл pdf
drive.google.com/file/d/0…4WWNjQzg/view?usp=sharing
+++++++++++++++++++++++++++++++++++++++++++++++

Руководство по техническому обслуживанию Subaru Forester II (SG) 2004 MY — файл pdf
yadi.sk/i/NKxH1DR4m68Wzg
Руководство по эксплуатации Subaru Forester II (SG) 2005 MY — файл pdf
drive.google.com/file/d/0…5MHJmYlk/view?usp=sharing
Руководство по эксплуатации Subaru Forester II (SG) 2007 MY — файл pdf
drive.google.com/file/d/0…zdi1Cb0E/view?usp=sharing
Руководство по обслуживанию Subaru Forester II (SG) 2008 MY — файл pdf
drive.google.com/file/d/0…5ell0MDg/view?usp=sharing
+++++++++++++++++++++++++++++++++++++++++++++++
Руководство по ремонту и эксплуатации Subaru Forester III (SH) 2009 MY — файл pdf
drive.google.com/file/d/0…SUkVMT2M/view?usp=sharing
Руководство по сервисному обслуживанию Subaru Forester III (SH) 2009 MY — сжатый архив
disk.yandex.ru/d/B96-Gk7pODUIYQ
drive.google.com/file/d/0…PR21RT2c/view?usp=sharing
Руководство по сервисному обслуживанию Subaru Forester III (SH) 2012 MY — zip-архив
yadi.sk/d/WyoA6UE8prtNW
+++++++++++++++++++++++++++++++++++++++++++++++
Руководство по сервисному обслуживанию Subaru Forester IV (SJ) 2014 MY — zip-архив
drive.google.com/file/d/0…ydE1vTEk/view?usp=sharing
или
disk.yandex.ru/d/ZmJB58ifGLEsRg
Руководство по эксплуатации Subaru Forester IV (SJ) 2014 MY — файл pdf
drive.google.com/file/d/0…kM1dnS00/view?usp=sharing
+++++++++++++++++++++++++++++++++++++++++++++++
Руководство по обслуживанию и ремонту Subaru Forester SK (SM G8240GR FORESTER 19MY, версия 002) — файл ISO в rar-архиве.
yadi.sk/d/nnaihovx9Le_dQ или drive.google.com/file/d/1…_mFo-IS9/view?usp=sharing
Взято здесь cloud.mail.ru/public/HRZT/mfMRZ48dH
Руководство по эксплуатации Subaru Forester V (SK) 2019 MY — файл pdf
yadi.sk/i/H3Eh8Lm1IYQYgA
Краткое руководство по эксплуатации Subaru Forester V (SK) 2019 MY — файл pdf
yadi.sk/i/Fe1V-7hYZE59pA
Eyesight Руководство SK — файл pdf
yadi.sk/i/hZXPw5enDtoTqw
Starlink Руководство SK — файл pdf
yadi.sk/i/yDhy1Qx86FDbbg
+++++++++++++++++++++++++++++++++++++++++++++++
+++++++++++++++++++++++++++++++++++++++++++++++
Инструкция по эксплуатации автомобиля Subaru Forester 2005 модельного года (SG) — файл pdf
drive.google.com/file/d/0…BZkhGTEU/view?usp=sharing
Инструкция по эксплуатации автомобиля Subaru Forester 2007 модельного года (SG) — файл pdf
drive.google.com/file/d/0…SMzFxSHc/view?usp=sharing
Инструкция по эксплуатации автомобиля Subaru Forester 2011 модельного года (SH) — файл pdf drive.google.com/file/d/0…Ib0lEbm8/view?usp=sharing
Инструкция по эксплуатации автомобиля Subaru Forester 2012 модельного года (SH) — файл pdf drive.google.com/file/d/0…0cEE1bDg/view?usp=sharing
Инструкция по эксплуатации автомобиля Subaru Forester 2013 модельного года (SJ) — файл pdf drive.google.com/file/d/0…LZEgxbGM/view?usp=sharing
Инструкция по эксплуатации автомобиля Subaru Forester 2014 модельного года (SJ) — файл pdf drive.google.com/file/d/0…tOWt4elk/view?usp=sharing
Инструкция по эксплуатации автомобиля Subaru Forester 2015 модельного года (SJ) — файл pdf
drive.google.com/file/d/0…WZkI5SWs/view?usp=sharing
Инструкция по эксплуатации автомобиля Subaru Forester 2016 модельного года (SJ) — файл pdf
drive.google.com/file/d/0…kS3FSQVU/view?usp=sharing
+++++++++++++++++++++++++++++++++++++++++++++++
Subaru Forester Owner’s Manuals (ENG) — руководства по эксплуатации Subaru Forester на английском языке
Subaru Forester I (SF) 1998 Owner’s Manual ENG yadi.sk/d/OApC-oKBFMhGo
Subaru Forester I (SF) 1999 Owner’s Manual ENG yadi.sk/d/V6d3vPaGFMi5X
Subaru Forester I (SF) 2000 Owner’s Manual ENG yadi.sk/d/1Kb7E0RLFMiAS
Subaru Forester I (SF) 2001 Owner’s Manual ENG yadi.sk/d/OeuIrbH-FMiE2
Subaru Forester I (SF) 2002 Owner’s Manual ENG yadi.sk/d/7dlwPQT5FMiHm
Subaru Forester II (SG) 2003 Owner’s Manual ENG yadi.sk/d/8B5M3PEuFMiNv
Subaru Forester II (SG) 2004 Owner’s Manual ENG yadi.sk/d/DTiMBz4WFMiTP
Subaru Forester II (SG) 2005 Owner’s Manual ENG yadi.sk/d/tG-w1PzAFMiYG
Subaru Forester II (SG) 2006 Owner’s Manual ENG yadi.sk/d/h8RcBfgFFMic2
Subaru Forester II (SG) 2007 Owner’s Manual ENG yadi.sk/d/5heDeXV3FMifh
Subaru Forester II (SG) 2008 Owner’s Manual ENG yadi.sk/d/KTL_5eO7FMikE
Subaru Forester III (SH) 2009 Owner’s Manual ENG yadi.sk/d/CEPVhIngFMipG
Subaru Forester III (SH) 2010 Owner’s Manual ENG yadi.sk/d/Ee_eL7omFMiti
Subaru Forester III (SH) 2011 Owner’s Manual ENG yadi.sk/d/1Jacl7TMFMizz
Subaru Forester III (SH) 2012 Owner’s Manual ENG yadi.sk/d/44rqNMDzFMj7A
Subaru Forester IV (SJ) 2013 Owner’s Manual ENG yadi.sk/d/k40hjMB8FMjAd
Subaru Forester IV (SJ) 2014 Owner’s Manual ENG yadi.sk/d/mTlbnLRoFMjEX
Subaru Forester V (SK) 2019 Owner’s Manual ENG yadi.sk/d/8BgNvdXr5ryIxg
+++++++++++++++++++++++++++++++++++++++++++++++
Subaru Forester 2001 Service Manual ENG yadi.sk/d/PQ4ylgUpFNzot взято здесь manualov.net/Subaru.php
Subaru Forester 2003 Service Manual ENG — файл pdf yadi.sk/i/Yd-Gbfua3E38PH взято здесь
www.drive2.ru/l/466065937657758129/
Subaru Forester 2004 Service Manual ENG yadi.sk/d/_BMMdFxqFP28v взято здесь manualov.net/Subaru.php
Subaru Forester 2007 Service Manual (ENG) yadi.sk/d/B6rTskG3cxMbq взято здесь manualov.net/Subaru.php
Subaru Forester 2007 Service Manual ENG yadi.sk/d/X4CZKXSDcxMGW взято здесь auto-b.ru/blog/Subaru/2065.html
Subaru Forester IV (SJ) 2014 MY Service Manual (ENG) yadi.sk/d/zl1LmYEebjUsr + дополнение по ремонту кузова yadi.sk/d/hcob_9VJBQkDZ
пароль к архивам: forestermoscowclub взято здесь forester-moscowclub.ru/showthread.php?p=694911
+++++++++++++++++++++++++++++++++++++++++++++++
Схемы электропроводки:
Subaru Forester I (SF) 1998 Wires Diagram Section (EN) Электросхемы дорестайл SF — файлы pdf в архиве
yadi.sk/d/aCZSAQ2GqQQxT или
drive.google.com/file/d/1…ziEs-HcU/view?usp=sharing
Subaru Forester I (SF) 2001 Wires Diagram Section (EN) Электросхемы рестайл SF — файлы pdf в архиве
yadi.sk/d/f7GjJ6MIqQR3m
Схема электропроводки Subaru Forester SG 02-05 дорестайл Русский мануал — файл pdf
yadi.sk/i/daoWHmQ_qQQW7 или
drive.google.com/file/d/0…d1jolSTlJMVlJZFMwMW8/view
Схема электропроводки Subaru Forester SG 06-08 рестайл Русский мануал — файл pdf
yadi.sk/i/LfAHumyGqQQWD
+++++++++++++++++++++++++++++++++++++++++++++++
Мануалы и аксессуары для других Subaru (cпасибо tarasusNN): здесь.
+++++++++++++++++++++++++++++++++++++++++++++++
Весь текст взят здесь: www.drive2.ru/l/520570378314056066/
Заглядывайте на изначальную запись, так как ссылки могут меняться.
За материал, огромная благодарность konsigr
- Руководства по ремонту
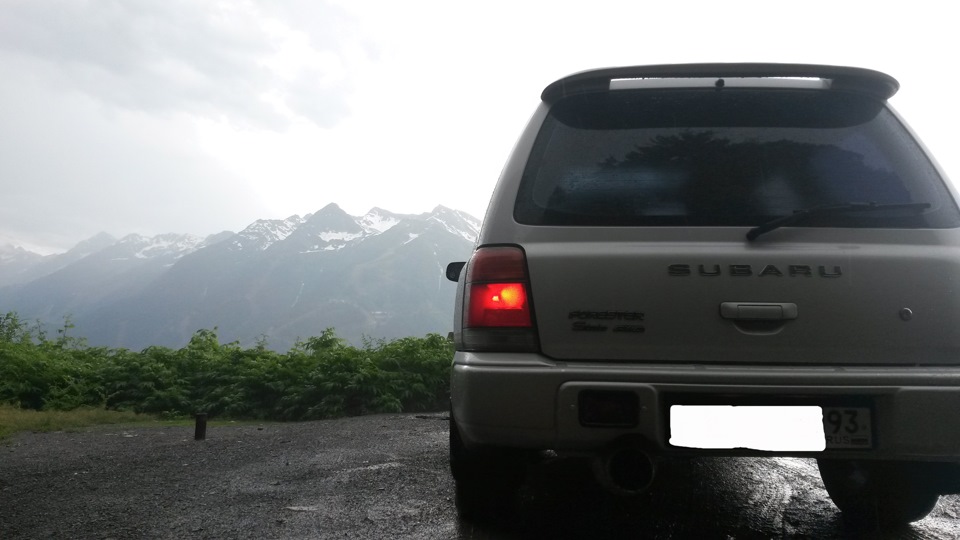
- Руководство по ремонту Субару Форестер 1997-2005 г.в.
Руководство по ремонту Subaru Forester / Субару Форестер
Общая информация об автомобиле.
Двигатели: 2.0 л SOHC и DOHC, 2.5 л DOHC, 4-цилиндровые 16-клапанные, оппозитные. На некоторых моделях оборудован турбонаддув.
Распределенная система впрыска с электронным управлением (MРFI).
5-ступенчатая РКПП или 4-ступенчатая АТ.
Передняя подвеска полностью независимая, стоечного типа с телескопическими амортизаторами и винтовыми пружинами, организована посредством поперечной балки, поперечных рычагов и стабилизатора поперечной устойчивости.
Задняя подвеска — независимая, стоечного типа, с телескопическими амортизаторами, организована посредством поперечной балки, одного продольного и двух (переднего и заднего) параллельно установленных поперечных рычагов и стабилизатора поперечной устойчивости.
Рулевой привод организован посредством реечной передачи и двух поперечных рулевых тяг. В стандартную комплектацию входит система гидроусиления руля.
Тормозные механизмы передних колес имеют дисковую конструкцию, задние могут быть как дискового, так и барабанного типа. В стандартную комплектацию всех моделей входит вакуумный усилитель тормозов. Некоторые модели оборудованы системой антиблокировки (ABS).
↓ Комментарии ↓
1. Автомобили Subaru Forester
1.0 Автомобили Subaru Forester
1.2 Идентификационные номера автомобиля
1.3 Приобретение запасных частей
1.4 Технология обслуживания, инструмент и оборудование рабочего места
1.5 Поддомкрачивание и буксировка
1.6 Запуск двигателя от вспомогательного источника питания
1.7 Автомобильные химикалии, очистители, герметики
1.8 Диагностика неисправностей узлов и систем автомобиля
2. Инструкция по эксплуатации
2.0 Инструкция по эксплуатации
2.1 Доступ, защита
2.2 Сиденья и устройства обеспечения безопасности
2.3 Контрольно-измерительные приборы и органы управления
2.4 Комфорт
2.5 Приемы эксплуатации
3. Текущее обслуживание
3.0 Текущее обслуживание
3.1 График текущего обслуживания автомобилей Subaru Forester
3.2 Общая информация
3.3 Общие сведения о настройках и регулировках
3.4 Проверка уровней жидкостей
3.5 Проверка состояния шин и давления их накачки
3.6 Проверка уровня трансмиссионного масла РКПП
3.7 Проверка уровня ATF и жидкости переднего дифференциала автоматической трансмиссии
3.8 Проверка уровня жидкости гидроусилителя руля
3.9 Замена двигательного масла и масляного фильтра
3.10 Проверка, обслуживание и зарядка аккумуляторной батареи
3.11 Проверка состояния компонентов системы охлаждения
3.12 Проверка состояния и замена расположенных в двигательном отсеке шлангов
3.13 Проверка состояния и замена щеток стеклоочистителей
3.14 Ротация колес
3.15 Проверка состояния компонентов подвески и рулевого привода
3.16 Смазывание компонентов шасси
3.17 Проверка состояния компонентов системы выпуска отработавших газов
3.18 Проверка уровня смазки в раздаточной коробке полноприводных моделей
3.19 Проверка уровня смазки заднего дифференциала
3.20 Проверка состояния ремней безопасности
3.21 Проверка и регулировка оборотов и состава смеси холостого хода
3.22 Проверка состояния защитных чехлов приводных валов
3.23 Проверка и замена клапана системы управляемой вентиляции картера (PCV) (при соответствующей комплектации автомобиля)
3.24 Замена фильтрующего элемента воздухоочистителя
3.25 Проверка состояния, регулировка усилия натяжения и замена приводных ремней
3.26 Проверка состояния компонентов системы питания
3.27 Проверка тормозной системы
3.28 Регулировка педалей ножного тормоза и сцепления
3.29 Проверка состояния и замена свечей зажигания
3.30 Проверка состояния и замена компонентов системы зажигания
3.31 Обслуживание системы охлаждения (опорожнение, промывка и заправка)
3.32 Замена ATF автоматической трансмиссии
3.33 Замена трансмиссионного масла РКПП
3.34 Замена смазки раздаточной коробки (полноприводные модели)
3.35 Замена смазки дифференциала
3.36 Проверка состояния компонентов системы улавливания топливных испарений
3.37 Проверка исправности состояния компонентов системы рециркуляции отработавших газов (EGR)
4. Двигатель
4.0 Двигатель
4.1 Конструктивные особенности и принцип функционирования двигателя, — общая информация и регулировка клапанных зазоров
4.2 Капитальный ремонт и обслуживание двигателя — общая информация
4.3 Проверка давления масла
4.4 Проверка компрессионного давления в цилиндрах
4.5 Диагностика состояния двигателя с применением вакуумметра
4.6 Снятие силового агрегата с автомобиля — подготовка и меры предосторожности
4.7 Снятие и установка двигателя
4.8 Альтернативные варианты схем восстановительного ремонта двигателя
4.9 Порядок разборки двигателя при подготовке его к капитальному ремонту
4.10 Разборка привода ГРМ, — снятие, проверка состояния и установка компонентов
4.11 Снятие, разборка, проверка, сборка и установка оси коромысел, — двигатели SOHC
4.12 Снятие, проверка состояния и установка распределительных валов
4.13 Обслуживание головок цилиндров
4.14 Обслуживание блока цилиндров
4.15 Система смазки — общая информация
4.16 Снятие, обслуживание и установка
4.17 Снятие, проверка и установка маслоохладителя — только двигатели DOHC
4.18 Пробный запуск и обкатка двигателя после капитального ремонта
5. Системы охлаждения, отопления
5.0 Системы охлаждения, отопления
5.1 Спецификации
5.2 Антифриз — общие сведения
5.3 Проверка исправности функционирования и замена термостата
5.4 Снятие и установка вентилятора системы охлаждения
5.5 Обслуживание, снятие и установка радиатора системы охлаждения
5.6 Снятие и установка наполнительного бачка (модели с турбонаддувом)
5.7 Снятие, проверка и установка водяного насоса
5.8 Система отопления и вентиляции салона — общая информация
5.9 Снятие и установка отопителя
5.10 Снятие и установка вентилятора отопителя
5.11 Проверка исправности функционирования и обслуживание систем отопления и кондиционирования воздуха
6. Системы питания и выпуска
6.0 Системы питания и выпуска
6.1 Спецификации
6.2 Система выпуска отработавших газов — общая информация
6.3 Измерение давления топлива
6.4 Сброс давления в системе питания
6.5 Принцип действия и проверка исправности функционирования топливного насоса
6.6 Обслуживание топливного фильтра
6.7 Проверка состояния и замена топливных линий и их штуцерных соединений
6.8 Обслуживание перекидного клапана
6.9 Снятие и установка корпуса дросселя
6.10 Инжекторы впрыска топлива — общая информация и обслуживание
6.11 Регулятор давления топлива — общие сведения
6.12 Чистка и ремонт топливного бака — общие сведения
6.13 Снятие и установка датчика измерения массы воздуха (MAF)
6.14 Проверка исправности функционирования системы электронного впрыска
6.15 Система турбонаддува — общая информация
6.16 Обслуживание системы турбонаддува
6.17 Система выпуска — общая информация
7. Электрооборудование двигателя
7.0 Электрооборудование двигателя
7.1 Спецификации
7.2 Запуск двигателя от вспомогательного источника питания
7.3 Снятие и установка аккумуляторной батареи
7.4 Проверка состояния и замена проводов батареи
7.5 Система зажигания — общая информация и меры предосторожности
7.6 Проверка исправности функционирования системы зажигания
7.7 Сборка катушек зажигания — общая информация, проверка состояния и замена
7.8 Проверка и регулировка установки угла опережения зажигания
7.9 Замена модуля зажигания
7.10 Проверка исправности функционирования датчиков CKP, CMP и детонации
7.11 Обслуживание свечей зажигания
7.12 Проверка состояния высоковольтных проводов
7.13 Система заряда — общая информация и меры предосторожности
7.14 Генератор, общая информация, проверка и обслуживание
7.15 Снятие и установка генератора
7.16 Система запуска — общая информация и меры предосторожности
7.17 Проверка исправности функционирования стартера и цепи запуска
7.18 Стартеры Nippondenso — проверка и обслуживание
7.19 Стартеры Mitsubishi — проверка и обслуживание
8. Системы управления двигателем
8.0 Системы управления двигателем
8.1 Спецификации
8.2 бортовой диагностики (OBD) — принцип функционирования и коды неисправностей. Сигналы в цепях управления
8.3 ЕСМ — общая информация, оценка состояния и замена
8.4 Информационные датчики, реле и исполнительные устройства — общая информация
8.5 Система улавливания топливных испарений (EVAP)
8.6 Система рециркуляции отработавших газов (EGR)
8.7 Система управляемой вентиляции картера (PCV)
8.8 Кондуктор заливной горловины топливного бака
8.9 Каталитический преобразователь — общая информация, проверка состояния и замена
9. Коробка переключения передач
9.0 Коробка переключения передач
9.1. 5-ступенчатая ручная коробка переключения передач (РКПП)
9.2. 4-ступенчатая автоматическая трансмиссия (АТ)
10. Сцепление, трансмиссионная линия
10.0 Сцепление, трансмиссионная линия
10.1 Спецификации
10.2 Сцепление — общая информация и проверка состояния компонентов
10.3 Снятие, проверка состояния компонентов и установка главного цилиндра сцепления
10.4 Снятие и установка исполнительного цилиндра сцепления
10.5 Удаление воздуха из гидравлического тракта привода выключения сцепления
10.6 Передние приводные валы — общая информация
10.7 Снятие, обслуживание и установка передних приводных валов
10.8 Снятие и установка сборки поворотного кулака, обслуживание ступичной сборки
10.9 Задние приводные валы — общая информация
10.10 Снятие, обслуживание и установка задних приводных валов
10.11 Снятие, обслуживание и установка задней ступицы
10.12 Задний дифференциал — общая информация
10.13 Снятие и установка карданного вала
10.14 Снятие и установка фланца ведущей шестерни дифференциала и сальника
10.15 Снятие и установка заднего дифференциала
10.16 Капитальный ремонт дифференциала
11. Тормозная система
11.0 Тормозная система
11.1 Спецификации
11.2 Система антиблокировки тормозов (ABS) — общая информация и диагностические проверки
11.3 Снятие и установка основных компонентов ABS
11.4 Проверка и регулировка высоты положения и свободного хода педали ножного тормоза
11.5 Регулировка штока толкателя ГТЦ/вакуумного усилителя тормозов
11.6 Проверка и регулировка привода стояночного тормоза
11.7 Проверка исправности функционирования вакуумного усилителя тормозов
11.8 Замена тормозных колодок дисковых тормозных механизмов
11.9 Снятие и установка суппортов дисковых тормозных механизмов
11.10 Проверка состояния, снятие и установка тормозного диска
11.11 Замена башмаков и обслуживание барабанных тормозных механизмов задних колес
11.12 Снятие и установка компонентов сборки стояночного тормоза (модели с дисковыми тормозными механизмами задних колес)
11.13 Снятие и установка главного тормозного цилиндра
11.14 Проверка состояния и замена тормозных линий и шлангов
11.15 Снятие и установка сборки вакуумного усилителя тормозов
11.16 Прокачка тормозной системы
12. Подвеска и рулевое управление
12.0 Подвеска и рулевое управление
12.1 Спецификации
12.2 Проверка состояния шаровых опор передней подвески
12.3 Проверка состояния передних колесных подшипников
12.4 Снятие и установка поперечной балки передней подвески
12.5 Снятие и установка поворотного кулака с колесным подшипником, обслуживание ступичной сборки
12.6 Снятие и установка нижнего рычага передней подвески с шаровой опорой
12.7 Обслуживание стоек передней подвески
12.8 Снятие и установка переднего стабилизатора поперечной устойчивости
12.9 Проверка состояния задних колесных подшипников
12.10 Снятие и установка поперечной балки (подрамника) задней подвески
12.11 Снятие, обслуживание и установка стоек задней подвески
12.12 Снятие и установка задних колесных подшипников
12.13 Прокачка гидравлического тракта рулевого привода
12.14 Регулировка люфта зацепления реечной передачи
12.15 Проверка напорной характеристики рулевого насоса
12.16 Проверка усилия вращения рулевого механизма
12.17 Снятие и установка рулевого насоса
12.18 Снятие и установка рулевого механизма
12.19 Капитальный ремонт рулевого насоса
12.20 Капитальный ремонт рулевого механизма
12.21 Рулевая колонка, — общая информация, меры предосторожности
12.22 Снятие и установка модуля подушки безопасности
12.23 Снятие и установка рулевого колеса
12.24 Снятие и установка сборки комбинированных подрулевых переключателей
12.25 Снятие и установка замка зажигания/блокировки рулевой колонки
12.26 Снятие и установка рулевой колонки
12.27 Капитальный ремонт рулевой колонки
12.28 Колеса и шины — общая информация
12.29 Регулировка геометрии подвески
13. Кузов
13.0 Кузов
13.2 Уход за компонентами кузова и днища автомобиля
13.3 Уход за виниловыми элементами отделки
13.4 Уход за обивкой и ковровыми покрытиями салона
13.5 Контрольные кузовные размеры
14. Бортовое электрооборудование
14.0 Бортовое электрооборудование
14.1 Спецификации
14.2 Поиск причин отказов электрооборудования
14.3 Предохранители — общая информация
14.4 Прерыватели цепи — общая информация
14.5 Реле — общая информация и проверка исправности функционирования
14.6 Система дополнительной безопасности (SRS) — устройство и принцип функционирования
14.7 Снятие и установка компонентов SRS
14.8 Диагностика неисправностей SRS
14.9 Система управления скоростью (темпостат) — устройство и принцип функционирования
14.10 Регулировки компонентов темпостата
14.11 Проверка исправности функционирования компонентов и диагностика отказов темпостата
14.12 Снятие и установка компонентов системы управления скоростью
14.13 Обогрев заднего стекла и зеркал заднего вида — общая информация, проверка исправности функционирования, восстановительный ремонт
14.14 Комбинация приборов — общая информация, проверка исправности функционирования компонентов
14.15 Снятие и установка комбинации приборов
14.16 Электропривод зеркал заднего вида — общая информация, проверка исправности функционирования компонентов
14.17 Снятие и установка компонентов электропривода зеркал заднего вида
14.18 Электропривод дверных стеклоподъемников — общая информация, проверка исправности функционирования компонентов
14.19 Снятие и установка регуляторов стеклоподъемников
14.20 Единый замок — устройство и принцип функционирования, диагностика неисправностей, проверка состояния компонентов
14.21 Снятие и установка активаторов дверных замков
14.22 Выключатели рулевой колонки — общая информация, проверка исправности функционирования
14.23 Снятие и установка выключателей рулевой колонки
14.24 Очистители и омыватели стекол — общая информация, регулировка и проверка состояния компонентов
14.25 Снятие и установка компонентов очистителей/омывателей стекол
14.26 Замена ламп осветительных приборов
14.27 Антенна радиоприемника — общая информация
14.28 Аудиосистема — общая информация
14.29 Схемы электрических соединений — общая информация
14.30. Система распределения питания
- Manuals
- Brands
- Subaru Manuals
- Automobile
- 1998 Forester
- Owner’s manual
-
Contents
-
Table of Contents
-
Bookmarks
Related Manuals for Subaru 1998 Forester
Summary of Contents for Subaru 1998 Forester
-
Page 1
1 9 9 8 O W N E R ’ S M A N U A L Wear Seat Belts at All Times for Your Own Safety. -
Page 2
Foreword Congratulations on choosing a SUBARU vehicle. This Owner’s Manual has all the information necessary to keep your SUBARU in excellent condition and to properly maintain the emission control system for minimizing emission pollutants. We urge you to read this manual carefully so that you may understand your vehicle and its operation. -
Page 3
Warranties J Warranties for U.S.A. All SUBARU vehicles distributed by Subaru of America, Inc. and sold at retail by an authorized SUBARU dealer in the continental U.S., Alaska and Hawaii come with the following warranties: D SUBARU Limited Warranty D Emission Control Systems Warranty… -
Page 4: Doors And Locks
This chapter informs you how to operate interior equipment. Chapter 7: Starting and operating This chapter informs you how to start and operate your SUBARU. Chapter 8: In case of emergency This chapter informs you what to do if you have a problem while driving, such as a flat tire or engine overheating.
-
Page 5: Specifications
Please read these safety warnings as well as all other portions of this manual carefully in order to gain a better understanding of how to use your SUBARU vehicle safely. WARNING A WARNING indicates a situation in which serious injury or death could result if the warning is ignored.
-
Page 6
J Safety symbol You will find a circle with a slash through it in this manual. This symbol means “Do not”, “Do not do this”, or “Do not let this happen”. Safety precautions when driving SEAT BELT AND SRS AIRBAG WARNING D All persons in the vehicle should fasten their seat belts BE- FORE the vehicle starts to move. -
Page 7
AIRBAG needs much space for deployment, the driver should al- ways sit upright and well back in the seat as far from the steering wheel as practical while still maintaining full vehicle control and the front passenger should move the seat as far back as possible and sit upright and well back in the seat. -
Page 8
THE CHILD BY PLACING THE CHILD’S HEAD TOO CLOSE TO THE SRS AIRBAG. D Always use the child safety locks whenever a child rides in the rear seat. Serious injury could result if a child accidentally opened the door and fell out. Refer to the Door Lock section in chapter 1. -
Page 9
D If at any time you suspect that exhaust fumes are entering the vehicle, have the problem checked and corrected as soon as pos- sible. If you must drive under these conditions, drive only with all windows fully open. D Keep the trunk lid or rear gate closed while driving to prevent exhaust gas from entering the vehicle. -
Page 10
If you are taking any drugs, check with your doctor or pharmacist or read the literature that accompanies the medication to determine if the drug you are taking can impair your driving ability. Do not drive after taking any medications that can make you drowsy or otherwise affect your abil- ity to safely operate a motor vehicle. -
Page 11
MODIFICATION OF YOUR VEHICLE CAUTION Your vehicle should not be modified. Modification could affect its performance, safety or durability, and may even violate govern- mental regulations. In addition, damage or performance problems resulting from modification may not be covered under warranties. DRIVING WITH PETS Unrestrained pets can interfere with your driving and distract your atten- tion from driving. -
Page 12: Table Of Contents
Table of contents Doors and locks Seat, seatbelt and SRS AIRBAG Instruments and controls Climate control Audio Interior equipment Starting and operating In case of emergency Appearance care Maintenance and service Specifications Consumer information and Reporting safety defects Index – CONTINUED –…
-
Page 13
ABS (Anti-Lock Brake system) ABS warning light …………..Accessary power socket AIRBAG . -
Page 14
Brake (Tips for using brakes) Brake booster (Maintenance) Brake fluid (Maintenance) Brake system warning light Brake pedal (Maintenance) Brake pad and lining (Maintenance) Break-in (New vehicle break-in driving) Bulb chart …………….Bulb replacement . -
Page 15
Clock function (built in cassette stereo) Clutch fluid (Maintenance) Clutch pedal (Manual transmission) (Maintenance) Coin tray …………….Combination meter . -
Page 16
Emission test (State emission testing) Engine compartment …………Engine coolant (Maintenance) Engine exhaust gas (Carbon monoxide) Engine hood… -
Page 17
Fuel filler cap To open and close the fuel filler door Refueling …………. . . Fuel gauge . -
Page 18
Hazard warning flasher Heater (Heating and air conditioning) Heater (Seat heater) …………. Heater (Mirror heater = Outside mirror defogger) Heating and air conditioning Air conditioner button (if equipped) -
Page 19
…………… . START . -
Page 20
Luggage floor storage tray Loading your vehicle …………Vehicle capacity weight GVWR and GAWR Lumbar support… -
Page 21
Odometer …………….Oil (Engine oil) . -
Page 22
Rear combination light (Bulb replacement) Rear differential gear oil (AWD vehicles) (Maintenance) Rear gate …………….Rear seats . -
Page 23
Seat heater …………… . . Seatback (Reclining the seatback) Seat belts —… -
Page 24
SRS AIRBAG warning light Starting the engine …………. . . Automatic transmission vehicles During cold weather below –4 F (–20 C) Flooded engine… -
Page 25
Inspection and rotation Tire size (Specifications) Tool (Maintenance tools) Tool (Tire changing tools) Top strap anchor (Child restraint system) Towing …………….Towing eyelet Towing with all wheels on the ground Towing with the front wheels raised off the ground… -
Page 26
Warning and indicator lights ABS warning light (for vehicles with ABS) AT OIL TEMPerature warning light (for AT vehicles) Brake system warning light CHECK ENGINE warning light/Malfunction indicator lamp Checking bulbs Door open warning lights Front-wheel drive warning light (for AT vehicles) High beam indicator Low fuel warning light (Fuel gauge) Oil pressure warning light… -
Page 27
Doors and locks Keys …………….Master, submaster and valet key Key number . -
Page 28: Keys
Keys Master key Submaster key J Master, submaster and valet key Three types of keys are provided for your vehicle. Master key, submaster key and valet key. The master key and submaster key fit all locks on your vehicle. D Ignition switch D Doors D Rear gate D Glove compartment…
-
Page 29: Doors And Locks
Door locks J Locking and unlocking from the outside B For Vehicles with power door locking switches Unlock To lock the door from the outside with the key, turn the key toward the rear. To unlock the door, turn the key toward the front. Pull the outside door handle to open an unlocked door.
-
Page 30
time. Always make sure that all doors and the rear gate are locked before leaving your vehicle. NOTE Make sure that you do not leave the key inside the vehicle before locking the doors from the outside without the key. B For vehicles without power door locking switches Unlock To lock the door from the outside with the key, turn the key toward the… -
Page 31: Locking And Unlocking From The Inside
To lock the rear door from the outside without the key, press the end of the lock lever down on the door and then close the door. Always make sure that all doors and the rear gate are locked before leaving your vehicle.
-
Page 32: Power Door Locking Switches (If Equipped)
J Power door locking switches (if equipped) Front passenger’s switch Driver’s switch Unlock Unlock Lock Lock HS0016 All doors and the rear gate can be locked and unlocked by the power door locking switches at the driver’s side and the front passenger’s side doors.
-
Page 33: Child Safety Locks
J Child safety locks Unlock Lock WARNING Always use the child safety lock whenever a child rides in the rear seat. Serious injury could result if a child accidentally opened the door and fell out. Each rear door has a child safety lock that prevents the doors from being opened even if the inside door handle is pulled.
-
Page 34: Power Windows
Door open warning lights The door open warning light comes on if any door is not fully closed. Always make sure this light is out before starting to drive. Power windows WARNING D When operating power windows, be extremely careful to pre- vent anyone’s fingers, arms or head from being caught in the window.
-
Page 35: Power Windows Switch Cluster (Driver’s Side)
J Power window switch cluster (driver’s side) Lock switch “AUTO” switch for driver’s window For rear left passenger’s window Lock Unlock Close Open Automatically open All door windows can be controlled by the power window switch cluster at the driver side door. B To open or close the driver’s window AUTO switch: This switch has two functions.
-
Page 36: Front Passenger’s Switch
B To open or close the passengers’ windows To open the passengers’ windows, push the appropriate switch down and hold it until the window reaches the desired position. To close the window, pull the switch up and hold it until it reaches the desired posi- tion.
-
Page 37: Rear Passenger’s Switches
Doors and locks J Rear passenger’s switches Close Open HS0020 To open the window, push the switch down and hold it until the window reaches the desired position. To close the window, push the switch up and hold it until the window reaches the desired position. When the lock switch on the power window switch cluster, located on the driver’s side door, is in the “LOCK”…
-
Page 38: Rear Gate
Rear gate WARNING To prevent dangerous exhaust gas from entering the vehicle, al- ways keep the rear gate closed while driving. J To open and close the rear gate To unlock the rear gate, insert the key in the keyhole and turn it clock- wise.
-
Page 39: To Open And Close The Fuel Filler Door
Never add any cleaning agents to the fuel tank. The addition of a cleaning agent may cause damage to the fuel system. For choosing the right fuel for your SUBARU, refer to the “Fuel Require- ments” section (located in chapter 7).
-
Page 40: Fuel Filler Cap
D Make sure that the cap is tightened until it clicks to prevent fuel spillage in the event of an accident. D Always use a genuine SUBARU fuel filler cap. If you use the wrong cap, it may not fit or have proper venting, and your fuel tank and emission control system might be damaged.
-
Page 41: Engine Hood
SUBARU Limited Warranty. Engine hood WARNING Always check that the hood is properly locked before you start driving. If it is not, it might fly open while the vehicle is moving, blocking your view which may cause an accident and serious bodily injury.
-
Page 42: Roof Rail
the hood prop from its retainer and put the end of the hood prop into the slot in the hood. To close the hood: 1. Lift the hood slightly and remove the hood prop from the slot in the hood and return the prop to its retainer. 2.
-
Page 43: Installing Carrying Attachments On The Cross Bars
Doors and locks Roof cross bar kit HS0027 Luggage can be carried on the roof after securing the roof cross bar kit to the roof rail. When installing the roof cross bar kit on the roof rail, follow the manufacturer’s instructions. When you carry cargo on the roof using the roof cross bar kit, never exceed maximum load limit explained below.
-
Page 44
Seat, seat belt and SRS AIRBAG Front seats …………..Fore and aft adjustment Reclining the seatback Seat cushion angle and height adjustment (driver’s seat) -
Page 45: Front Seats
Front seats WARNING D Never adjust the seat while driving to avoid the possibility of loss of vehicle control and of personal injury. D Never drive the vehicle with the head restraints removed be- cause they are designed to reduce the risk of serious neck injury in the event that the vehicle is struck from the rear.
-
Page 46: Seat, Seatbelt And Srs Airbag
than adults, their risk of being injured from deployment is greater. For that reason, we strongly recommend that ALL children (includ- ing those in child seats and those that have outgrown child re- straint devices) sit in the REAR seat properly restrained at all times in a child restraint device or in a seat belt, whichever is ap- propriate for the child’s age, height and weight.
-
Page 47: Fore And Aft Adjustment
CAUTION Metallic parts of the seat belt can become very hot in a vehicle that has been closed up in sunny weather; they could burn an oc- cupant. Do not touch such hot parts. J Fore and aft adjustment Pull the lever upward and slide the seat to the desired position. Then re- lease the lever and move the seat back and forth to make sure that it is securely locked into place.
-
Page 48: Seat Cushion Angle And Height Adjustment (Driver’s Seat)
J Seat cushion angle and height adjustment (driver’s seat) Raise Lower For rear edge For front edge Turn either dial to adjust the angle and height of the seat cushion to the desired position. J Head restraint adjustment To raise the head restraint, pull it up. To lower it, push the head restraint down while depressing the release button on the top of the seatback.
-
Page 49: Lumbar Support
OM-H2735 The best position for the head restraint is just above or level with the top of the ears. J Lumbar support HS0032 Pull the lever forward or backward. Pulling the lever forward will increase the amount of support for your lower back.
-
Page 50: Seat Heater (If Equipped)
J Seat heater (if equipped) CAUTION D Do not use the seat heater when the engine is not running. The battery could run down if the heater is operated while the engine is not running. D Do not put anything on the seat which insulates against heat, such as a blanket, cushion, or similar items.
-
Page 51: Rear Seats
Rear seats WARNING D Never drive the vehicle with the head rests removed because they are designed to reduce the risk of serious neck injury in the event that the vehicle is struck from the rear. D Seat belts provide maximum restraint when the occupant sits well back and upright in the seat.
-
Page 52: Reclining The Seatback
Adjust seatback to upright position. Sit well back and upright. CAUTION Metallic parts of the seat belt can become very hot in a vehicle that has been closed up in sunny weather; they could burn an oc- cupant. Do not touch such hot parts. J Reclining the seat back Pull the release knob up and adjust the seatback to the desired position.
-
Page 53: Folding Down The Seatback
J Folding down the seatback HS0036 Unlock the seatback by pulling the release knob and fold it down. Then push the seatback downward until it locks into place and make sure that it is securely locked. To return the seatback to its original position, unlock the seatback by pulling the release knob and raise it until it locks into place and make sure that it is securely locked.
-
Page 54: 3-Point Type Seat Belts (Combination Lap/Shoulder Belts)
The best position for the head rest is just above or level with the top of the ears. 3-point type seat belts (Combination lap/shoulder belts) WARNING D Never use a belt that is twisted or reversed. In an accident, this can increase the risk or severity of injury.
-
Page 55
Especially when the occupant is a child, be sure to position the seatback upright. Children are more likely to slide under the lap belt than adults if the seatback is reclined in a collision. D Do not put cushions or any other materials between occupants and seatbacks or seat cushions. -
Page 56: Seat Belt Warning Light And Chime
Always wear the seat belts correctly. Adjust the seat- back to upright position. Sit well back and upright. HS0230 CAUTION Metallic parts of the seat belt can become very hot in a vehicle that has been closed up in sunny weather; they could burn an oc- cupant.
-
Page 57: Emergency Locking Retractor (Elr) Function
J Emergency Locking Retractor (ELR) function 3-point type seat belts have an emergency locking retractor. This allows normal body movement but the retractor locks automatically during a sudden stop, impact or if you pull the belt very quickly out of the retrac- tor.
-
Page 58: Unfastening The Belt
Seat, seat belt and SRS AIRBAG Driver’s seat: Move the seat back as far from the steering wheel as practical while still maintaining full vehicle control and adjust the seat- back to the upright position. Front passenger’s seat: Move the seat as far back as possible and ad- just the seatback to the upright position.
-
Page 59: Adjusting The Front Seat Shoulder Belt Anchor Height
J Adjusting the front seat shoulder belt anchor height WARNING When wearing the front seat belts, make sure the shoulder por- tion of the webbing does not pass over your neck. If it does, ad- just the seat belt anchor to a lower position. Placing the shoulder belt over the neck may result in neck injury during sudden brak- ing or in a collision.
-
Page 60: 2-Point Type Seat Belts (Lap Only Belts)
2-point type seat belts (lap only belts) WARNING D Never use a belt that is twisted or reversed. In an accident, this can increase the risk or severity of injury. D Keep the lap belt as low as possible on your hips. In a colli- sion, this spreads the force of the lap belt over stronger hip bones instead of across the weaker abdomen.
-
Page 61: Fastening The Seat Belt
CAUTION Metallic parts of the seat belt can become very hot in a vehicle that has been closed up in sunny weather; they could burn an oc- cupant. Do not touch such hot parts. The 2-point type seat belt has a manual adjustment device. J Fastening the seat belt 1.
-
Page 62: Unfastening The Belt
Seat, seat belt and SRS AIRBAG J Unfastening the belt Push OM-H0050 Push the button on the buckle. NOTE When the seat belt is not in use, store the seat belt in the seat belt pock- et to prevent it from being damaged. Seat belt pocket HS0041 –…
-
Page 63: Seat Belt Safety Tips
Seat belt safety tips WARNING D All persons in the vehicle should fasten their seat belts BE- FORE the vehicle starts to move. Otherwise, the possibility of se- rious injury becomes greater in the event of a sudden stop or ac- cident.
-
Page 64: Expectant Mothers
J Expectant mothers Expectant mothers also need to use the seat belts. They should consult their doctor for specific recommendations. The lap belt should be worn securely and as low as possible over the hips, not over the waist. J Maintenance CAUTION D Keep the belts free of polishes, oils, chemicals and particularly battery acid.
-
Page 65: Child Restraint Systems
Child restraint systems WARNING D Never let a passenger hold a child on his or her lap while the vehicle is moving. The passenger cannot protect the child from injury in a collision, because the child will be caught between the passenger and objects inside the vehicle.
-
Page 66
Secure child restraint devices in the REAR seats at all times. Never allow a child to stand up, or to kneel on the front passenger’s seat or any other seat. WARNING D Child restraint systems and seat belts can become hot in a ve- hicle that has been closed up in sunny weather;… -
Page 67: Position (Rear Center Seating Position)
the child’s age and size. All child restraint systems are designed to be se- cured in vehicle seats by lap belts or the lap portion of a lap/shoulder belt. Children could be endangered in an accident if their child restraints are not properly secured in the vehicle.
-
Page 68: Position
Seat, seat belt and SRS AIRBAG tightening the seatbelt. If the child restraint system requires a top strap, latch the hook onto the top strap anchor and tighten the top strap. J Installing child restraint systems in the 3-point type seat belt position NOTE When the child restraint system is no longer in use, remove it and restore…
-
Page 69: Top Strap Anchors
then tightening the seat belt. 8. Pull at the shoulder portion of the belt to confirm that it cannot be pulled out (ALR properly functioning). If the child restraint system requires a top strap, first remove the head rest and then latch the hook onto the top strap anchor and tighten the top strap. J Top strap anchors CAUTION D Always use a genuine top strap anchor.
-
Page 70
Vehicles built for sale in U.S. do not include an anchor kit in the glove compartment. However, the anchor kit and installation instructions are available from your SUBARU dealer. You can also follow the installa- tion instructions for Canada models. -
Page 71: Srs Airbag (Supplemental Restraint System Airbag)
*SRS AIRBAG (Supplemental Restraint System Airbag) *SRS: This stands for supplemental restraint system. This name is used because the AIRBAG system supplements the vehicle’s seat belts. J Vehicle with driver’s and front passenger’s SRS AIRBAGs and lap/shoulder restraints WARNING D To obtain maximum protection in the event of an accident, the driver and all passengers in the vehicle should always wear seat belts when the vehicle is moving.
-
Page 72
the front passenger should move the seat as far back as possible and sit upright and well back in the seat. D Do not place any objects over the SRS AIRBAG cover or between you and the SRS AIRBAG. If the SRS AIRBAG deploys, those objects could interfere with its proper operation and could be propelled inside the car and cause injury. -
Page 73
For instructions and precautions concerning the child restraint system, see the Child Restraint System section in this chapter. D NEVER INSTALL A REARWARD FACING CHILD SEAT IN THE FRONT SEAT. DOING SO RISKS SERIOUS INJURY OR DEATH TO THE CHILD BY PLACING THE CHILD’S HEAD TOO CLOSE TO THE SRS AIRBAG. -
Page 74
In the event that the SRS AIRBAG is deployed, re- placement of the system should be performed only by an authorized SUBARU dealer. When the components of the SRS AIRBAG are re- placed, use only genuine SUBARU parts. -
Page 75: Srs Airbag System Operation
NOTE When you sell your vehicle, we urge you to explain to the buyer that it is equipped with SRS AIRBAGs by alerting him or her to the appli- cable section in this owner’s manual. J SRS AIRBAG System operation CAUTION D When the SRS AIRBAG deploys, some smoke will be released.
-
Page 76
SRS AIRBAG module (Driver’s side) Driver’s side SRS AIRBAGs deploy as soon as a collision occurs. After deployment, SRS AIRBAGs start to deflate immedi- ately so that the driver’s vision is not obstructed. Seat, seat belt and SRS AIRBAG SRS AIRBAG module (Passenger’s side) SRS AIRBAG control module (including impact sensors) -
Page 77
The SRS AIRBAG can function only when the ignition switch is in the “ON” position. If the impact sensors in the airbag control module detect a certain pre- determined amount of force during a frontal or front-angled collision, the control module sends signals to the airbag modules instructing them to inflate the SRS AIRBAGs. -
Page 78
B Examples of the types of accidents in which the SRS AIRBAG is unlikely to deploy. There are many types of collisions which might not necessarily require SRS AIRBAG deployment. If the vehicle strikes an object, such as a telephone pole or sign pole, or if it slides under a truck’s load bed, or if it sustains an oblique offset frontal impact, the SRS AIRBAG may not deploy depending on the level of accident forces involved. -
Page 79: System Monitors
D All related wiring In the event of a malfunction indicated by any of following, the vehicle should be taken promptly to your nearest SUBARU dealer to have the system checked. Unless checked and repaired, the SRS AIRBAG will not function reliably: D Flashing or flickering of the warning light.
-
Page 80: System Servicing
SUBARU dealer perform the work. To ensure its long-term reliability, the SRS AIRBAG must be inspected by a SUBARU dealer ten years after the date of manufacture, which is shown on the certification plate attached to the driver’s jamb. NOTE…
-
Page 81: Precautions For Vehicle Modification
J Precautions for vehicle modification WARNING D Do not put any objects over the steering wheel pad and dash- board. If the SRS AIRBAG deploys, those objects could interfere with its proper operation and could be propelled inside the vehi- cle and cause injury.
-
Page 82
D Installation of a tire of different size and construction from the original tire listed on the tire placard attached to the door jamb. Always consult your SUBARU dealer if you want to install any accessory parts to your vehicle. -
Page 83
Instruments and controls Instrument panel overview Combination meter overview Gauges …………… Speedometer . -
Page 84: Instrument Panel Overview
Instrument panel overview 1 2 3 4 Sun visor/Vanity mirror (page 6-2) Combination meter (page 3-4) Hazard warning flasher switch (page 3-14) Rear window defogger switch (page 3-24)/Outside mirror defogger switch (page 3-26) Spot light (page 6-14) Clock (page 6-8) Inside mirror (page 3-25) Cup holder (page 6-6) Heater or air conditioner…
-
Page 85: Instruments And Controls
Parking light switch (page 3-18) Hazard warning flasher switch (page 3-14) Rear window defogger switch (page 3-24)/Outside mirror defogger switch (page 3-26) Rear window wiper and washer switch (page 3-22) Windshield washer (page 3-21) Mist (page 3-21) Windshield wiper (page 3-21) Wiper control (page 3-19) Light control (page 3-14) Illumination brightness control…
-
Page 86: Combination Meter Overview
Combination meter overview ABS warning light (page 3-12) Speedometer (page 3-5) Turn signal indicator light (page 3-13) Tachometer (page 3-6) AT oil temperature warning light (page 3-12) High beam indicator light (page 3-13) SRS AIRBAG warning light (page 3-8) Door opening warning light (page 3-13) Temperature gauge (page 3-7)
-
Page 87: Speedometer
Instruments and controls Gauges HS0050 J Speedometer The speedometer shows the vehicle speed. J Odometer/Trip meter Tripmeter Odometer HS0051 This meter displays the odometer and trip meter when the ignition switch is in the “ON” position. To change the mode indication, briefly push the knob. The odometer shows the total distance that the vehicle has been driven.
-
Page 88: Fuel Gauge
pushing the knob and keep the knob pushed for more than 2 seconds. NOTE If the connection between the combination meter and battery is broken for any reason such as vehicle maintenance or fuse replacement, the data recorded on the trip meter will be lost. J Tachometer CAUTION Do not operate the engine with the pointer of the tachometer in…
-
Page 89: Temperature Gauge
The gauge may move slightly during braking, turning or acceleration due to fuel movement in the tank. B Low fuel warning light The low fuel warning light comes on when the tank is nearly empty (about 2.3 U.S. gal., 9.0 liters, 1.9 Imp. gal.). It only operates when the ignition switch is in the “ON”…
-
Page 90: Charge Warning Light
If any lights fail to come on, it indicates a burned-out bulb or a malfunc- tion of the corresponding system. Consult your authorized SUBARU dealer for repair. J Seat belt warning light and chime When the ignition switch is turned to the “ON” position, the seat belt warning light will come on and the reminder chime will sound to remind driver to fasten the seat belt.
-
Page 91: Brake System Warning Light
If the oil level is low, add oil immediately. If the engine oil is at the proper level but the light remains on, contact your nearest SUBARU dealer immediately.
-
Page 92: Check Engine Warning Light/Malfunction Indicator Lamp
“ON”), it could be an indication of leaking of brake fluid or worn brake pads. Have your vehicle checked by a SUBARU dealer immediately. J CHECK ENGINE warning light/…
-
Page 93
Tightening the cap will not make the CHECK ENGINE warning light turn off immediately. It may take several driving trips. If the light does not go out, take your vehicle to your authorized SUBARU dealer immediately. B If the light is blinking: If the light is blinking while driving, an engine misfire condition has been detected which may damage the emission control system. -
Page 94: Abs Warning Light (For Vehicles With Abs)
“ON” position, but it does not go out even when the vehicle speed exceeds approximately 8 mph (12 km/h). D The warning light comes on during driving. Contact your nearest SUBARU dealer for service immediately. NOTE If the warning light behavior is as shown below, the ABS system may be considered normal.
-
Page 95: Door Open Warning Lights
Instruments and controls J Door open warning lights The door open warning light comes on if any door or rear gate is not fully closed. Always make sure this light is out before you start to drive. J Front-wheel drive warning light (for AT vehicles) This light comes on when All Wheel Drive is disengaged and the drive mechanism is switched to Front Wheel Drive for maintenance or similar purposes.
-
Page 96: Hazard Warning Flasher
Hazard warning flasher The hazard warning flasher is used to warn other drivers when you have to park your vehicle under emergency conditions. The hazard warning flasher works with the ignition switch in any position. When you have to park your vehicle under emergency conditions, pull off the roads safely and park away from the traffic if it is possible.
-
Page 97: Turn Signal Lever
The light switch operates only when the ignition switch is in the “ON” position. B Headlights To turn on the headlights, turn the knob on the end of the turn signal lever. first position Position lights, instrument panel illumination, tail lights and license plate light are on.
-
Page 98
To flash the headlights, pull the lever toward you and then release it. The high beam will stay on for as long as you hold the lever. The headlight flasher works even though the lighting switch is in the “OFF” position. -
Page 99: Illumination Brightness Control
To activate the right turn signal, push the turn signal lever up. To acti- vate the left turn signal, push the turn signal lever down. When the turn is finished, the lever will return automatically. If the lever will not return after cornering, return the lever to the neutral position by hand.
-
Page 100: Fog Light Switch
J Parking light switch The parking light switch operates regardless of the ignition switch posi- tion. By pushing the rear end of this switch, following lights will come on. – Parking lights – Front side marker lights – Tail lights –…
-
Page 101: Wiper Controls
The indicator light located on the switch will illuminate when the fog lights are on. Wiper controls WARNING In freezing weather, do not use the windshield washer until the windshield is sufficiently warmed by the defroster. Otherwise the washer fluid can freeze on the windshield, blocking your view.
-
Page 102
D In freezing weather, be sure the wiper blades are not frozen to the windshield or rear window before operating the wipers. D Do not operate the wipers if the wiper blades are frozen to the windshield or rear window. If the wiper would be operated with the wiper blades frozen to the windshield or rear window, the wiper blades could be worn or damaged prematurely, resulting in streaking or incomplete wiping. -
Page 103: Windshield Wiper And Washer Switch
J Windshield wipers and washer switch B Windshield wipers Mist To turn the wipers on, push the wiper control lever down. : Intermittent LO : Low speed HI : High speed To turn the wipers off, return the lever to the “OFF” position. B Mist (for a single wipe) For a single wipe of the wipers, pull the lever toward you.
-
Page 104: Rear Window Wiper And Washer Switch
Check washer fluid level fre- quently, such as at fuel stops. D Use clean water if windshield washer fluid is unavailable. In areas where water freezes in winter, use SUBARU Windshield Washer Fluid or the equivalent. (See Windshield Washer Fluid section in chapter 10.) Also, when driving the vehicle when there are freezing tempera- tures, use non-freezing type wiper blades.
-
Page 105
To turn the rear wiper on, turn the knob on the end of the wiper control lever to the “ON” position. To turn the wiper off, return the knob on the end of the lever to the “OFF” position. B Washer To wash the rear window while the rear wiper is operating, turn the knob on the end of the wiper control lever counterclockwise to the “… -
Page 106: Rear Window Defogger Switch
Rear window defogger switch CAUTION D Do not use sharp instruments or window cleaner containing abrasives to clean the inner surface of the rear window. They may damage the conductors printed on the window. D To prevent the battery from being discharged, do not operate the defogger continuously longer than necessary.
-
Page 107: Horn
Instruments and controls Horn OM-H2736 To sound the horn, push the horn pad. Mirrors Always check that the inside and outside mirrors are properly adjusted before you start driving. J Inside mirror HS0064 The inside mirror has a day and night position. Pull the tab at the bottom of the mirror toward you for the night position.
-
Page 108: Outside Mirrors
J Outside mirrors WARNING Objects look smaller in a convex mirror (passenger side) and far- ther away than when viewed in a flat mirror. Do not use the con- vex mirror to judge the distances of vehicles behind you when changing lanes.
-
Page 109: Outside Mirror Defogger
B Remote control mirror switch (if equipped) The remote control mirrors operate only when the ignition switch is in the “ON” or “ACC” position. Selection switch Direction control switch 1. Press either end of the selection switch, “L” for the left and “R” for the right.
-
Page 110
Indicator light HS0063 To turn on the outside mirror defogger, push the switch. To turn it off, push the switch again. The indicator light located on the switch is on while the outside mirror defogger is operation. The defogger will automatically shut off after about 15 minutes. -
Page 111
Climate control Ventilator …………..Heating and air conditioning Air flow control dial . -
Page 112: Ventilator
Ventilator Move the thumb-wheel up and down or right and left to adjust the air flow direction Oepn Close Move the thumb-wheel up and down or right and left to adjust the air flow direction Move the thumb-wheel up and down or right and left to adjust the air flow direction Oepn…
-
Page 113: Climate Control
Heating and air conditioning Temperature control dial Fan speed control lever J Air flow control dial This dial has following five positions: : Air flows through the instrument panel outlets. : Air flows through the instrument panel outlets and the foot out- lets.
-
Page 114: Air Inlet Selection Lever
J Air inlet selection lever WARNING Continued operaton in the “ dows. Switch to the “ dusty condition clears. : Interior air is recirculated inside the passenger comparment. : Outside air is drawn into the passenger compartment. J Air conditioner button (if equipped) The air conditioner operates only when the engine is running.
-
Page 115: Heating And Defrosting
4. Set the fan speed control lever to the highest speed. Warm air also comes out from the right and left air outlets. To stop warm air flow from these outlets, turn the corresponding thumb-wheel to the “ ” position. J Heating and defrosting To direct warm air toward the floor and the windshield: 1.
-
Page 116: Bi.level Heating
J Heating To direct warm air toward the floor: 1. Set the air inlet selection lever to the “ 2 Set the air outlet control dial to the “ 3. Set the temperature control dial to the most comfortable level. 4.
-
Page 117: Ventilation
warmer than from the instrument panel outlet. 1. Set the air inlet selection lever to the “ 2. Set the air outlet control dial to the “ 3. Set the temperature control dial to the desired temperature level. 4. Set the fan speed control lever to the desired speed. Setting the temperature control dial fully turned to the red area or blue area decreases the temperature difference between the air from the instrument panel outlets and the air from the foot outlets.
-
Page 118: Air Conditioner Operation
AIR CONDITIONER OPERATION J Cooling or dehumidifying ON position For cooling and dehumidification of the passenger compartment, air flows through the instrument panel outlets: 1. Set the air inlet selection lever to the “ 2. Set the air outlet control dial to the “ 3.
-
Page 119: Operating Tips For Heater And Air Conditioner
Climate control 2. Set the air outlet control dial to the “ ” position. 3. Push the air conditioner button on. 4. Set the temperature control dial to the red area. 5. Set the fan speed control lever at the highest speed. Operating tips for heater and air conditioner J Cleaning ventilator grille Ventilator inlet grille…
-
Page 120: Checking Air Conditioning System Before Summer Season
Your air conditioner uses ozone friendly refrigerant HFC134a. Therefore, the method of adding, changing or checking the refrigerant is different from the method for CFC12 (freon). Consult your SUBARU dealer for ser- vice. Repairs needed as a result of using the wrong refrigerant are not covered under warranty.
-
Page 121: Replacement Procedure
Replacement schedule: Every 12 months or 7,500 miles (12,000 km) whichever comes first NOTE The filter can influence the air conditioning, heating and defroster perfor- mance. J Replacement procedure Cooling unit Filter cover and rubber Screws seal 1. Remove the filter cover by removing the two (2) screws. 2.
-
Page 122
CAUTION Make certain that the rubber seal is evenly seated on the duct opening. 5. Install the filter cover and secure with two (2) screws. 6. Fill out information on the small label supplied with the filter kit. 7. Attach small and large labels on the lower part of the center pillar. 4-12 Center pillar Caution label… -
Page 123
Audio Radio …………….Antenna . -
Page 124: Radio
Radio J Antenna B Installation and removal of antenna CAUTION When washing the vehicle, always remove the antenna before- hand to prevent it from being damaged. The antenna and the special wrench for mounting/dismounting the antenna is stored in the luggage floor storage tray at the front side. 1.
-
Page 125: Audio
3. Install the antenna to the antenna base while turning the antenna clockwise by hand. Loosen Tighten 4. Tighten the antenna by the dedicated wrench. 5. To remove the antenna, follow the installation sequence in reverse. Be careful not to lose the special tool. NOTE There may be a case that the antenna is already installed on the vehicle at the time of delivery.
-
Page 126: Am/Fm Stereo Radio With Cassette Player
AM/FM stereo radio with cassette player The radio will operate only when the ignition switch is in the “ACC” or “ON” positions. RADIO OPERATION Stereo Waveband indicator indicator Press station Frequency number SCAN button Tone and balance Power switch and control button volume control J Power switch and volume control (ON/VOL)
-
Page 127
The volume control has total of 34 volume levels (V: 0 for minimum, V: 33 for maximum). J Tone and balance control (TONE/BAL) The volume control knob normally function as volume control. This knob become the controls for Bass, Treble, Fader or Balance when you select the relevant tone and balance control mode. -
Page 128
The bass control has total of 13 volume levels (B: –6 for minimum, 0 for middle, B: +6 for maximum). Choose desired bass volume level by turning the volume control knob. The control function returns to vol- ume control mode after about 5 seconds. B Treble control Treble volume control indication Select the Treble control mode by pressing the “T/B”… -
Page 129
Select the Fader control mode by pressing the “T/B” button. In the fader control mode, the display shows the indication as shown. The fader control has total of 25 settings (F: 12 for front maximum and rear minimum, 0 for neutral, R: 12 for front minimum and rear maxi- mum). -
Page 130: Automatic Tuning (Scn)
Each time the button is pressed, the frequency changes 10 KHz in the AM mode and 0.2 MHz in the FM mode. Constant pressure on the button causes a continuous change in the fre- quency. J Automatic tuning (SCN) Press the “SCN” button to change the radio to the SCAN mode. In this mode, the radio scans through the radio band until a station is found.
-
Page 131: Cassette Player Operation
CASSETTE PLAYER OPERATION Tape travel indicator Cassette player operation indicator Tape program sensor button NOTE D Only use good quality cassettes (cassettes longer than C-90 are not recommended). D Put cassettes back in their boxes immediately after use to protect them from dust and dirt and to prevent the tape from unwinding.
-
Page 132
J Program switching buttons (PROG) When the program switching buttons (“ pressed at the same time during playback, the tape travel indicators will switch and the player will begin playing back the opposite side of the tape. The same mechanism is automatically activated when the end of the tape is reached. -
Page 133: Clock Function
D When the blanks between selections are shorter than five seconds. D When there are no blanks between selections (live concerts, etc.). J Dolby NR button (BNR) Press “BNR” button when playing tapes recorded using the Dolby NR system*. The “BNR” indicator will light up and high-frequency noise on the tape will be reduced for clearer sound reproduction.
-
Page 134: Setting The Time
If this occurs, it is necessary to reset the time. Installation of accessories Always consult your SUBARU dealer before installing a citizen band ra- dio or other transmitting device in your vehicle. Such devices may cause the electronic control system to malfunction if they are incorrectly installed or if they are not suited for the vehicle.
-
Page 135
Interior equipment Sun visors …………..Vanity mirror (if equipped) Storage compartment Glove compartment… -
Page 136: Sun Visors
Sun visors To block out glare, swing down the visors. To use the sun visor at a side window, swing it down and move it sideways. J Vanity mirror (if equipped) To use the vanity mirror, swing down the visor and open the cover. HS0088 HS0089…
-
Page 137: Interior Equipment
Storage compartment CAUTION D Always keep the storage compartment closed while driving to reduce the risk of injury in the event of sudden stops or an acci- dent. D Do not store spray cans, containers with flammable or corro- sive liquids or any other dangerous items in the storage compart- ment.
-
Page 138: Center Console
J Center console HS0091 To open the lid, pull up the lock release. J Sunglasses storage compartment Push HS0092 HS0093 The sunglasses storage compartment can be used to store a pair of sun- glasses or small items such as a garage door opener. To open the compartment, push the button and it will automatically open.
-
Page 139: Dashboard Storage Compartment
J Dashboard storage compartment Push To open the dashboard compartment, push the button and pull up on the lid. Be sure to close the compartment fully before driving. J Door storage compartment Push Each door is equipped with a door storage compartment. To open the compartment, push the button and pull up on the lid.
-
Page 140: Coin Tray
J Coin tray To open the coin tray, pull the upper edge of the lid. Cup holder CAUTION D When not in use, always keep the holder stored while driving to reduce the risk of injury in the event of a sudden stop or an accident.
-
Page 141: Driver’s Cup Holder
J Driver’s cup holder To use the cup holder, pull it out to the first click stop. If you want to use a larger cup, pull it out farther until it stops. J Front passenger’s cup holder The front passenger’s cup holder is built in the lid of the center console. To use the cup holder, open the lid by sliding it forward and unfold the arm.
-
Page 142: Setting The Clock
J Rear passenger’s cup holder HS0101 HS0102 The rear passenger’s cup holder is located at the back of the center con- sole. To use the cup holder, open the lid by pulling its upper edge. Clock HS0103 The clock displays the time when the ignition switch is in the “ACC” or “ON”…
-
Page 143: Accessory Power Socket
Accessory power socket CAUTION D Do not attempt to use a cigarette lighter in the accessory socket. D Do not place any foreign objects, especially metal ones such as coins or aluminum foil, into the accessory socket. That could cause a short circuit. Always put the cap on the accessory socket when it is not in use.
-
Page 144
J Front accessory socket (if equipped) The front accessory socket is located on the lower part of the instrument panel. J Rear accessory socket The rear accessory socket is located on the right side of the luggage compartment. 6-10 HS0104 HS0105… -
Page 145: Cigarette Lighter (If Equipped)
D Do not hold the lighter pushed in, because it will overheat. D If the lighter is replaced, it is best to use only a genuine SUBARU part. The use of parts that are not SUBARU-made may result in a short circuit and overheating.
-
Page 146: Ashtray (If Equipped)
Ashtray (if equipped) CAUTION Do not use ashtrays as waste receptacles or leave a lighted ciga- rette in an ashtray. This could cause a fire. Fully close the ashtray after using it to help reduce residual smoke. J Front ashtray To open the ashtray, pull the lid out.
-
Page 147: Coat Hook
Coat hook CAUTION Never hang anything on the coat hook that might obstruct the driver’s view. And do not hang items on the coat hook that weight 1 kg (2.2 lb) or more. The coat hook is attached to the rear passenger’s hand grip behind the driver.
-
Page 148: Spotlight
The interior light switch has three positions: ON: The light stays on continuously. Middle position: The light comes on when any door is opened and stays on for a few seconds after all doors are closed. OFF: The light stays off. When leaving your vehicle, make sure the light is turned off to avoid bat- tery discharge.
-
Page 149: Luggage Area Light
Luggage area light The luggage area light switch has three positions: ON: The light stays on continuously. DOOR: The light comes on only when the rear gate is opened. OFF: The light stays off. When leaving your vehicle, make sure the light is turned off to avoid bat- tery discharge.
-
Page 150: Using The Cover
J Using the cover HS0133 To extend the cover, pull the end of the cover out of the cover housing, then insert its hooks into the catches as shown. To rewind it, unhook it from the catches and it will rewind automatically. You should hold on to the cover and guide it back into the cover housing while it is rewinding.
-
Page 151: To Install The Cover
J To install the cover 1. Insert the both ends of the cover housing into the retainers. 2. Attach the fastening straps to the pillows. The cover can be installed in either of two positions. Cargo anchorage eyelets CAUTION The cargo anchorage eyelets are designed only for securing light luggage.
-
Page 152: Luggage Floor Storage Tray
Luggage floor storage tray CAUTION D Always keep the lid of the storage tray closed while driving to reduce the risk of injury in the event of sudden stops or an acci- dent. D Do not store spray cans, containers with flammable or corro- sive liquids or any other dangerous items in the storage tray.
-
Page 153
J Front, left and right side storage tray To open the lid, raise the cargo anchorage eyelets and pull the tab up. The jack and jack handle are stored in the left side storage tray. HS0117 HS0119 Interior equipment HS0118 –… -
Page 154: Maintenance Tools
J Center storage tray To open the lid, pull the handle up. To keep the lid open, hang the hook provided on the backside of the lid on the rear edge of the roof. The spare tire is stored under the storage tray. Maintenance tools Your vehicle is equipped with the following maintenance tools: Screwdriver…
-
Page 155
Starting and operating New vehicle break-in driving The first 1,000 miles (1,600 km) Fuel requirements …………Fuel Octane Rating . -
Page 156
Cruise control (if equipped) To set cruise control To temporarily cancel the cruise control To turn off the cruise control To change the cruising speed Parking your vehicle Parking brake …………Parking tips . -
Page 157: Starting And Operating
New vehicle break-in driving J The first 1,000 miles (1,600 km) The performance and long life of your vehicle are dependent on how you handle and care for your vehicle while it is new. Follow these instructions during the first 1,000 miles (1,600 km): D Do not race the engine.
-
Page 158: Unleaded Gasoline
Many gasolines are now blended with materials called oxygenates. Use of these fuels can also help keep the air cleaner. SUBARU approves the use of oxygenated blend fuels, such as MTBE (Methyl Tertiary Butyl Ether) or ethanol (ethyl or grain alcohol).
-
Page 159: State Emission Testing (U.s. Only)
SUBARU dealer. D Fuel system damage or driveability problems which result from the use of improper fuel are not covered under the SUBARU Limited War- ranty. State emission testing (U.S. only)
-
Page 160
2,500 RPM. The “enhanced” I/M test also includes a pressure check to identify evaporative emissions leaks in the fuel system. The U.S. EPA has EXEMPTED SUBARU Full-Time All-Wheel Drive (AWD) vehicles from the following performance warranty short tests:… -
Page 161: Exhaust Gas (Engine Exhaust Gas)
Engine exhaust gas (Carbon monoxide) WARNING D Never inhale engine exhaust gas. Engine exhaust gas contains carbon monoxide, a colorless and odorless gas which is danger- ous, or even lethal, if inhaled. D Always properly maintain the engine exhaust system to pre- vent engine exhaust gas from entering the vehicle.
-
Page 162: Catalytic Converter
D Keep your engine tuned-up. If you feel the engine running rough (mis- firing, backfiring or incomplete combustion), have your vehicle checked and repaired by an authorized SUBARU dealer. D Do not apply undercoating or rust prevention treatment to the heat…
-
Page 163: Fuel Economy Hints
Starting and operating Fuel economy hints The following suggestions will help to save your fuel. D Select the proper gear position for the speed and road conditions. D Avoid sudden acceleration or deceleration. Always accelerate gently until you reach the desired speed. Then try to maintain that speed for as long as possible.
-
Page 164: Lock
NOTE Engine oil, engine coolant, brake fluid, washer fluid and other fluid levels should be checked daily, weekly or at fuel stops. Driving in foreign countries When planning to use your vehicle in another country: D Confirm the availability of the correct fuel. (Refer to Fuel Requirement section in this chapter.) D Comply with all regulations and requirements of each country.
-
Page 165
J LOCK The key can only be inserted or removed in this position. The ignition switch will lock the steering wheel when you remove the key. If turning the key is difficult, turn the steering wheel slightly to the right and left as you turn the key. -
Page 166: Start
B Manual transmission vehicles: The key can be turned from “ACC” to “LOCK” only when the key is pushed in while turning it. J ACC In this position the electrical accessories (radio, accessory power sock- et, etc.) can be used. J ON This is the normal operating position after the engine is started.
-
Page 167: Key Interlock Release (At Vehicles Only)
3. Remove the under cover of the steering column. 4. Turn the ignition key while pressing the key interlock release lever. Take your vehicle to the nearest SUBARU dealer immediately to have the key interlock system repaired. Starting the engine…
-
Page 168: Manual Transmission Vehicles
J Manual transmission vehicles 1. Apply the parking brake. 2. Turn off unnecessary lights and accessories. 3. Press the clutch pedal to the floor and shift the shift lever into neutral. Hold the clutch pedal to the floor while starting the engine. The starter motor will only operate when the clutch pedal is pressed fully to the floor.
-
Page 169: During Cold Weather Below –4 F (–20 C)
Starting and operating 5. Turn the ignition switch to the “START” position without depressing the accelerator pedal. Release the key immediately after the engine has started. If the engine does not start within ten seconds, wait a while and then turn the ignition switch to the “START”…
-
Page 170: Stopping The Engine
Stopping the engine WARNING Do not stop the engine when the vehicle is moving. This will cause loss of power to the power steering and the brake booster, making steering and braking more difficult. It could also result in accidental activation of the “LOCK” position on the ignition switch, causing the steering wheel to lock.
-
Page 171: Shifting Speed For Fuel Economy
shift into reverse gear. To change gears, fully depress the clutch pedal, move the shift lever, and gradually let the pedal up. J Shifting speed for fuel economy The best compromise between fuel economy and vehicle performance during normal driving is ensured by shifting up at the speeds listed in the following table.
-
Page 172: Automatic Transmission
(over use) the brakes while descending a hill, they may overheat and not work properly. Automatic transmission WARNING Do not shift from the “P” or “N” position into the “D”, “3”, “2”, “1” or “R” position while depressing the accelerator pedal. This may cause the vehicle to jump forward or backward.
-
Page 173: Selector Lever
J Selector lever Release button The selector lever has seven positions. The release button must be pushed to select the “P”, “R”, or “2” posi- tions. B P (Park) This position is for parking the vehicle and starting the engine. In this position, the transmission is mechanically locked to prevent the vehicle from rolling freely.
-
Page 174
B R (Reverse) This position is for backing the vehicle. To shift from the “N” to “R” position, first stop the vehicle completely then move the lever to the “R” position while pushing the release but- ton. B N (Neutral) This position is for restarting a stalled engine. -
Page 175: Maximum Speeds
B 2 (Second) To shift from the “3” to “2” position, push the release button. This position is for using engine braking when going down a hill or for climbing a steep grade. In this position, the transmission holds in the 2nd gear. Use this position when starting off from a standstill on slippery road surfaces such as mud or snow.
-
Page 176
“P” to the “N” position. 8. Remove the shaft from the hole. Depress the brake pedal and start the engine. Take your vehicle to the nearest SUBARU dealer immediately to have the system repaired. 7-22… -
Page 177: Steering
Steering J Tilt steering wheel WARNING Do not adjust the steering tilt position while driving. This may cause loss of vehicle control and result in personal injury. B Tilt adjustment 1. Adjust the seat position. Refer to Front Seat section (chapter 2). 2.
-
Page 178: Cruise Control (If Equipped)
The power steering system operates only when the engine is running. If you lose power steering assist because the engine stops or the system fails to function, you can steer but it will take much more effort. Cruise control (if equipped) WARNING Do not use the cruise control under any of the following condi- tions.
-
Page 179: To Temporarily Cancel The Cruise Control
release it. Then release the accelerator pedal. The vehicle will maintain the desired speed. Vehicle speed can be temporarily increased while driving with the cruise control activated. Simply depress the accelerator pedal to accelerate the vehicle. When the accelerator pedal is released, the vehicle will return to and maintain the previous cruising speed.
-
Page 180: Parking Your Vehicle
1. Depress the accelerator pedal to accelerate the vehicle to the de- sired speed. 2. Push the control lever downward in the “SET, COAST” direction once. Now the desired speed is set and the vehicle will keep running at that speed without depressing the accelerator pedal. B To decrease the speed 1.
-
Page 181: Parking Tips
Release button To release the parking brake, pull the lever up slightly, press the release button, then lower the lever while keeping the button pressed. When the parking brake is set while the engine is running, the parking brake warning light comes on. After starting the vehicle, be sure that the warning light has gone out before the vehicle is driven.
-
Page 182: Tips For Using The Brakes
When parking your vehicle, always set the parking brake firmly and put the shift lever in the “1” (1st) for an upgrade or “R” (Reverse) for a down- grade for manual transmission vehicles, or in the “P” (Park) position for automatic transmission vehicles.
-
Page 183: Brake System
Starting and operating B When the brakes get wet When driving in rain, in puddle or after washing the vehicle, the brakes may get wet. As a result, brake stopping distance will be long- er. To dry the brakes, drive the vehicle at a safe speed while lightly depressing the brake pedal to heat up the brakes.
-
Page 184: Abs (Anti-Lock Brake System)
The disc brake pad wear warning indicators on the disc brakes give a warning noise when the brake pads are worn. If a squeaking or scraping noise is heard from the disc brakes while braking, immediately have your vehicle checked by your SUBARU deal- J ABS (Anti-Lock Brake System) (if equipped) WARNING Always use the utmost care in driving –…
-
Page 185
The ABS system prevents the lock-up of wheels which may occur during sudden braking or braking on slippery road surfaces. This helps prevent the loss of steering control and directional stability caused by wheel lock-up. When the ABS system is operating, you may hear a chattering noise or feel a slight vibration in the brake pedal. -
Page 186: Driving Tips For Awd Vehicles
If this occurs, have the ABS system repaired at the first available opportuni- ty by your SUBARU dealer. NOTE If the warning light behavior is as shown below, the ABS system may be considered normal.
-
Page 187
By shifting power between the front and rear wheels, SUBARU AWD can also pro- vide added traction during acceleration and added engine braking force during deceleration. -
Page 188: Off Road Driving
But please keep in mind that an AWD Subaru is a passenger car and is neither a conventional off-road vehicle nor an all-terrain vehicle. If you do take your Subaru off-road, cer-…
-
Page 189
Starting and operating D Avoid sharp turning maneuvers, especially at higher speeds. D Do not grip the inside or spokes of the steering wheel. A bad bump could jerk the wheel and injure your hands. Instead drive with your fin- gers and thumbs on the outside of the rim. -
Page 190: Winter Driving
Warranty and Maintenance Booklet. Remember that damage done to your Subaru while operating if off-road and not using common sense precautions such as those listed above is not eligible for warranty coverage.
-
Page 191
Keep the door locks from freezing by squirting them with deicer or glyc- erin. Forcing a frozen door open may damage or separate the rubber weather strips around the door. If the door is frozen, use hot water to melt the ice, and afterwards thoroughly wipe the water away. -
Page 192: Driving On Snowy And Icy Roads
When an antifreeze additive is used, its effect lasts longer if the tank is refilled whenever the fuel level reaches half empty. If your SUBARU is not going to be used for an extended period, it is best to have the fuel tank filled to capacity.
-
Page 193: Snow Tires
formance on snowy and icy roads. Refer to ABS (Anti-Lock Brake Sys- tem) in this chapter for information on braking on slippery surfaces in ABS equipped vehicle. B Wiper operation when snowing Before driving in cold weather, make sure the wiper blades are not frozen to the windshield or rear window.
-
Page 194: Tire Chains
Your vehicle is equipped with “all season tires” which are designed to provide an adequate measure of traction, handling and braking perfor- mance in year-round driving. In winter, it may be possible to enhance performance through use of tires designed specifically for winter driving conditions.
-
Page 195: Corrosion Protection
Refer to the Automatic Transmission section in this chapter for informa- tion on holding the transmission in 2nd position. J Corrosion protection Refer to the Corrosion Protection section (chapter 9). Loading your vehicle WARNING D Never allow passengers to ride on the folded rear seatback or in the cargo area.
-
Page 196: Vehicle Capacity Weight
J Vehicle capacity weight Tire information label HS0250 HS0251 The load capacity of your vehicle is determined by weight, not by avail- able cargo space. The maximum load you can carry in your vehicle is shown as the Vehicle Capacity Weight on the tire information label at- tached to the driver’s side door jamb.
-
Page 197: Gvwr And Gawr
Starting and operating J GVWR and GAWR (Gross Vehicle Weight Rating and Gross Axle Weight Rating) Certification plate HS0143 The certification plate attached to the driver’s side door jamb shows GVWR (Gross Vehicle Weight Rating) and GAWR (Gross Axle Weight Rating).
-
Page 198: Trailer Towing
If you do decide to tow a trailer, your safety and satisfaction depend upon proper use of correct equipment and cautious operation of your ve- hicle. Seek the advice of your SUBARU dealer to assist you in purchas- ing a hitch and other necessary towing equipment appropriate for your vehicle.
-
Page 199: Maximum Load Limits
J Maximum load limits WARNING Never exceed the maximum load limits explained below. Exceed- ing the maximum load limits could cause personal injury and/or vehicle damage. CAUTION D Adequate size trailer brakes are required when the trailer and its cargo exceed 1,000 lbs (453 kg) total weight. D Before towing a trailer, check the trailer total weight, GVW, GAWs and tongue load.
-
Page 200
Total trailer weight B Gross Vehicle Weight (GVW) and Gross Vehicle Weight Rating (GVWR) The Gross Vehicle Weight (GVW) must never exceed the Gross Vehicle Weight Rating (GVWR). Gross Vehicle Weight (GVW) is the combined total of weight of the vehicle, driver, passengers, luggage, trailer hitch, trailer tongue load and any other optional equipment installed on your vehicle. -
Page 201
B Gross Axle Weight (GAW) and Gross Axle Weight Rating (GAWR) The total weight applied to each axle (GAW) must never exceed the Gross Axle Weight Rating (GAWR). The front and rear GAWs can be adjusted by relocating passengers and luggage inside the vehicle. The front and rear GAWR are also shown on the certification plate. -
Page 202
The tongue load can be weighed with a bathroom scale as shown in the illustration below. When weighing the tongue load, be sure to posi- tion the towing coupler at the height at which it would be during actual towing, using a jack as shown. Tongue load Bathroom scale Jack… -
Page 203: Trailer Hitches
Choose a proper hitch for your vehicle and trailer. The use of genuine SUBARU trailer hitch is recommended. A genuine SUBARU hitches are available from your SUBARU dealer. If use of a non-genuine hitch is unavoidable, be sure the hitch is suited to your vehicle and trailer.
-
Page 204
Check that your trailer’s brakes conform with Federal, state/province and/or other applicable regulations. Your SUBARU’s brake system is not designed to be tapped into the trailer’s hydraulic brake system. Please ask your SUB- ARU dealer and professional trailer supplier for more information about the trailer’s brake system. -
Page 205
To ensure the trailer lights are connected properly, please consult your SUBARU dealer. Check for proper operation of the turn signals and the brake lights each time you hitch up. -
Page 206: Trailer Towing Tips
B Tires Make sure that all the tires on your vehicle are inflated to the pressure under towing conditions as shown in following table. These tire infla- tions are also shown on the tire placard located on the left center pil- lar of your vehicle.
-
Page 207
signal lever is operated. – the safety chains are connected properly. – all cargo in the trailer is secured safety in position. – the side mirrors provide a good rearward field of view without a significant blind spot. D Sufficient time should be taken to learn the “feel” of the vehicle/ trailer combination before starting out on a trip. -
Page 208
D If the ABS warning light illuminates while the vehicle is in motion, stop towing the trailer and have repairs carried out immediately by the nearest SUBARU dealer. B Driving on grades D Before going down a steep hill, slow down and shift into low gear in order to utilize the engine braking effect and prevent overheating of your vehicle’s brakes. -
Page 209
Starting and operating B Parking on a grade Always block the wheels under both vehicle and trailer when parking. Apply the parking brake firmly. You should not park on a hill or slope. But if parking on a hill or slope cannot be avoided, you should take the following steps: 1. -
Page 210
In case of emergency Hazard warning flasher Engine overheating …………If steam is coming from the engine compartment If no steam is coming from the engine compartment Jump starting… -
Page 211: Engine Overheating
Hazard warning flasher Day or night, if your vehicle becomes a traffic hazard, use the hazard warning flasher. Avoid stopping on the road. It is best to safely pull off the road if a problem occurs. The hazard warning flasher can be acti- vated regardless of the ignition switch position.
-
Page 212: In Case Of Emergency
J If no steam is coming from the engine compartment 1. Keep the engine running at idling speed. 2. Open the hood to ventilate the engine compartment. Confirm that the cooling fan is turning. If the fan is not turning, immedi- ately turn the engine off and contact your authorized dealer for repair.
-
Page 213
D The gas generated by a battery explodes if a flame or spark is brought near it. Do not smoke or light a match while jump start- ing. D Never attempt jump starting if the discharged battery is frozen. It could cause the battery to burst or explode. D Whenever working on or around a battery, always wear suit- able eye protectors, and remove metal objects such as rings, bands or other metal jewelry. -
Page 214
Engine lifting bracket Connect one jumper cable to the positive (+) terminal on the dis- charged battery. Connect the other end of the jumper cable to the positive (+) termi- nal of the booster battery. Connect one end of the other cable to the negative (–) terminal of the booster battery. -
Page 215: Flat Tires
Flat tires WARNING D Do not jack up the vehicle on an incline or a loose road sur- face. The jack can come out of the jacking point or sink into the ground and this can result in a severe accident. D Use only the jack provided with your vehicle.
-
Page 216
4. Put wheel blocks at the front and rear of the tire diagonally opposite the flat tire. Jacking position Wheel blocks 5. Take out the spare tire, jack, and wheel nut wrench. See Tire Chang- ing Tools in this chapter. 6. -
Page 217
8. Insert the jack handle into the jackscrew, and turn the handle clock- wise until the tire clears the ground. Do not raise the vehicle higher than necessary. 9. Remove the wheel nuts and the flat tire. 10. Before putting the spare tire on, clean the mounting surface of the wheel and hub with a cloth. -
Page 218
In case of emergency OM-H0172 HG0104 11. Put on the spare tire. Replace the wheel nuts. Tighten them by hand. 12. Turn the jack handle counterclockwise to lower the vehicle. 13. Use the wheel nut wrench to securely tighten the wheel nuts to the specified torque, following the tightening order in the illustration. -
Page 219: Tire Changing Tools
Attaching bolt Flat tire Also store the jack and wheel nut wrench in their storage locations. See Tire Changing Tools in this section. J Tire changing tools Jack Jack handle 8-10 Spacer HS0153 Spare tire HS0004…
-
Page 220: Spare Tire
In case of emergency B Spare tire HS0159 The spare tire is stored under the floor of the luggage compartment. To remove the spare tire, first open the spare tire cover and remove the storage tray, turn the attaching bolt counterclockwise, then take the spare tire out.
-
Page 221: Towing
Towing If towing is necessary, it is best done by your SUBARU dealer or a com- mercial towing service. Observe the following procedures for safety. J Transporting your vehicle using a flat-bed truck This is the best way to transport your vehicle. Use the following proce- dures to ensure safe transportation.
-
Page 222: Towing With All Wheels On The Ground
CAUTION When transmission failure occurs, transport your vehicle on a flat-bed truck. 1. Check the transmission and differential oil levels and add oil to bring it to the upper level if necessary. 2. Release the parking brake and put the transmission in neutral. 3.
-
Page 223
We do not recommend this method of towing. Use this method only when towing service by a SUBARU dealer or a commercial towing service is not available. 1. Check the transmission and differential oil levels and add oil to bring it to the upper level if necessary. -
Page 224: Towing Eyelet
J Towing eyelet CAUTION D Never use the tie-down eyelet closest to the muffler under the vehicle for towing purposes. D Do not apply excessive lateral load to the towing eyelets. Towing eyelet Never use tie-down eyelet for towing purpose. The towing eyelets should be used only in an emergency (e.g., to free a stuck vehicle from mud, sand or snow).
-
Page 225: Appearance Care
Appearance care Exterior care …………..Washing .
-
Page 226: Exterior Care
Exterior care J Washing CAUTION D When washing the vehicle, the brakes may get wet. As a result, the brake stopping distance will be longer. To dry the brakes, drive the vehicle at a safe speed while lightly pressing the brake pedal to heat up the brakes.
-
Page 227: Waxing And Polishing
Frequent polishing with a compound or an incorrect polishing technique will result in removing the paint layer and exposing the undercoat. When in doubt, it is always best to contact your SUBARU dealer or an auto paint specialist. Appearance care – CONTINUED –…
-
Page 228: Corrosion Protection
Corrosion protection Your SUBARU has been designed and built to resist corrosion. Special materials and protective finishes have been used on most parts of the vehicle to help maintain fine appearance, strength, and reliable opera- tion. J Most common causes of corrosion The most common causes of corrosion are: 1.
-
Page 229: Cleaning The Interior
Appearance care treatment or should be replaced. Contact your SUBARU dealer to per- form this kind of maintenance and treatment if you need assistance. Repair chips and scratches in the paint as soon as you find them. Check the interior of the vehicle for water and dirt accumulation under the floor mats because that could cause corrosion.
-
Page 230: Synthetic Leather Upholstery
J Synthetic leather upholstery The synthetic leather material used on the SUBARU may be cleaned us- ing mild soap or detergent and water, after first vacuuming or brushing away loose dirt. Allow the soap to soak in for a few minutes and wipe off with a clean, damp cloth.
-
Page 231
Maintenance and service Maintenance precautions Before checking or servicing in the engine compartment When you do the checking or servicing in the engine compartment while the engine is running Engine compartment overview Engine, transmission, and differential gear oil leaks Engine oil . -
Page 232
Clutch fluid …………..Recommended clutch fluid Brake booster . -
Page 233: Maintenance And Service
Maintenance precautions When maintenance and service are required, it is recommended that all work be done by an authorized SUBARU dealer. If you perform maintenance and service by yourself, you should familiar- ize yourself with the information provided in this section on general main- tenance and service for your SUBARU.
-
Page 234: Before Checking Or Servicing In The Engine Compartment
D Because the fuel system is under pressure, replacement of the fuel filter should be performed only by your SUBARU dealer. D The SRS AIRBAG has no user-serviceable parts. Tampering with or disconnecting the system’s wiring could result in acci- dental inflation of the airbag or could make the system inopera- tive, which may result in serious injury.
-
Page 235: Engine Compartment Overview
Engine compartment overview Manual transmission oil level gauge (MT) (page 10-20) or Differential gear oil level gauge (AT) (page 10-23) Automatic transmission fluid level gauge (page 10-21) Clutch fluid reservoir (page 10-29) Brake fluid reservoir (page 10-28) Fuel filter Windshield washer tank (page 10-32) Fuse box (page 10-43) Maintenance and service…
-
Page 236: Engine, Transmission, And Differential Gear Oil Leaks
Mating area between the engine and transmission Around the rear differential case cover Each drain plug and filler plug If you find any leaks, contact your SUBARU dealer. Engine oil WARNING Never let engine oil contact your eyes because engine oil can be harmful to your eyes.
-
Page 237: Changing The Oil And Oil Filter
1. Park the vehicle on a level surface and stop the engine. 2. Pull out the dipstick, wipe it clean, and insert it again. 3. Be sure the dipstick is correctly inserted until it stops with the graphic symbol on its top appearing as shown in the illustration. 4.
-
Page 238
tremely cold whether. 1. Warm up the engine by letting the engine idle for about 10 minutes to ease draining the engine oil. 2. Park the vehicle on a level surface and stop the engine. 3. Remove the oil filler cap. Drain plug HS0174 4. -
Page 239
Drain plug Sealing washer 6. Remove the under cover. 7. Remove the oil filter with an oil filter wrench. 8. Before installing a new oil filter, apply a thin coat of engine oil to the seal. 9. Clean the rubber seal seating area of the lower crank case and install the oil filter by hand turning. -
Page 240: Recommended Grade And Viscosity
When adding oil, different brands may be used together as long as they are the same API classification and SAE viscosity as those recom- mended by SUBARU. Engine oil viscosity (thickness) affects fuel economy. Oils of lower vis- cosity provide better fuel economy. However, in hot weather, oil of higher viscosity is required to properly lubricate the engine.
-
Page 241: Recommended Grade And Viscosity Under Severe Driving Conditions
SAE viscosity number and applicable temperature J Recommended grade and viscosity under severe driving condi- tions If the vehicle is used in desert areas, in areas with very high tempera- tures, or used for heavy-duty applications such as a towing a trailer, use of oil with the following grade and viscosities is recommended.
-
Page 242: Engine Coolant
Check the fuse and replace it if nec- essary. If the fuse is not blown, have the cooling system checked by your SUBARU dealer. If frequent addition of coolant is necessary, there may be a leak in the engine cooling system.
-
Page 243
–33 F (–36 C). For adding, use genuine SUBARU coolant or an equivalent: a mixture of 50% soft water and 50% ethylene-glycol basis coolant. Use of improp- er coolants may result in corrosion in the cooling system. It is im- portant to maintain protection against freezing and corrosion, even if freezing temperatures are not expected. -
Page 244: Changing The Coolant
Rubber gaskets 3. After refilling the reserve tank and the radiator, reinstall the caps and check that the rubber gasket inside the radiator cap is in the proper position. J Changing the coolant WARNING D Never let engine coolant contact your eyes because engine coolant can be harmful to your eyes.
-
Page 245
protection against freezing and corrosion, even if freezing tem- peratures are not expected. Never mix different kinds of coolant. D Do not splash the engine coolant over painted parts. The alco- hol contained in the engine coolant may damage the paint sur- face. -
Page 246
5. Remove the air vent plug from the radiator. Fill up to here 6. Slowly pour the coolant and fill to the radiator filler neck and to the reserve tank’s “FULL” level mark. Do not pour the coolant too quickly, as this may lead to insufficient air bleeding and trapped air in the system. -
Page 247: Air Cleaner Element
Replace the air cleaner element according to the maintenance schedule in the warranty and maintenance booklet. Under extremely dusty condi- tions, replace it more frequently. It is recommended that you always use genuine SUBARU parts. Maintenance and service cleaner element…
-
Page 248: Spark Plugs
Follow the maintenance schedule in the Warranty and Maintenance booklet. Do not reuse the platinum-tipped spark plugs by cleaning or regapping. If re- placement is required, see your SUBARU dealer for servicing. J Recommended spark plugs PFR5B-11 (NGK), RC10PYP4A (Champion)
-
Page 249: Drive Belts
98 N (22 lb, 10 kg) midway between the pulleys by using a spring scale. Belt deflection should be the amount specified. If a belt is loose, cracked, or worn, contact your SUBARU dealer.
-
Page 250: Manual Transmission Oil
Manual transmission oil J Checking the oil level WARNING Never let transmission oil contact your eyes because transmis- sion oil can be harmful to your eyes. If transmission oil gets in your eyes, immediately flush them thoroughly with clean water. For safety, when performing this work, wearing eye protection is advisable.
-
Page 251: Automatic Transmission Fluid
SAE viscosity No. and Applicable Temperature Automatic transmission fluid WARNING Never let automatic transmission fluid contact your eyes because automatic transmission fluid can be harmful to your eyes. If auto- matic transmission fluid gets in your eyes, immediately flush them thoroughly with clean water. For safety, when performing this work, wearing eye protection is advisable.
-
Page 252: Checking The Fluid Level When The Fluid Is Cold
C) is normal. 2. Park the vehicle on a level surface and set the parking brake. 3. First shift the selector lever in each position. Then shift it in the “P” position, and run the engine at idling speed. Front of vehicle Dipstick Drain plug 4.
-
Page 253: Front Differential Gear Oil (Automatic Transmission)
Front differential gear oil (Automatic transmission) J Checking the oil level WARNING Never let gear oil contact your eyes because gear oil can be harmful to your eyes. If gear oil gets in your eyes, immediately flush them thoroughly with clean water. For safety, when perform- ing this work, wearing eye protection is advisable.
-
Page 254: Rear Differential Gear Oil (Awd Vehicles)
For safety, when perform- ing this work, wearing eye protection is advisable. CAUTION If the vehicle requires frequent refilling, there may be an oil leak. If you suspect a problem, have the vehicle checked at your SUBARU dealer. 10-24 OM-H0212…
-
Page 255: Recommended Grade And Viscosity
Maintenance and service Filler hole Oil level Filler hole Drain hole Drain hole HB0077 HB0078 Remove the plug from the filler hole and check the oil level. The oil level should be kept even with the bottom of the filler hole. If the oil level is below the bottom edge of the hole, add oil through the filler hole to raise the level.
-
Page 256: Power Steering Fluid
Power steering fluid WARNING Never let power steering fluid contact your eyes because power steering fluid can be harmful to your eyes. If power steering fluid gets in your eyes, immediately flush them thoroughly with clean water. For safety, when performing this work, wearing eye protec- tion is advisable.
-
Page 257: Checking The Fluid Level When The Fluid Is Cold
If the fluid level is extreme low, it may indicate possible leakage. Consult your SUBARU dealer for inspection. J Checking the fluid level when the fluid is cold When the fluid level has to be checked without warming up the power steering system (approximately 70 F [21 C]), read the fluid level on the “COLD”…
-
Page 258: Brake Fluid
Brake fluid J Checking the fluid level WARNING D Never let brake fluid contanct your eyes because brake fluid can be harmful to your eyes. If brake fluid gets in your eyes, im- mediately flush them thoroughly with clean water. For safety, when performing this work, wearing eye protection is advisable.
-
Page 259: Recommended Brake Fluid
D If the vehicle requires frequent refilling, there may be a leak. If you suspect a problem, have the vehicle checked at your SUBARU dealer. D Never use different brands of clutch fluid together. D When clutch fluid is added, be careful not to allow any dirt into the tank.
-
Page 260: Recommended Clutch Fluid
J Checking brake booster operation If the brake booster does not operate as described below, have it checked by your SUBARU dealer. 1. With the engine off, depress the brake pedal several times, applying the same pedal force each time. The distance the pedal travels should not vary.
-
Page 261: Battery
Battery WARNING D Before beginning work on or near any battery, be sure to extin- guish all cigarettes, matches, and lighters. Never expose a bat- tery to an open flame or electric sparks. Batteries give off a gas which is highly flammable and explosive. D For safety, in case an explosion does occur, wear eye protec- tion or shield your eyes when working near any battery.
-
Page 262: Checking The Fluid Level
In areas where water freezes in winter, use an anti-freeze type windshield washer fluid. SUBARU Windshield Washer Fluid contains 58.5% methyl alcohol and 41.5% surfactant, by volume. Its freezing temperature varies according to how much it is diluted, as indicated below.
-
Page 263: Replacement Of Windshield Wiper Blades
Washer Fluid Concentration 100% Replacement of windshield wiper blades Grease, wax, insects, or other material on the windshield or the wiper blade results in jerky wiper operation and streaking on the glass. If you cannot remove the streaks after operating the windshield washer or if the wiper operation is jerky, clean the outer surface of the windshield (or rear window) and the wiper blades using a sponge or soft cloth with a neutral detergent or mild-abrasive cleaner.
-
Page 264
1. Raise the wiper arm off the windshield. 2. Remove the wiper blade assembly by holding its pivot area and push- ing it in the direction shown by the arrow while depressing the wiper blade stopper. Stopper 3. Grasp the locked end of the blade rubber assembly and pull it firmly until the stoppers on the rubber are free of the metal support. -
Page 265
Maintenance and service Metal spines HS0192 5. Align the claws of the metal support with the grooves in the rubber and slide the blade rubber assembly into the metal support until it locks. Be sure to position the claws at the end of the metal support between the stoppers on the rubber as shown. -
Page 266: Brake Pedal
10 N (2 lb, 1 kg). If the free play is not within proper specification, contact your SUBARU dealer. J Checking the brake pedal reserve distance More than 2.56 in…
-
Page 267: Clutch Pedal (Manual Transmission)
(4.0 — 13.0 mm) Lightly press the clutch pedal down with your finger until you feel resis- tance, and check the free play. If the free play is not within proper specification, contact your SUBARU dealer. Maintenance and service OM-H0224 –…
-
Page 268: Replacement Of Brake Pad And Lining
If you hear this scraping noise each time you apply the brake pedal, have the brake pads serviced by your SUBARU dealer as soon as pos- sible. CAUTION…
-
Page 269: Parking Brake Stroke
(about 196 N, 44 lb, 20 kg). If the parking brake lever stroke is not within the specified range, have the brake system checked and adjusted at your SUBARU dealer. Maintenance and service –…
-
Page 270: Tires And Wheels
7 to 8 notches Tires and wheels J Inspection and rotation WARNING D When replacing a tire, make sure you use only the same size, construction, brand, and load range as the original tires listed on the tire placard. Using other sizes or construction may result in severe mechanical damage to the drivetrain of your vehicle and may affect ride, handling, braking, speedometer/odometer cal- ibration, and clearance between the body and tires.
-
Page 271
specifications. Check the tire pressure when the tires are cold. Cold means that the vehicle has been parked for three hours or has been driven less than 1 mile (1.6 km). The recommended tire pressure and sizes are provided on the tire placard, which is located under the door latch on the driver’s side. -
Page 272: Aluminum Wheels (If Equipped)
A tire should be replaced when the tread wear indicator appears as a solid band across the tread. The indicators appear when the remain- ing tread has been worn to 0.063 in (1.6 mm) or less. NOTE When any of the wheels is removed and replaced for tire rotation or to change a flat tire, always check the tightness of the wheel nuts after driv- ing approximately 600 miles (1,000 km).
-
Page 273: Fuses
Maintenance and service be sure to replace them with genuine SUBARU parts designed for alumi- num wheels. Fuses HS0202 HS0203 The fuses are designed to melt during an overload to prevent damage to the wiring harness and electrical equipment. The fuses are located in two fuse boxes.
-
Page 274: Replacing A Fuse
J Replacing a fuse CAUTION Never replace a fuse with one having a higher rating or with mate- rial other than a fuse because serious damage or a fire could re- sult. B Fuse box (behind the coin tray) 1. Turn the ignition switch to the “LOCK” position and turn off all elec- trical accessories.
-
Page 275
6. If the same fuse blows again, this indicates that its system has a problem. Contact your SUBARU dealer for repairs. B Main fuse box (in the engine compartment) 1. Turn the ignition switch to the “LOCK” position and turn off all elec- trical accessories. -
Page 276: Main Fuse And Fusible Link
SUBARU dealer. Installation of accessories Always consult your SUBARU dealer before installing fog lights or any other electrical equipment in your vehicle. Such accessories may cause the electronic system to malfunction if they are incorrectly installed or if they are not suited for the vehicle.
-
Page 277: To Check The Headlight Aim
the cargo area of the vehicle. 3. Check the tires for correct inflation pressure. 4. Make certain that the vehicle’s gas tank is full and that someone is seated in the driver’s seat. 5. Bounce the vehicle several times to normalize the suspension. J To check the headlight aim To check the headlight aim, check the vertical and horizontal gauges on the back of head lights.
-
Page 278
If the beam angle gauge deviates from the acceptable range, take the vehicle to your SUBARU dealer for adjustment of the headlight aim. 10-48 Indicator… -
Page 279: Replacing Bulbs
Replacing bulbs Spot light Room light Front turn signal, parking light and front side marker light Fog light Headlight High mount stop light Brake/tail light Rear turn signal light Backup light License plate light Maintenance and service Wattate (12V-8W) (12V-8W) (12V-27/8W Amber) (12V-51W) (12V-60/55W)
-
Page 280
J Headlight CAUTION Halogen headlight bulbs become very hot while in use. If you touch the bulb surface with bare hands or greasy gloves, finger prints or grease on the bulb surface develop into hot spots, caus- ing the bulb to break. If there are finger prints or grease on the bulb surface, wipe them away with a soft cloth moistened with al- cohol. -
Page 281
J Fog light (if equipped) CAUTION Halogen light bulbs become very hot while in use. If you touch the bulb surface with bare hands or greasy gloves, finger prints or grease on the bulb surface develop into hot spots, causing the bulb to break. -
Page 282: Front Turn Signal, Parking Light And Front Side Marker Light
B Bulb replacement 1. Remove the fog light protector. 2. Remove the fog light assembly by removing the two screws. 3. Disconnect the connector. 4. Remove the fog light bulb by turning it counterclockwise. 5. Replace the bulb with a new one. Then reconnect the connectors and reinstall the removed parts in the reverse order of removal.
-
Page 283: Rear Combination Lights
Maintenance and service 3. Remove the bulb holder from the front turn signal light assembly by turning it counterclockwise. 4. Pull the bulb out of the socket. Install a new bulb. 5. Set the bulb holder into the front turn signal light assembly and turn it clockwise until it locks.
-
Page 284: License Plate Light
J License plate light HS0220 1. Remove the mounting screws using a phillips screwdriver. 2. Remove the cover and lens. 3. Pull the bulb out of the socket. Install a new bulb. 4. Reinstall the lens and cover. 5. Tighten the mounting screws. 10-54…
-
Page 285: Interior Light, Spot Light And Luggage Compartment Light
Maintenance and service J Interior light, spot light and luggage compartment light HS0221 HS0222 HS0223 1. Remove the lens by prying the edge of the lens with a regular screw- driver. 2. Pull the bulb out of the socket. Install a new bulb. 3.
-
Page 286: High Mount Stop Light
3. Pull the bulb out of the socket. Install a new bulb. 4. Reinstall the cover. 5. Tighten the mounting screws then reinstall the covers. NOTE Other bulbs may be difficult for owner to replace. Have your SUBARU dealer replace these bulbs if necessary. 10-56…
-
Page 287: Specifications
Specifications Specifications …………. . Dimensions .
-
Page 288: Specifications
Specifications These specifications are subject to change without notice. Dimensions Overall length Overall width Overall height Ground clearance Front tread Rear tread Wheelbase Engine Engine model Engine type Engine displacement Bore Stroke Compression ratio Firing order Electrical system Battery Type Reserve capacity Cold cranking ampere Alternator…
-
Page 289: Tires
AT differential gear oil AWD rear differential gear oil Power steering fluid Engine coolant Tires Type Size Pressure Front (light load) (full load) Rear (light load) (full load) Trailer towing Front Rear Wheel size Wheel alignment Front Rear Camber Front Rear Specifications 1.3 US qt (1.2 liter, 1.1 Imp qt)
-
Page 290: Fog Light
Fuses and circuits J Fuse panel located behind the coin tray Fuse panel Fuse rating 11-4 Circuit D Heater fan D Heater fan D Power door lock D Front accessory power socket D Cigarette lighter D Remote controlled rear view mirrors D Tail light D Parking light D SRS AIRBAG…
-
Page 291
Fuse panel Fuse rating Empty Empty Empty Circuit D Engine ignition system D SRS AIRBAG D Illumination brightness control D Windshield wiper and washer D Rear window wiper and washer D Brake light D Air conditioner D Backup light D Cruise control D ABS control D Rear accessory power socket D Seat heater… -
Page 292: Fuse Panel Located In The Engine Compartment
J Fuse panel located in the engine compartment Fusible link Fuse panel Fuse rating 11-6 Circuit D Radiator cooling fan (Main) D Radiator cooling fan (Sub) D Rear window defogger D Hazard warning flasher D Horn D Meter D SRS AIRBAG warning light D Automatic transmission control unit D Alternator D Headlight (right side)
-
Page 293: Front Turn Signal, Parking Light And Front Side Marker Light
Bulb chart Description Spot light Room light Front turn signal, parking light and front side marker light Fog light Headlight Brake/tail light Rear turn signal light Backup light High mount stop light License plate light Specifications Wattage Bulb No. 12V-8W —…
-
Page 294: Vehicle Identification
Vehicle identification Emission control label Vehicle identification number 11-8 Vacuum hose piping label Vehicle identification number plate Model number plate Tire inflation pressure label Certification plate Bar cord label HS0226…
-
Page 295: Consumer Information And Reporting Safety Defects
Consumer information and Reporting safety defects Uniform tire quality grading standards Treadwear …………..Traction A, B, C .
-
Page 296: Uniform Tire Quality Grading Standards
For U.S.A. The following information has been compiled according to Code of Fed- eral Regulations “Title 49, Part 575”. Uniform tire quality grading standards This information indicates the relative performance of passenger car tires in the area of treadwear, traction, and temperature resistance. This is to aid the consumer in making an informed choice in the purchase of tires.
-
Page 297: Reporting Safety Defects
Consumer information and Reporting safety defects J Temperature A, B, C The temperature grades are A (highest), B and C, representing the tire’s resistance to generation of heat and its ability to dissipate heat when tested under controlled conditions on a specified indoor laboratory test wheel.
-
Page 298
However, NHTSA cannot become involved in individual problems between you, your dealer, or Subaru of America, Inc. To contact NHTSA, you may either call the Auto Safety Hotline toll-free at 1-800-424-9393 (or 366-0123 in the Washington D.C. area) or write to: NHTSA, U.S.
инструкцияSubaru Forester (1998)

TOKYO, JAPAN
1998
Wear Seat Belts at All Times for Your Own Safety.
Issued: April 1997A
Printed in USA
A8010BE
1998
OWNER’S
MANUAL
GAS STATION REFERENCE
Fuel:
Use only unleaded gasoline with an octane rating of 87
AKI or higher. This octane rating is the average of the Re-
search Octane and Motor Octane numbers and is com-
monly referred to as the Anti Knock Index (AKI).
Refer to Fuel Requirement Section in this manual.
Fuel capacity:
15.9 US gal (60 liters, 13.2 Imp gal)
Engine oil:
Use only API classification SJ or SH with the words
“ENERGY CONSERVING II”
or the new API certification mark (Starbrust mark) dis-
played on the container.
Engine oil capacity:
4.8 US qt (4.5 liters, 4.0 Imp qt)
Cold tire pressure:
See the label located under the driver’s door latch.
Downloaded from www.Manualslib.com manuals search engine
Посмотреть инструкция для Subaru Forester (1998) бесплатно. Руководство относится к категории Автомобили, 1 человек(а) дали ему среднюю оценку 7.9. Руководство доступно на следующих языках: английский. У вас есть вопрос о Subaru Forester (1998) или вам нужна помощь? Задайте свой вопрос здесь
Главная
Не можете найти ответ на свой вопрос в руководстве? Вы можете найти ответ на свой вопрос ниже, в разделе часто задаваемых вопросов о Subaru Forester (1998).
Не нашли свой вопрос? Задайте свой вопрос здесь
 Loading…

1 9 9 8
O W N E R ’ S M A N U A L
Wear Seat Belts at All Times for Your Own Safety.

Foreword
Congratulations on choosing a SUBARU vehicle. This Owner’s Manual has all the information necessary to keep your SUBARU in excellent condition and to properly maintain the emission control system for minimizing emission pollutants. We urge you to read this manual carefully so that you may understand your vehicle and its operation. For information not found in this Owner’s Manual, such as details concerning repairs or adjustments, please contact the dealer from whom you purchased your SUBARU or the nearest SUBARU dealer.
The information, specifications and illustrations found in this manual are those in effect at the time of printing. FUJI HEAVY INDUSTRIES LTD. reserves the right to change specifications and designs at any time without prior notice and without incurring any obligation to make the same or similar changes on vehicles previously sold. This Owner’s Manual applies to all models and covers all equipment, including factory installed options. Some explanations, therefore may be for equipment not installed in your vehicle.
Please leave this manual in the vehicle at the time of resale. The next owner will need the information found herein.
FUJI HEAVY INDUSTRIES LTD., TOKYO, JAPAN
|
and |
are registered trademarks of FUJI HEAVY INDUSTRIES, LTD. |
copyright 1997 FUJI HEAVY INDUSTRIES LTD.

Warranties
J Warranties for U.S.A.
All SUBARU vehicles distributed by Subaru of America, Inc. and sold at retail by an authorized SUBARU dealer in the continental U.S., Alaska and Hawaii come with the following warranties:
DSUBARU Limited Warranty
DEmission Control Systems Warranty
DEmissions Performance Warranty
All warranty information, including details of coverage and exclusions, is in the Warranty and Maintenance Booklet. Please read these warranties carefully.
J Warranties for Canada
All SUBARU vehicles distributed by Subaru Canada, Inc. and sold at retail by an authorized SUBARU dealer in Canada come with the following warranties:
DSUBARU Limited Warranty
DAnti-Corrosion Warranty
DEmission Control Warranty
All warranty information, including details of coverage and exclusions, is in the Warranty and Service Booklet. Please read these warranties carefully.
± CONTINUED ±
i

How to use this owner’s manual
J Using your Owner’s manual
Before you operate your vehicle, carefully read this manual. To protect yourself and extend the service life of your vehicle, follow the instructions in this manual. Failure to observe these instructions may result in serious injury and damage to your vehicle.
This manual is composed of thirteen chapters. Each chapter begins with a brief table of contents, so you can usually tell at a glance if that chapter contains the information you want.
Chapter 1: Doors and Locks
This chapter informs you how to operate the keys, locks and windows.
Chapter 2: Seat, seat belt and SRS AIRBAG
This chapter informs you how to use the seat and seat belt and contains precautions for the SRS AIRBAG.
Chapter 3: Instruments and controls
This chapter informs you about the operation of instrument panel indica- tors and how to use the instruments and other switches.
Chapter 4: Climate Control
This chapter informs you how to operate the climate control.
Chapter 5: Audio
This chapter informs you how to operate your audio system.
Chapter 6: Interior equipment
This chapter informs you how to operate interior equipment.
Chapter 7: Starting and operating
This chapter informs you how to start and operate your SUBARU.
Chapter 8: In case of emergency
This chapter informs you what to do if you have a problem while driving, such as a flat tire or engine overheating.
Chapter 9: Appearance care
This chapter informs you how to keep your SUBARU looking good.
Chapter 10: Maintenance and service
This chapter informs you how to keep your SUBARU running properly.
ii

Chapter 11: Specifications
This chapter informs you about dimension and capacities of your SUBARU.
Chapter 12: Consumer information and Reporting safety defects
This chapter informs you about Uniform tire quality grading standards and Reporting safety defects.
Chapter 13: Index
This is an alphabetical listing of all that’s in this manual. You can use it to quickly find something you want to read.
J Safety warnings
You will find a number of WARNINGs, CAUTIONs and NOTEs in this manual.
These safety warnings alert you to potential hazards that could result in injury to you or others.
Please read these safety warnings as well as all other portions of this manual carefully in order to gain a better understanding of how to use your SUBARU vehicle safely.
 WARNING
A WARNING indicates a situation in which serious injury or death could result if the warning is ignored.
 CAUTION
A CAUTION indicates a situation in which injury or damage to your vehicle, or both, could result if the caution is ignored.
NOTE
A NOTE gives information or suggestions how to make better use of your vehicle.
± CONTINUED ±
iii

J Safety symbol
HS0008
You will find a circle with a slash through it in this manual. This symbol means ªDo notº, ªDo not do thisº, or ªDo not let this happenº.
Safety precautions when driving
SEAT BELT AND SRS AIRBAG
 WARNING
DAll persons in the vehicle should fasten their seat belts BEFORE the vehicle starts to move. Otherwise, the possibility of serious injury becomes greater in the event of a sudden stop or accident.
DTo obtain maximum protection in the event of an accident, the driver and all passengers in the vehicle should always wear seat belts when the vehicle is moving. The SRS (Supplemental Restraint System) AIRBAG does not do away with the need to fasten seat belts. In combination with the seat belts, it offers the best combined protection in case of a serious accident.
Not wearing a seat belt increases the chance of severe injury or death in a crash even when the car has the SRS AIRBAG.
DThe SRS AIRBAGs deploy with considerable speed and force. Occupants who are out of proper position when the SRS AIRBAG deploys could suffer very serious injuries. Because the SRS
iv

AIRBAG needs much space for deployment, the driver should always sit upright and well back in the seat as far from the steering wheel as practical while still maintaining full vehicle control and the front passenger should move the seat as far back as possible and sit upright and well back in the seat.
Be sure to carefully read the sections 3-point Type Seat Belts, 2-point Type Seat Belts and SRS AIRBAG in chapter 2 of this owner’s manual for instructions and precautions concerning the seat belt system and SRS AIRBAG system.
CHILD SAFETY
 WARNING
DNever hold a child on your lap or in your arms while the vehicle is moving. The passenger cannot protect the child from injury in a collision, because the child will be caught between the passenger and objects inside the vehicle.
DWhile riding in the vehicle, infants and small children should always be placed in an infant or child restraint system in the REAR seat which is appropriate for the child’s age, height and weight. If a child is too big for a child restraint system, the child should sit in the REAR seat and be restrained using the seat belts. According to accident statistics, children are safer when properly restrained in the rear seating positions than in the front seating positions. Never allow a child to stand up or kneel on the seat.
DBe sure to put children aged 12 and under in the REAR seat properly restrained at all times in a child restraint device or in a seat belt. The SRS AIRBAG deploys with considerable speed and force and can injure or even kill children, especially if they are 12 years of age and under and are not restrained or improperly restrained. Because children are lighter and weaker than adults, their risk being injured from deployment is greater.
DNEVER INSTALL A REARWARD FACING CHILD SEAT IN THE FRONT SEAT. DOING SO RISKS SERIOUS INJURY OR DEATH TO
±CONTINUED ±
v

THE CHILD BY PLACING THE CHILD’S HEAD TOO CLOSE TO THE SRS AIRBAG.
DAlways use the child safety locks whenever a child rides in the rear seat. Serious injury could result if a child accidentally opened the door and fell out. Refer to the Door Lock section in chapter 1.
DAlways lock the passenger’s windows using the lock switch when children are riding in the vehicle. Failure to follow this procedure could result in injury to a child operating the power window. Refer to the Power Window section in chapter 1.
DNever leave unattended children in the vehicle. They could accidentally injure themselves or others through inadvertent operation of the vehicle. Also, on hot or sunny days, temperature in a closed vehicle could quickly become high enough to cause severe or possibly fatal injuries to them.
Be sure to carefully read the sections Child Restraint System, SRS AIRBAG, 3-point Type Seat Belts and 2-point Type Seat Belts in chapter 2 of this owner’s manual for instructions and precautions concerning the child restraint system, seat belt system and SRS AIRBAG system.
ENGINE EXHAUST GAS (CARBON MONOXIDE)
 WARNING
DNever inhale engine exhaust gas. Engine exhaust gas contains carbon monoxide, a colorless and odorless gas which is dangerous, or even lethal, if inhaled.
DAlways properly maintain the engine exhaust system to prevent engine exhaust gas from entering the vehicle.
DNever run the engine in a closed space, such as a garage, except for the brief time needed to drive the vehicle in or out of it.
DAvoid remaining in a parked vehicle for a lengthy time while the engine is running. If that is unavoidable, then use the ventilation fan to force fresh air into the vehicle.
DAlways keep the front ventilator inlet grille free from snow, leaves or other obstructions to ensure that the ventilation system always works properly.
vi

DIf at any time you suspect that exhaust fumes are entering the vehicle, have the problem checked and corrected as soon as possible. If you must drive under these conditions, drive only with all windows fully open.
DKeep the trunk lid or rear gate closed while driving to prevent exhaust gas from entering the vehicle.
DRINKING AND DRIVING
 WARNING
Drinking and then driving is very dangerous. Alcohol in the bloodstream delays your reaction and impairs your perception, judgment and attentiveness. If you drive after drinking ± even if you drink just a little ± it will increase the risk of being involved in a serious or fatal accident, injuring or killing yourself, your passengers and others. In addition, if you are injured in the accident, alcohol may increase the severity of that injury.
Please don’t drink and drive.
Drunken driving is one of the most frequent causes of accidents. Since alcohol affects all people differently, you may have consumed too much alcohol to drive safely even if the level of alcohol in your blood is below the legal limit. The safest thing you can do is never drink and drive. However if you have no choice but to drive, stop drinking and sober up completely before getting behind the wheel.
DRUGS AND DRIVING
 WARNING
There are some drugs (over the counter and prescription) that can delay your reaction time and impair your perception, judgment and attentiveness. If you drive after taking them, it may increase your, your passengers’ and other persons’ risk of being involved in a serious or fatal accident.
± CONTINUED ±
vii

If you are taking any drugs, check with your doctor or pharmacist or read the literature that accompanies the medication to determine if the drug you are taking can impair your driving ability. Do not drive after taking any medications that can make you drowsy or otherwise affect your ability to safely operate a motor vehicle. If you have a medical condition that requires you to take drugs, please consult with your doctor.
Never drive if you are under the influence of any illicit mind-altering drugs. For your own health and well-being, we urge you not to take illegal drugs in the first place and to seek treatment if you are addicted to those drugs.
DRIVING WHEN TIRED OR SLEEPY
 WARNING
When you are tired or sleepy, your reaction will be delayed and your perception, judgment and attentiveness will be impaired. If you drive when tired or sleepy, your, your passengers’ and other persons’ chances of being involved in a serious accident may increase.
Please do not continue to drive but instead find a safe place to rest if you are tired or sleepy. On long trips, you should make periodic rest stops to refresh yourself before continuing on your journey. When possible, you should share the driving with others.
CAR PHONES AND DRIVING
 CAUTION
A driver’s use of a car phone can be distracting and if special care is not taken, can lead to an accident. If you use a car phone while driving, make an extra effort to pay attention to the road and to traffic at all times.
viii
![]()
MODIFICATION OF YOUR VEHICLE
 CAUTION
Your vehicle should not be modified. Modification could affect its performance, safety or durability, and may even violate governmental regulations. In addition, damage or performance problems resulting from modification may not be covered under warranties.
DRIVING WITH PETS
Unrestrained pets can interfere with your driving and distract your attention from driving. In a collision or sudden stop, unrestrained pets or cages can be thrown around inside the vehicle and hurt you or your passengers. Besides, the pets can be hurt under these situations. It is also for their own safety that pets should be properly restrained in your vehicle. Restrain a pet with a special traveling harness which can be secured to the rear seat with a seat belt or use a pet carrier which can be secured to the rear seat by routing a seat belt through the carrier’s handle. Never restrain pets or pet carriers in the front passenger’s seat. For further information, consult your veterinarian, local animal protection society or pet shop.
± CONTINUED ±
ix

Table of contents
|
Doors and locks |
1 |
||
|
Seat, seatbelt and SRS AIRBAG |
2 |
||
|
Instruments and controls |
3 |
||
|
Climate control |
4 |
||
|
Audio |
5 |
||
|
Interior equipment |
6 |
||
|
Starting and operating |
7 |
||
|
In case of emergency |
8 |
||
|
Appearance care |
9 |
||
|
Maintenance and service |
10 |
||
|
Specifications |
11 |
||
|
Consumer information and Reporting safety defects |
12 |
||
|
Index |
13 |
||
± CONTINUED ±
xi

|
A |
|
|
ABS (Anti-Lock Brake system) . . . . . . . . . . . . . . . . . . . . . . . . . . . . . . . . . . . . . . . . . . . . . . . . |
7-30 |
|
ABS warning light . . . . . . . . . . . . . . . . . . . . . . . . . . . . . . . . . . . . . . . . . . . . . . . . . . . . . . . . . . . . . . . . |
3-12 |
|
Accessary power socket . . . . . . . . . . . . . . . . . . . . . . . . . . . . . . . . . . . . . . . . . . . . . . . . . . . . . . . |
6-9 |
|
AIRBAG . . . . . . . . . . . . . . . . . . . . . . . . . . . . . . . . . . . . . . . . . . . . . . . . . . . . . . . . . . . . . . . . . . . . . . . . . . . . . |
2-28 |
|
Precautions for vehicle modification . . . . . . . . . . . . . . . . . . . . . . . . . . . . . |
2-33 |
|
SRS AIRBAG system operation . . . . . . . . . . . . . . . . . . . . . . . . . . . . . . . . . . . |
2-32 |
|
System monitors . . . . . . . . . . . . . . . . . . . . . . . . . . . . . . . . . . . . . . . . . . . . . . . . . . . . . . |
2-36 |
|
System servicing . . . . . . . . . . . . . . . . . . . . . . . . . . . . . . . . . . . . . . . . . . . . . . . . . . . . . |
2-37 |
|
Vehicle with driver’s and front passenger’s SRS AIRBAGs |
|
|
and lap/shoulder restraints . . . . . . . . . . . . . . . . . . . . . . . . . . . . . . . . . . . . |
2-28 |
|
AIRBAG warning light . . . . . . . . . . . . . . . . . . . . . . . . . . . . . . . . . . . . . . . . . . . . . . . . . . . . . . . . . . . |
3-8 |
|
Air conditioner (Heating and air conditioning) . . . . . . . . . . . . . . . . . . . . . . . . . . . . |
4-8 |
|
Air cleaner element (Replacement) . . . . . . . . . . . . . . . . . . . . . . . . . . . . . . . . . . . . . . . . . |
10-17 |
|
Alcohol and driving . . . . . . . . . . . . . . . . . . . . . . . . . . . . . . . . . . . . . . . . . . . . . . . . . . . . . . . . . . . . . . |
vii |
|
All wheel drive vehicles (Driving tips for AWD vehicles) . . . . . . . . . . . . . . . |
7-32 |
|
Aluminum wheels (If equipped) (Maintenance) . . . . . . . . . . . . . . . . . . . . . . . . . . |
10-42 |
|
Aluminum wheels (If equipped) (Cleaning) . . . . . . . . . . . . . . . . . . . . . . . . . . . . . . . |
9-6 |
|
AM/FM stereo radio with cassette player . . . . . . . . . . . . . . . . . . . . . . . . . . . . . . . . . . |
5-4 |
|
RADIO OPERATION . . . . . . . . . . . . . . . . . . . . . . . . . . . . . . . . . . . . . . . . . . . . . . . . . . . . . . . . |
5-4 |
|
CASSETTE PLAYER OPERATION . . . . . . . . . . . . . . . . . . . . . . . . . . . . . . . . . . . . . . . . |
5-9 |
|
CLOCK FUNCTION . . . . . . . . . . . . . . . . . . . . . . . . . . . . . . . . . . . . . . . . . . . . . . . . . . . . . . . . . . |
5-11 |
|
Antenna . . . . . . . . . . . . . . . . . . . . . . . . . . . . . . . . . . . . . . . . . . . . . . . . . . . . . . . . . . . . . . . . . . . . . . . . . . . . . |
5-2 |
|
Anti-lock brake system . . . . . . . . . . . . . . . . . . . . . . . . . . . . . . . . . . . . . . . . . . . . . . . . . . . . . . . . . . |
7-30 |
|
Ashtray (If equipped) . . . . . . . . . . . . . . . . . . . . . . . . . . . . . . . . . . . . . . . . . . . . . . . . . . . . . . . . . . . . |
6-12 |
|
AT OIL TEMPerature warning light . . . . . . . . . . . . . . . . . . . . . . . . . . . . . . . . . . . . . . . . . . . |
3-12 |
|
Automatic transmission . . . . . . . . . . . . . . . . . . . . . . . . . . . . . . . . . . . . . . . . . . . . . . . . . . . . . . . . . |
7-18 |
|
Driving tips . . . . . . . . . . . . . . . . . . . . . . . . . . . . . . . . . . . . . . . . . . . . . . . . . . . . . . . . . . . . . |
7-21 |
|
Maximum speeds . . . . . . . . . . . . . . . . . . . . . . . . . . . . . . . . . . . . . . . . . . . . . . . . . . . . |
7-21 |
|
Selector lever . . . . . . . . . . . . . . . . . . . . . . . . . . . . . . . . . . . . . . . . . . . . . . . . . . . . . . . . . . |
7-19 |
|
Shift lock release . . . . . . . . . . . . . . . . . . . . . . . . . . . . . . . . . . . . . . . . . . . . . . . . . . . . . |
7-21 |
|
Automatic transmission fluid (Maintenance) . . . . . . . . . . . . . . . . . . . . . . . . . . . . . . |
10-21 |
|
B |
|
|
Back-up light (Rear combination lights, bulb replacement) . . . . . . . . . . . |
10-53 |
|
Battery (Maintenance) . . . . . . . . . . . . . . . . . . . . . . . . . . . . . . . . . . . . . . . . . . . . . . . . . . . . . . . . . . |
10-31 |
13-2

|
Index |
||||
|
Brake (Tips for using brakes) . . . . . . . . . . . . . . . . . . . . . . . . . . . . . . . . . . . . . . . . . . . . . . |
. . 7-28. |
|||
|
Brake booster (Maintenance) . . . . . . . . . . . . . . . . . . . . . . . . . . . . . . . . . . . . . . . . . . . . . . |
. . 10-30. |
|||
|
Brake fluid (Maintenance) . . . . . . . . . . . . . . . . . . . . . . . . . . . . . . . . . . . . . . . . . . . . . . . . . . . |
. . 10-28. |
|||
|
Brake system warning light . . . . . . . . . . . . . . . . . . . . . . . . . . . . . . . . . . . . . . . . . . . . . . . . . |
. . 3-9. |
|||
|
Brake pedal (Maintenance) . . . . . . . . . . . . . . . . . . . . . . . . . . . . . . . . . . . . . . . . . . . . . . . . . |
. . 10-36. |
|||
|
Brake pad and lining (Maintenance) . . . . . . . . . . . . . . . . . . . . . . . . . . . . . . . . . . . . . |
. . 10-38. |
|||
|
Break-in (New vehicle break-in driving) . . . . . . . . . . . . . . . . . . . . . . . . . . . . . . . . . |
. . 7-3. |
|||
|
Bulb chart . . . . . . . . . . . . . . . . . . . . . . . . . . . . . . . . . . . . . . . . . . . . . . . . . . . . . . . . . . . . . . . . . . . . . . . |
. . 11-7. |
|||
|
Bulb replacement . . . . . . . . . . . . . . . . . . . . . . . . . . . . . . . . . . . . . . . . . . . . . . . . . . . . . . . . . . . . . |
. . 10-49. |
|||
|
C |
||||
|
Carbon monoxide (Engine exhaust gas) . . . . . . . . . . . . . . . . . . . . . . . . . . . . . . . . |
. . 7-7. |
|||
|
Cargo anchorage eyelets . . . . . . . . . . . . . . . . . . . . . . . . . . . . . . . . . . . . . . . . . . . . . . . . . . . |
. . 6-17. |
|||
|
Cargo area cover (Luggage cover) . . . . . . . . . . . . . . . . . . . . . . . . . . . . . . . . . . . . . . |
. . 6-15. |
|||
|
Cargo hooks (Cargo anchorage eyelets) . . . . . . . . . . . . . . . . . . . . . . . . . . . . . . . |
. . 6-17. |
|||
|
Cargo room light (Luggage area light) . . . . . . . . . . . . . . . . . . . . . . . . . . . . . . . . . . |
. . 6-15. |
|||
|
Car phones and driving . . . . . . . . . . . . . . . . . . . . . . . . . . . . . . . . . . . . . . . . . . . . . . . . . . . . . |
. . |
. viii |
||
|
Cassette player operation |
||||
|
(AM/FM stereo radio with cassette player) . . . . . . . . . . . . . . . . . . . . . . . . . |
. . 5-9. |
|||
|
Catalytic converter . . . . . . . . . . . . . . . . . . . . . . . . . . . . . . . . . . . . . . . . . . . . . . . . . . . . . . . . . . . . |
. . 7-8. |
|||
|
Center console . . . . . . . . . . . . . . . . . . . . . . . . . . . . . . . . . . . . . . . . . . . . . . . . . . . . . . . . . . . . . . . . . |
. . 6-4. |
|||
|
Charge warning light . . . . . . . . . . . . . . . . . . . . . . . . . . . . . . . . . . . . . . . . . . . . . . . . . . . . . . . . . |
. . 3-9. |
|||
|
CHECK ENGINE warning light/Malfunction indicator lamp . . . . . . . . |
. . 3-10. |
|||
|
Child restraint system . . . . . . . . . . . . . . . . . . . . . . . . . . . . . . . . . . . . . . . . . . . . . . . . . . . . . . . . |
. . 2-22. |
|||
|
Installing child restraint system in the 3-point type |
||||
|
seatbelt seating position . . . . . . . . . . . . . . . . . . . . . . . . . . . . . . . . . . . . |
. . 2-25. |
|||
|
Installing child restraint system in the 2-point type |
||||
|
seatbelt seating position . . . . . . . . . . . . . . . . . . . . . . . . . . . . . . . . . . . . |
. . 2-24. |
|||
|
Top strap anchors . . . . . . . . . . . . . . . . . . . . . . . . . . . . . . . . . . . . . . . . . . . . . . . . . |
. . 2-26. |
|||
|
Child safety |
v |
|||
|
Cigarette lighter (if equipped) . . . . . . . . . . . . . . . . . . . . . . . . . . . . . . . . . . . . . . . . . . . . . |
. . 6-11. |
|||
|
. . . . . . . . . . . . . . . . . . . . . . . . . . . . . . . . . . . . . . . . . . . . . . . . .Cleaning aluminum wheels |
. . . 9-6 |
|||
|
Cleaning the interior . . . . . . . . . . . . . . . . . . . . . . . . . . . . . . . . . . . . . . . . . . . . . . . . . . . . . . . . . . |
. . 9-5. |
|||
|
Seat fabric . . . . . . . . . . . . . . . . . . . . . . . . . . . . . . . . . . . . . . . . . . . . . . . . . . . . . . . . . . . |
. . 9-5. |
|||
|
Synthetic leather upholstery . . . . . . . . . . . . . . . . . . . . . . . . . . . . . . . . . . . . |
. . 9-6. |
|||
|
Clock . . . . . . . . . . . . . . . . . . . . . . . . . . . . . . . . . . . . . . . . . . . . . . . . . . . . . . . . . . . . . . . . . . . . . . . . . . . . |
5-11, 6-8 |
13-3

|
Clock function (built in cassette stereo) . . . . . . . . . . . . . . . . . . . . . . . . . . |
. . . 5-11 |
|
Clutch fluid (Maintenance) . . . . . . . . . . . . . . . . . . . . . . . . . . . . . . . . . . . . . . . . . . . . . . . . . . |
. . . 10-29 |
|
Clutch pedal (Manual transmission) (Maintenance) . . . . . . . . . . . . . . . . . |
. . . 10-37 |
|
Coin tray . . . . . . . . . . . . . . . . . . . . . . . . . . . . . . . . . . . . . . . . . . . . . . . . . . . . . . . . . . . . . . . . . . . . . . . . . |
. . . 6-6 |
|
Combination meter . . . . . . . . . . . . . . . . . . . . . . . . . . . . . . . . . . . . . . . . . . . . . . . . . . . . . . . . . . . . |
. . . 3-4 |
|
Console (Center console) . . . . . . . . . . . . . . . . . . . . . . . . . . . . . . . . . . . . . . . . . . . . . . . . . . . |
. . . 6-4 |
|
Coolant (Engine coolant) . . . . . . . . . . . . . . . . . . . . . . . . . . . . . . . . . . . . . . . . . . . . . . . . . . . . |
. . . 10-12 |
|
Corrosion protection . . . . . . . . . . . . . . . . . . . . . . . . . . . . . . . . . . . . . . . . . . . . . . . . . . . . . . . . . . |
. . . 9-4 |
|
Cruise control (if equipped) . . . . . . . . . . . . . . . . . . . . . . . . . . . . . . . . . . . . . . . . . . . . . . . . |
. . . 7-24 |
|
To change the cruising speed . . . . . . . . . . . . . . . . . . . . . . . . . . . . . . . . . |
. . . 7-25 |
|
To set cruise control . . . . . . . . . . . . . . . . . . . . . . . . . . . . . . . . . . . . . . . . . . . . . . |
. . . 7-24 |
|
To temporarily cancel the cruise control . . . . . . . . . . . . . . . . . . . . . |
. . . 7-25 |
|
To turn off the cruise control . . . . . . . . . . . . . . . . . . . . . . . . . . . . . . . . . . . . |
. . . 7-25 |
|
Cup holder . . . . . . . . . . . . . . . . . . . . . . . . . . . . . . . . . . . . . . . . . . . . . . . . . . . . . . . . . . . . . . . . . . . . . . |
. . . 6-6 |
|
D |
|
|
Defogging (Windshield) . . . . . . . . . . . . . . . . . . . . . . . . . . . . . . . . . . . . . . . . . . . . . . . . . . . . |
4-4, 4-8 |
|
Defogging (Rear window defogger) . . . . . . . . . . . . . . . . . . . . . . . . . . . . . . . . . . . . . . |
. . . 3-24 |
|
Defogging (Outside mirror defogger) . . . . . . . . . . . . . . . . . . . . . . . . . . . . . . . . . . . . |
. . . 3-26 |
|
Differential gear oil (Front Ð AT vehicles) (Maintenance) . . . . . . . . . . |
. . . 10-23 |
|
Differential gear oil (Rear Ð AWD vehicles) (Maintenance) . . . . . . . . |
. . . 10-24 |
|
Dome light (Interior light) . . . . . . . . . . . . . . . . . . . . . . . . . . . . . . . . . . . . . . . . . . . . . . . . . . . . |
. . . 6-13 |
|
Door locks . . . . . . . . . . . . . . . . . . . . . . . . . . . . . . . . . . . . . . . . . . . . . . . . . . . . . . . . . . . . . . . . . . . . . . . |
. . . 1-3 |
|
Child safety locks . . . . . . . . . . . . . . . . . . . . . . . . . . . . . . . . . . . . . . . . . . . . . . . . . |
. . . 1-7 |
|
Locking and unlocking from the inside . . . . . . . . . . . . . . . . . . . . . . |
. . . 1-5 |
|
Locking and unlocking from the outside . . . . . . . . . . . . . . . . . . . . |
. . . 1-3 |
|
Power door locking switches . . . . . . . . . . . . . . . . . . . . . . . . . . . . . . . . . . . |
. . . 1-6 |
|
Door open warning light . . . . . . . . . . . . . . . . . . . . . . . . . . . . . . . . . . . . . . . . . . . . . . . . . . . . |
1-8, 3-13 |
|
Drive belts (Maintenance) . . . . . . . . . . . . . . . . . . . . . . . . . . . . . . . . . . . . . . . . . . . . . . . . . . . |
. . . 10-19 |
|
Driving drunken . . . . . . . . . . . . . . . . . . . . . . . . . . . . . . . . . . . . . . . . . . . . . . . . . . . . . . . . . . . . . . . . |
. . . vii |
|
Driving in foreign countries . . . . . . . . . . . . . . . . . . . . . . . . . . . . . . . . . . . . . . . . . . . . . . . . . |
. . . 7-10 |
|
Driving in winter season . . . . . . . . . . . . . . . . . . . . . . . . . . . . . . . . . . . . . . . . . . . . . . . . . . . . . |
. . . 7-36 |
|
Driving off road . . . . . . . . . . . . . . . . . . . . . . . . . . . . . . . . . . . . . . . . . . . . . . . . . . . . . . . . . . . . . . . . |
. . . 7-34 |
|
Driving tips for AWD vehicles . . . . . . . . . . . . . . . . . . . . . . . . . . . . . . . . . . . . . . . . . . . . . . |
. . . 7-32 |
|
Driving when tired or sleepy . . . . . . . . . . . . . . . . . . . . . . . . . . . . . . . . . . . . . . . . . . . . . . . . |
. . . viii |
|
Driving with pet . . . . . . . . . . . . . . . . . . . . . . . . . . . . . . . . . . . . . . . . . . . . . . . . . . . . . . . . . . . . . . . . |
. . . ix |
13-4

|
Index |
||||
|
E |
||||
|
Emission test (State emission testing) . . . . . . . . . . . . . . . . . . . . . . . . . . . . . . . . . . . . . . |
7-5 |
|||
|
Engine compartment . . . . . . . . . . . . . . . . . . . . . . . . . . . . . . . . . . . . . . . . . . . . . . . . . . . . . . . . . . . . |
10-5 |
|||
|
Engine coolant (Maintenance) . . . . . . . . . . . . . . . . . . . . . . . . . . . . . . . . . . . . . . . . . . . . . . . . |
10-12 |
|||
|
Engine exhaust gas (Carbon monoxide) . . . . . . . . . . . . . . . . . . . . . . . . . . . . . . . . . . . |
7-7 |
|||
|
Engine hood . . . . . . . . . . . . . . . . . . . . . . . . . . . . . . . . . . . . . . . . . . . . . . . . . . . . . . . . . . . . . . . . . . . . . . . |
1-15 |
|||
|
Engine malfunction indicator lamp |
||||
|
(CHECK ENGINE warning light) . . . . . . . . . . . . . . . . . . . . . . . . . . . . . . . . . . . . . . . . . . |
3-10 |
|||
|
Engine oil (Maintenance) . . . . . . . . . . . . . . . . . . . . . . . . . . . . . . . . . . . . . . . . . . . . . . . . . . . . . . . |
10-6 |
|||
|
Engine overheating . . . . . . . . . . . . . . . . . . . . . . . . . . . . . . . . . . . . . . . . . . . . . . . . . . . . . . . . . . . . . . |
8-2 |
|||
|
If no steam is coming from the engine compartment . . . . . . . |
8-3 |
|||
|
If steam is coming from the engine compartment . . . . . . . . . . . |
8-2 |
|||
|
Engine, transmission, and differential gear oil leaks (Maintenance) |
10-6 |
|||
|
Exhaust gas (Engine exhaust gas) . . . . . . . . . . . . . . . . . . . . . . . . . . . . . . . . . . . . . . . . . . |
7-7 |
|||
|
Exterior care . . . . . . . . . . . . . . . . . . . . . . . . . . . . . . . . . . . . . . . . . . . . . . . . . . . . . . . . . . . . . . . . . . . . . . . |
9-2 |
|||
|
Washing . . . . . . . . . . . . . . . . . . . . . . . . . . . . . . . . . . . . . . . . . . . . . . . . . . . . . . . . . . . . . . . . . |
9-2 |
|||
|
Waxing and polishing . . . . . . . . . . . . . . . . . . . . . . . . . . . . . . . . . . . . . . . . . . . . . . . |
9-3 |
|||
|
F |
||||
|
Flat tires . . . . . . . . . . . . . . . . . . . . . . . . . . . . . . . . . . . . . . . . . . . . . . . . . . . . . . . . . . . . . . . . . . . . . . . . . . . . . |
8-6 |
|||
|
Changing a flat tire . . . . . . . . . . . . . . . . . . . . . . . . . . . . . . . . . . . . . . . . . . . . . . . . . . . |
8-6 |
|||
|
Tire changing tools . . . . . . . . . . . . . . . . . . . . . . . . . . . . . . . . . . . . . . . . . . . . . . . . . . . |
8-10 |
|||
|
Fog light (Bulb replacement) . . . . . . . . . . . . . . . . . . . . . . . . . . . . . . . . . . . . . . . . . . . . . . . . . . |
10-51 |
|||
|
Fog light switch . . . . . . . . . . . . . . . . . . . . . . . . . . . . . . . . . . . . . . . . . . . . . . . . . . . . . . . . . . . . . . . . . . . |
3-18 |
|||
|
Four wheel drive vehicles (Driving tips for AWD vehicles) . . . . . . . . . . . . |
7-32 |
|||
|
Front differential gear oil (Automatic transmission) (Maintenance) . . |
10-23 |
|||
|
Front seats . . . . . . . . . . . . . . . . . . . . . . . . . . . . . . . . . . . . . . . . . . . . . . . . . . . . . . . . . . . . . . . . . . . . . . . . . |
2-2 |
|||
|
Fore and aft adjustment . . . . . . . . . . . . . . . . . . . . . . . . . . . . . . . . . . . . . . . . . . . . |
2-4 |
|||
|
Head restraint adjustment . . . . . . . . . . . . . . . . . . . . . . . . . . . . . . . . . . . . . . . . . . |
2-5 |
|||
|
Lumbar support |
2-6 |
|||
|
Seat cushion angle and height adjustment . . . . . . . . . . . . . . . . . . . . |
2-5 |
|||
|
. . . . . . . . . . . . . . . . . . . . . . . . . . . . . . . . . . . . . . . . . . . . .Reclining the seatback |
2-4 |
|||
|
Seat heater . . . . . . . . . . . . . . . . . . . . . . . . . . . . . . . . . . . . . . . . . . . . . . . . . . . . . . . . . . . . . |
2-7 |
|||
|
Front wheel drive warning light . . . . . . . . . . . . . . . . . . . . . . . . . . . . . . . . . . . . . . . . . . . . . . . |
3-13 |
|||
|
Fuel economy hints . . . . . . . . . . . . . . . . . . . . . . . . . . . . . . . . . . . . . . . . . . . . . . . . . . . . . . . . . . . . . . |
7-9 |
|||
|
Fuel filler door and cap . . . . . . . . . . . . . . . . . . . . . . . . . . . . . . . . . . . . . . . . . . . . . . . . . . . . . . . . . |
1-13 |
13-5

|
Fuel filler cap . . . . . . . . . . . . . . . . . . . . . . . . . . . . . . . . . . . . . . . . . . . . . . . . . . . . . . . . . . |
1-14 |
|
To open and close the fuel filler door . . . . . . . . . . . . . . . . . . . . . . . . . . . . |
1-13 |
|
Refueling . . . . . . . . . . . . . . . . . . . . . . . . . . . . . . . . . . . . . . . . . . . . . . . . . . . . . . . . . . . . . . . |
1-14 |
|
Fuel gauge . . . . . . . . . . . . . . . . . . . . . . . . . . . . . . . . . . . . . . . . . . . . . . . . . . . . . . . . . . . . . . . . . . . . . . . . . |
3-6 |
|
Low fuel warning light . . . . . . . . . . . . . . . . . . . . . . . . . . . . . . . . . . . . . . . . . . . . . . . |
7-7 |
|
Fuel requirements . . . . . . . . . . . . . . . . . . . . . . . . . . . . . . . . . . . . . . . . . . . . . . . . . . . . . . . . . . . . . . . . |
7-3 |
|
Fuel octane rating . . . . . . . . . . . . . . . . . . . . . . . . . . . . . . . . . . . . . . . . . . . . . . . . . . . . |
7-3 |
|
Unleaded gasoline . . . . . . . . . . . . . . . . . . . . . . . . . . . . . . . . . . . . . . . . . . . . . . . . . . . |
7-4 |
|
Gasoline for California-certified TELV . . . . . . . . . . . . . . . . . . . . . . . . . . . |
7-4 |
|
Gasoline for cleaner air . . . . . . . . . . . . . . . . . . . . . . . . . . . . . . . . . . . . . . . . . . . . . |
7-4 |
|
Fuel tank capacity (Specifications) . . . . . . . . . . . . . . . . . . . . . . . . . . . . . . . . . . . . . . . . . . |
11-2 |
|
Fluid (Automatic transmission fluid) . . . . . . . . . . . . . . . . . . . . . . . . . . . . . . . . . . . . . . . . . |
10-21 |
|
Fluid (Brake fluid) . . . . . . . . . . . . . . . . . . . . . . . . . . . . . . . . . . . . . . . . . . . . . . . . . . . . . . . . . . . . . . . . |
10-28 |
|
Fluid (Clutch fluid) . . . . . . . . . . . . . . . . . . . . . . . . . . . . . . . . . . . . . . . . . . . . . . . . . . . . . . . . . . . . . . . . |
10-29 |
|
Fluid (Power steering fluid) . . . . . . . . . . . . . . . . . . . . . . . . . . . . . . . . . . . . . . . . . . . . . . . . . . . . |
10-26 |
|
Fuses (Replacing a fuse) . . . . . . . . . . . . . . . . . . . . . . . . . . . . . . . . . . . . . . . . . . . . . . . . . . . . . . . |
10-43 |
|
Fuses and circuits . . . . . . . . . . . . . . . . . . . . . . . . . . . . . . . . . . . . . . . . . . . . . . . . . . . . . . . . . . . . . . . . |
11-4 |
|
Fuse panel located in the engine compartment . . . . . . . . . . . . . . |
11-6 |
|
Fuse panel located behind the coin tray . . . . . . . . . . . . . . . . . . . . . . . |
11-4 |
|
G |
|
|
Gauges . . . . . . . . . . . . . . . . . . . . . . . . . . . . . . . . . . . . . . . . . . . . . . . . . . . . . . . . . . . . . . . . . . . . . . . . . . . . . |
3-5 |
|
Fuel gauge . . . . . . . . . . . . . . . . . . . . . . . . . . . . . . . . . . . . . . . . . . . . . . . . . . . . . . . . . . . . . |
3-6 |
|
Odometer/Trip meter . . . . . . . . . . . . . . . . . . . . . . . . . . . . . . . . . . . . . . . . . . . . . . . . |
3-5 |
|
Speedometer . . . . . . . . . . . . . . . . . . . . . . . . . . . . . . . . . . . . . . . . . . . . . . . . . . . . . . . . . . |
3-5 |
|
Tachometer . . . . . . . . . . . . . . . . . . . . . . . . . . . . . . . . . . . . . . . . . . . . . . . . . . . . . . . . . . . . |
3-6 |
|
Temperature gauge . . . . . . . . . . . . . . . . . . . . . . . . . . . . . . . . . . . . . . . . . . . . . . . . . . |
3-7 |
|
Gasoline (Fuel requirement) . . . . . . . . . . . . . . . . . . . . . . . . . . . . . . . . . . . . . . . . . . . . . . . . . . . |
7-3 |
|
Gas tank capacity (Specifications) . . . . . . . . . . . . . . . . . . . . . . . . . . . . . . . . . . . . . . . . . . |
11-2 |
|
Glove compartment . . . . . . . . . . . . . . . . . . . . . . . . . . . . . . . . . . . . . . . . . . . . . . . . . . . . . . . . . . . . . |
6-3 |
|
Glove box (Glove compartment) . . . . . . . . . . . . . . . . . . . . . . . . . . . . . . . . . . . . . . . . . . . . . |
6-3 |
|
GVWR and GAWR |
|
|
(Gross vehicle weight rating and Gross axle weight rating) . . . . . . |
7-43 |
13-6

|
Index |
||||
|
H |
||||
|
Hazard warning flasher . . . . . . . . . . . . . . . . . . . . . . . . . . . . . . . . . . . . . . . . . . . . . . . . . . . . . |
3-14, 8-2 |
|||
|
Heater (Heating and air conditioning) . . . . . . . . . . . . . . . . . . . . . . . . . . . . . . . . . . |
. . 4-3. |
|||
|
Heater (Seat heater) . . . . . . . . . . . . . . . . . . . . . . . . . . . . . . . . . . . . . . . . . . . . . . . . . . . . . . . . . . |
. . 2-7. |
|||
|
Heater (Mirror heater = Outside mirror defogger) . . . . . . . . . . . . . . . . . . . . |
. . 3-26. |
|||
|
Heating and air conditioning . . . . . . . . . . . . . . . . . . . . . . . . . . . . . . . . . . . . . . . . . . . . . . . |
. . 4-3. |
|||
|
Air conditioner button (if equipped) . . . . . . . . . . . . . . . . . . . . . . . . . . |
. . 4-4. |
|||
|
Air flow control dial . . . . . . . . . . . . . . . . . . . . . . . . . . . . . . . . . . . . . . . . . . . . . . . . |
. . 4-3. |
|||
|
Air inlet selection lever . . . . . . . . . . . . . . . . . . . . . . . . . . . . . . . . . . . . . . . . . . . |
. . 4-4. |
|||
|
Fan speed control lever . . . . . . . . . . . . . . . . . . . . . . . . . . . . . . . . . . . . . . . . . . |
. . 4-3. |
|||
|
Temperature control dial . . . . . . . . . . . . . . . . . . . . . . . . . . . . . . . . . . . . . . . . . |
. . 4-3. |
|||
|
HEATER OPERATION . . . . . . . . . . . . . . . . . . . . . . . . . . . . . . . . . . . . . . . . . . . . . . . . . . . . |
. . 4-4. |
|||
|
Bi. level heating . . . . . . . . . . . . . . . . . . . . . . . . . . . . . . . . . . . . . . . . . . . . . . . . . . . . |
. . 4-6. |
|||
|
Defrosting or defogging the windshield . . . . . . . . . . . . . . . . . . . . . |
. . 4-4. |
|||
|
Heating and defrosting . . . . . . . . . . . . . . . . . . . . . . . . . . . . . . . . . . . . . . . . . . |
. . 4-5. |
|||
|
Heating . . . . . . . . . . . . . . . . . . . . . . . . . . . . . . . . . . . . . . . . . . . . . . . . . . . . . . . . . . . . . . . |
. . 4-6. |
|||
|
Ventilation . . . . . . . . . . . . . . . . . . . . . . . . . . . . . . . . . . . . . . . . . . . . . . . . . . . . . . . . . . . |
. . 4-7. |
|||
|
AIR CONDITIONER OPERATION . . . . . . . . . . . . . . . . . . . . . . . . . . . . . . . . . . . . . |
. . 4-8. |
|||
|
Cooling or dehumidifying . . . . . . . . . . . . . . . . . . . . . . . . . . . . . . . . . . . . . . . |
. . 4-8. |
|||
|
Defrosting or defogging . . . . . . . . . . . . . . . . . . . . . . . . . . . . . . . . . . . . . . . . . |
. . 4-8. |
|||
|
OPERATING TIPS FOR HEATING AND AIR CONDITIONING . |
. . 4-9. |
|||
|
Head light (Lighting switch) . . . . . . . . . . . . . . . . . . . . . . . . . . . . . . . . . . . . . . . . . . . . . . . . |
. . 3-14. |
|||
|
Head light (Bulb replacement) . . . . . . . . . . . . . . . . . . . . . . . . . . . . . . . . . . . . . . . . . . . . . |
. . 10-50. |
|||
|
Head light aiming (Checking the headlight aim) . . . . . . . . . . . . . . . . . . . . . . |
. . 10-46. |
|||
|
Head restraint . . . . . . . . . . . . . . . . . . . . . . . . . . . . . . . . . . . . . . . . . . . . . . . . . . . . . . . . . . . . . . . . . |
2-5 |
|||
|
High beam indicator . . . . . . . . . . . . . . . . . . . . . . . . . . . . . . . . . . . . . . . . . . . . . . . . . . . . . . . . . . |
. . 3-13. |
|||
|
High mount stop light (Bulb replacement) . . . . . . . . . . . . . . . . . . . . . . . . . . . . . . |
. . 10-56. |
|||
|
Hood (Engine hood) . . . . . . . . . . . . . . . . . . . . . . . . . . . . . . . . . . . . . . . . . . . . . . . . . . . . . . . . . . |
. . 1-15. |
|||
|
Horn . . . . . . . . . . . . . . . . . . . . . . . . . . . . . . . . . . . . . . . . . . . . . . . . . . . . . . . . . . . . . . . . . . . . . . . . . . . . . . |
. . 3-25. |
|||
|
I |
||||
|
. . . . . . . . . . . . . . . . . . . . . . . . . . . . . . . . . . . . . . . . . . . . . . . . . . . . . . . . . . . . . . . . . .Ignition switch |
. . . 7-10 |
|||
|
ACC . . . . . . . . . . . . . . . . . . . . . . . . . . . . . . . . . . . . . . . . . . . . . . . . . . . . . . . . . . . . . . . . . . . |
. . 7-12. |
|||
|
Key interlock release (AT vehicles only) . . . . . . . . . . . . . . . . . . . . . |
. . 7-13. |
|||
|
Key reminder chime . . . . . . . . . . . . . . . . . . . . . . . . . . . . . . . . . . . . . . . . . . . . . . |
. . 7-13. |
|||
|
LOCK . . . . . . . . . . . . . . . . . . . . . . . . . . . . . . . . . . . . . . . . . . . . . . . . . . . . . . . . . . . . . . . . . |
. . 7-10. |
13-7

|
ON . . . . . . . . . . . . . . . . . . . . . . . . . . . . . . . . . . . . . . . . . . . . . . . . . . . . . . . . . . . . . . . . . |
. . . . . . . |
7-12 |
|
START . . . . . . . . . . . . . . . . . . . . . . . . . . . . . . . . . . . . . . . . . . . . . . . . . . . . . . . . . . . . |
. . . . . . . |
7-12 |
|
Illumination brightness control . . . . . . . . . . . . . . . . . . . . . . . . . . . . . . . . . . . . . . . . . . |
. . . . . . |
3-17 |
|
I/M test (Inspection Maintenance test ) (State emission testing) . . . . . |
7-5 |
|
|
Interior (Cleaning the interior) . . . . . . . . . . . . . . . . . . . . . . . . . . . . . . . . . . . . . . . . . . . |
. . . . . . |
9-5 |
|
Installation of accessories . . . . . . . . . . . . . . . . . . . . . . . . . . . . . . . . . . . . . . . . . . . . . . |
5-12, 10-46 |
|
|
Instrument panel overview . . . . . . . . . . . . . . . . . . . . . . . . . . . . . . . . . . . . . . . . . . . . . . . |
. . . . . . |
3-2 |
|
Interior light . . . . . . . . . . . . . . . . . . . . . . . . . . . . . . . . . . . . . . . . . . . . . . . . . . . . . . . . . . . . . . . . . . |
. . . . . . |
6-13 |
|
Interior light (Bulb replacement) . . . . . . . . . . . . . . . . . . . . . . . . . . . . . . . . . . . . . . . . |
. . . . . . |
10-55 |
|
J |
||
|
Jack and handle . . . . . . . . . . . . . . . . . . . . . . . . . . . . . . . . . . . . . . . . . . . . . . . . . . . . . . . . . . . . |
. . . . . . |
8-10 |
|
Jump starting . . . . . . . . . . . . . . . . . . . . . . . . . . . . . . . . . . . . . . . . . . . . . . . . . . . . . . . . . . . . . . . . |
. . . . . . |
8-3 |
|
K |
||
|
Key interlock (Key interlock release) . . . . . . . . . . . . . . . . . . . . . . . . . . . . . . . . . . |
. . . . . . |
7-13 |
|
Key reminder chime . . . . . . . . . . . . . . . . . . . . . . . . . . . . . . . . . . . . . . . . . . . . . . . . . . . . . . . |
. . . . . . |
7-13 |
|
Keys . . . . . . . . . . . . . . . . . . . . . . . . . . . . . . . . . . . . . . . . . . . . . . . . . . . . . . . . . . . . . . . . . . . . . . . . . . . |
. . . . . . |
1-2 |
|
Key number . . . . . . . . . . . . . . . . . . . . . . . . . . . . . . . . . . . . . . . . . . . . . . . . . . . . . . |
. . . . . . |
1-2 |
|
Master, submaster and valet key . . . . . . . . . . . . . . . . . . . . . . . . . . . |
. . . . . . |
1-2 |
|
L |
||
|
License plate light (Bulb replacement) . . . . . . . . . . . . . . . . . . . . . . . . . . . . . . . |
. . . . . . |
10-54 |
|
Light (Interior light) . . . . . . . . . . . . . . . . . . . . . . . . . . . . . . . . . . . . . . . . . . . . . . . . . . . . . . . . . |
. . . . . . |
6-13 |
|
Light control . . . . . . . . . . . . . . . . . . . . . . . . . . . . . . . . . . . . . . . . . . . . . . . . . . . . . . . . . . . . . . . . . |
. . . . . . |
3-14 |
|
Fog light switch . . . . . . . . . . . . . . . . . . . . . . . . . . . . . . . . . . . . . . . . . . . . . . . . . |
. . . . . . |
3-18 |
|
Illumination brightness control . . . . . . . . . . . . . . . . . . . . . . . . . . . . . . |
. . . . . . |
3-17 |
|
Light switch . . . . . . . . . . . . . . . . . . . . . . . . . . . . . . . . . . . . . . . . . . . . . . . . . . . . . . |
. . . . . . |
3-14 |
|
Parking light switch . . . . . . . . . . . . . . . . . . . . . . . . . . . . . . . . . . . . . . . . . . . . |
. . . . . . |
3-18 |
|
Lock (Door Lock) . . . . . . . . . . . . . . . . . . . . . . . . . . . . . . . . . . . . . . . . . . . . . . . . . . . . . . . . . . . |
. . . . . . |
1-3 |
|
Lock (Child safety locks) . . . . . . . . . . . . . . . . . . . . . . . . . . . . . . . . . . . . . . . . . . . . . . . . . |
. . . . . . |
1-7 |
|
Lock (Power door locking switches) . . . . . . . . . . . . . . . . . . . . . . . . . . . . . . . . . . |
. . . . . . |
1-6 |
|
Low fuel warning light . . . . . . . . . . . . . . . . . . . . . . . . . . . . . . . . . . . . . . . . . . . . . . . . . . . . . |
. . . . . . |
3-7 |
|
Luggage area light . . . . . . . . . . . . . . . . . . . . . . . . . . . . . . . . . . . . . . . . . . . . . . . . . . . . . . . . . |
. . . . . . |
6-15 |
|
Luggage area light (Bulb replacement) . . . . . . . . . . . . . . . . . . . . . . . . . . . . . . |
. . . . . . |
10-55 |
|
Luggage cover (if equipped) . . . . . . . . . . . . . . . . . . . . . . . . . . . . . . . . . . . . . . . . . . . |
. . . . . . |
6-15 |
13-8

|
Index |
|||
|
Luggage floor storage tray . . . . . . . . . . . . . . . . . . . . . . . . . . . . . . . . . . . . . . . . . . . . . . . . . . . |
. 6-18 |
||
|
Loading your vehicle . . . . . . . . . . . . . . . . . . . . . . . . . . . . . . . . . . . . . . . . . . . . . . . . . . . . . . . . . . . |
. 7-41 |
||
|
Vehicle capacity weight . . . . . . . . . . . . . . . . . . . . . . . . . . . . . . . . . . . . . . . . . . . |
. 7-42 |
||
|
GVWR and GAWR . . . . . . . . . . . . . . . . . . . . . . . . . . . . . . . . . . . . . . . . . . . . . . . . . . . |
. 7-43 |
||
|
Lumbar support . . . . . . . . . . . . . . . . . . . . . . . . . . . . . . . . . . . . . . . . . . . . . . . . . . . . . . . . . . . . . . . . . |
. 2-6 |
||
|
M |
|||
|
Main fuse and fusible link . . . . . . . . . . . . . . . . . . . . . . . . . . . . . . . . . . . . . . . . . . . . . . . . . . . . . |
. 10-46 |
||
|
Maintenance precautions . . . . . . . . . . . . . . . . . . . . . . . . . . . . . . . . . . . . . . . . . . . . . . . . . . . . . |
. 10-3 |
||
|
Before checking or servicing in the engine compartment . 10-4 |
|||
|
When you do the checking or servicing in the engine |
|||
|
compartment while the engine is running . . . . . . . . . . . . . . . . . |
. 10-4 |
||
|
Maintenance tools . . . . . . . . . . . . . . . . . . . . . . . . . . . . . . . . . . . . . . . . . . . . . . . . . . . . . . . . . . . . . . . |
. 6-20 |
||
|
Malfunction indicator lamp (CHECK ENGINE warning light) . . . . . . . . |
. 3-10 |
||
|
Manual transmission . . . . . . . . . . . . . . . . . . . . . . . . . . . . . . . . . . . . . . . . . . . . . . . . . . . . . . . . . . . . |
. 7-16 |
||
|
Driving tips . . . . . . . . . . . . . . . . . . . . . . . . . . . . . . . . . . . . . . . . . . . . . . . . . . . . . . . . . . . . |
. 7-17 |
||
|
Maximum speeds . . . . . . . . . . . . . . . . . . . . . . . . . . . . . . . . . . . . . . . . . . . . . . . . . . . |
. 7-17 |
||
|
Shifting speed for fuel economy . . . . . . . . . . . . . . . . . . . . . . . . . . . . . . . . . |
. 7-17 |
||
|
Manual transmission oil (Maintenance) . . . . . . . . . . . . . . . . . . . . . . . . . . . . . . . . . . . . |
. 10-20 |
||
|
Meter (Combination meter) . . . . . . . . . . . . . . . . . . . . . . . . . . . . . . . . . . . . . . . . . . . . . . . . . . . |
. 3-4 |
||
|
Fuel gauge . . . . . . . . . . . . . . . . . . . . . . . . . . . . . . . . . . . . . . . . . . . . . . . . . . . . . . . . . . . . |
. 3-6 |
||
|
Odometer/Tripmeter . . . . . . . . . . . . . . . . . . . . . . . . . . . . . . . . . . . . . . . . . . . . . . . . |
. 3-5 |
||
|
Speedometer . . . . . . . . . . . . . . . . . . . . . . . . . . . . . . . . . . . . . . . . . . . . . . . . . . . . . . . . . |
. 3-5 |
||
|
Tachometer . . . . . . . . . . . . . . . . . . . . . . . . . . . . . . . . . . . . . . . . . . . . . . . . . . . . . . . . . . . |
. 3-6 |
||
|
Temperature gauge . . . . . . . . . . . . . . . . . . . . . . . . . . . . . . . . . . . . . . . . . . . . . . . . . |
. 3-7 |
||
|
Mirrors . . . . . . . . . . . . . . . . . . . . . . . . . . . . . . . . . . . . . . . . . . . . . . . . . . . . . . . . . . . . . . . . . . . . . . . . . . . . . . |
. 3-25 |
||
|
Inside mirror . . . . . . . . . . . . . . . . . . . . . . . . . . . . . . . . . . . . . . . . . . . . . . . . . . . . . . . . . . |
. 3-25 |
||
|
Outside mirrors . . . . . . . . . . . . . . . . . . . . . . . . . . . . . . . . . . . . . . . . . . . . . . . . . . . . . . |
. 3-26 |
||
|
Remote controlled rearview mirror . . . . . . . . . . . . . . . . . . . . . . . . . . . . . . |
. 3-27 |
||
|
Outside mirror defogger |
3-27 |
||
|
Mirrors (Vanity mirror) . . . . . . . . . . . . . . . . . . . . . . . . . . . . . . . . . . . . . . . . . . . . . . . . . . . . . . . . . . |
. 6-2 |
||
|
N |
|||
|
New vehicle break-in driving . . . . . . . . . . . . . . . . . . . . . . . . . . . . . . . . . . . . . . . . . . . . . . . . . |
. 7-3 |
13-9
![]()
|
O |
|
|
Odometer . . . . . . . . . . . . . . . . . . . . . . . . . . . . . . . . . . . . . . . . . . . . . . . . . . . . . . . . . . . . . . . . . . . . . . . . . . . |
3-5 |
|
Oil (Engine oil) . . . . . . . . . . . . . . . . . . . . . . . . . . . . . . . . . . . . . . . . . . . . . . . . . . . . . . . . . . . . . . . . . . . . |
10-6 |
|
Oil (Manual transmission oil) . . . . . . . . . . . . . . . . . . . . . . . . . . . . . . . . . . . . . . . . . . . . . . . . . . |
10-20 |
|
Oil (Front differential oil) . . . . . . . . . . . . . . . . . . . . . . . . . . . . . . . . . . . . . . . . . . . . . . . . . . . . . . . . |
10-23 |
|
Oil (Rear differential oil) . . . . . . . . . . . . . . . . . . . . . . . . . . . . . . . . . . . . . . . . . . . . . . . . . . . . . . . . . |
10-24 |
|
Oil filter (Engine oil) . . . . . . . . . . . . . . . . . . . . . . . . . . . . . . . . . . . . . . . . . . . . . . . . . . . . . . . . . . . . . . |
10-7 |
|
Oil pressure warning light . . . . . . . . . . . . . . . . . . . . . . . . . . . . . . . . . . . . . . . . . . . . . . . . . . . . . . |
3-9 |
|
Overheat (Engine overheating) . . . . . . . . . . . . . . . . . . . . . . . . . . . . . . . . . . . . . . . . . . . . . . . |
8-2 |
|
P |
|
|
Parking brake . . . . . . . . . . . . . . . . . . . . . . . . . . . . . . . . . . . . . . . . . . . . . . . . . . . . . . . . . . . . . . . . . . . . . |
7-26 |
|
Parking brake stroke (Maintenance) . . . . . . . . . . . . . . . . . . . . . . . . . . . . . . . . . . . . . . . . |
10-39 |
|
Parking your vehicle . . . . . . . . . . . . . . . . . . . . . . . . . . . . . . . . . . . . . . . . . . . . . . . . . . . . . . . . . . . . . |
7-26 |
|
Parking brake . . . . . . . . . . . . . . . . . . . . . . . . . . . . . . . . . . . . . . . . . . . . . . . . . . . . . . . . . |
7-26 |
|
Parking tips . . . . . . . . . . . . . . . . . . . . . . . . . . . . . . . . . . . . . . . . . . . . . . . . . . . . . . . . . . . . |
7-27 |
|
Parking light switch . . . . . . . . . . . . . . . . . . . . . . . . . . . . . . . . . . . . . . . . . . . . . . . . . . . . . . . . . . . . . . |
3-18 |
|
Parking light (Bulb replacement) . . . . . . . . . . . . . . . . . . . . . . . . . . . . . . . . . . . . . . . . . . . . . |
10-52 |
|
Periodic inspections . . . . . . . . . . . . . . . . . . . . . . . . . . . . . . . . . . . . . . . . . . . . . . . . . . . . . . . . . . . . . |
7-10 |
|
Pets and driving . . . . . . . . . . . . . . . . . . . . . . . . . . . . . . . . . . . . . . . . . . . . . . . . . . . . . . . . . . . . . . . . . . |
ix |
|
Power door locking switches (if equipped) . . . . . . . . . . . . . . . . . . . . . . . . . . . . . . . . |
1-6 |
|
Power socket (Accessory power socket) . . . . . . . . . . . . . . . . . . . . . . . . . . . . . . . . . . |
6-9 |
|
Power steering . . . . . . . . . . . . . . . . . . . . . . . . . . . . . . . . . . . . . . . . . . . . . . . . . . . . . . . . . . . . . . . . . . . . |
7-23 |
|
Power steering fluid (Maintenance) . . . . . . . . . . . . . . . . . . . . . . . . . . . . . . . . . . . . . . . . . |
10-26 |
|
Power windows . . . . . . . . . . . . . . . . . . . . . . . . . . . . . . . . . . . . . . . . . . . . . . . . . . . . . . . . . . . . . . . . . . . |
1-8 |
|
Power windows switch cluster (Driver’s side) . . . . . . . . . . . . . . . . . |
1-9 |
|
Front passenger’s switch . . . . . . . . . . . . . . . . . . . . . . . . . . . . . . . . . . . . . . . . . . . |
1-10 |
|
Rear passenger’s switches . . . . . . . . . . . . . . . . . . . . . . . . . . . . . . . . . . . . . . . . |
1-11 |
|
Preparing to drive . . . . . . . . . . . . . . . . . . . . . . . . . . . . . . . . . . . . . . . . . . . . . . . . . . . . . . . . . . . . . . . . |
7-9 |
|
R |
|
|
Radio . . . . . . . . . . . . . . . . . . . . . . . . . . . . . . . . . . . . . . . . . . . . . . . . . . . . . . . . . . . . . . . . . . . . . . . . . . . . . . . . |
5-2 |
|
Antenna . . . . . . . . . . . . . . . . . . . . . . . . . . . . . . . . . . . . . . . . . . . . . . . . . . . . . . . . . . . . . . . . . |
5-2 |
|
FM reception . . . . . . . . . . . . . . . . . . . . . . . . . . . . . . . . . . . . . . . . . . . . . . . . . . . . . . . . . . |
5-3 |
|
Radio operation . . . . . . . . . . . . . . . . . . . . . . . . . . . . . . . . . . . . . . . . . . . . . . . . . . . . . . . . . . . . . . . . . . . |
5-4 |
|
AM/FM stereo radio with cassette player . . . . . . . . . . . . . . . . . . . . . . . . . . . . . . . . . . |
5-4 |
13-10

|
Index |
|||
|
Rear combination light (Bulb replacement) . . . . . . . . . . . . . . . . . . . . . . . . . . . . . . |
. 10-53 |
||
|
Rear differential gear oil (AWD vehicles) (Maintenance) . . . . . . . . . . . . . . |
. 10-24 |
||
|
Rear gate . . . . . . . . . . . . . . . . . . . . . . . . . . . . . . . . . . . . . . . . . . . . . . . . . . . . . . . . . . . . . . . . . . . . . . . . . . |
. 1-12 |
||
|
Rear seats . . . . . . . . . . . . . . . . . . . . . . . . . . . . . . . . . . . . . . . . . . . . . . . . . . . . . . . . . . . . . . . . . . . . . . . . . |
. 2-8 |
||
|
Folding down the seatback . . . . . . . . . . . . . . . . . . . . . . . . . . . . . . . . . . . . . . . |
. 2-10 |
||
|
Head rest adjustment . . . . . . . . . . . . . . . . . . . . . . . . . . . . . . . . . . . . . . . . . . . . . . |
. 2-10 |
||
|
Reclining the seatback . . . . . . . . . . . . . . . . . . . . . . . . . . . . . . . . . . . . . . . . . . . . |
. 2-9 |
||
|
Rear view mirror . . . . . . . . . . . . . . . . . . . . . . . . . . . . . . . . . . . . . . . . . . . . . . . . . . . . . . . . . . . . . . . . . |
. 3-25 |
||
|
Rear window defogger switch . . . . . . . . . . . . . . . . . . . . . . . . . . . . . . . . . . . . . . . . . . . . . . . |
. 3-24 |
||
|
Rear window wiper and washer switch . . . . . . . . . . . . . . . . . . . . . . . . . . . . . . . . . . . . |
. 3-22 |
||
|
Remote control mirror switch . . . . . . . . . . . . . . . . . . . . . . . . . . . . . . . . . . . . . . . . . . . . . . . . . |
. 3-27 |
||
|
Replacement of brake pad and lining . . . . . . . . . . . . . . . . . . . . . . . . . . . . . . . . . . . . . |
. 10-38 |
||
|
Brake pad . . . . . . . . . . . . . . . . . . . . . . . . . . . . . . . . . . . . . . . . . . . . . . . . . . . . . . . . . . . . . |
. 10-38 |
||
|
Parking brake lining . . . . . . . . . . . . . . . . . . . . . . . . . . . . . . . . . . . . . . . . . . . . . . . . |
. 10-39 |
||
|
Replacement of windshield wiper blades . . . . . . . . . . . . . . . . . . . . . . . . . . . . . . . . . |
. 10-33 |
||
|
Replacing bulbs . . . . . . . . . . . . . . . . . . . . . . . . . . . . . . . . . . . . . . . . . . . . . . . . . . . . . . . . . . . . . . . . . |
. 10-49 |
||
|
Fog light . . . . . . . . . . . . . . . . . . . . . . . . . . . . . . . . . . . . . . . . . . . . . . . . . . . . . . . . . . . . . . . |
. 10-51 |
||
|
Front turn signal, parking light and front side marker light |
10-52 |
||
|
Headlight . . . . . . . . . . . . . . . . . . . . . . . . . . . . . . . . . . . . . . . . . . . . . . . . . . . . . . . . . . . . . . |
. 10-50 |
||
|
High mount stop light . . . . . . . . . . . . . . . . . . . . . . . . . . . . . . . . . . . . . . . . . . . . . . |
. 10-56 |
||
|
Interior light, spot light and luggage compartment . . . . . . . . . |
. 10-55 |
||
|
License plate light . . . . . . . . . . . . . . . . . . . . . . . . . . . . . . . . . . . . . . . . . . . . . . . . . . . |
. 10-54 |
||
|
Rear combination lights . . . . . . . . . . . . . . . . . . . . . . . . . . . . . . . . . . . . . . . . . . . |
. 10-53 |
||
|
Reporting safety defects . . . . . . . . . . . . . . . . . . . . . . . . . . . . . . . . . . . . . . . . . . . . . . . . . . . . . . |
. 12-4 |
||
|
Roof rail / Roof rack . . . . . . . . . . . . . . . . . . . . . . . . . . . . . . . . . . . . . . . . . . . . . . . . . . . . . . . . . . . . . |
. 1-16 |
||
|
Rotation (Tire) . . . . . . . . . . . . . . . . . . . . . . . . . . . . . . . . . . . . . . . . . . . . . . . . . . . . . . . . . . . . . . . . . . . . |
. 10-40 |
||
|
S |
|||
|
Seat (Front seat) . . . . . . . . . . . . . . . . . . . . . . . . . . . . . . . . . . . . . . . . . . . . . . . . . . . . . . . . . . . . . . . . . |
. 2-2 |
||
|
Seat (Rear seat) |
2-8 |
||
|
Seat belt safety tips . . . . . . . . . . . . . . . . . . . . . . . . . . . . . . . . . . . . . . . . . . . . . . . . . . . . . . . . . . . . . |
. 2-20 |
||
|
. . . . . . . . . . . . . . . . . . . . . . . . . . . . . . . . . . . . . . . . . . . . . . . . . . . . . . . . . . . . . . . .Children |
. 2-20 |
||
|
Expectant mothers . . . . . . . . . . . . . . . . . . . . . . . . . . . . . . . . . . . . . . . . . . . . . . . . . . |
. 2-21 |
||
|
Infant or small children . . . . . . . . . . . . . . . . . . . . . . . . . . . . . . . . . . . . . . . . . . . . . |
. 2-20 |
||
|
Maintenance . . . . . . . . . . . . . . . . . . . . . . . . . . . . . . . . . . . . . . . . . . . . . . . . . . . . . . . . . . |
. 2-21 |
||
|
Seat fabric (Cleaning the interior) . . . . . . . . . . . . . . . . . . . . . . . . . . . . . . . . . . . . . . . . . . . |
. 9-5 |
13-11

|
Seat heater . . . . . . . . . . . . . . . . . . . . . . . . . . . . . . . . . . . . . . . . . . . . . . . . . . . . . . . . . . . . . . . . . . . . . . |
. . . 2-7 |
|
Seatback (Reclining the seatback) . . . . . . . . . . . . . . . . . . . . . . . . . . . . . . . . . . . . . . |
2-4, 2-9 |
|
Seat belts Ð 2-point type (lap only belts) . . . . . . . . . . . . . . . . . . . . . . . . . . . . . . |
. . . 2-17 |
|
Fastening the seat belt . . . . . . . . . . . . . . . . . . . . . . . . . . . . . . . . . . . . . . . . . . . |
. . . 2-18 |
|
Unfastening the belt . . . . . . . . . . . . . . . . . . . . . . . . . . . . . . . . . . . . . . . . . . . . . . |
. . . 2-19 |
|
Seat belts Ð 3-point type (combination lap/shoulder belts) . . . . . . . |
. . . 2-11 |
|
Seat belt warning light and chime . . . . . . . . . . . . . . . . . . . . . . . . . . . . |
. . . 2-13 |
|
ELR (Emergency Locking Retractor) function . . . . . . . . . . . . . |
. . . 2-14 |
|
ALR (Automatic Locking Retractor) function . . . . . . . . . . . . . . . |
. . . 2-14 |
|
Adjusting the shoulder belt anchor height . . . . . . . . . . . . . . . . . . |
. . . 2-16 |
|
Fastening the seat belt . . . . . . . . . . . . . . . . . . . . . . . . . . . . . . . . . . . . . . . . . . . |
. . . 2-14 |
|
Unfastening the belt . . . . . . . . . . . . . . . . . . . . . . . . . . . . . . . . . . . . . . . . . . . . . . |
. . . 2-15 |
|
Seat belt warning light and chime . . . . . . . . . . . . . . . . . . . . . . . . . . . . . . . . . . . . . . . |
2-13, 3-8 |
|
Selector lever (automatic transmission) . . . . . . . . . . . . . . . . . . . . . . . . . . . . . . . . . |
. . . 7-19 |
|
Shift lever (Manual transmission) . . . . . . . . . . . . . . . . . . . . . . . . . . . . . . . . . . . . . . . . . . |
. . . 7-16 |
|
Shift lock release . . . . . . . . . . . . . . . . . . . . . . . . . . . . . . . . . . . . . . . . . . . . . . . . . . . . . . . . . . . . . . |
. . . 7-21 |
|
Side marker light (Bulb replacement) . . . . . . . . . . . . . . . . . . . . . . . . . . . . . . . . . . . . |
. . . 10-52 |
|
Snow tires (Winter driving) . . . . . . . . . . . . . . . . . . . . . . . . . . . . . . . . . . . . . . . . . . . . . . . . . . |
. . . 7-39 |
|
Spark plugs (Maintenance) . . . . . . . . . . . . . . . . . . . . . . . . . . . . . . . . . . . . . . . . . . . . . . . . . |
. . . 10-18 |
|
Specifications . . . . . . . . . . . . . . . . . . . . . . . . . . . . . . . . . . . . . . . . . . . . . . . . . . . . . . . . . . . . . . . . . . |
. . . 11-2 |
|
Capacities . . . . . . . . . . . . . . . . . . . . . . . . . . . . . . . . . . . . . . . . . . . . . . . . . . . . . . . . . . . |
. . . 11-2 |
|
Dimensions . . . . . . . . . . . . . . . . . . . . . . . . . . . . . . . . . . . . . . . . . . . . . . . . . . . . . . . . . |
. . . 11-2 |
|
Electrical system . . . . . . . . . . . . . . . . . . . . . . . . . . . . . . . . . . . . . . . . . . . . . . . . . . |
. . . 11-2 |
|
Engine . . . . . . . . . . . . . . . . . . . . . . . . . . . . . . . . . . . . . . . . . . . . . . . . . . . . . . . . . . . . . . . . |
. . . 11-2 |
|
Tires . . . . . . . . . . . . . . . . . . . . . . . . . . . . . . . . . . . . . . . . . . . . . . . . . . . . . . . . . . . . . . . . . . . |
. . . 11-3 |
|
Wheel alignment . . . . . . . . . . . . . . . . . . . . . . . . . . . . . . . . . . . . . . . . . . . . . . . . . . . |
. . . 11-3 |
|
Speedometer . . . . . . . . . . . . . . . . . . . . . . . . . . . . . . . . . . . . . . . . . . . . . . . . . . . . . . . . . . . . . . . . . . . |
. . . 3-5 |
|
Spotlight (if equipped) . . . . . . . . . . . . . . . . . . . . . . . . . . . . . . . . . . . . . . . . . . . . . . . . . . . . . . . |
. . . 6-14 |
|
Spotlight (Bulb replacement) . . . . . . . . . . . . . . . . . . . . . . . . . . . . . . . . . . . . . . . . . . . . . . . |
. . . 10-55 |
|
SRS AIRBAG . . . . . . . . . . . . . . . . . . . . . . . . . . . . . . . . . . . . . . . . . . . . . . . . . . . . . . . . . . . . . . . . . . . |
. . . 2-28 |
|
Precautions for vehicle modification . . . . . . . . . . . . . . . . . . . . . . . . . . |
. . . 2-38 |
|
SRS AIRBAG system operation . . . . . . . . . . . . . . . . . . . . . . . . . . . . . . . . |
. . . 2-32 |
|
System monitors . . . . . . . . . . . . . . . . . . . . . . . . . . . . . . . . . . . . . . . . . . . . . . . . . . . |
. . . 2-36 |
|
System servicing . . . . . . . . . . . . . . . . . . . . . . . . . . . . . . . . . . . . . . . . . . . . . . . . . . |
. . . 2-37 |
|
Vehicle with driver’s and front passenger’s SRS AIRBAGs |
|
|
and lap/shoulder restraints . . . . . . . . . . . . . . . . . . . . . . . . . . . . . . . . . |
. . . 2-28 |
13-12

|
Index |
|||
|
SRS AIRBAG warning light . . . . . . . . . . . . . . . . . . . . . . . . . . . . . . . . . . . . . . . . . . . . . . . . . . . |
. 3-8 |
||
|
Starting the engine . . . . . . . . . . . . . . . . . . . . . . . . . . . . . . . . . . . . . . . . . . . . . . . . . . . . . . . . . . . . . . |
. 7-13 |
||
|
Automatic transmission vehicles . . . . . . . . . . . . . . . . . . . . . . . . . . . . . . . . |
. 7-14 |
||
|
During cold weather below ±4°F (±20°C) . . . . . . . . . . . . . . . . . . . . . |
. 7-15 |
||
|
Flooded engine . . . . . . . . . . . . . . . . . . . . . . . . . . . . . . . . . . . . . . . . . . . . . . . . . . . . . . |
. 7-15 |
||
|
Manual transmission vehicles . . . . . . . . . . . . . . . . . . . . . . . . . . . . . . . . . . . . |
. 7-13 |
||
|
Spare tire . . . . . . . . . . . . . . . . . . . . . . . . . . . . . . . . . . . . . . . . . . . . . . . . . . . . . . . . . . . . . . . . . . . . . . . . . . |
. 8-11 |
||
|
Steering . . . . . . . . . . . . . . . . . . . . . . . . . . . . . . . . . . . . . . . . . . . . . . . . . . . . . . . . . . . . . . . . . . . . . . . . . . . . |
. 7-23 |
||
|
Power steering . . . . . . . . . . . . . . . . . . . . . . . . . . . . . . . . . . . . . . . . . . . . . . . . . . . . . . . |
. 7-23 |
||
|
Tilt steering wheel . . . . . . . . . . . . . . . . . . . . . . . . . . . . . . . . . . . . . . . . . . . . . . . . . . . |
. 7-23 |
||
|
Step light (Bulb replacement) . . . . . . . . . . . . . . . . . . . . . . . . . . . . . . . . . . . . . . . . . . . . . . . . |
. 10-55 |
||
|
Stopping the engine . . . . . . . . . . . . . . . . . . . . . . . . . . . . . . . . . . . . . . . . . . . . . . . . . . . . . . . . . . . . |
. 7-16 |
||
|
Storage compartment . . . . . . . . . . . . . . . . . . . . . . . . . . . . . . . . . . . . . . . . . . . . . . . . . . . . . . . . . . |
. 6-3 |
||
|
Center console . . . . . . . . . . . . . . . . . . . . . . . . . . . . . . . . . . . . . . . . . . . . . . . . . . . . . . |
6-4 |
||
|
Coin tray . . . . . . . . . . . . . . . . . . . . . . . . . . . . . . . . . . . . . . . . . . . . . . . . . . . . . . . . . . . . . . |
6-6 |
||
|
Dashboard storage compartment . . . . . . . . . . . . . . . . . . . . . . . . . . . . . |
6-5 |
||
|
Door storage compartment . . . . . . . . . . . . . . . . . . . . . . . . . . . . . . . . . . . . . . |
6-5 |
||
|
Glove compartment . . . . . . . . . . . . . . . . . . . . . . . . . . . . . . . . . . . . . . . . . . . . . . . . |
6-3 |
||
|
Storage tray (Luggage floor storage tray) . . . . . . . . . . . . . . . . . . . . . . . . . . . . . . . . |
. 6-18 |
||
|
Sun visors . . . . . . . . . . . . . . . . . . . . . . . . . . . . . . . . . . . . . . . . . . . . . . . . . . . . . . . . . . . . . . . . . . . . . . . . . |
. 6-2 |
||
|
Vanity mirror (if equipped) . . . . . . . . . . . . . . . . . . . . . . . . . . . . . . . . . . . . . . . |
6-2 |
||
|
T |
|||
|
Tachometer . . . . . . . . . . . . . . . . . . . . . . . . . . . . . . . . . . . . . . . . . . . . . . . . . . . . . . . . . . . . . . . . . . . . . . . |
. 3-6 |
||
|
Temperature gauge . . . . . . . . . . . . . . . . . . . . . . . . . . . . . . . . . . . . . . . . . . . . . . . . . . . . . . . . . . . . . |
. 3-7 |
||
|
Tips for using the brakes . . . . . . . . . . . . . . . . . . . . . . . . . . . . . . . . . . . . . . . . . . . . . . . . . . . . . . |
. 7-28 |
||
|
ABS (Anti-Lock Brake System) (if equipped) . . . . . . . . . . . . . . . . |
. 7-30 |
||
|
Brake system . . . . . . . . . . . . . . . . . . . . . . . . . . . . . . . . . . . . . . . . . . . . . . . . . . . . . . . . . |
. 7-29 |
||
|
Braking tips . . . . . . . . . . . . . . . . . . . . . . . . . . . . . . . . . . . . . . . . . . . . . . . . . . . . . . . . . . . |
. 7-28 |
||
|
Disc brake pad wear warning indicators |
7-30 |
||
|
Tilt steering wheel . . . . . . . . . . . . . . . . . . . . . . . . . . . . . . . . . . . . . . . . . . . . . . . . . . . . . . . . . . . . . . . |
. 7-23 |
||
|
. . . . . . . . . . . . . . . . . . . . . . . . . .Tire (Uniformity tire quality grading standards) |
. 12-2 |
||
|
Tire (Snow tires = Winter driving) . . . . . . . . . . . . . . . . . . . . . . . . . . . . . . . . . . . . . . . . . . . |
. 7-39 |
||
|
Tire chains (Winter driving) . . . . . . . . . . . . . . . . . . . . . . . . . . . . . . . . . . . . . . . . . . . . . . . . . . . |
. 7-40 |
||
|
Tire rotation (Tires and wheels) . . . . . . . . . . . . . . . . . . . . . . . . . . . . . . . . . . . . . . . . . . . . . . |
. 10-40 |
||
|
Tires and wheels . . . . . . . . . . . . . . . . . . . . . . . . . . . . . . . . . . . . . . . . . . . . . . . . . . . . . . . . . . . . . . . . |
. 10-40 |
13-13

|
Inspection and rotation . . . . . . . . . . . . . . . . . . . . . . . . . . . . . . . . . . . . . . . . . . . . . |
10-40 |
|
Tire size (Specifications) . . . . . . . . . . . . . . . . . . . . . . . . . . . . . . . . . . . . . . . . . . . . . . . . . . . . . . . |
11-3 |
|
Tool (Maintenance tools) . . . . . . . . . . . . . . . . . . . . . . . . . . . . . . . . . . . . . . . . . . . . . . . . . . . . . . . |
6-20 |
|
Tool (Tire changing tools) . . . . . . . . . . . . . . . . . . . . . . . . . . . . . . . . . . . . . . . . . . . . . . . . . . . . . . |
8-10 |
|
Top strap anchor (Child restraint system) . . . . . . . . . . . . . . . . . . . . . . . . . . . . . . . . . . |
2-26 |
|
Towing . . . . . . . . . . . . . . . . . . . . . . . . . . . . . . . . . . . . . . . . . . . . . . . . . . . . . . . . . . . . . . . . . . . . . . . . . . . . . . . |
8-12 |
|
Towing eyelet . . . . . . . . . . . . . . . . . . . . . . . . . . . . . . . . . . . . . . . . . . . . . . . . . . . . . . . . . . |
8-15 |
|
Towing with all wheels on the ground . . . . . . . . . . . . . . . . . . . . . . . . . . . |
8-13 |
|
Towing with the front wheels raised off the ground . . . . . . . . . . |
8-12 |
|
Transporting your vehicle using a flat-bed truck . . . . . . . . . . . . . |
8-12 |
|
Towing trailer . . . . . . . . . . . . . . . . . . . . . . . . . . . . . . . . . . . . . . . . . . . . . . . . . . . . . . . . . . . . . . . . . . . . . . |
7-44 |
|
Trailer towing . . . . . . . . . . . . . . . . . . . . . . . . . . . . . . . . . . . . . . . . . . . . . . . . . . . . . . . . . . . . . . . . . . . . . . |
7-44 |
|
Connecting a trailer . . . . . . . . . . . . . . . . . . . . . . . . . . . . . . . . . . . . . . . . . . . . . . . . . . |
7-49 |
|
Maximum load limits . . . . . . . . . . . . . . . . . . . . . . . . . . . . . . . . . . . . . . . . . . . . . . . . . |
7-45 |
|
Trailer hitches . . . . . . . . . . . . . . . . . . . . . . . . . . . . . . . . . . . . . . . . . . . . . . . . . . . . . . . . . . |
7-49 |
|
Trailer towing tips . . . . . . . . . . . . . . . . . . . . . . . . . . . . . . . . . . . . . . . . . . . . . . . . . . . . . |
7-52 |
|
Warranties and maintenance . . . . . . . . . . . . . . . . . . . . . . . . . . . . . . . . . . . . . . |
7-44 |
|
Trip meter (Odometer/Tripmeter) . . . . . . . . . . . . . . . . . . . . . . . . . . . . . . . . . . . . . . . . . . . . . |
3-5 |
|
Turn signal indicator lights . . . . . . . . . . . . . . . . . . . . . . . . . . . . . . . . . . . . . . . . . . . . . . . . . . . . . |
3-13 |
|
Turn signal lever . . . . . . . . . . . . . . . . . . . . . . . . . . . . . . . . . . . . . . . . . . . . . . . . . . . . . . . . . . . . . . . . . . |
3-14 |
|
Turn signal light (Bulb replacement Ð Front) . . . . . . . . . . . . . . . . . . . . . . . . . . . . . |
10-52 |
|
Turn signal light (Bulb replacement Ð Rear) . . . . . . . . . . . . . . . . . . . . . . . . . . . . . |
10-53 |
|
V |
|
|
Vanity mirror . . . . . . . . . . . . . . . . . . . . . . . . . . . . . . . . . . . . . . . . . . . . . . . . . . . . . . . . . . . . . . . . . . . . . . . |
6-2 |
|
Vehicle identification . . . . . . . . . . . . . . . . . . . . . . . . . . . . . . . . . . . . . . . . . . . . . . . . . . . . . . . . . . . . . |
11-8 |
|
Ventilation . . . . . . . . . . . . . . . . . . . . . . . . . . . . . . . . . . . . . . . . . . . . . . . . . . . . . . . . . . . . . . . . . . . . . . . . . . |
4-7 |
|
Ventilator . . . . . . . . . . . . . . . . . . . . . . . . . . . . . . . . . . . . . . . . . . . . . . . . . . . . . . . . . . . . . . . . . . . . . . . . . . . . |
4-2 |
|
Vehicle capacity weight . . . . . . . . . . . . . . . . . . . . . . . . . . . . . . . . . . . . . . . . . . . . . . . . . . . . . . . . |
7-42 |
|
U |
|
|
Uniform tire quality grading standards . . . . . . . . . . . . . . . . . . . . . . . . . . . . . . . . . . . . . |
12-2 |
|
Treadwear . . . . . . . . . . . . . . . . . . . . . . . . . . . . . . . . . . . . . . . . . . . . . . . . . . . . . . . . . . . . . . |
12-2 |
|
Traction A, B, C . . . . . . . . . . . . . . . . . . . . . . . . . . . . . . . . . . . . . . . . . . . . . . . . . . . . . . . |
12-2 |
|
Temperature A, B, C . . . . . . . . . . . . . . . . . . . . . . . . . . . . . . . . . . . . . . . . . . . . . . . . . |
12-3 |
13-14

|
Index |
||||
|
W |
||||
|
Warning and indicator lights . . . . . . . . . . . . . . . . . . . . . . . . . . . . . . . . . . . . . . . . . . . . . . . . . . |
3-8 |
|||
|
ABS warning light (for vehicles with ABS) . . . . . . . . . . . . . . . . . . . . . |
3-12 |
|||
|
AT OIL TEMPerature warning light (for AT vehicles) . . . . . . . . . |
3-12 |
|||
|
Brake system warning light . . . . . . . . . . . . . . . . . . . . . . . . . . . . . . . . . . . . . . . . |
3-9 |
|||
|
CHECK ENGINE warning light/Malfunction indicator lamp |
3-10 |
|||
|
Checking bulbs . . . . . . . . . . . . . . . . . . . . . . . . . . . . . . . . . . . . . . . . . . . . . . . . . . . . . . . |
3-8 |
|||
|
Door open warning lights . . . . . . . . . . . . . . . . . . . . . . . . . . . . . . . . . . . . . . . . . . |
3-13 |
|||
|
Front-wheel drive warning light (for AT vehicles) . . . . . . . . . . . . . |
3-13 |
|||
|
High beam indicator . . . . . . . . . . . . . . . . . . . . . . . . . . . . . . . . . . . . . . . . . . . . . . . . . |
3-13 |
|||
|
Low fuel warning light (Fuel gauge) . . . . . . . . . . . . . . . . . . . . . . . . . . . . . |
3-7 |
|||
|
Oil pressure warning light . . . . . . . . . . . . . . . . . . . . . . . . . . . . . . . . . . . . . . . . . . |
3-9 |
|||
|
Seat belt warning light and chime . . . . . . . . . . . . . . . . . . . . . . . . . . . . . . . |
3-8 |
|||
|
SRS AIRBAG warning light . . . . . . . . . . . . . . . . . . . . . . . . . . . . . . . . . . . . . . . . |
3-8 |
|||
|
Washing (Exterior care) . . . . . . . . . . . . . . . . . . . . . . . . . . . . . . . . . . . . . . . . . . . . . . . . . . . . . . . . . |
9-2 |
|||
|
Waxing (Exterior care) . . . . . . . . . . . . . . . . . . . . . . . . . . . . . . . . . . . . . . . . . . . . . . . . . . . . . . . . . . |
9-3 |
|||
|
Windows . . . . . . . . . . . . . . . . . . . . . . . . . . . . . . . . . . . . . . . . . . . . . . . . . . . . . . . . . . . . . . . . . . . . . . . . . . . . |
1-8 |
|||
|
Power window . . . . . . . . . . . . . . . . . . . . . . . . . . . . . . . . . . . . . . . . . . . . . . . . . . . . . . . . . |
1-8 |
|||
|
Windshield washer fluid . . . . . . . . . . . . . . . . . . . . . . . . . . . . . . . . . . . . . . . . . . . . . . . . . . . . . . . . |
10-32 |
|||
|
Windshield wiper and washer switch . . . . . . . . . . . . . . . . . . . . . . . . . . . . . . . . . . . . . . . |
3-21 |
|||
|
Winter driving . . . . . . . . . . . . . . . . . . . . . . . . . . . . . . . . . . . . . . . . . . . . . . . . . . . . . . . . . . . . . . . . . . . . . . |
7-36 |
|||
|
Corrosion protection . . . . . . . . . . . . . . . . . . . . . . . . . . . . . . . . . . . . . . . . . . . . . . . . . |
7-41 |
|||
|
Driving on snowy and icy roads . . . . . . . . . . . . . . . . . . . . . . . . . . . . . . . . . . |
7-38 |
|||
|
Operation during cold weather . . . . . . . . . . . . . . . . . . . . . . . . . . . . . . . . . . . |
7-36 |
|||
|
Rocking the vehicle . . . . . . . . . . . . . . . . . . . . . . . . . . . . . . . . . . . . . . . . . . . . . . . . . . |
7-40 |
|||
|
Snow tires . . . . . . . . . . . . . . . . . . . . . . . . . . . . . . . . . . . . . . . . . . . . . . . . . . . . . . . . . . . . . . |
7-39 |
|||
|
Tire chains . . . . . . . . . . . . . . . . . . . . . . . . . . . . . . . . . . . . . . . . . . . . . . . . . . . . . . . . . . . . . |
7-40 |
|||
|
Wiper controls . . . . . . . . . . . . . . . . . . . . . . . . . . . . . . . . . . . . . . . . . . . . . . . . . . . . . . . . . . . . . . . . . . . . . |
3-19 |
|||
|
Rear window wiper and washer switch . . . . . . . . . . . . . . . . . . . . . . . . . |
3-22 |
|||
|
Windshield wipers and washer switch |
3-21 |
|||
|
Windshield wiper blades (Replacement) . . . . . . . . . . . . . . . . . . . . . . . . . . . . . . . . . . |
10-33 |
13-15

Doors and locks
|
Keys . . . . . . . . . . . . . . . . . . . . . . . . . . . . . . . . . . . . . . . . . . . . . . . . . . . . . . . . . . . . . . . . . . . . . . . . . . . |
1-2 |
|||
|
1 |
||||
|
. . . . . . . . . . . . . . . . . . . . . . . . . . . . . . . . . . . . .Master, submaster and valet key |
1-2 |
|||
|
Key number . . . . . . . . . . . . . . . . . . . . . . . . . . . . . . . . . . . . . . . . . . . . . . . . . . . . . . . . . . . . . . . |
1-2 |
|||
|
Door locks . . . . . . . . . . . . . . . . . . . . . . . . . . . . . . . . . . . . . . . . . . . . . . . . . . . . . . . . . . . . . . . . . . . |
1-3 |
|||
|
Locking and unlocking from the outside . . . . . . . . . . . . . . . . . . . . . . . . . . . . |
1-3 |
|||
|
Locking and unlocking from the inside . . . . . . . . . . . . . . . . . . . . . . . . . . . . . |
1-5 |
|||
|
Power door locking switches (if equipped) . . . . . . . . . . . . . . . . . . . . . . . . . |
1-6 |
|||
|
Child safety locks . . . . . . . . . . . . . . . . . . . . . . . . . . . . . . . . . . . . . . . . . . . . . . . . . . . . . . . |
1-7 |
|||
|
Door open warning lights . . . . . . . . . . . . . . . . . . . . . . . . . . . . . . . . . . . . . . . . . . . . . . |
1-8 |
|||
|
Power windows . . . . . . . . . . . . . . . . . . . . . . . . . . . . . . . . . . . . . . . . . . . . . . . . . . . . . . . . . . . . |
1-8 |
|||
|
Power window switch cluster (driver’s side) . . . . . . . . . . . . . . . . . . . . . . . |
1-9 |
|||
|
Front passenger’s switches . . . . . . . . . . . . . . . . . . . . . . . . . . . . . . . . . . . . . . . . . . . |
1-10 |
|||
|
Rear passenger’s switches . . . . . . . . . . . . . . . . . . . . . . . . . . . . . . . . . . . . . . . . . . . . |
1-11 |
|||
|
Rear gate . . . . . . . . . . . . . . . . . . . . . . . . . . . . . . . . . . . . . . . . . . . . . . . . . . . . . . . . . . . . . . . . . . . . |
1-12 |
|||
|
To open and close the rear gate . . . . . . . . . . . . . . . . . . . . . . . . . . . . . . . . . . . . . . |
1-12 |
|||
|
Fuel filler door and cap . . . . . . . . . . . . . . . . . . . . . . . . . . . . . . . . . . . . . . . . . . . . . . . . . |
1-13 |
|||
|
To open and close the fuel filler door . . . . . . . . . . . . . . . . . . . . . . . . . . . . . . . . |
1-13 |
|||
|
Fuel filler cap . . . . . . . . . . . . . . . . . . . . . . . . . . . . . . . . . . . . . . . . . . . . . . . . . . . . . . . . . . . . . |
1-14 |
|||
|
Refueling . . . . . . . . . . . . . . . . . . . . . . . . . . . . . . . . . . . . . . . . . . . . . . . . . . . . . . . . . . . . . . . . . . |
1-14 |
|||
|
Engine hood . . . . . . . . . . . . . . . . . . . . . . . . . . . . . . . . . . . . . . . . . . . . . . . . . . . . . . . . . . . . . . . . |
1-15 |
|||
|
Roof rail . . . . . . . . . . . . . . . . . . . . . . . . . . . . . . . . . . . . . . . . . . . . . . . . . . . . . . . . . . . . . . . . . . . . . |
1-16 |
|||
|
Roof rack |
||||
|
(When luggage is put on the slats of the roof cross bar kit) . . |
1-17 |
|||
|
Installing carrying attachments on the cross bars . . . . . . . . . . . . . . . . |
1-17 |

Keys
Master key
Submaster key
Valet key
Key number plate
HS0009
J Master, submaster and valet key
Three types of keys are provided for your vehicle.
Master key, submaster key and valet key.
The master key and submaster key fit all locks on your vehicle.
DIgnition switch
DDoors
DRear gate
DGlove compartment
The valet key fits only the ignition switch and door locks. You can keep the glove compartment locked when you leave your vehicle and valet key at a parking facility.
J Key number
The key number is stamped on the metal plate attached to the key set. Write down the key number and keep it in another safe place, not in the vehicle. This number is needed to make a replacement key if you lose your key or lock it inside the vehicle.
1-2

Doors and locks
Door locks
JLocking and unlocking from the outside
B For Vehicles with power door locking switches
Unlock
Lock
To lock the door from the outside with the key, turn the key toward the rear. To unlock the door, turn the key toward the front.
Pull the outside door handle to open an unlocked door.
|
Locking without the key |
Locking without the key |
|
1 |
||||||||
|
2 |
||||||||
|
2 |
||||||||
|
1 |
||||||||
|
1 Push the power door locking |
||||||||
|
1 Press the lock lever. |
||||||||
|
switch rearward. |
||||||||
|
2 Close the door. |
||||||||
|
HS0011 |
2 Close the door. |
HS0012 |
||||||
To lock the door from the outside without the key, press the end of the lock lever down on the door and then close the door.
To lock the door from the outside using the power door locking switch, push the switch rearward (ªLOCKº side) and then close the door. In this case, all closed doors and the rear gate are locked at the same
± CONTINUED ±
1-3

time. Always make sure that all doors and the rear gate are locked before leaving your vehicle.
NOTE
Make sure that you do not leave the key inside the vehicle before locking the doors from the outside without the key.
B For vehicles without power door locking switches
Unlock
Lock
To lock the door from the outside with the key, turn the key toward the rear. To unlock the door, turn the key toward the front.
Pull the outside door handle to open an unlocked door.
|
Locking without the key (Front door) |
Locking without the key (Rear door) |
|
1 |
||||||||||
|
1 |
||||||||||
|
2 |
||||||||||
|
2 |
||||||||||
|
1 Press the lock lever. |
||||||||||
|
1 Press the lock lever. |
||||||||||
|
2 Close the door while holding |
||||||||||
|
2 Close the door. |
||||||||||
|
the handle up. |
HS0011 |
HS0013 |
||||||||
To lock the from the outside without the key, press the end of the lock lever down on the door and hold the outside door handle up while closing the door.
1-4
![]()
Doors and locks
To lock the rear door from the outside without the key, press the end of the lock lever down on the door and then close the door.
Always make sure that all doors and the rear gate are locked before leaving your vehicle.
NOTE
Make sure that you do not leave the key inside the vehicle before locking the doors from the outside without the key.
J Locking and unlocking from the inside
Inside door handle
Red mark
Unlock
Lock
HS0014
To lock the door from the inside, press the end of the lock lever down. To unlock the door from the inside, pull the front end of the lock lever.
The red mark on the lock lever appears when the door is unlocked.
Pull the inside door handle to open an unlocked door.
Always make sure that all doors and the rear gate are closed before starting to drive.
± CONTINUED ±
1-5

J Power door locking switches (if equipped)
|
Driver’s switch |
Front passenger’s switch |
|||
|
Unlock |
Unlock |
|||
HS0016
All doors and the rear gate can be locked and unlocked by the power door locking switches at the driver’s side and the front passenger’s side doors.
To lock the doors, push the switch rearward.
To unlock the doors, push the switch forward.
When you close the doors after you set the door locks, the doors remain locked.
NOTE
Make sure that you do not leave the key inside the vehicle before locking the doors from the outside using power door locking switches.
1-6

Doors and locks
J Child safety locks
Unlock
Lock
HS0015
 WARNING
Always use the child safety lock whenever a child rides in the rear seat. Serious injury could result if a child accidentally opened the door and fell out.
Each rear door has a child safety lock that prevents the doors from being opened even if the inside door handle is pulled.
When the child safety lock lever is in the lock position, the door cannot be opened from inside regardless of the position of the inner door handle lock lever. The door can only be opened from the outside.
± CONTINUED ±
1-7

Door open warning lights
The door open warning light comes on if any door is not fully closed. Always make sure this light is out before starting to drive.
Power windows
 WARNING
DWhen operating power windows, be extremely careful to prevent anyone’s fingers, arms or head from being caught in the window.
DAlways lock the passengers’ windows using the lock switch when children are riding in the vehicle.
DBefore leaving the vehicle, always remove the key from the ignition switch for safety if a child remains in the vehicle. Failure to follow this procedure could result in injury to a child operating the power window.
The power windows operate only when the ignition switch is in the ªONº position.
1-8

Doors and locks
J Power window switch cluster (driver’s side)
|
Lock switch |
|||||||||
|
ªAUTOº switch for |
|||||||||
|
For front |
|||||||||
|
driver’s window |
|||||||||
|
passenger’s |
|||||||||
|
window |
|||||||||
|
For rear left |
|||||||||
|
For rear right |
|||||||||
|
passenger’s |
|||||||||
|
passenger’s |
|||||||||
|
window |
|||||||||
|
window |
|||||||||
|
HS0017 |
|||||||||
|
Lock Unlock |
|
Close |
Close |
|
Open |
|
|
Automatically |
Open |
|
open |
HS0018
All door windows can be controlled by the power window switch cluster at the driver side door.
B To open or close the driver’s window
AUTO switch: This switch has two functions.
Push the switch down until it clicks and release it, and the window will fully open. To stop the window halfway, pull the switch up lightly.
Push the switch down lightly and hold it. The window will open as long as the switch is held.
Pull the switch up lightly and hold it. The window will close as long as the switch is held.
± CONTINUED ±
1-9

B To open or close the passengers’ windows
To open the passengers’ windows, push the appropriate switch down and hold it until the window reaches the desired position. To close the window, pull the switch up and hold it until it reaches the desired position.
B To lock the passengers’ windows
To lock the passengers’ windows, push the lock switch. When the lock switch is in the ªLOCKº position, the passengers’ windows cannot be opened or closed.
J Front passenger’s switch
Close
Open
To open the window, push the switch down and hold it until the window reaches the desired position. To close the window, pull the switch up and hold it until the window reaches the desired position.
When the lock switch on the power window switch cluster, located on the driver’s side door, is in the ªLOCKº position, the front passenger’s window cannot be operated with the front passenger’s switch.
1-10

Doors and locks
J Rear passenger’s switches
Close
Open
HS0020
To open the window, push the switch down and hold it until the window reaches the desired position. To close the window, push the switch up and hold it until the window reaches the desired position.
When the lock switch on the power window switch cluster, located on the driver’s side door, is in the ªLOCKº position, the rear passengers’ windows cannot be operated with the rear passengers’ switches.
± CONTINUED ±
1-11

Rear gate
 WARNING
To prevent dangerous exhaust gas from entering the vehicle, always keep the rear gate closed while driving.
J To open and close the rear gate
Lock
Unlock
HS0021
To unlock the rear gate, insert the key in the keyhole and turn it clockwise. To lock the rear gate, insert the key in the keyhole and turn it counterclockwise. If your vehicle is equipped with power door locking switches, the rear gate can also be locked and unlocked through use of the power door locking switches. Refer to Power Door Locking Switches section in this chapter.
To open the rear gate, first unlock the rear gate lock then pull the outside handle up. To close the rear gate, lower it slowly and push down firmly until the latch engages.
1-12

Doors and locks
Fuel filler door and cap
 WARNING
DGasoline vapor is highly flammable. Before refueling, always first stop the engine and make sure that there are no lighted cigarettes, open flames or electrical sparks in the adjacent area.
DWhen opening the cap, do not remove the cap quickly. Fuel may be under pressure and spray out of the fuel filler neck especially in hot weather, which may cause injury.
 CAUTION
Never add any cleaning agents to the fuel tank. The addition of a cleaning agent may cause damage to the fuel system.
For choosing the right fuel for your SUBARU, refer to the ªFuel Requirementsº section (located in chapter 7).
J To open and close the fuel filler door
To open the fuel filler door, pull it outward. After refueling, be sure to close the fuel filler door completely.
± CONTINUED ±
1-13

J Fuel filler cap
 CAUTION
DMake sure that the cap is tightened until it clicks to prevent fuel spillage in the event of an accident.
DAlways use a genuine SUBARU fuel filler cap. If you use the wrong cap, it may not fit or have proper venting, and your fuel tank and emission control system might be damaged.
Open Close
OM-H2399
To take off the fuel filler cap, turn it slowly counterclockwise and remove the cap.
To put the cap back on, turn it clockwise until you hear a clicking noise. Be certain not to catch the cap tether under the cap while tightening.
NOTE
If the fuel filler cap is not tightened until it clicks or if the tether is caught under the cap, the CHECK ENGINE warning light may come on. Refer to the ªWarning and Indicator Lightsº section located in chapter 3.
J Refueling
After the fuel filler nozzle has automatically stopped, do not add more fuel.
If you spill any fuel on the painted surface, rinse it off immediately. Otherwise, the painted surface could be damaged. Such damage is not cov-
1-14
![]()
Doors and locks
ered under the SUBARU Limited Warranty.
Engine hood
 WARNING
Always check that the hood is properly locked before you start driving. If it is not, it might fly open while the vehicle is moving, blocking your view which may cause an accident and serious bodily injury.
HS0026
To open the hood:
1.Pull the hood release knob under the instrument panel.
2.Release the secondary hood release located under the front of the engine hood by moving the lever toward the left. Lift up the hood, release
±CONTINUED ±
1-15

the hood prop from its retainer and put the end of the hood prop into the slot in the hood.
To close the hood:
1.Lift the hood slightly and remove the hood prop from the slot in the hood and return the prop to its retainer.
2.Lower the hood until it approaches about 6 in. (15 cm) from the closed position and let it drop.
3.After closing the hood, be sure the hood is securely locked.
If this does not close the hood, release it from a slightly higher position. Do not push the hood forcibly to close it. It could deform the engine hood.
Roof rail
 CAUTION
DFor cargo carrying purposes, the roof rail must be used together with a roof cross bar kit. The roof rail must never be used alone to carry cargo. Otherwise, damage to the roof or paint or a dangerous road hazard due to loss of cargo could result.
DWhen using the roof cross bar kit, make sure that the total carrying capacity of the roof cross bar kit and luggage does not exceed the maximum load limit. Overloading may cause damage to the vehicle and create a safety hazard.
1-16

Doors and locks
Roof cross bar kit
Luggage can be carried on the roof after securing the roof cross bar kit to the roof rail. When installing the roof cross bar kit on the roof rail, follow the manufacturer’s instructions. When you carry cargo on the roof using the roof cross bar kit, never exceed maximum load limit explained below. You should also be careful that your vehicle does not exceed the Gross Vehicle Weight Rating (GVWR) and front and rear Gross Axle Weight Rating (GAWR). See the Loading Your Vehicle section in chapter 7 for information on loading cargo into or onto your vehicle.
JRoof rack (When luggage is put on the slats of the roof cross bar kit)
When the roof cross bar kit is used as roof rack, make sure the total carrying capacity of the luggage on the slats of the roof cross bar kit does not exceed 100 lb. (45 kg). Overloading may cause damage to the roof and create a safety hazard. Always evenly distribute the luggage and secure it with straps or nets.
J Installing carrying attachments on the cross bars
When installing any carrying attachment such as a bike carrier, ski carrier, canue carrier, etc. on the cross bars, follow the manufacturer’s instructions and make sure that the attachment is securely fixed to the cross bars. A set of the cross bars is designed to carry loads (luggage and attachment) of not more than 150 lb. (68 kg). Before operating the vehicle, make sure that the luggage is properly secured on the attachment.
± CONTINUED ±
1-17

Seat, seat belt and
SRS AIRBAG
|
Front seats . . . . . . . . . . . . . . . . . . . . . . . . . . . . . . . . . . . . . . . . . . . . . . . . . . . . . . . . . . . . . . . . . . |
2-2 |
||
|
Fore and aft adjustment |
2-4 |
||
|
2 |
|||
|
Reclining the seatback . . . . . . . . . . . . . . . . . . . . . . . . . . . . . . . . . . . . . . . . . . . . . . . . . |
2-4 |
||
|
Seat cushion angle and height adjustment (driver’s seat) |
2-5 |
||
|
Head restraint adjustment . . . . . . . . . . . . . . . . . . . . . . . . . . . . . . . . . . . . . . . . . . . . . |
2-5 |
||
|
Lumbar support . . . . . . . . . . . . . . . . . . . . . . . . . . . . . . . . . . . . . . . . . . . . . . . . . . . . . . . . . . |
2-6 |
||
|
Seat heater (if equipped) . . . . . . . . . . . . . . . . . . . . . . . . . . . . . . . . . . . . . . . . . . . . . . . |
2-7 |
||
|
Rear seats . . . . . . . . . . . . . . . . . . . . . . . . . . . . . . . . . . . . . . . . . . . . . . . . . . . . . . . . . . . . . . . . . . . |
2-8 |
||
|
Reclining the seatback . . . . . . . . . . . . . . . . . . . . . . . . . . . . . . . . . . . . . . . . . . . . . . . . . |
2-9 |
||
|
Folding down the seatback . . . . . . . . . . . . . . . . . . . . . . . . . . . . . . . . . . . . . . . . . . . . |
2-10 |
||
|
Head rest adjustment . . . . . . . . . . . . . . . . . . . . . . . . . . . . . . . . . . . . . . . . . . . . . . . . . . . |
2-10 |
||
|
3-point type seat belts (combination lap/shoulder belts) . . . |
2-11 |
||
|
Seat belt warning light and chime . . . . . . . . . . . . . . . . . . . . . . . . . . . . . . . . . . . . |
2-13 |
||
|
Emergency Locking Retractor (ELR) function . . . . . . . . . . . . . . . . . . . . . |
2-14 |
||
|
Automatic Locking Retractor (ALR) function . . . . . . . . . . . . . . . . . . . . . . |
2-14 |
||
|
Fastening the seat belt . . . . . . . . . . . . . . . . . . . . . . . . . . . . . . . . . . . . . . . . . . . . . . . . . |
2-14 |
||
|
Unfastening the belt . . . . . . . . . . . . . . . . . . . . . . . . . . . . . . . . . . . . . . . . . . . . . . . . . . . . . |
2-15 |
||
|
Adjusting the front seat shoulder belt anchor height . . . . . . . . . . . . . |
2-16 |
||
|
2-point type seat belts (lap only belts) . . . . . . . . . . . . . . . . . . . . . . . . . . . . |
2-17 |
||
|
Fastening the seat belt . . . . . . . . . . . . . . . . . . . . . . . . . . . . . . . . . . . . . . . . . . . . . . . . . |
2-18 |
||
|
Unfastening the belt . . . . . . . . . . . . . . . . . . . . . . . . . . . . . . . . . . . . . . . . . . . . . . . . . . . . . |
2-19 |
||
|
Seat belt safety tips . . . . . . . . . . . . . . . . . . . . . . . . . . . . . . . . . . . . . . . . . . . . . . . . . . . . . . |
2-20 |
||
|
Infants or small children . . . . . . . . . . . . . . . . . . . . . . . . . . . . . . . . . . . . . . . . . . . . . . . |
2-20 |
||
|
Children . . . . . . . . . . . . . . . . . . . . . . . . . . . . . . . . . . . . . . . . . . . . . . . . . . . . . . . . . . . . . . . . . . . |
2-20 |
||
|
Expectant mothers . . . . . . . . . . . . . . . . . . . . . . . . . . . . . . . . . . . . . . . . . . . . . . . . . . . . . . |
2-21 |
||
|
Maintenance . . . . . . . . . . . . . . . . . . . . . . . . . . . . . . . . . . . . . . . . . . . . . . . . . . . . . . . . . . . . . . |
2-21 |
||
|
Child restraint systems . . . . . . . . . . . . . . . . . . . . . . . . . . . . . . . . . . . . . . . . . . . . . . . . . |
2-22 |
||
|
Installing child restraint systems in the 2-point type seat belt |
|||
|
position (Rear center seating position) . . . . . . . . . . . . . . . . . . . . . . . . . . . . |
2-24 |
||
|
Installing child restraint systems in the 3-point type seat belt |
|||
|
position . . . . . . . . . . . . . . . . . . . . . . . . . . . . . . . . . . . . . . . . . . . . . . . . . . . . . . . . . . . . . . . . . |
2-25 |
||
|
Top strap anchors . . . . . . . . . . . . . . . . . . . . . . . . . . . . . . . . . . . . . . . . . . . . . . . . . . . . . . . |
2-26 |
||
|
SRS AIRBAG (Supplemental Restraint System Airbag) . . . . . |
2-28 |
||
|
Vehicle with driver’s and front passenger’s SRS AIRBAGs |
|||
|
and lap/shoulder restraints . . . . . . . . . . . . . . . . . . . . . . . . . . . . . . . . . . . . . . . . . . |
2-28 |
||
|
SRS AIRBAG system operation . . . . . . . . . . . . . . . . . . . . . . . . . . . . . . . . . . . . . . . |
2-32 |
||
|
System monitors . . . . . . . . . . . . . . . . . . . . . . . . . . . . . . . . . . . . . . . . . . . . . . . . . . . . . . . . |
2-36 |
||
|
System servicing . . . . . . . . . . . . . . . . . . . . . . . . . . . . . . . . . . . . . . . . . . . . . . . . . . . . . . . . |
2-37 |
||
|
Precautions for vehicle modification . . . . . . . . . . . . . . . . . . . . . . . . . . . . . . . . |
2-38 |

Front seats
 WARNING
DNever adjust the seat while driving to avoid the possibility of loss of vehicle control and of personal injury.
DNever drive the vehicle with the head restraints removed because they are designed to reduce the risk of serious neck injury in the event that the vehicle is struck from the rear.
DBefore adjusting the seat, make sure the hands and feet of rear seat passengers are clear of the adjusting mechanism.
DSeat belts provide maximum restraint when the occupant sits well back and upright in the seat. To reduce the risk of sliding under the seat belt in a collision, the front seatbacks should be always used in the upright position while the vehicle is running. If the front seatbacks are not used in the upright position in a collision, the risk of sliding under the lap belt and of the lap belt sliding up over the abdomen will increase, and both can result in serious internal injury or death.
DDo not put cushions or any other materials between occupants and seatbacks or seat cushions. If you do so, the risk of sliding under the lap belt and of the lap belt sliding up over the abdomen will increase, and both can result in serious internal injury or death.
DThe SRS AIRBAGs deploy with considerable speed and force. Occupants who are out of proper position when the SRS AIRBAG deploys could suffer very serious injuries. Because the SRS AIRBAG needs much space for deployment, the driver should always sit upright and well back in the seat as far from the steering wheel as practical while still maintaining full vehicle control and the front passenger should move the seat as far back as possible and sit upright and well back in the seat.
DBe sure to put children aged 12 and under in the rear seat properly restrained at all times. The SRS AIRBAG deploys with considerable speed and force and can injure or even kill children, especially if they are 12 years of age and under and are not restrained or improperly restrained. Because children are lighter and weaker
2-2

Seat, seat belt and SRS AIRBAG
than adults, their risk of being injured from deployment is greater. For that reason, we strongly recommend that ALL children (including those in child seats and those that have outgrown child restraint devices) sit in the REAR seat properly restrained at all times in a child restraint device or in a seat belt, whichever is appropriate for the child’s age, height and weight. Be sure to secure ALL types of child restraint devices (including forward facing child seat) in the REAR seats at all times. NEVER INSTALL A REARWARD FACING CHILD SEAT IN THE FRONT SEAT. DOING SO RISKS SERIOUS INJURY OR DEATH TO THE CHILD BY PLACING THE CHILD’S HEAD TOO CLOSE TO THE SRS AIRBAG. According to accident statistics, children are safer when properly restrained in the rear seating positions than in the front seating positions. For instructions and precautions concerning child restraint systems, see the Child Restraint System section in this chapter.
|
Adjust the seatback to |
Adjust the seatback to |
|
upright position. Sit well |
upright position. Sit |
|
back and upright. |
well back and upright. |
|
Move the seat |
|||||||
|
Move the seat as far from the |
as far back as |
||||||
|
steering wheel as practical. |
HS0233 |
possible. |
HS0234 |
||||
|
Put children in the rearseat properly |
Do not recline the seatback while |
||||||
|
restrained at all times. |
vehicle is moving. |
||||||
± CONTINUED ±
2-3

 CAUTION
Metallic parts of the seat belt can become very hot in a vehicle that has been closed up in sunny weather; they could burn an occupant. Do not touch such hot parts.
J Fore and aft adjustment
Pull the lever upward and slide the seat to the desired position. Then release the lever and move the seat back and forth to make sure that it is securely locked into place.
J Reclining the seatback
Pull the reclining lever up and adjust the seatback to the desired position. Then release the lever and make sure the seatback is securely locked into place.
2-4

Seat, seat belt and SRS AIRBAG
J Seat cushion angle and height adjustment (driver’s seat)
Raise Lower
Lower
Raise
HS0030
Turn either dial to adjust the angle and height of the seat cushion to the desired position.
J Head restraint adjustment
To raise the head restraint, pull it up. To lower it, push the head restraint down while depressing the release button on the top of the seatback.
± CONTINUED ±
2-5

H2735
The best position for the head restraint is just above or level with the top of the ears.
J Lumbar support
Pull the lever forward or backward.
Pulling the lever forward will increase the amount of support for your lower back.
2-6

Seat, seat belt and SRS AIRBAG
J Seat heater (if equipped)
 CAUTION
DDo not use the seat heater when the engine is not running. The battery could run down if the heater is operated while the engine is not running.
DDo not put anything on the seat which insulates against heat, such as a blanket, cushion, or similar items. This may cause the seat heater to overheat.
DWhen cleaning the seat, do not use benzine, paint thinner, or any similar materials.
The seat heater operates when the ignition switch is either in the ªACCº or ªONº position.
Heating element
HS0034
To turn on the seat heater, push the ªLOº or ªHIº position on the switch, as desired, depending on the temperature.
LO: Normal heating HI: Rapid heating
The indicator located on the switch comes on when the seat heater in operation. When the vehicle’s interior is warmed enough or before you leave the vehicle, be sure to turn the switch off.
± CONTINUED ±
2-7