-
Contents
-
Table of Contents
-
Bookmarks
Quick Links
testo 875 · Thermal imager
Instruction manual
Related Manuals for TESTO 875
Summary of Contents for TESTO 875
-
Page 1
875 · Thermal imager Instruction manual… -
Page 3: Table Of Contents
1 Contents Contents Contents ………………..3 Safety and the environment…………..4 2.1. About this document …………….4 2.2. Ensure safety……………….5 2.3. Protecting the environment…………..6 Specifications ………………7 3.1. Use ………………..7 3.2. Technical data ……………..8 Product description…………….12 4.1. Overview………………12 4.2. Basic properties…………….13 First steps ………………..14 5.1.
-
Page 4: Safety And The Environment
2 Safety and the environment Safety and the environment 2.1. About this document > Please read this documentation through carefully and familiarize yourself with the product before putting it to use. Pay particular attention to the safety instructions and warning advice in order to prevent injuries and damage to the products.
-
Page 5: Ensure Safety
> Carry out only the maintenance and repair work on this instrument that is described in the documentation. Follow the prescribed steps exactly. Use only original spare parts from Testo. > Improper use of rechargeable batteries can lead to destruction or injuries by means of current surges, fire or escaping chemicals.
-
Page 6: Protecting The Environment
> Dispose of faulty rechargeable batteries/spent batteries in accordance with the valid legal specifications. > At the end of its useful life, send the product to the separate collection for electric and electronic devices (observe local regulations) or return the product to Testo for disposal.
-
Page 7: Specifications
3 Specifications Specifications 3.1. The testo 875 is a handy and robust thermal imager. It opens the door to contactless determination and illustration of the temperature distribution on surfaces for you. Typical areas of application are: • Building inspection (heating, ventilation and air conditioning…
-
Page 8: Technical Data
9 Hz Focus manual Detector type FPA 160 x 120 pixels, a.Si Spectral range 8 — 14 μm Visual image output (testo 875-2 only) Characteristic Values Field of vision/min. 33° x 25°/0.4 m (1.31 ft) focusing distance Image size 640 x 480 pixels…
-
Page 9
Telephoto lens: 3 mm at 1 m On-time (time to 30 s image) Measuring functions Standard measurement (1-point), Cold-/ Hotspot testo 875-2: Display of the surface moisture distribution via manual entry of the dewpoint Compensation for manual reflected temperature Setting emissivity 0.01 — 1.00… -
Page 10
3 Specifications Power supply Characteristic Values Fast-charging, Li-ion battery can be Battery type changed on-site Operating time approx. 4 h at 20 — 30 °C (68 — 86 °F) Charging option In instrument/in charging station (optional) Mains operation Yes, with mains unit 0554 8808 Mains unit output 5 V/4 A voltage… -
Page 11
3 Specifications PC software Characteristic Values System Operating system Windows XP Service requirements Pack 2 or Windows Vista USB 2.0 interface Standards, tests, warranty Characteristic Values EU Directive 2004/108/EC Vibration IEC 60068-2-6 Warranty 2 years, warranty conditions: see website www.testo.com/warranty… -
Page 12: Product Description
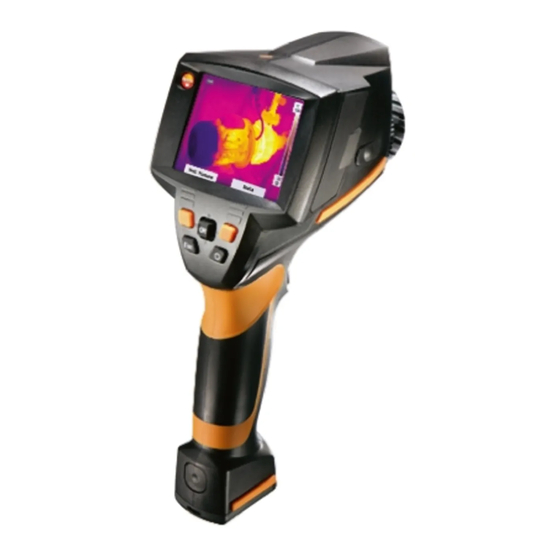
4 Product description Product description 4.1. Overview Product components 1 Display. 2 Control keys: Functions Switch the imager on/off. [OK] Joystick • Press [OK]: Open menu, confirm selection/setting. • Move [OK] up/down/right/left = Joystick function: Select functions, navigate [Esc] Cancel action. Left/right [«xy»] Call up a function.
-
Page 13: Basic Properties
4 Metric thread: For fastening the included tripod adapter. Do not use desktop tripods, danger of tilting! 5 Right interface terminal: Not assigned 6 Digital camera lens: For recording visual images (testo 875-2 only) 7 Infrared camera lens: For recording thermography images.
-
Page 14: First Steps
5 First steps First steps 5.1. Commissioning Connect rechargeable battery The imager is delivered with a rechargeable battery that is inserted in the rechargeable battery slot but not connected. > Push the battery all the way into the rechargeable battery slot until this is flush with the bottom of the handle.
-
Page 15
5 First steps Initial charging of rechargeable battery The thermal imager is delivered with a partially charged battery. Completely charge the battery before use. > Connect the country-specific adapter required for the existing mains to the mains unit. 1. Open the cover on the left side of the thermal imager (1). 2. -
Page 16: Getting To Know The Product
1. Place the tripod adapter on the lower end of the handle and screw on using the included Allen key (ISO 2936, size 4). 2. Slide thermal imager into the fastening plate of the testo tripod and lock or fasten it to the commercially available standard…
-
Page 17
Softcase down around the display (2). 2. Guide Velcro strip through the two plates (3) and close (4). Changing lens (testo 875-2 only) Only lenses that were adjusted to the respective thermal imager can be used. The serial number on the lens must match the serial number of the instrument, see Optics… -
Page 18
If the image is to be saved, the desired storage location can be set using the left [Folder] quick select button, see Select the storage location (folder): page 31. testo 875-1: • Infrared image is shown: Infrared image is saved. testo 875-2: •… -
Page 19
Factory settings: • Left quick select button: [Scale]. • Right quick select button: [Palette] (testo 875-1) or [Image type] (testo 875-2). Changing assignment of the quick select buttons 1. Move Joystick… -
Page 20
5 First steps Navigating in the menu 1. Press [OK] button. Menu is opened. 2. Select navigation/function: • Move Joystick up or down to select the menu item. • Press [OK] to confirm the selection. Or for menu items that are marked with an arrow (►): Move Joystick to the right. -
Page 21: Using The Product
), all available options can be selected via the quick select buttons. > [OK] Measurement [OK] 1-point measurement | [OK]. testo 875-2 only: If the 1-point measurement is activated, the crosshairs can be moved using the Joystick on frozen and saved images to read off the individual temperatures.
-
Page 22
6 Using the product Humidity (testo 875-2 only) The surface humidity is calculated using the manually entered dewpoint temperature and the measured surface temperatures. In the display, the areas that are at risk of developing mould are shown using a special colour palette:… -
Page 23: Image Gallery
6 Using the product 6.1.2. Image gallery Show images… [OK] Image gallery [OK] Show images… | [OK]. Folder dialogue is opened. The folder name of the opened folder is displayed in the header. ROOT designates the base folder (top level). The saved data is shown as preview images (image overview).
-
Page 24: Scale
6 Using the product The folder name can consist of up to 8 characters. Incorrect entries can be deleted using the right [◄C] quick select button. 3. Press left [Create Folder] quick select button to create the folder. Erase all [OK] Image gallery [OK]…
-
Page 25: Display
6 Using the product 6.1.4. Display… Select display options The presentation can be adapted by means of showing/hiding the following elements: Crosshairs, temperature scale and quick select buttons. Hidden function keys can be shown again by pressing a quick select button: The first press of the button shows the function keys again.
-
Page 26
6 Using the product Material (material temperature) Emissivity Aluminium, bright rolled (170 °C) 0.04 Cotton (20 °C) 0.77 Concrete (25 °C) 0.93 Ice, smooth (0 °C) 0.97 Iron, emery ground (20 °C) 0.24 Iron with casting skin (100 °C) 0.80 Iron with rolling skin (20 °C) 0.77 Gypsum (20 °C) -
Page 27
6 Using the product as ovens or machines) are in the proximity of the object being measured should the radiation temperature of theses heat sources be determined and used (e.g. using a globe thermometer). The reflected temperature has only little effect on objects with high emissivity. -
Page 28: Palette
6 Using the product 6.1.6. Palette Change colour palette for the infrared image You can choose between 4 existing palettes. The currently activated option is marked with a tick ( [OK] | Palette| [OK]. 2. Move Joystick up/down to select the desired option. 3.
-
Page 29
6 Using the product 5. Confirm the entry with [OK]. 6. Confirm the settings with Apply. Optics… The lenses adjusted to the instrument are shown. Only the lenses that are shown may be used. > [OK] Configuration… [OK] Optics… | [OK]. Using the Protection glass option, you can set whether an infrared… -
Page 30: Measuring
Measuring Important framework conditions Please observe the following framework conditions in order to obtain significant measurement results. Humidity measurement (testo 875-2 only): • Gently wave the separate dewpoint measuring instrument to shorten the equalization period. Avoid sources of interference (e.g. breathed air).
-
Page 31
6 Using the product Important settings Before recording an image, check whether the protection glass option is set correctly to prevent corruption of the measurement results, see Optics… page 29. Before saving an image, ensure that it is focused correctly (in focus), see Manually focusing the image page 18. -
Page 32: Maintaining The Product
7 Maintaining the product Maintaining the product Changing the battery To prevent losing the instrument settings: Only change the rechargeable battery when a buffer battery is inserted in the instrument or the mains unit is connected. 1. Press lock release button. The rechargeable battery is released and sticks out a little from the rechargeable battery slot.
-
Page 33
7 Maintaining the product 3. Remove empty battery from the holder and insert new battery (type CR 1632). NOTICE Incorrectly inserted batteries can lead to damage of the product! > When inserting the batteries, observe the polarity (label on the battery holder). -
Page 34: Tips And Assistance
Reading cannot be calculated. reading. > Check parameter settings for plausibility. If we could not answer your question, please contact your dealer or Testo Customer Service. For contact details see the rear side of this document or the web page www.testo.com/service-contact…
-
Page 35: Accessories And Spare Parts
-20 °C — 100 °C 0520 0490 • Calibration points at 0 °C, 100 °C, 200 °C in measuring range 0 °C to 280°C For further accessories and spare parts, please refer to the product catalogues and brochures or look up our website: www.testo.com…
-
Page 36
0970 8750 en 01 V01.00 en-GB…
Цена по запросу
Нужны дополнительные вводные для просчета цены, закажите звонок или напишите менеджеру в WhatsApp:
Спасибо за заявку
Наш менеджер свяжется с вами в ближайшее время
Узнать цену в WhatsApp
- Наличие
- уточняйте
- Гарантия
- 12
- Самовывоз
-
Тюмень
- Возможна доставка до адреса
-
Способы оплаты
Описание
Характеристики
Комплектация
-
Комплектация: Testo 875-1i, прочный кейс, ПО, чехол Soft Case, Ремень для переноски, SD-карта, USB-кабель, ткань для очистки объектива, блок питания, литиево – ионный аккумулятор, адаптер для крепления к штативу, заводской протокол калибровки, карманное практическое руководство по термографии, краткое руководство, руководство по эксплуатации и руководство пользователя.
Файлы

Оформить заказ
Экспертные мнения
Экспертные мнения
Купить Testo 875-1i в Тюмени легко — просто позвоните по телефону:: 8-800-551-11-01
-
На Главную
-
Видеоинструкции: testo 875i
Этот видеотренинг состоит из отдельных обучающих видео, собранных в плейлист. Вы можете сразу перейти к нужному вам видео!
- Часть 1: Вставка батарейки
- Часть 2: Использование кнопок
- Часть 3: Первый запуск тепловизора
- Часть 4: Программирование кнопок быстрого доступа
- Часть 5: Интерфейсы
- Часть 6: Вставка SD-карты
- Часть 7: Настройка коэффициента излучения и отраженной температуры (RTC)
- Часть 8: Получение термограмм
- Часть 9: Анализ термограмм
- Часть 10: Настройка диапазона измерения и использование опции измерения высоких температур
- Часть 11: Активация измерительных функций
- Часть 12: Смена объектива
- Часть 13: Установка защитного фильтра на объектив
- Часть 14: Использование беспроводных зондов влажности
- Часть 15: Снятие защитного чехла