TNC 640
Руководство пользователя
«Диалог открытым текстом
HEIDENHAIN»
Программное обеспечение с ЧПУ
340590-05
340591-05
340595-05
Русский (ru)
5/2015

- Manuals
- Brands
- HEIDENHAIN Manuals
- Control Panel
- TNC 640
- User manual
-
Contents
-
Table of Contents
-
Bookmarks
Quick Links
TNC 640
User’s Manual
Conversational Programming
NC Software
340590-08
340591-08
340595-08
English (en)
10/2017
Related Manuals for HEIDENHAIN TNC 640
Summary of Contents for HEIDENHAIN TNC 640
-
Page 1
TNC 640 User’s Manual Conversational Programming NC Software 340590-08 340591-08 340595-08 English (en) 10/2017… -
Page 2
Controls and displays Programming modes Controls and displays Function Keys Programming If you are using a TNC 640 with touch control, you can replace some keystrokes with hand-to-screen contact. Test run Further information: «Operating the Touchscreen», page 131 Entering and editing coordinate… -
Page 3
Navigate up one page Potentiometer for feed rate Navigate down one page and spindle speed Feed rate Spindle speed Select the next tab in forms Up/down one dialog box or button HEIDENHAIN | TNC 640 | Conversational Programming User’s Manual | 10/2017… -
Page 5
Fundamentals… -
Page 6: About This Manual
Signal word indicating the hazard severity Type and source of hazard Consequences of ignoring the hazard, e.g.: «There is danger of collision during subsequent machining operations» Escape – Hazard prevention measures HEIDENHAIN | TNC 640 | Conversational Programming User’s Manual | 10/2017…
-
Page 7
Would you like any changes, or have you found any errors? We are continuously striving to improve our documentation for you. Please help us by sending your requests to the following e-mail address: tnc-userdoc@heidenhain.de HEIDENHAIN | TNC 640 | Conversational Programming User’s Manual | 10/2017… -
Page 8
All of the cycle functions (touch probe cycles and fixed cycles) are described in the Cycle Programming User’s Manual. If you need this user’s manual, please contact HEIDENHAIN if required. ID: 892905-xx HEIDENHAIN | TNC 640 | Conversational Programming User’s Manual | 10/2017… -
Page 9
Fundamentals | Control model, software and features Software options The TNC 640 features various software options that can be enabled by your machine tool builder. Each option is to be enabled separately and contains the following respective functions: Additional Axis (options 0 to 7) -
Page 10
Extended Tool Management (option 93) Extended tool management Python-based Advanced Spindle Interpolation (option 96) Interpolating spindle Interpolation turning: Cycle 291: Interpolation turning, coupling Cycle 292: Interpolation turning, contour finishing HEIDENHAIN | TNC 640 | Conversational Programming User’s Manual | 10/2017… -
Page 11
Active Vibration Damping – AVD (option 46) Active vibration damping Damping of machine oscillations to improve the workpiece surface Batch Process Manager (option 154) Batch process manager Planning of production orders HEIDENHAIN | TNC 640 | Conversational Programming User’s Manual | 10/2017… -
Page 12
Legal information This product uses open source software. Further information is available on the control under: Programming operating mode MOD function LICENSE INFO soft key HEIDENHAIN | TNC 640 | Conversational Programming User’s Manual | 10/2017… -
Page 13
New function for rounding corners, see «Rounding corners: M197», page 500 External access to the control can now be blocked with an MOD function, see «External access», page 848 HEIDENHAIN | TNC 640 | Conversational Programming User’s Manual | 10/2017… -
Page 14
With the manual Basic Rotation touch probe cycle, workpiece misalignment can now be compensated for via a table rotation, see «Compensation of workpiece misalignment by rotating the table», page 767 HEIDENHAIN | TNC 640 | Conversational Programming User’s Manual | 10/2017… -
Page 15
DEPTH REFERENCE has been introduced in order to evaluate the T ANGLE, see Cycle Programming User’s Manual Probing Cycle 4 MEASURING IN 3-D has been introduced, see Cycle Programming User’s Manual HEIDENHAIN | TNC 640 | Conversational Programming User’s Manual | 10/2017… -
Page 16
Cycle Programming User’s Manual In Cycle 205 Universal Pecking you can now use parameter Q208 to define a feed rate for retraction, see Cycle Programming User’s Manual HEIDENHAIN | TNC 640 | Conversational Programming User’s Manual | 10/2017… -
Page 17
Transfer from CAD Files», page 333 New software option 96 Advanced Spindle Interpolation, see «Software options», page 9 New software option 131 Spindle Synchronism, see «Software options», page 9 HEIDENHAIN | TNC 640 | Conversational Programming User’s Manual | 10/2017… -
Page 18
Machine parameter maxLineGeoSearch (no. 105408) has been increased to max. 100000, see «Machine-specific user parameters», page 882 The names of software options number 8, 9 and 21 have changed, see «Software options», page 9 HEIDENHAIN | TNC 640 | Conversational Programming User’s Manual | 10/2017… -
Page 19
ENH.REC.TURNING, AX. have been expanded by plunge feed rate Q488 Eccentric turning with Cycle 800 ADJUST XZ SYSTEM is possible with option 50 Further information: Cycle Programming User’s Manual HEIDENHAIN | TNC 640 | Conversational Programming User’s Manual | 10/2017… -
Page 20
New software option 136 Visual Setup Control (camera-based monitoring of the setup situation), see «Software options», page 9,see «Camera-based monitoring of the setup situation VSC (option 136)», page 789. HEIDENHAIN | TNC 640 | Conversational Programming User’s Manual | 10/2017… -
Page 21
999.9999, see «Managing presets», page 739 Tilting is permitted in combination with mirroring, see «The PLANE function: Tilting the working plane (option 8)», page 587 HEIDENHAIN | TNC 640 | Conversational Programming User’s Manual | 10/2017… -
Page 22
Cycle 205 performs deburring on the coordinate surface With SL cycles, M110 is now taken into account with circles compensated inwards if it is active during machining Further information: Cycle Programming User’s Manual HEIDENHAIN | TNC 640 | Conversational Programming User’s Manual | 10/2017… -
Page 23
SWITCH soft key, see «Editing an NC program», page 169 File management displays vertical scrollbars and supports scrolling with the mouse, see «Calling the file manager», page 180 HEIDENHAIN | TNC 640 | Conversational Programming User’s Manual | 10/2017… -
Page 24
«Retraction after a power interruption», page 830 In the RETRACT operating mode, feed-rate limitation can be deactivated with the CANCEL THE FEED RATE LIMITATION soft key, see «Retraction after a power interruption», page 830 HEIDENHAIN | TNC 640 | Conversational Programming User’s Manual | 10/2017… -
Page 25
With functions NC/PLC Backup and NC/PLC Restore you can save and restore single directories or the complete TNC drive, see «Backup and restore», page 119 Touchscreens operation is supported, see «Operating the Touchscreen», page 131 HEIDENHAIN | TNC 640 | Conversational Programming User’s Manual | 10/2017… -
Page 26
M124 no longer triggers an error message but only a warning. This enables NC programs with programmed M124 to run through without interruption Upper and lower cases for a file name can be modified in the file management HEIDENHAIN | TNC 640 | Conversational Programming User’s Manual | 10/2017… -
Page 27
«Entering the program at any point: Mid-program startup», page 833 Mid-program startup operation and dialog guidance has been improved, also for pallet tables, see «Entering the program at any point: Mid-program startup», page 833 HEIDENHAIN | TNC 640 | Conversational Programming User’s Manual | 10/2017… -
Page 28
Cycle 251 has been expanded by parameter Q439. The finishing strategy was also revised The finishing strategy was revised with cycle 252 Cycle 275 has been expanded with parameters Q369 and Q439 Further information: Cycle Programming User’s Manual HEIDENHAIN | TNC 640 | Conversational Programming User’s Manual | 10/2017… -
Page 29
The machine tool builder can define update rules that make it possible, for example, to automatically remove umlauts from tables and NC programs when importing a table, see «Importing tool tables», page 252 HEIDENHAIN | TNC 640 | Conversational Programming User’s Manual | 10/2017… -
Page 30
The FN18 functions have been expanded, see «FN 18: SYSREAD – Reading system data», page 402 New machine parameter iconPrioList (no. 100813) for defining the order of icons in the status display, see «Machine-specific user parameters», page 882 HEIDENHAIN | TNC 640 | Conversational Programming User’s Manual | 10/2017… -
Page 31
«Machine-specific user parameters», page 882 The control now supports up to 24 control loops, including a maximum of four spindles. HEIDENHAIN | TNC 640 | Conversational Programming User’s Manual | 10/2017… -
Page 32
To connect a USB stick you no longer have to press a soft key, see «Connecting and removing USB storage devices», page 190 The speed of setting the jog increment, spindle speed and feed rate was adjusted for electronic handwheels. HEIDENHAIN | TNC 640 | Conversational Programming User’s Manual | 10/2017… -
Page 33
In the machine parameter decimalCharakter (no. 100805) you can define whether a period or a comma will be used as the decimal separator, see «Machine-specific user parameters», page 882 HEIDENHAIN | TNC 640 | Conversational Programming User’s Manual | 10/2017… -
Page 34
New SERIAL column in the touch probe table Enhancement of the contour train: Cycle 25 with Residual Material Machining, Cycle 276 Three-D Contour Train Further information: Cycle Programming User’s Manual HEIDENHAIN | TNC 640 | Conversational Programming User’s Manual | 10/2017… -
Page 35
16 Turning……………………….673 17 Manual Operation and Setup………………….713 18 Positioning with Manual Data Input………………797 19 Test Run and Program Run………………….803 20 MOD Functions……………………..843 21 Tables and Overviews……………………881 HEIDENHAIN | TNC 640 | Conversational Programming User’s Manual | 10/2017… -
Page 36
Contents HEIDENHAIN | TNC 640 | Conversational Programming User’s Manual | 10/2017… -
Page 37: Table Of Contents
Presetting with a 3-D touch probe………………….88 Running the first program……………………89 Selecting the correct operating mode………………..89 Choosing the program you want to run………………..89 Starting the program……………………..89 HEIDENHAIN | TNC 640 | Conversational Programming User’s Manual | 10/2017…
-
Page 38
Configuring the connection – VNC…………………. 125 Shutting down or rebooting an external computer…………….126 Starting and stopping the connection………………..127 Accessories: HEIDENHAIN 3-D touch probes and electronic handwheels……..128 3-D touch probes……………………..128 HR electronic handwheels……………………129 HEIDENHAIN | TNC 640 | Conversational Programming User’s Manual | 10/2017… -
Page 39
Navigating in the table and NC programs………………. 134 Operating the simulation……………………135 Using the HEROS menu……………………136 Operating the CAD viewer……………………137 Functions in the taskbar……………………142 Touchscreen Calibration……………………142 Touchscreen Configuration……………………142 Touchscreen Cleaning…………………….. 143 HEIDENHAIN | TNC 640 | Conversational Programming User’s Manual | 10/2017… -
Page 40
Renaming a file………………………. 189 Sorting files……………………….189 Additional functions……………………..190 Additional tools for management of external file types……………191 Additional tools for ITCs……………………199 Data transfer to or from an external data carrier……………..201 HEIDENHAIN | TNC 640 | Conversational Programming User’s Manual | 10/2017… -
Page 41
Contents The control in a network……………………203 USB devices on the control…………………….204 HEIDENHAIN | TNC 640 | Conversational Programming User’s Manual | 10/2017… -
Page 42
Opening the error window……………………224 Closing the error window……………………224 Detailed error messages……………………225 INTERNAL INFO soft key……………………225 FILTER soft key………………………. 225 Clearing errors……………………….226 Error log…………………………226 Keystroke log……………………….227 Informational texts……………………..228 HEIDENHAIN | TNC 640 | Conversational Programming User’s Manual | 10/2017… -
Page 43
Contents Saving service files……………………..228 Calling the TNCguide help system…………………. 228 TNCguide context-sensitive help system………………229 Application……………………….229 Working with TNCguide……………………230 Downloading current help files………………….234 HEIDENHAIN | TNC 640 | Conversational Programming User’s Manual | 10/2017… -
Page 44
Tool length compensation……………………266 Tool radius compensation……………………267 Tool management (option number 93)………………..270 Basics…………………………270 Calling tool management……………………271 Editing tool management……………………272 Available tool types……………………..276 Importing and exporting tool data………………….. 278 HEIDENHAIN | TNC 640 | Conversational Programming User’s Manual | 10/2017… -
Page 45
Path contours – Polar coordinates………………..310 Overview………………………… 310 Datum for polar coordinates: pole CC………………..311 Straight line LP………………………..311 Circular path CP around pole CC………………….312 Circle CTP with tangential connection………………..312 Helix…………………………313 HEIDENHAIN | TNC 640 | Conversational Programming User’s Manual | 10/2017… -
Page 46
Free straight line programming………………….321 Free circular path programming………………….322 Input possibilities……………………..323 Auxiliary points……………………….. 326 Relative data……………………….327 Example: FK programming 1………………….. 329 Example: FK programming 2………………….. 330 Example: FK programming 3………………….. 331 HEIDENHAIN | TNC 640 | Conversational Programming User’s Manual | 10/2017… -
Page 47
Using the CAD viewer……………………. 336 Opening the CAD file………………………336 Basic settings……………………….337 Setting layers……………………….339 Setting a preset……………………….340 Defining the datum……………………..342 Selecting and saving a contour………………….345 Selecting and saving machining positions………………. 349 HEIDENHAIN | TNC 640 | Conversational Programming User’s Manual | 10/2017… -
Page 48
Repeating program section repeats…………………368 Repeating a subprogram……………………369 Programming examples……………………370 Example: Milling a contour in several infeeds………………370 Example: Groups of holes……………………371 Example: Group of holes with several tools………………372 HEIDENHAIN | TNC 640 | Conversational Programming User’s Manual | 10/2017… -
Page 49
FN 38: SEND – Send information from NC program…………….435 10.9 Accessing tables with SQL commands………………. 436 Introduction……………………….436 Overview of functions……………………..437 Programming SQL commands………………….438 Application example……………………..439 SQL BIND………………………..440 HEIDENHAIN | TNC 640 | Conversational Programming User’s Manual | 10/2017… -
Page 50
Measurement results from touch probe cycles……………… 470 Checking the setup situation: Q601…………………471 10.13 Programming examples……………………472 Example: Ellipse……………………… 472 Example: Concave cylinder machined with spherical cutter…………..474 Example: Convex sphere machined with end mill…………….476 HEIDENHAIN | TNC 640 | Conversational Programming User’s Manual | 10/2017… -
Page 51
Retraction from the contour in the tool-axis direction: M140…………..495 Suppressing touch probe monitoring: M141………………497 Deleting basic rotation: M143………………….498 Automatically retracting the tool from the contour at an NC stop: M148……….. 499 Rounding corners: M197……………………500 HEIDENHAIN | TNC 640 | Conversational Programming User’s Manual | 10/2017… -
Page 52
Recording a teach-in cut……………………541 Activating and deactivating AFC………………….546 Log file…………………………548 Tool wear monitoring……………………… 549 Tool load monitoring……………………..549 12.6 Active Chatter Control ACC (option 145)………………550 Application……………………….550 Activating/deactivating ACC……………………551 HEIDENHAIN | TNC 640 | Conversational Programming User’s Manual | 10/2017… -
Page 53
FN 28: TABREAD – Read from a freely definable table…………..575 Customizing the table format………………….575 12.13 Pulsing spindle speed FUNCTION S-PULSE………………576 Programming a pulsing spindle speed………………..576 Resetting the pulsing spindle speed………………..577 HEIDENHAIN | TNC 640 | Conversational Programming User’s Manual | 10/2017… -
Page 54
12.15 Dwell time FUNCTION DWELL………………….580 Programming dwell time……………………580 12.16 Lift off tool at NC stop: FUNCTION LIFTOFF……………… 581 Programming tool lift-off with FUNCTION LIFTOFF…………….581 Resetting the lift-off function………………….. 583 HEIDENHAIN | TNC 640 | Conversational Programming User’s Manual | 10/2017… -
Page 55
Selection of tool reference point and center of rotation…………..629 Resetting FUNCTION TCPM……………………630 13.6 Three-dimensional tool compensation (option 9)…………….631 Introduction……………………….631 Suppressing error messages with positive tool oversize: M107…………632 HEIDENHAIN | TNC 640 | Conversational Programming User’s Manual | 10/2017… -
Page 56
From 3-D model to NC program………………….643 Consider with post processor configuration………………644 Please note the following for CAM programming…………….646 Possibilities for intervention on the control………………648 ADP motion control……………………..649 HEIDENHAIN | TNC 640 | Conversational Programming User’s Manual | 10/2017… -
Page 57
Processing pallet table……………………. 657 14.2 Pallet preset management…………………… 659 Fundamentals……………………….659 Using pallet presets……………………..659 14.3 Tool-oriented machining……………………660 Fundamentals……………………….660 Sequence of tool-oriented machining………………..662 Mid-program startup with block scan………………..663 HEIDENHAIN | TNC 640 | Conversational Programming User’s Manual | 10/2017… -
Page 58
15.1 Batch Process Manager (option 154)………………..666 Fundamentals……………………….666 Application……………………….666 Opening the Batch Process Manager………………..669 Creating a job list……………………..669 Editing a job list……………………… 671 Executing the job list……………………… 672 HEIDENHAIN | TNC 640 | Conversational Programming User’s Manual | 10/2017… -
Page 59
16.5 Turning program functions (option 50)……………….. 697 Recessing and undercutting…………………….697 Blank form update TURNDATA BLANK………………..703 Inclined turning………………………..704 Simultaneous turning……………………… 705 Using a facing slide……………………..707 Cutting force monitoring with the AFC function…………….. 711 HEIDENHAIN | TNC 640 | Conversational Programming User’s Manual | 10/2017… -
Page 60
Recording measured values from the touch probe cycles…………..755 Writing measured values from the touch probe cycles to a datum table……….756 Writing measured values from the touch-probe cycles to the preset table………757 HEIDENHAIN | TNC 640 | Conversational Programming User’s Manual | 10/2017… -
Page 61
17.12 Camera-based monitoring of the setup situation VSC (option 136)……….789 Basics…………………………789 Overview………………………… 791 Produce live image……………………..792 Manage monitoring data……………………793 Configuration……………………….795 Results of the image evaluation………………….796 HEIDENHAIN | TNC 640 | Conversational Programming User’s Manual | 10/2017… -
Page 62
Contents 18 Positioning with Manual Data Input………………797 18.1 Programming and executing simple machining operations…………798 Positioning with manual data input (MDI)………………. 799 Protecting programs in $MDI………………….802 HEIDENHAIN | TNC 640 | Conversational Programming User’s Manual | 10/2017… -
Page 63
Returning to the contour……………………839 19.6 Automatic program start……………………840 Application……………………….840 19.7 Skipping blocks……………………..841 Application……………………….841 Delete / symbol………………………. 841 Delete / symbol………………………. 841 19.8 Optional program-run interruption………………..842 Application……………………….842 HEIDENHAIN | TNC 640 | Conversational Programming User’s Manual | 10/2017… -
Page 64
Check parity (parity no. 106704)………………….859 Set stop bits (stopBits no. 106705)………………… 859 Set handshake (flowControl no. 106706)…………………860 File system for file operation (fileSystem no. 106707)……………. 860 Block check character (bccAvoidCtrlChar no. 106708)…………….. 860 HEIDENHAIN | TNC 640 | Conversational Programming User’s Manual | 10/2017… -
Page 65
Application……………………….877 Assigning the handwheel to a specific handwheel holder…………..877 Setting the transmission channel………………….878 Selecting the transmitter power………………….878 Statistical data……………………….879 20.16 Load machine configuration………………….880 Application……………………….880 HEIDENHAIN | TNC 640 | Conversational Programming User’s Manual | 10/2017… -
Page 66
Software options……………………..905 Accessories……………………….908 21.4 Overview tables……………………..909 Fixed cycles……………………….909 Miscellaneous functions……………………911 21.5 Functions of the TNC 640 and the iTNC 530 compared…………..913 Comparison: Specifications……………………913 Comparison: Data interfaces……………………913 Comparison: PC software……………………914 Comparison: User functions…………………… 914 Comparison: Miscellaneous functions……………….. -
Page 67: First Steps With The Tnc 640
First Steps with the TNC 640…
-
Page 68: Overview
Read and follow the safety precautions and safety symbols Use the safety devices Refer to your machine manual. Switching on the machine and traversing the reference points can vary depending on the machine tool. HEIDENHAIN | TNC 640 | Conversational Programming User’s Manual | 10/2017…
-
Page 69
The control is now ready for operation in the Manual operation mode. Further information on this topic Approaching reference points Further information: «Switch-on», page 714 Operating modes Further information: «Programming», page 96 HEIDENHAIN | TNC 640 | Conversational Programming User’s Manual | 10/2017… -
Page 70: Programming The First Part
First Steps with the TNC 640 | Programming the first part Programming the first part Selecting the correct operating mode You can write programs only in Programming mode: Press the operating mode key The control switches to the Programming mode of operation.
-
Page 71: Opening A New Program/File Management
First Steps with the TNC 640 | Programming the first part Opening a new program/file management Press the PGM MGT key The control opens the file manager. The file management of the control is arranged much like the file management on a PC with Windows Explorer.
-
Page 72: Defining A Workpiece Blank
First Steps with the TNC 640 | Programming the first part Defining a workpiece blank After you have created a new program you can define a workpiece blank. For example, define a cuboid by entering the MIN and MAX points, each with reference to the selected preset.
-
Page 73: Program Layout
First Steps with the TNC 640 | Programming the first part Program layout NC programs should be arranged consistently in a similar manner. This makes it easier to find your place, accelerates programming and reduces errors. Recommended program layout for simple, conventional…
-
Page 74
First Steps with the TNC 640 | Programming the first part Recommended program layout for simple cycle programs Example 0 BEGIN PGM BSBCYC MM 1 BLK FORM 0.1 Z X… Y… Z… 2 BLK FORM 0.2 X… Y… Z… 3 TOOL CALL 5 Z S5000 4 L Z+250 R0 FMAX 5 PATTERN DEF POS1( X… -
Page 75: Programming A Simple Contour
First Steps with the TNC 640 | Programming the first part Programming a simple contour The contour shown to the right is to be milled once to a depth of 5 mm. You have already defined the workpiece blank. After you have initiated a dialog through a function key, enter all the data requested by the control in the screen header.
-
Page 76
First Steps with the TNC 640 | Programming the first part Press the approach function soft key APPR CT: Enter the coordinates of the contour starting in X and Y, e.g. 5/5, confirm with the ENT point Center angle? Enter the approach angle, e.g. -
Page 77
First Steps with the TNC 640 | Programming the first part Retracting tool: Press the orange axis key Z and enter the value for the position to be approached, e.g. 250. Press the ENT key Confirm Tool radius comp: RL/RR/no comp? -
Page 78: Creating A Cycle Program
First Steps with the TNC 640 | Programming the first part Creating a cycle program The holes (depth of 20 mm) shown in the figure at right are to be drilled with a standard drilling cycle. You have already defined the workpiece blank.
-
Page 79
First Steps with the TNC 640 | Programming the first part Run the drilling cycle on the defined pattern: Confirm Feed rate F=? with the ENT key: Move at rapid traverse (FMAX) Miscellaneous function M? Switch on the spindle and coolant, e.g. M13, and confirm with the END key The control stores the entered positioning block. -
Page 80
First Steps with the TNC 640 | Programming the first part Example 0 BEGIN PGM C200 MM 1 BLK FORM 0.1 Z X+0 Y+0 Z-40 Workpiece blank definition 2 BLK FORM 0.2 X+100 Y+100 Z+0 3 TOOL CALL 5 Z S4500… -
Page 81: Graphically Testing The First Part
First Steps with the TNC 640 | Graphically testing the first part Graphically testing the first part Selecting the correct operating mode You can test programs in the Test Run operating mode: Press the operating mode key The control switches to the Test Run mode of operation.
-
Page 82: Choosing The Program You Want To Test
First Steps with the TNC 640 | Graphically testing the first part Choosing the program you want to test Press the PGM MGT key The control opens the file manager. Press the LAST FILES soft key The control opens a pop-up window with the most recently selected files.
-
Page 83: Starting The Test Run
First Steps with the TNC 640 | Graphically testing the first part Starting the test run Press the RESET + START soft key The control resets the previously active tool data The control simulates the active program up to a…
-
Page 84: Setting Up Tools
When measuring on the machine: store the tools in the tool changer Further information: «The pocket table TOOL_P .TCH», page 86 HEIDENHAIN | TNC 640 | Conversational Programming User’s Manual | 10/2017…
-
Page 85: The Tool Table Tool.t
«Modes of operation», page 95 Working with the tool table Further information: «Entering tool data into the table», page 242 Using the tool management (option 93) Further information: «Calling tool management», page 271 HEIDENHAIN | TNC 640 | Conversational Programming User’s Manual | 10/2017…
-
Page 86: The Pocket Table Tool_P .Tch
Further information on this topic Operating modes of the control Further information: «Modes of operation», page 95 Working with the pocket table Further information: «Pocket table for tool changer», page 255 HEIDENHAIN | TNC 640 | Conversational Programming User’s Manual | 10/2017…
-
Page 87: Workpiece Setup
Presetting with a 3-D touch probe Further information: «Presetting with a 3-D touch probe «, page 772 Presetting without 3-D touch probe Further information: «Presetting without a 3-D touch probe», page 747 HEIDENHAIN | TNC 640 | Conversational Programming User’s Manual | 10/2017…
-
Page 88: Presetting With A 3-D Touch Probe
To set to 0: Press the SET PRESET soft key Press the END soft key to close the menu Further information on this topic Presetting Further information: «Presetting with a 3-D touch probe «, page 772 HEIDENHAIN | TNC 640 | Conversational Programming User’s Manual | 10/2017…
-
Page 89: Running The First Program
First Steps with the TNC 640 | Running the first program Running the first program Selecting the correct operating mode You can run programs either in the Program run, single block or the Program run, full sequence mode: Press the operating mode key…
-
Page 91: Introduction
Introduction…
-
Page 92: The Tnc 640
Compatibility Machining programs created on HEIDENHAIN contouring controls (starting from the TNC 150 B) may not always run on the TNC 640. If the NC blocks contain invalid elements, the control will mark these as ERROR blocks or with error messages when the file is opened.
-
Page 93: Visual Display Unit And Operating Panel
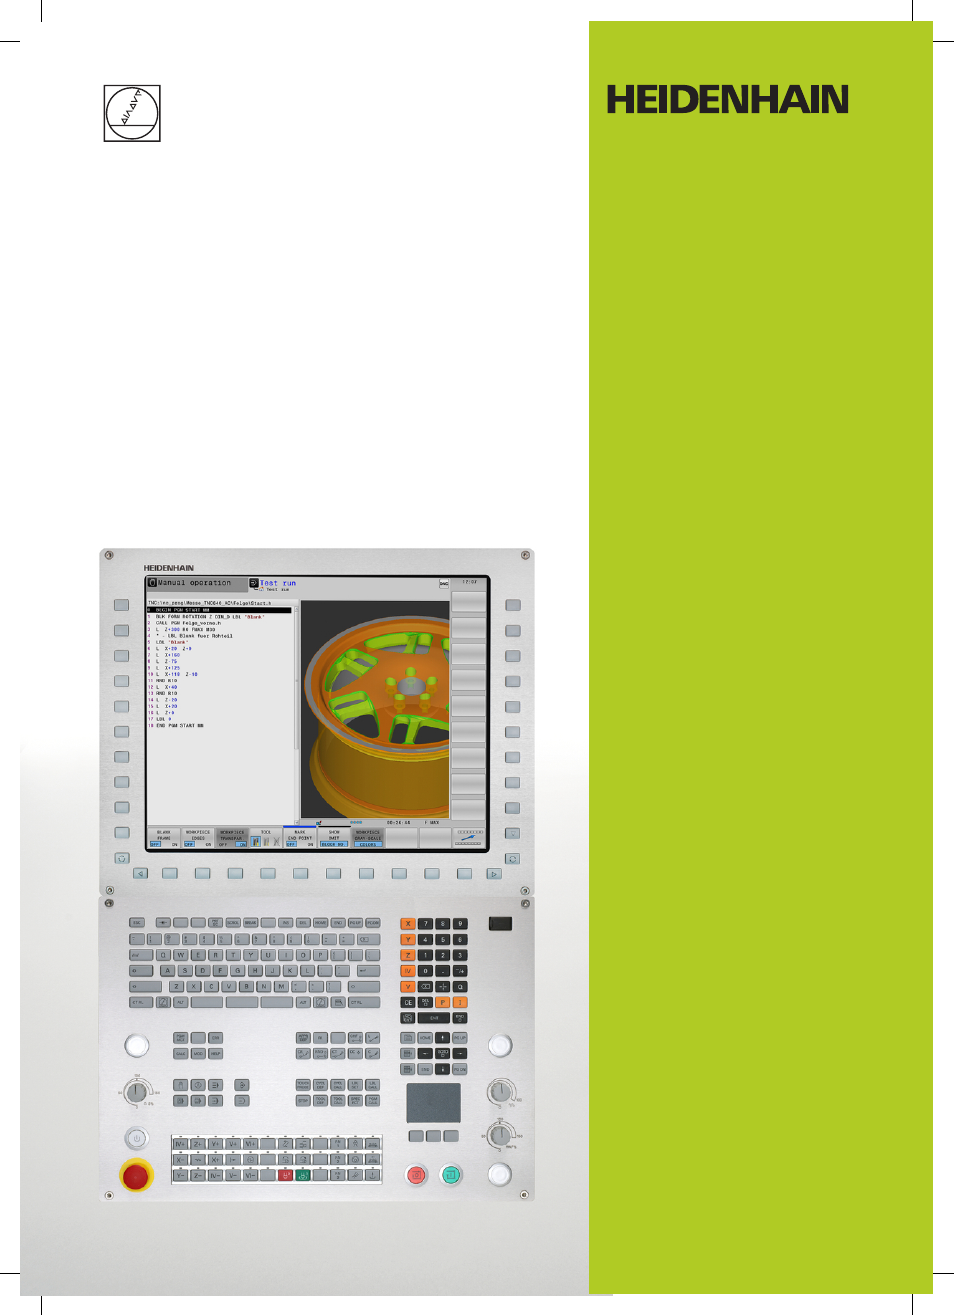
Soft-key selection keys for machine tool builders Keys for switching the soft keys for machine tool builders If you are using a TNC 640 with touch control, you can replace some keystrokes with hand-to-screen contact. Further information: «Operating the Touchscreen»,…
-
Page 94: Control Panel
Mouse buttons USB connection The functions of the individual keys are described on the inside front cover. If you are using a TNC 640 with touch control, you can replace some keystrokes with hand-to-screen contact. Further information: «Operating the Touchscreen», page 131 Refer to your machine manual.
-
Page 95: Modes Of Operation
Soft keys for selecting the screen layout Soft key Window Program Left: program, right: status display Left: program, right: collision object HEIDENHAIN | TNC 640 | Conversational Programming User’s Manual | 10/2017…
-
Page 96: Programming
Soft keys for selecting the screen layout Soft key Window Program Left: program, right: status display Left: program, right: graphics Graphic Left: program, right: collision object Collision object HEIDENHAIN | TNC 640 | Conversational Programming User’s Manual | 10/2017…
-
Page 97: Program Run, Full Sequence And Program Run, Single Block
Soft keys for screen layout with pallet tables Soft key Window Pallet table Left: program, right: pallet table Left: pallet table, right: status display Left: pallet table, right: graphics HEIDENHAIN | TNC 640 | Conversational Programming User’s Manual | 10/2017…
-
Page 98: Status Displays
Axes are moving under a 3-D basic rotation Axes are moving in a tilted working plane Axes are mirrored and moved The M128 function or FUNCTION TCPM is active HEIDENHAIN | TNC 640 | Conversational Programming User’s Manual | 10/2017…
-
Page 99
The order of icons can be changed with the optional machine parameter iconPrioList (no. 100813). The control-in-operation symbol and the DCM icon (option 40) are always visible and cannot be configured. HEIDENHAIN | TNC 640 | Conversational Programming User’s Manual | 10/2017… -
Page 100: Additional Status Displays
Tool information Active M functions Active coordinate transformations Active subprogram Active program section repeat Program called with PGM CALL Current machining time Name and path of the active main program HEIDENHAIN | TNC 640 | Conversational Programming User’s Manual | 10/2017…
-
Page 101
Active subprograms with block number in which the subprogram was called and the label number that was called HEIDENHAIN | TNC 640 | Conversational Programming User’s Manual | 10/2017… -
Page 102
Positions and coordinates (POS tab) Soft key Meaning Type of position display, e.g. actual position Tilt angle of the working plane Angle of basic transformations Active kinematics HEIDENHAIN | TNC 640 | Conversational Programming User’s Manual | 10/2017… -
Page 103
(TAB) and FUNCTION TURNDATA CORR (PGM) Tool life, maximum tool life (TIME 1) and maximum tool life for TOOL CALL (TIME 2) Display of programmed tool and replacement tool HEIDENHAIN | TNC 640 | Conversational Programming User’s Manual | 10/2017… -
Page 104
In the optional machine parameter CfgDisplayCoordSys (no. 127501) you can specify the coordinate system in which the status display shows an active datum shift. Further information: Cycle Programming User’s Manual HEIDENHAIN | TNC 640 | Conversational Programming User’s Manual | 10/2017… -
Page 105
Shift (mW-CS) Rotation (WPL-CS) Feed rate factor Further information: «Global Program Settings (option 44)», page 519 The values of the Handwheel superimp. setting are displayed on the POS HR tab. HEIDENHAIN | TNC 640 | Conversational Programming User’s Manual | 10/2017… -
Page 106
Current deviation of the speed Current machining time Line diagram, in which the current spindle load and the value commanded by the control for the feed rate override are shown HEIDENHAIN | TNC 640 | Conversational Programming User’s Manual | 10/2017… -
Page 107: Window Manager
In this case, switch to the window manager and correct the problem. If required, refer to your machine manual. HEIDENHAIN | TNC 640 | Conversational Programming User’s Manual | 10/2017…
-
Page 108: Overview Of Taskbar
HEIDENHAIN symbol between the workspaces by pressing and holding the left mouse button. Click the green HEIDENHAIN symbol to open a menu in which you can get information, make settings or start applications. The following functions are available:…
-
Page 109
«VNC», page 117 WindowManagerConfig: Available only to authorized specialists Firewall: Configure the firewall Further information: «Firewall», page 870 HePacketManager: Available only to authorized specialists HePacketManager Custom: Available only to authorized specialists HEIDENHAIN | TNC 640 | Conversational Programming User’s Manual | 10/2017… -
Page 110
The applications available under tools can be started directly by selecting the corresponding file type in the file management of the control Further information: «Additional tools for management of external file types», page 191 HEIDENHAIN | TNC 640 | Conversational Programming User’s Manual | 10/2017… -
Page 111: Portscan
Select the Diagnostic menu item Select the Portscan menu item The control opens the HeRos Portscan pop-up window. Press the Automatic update on key Set the time interval with the slider HEIDENHAIN | TNC 640 | Conversational Programming User’s Manual | 10/2017…
-
Page 112: Remote Service
With an NC software installation a temporary certificate is automatically installed on the control. An installation, also in the form of an update, may only be carried out by a service technician from the machine tool builder. HEIDENHAIN | TNC 640 | Conversational Programming User’s Manual | 10/2017…
-
Page 113
Press the green HEIDENHAIN button to open the JH menu Select the Diagnostic menu item Select the RemoteService menu item Enter the Session key of the machine tool builder HEIDENHAIN | TNC 640 | Conversational Programming User’s Manual | 10/2017… -
Page 114: Printer
FN functions, e.g. during probing. Standard printer Select to define the standard printer in case several printers are available. Is defined automatically when creating the first printer. HEIDENHAIN | TNC 640 | Conversational Programming User’s Manual | 10/2017…
-
Page 115
Using the FN 16: F-PRINT function Further information: «Printing messages», page 401 List of printable files: Text files Graphic files PDF files The connected printer must be PostScript-enabled. HEIDENHAIN | TNC 640 | Conversational Programming User’s Manual | 10/2017… -
Page 116: Selinux Security Software
Starting the SELinux configuration: The configuration of SELinux is usually password-protected by your machine manufacturer; refer here to the relevant machine manual HEIDENHAIN recommends activating SELinux because it provides additional protection against attacks from outside. HEIDENHAIN | TNC 640 | Conversational Programming User’s Manual | 10/2017…
-
Page 117: Vnc
Manual Manually entered client Denied This client is not permitted to connect TeleService/IPC 61xx Client via TeleService connection DHCP Other computer that obtains an IP address from this computer HEIDENHAIN | TNC 640 | Conversational Programming User’s Manual | 10/2017…
-
Page 118
This dialog makes it possible to refuse that the focus be given to the requesting client. If this does not occur, the focus changes to the requesting client after the set time limit. HEIDENHAIN | TNC 640 | Conversational Programming User’s Manual | 10/2017… -
Page 119: Backup And Restore
Press the green HEIDENHAIN button to open the JH menu Select the Tools menu item Open the NC/PLC Backup or NC/PLC Restore menu item The control opens the pop-up window. HEIDENHAIN | TNC 640 | Conversational Programming User’s Manual | 10/2017…
-
Page 120
Select the next step with the FORWARD soft key The control generates the backup file. Confirm with the OK soft key The control concludes the backup process and restarts the NC software. HEIDENHAIN | TNC 640 | Conversational Programming User’s Manual | 10/2017… -
Page 121
Stop the control if required with the STOP NC SOFTWARE soft Extract the archive The control restores the files. Confirm with the OK soft key The control restarts the NC software. HEIDENHAIN | TNC 640 | Conversational Programming User’s Manual | 10/2017… -
Page 122: Remote Desktop Manager (Option 133)
HEIDENHAIN assures a functioning connection between HEROS 5 and the IPC 6641. No guarantee is given for other combinations and connections. If you are using a TNC 640 with touch control, you can replace some keystrokes with hand-to-screen contact. Further information: «Operating the Touchscreen»,…
-
Page 123: Configuring Connections — Windows Terminal Service (Remotefx)
Select the desired operating system Win XP Win 7 Win 8.X Win 10 Another Windows Press OK The control opens the Edit the connection pop-up window. Edit the connection HEIDENHAIN | TNC 640 | Conversational Programming User’s Manual | 10/2017…
-
Page 124
This prevents that two users access the control simultaneously. HEIDENHAIN | TNC 640 | Conversational Programming User’s Manual | 10/2017… -
Page 125: Configuring The Connection — Vnc
Host name or IP address of the external computer. In the recom- Required mended configuration of the IPC 6641, the IP address 192.168.254.3 is used Password Password for connecting to the VNC server Required HEIDENHAIN | TNC 640 | Conversational Programming User’s Manual | 10/2017…
-
Page 126: Shutting Down Or Rebooting An External Computer
The control switches to the desktop of the connection. Single click with the right mouse button The control displays the connection menu. Move to the following Not active with this connection – workspace HEIDENHAIN | TNC 640 | Conversational Programming User’s Manual | 10/2017…
-
Page 127: Starting And Stopping The Connection
Further information: «Shutting down or rebooting an external computer», page 126 HEIDENHAIN | TNC 640 | Conversational Programming User’s Manual | 10/2017…
-
Page 128: Accessories: Heidenhain 3-D Touch Probes And Electronic Handwheels
A wear-resistant optical switch generates the trigger signal. With the TT 160, signal transmission is by cable. The TT 460 supports infrared and radio transmission. HEIDENHAIN | TNC 640 | Conversational Programming User’s Manual | 10/2017…
-
Page 129: Hr Electronic Handwheels
Several electronic handwheels can also be connected simultaneously and used alternatively on controls with the (HSCI: HEIDENHAIN Serial Controller Interface) serial interface for control components. Configuration is performed via the machine tool builder. HEIDENHAIN | TNC 640 | Conversational Programming User’s Manual | 10/2017…
-
Page 131: Operating The Touchscreen
Operating the Touchscreen…
-
Page 132: Display Unit And Operation
Tap on the operating mode in the header modes Shift the soft-key row Swipe horizontally over the soft-key row Soft-key selection keys Tap on the function in the touchscreen HEIDENHAIN | TNC 640 | Conversational Programming User’s Manual | 10/2017…
-
Page 133: Gestures
Continuous contact of fingertip on the screen Swipe Flowing motion over the screen Drag A combination of long-press and then swipe, moving a finger over the screen when the starting point is clear- ly defined HEIDENHAIN | TNC 640 | Conversational Programming User’s Manual | 10/2017…
-
Page 134: Navigating In The Table And Nc Programs
You can navigate in an NC program or a table as follows: Symbol Gesture Function Mark the NC block or table line Stop scrolling Double tap Activate the table line Swipe Scroll through the NC program or table HEIDENHAIN | TNC 640 | Conversational Programming User’s Manual | 10/2017…
-
Page 135: Operating The Simulation
Function Double tap Set the graphic to its original size Drag Rotate the graphic (only 3-D graphics) Two-finger drag Move graphics Spread Magnify the graphic Pinch Reduce the graphic HEIDENHAIN | TNC 640 | Conversational Programming User’s Manual | 10/2017…
-
Page 136: Using The Heros Menu
Gesture Function Select the measuring point Using the HEROS menu You can use the HEROS menu as follows: Symbol Gesture Function Select the application Long press Open the application HEIDENHAIN | TNC 640 | Conversational Programming User’s Manual | 10/2017…
-
Page 137: Operating The Cad Viewer
Activate Add and double-tap on Reset the graphic or 3-D model to its original size and the background angle Drag Rotate the graphic or 3-D model (only in the Layer Setting mode) HEIDENHAIN | TNC 640 | Conversational Programming User’s Manual | 10/2017…
-
Page 138
Select element Tap on an element in the list- Select or deselect an element view window Activate Add and tap on an Part, shorten, or lengthen and element element HEIDENHAIN | TNC 640 | Conversational Programming User’s Manual | 10/2017… -
Page 139
Reset the graphic to its original size Swipe over an element Show a preview of selected elements Show element information Two-finger drag Move graphics Spread Magnify the graphic Pinch Reduce the graphic HEIDENHAIN | TNC 640 | Conversational Programming User’s Manual | 10/2017… -
Page 140
Show a preview of selected elements Show element information Activate Add and drag Spread a fast selection area Activate Remove and drag Spread an area for deselection of elements Two-finger drag Move graphics HEIDENHAIN | TNC 640 | Conversational Programming User’s Manual | 10/2017… -
Page 141
The third desktop stays active in the background Switch as follows back to the Programming mode of operation: Press the DIADUR key Select work surface 2 in the taskbar HEIDENHAIN | TNC 640 | Conversational Programming User’s Manual | 10/2017… -
Page 142: Functions In The Taskbar
Disable Touchfingers to hide the touch points Enable Single Touchfinger to show the touch point Enable Full Touchfingers to show the touch points of all fingers involved Confirm with OK HEIDENHAIN | TNC 640 | Conversational Programming User’s Manual | 10/2017…
-
Page 143: Touchscreen Cleaning
The control locks the screen for 90 seconds. Clean the screen If you would like to stop the cleaning mode: Pull the displayed sliders apart at the same time HEIDENHAIN | TNC 640 | Conversational Programming User’s Manual | 10/2017…
-
Page 145: Fundamentals, File Management
Fundamentals, File Management…
-
Page 146: Fundamentals
With absolute encoders, an absolute position value is transmitted to the control immediately upon switch-on. In this way the assignment of the actual position to the machine slide position is re-established directly after switch-on. HEIDENHAIN | TNC 640 | Conversational Programming User’s Manual | 10/2017…
-
Page 147: Reference Systems
Tool Coordinate System All reference systems build up on each other. They are subject to the kinematic chain of the specific machine tool. The machine coordinate system is the reference system. HEIDENHAIN | TNC 640 | Conversational Programming User’s Manual | 10/2017…
-
Page 148
Refer to the machine tool builder’s documentation Use pallet presets only in conjunction with pallets Check the display of the PAL tab before you start machining HEIDENHAIN | TNC 640 | Conversational Programming User’s Manual | 10/2017… -
Page 149
The ACTL. and NOML. displays show movements of the Y axis and Z axis in the input coordinate system. The user can program positions related to the machine datum, e.g. by using the miscellaneous function M91. HEIDENHAIN | TNC 640 | Conversational Programming User’s Manual | 10/2017… -
Page 150
Refer to the machine tool builder’s documentation Use pallet presets only in conjunction with pallets Check the display of the PAL tab before you start machining HEIDENHAIN | TNC 640 | Conversational Programming User’s Manual | 10/2017… -
Page 151
3D ROT functions B-CS PLANE functions Cycle 19 WORKING PLANE Cycle 7 DATUM SHIFT (shifting before tilting the working plane) Cycle 8 MIRROR IMAGE (mirroring before tilting the working plane) HEIDENHAIN | TNC 640 | Conversational Programming User’s Manual | 10/2017… -
Page 152
Other transformations are of course possible in the working plane coordinate system. Further information: «Working plane coordinate system WPL-CS», page 153 HEIDENHAIN | TNC 640 | Conversational Programming User’s Manual | 10/2017… -
Page 153
Turning function (option 50). I-CS Transformations in the working plane coordinate system: Cycle 7 DATUM SHIFT Cycle 8 MIRROR IMAGE Cycle 10 ROTATION Cycle 11 SCALING Cycle 26 AXIS-SPECIFIC SCALING PLANE RELATIVE HEIDENHAIN | TNC 640 | Conversational Programming User’s Manual | 10/2017… -
Page 154
3-axis machine tools or with pure 3-axis machining. The BASE TRANSFORM. values of the active line of the preset table have a direct effect on the input coordinate system with this assumption. HEIDENHAIN | TNC 640 | Conversational Programming User’s Manual | 10/2017… -
Page 155
Orientation of the tool coordinate system can be performed in various reference systems. Further information: «Tool coordinate system T-CS», page 156 HEIDENHAIN | TNC 640 | Conversational Programming User’s Manual | 10/2017… -
Page 156
7 L A+0 B+45 C+0 R0 F2500 7 LN X+48 Y+102 Z-1.5 NX-0.04658107 NY0.00045007 NZ0.8848844 TX-0.08076201 TY-0.34090025 TZ0.93600126 R0 M128 7 LN X+48 Y+102 Z-1.5 NX-0.04658107 NY0.00045007 NZ0.8848844 R0 M128 HEIDENHAIN | TNC 640 | Conversational Programming User’s Manual | 10/2017… -
Page 157
+ DR PROG PROG → toroid cutter or toroidal cutter Without the TCPM function or miscellaneous function M128, orientation of the tool coordinate system and input coordinate system is identical. HEIDENHAIN | TNC 640 | Conversational Programming User’s Manual | 10/2017… -
Page 158: Designation Of The Axes On Milling Machines
The pole is set by entering two Cartesian coordinates in one of the three planes. These coordinates also set the reference axis for the polar angle PA. Coordinates of the pole Reference axis of the angle (plane) HEIDENHAIN | TNC 640 | Conversational Programming User’s Manual | 10/2017…
-
Page 159: Absolute And Incremental Workpiece Positions
Absolute and incremental polar coordinates Absolute coordinates always refer to the pole and the angle reference axis. Incremental polar coordinates always refer to the last programmed nominal position of the tool. HEIDENHAIN | TNC 640 | Conversational Programming User’s Manual | 10/2017…
-
Page 160: Selecting The Preset
X=450 Y=750. By using the Datum shift cycle you can shift the datum temporarily to the position X=450, Y=750 and program the holes to 7) without further calculations. HEIDENHAIN | TNC 640 | Conversational Programming User’s Manual | 10/2017…
-
Page 161: Creating And Writing Programs
The control does not automatically check whether collisions can occur between the tool and the workpiece. There is danger of collision during the approach movement after a tool change! If necessary, program an additional safe auxiliary position HEIDENHAIN | TNC 640 | Conversational Programming User’s Manual | 10/2017…
-
Page 162: Defining The Blank: Blk Form
1 BLK FORM 0.1 Z X+0 Y+0 Z-40 Spindle axis, MIN point coordinates 2 BLK FORM 0.2 X+100 Y+100 Z+0 MAX point coordinates 3 END PGM NEW MM Program end, name, unit of measure HEIDENHAIN | TNC 640 | Conversational Programming User’s Manual | 10/2017…
-
Page 163
If you define a rotationally symmetric blank with incremental coordinates, the dimensions are then independent of the diameter programming. The subprogram can be designated with a number, an alphanumeric name, or a QS parameter. HEIDENHAIN | TNC 640 | Conversational Programming User’s Manual | 10/2017… -
Page 164: Creating A New Nc Program
BLK FORM (workpiece blank). Select a rectangular workpiece blank: Press the soft key for a rectangular blank form Working plane in graphic: XY Enter the spindle axis, e.g. Z HEIDENHAIN | TNC 640 | Conversational Programming User’s Manual | 10/2017…
-
Page 165
The control automatically generates the block numbers as well as the BEGIN and END blocks. If you do not wish to define a blank form, cancel the dialog at Working plane in graphic: XY using the DEL key. HEIDENHAIN | TNC 640 | Conversational Programming User’s Manual | 10/2017… -
Page 166: Programming Tool Movements In Klartext
MISCELLANEOUS FUNCTION M ? 3 (enter the miscellaneous function M3 Spindle on) With the END key, the control ends this dialog. Example 3 L X+10 Y+5 R0 F100 M3 HEIDENHAIN | TNC 640 | Conversational Programming User’s Manual | 10/2017…
-
Page 167
The number of teeth must be defined in the tool table in the CUT column. Functions for conversational guidance Ignore the dialog question End the dialog immediately Abort the dialog and erase the block HEIDENHAIN | TNC 640 | Conversational Programming User’s Manual | 10/2017… -
Page 168: Actual Position Capture
(e.g. for radius compensation), then the control closes the soft-key row for axis selection. The actual-position-capture function is not allowed if the Tilt working plane function is active. HEIDENHAIN | TNC 640 | Conversational Programming User’s Manual | 10/2017…
-
Page 169: Editing An Nc Program
ENT key. Or: Press the GOTO key, enter the block number step and jump up or down the number of entered lines by pressing the N LINES soft HEIDENHAIN | TNC 640 | Conversational Programming User’s Manual | 10/2017…
-
Page 170
Confirm with the OK soft key or the ENT key, or press the CANCEL soft key to abort The file saved with SAVE AS can also be found in the file management by pressing the LAST FILES soft key. HEIDENHAIN | TNC 640 | Conversational Programming User’s Manual | 10/2017… -
Page 171
If you start a search in a very long NC program, the control shows a progress indicator. You can cancel the search at any time, if necessary. HEIDENHAIN | TNC 640 | Conversational Programming User’s Manual | 10/2017… -
Page 172
Using the arrow keys, select the block after which you wish to insert the copied (cut) program section Insert the saved program section: Press the INSERT BLOCK soft To end the marking function, press the CANCEL SELECTION soft HEIDENHAIN | TNC 640 | Conversational Programming User’s Manual | 10/2017… -
Page 173: The Control’s Search Function
Repeat the search process The control moves to the next block containing the text you are searching for. Terminate the search function: Press the END soft key HEIDENHAIN | TNC 640 | Conversational Programming User’s Manual | 10/2017…
-
Page 174
To replace all text occurrences, press the REPLACE ALL soft key. To skip the text and move to its next occurrence press the FIND soft key Terminate the search function: Press the END soft key HEIDENHAIN | TNC 640 | Conversational Programming User’s Manual | 10/2017… -
Page 175: File Management: Basics
2 GB in size. Depending on the setting, the control generates backup files with the extension *.bak after editing and saving of NC programs. This reduces the available memory space. HEIDENHAIN | TNC 640 | Conversational Programming User’s Manual | 10/2017…
-
Page 176
The maximum permitted path length is 255 characters. The path length consists of the drive characters, the directory name and the file name, including the extension. Further information: «Paths», page 178 HEIDENHAIN | TNC 640 | Conversational Programming User’s Manual | 10/2017… -
Page 177: Displaying Externally Generated Files On The Control
Depending on operating conditions (e.g. vibration load), hard disks generally have a higher failure rate after three to five years of service. HEIDENHAIN therefore recommends having the hard disk inspected after three to five years. HEIDENHAIN | TNC 640 | Conversational Programming User’s Manual | 10/2017…
-
Page 178: Working With The File Manager
PROG1.H was copied into it. The part program now has the following path: TNC:AUFTR1NCPROGPROG1.H The chart at right illustrates an example of a directory display with different paths. HEIDENHAIN | TNC 640 | Conversational Programming User’s Manual | 10/2017…
-
Page 179: Overview: Functions Of The File Manager
Customize table view Manage network drives Select the editor Sort files by properties Copy a directory Delete directory with all its subdirectories Refresh directory Rename a directory Create a new directory HEIDENHAIN | TNC 640 | Conversational Programming User’s Manual | 10/2017…
-
Page 180: Calling The File Manager
Date that the file was last edited Time Time that the file was last edited To display the dependent files, set the machine parameter dependentFiles (no. 122101) to MANUAL. HEIDENHAIN | TNC 640 | Conversational Programming User’s Manual | 10/2017…
-
Page 181: Selecting Drives, Directories And Files
Step 1: Select drive Move the highlight to the desired drive in the left window To select a drive, press the SELECT soft key, or Press the ENT key HEIDENHAIN | TNC 640 | Conversational Programming User’s Manual | 10/2017…
-
Page 182
If you enter the first letter of the file you are looking for in file management, the cursor automatically jumps to the first program with the same letter. HEIDENHAIN | TNC 640 | Conversational Programming User’s Manual | 10/2017… -
Page 183: Creating A New Directory
The original file is retained. When you start the copying process with the ENT key or the OK soft key, the control displays a pop-up window with a progress indicator. HEIDENHAIN | TNC 640 | Conversational Programming User’s Manual | 10/2017…
-
Page 184: Copying Files Into Another Directory
To leave the files as they are, press the CANCEL soft key If you want to overwrite a protected file, select the Protected files field or cancel the process. HEIDENHAIN | TNC 640 | Conversational Programming User’s Manual | 10/2017…
-
Page 185: Copying A Table
Press the TAG soft key Select additional lines, if required Press the SAVE AS soft key Enter a name for the table in which the selected lines are to be saved HEIDENHAIN | TNC 640 | Conversational Programming User’s Manual | 10/2017…
-
Page 186: Copying A Directory
The control asks whether you want to delete the file. To confirm the deletion, press the OK soft key; or To cancel deletion, press the CANCEL soft key HEIDENHAIN | TNC 640 | Conversational Programming User’s Manual | 10/2017…
-
Page 187: Deleting A Directory
The control asks you whether you really want to delete the directory and all its subdirectories and files. To confirm the deletion, press the OK soft key; or To cancel deletion, press the CANCEL soft key HEIDENHAIN | TNC 640 | Conversational Programming User’s Manual | 10/2017…
-
Page 188: Tagging Files
To copy tagged files: Leave the active soft-key row Press the COPY soft key To delete tagged files: Leave the active soft-key row Press the DELETE soft key HEIDENHAIN | TNC 640 | Conversational Programming User’s Manual | 10/2017…
-
Page 189: Renaming A File
Press the SORT soft key Select the soft key with the corresponding display criterion SORT BY NAME SORT BY SIZE SORT BY DATE SORT BY TYPE SORT BY STATUS UNSORTED HEIDENHAIN | TNC 640 | Conversational Programming User’s Manual | 10/2017…
-
Page 190: Additional Functions
To remove a USB device, proceed as follows: Move the cursor to the left-hand window Press the MORE FUNCTIONS soft key Remove the USB device Further information: «USB devices on the control», page 204 HEIDENHAIN | TNC 640 | Conversational Programming User’s Manual | 10/2017…
-
Page 191: Additional Tools For Management Of External File Types
Adjust the setting in the TNCremo data transfer software, if required (menu item >Extras > Configuration > Mode). If you are using a TNC 640 with touch control, you can replace some keystrokes with hand-to-screen contact. Further information: «Operating the Touchscreen»,…
-
Page 192
Press the key for switching the soft keys opens the File pull-down menu. PDF viewer Move the cursor to the Close menu item. Press the ENT key The control returns to the file management. HEIDENHAIN | TNC 640 | Conversational Programming User’s Manual | 10/2017… -
Page 193
Press the key for switching the soft keys additional tool opens the File pull- Gnumeric down menu. Move the cursor to the Close menu item Press the ENT key The control returns to the file management. HEIDENHAIN | TNC 640 | Conversational Programming User’s Manual | 10/2017… -
Page 194
If you position the mouse pointer over a button, a brief tool tip explaining the function of this button will be displayed. More information on how to use is available in Help. Browser HEIDENHAIN | TNC 640 | Conversational Programming User’s Manual | 10/2017… -
Page 195
Press the ENT key The control returns to the file management. Do not change the Web Browser version. Otherwise, the security settings of SELinux will block the execution of Web Browser. HEIDENHAIN | TNC 640 | Conversational Programming User’s Manual | 10/2017… -
Page 196
Press the key for switching the soft keys opens the ARCHIVE pull-down menu. Xarchiver Move the cursor to the Exit menu item Press the ENT key The control returns to the file management. HEIDENHAIN | TNC 640 | Conversational Programming User’s Manual | 10/2017… -
Page 197
Select the Tools and Leafpad menu items in the pull-down menu Proceed as follows to exit Leafpad: Use the mouse to select the File menu item Select Exit The control returns to the file management. HEIDENHAIN | TNC 640 | Conversational Programming User’s Manual | 10/2017… -
Page 198
Press the key for switching the soft keys opens the File pull-down menu. ristretto Move the cursor to the Exit menu item Press the ENT key The control returns to the file management. HEIDENHAIN | TNC 640 | Conversational Programming User’s Manual | 10/2017… -
Page 199: Additional Tools For Itcs
Using the additional ITC Gestures tool, the machine manufacturer configures the gesture control on the touch screen. Refer to your machine manual. This function may only be used with the permission of your machine manufacturer. HEIDENHAIN | TNC 640 | Conversational Programming User’s Manual | 10/2017…
-
Page 200
Start the tool in control using the task bar The ITC opens a pop-up window with three options Select Touch Sensitivity Press the OK button The ITC closes the pop-up window HEIDENHAIN | TNC 640 | Conversational Programming User’s Manual | 10/2017… -
Page 201: Data Transfer To Or From An External Data Carrier
Use the arrow keys to move the cursor to the file you wish to transfer: Moves the cursor up and down within a window Moves the cursor from the right to the left window, and vice versa HEIDENHAIN | TNC 640 | Conversational Programming User’s Manual | 10/2017…
-
Page 202
A status window appears on the control, informing about the copying progress, or Stop transfer: Press the WINDOW soft key The control displays the standard file manager window again. HEIDENHAIN | TNC 640 | Conversational Programming User’s Manual | 10/2017… -
Page 203
Auto column if the connec- tion is established automatically Set up new network connection Remove Delete existing network connection Copy Copy network connection Edit Edit network connection Clear Delete the status window HEIDENHAIN | TNC 640 | Conversational Programming User’s Manual | 10/2017… -
Page 204
The dialog is closed with the HIDE soft key and file transfer is continued in the background. The control displays a warning until file transfer is completed. HEIDENHAIN | TNC 640 | Conversational Programming User’s Manual | 10/2017… -
Page 205
Fundamentals, File Management | Working with the file manager Removing USB devices To remove a USB device, proceed as follows: Move the cursor to the left-hand window Press the MORE FUNCTIONS soft key Remove the USB device HEIDENHAIN | TNC 640 | Conversational Programming User’s Manual | 10/2017… -
Page 207: Programming Aids
Programming Aids…
-
Page 208: Adding Comments
Press the INSERT COMMENT soft key Alternative: Press the < key on the alphabetic keyboard The control inserts a semicolon ; at the beginning of the block. Press the END key HEIDENHAIN | TNC 640 | Conversational Programming User’s Manual | 10/2017…
-
Page 209: Functions For Editing Of The Comment
Jump to the beginning of a word. Use a space to separate words Jump to the end of a word. Use a space to separate words Switch between paste and overwrite mode HEIDENHAIN | TNC 640 | Conversational Programming User’s Manual | 10/2017…
-
Page 210: Freely Editing An Nc Program
The control opens a new NC block. Add the desired syntax Confirm your entry with END After confirmation, the control checks the syntax. Errors will result in ERROR blocks. HEIDENHAIN | TNC 640 | Conversational Programming User’s Manual | 10/2017…
-
Page 211: Display Of Nc Programs
Screen content can be shifted with the mouse using the scroll bar at the right edge of the program window. In addition, the size and position of the scrollbar indicates program length and cursor position. HEIDENHAIN | TNC 640 | Conversational Programming User’s Manual | 10/2017…
-
Page 212: Structuring Programs
Displaying the program structure window / Changing the active window Display structure window: For this screen layout press the PROGRAM + STRUCTURE soft key Change the active window: Press the CHANGE WINDOW soft key HEIDENHAIN | TNC 640 | Conversational Programming User’s Manual | 10/2017…
-
Page 213: Inserting A Structure Block In The Program Window
If you are scrolling through the program structure window block by block, the control at the same time automatically moves the corresponding NC blocks in the program window. This way you can quickly skip large program sections. HEIDENHAIN | TNC 640 | Conversational Programming User’s Manual | 10/2017…
-
Page 214: Calculator
Add value to buffer memory Save the value to buffer memory Recall from buffer memory Delete buffer memory contents Natural logarithm Logarithm Exponential function Check the algebraic sign Form the absolute value HEIDENHAIN | TNC 640 | Conversational Programming User’s Manual | 10/2017…
-
Page 215
The calculator remains in effect even after a change in operating modes. Press the END soft key to close the calculator. HEIDENHAIN | TNC 640 | Conversational Programming User’s Manual | 10/2017… -
Page 216
Open the cutting data calculator You can also shift the calculator with the arrow keys on your keyboard. If you have connected a mouse you can also position the calculator with this. HEIDENHAIN | TNC 640 | Conversational Programming User’s Manual | 10/2017… -
Page 217: Cutting Data Calculator
Window for spindle speed calculation: Code letter Meaning Tool radius (mm) Cutting speed (m/min) Result for spindle speed (rev/min) HEIDENHAIN | TNC 640 | Conversational Programming User’s Manual | 10/2017…
-
Page 218
Load the feed per tooth from the open dialog field into the cutting data calculator form Load the value from an open dialog field into the cutting data calculator form Switch to the pocket calculator HEIDENHAIN | TNC 640 | Conversational Programming User’s Manual | 10/2017… -
Page 219
Programming Aids | Cutting data calculator Soft key Function Move the cutting data calculator in the direction of the arrow Use inch values in the cutting data calculator Close the cutting data calculator HEIDENHAIN | TNC 640 | Conversational Programming User’s Manual | 10/2017… -
Page 220: Programming Graphics
RND light blue: holes and threads ocher: tool midpoint path red: rapid traverse Further information: «FK programming graphics», page 319 HEIDENHAIN | TNC 640 | Conversational Programming User’s Manual | 10/2017…
-
Page 221: Generating A Graphic For An Existing Program
Selecting views Plan view Front view Page view Display or hide tool paths Display or hide tool paths in rapid traverse HEIDENHAIN | TNC 640 | Conversational Programming User’s Manual | 10/2017…
-
Page 222: Block Number Display On/Off
Shift the soft-key row Erase the graphics: Press the CLEAR GRAPHICS soft key Showing grid lines Shift the soft-key row Show grid lines: Press the Show grid lines soft HEIDENHAIN | TNC 640 | Conversational Programming User’s Manual | 10/2017…
-
Page 223: Magnification Or Reduction Of Details
After you release the left mouse button, the control zooms in on the defined area. To rapidly magnify or reduce any area, rotate the mouse wheel backwards or forwards. HEIDENHAIN | TNC 640 | Conversational Programming User’s Manual | 10/2017…
-
Page 224: Error Messages
The control opens the error window and displays all accumulated error messages. Closing the error window Press the END soft key; or Press the ERR key The control closes the error window. HEIDENHAIN | TNC 640 | Conversational Programming User’s Manual | 10/2017…
-
Page 225: Detailed Error Messages
Open the error window Press the MORE FUNCTIONS soft key Press the FILTER soft key The control filters the identical warnings Leave Filter: Press the GO BACK soft key HEIDENHAIN | TNC 640 | Conversational Programming User’s Manual | 10/2017…
-
Page 226: Clearing Errors
Set the current error log if required: Press the CURRENT FILE soft key The oldest entry is at the beginning of the log file, and the most recent entry is at the end. HEIDENHAIN | TNC 640 | Conversational Programming User’s Manual | 10/2017…
-
Page 227: Keystroke Log
Soft key/Keys Function Go to beginning of keystroke log Go to end of keystroke log Find text Current keystroke log Previous keystroke log Up/down one line Return to main menu HEIDENHAIN | TNC 640 | Conversational Programming User’s Manual | 10/2017…
-
Page 228: Informational Texts
There you will find further, more detailed information on the error message concerned. Call the help for HEIDENHAIN error messages Call the help for HEIDENHAIN machine-specific error messages, if available HEIDENHAIN | TNC 640 | Conversational Programming User’s Manual | 10/2017…
-
Page 229: Tncguide Context-Sensitive Help System
.chm files. As an option, your machine tool builder can embed machine-specific documentation in the TNCguide. These documents then appear as a separate book in the main.chm file. HEIDENHAIN | TNC 640 | Conversational Programming User’s Manual | 10/2017…
-
Page 230: Working With Tncguide
Press the HELP key. The control opens the Help system and shows the description of the active function. This does not apply for miscellaneous functions or cycles from your machine manufacturer. HEIDENHAIN | TNC 640 | Conversational Programming User’s Manual | 10/2017…
-
Page 231
Select the page last shown Page forward if you have used the Select page last shown function Move up by one page Move down by one page HEIDENHAIN | TNC 640 | Conversational Programming User’s Manual | 10/2017… -
Page 232
The control synchronizes the subject index and creates a list in which you can find the subject more easily. Use the ENT key to call the information on the selected keyword HEIDENHAIN | TNC 640 | Conversational Programming User’s Manual | 10/2017… -
Page 233
If you activate the Search only in titles function, the control searches only through headings and ignores the body text. To activate the function, use the mouse or select it and then press the space bar to confirm. HEIDENHAIN | TNC 640 | Conversational Programming User’s Manual | 10/2017… -
Page 234: Downloading Current Help Files
When using TNCremo to transfer the .chm files to the control, select the binary mode for files with the .chm extension. HEIDENHAIN | TNC 640 | Conversational Programming User’s Manual | 10/2017…
-
Page 235
Danish TNC:tncguidefi Finnish TNC:tncguidenl Dutch TNC:tncguidepl Polish TNC:tncguidehu Hungarian TNC:tncguideru Russian TNC:tncguidezh Chinese (simplified) TNC:tncguidezh-tw Chinese (traditional) TNC:tncguidesl Slovenian TNC:tncguideno Norwegian TNC:tncguidesk Slovak TNC:tncguidekr Korean TNC:tncguidetr Turkish TNC:tncguidero Romanian HEIDENHAIN | TNC 640 | Conversational Programming User’s Manual | 10/2017… -
Page 237: Tools
Tools…
-
Page 238: Entering Tool-Related Data
You can adjust the feed rate during the program run with the feed rate potentiometer F . The feed rate potentiometer lowers the programmed feed rate, not the feed rate calculated by the control. HEIDENHAIN | TNC 640 | Conversational Programming User’s Manual | 10/2017…
-
Page 239: Spindle Speed S
Changing during program run You can adjust the spindle speed during program run with the spindle speed potentiometer S. HEIDENHAIN | TNC 640 | Conversational Programming User’s Manual | 10/2017…
-
Page 240: Tool Data
The entire tool length is essential for the control in order to perform numerous functions involving multi-axis machining. Tool radius R You can enter the tool radius R directly. HEIDENHAIN | TNC 640 | Conversational Programming User’s Manual | 10/2017…
-
Page 241: Delta Values For Lengths And Radii
In the programming dialog, you can transfer the value for tool length and tool radius directly into the input line by pressing the desired axis soft key. Example 4 TOOL DEF 5 L+10 R+5 HEIDENHAIN | TNC 640 | Conversational Programming User’s Manual | 10/2017…
-
Page 242: Entering Tool Data Into The Table
You can select the table view with the Screen Layout key. You can choose between a list view and a form view. Other settings, such as HIDE/ SORT/ COLUMNS, can be made after the file is open. HEIDENHAIN | TNC 640 | Conversational Programming User’s Manual | 10/2017…
-
Page 243
The Dynamic Collision Monitoring (DCM) function also uses the length and radius data for displaying the active tool and for collision monitoring. Incomplete or incorrect tool definitions may lead to premature or false collision warnings. HEIDENHAIN | TNC 640 | Conversational Programming User’s Manual | 10/2017… -
Page 244
Current age of the tool in minutes: The control automati- cally counts the current tool life (CUR_TIME: For CURrent TIME) A starting value can be entered for used tools HEIDENHAIN | TNC 640 | Conversational Programming User’s Manual | 10/2017… -
Page 245
The control immediately uses the value given for regula- tion, meaning a teach-in cut is dropped. The value should be previously determined with a teach-in cut. Further information: «Recording a teach-in cut», page 541 HEIDENHAIN | TNC 640 | Conversational Programming User’s Manual | 10/2017… -
Page 246
Tool life expired Time for exceeding the tool life in minutes Further information: «Overtime for tool life», page 262 Function is defined by the machine manufacturer. Refer to your machine manual. HEIDENHAIN | TNC 640 | Conversational Programming User’s Manual | 10/2017… -
Page 247
If the entered value is exceeded, the control locks the tool (status L). Input range: 0 to 0.9999 mm For a description of the cycles governing automatic tool measurement, Further information: Cycle Programming User’s Manual HEIDENHAIN | TNC 640 | Conversational Programming User’s Manual | 10/2017… -
Page 248
Select the table start Select the table end Select the previous page in the table Select the next page in the table Find the text or number Go to beginning of line HEIDENHAIN | TNC 640 | Conversational Programming User’s Manual | 10/2017… -
Page 249
Delete the current line (tool) Sort the tools according to the content of a column Select possible entries from a pop-up window Reset the value Place the cursor in the current cell HEIDENHAIN | TNC 640 | Conversational Programming User’s Manual | 10/2017… -
Page 250
Show all drills in the tool table Show all cutters in the tool table Show all taps/thread cutters in the tool table Show all touch probes in the tool table HEIDENHAIN | TNC 640 | Conversational Programming User’s Manual | 10/2017… -
Page 251
The control provides special tool management for turning tools to support this definition process. Further information: «Tool data», page 688 HEIDENHAIN | TNC 640 | Conversational Programming User’s Manual | 10/2017… -
Page 252: Importing Tool Tables
If you export a tool table from an iTNC 530 and import it into a TNC 640, you have to adapt its format and content before you can use the tool table. On the TNC 640, you can adapt the tool table conveniently with the ADAPT NC PGM / TABLE function. The control converts the contents of the imported tool table to a format valid for the TNC 640 and saves the changes to the selected file.
-
Page 253
When iTNC 530 tool tables are imported, all defined tool types are transferred as well. Tool types not present are imported as type Undefined. Check the tool table after the import. HEIDENHAIN | TNC 640 | Conversational Programming User’s Manual | 10/2017… -
Page 254: Overwriting Tool Data From An External Pc
(e.g. TST.T) is overwritten. All other tool data of the table TOOL.T remains unchanged. The procedure for copying tool tables using the file manager is described in the file management. Further information: «Copying a table», page 185 HEIDENHAIN | TNC 640 | Conversational Programming User’s Manual | 10/2017…
-
Page 255: Pocket Table For Tool Changer
Press the POCKET TABLE soft key Set the EDIT soft key to ON. On your machine this might not be necessary or even possible. Refer to your machine manual HEIDENHAIN | TNC 640 | Conversational Programming User’s Manual | 10/2017…
-
Page 256
Box magazine: Lock the pocket below below? LOCKED_LEFT Lock the pocket at Box magazine: Lock the pocket at left left? LOCKED_RIGHT Lock the pocket at Box magazine: Lock the pocket at right right? HEIDENHAIN | TNC 640 | Conversational Programming User’s Manual | 10/2017… -
Page 257
Place the cursor in the current cell Sort the view Refer to your machine manual. The machine manufacturer defines the features, properties and designations of the various display filters. HEIDENHAIN | TNC 640 | Conversational Programming User’s Manual | 10/2017… -
Page 258: Calling The Tool Data
If the tool axis is also entered in the TOOL CALL block, the control will insert a replacement tool if a replacement tool was defined. HEIDENHAIN | TNC 640 | Conversational Programming User’s Manual | 10/2017…
-
Page 259
If you are working with tool tables, use a TOOL DEF block to preselect the next tool. Simply enter the tool number or a corresponding Q parameter, or type the tool name in quotation marks. HEIDENHAIN | TNC 640 | Conversational Programming User’s Manual | 10/2017… -
Page 260: Tool Change
Directly before a departure function DEP Directly before and after CHF and RND During execution of macros During execution of a tool change Directly after a TOOL CALL or TOOL DEF During execution of SL cycles HEIDENHAIN | TNC 640 | Conversational Programming User’s Manual | 10/2017…
-
Page 261
If you want to reset the current age of a tool (e.g. after changing the indexable inserts), enter the value 0 in the CUR_TIME column. The M101 function is not available for turning tools and in turning mode. HEIDENHAIN | TNC 640 | Conversational Programming User’s Manual | 10/2017… -
Page 262
With deviations, the control displays an error message and does not replace the tool. You can suppress this message with the M function M107, and reactivate it with M108. Further information: «Three-dimensional tool compensation (option 9)», page 631 HEIDENHAIN | TNC 640 | Conversational Programming User’s Manual | 10/2017… -
Page 263: Tool Usage Test
Completely run the NC program in the Program Run, Full Sequence/Single Block operating modes In the Test Run operating mode, press the GENERATE TOOL USAGE FILE soft key (also possible without simulation) HEIDENHAIN | TNC 640 | Conversational Programming User’s Manual | 10/2017…
-
Page 264
Minimum feed rate override that occurred during machining. The control enters the value -1 during the test run NAMEPROG 0: The tool number is programmed 1: The tool name is programmed HEIDENHAIN | TNC 640 | Conversational Programming User’s Manual | 10/2017… -
Page 265
Press the OK soft key The control closes the pop-up window. Alternative: Press the ENT key You can query the tool usage test with the FN 18 ID975 NR1 function. HEIDENHAIN | TNC 640 | Conversational Programming User’s Manual | 10/2017… -
Page 266: Tool Compensation
Tool length L from TOOL DEF block or tool table Oversize for length DL in the TOOL CALL block TOOL CALL Oversize for length DL in the tool table HEIDENHAIN | TNC 640 | Conversational Programming User’s Manual | 10/2017…
-
Page 267: Tool Radius Compensation
Oversize for radius DR in the tool table Contouring without radius compensation: R0 The tool center moves in the working plane along the programmed path, or to the programmed coordinates. Applications: Drilling and boring, pre-positioning HEIDENHAIN | TNC 640 | Conversational Programming User’s Manual | 10/2017…
-
Page 268
Select tool movement to the right of the contour: Press the RR soft key, or Select tool movement without radius compensation or cancel radius compensation: Press the ENT key Terminate the block: Press the END key HEIDENHAIN | TNC 640 | Conversational Programming User’s Manual | 10/2017… -
Page 269
Incorrect positions can lead to contour damage. Danger of collision during machining! Program safe approach and departure positions at a sufficient distance from the contour Consider the tool radius Consider the approach strategy HEIDENHAIN | TNC 640 | Conversational Programming User’s Manual | 10/2017… -
Page 270: Tool Management (Option Number 93)
If you edit a tool in tool management, the selected tool is locked. If this tool is required in the NC program being used, the control shows the message: Tool table locked. HEIDENHAIN | TNC 640 | Conversational Programming User’s Manual | 10/2017…
-
Page 271: Calling Tool Management
«Tool usage test», page 263 If a pallet table is selected in the Program Run operating mode, the Tooling list and T usage order are calculated for the entire pallet table. HEIDENHAIN | TNC 640 | Conversational Programming User’s Manual | 10/2017…
-
Page 272: Editing Tool Management
SHIFT COLUMN active: The column can be moved by drag and drop Reset the manually changed settings (move columns) to the original condition HEIDENHAIN | TNC 640 | Conversational Programming User’s Manual | 10/2017…
-
Page 273
EDIT ON/OFF soft key to ON HEIDENHAIN | TNC 640 | Conversational Programming User’s Manual | 10/2017… -
Page 274
Calculate the measured values of tool compensation (only active for turning tools) Add tool index Delete tool index Copy the tool data of the selected tool Insert the copied tool data in the selected tool HEIDENHAIN | TNC 640 | Conversational Programming User’s Manual | 10/2017… -
Page 275
Regularly back up important data to external drives The tool data of tools still stored in the pocket table cannot be deleted. The tools must be removed from the magazine first. HEIDENHAIN | TNC 640 | Conversational Programming User’s Manual | 10/2017… -
Page 276: Available Tool Types
Piloted counterbore(TSINK),TSINK Boring tool,BOR Back boring tool,BCKBOR Thread mill,GF Thread mill w/ countersink,GSF Thread mill w/ single thread,EP Thread mill w/ indxbl insert,WSP Thread milling drill,BGF Circular thread mill,ZBGF HEIDENHAIN | TNC 640 | Conversational Programming User’s Manual | 10/2017…
-
Page 277
Tools | Tool management (option number 93) Icon Tool type Tool type number Roughing cutter (MILL_R),MILL_R Finishing cutter (MILL_F),MILL_F Rough/finish cutter,MILL_RF Floor finisher(MILL_FD),MILL_FD Side finisher (MILL_FS),MILL_FS Face milling cutter,MILL_FACE HEIDENHAIN | TNC 640 | Conversational Programming User’s Manual | 10/2017… -
Page 278: Importing And Exporting Tool Data
Use the arrow keys or mouse to select the file to be imported and confirm with the ENT key The control shows a pop-up window with the content of the CSV file Start the import procedure with the EXECUTE soft key. HEIDENHAIN | TNC 640 | Conversational Programming User’s Manual | 10/2017…
-
Page 279
Example T,L,R,DL,DR Line 1 with column names 4,125.995,7.995,0,0 Line 2 with tool data 9,25.06,12.01,0,0 Line 3 with tool data 28,196.981,35,0,0 Line 4 with tool data HEIDENHAIN | TNC 640 | Conversational Programming User’s Manual | 10/2017… -
Page 280
The control shows a pop-up window with the status of the export process Terminate the export process by pressing the END key or soft By default the control stores the exported CSV file in the TNC:systemtooltab directory. HEIDENHAIN | TNC 640 | Conversational Programming User’s Manual | 10/2017… -
Page 281: Programming Contours
Programming Contours…
-
Page 282: Tool Movements
With the control’s miscellaneous functions you can affect the program run, e.g., a program interruption the machine functions, such as switching spindle rotation and coolant supply on and off the path behavior of the tool HEIDENHAIN | TNC 640 | Conversational Programming User’s Manual | 10/2017…
-
Page 283: Subprograms And Program Section Repeats
In addition, programming with Q parameters enables you to measure with the 3-D touch probe during the program run. Further information: «Programming Q Parameters», page 375 HEIDENHAIN | TNC 640 | Conversational Programming User’s Manual | 10/2017…
-
Page 284: Fundamentals Of Path Functions
If the NC block contains two coordinates, the control moves the tool in the programmed plane. Example L X+70 Y+50 The tool retains the Z coordinate and moves on the XY plane to the position X=70, Y=50. HEIDENHAIN | TNC 640 | Conversational Programming User’s Manual | 10/2017…
-
Page 285
When a circular path has no tangential transition to another contour element, enter the direction of rotation as follows: Clockwise direction of rotation: DR- Counterclockwise direction of rotation: DR+ HEIDENHAIN | TNC 640 | Conversational Programming User’s Manual | 10/2017… -
Page 286
Creating the NC blocks with the path function keys The gray path function keys initiate the dialog. The control asks you successively for all the necessary information and inserts the NC block into the part program. HEIDENHAIN | TNC 640 | Conversational Programming User’s Manual | 10/2017… -
Page 287
Press the F AUTO soft key. CALL MISCELLANEOUS FUNCTION M? Enter 3 (miscellaneous function e.g. M3) and terminate the dialog with the END key Example L X-20 Y+30 R0 FMAX M3 HEIDENHAIN | TNC 640 | Conversational Programming User’s Manual | 10/2017… -
Page 288: Approaching And Departing A Contour
If danger of collision exists, approach the starting point in the spindle axis separately. Example 30 L Z-10 R0 FMAX 31 L X+20 Y+30 RL F350 HEIDENHAIN | TNC 640 | Conversational Programming User’s Manual | 10/2017…
-
Page 289
Example in the figure on the right: If you set the end point in the dark gray area, the contour will be damaged when the contour is approached/departed. HEIDENHAIN | TNC 640 | Conversational Programming User’s Manual | 10/2017… -
Page 290: Overview: Types Of Paths For Contour Approach And Departure
The tool approaches and departs a helix on its extension by moving in a circular arc that connects tangentially to the contour. You program helical approach and departure with the APPR CT and DEP CT functions. HEIDENHAIN | TNC 640 | Conversational Programming User’s Manual | 10/2017…
-
Page 291: Important Positions For Approach And Departure
There is danger of collision during the approach movement! Program a suitable pre-position Check the auxiliary point P , the sequence and the contour with the aid of the graphic simulation HEIDENHAIN | TNC 640 | Conversational Programming User’s Manual | 10/2017…
-
Page 292
If you program APPR LN or APPR CT with R0, the control stops the machining/simulation with an error message. This method of function differs from the iTNC 530 control! HEIDENHAIN | TNC 640 | Conversational Programming User’s Manual | 10/2017… -
Page 293: Approaching On A Straight Line With Tangential Connection: Appr Lt
8 APPR LN X+10 Y+20 Z-10 LEN15 RR F100 PA with radius comp. RR 9 L X+20 Y+35 End point of the first contour element 10 L … Next contour element HEIDENHAIN | TNC 640 | Conversational Programming User’s Manual | 10/2017…
-
Page 294: Approaching On A Circular Path With Tangential Connection: Appr Ct
8 APPR CT X+10 Y+20 Z-10 CCA180 R+10 RR F100 PA with radius compensation RR, radius R=10 9 L X+20 Y+35 End point of the first contour element 10 L … Next contour element HEIDENHAIN | TNC 640 | Conversational Programming User’s Manual | 10/2017…
-
Page 295: Approaching On A Circular Path With Tangential Connection From A Straight Line To The Contour: Appr Lct
8 APPR LCT X+10 Y+20 Z-10 R10 RR F100 PA with radius compensation RR, radius R=10 9 L X+20 Y+35 End point of the first contour element 10 L … Next contour element HEIDENHAIN | TNC 640 | Conversational Programming User’s Manual | 10/2017…
-
Page 296: Departing In A Straight Line With Tangential Connection: Dep Lt
Last contour element: PE with radius compensation 24 DEP LN LEN+20 F100 Depart perpendicular to contour by LEN=20 mm 25 L Z+100 FMAX M2 Retract in Z, return to block 1, end program HEIDENHAIN | TNC 640 | Conversational Programming User’s Manual | 10/2017…
-
Page 297: Departing On A Circular Path With Tangential Connection: Dep Ct
Last contour element: PE with radius compensation 24 DEP LCT X+10 Y+12 R+8 F100 Coordinates PN, arc radius=8 mm 25 L Z+100 FMAX M2 Retract in Z, return to block 1, end program HEIDENHAIN | TNC 640 | Conversational Programming User’s Manual | 10/2017…
-
Page 298: Path Contours Cartesian Coordinates
Straight line or circular «Path contours – FK free programming path with any connection contour programming «, to the preceding contour page 317 element HEIDENHAIN | TNC 640 | Conversational Programming User’s Manual | 10/2017…
-
Page 299: Straight Line L
Select the NC block after which you want to insert the straight line block Press the actual position capture key The control generates a straight-line block with the actual position coordinates. HEIDENHAIN | TNC 640 | Conversational Programming User’s Manual | 10/2017…
-
Page 300: Inserting A Chamfer Between Two Straight Lines
A feed rate programmed in the CHF block is effective only in that CHF block. After the CHF block, the previous feed rate becomes effective again. HEIDENHAIN | TNC 640 | Conversational Programming User’s Manual | 10/2017…
-
Page 301: Rounded Corners Rnd
A feed rate programmed in the RND block is effective only in that RND block. After the RND block, the previous feed rate becomes effective again. You can also use an RND block for a tangential contour approach. HEIDENHAIN | TNC 640 | Conversational Programming User’s Manual | 10/2017…
-
Page 302: Circle Center Cc
The only effect of CC is to define a position as circle center: The tool does not move to this position. The circle center is also the pole for polar coordinates. HEIDENHAIN | TNC 640 | Conversational Programming User’s Manual | 10/2017…
-
Page 303: Circular Path C Around Circle Center Cc
The maximum value for input tolerance is 0.016 mm. Set the input tolerance in the machine parameter circleDeviation (no. 200901). Smallest possible circle that the control can traverse: 0.016 mm. HEIDENHAIN | TNC 640 | Conversational Programming User’s Manual | 10/2017…
-
Page 304: Circle Cr With Defined Radius
However, you can also program circular arcs that do not lie in the active working plane. By simultaneously rotating these circular movements you can create spatial arcs (arcs in three axes). HEIDENHAIN | TNC 640 | Conversational Programming User’s Manual | 10/2017…
-
Page 305
11 CR X+70 Y+40 R+20 DR- (arc 1) 11 CR X+70 Y+40 R+20 DR+ (arc 2) 11 CR X+70 Y+40 R-20 DR- (arc 3) 11 CR X+70 Y+40 R-20 DR+ (arc 4) HEIDENHAIN | TNC 640 | Conversational Programming User’s Manual | 10/2017… -
Page 306: Circle Ct With Tangential Connection
A tangential arc is a two-dimensional operation: the coordinates in the CT block and in the contour element preceding it must be in the same plane of the arc! HEIDENHAIN | TNC 640 | Conversational Programming User’s Manual | 10/2017…
-
Page 307: Example: Linear Movements And Chamfers With Cartesian Coordinates
14 DEP LT LEN10 F1000 Depart the contour on a straight line with tangential connection 15 L Z+250 R0 FMAX M2 Retract the tool, end program 16 END PGM LINEAR MM HEIDENHAIN | TNC 640 | Conversational Programming User’s Manual | 10/2017…
-
Page 308: Example: Circular Movements With Cartesian Coordinates
16 DEP LCT X-20 Y-20 R5 F1000 Depart the contour on a circular arc with tangential connection 17 L Z+250 R0 FMAX M2 Retract the tool, end program 18 END PGM CIRCULAR MM HEIDENHAIN | TNC 640 | Conversational Programming User’s Manual | 10/2017…
-
Page 309: Example: Full Circle With Cartesian Coordinates
10 DEP LCT X-40 Y+50 R5 F1000 Depart the contour on a circular arc with tangential connection 11 L Z+250 R0 FMAX M2 Retract the tool, end program 12 END PGM C-CC MM HEIDENHAIN | TNC 640 | Conversational Programming User’s Manual | 10/2017…
-
Page 310: Path Contours — Polar Coordinates
Combination of a circular and a Polar radius, polar angle of the linear movement arc end point, coordinate of the end point in the tool axis HEIDENHAIN | TNC 640 | Conversational Programming User’s Manual | 10/2017…
-
Page 311: Datum For Polar Coordinates: Pole Cc
If the angle from the angle reference axis to PR is clockwise: PA<0 Example 12 CC X+45 Y+25 13 LP PR+30 PA+0 RR F300 M3 14 LP PA+60 15 LP IPA+60 16 LP PA+180 HEIDENHAIN | TNC 640 | Conversational Programming User’s Manual | 10/2017…
-
Page 312: Circular Path Cp Around Pole Cc
Example 12 CC X+40 Y+35 13 L X+0 Y+35 RL F250 M3 14 LP PR+25 PA+120 15 CTP PR+30 PA+30 16 L Y+0 HEIDENHAIN | TNC 640 | Conversational Programming User’s Manual | 10/2017…
-
Page 313: Helix
Internal thread Work direction Direction of rotation Radius compensation Right-hand DR– Left-hand DR– Right-hand Z– Left-hand Z– External thread Right-hand DR– Left-hand DR– Right-hand Z– Left-hand Z– HEIDENHAIN | TNC 640 | Conversational Programming User’s Manual | 10/2017…
-
Page 314
Example: Thread M6 x 1 mm with 5 revolutions 12 CC X+40 Y+25 13 L Z+0 F100 M3 14 LP PR+3 PA+270 RL F50 15 CP IPA-1800 IZ+5 DR- HEIDENHAIN | TNC 640 | Conversational Programming User’s Manual | 10/2017… -
Page 315: Example: Linear Movement With Polar Coordinates
15 DEP PLCT PR+60 PA+180 R5 F1000 Depart the contour on a circular arc with tangential connection 16 L Z+250 R0 FMAX M2 Retract the tool, end program 17 END PGM LINEARPO MM HEIDENHAIN | TNC 640 | Conversational Programming User’s Manual | 10/2017…
-
Page 316: Example: Helix
10 DEP CT CCA180 R+2 Depart the contour on a circular arc with tangential connection 11 L Z+250 R0 FMAX M2 Retract the tool, end program 12 END PGM HELIX MM HEIDENHAIN | TNC 640 | Conversational Programming User’s Manual | 10/2017…
-
Page 317: Path Contours — Fk Free Contour Programming
FK programming graphics. The figure at upper right shows a workpiece drawing for which FK programming is the most convenient programming method. HEIDENHAIN | TNC 640 | Conversational Programming User’s Manual | 10/2017…
-
Page 318
NC blocks with the gray path function keys to fully define the direction of contour approach. Do not program an FK contour immediately after an LBL command. HEIDENHAIN | TNC 640 | Conversational Programming User’s Manual | 10/2017… -
Page 319: Fk Programming Graphics
Showing block numbers in the graphic window To show a block number in the graphic window: Set the SHOW OMIT BLOCK NR. soft key to SHOW (soft-key row 3) HEIDENHAIN | TNC 640 | Conversational Programming User’s Manual | 10/2017…
-
Page 320: Initiating The Fk Dialog
The control displays the axis soft keys of the active working plane. Enter the pole coordinates using these soft keys The pole for FK programming remains active until you define a new one using FPOL. HEIDENHAIN | TNC 640 | Conversational Programming User’s Manual | 10/2017…
-
Page 321: Free Straight Line Programming
To display the soft keys for free contour programming, press the FK key To initiate the dialog, press the FLT soft key Enter all known data in the block by using the soft keys HEIDENHAIN | TNC 640 | Conversational Programming User’s Manual | 10/2017…
-
Page 322: Free Circular Path Programming
To display the soft keys for free contour programming, press the FK key To initiate the dialog, press the FCT soft key Enter all known data in the block by using the soft keys HEIDENHAIN | TNC 640 | Conversational Programming User’s Manual | 10/2017…
-
Page 323: Input Possibilities
Adapt imported NC programs if required Example 27 FLT X+25 LEN 12.5 AN+35 RL F200 28 FC DR+ R6 LEN 10 AN-45 29 FCT DR- R15 LEN 15 HEIDENHAIN | TNC 640 | Conversational Programming User’s Manual | 10/2017…
-
Page 324
Rotational direction of the arc Radius of an arc Example 10 FC CCX+20 CCY+15 DR+ R15 11 FPOL X+20 Y+15 12 FL AN+40 13 FC DR+ R15 CCPR+35 CCPA+40 HEIDENHAIN | TNC 640 | Conversational Programming User’s Manual | 10/2017… -
Page 325
FK section. Beginning of CLSD+ contour: End of contour: CLSD– Example 12 L X+5 Y+35 RL F500 M3 13 FC DR- R15 CLSD+ CCX+20 CCY+35 17 FC DR- R+15 CLSD- HEIDENHAIN | TNC 640 | Conversational Programming User’s Manual | 10/2017… -
Page 326: Auxiliary Points
X and Y coordinates of an auxiliary point near a circular arc Distance of auxiliary point to circu- lar arc Example 13 FC DR- R10 P1X+42.929 P1Y+60.071 14 FLT AN-70 PDX+50 PDY+53 D10 HEIDENHAIN | TNC 640 | Conversational Programming User’s Manual | 10/2017…
-
Page 327: Relative Data
Polar coordinates relative to block N Example 12 FPOL X+10 Y+10 13 FL PR+20 PA+20 14 FL AN+45 15 FCT IX+20 DR- R20 CCA+90 RX 13 16 FL IPR+35 PA+0 RPR 13 HEIDENHAIN | TNC 640 | Conversational Programming User’s Manual | 10/2017…
-
Page 328
N Example 12 FL X+10 Y+10 RL 13 FL … 14 FL X+18 Y+35 15 FL … 16 FL … 17 FC DR- R10 CCA+0 ICCX+20 ICCY-15 RCCX12 RCCY14 HEIDENHAIN | TNC 640 | Conversational Programming User’s Manual | 10/2017… -
Page 329: Example: Fk Programming 1
Depart the contour on a circular arc with tangential connection 16 L X-30 Y+0 R0 FMAX 17 L Z+250 R0 FMAX M2 Retract the tool, end program 18 END PGM FK1 MM HEIDENHAIN | TNC 640 | Conversational Programming User’s Manual | 10/2017…
-
Page 330: Example: Fk Programming 2
19 DEP LCT X+30 Y+30 R5 Depart the contour on a circular arc with tangential connection 20 L Z+250 R0 FMAX M2 Retract the tool, end program 21 END PGM FK2 MM HEIDENHAIN | TNC 640 | Conversational Programming User’s Manual | 10/2017…
-
Page 331: Example: Fk Programming 3
23 RND R5 24 FL X+65 Y-25 AN-90 25 FC DR+ R50 CCX+65 CCY-75 26 FCT DR- R65 27 FSELECT 1 28 FCT Y+0 DR- R40 CCX+0 CCY+0 29 FSELECT 4 HEIDENHAIN | TNC 640 | Conversational Programming User’s Manual | 10/2017…
-
Page 332
Depart the contour on a circular arc with tangential connection 31 L X-70 R0 FMAX 32 L Z+250 R0 FMAX M2 Retract the tool, end program 33 END PGM FK3 MM HEIDENHAIN | TNC 640 | Conversational Programming User’s Manual | 10/2017… -
Page 333: Data Transfer From Cad Files
Data Transfer from CAD Files…
-
Page 334: Screen Layout Of The Cad Viewer
The control displays the following file formats: File Type Format Step .STP and .STEP AP 203 AP 214 IGES .IGS and .IGES Version 5.3 .DXF R10 to 2015 HEIDENHAIN | TNC 640 | Conversational Programming User’s Manual | 10/2017…
-
Page 335: Cad Import (Option 42)
Further information: «File names», page 176 The control does not support binary DXF format. Save the DXF file in ASCII format in the CAD or drawing program. HEIDENHAIN | TNC 640 | Conversational Programming User’s Manual | 10/2017…
-
Page 336: Using The Cad Viewer
Klartext program by copy and paste using the clipboard. If you are using a TNC 640 with touch control, you can replace some keystrokes with hand-to-screen contact. Further information: «Operating the Touchscreen»,…
-
Page 337: Basic Settings
The active + symbol is the same as the pressed Shift key, and the active – symbol is the same as the pressed CTRL key. The active cursor symbol is the same as the mouse HEIDENHAIN | TNC 640 | Conversational Programming User’s Manual | 10/2017…
-
Page 338
In addition, you must remove the comments that the CAD-Viewer inserts into the contour program. The control displays the active basic settings in the status bar of the screen. HEIDENHAIN | TNC 640 | Conversational Programming User’s Manual | 10/2017… -
Page 339: Setting Layers
Alternatively, use the space key Show a layer: Select the layer with the left mouse button, and click its check box to show it Alternatively, use the space key HEIDENHAIN | TNC 640 | Conversational Programming User’s Manual | 10/2017…
-
Page 340: Setting A Preset
The control sets the preset symbol at the selected location. You can adjust the orientation of the coordinate system, if required. Further information: «Adjusting the orientation of the coordinate system», page 341 HEIDENHAIN | TNC 640 | Conversational Programming User’s Manual | 10/2017…
-
Page 341
In the Element Information window, the control shows how far the preset you have chosen is located from the drawing datum, and how this reference system is oriented with respect to the drawing. HEIDENHAIN | TNC 640 | Conversational Programming User’s Manual | 10/2017… -
Page 342: Defining The Datum
The control sets the preset symbol at the selected location. You can adjust the orientation of the coordinate system, if required. Further information: «Adjusting the orientation of the coordinate system», page 343 HEIDENHAIN | TNC 640 | Conversational Programming User’s Manual | 10/2017…
-
Page 343
Left-click an element that is approximately in the positive Y direction The control aligns the Y and Z axes and displays them in green and blue in the list view. HEIDENHAIN | TNC 640 | Conversational Programming User’s Manual | 10/2017… -
Page 344
Data Transfer from CAD Files | CAD import (option 42) Element information In the Element Information window, the control shows how far the datum you have chosen is located from the workpiece preset. HEIDENHAIN | TNC 640 | Conversational Programming User’s Manual | 10/2017… -
Page 345: Selecting And Saving A Contour
Layer: Indicates the layer you are currently on Type: Indicates the current element type, e.g. line Coordinates: Shows the starting point and end point of an element, and circle center and radius where appropriate HEIDENHAIN | TNC 640 | Conversational Programming User’s Manual | 10/2017…
-
Page 346
The control saves the contour program to the selected directory. If you want to select more contours, press the Cancel Selected Elements soft key and select the next contour as described above HEIDENHAIN | TNC 640 | Conversational Programming User’s Manual | 10/2017… -
Page 347
If the contour element to be extended or shortened is a circular arc, then the control extends or shortens the contour element along the same arc. HEIDENHAIN | TNC 640 | Conversational Programming User’s Manual | 10/2017… -
Page 348
To rapidly magnify or reduce any area: Rotate the mouse wheel backwards or forwards To return to the standard display: Double-click with the right mouse key HEIDENHAIN | TNC 640 | Conversational Programming User’s Manual | 10/2017… -
Page 349: Selecting And Saving Machining Positions
(L X… Y… Z… F MAX M99). You can also transfer this program to older TNC controls and run it there. The point tables (.PNT) of the TNC 640 and iTNC 530 are not compatible. Transferring and processing on the other control type in each case may lead to problems and unforeseen performance.
-
Page 350
The control saves the contour program to the selected directory. If you want to select more machining positions, press the Cancel Selected Elements icon and select as described above HEIDENHAIN | TNC 640 | Conversational Programming User’s Manual | 10/2017… -
Page 351
The control saves the contour program to the selected directory. If you want to select more machining positions, press the Cancel Selected Elements icon and select as described above HEIDENHAIN | TNC 640 | Conversational Programming User’s Manual | 10/2017… -
Page 352
The control saves the contour program to the selected directory. If you want to select more machining positions, press the Cancel Selected Elements icon and select as described above HEIDENHAIN | TNC 640 | Conversational Programming User’s Manual | 10/2017… -
Page 353
Display the next larger diameter found Display the largest diameter found (default setting) You can have the tool paths displayed by clicking the SHOW TOOL PATH icon. Further information: «Basic settings», page 337 HEIDENHAIN | TNC 640 | Conversational Programming User’s Manual | 10/2017… -
Page 354
To return to the standard display, press the shift key and simultaneously double-click with the right mouse button. The rotation angle is maintained if you only double-click with the right mouse button HEIDENHAIN | TNC 640 | Conversational Programming User’s Manual | 10/2017… -
Page 355: Subprograms And Program Section Repeats
Subprograms and Program Section Repeats…
-
Page 356: Labeling Subprograms And Program Section Repeats
Do not use a label number or label name more than once! Label 0 (LBL 0) is used exclusively to mark the end of a subprogram and can therefore be used as often as desired. HEIDENHAIN | TNC 640 | Conversational Programming User’s Manual | 10/2017…
-
Page 357: Subprograms
Write subprograms after the block with M2 or M30 If subprograms are located before the block with M2 or M30 in the part program, they will be executed at least once even if they are not called HEIDENHAIN | TNC 640 | Conversational Programming User’s Manual | 10/2017…
-
Page 358: Programming The Subprogram
Ignore repeats REP by pressing the NO ENT key. Repeat REP is used only for program section repeats CALL LBL 0 is not permitted (Label 0 is only used to mark the end of a subprogram). HEIDENHAIN | TNC 640 | Conversational Programming User’s Manual | 10/2017…
-
Page 359: Program-Section Repeats
The total number of times the program section is executed is always one more than the programmed number of repeats, because the first repeat starts after the first machining process. HEIDENHAIN | TNC 640 | Conversational Programming User’s Manual | 10/2017…
-
Page 360: Programming A Program Section Repeat
If you want to use a LABEL name, press the LBL NAME soft key to switch to text entry Enter the number of repeats REP and confirm with the ENT key. HEIDENHAIN | TNC 640 | Conversational Programming User’s Manual | 10/2017…
-
Page 361: Any Desired Nc Program As Subprogram
Select an NC program with SEL PGM Call the last selected file with CALL SELECTED Select any NC program with SEL CYCLE as a fixed cycle Further information: Cycle Programming User’s Manual HEIDENHAIN | TNC 640 | Conversational Programming User’s Manual | 10/2017…
-
Page 362: Operating Sequence
If the called NC program contains the miscellaneous functions M2 or M30, then the control displays a warning. The control automatically clears the warning as soon as you select another NC program. HEIDENHAIN | TNC 640 | Conversational Programming User’s Manual | 10/2017…
-
Page 363: Calling Any Program As A Subprogram
As a rule, Q parameters are effective globally with a PGM CALL. So please note that changes to Q parameters in the called program also influence the calling program. HEIDENHAIN | TNC 640 | Conversational Programming User’s Manual | 10/2017…
-
Page 364
Enter the path name with the keyboard Press the SELECT FILE soft key The control shows a selection window that allows you to select the program to be called. Press the ENT key HEIDENHAIN | TNC 640 | Conversational Programming User’s Manual | 10/2017… -
Page 365
FN 18 function (ID10 NR110 and NR111) Further information: «FN 18: SYSREAD – Reading system data», page 402 HEIDENHAIN | TNC 640 | Conversational Programming User’s Manual | 10/2017… -
Page 366: Nesting
Maximum nesting depth for subprograms: 19 Maximum nesting depth for main program calls: 19, where a CYCL CALL acts like a main program call You can nest program section repeats as often as desired HEIDENHAIN | TNC 640 | Conversational Programming User’s Manual | 10/2017…
-
Page 367: Subprogram Within A Subprogram
45. End of subprogram 1 and return jump to the main program UPGMS. 5 Main program UPGMS is executed from block 18 up to block 35. Return jump to block 1 and end of program. HEIDENHAIN | TNC 640 | Conversational Programming User’s Manual | 10/2017…
-
Page 368: Repeating Program Section Repeats
(including the program section repeat between 20 and block 27). 5 Main program REPS is executed from block 36 to block 50. Return jump to block 1 and end of program. HEIDENHAIN | TNC 640 | Conversational Programming User’s Manual | 10/2017…
-
Page 369: Repeating A Subprogram
This means that subprogram 2 is repeated twice. 4 Main program UPGREP is executed from block 13 up to block 19. Return jump to block 1 and end of program. HEIDENHAIN | TNC 640 | Conversational Programming User’s Manual | 10/2017…
-
Page 370: Programming Examples
Return jump to LBL 1; section is repeated a total of 4 times 20 L Z+250 R0 FMAX M2 Retract the tool, end program 21 END PGM PGMWDH MM HEIDENHAIN | TNC 640 | Conversational Programming User’s Manual | 10/2017…
-
Page 371: Example: Groups Of Holes
Move to 3rd hole, call cycle 17 L IX-20 R0 FMAX M99 Move to 4th hole, call cycle 18 LBL 0 End of subprogram 1 19 END PGM UP1 MM HEIDENHAIN | TNC 640 | Conversational Programming User’s Manual | 10/2017…
-
Page 372: Example: Group Of Holes With Several Tools
New plunging depth for drilling 11 CALL LBL 1 Call subprogram 1 for the entire hole pattern 12 L Z+250 R0 FMAX 13 TOOL CALL 3 Z S500 Reamer tool call HEIDENHAIN | TNC 640 | Conversational Programming User’s Manual | 10/2017…
-
Page 373
Move to 3rd hole, call cycle 29 L IX-20 R0 FMAX M99 Move to 4th hole, call cycle 30 LBL 0 End of subprogram 2 31 END PGM SP2 MM HEIDENHAIN | TNC 640 | Conversational Programming User’s Manual | 10/2017… -
Page 375: Programming Q Parameters
Programming Q Parameters…
-
Page 376: 10.1 Principle And Overview Of Functions
0 to 99 Parameters for users 100 to 199 Parameters for HEIDENHAIN functions (e.g., cycles) 200 to 499 Parameters for the machine tool builder (e.g., cycles) HEIDENHAIN | TNC 640 | Conversational Programming User’s Manual | 10/2017…
-
Page 377
Only use Q parameter ranges recommended by HEIDENHAIN. Comply with the documentation from HEIDENHAIN, the machine tool builder, and suppliers. Check the machining sequence using a graphic simulation HEIDENHAIN | TNC 640 | Conversational Programming User’s Manual | 10/2017… -
Page 378: Programming Notes
You can reset Q parameters to the status Undefined. If a position is programmed with a Q parameter that is undefined, the control ignores this movement. HEIDENHAIN | TNC 640 | Conversational Programming User’s Manual | 10/2017…
-
Page 379: Calling Q Parameter Functions
Then you define the parameter number. If you have a USB keyboard connected, you can press the Q key to open the dialog for entering a formula. HEIDENHAIN | TNC 640 | Conversational Programming User’s Manual | 10/2017…
-
Page 380: Part Families-Q Parameters In Place Of Numerical Values
Example: Cylinder with Q parameters Cylinder radius: R = Q1 Cylinder height: H = Q2 Cylinder Z1: Q1 = +30 Q2 = +10 Cylinder Z2: Q1 = +10 Q2 = +50 HEIDENHAIN | TNC 640 | Conversational Programming User’s Manual | 10/2017…
-
Page 381: Describing Contours With Mathematical Functions
You can enter the following to the right of the = sign: Two numbers Two Q parameters A number and a Q parameter The Q parameters and numerical values in the equations can be entered with positive or negative signs. HEIDENHAIN | TNC 640 | Conversational Programming User’s Manual | 10/2017…
-
Page 382: Programming Fundamental Operations
FIRST VALUE / PARAMETER? Enter Q5 as the first value and confirm with the ENT key. SECOND VALUE / PARAMETER? Enter 7 as the second value and confirm with the ENT key. HEIDENHAIN | TNC 640 | Conversational Programming User’s Manual | 10/2017…
-
Page 383
The FN 0 function also supports transfer of the value Undefined. If you wish to transfer the undefined Q parameter without FN 0, the control shows the error message Invalid value. HEIDENHAIN | TNC 640 | Conversational Programming User’s Manual | 10/2017… -
Page 384: Angle Functions
Calculate and assign an angle with the arc tangent from the opposite and adjacent sides or with the sine and cosine of the angle (0 < angle < 360°) HEIDENHAIN | TNC 640 | Conversational Programming User’s Manual | 10/2017…
-
Page 385: 10.5 Calculation Of Circles
(Y if spindle axis is Z) in parameter Q21, and the circle radius in parameter Q22. Note that FN 23 and FN 24 automatically overwrite the resulting parameter and the two following parameters. HEIDENHAIN | TNC 640 | Conversational Programming User’s Manual | 10/2017…
-
Page 386: 10.6 If-Then Decisions With Q Parameters
Example: FN 9: IF+10 EQU+10 GOTO LBL1 Abbreviations used: Equal to Not equal to Greater than Less than GOTO Go to UNDEFINED Undefined DEFINED Defined HEIDENHAIN | TNC 640 | Conversational Programming User’s Manual | 10/2017…
-
Page 387: Programming If-Then Decisions
FN 12: IF LESS, JUMP e. g. FN 12: IF+Q5 LT+0 GOTO LBL «ANYNAME» If the first value or parameter is smaller than the second value or parameter, jump to specified label HEIDENHAIN | TNC 640 | Conversational Programming User’s Manual | 10/2017…
-
Page 388: 10.7 Checking And Changing Q Parameters
If you want to check or edit local, global or string parameters, press the SHOW PARAMETERS Q QL QR QS soft key. The control then displays the specific parameter type. The functions previously described also apply. HEIDENHAIN | TNC 640 | Conversational Programming User’s Manual | 10/2017…
-
Page 389
The result of Q1 = COS 89.999 * 0.001 is shown by the control as +1.74532925e-08, whereby e-08 corresponds to the factor of 10 HEIDENHAIN | TNC 640 | Conversational Programming User’s Manual | 10/2017… -
Page 390: Additional Functions
Transfer up to eight values to the FN 37: EXPORTExport local Q parameters or QS parameters into a calling program FN 38: SEND Send information from the NC program HEIDENHAIN | TNC 640 | Conversational Programming User’s Manual | 10/2017…
-
Page 391: Fn 14: Error: Displaying Error Messages
1014 Touch point inaccessible 1015 Too many points 1016 Contradictory input 1017 CYCL incomplete 1018 Plane wrongly defined 1019 Wrong axis programmed 1020 Wrong rpm 1021 Radius comp. undefined HEIDENHAIN | TNC 640 | Conversational Programming User’s Manual | 10/2017…
-
Page 392
Pocket too large: scrap axis 2 1054 Stud too small: scrap axis 1 1055 Stud too small: scrap axis 2 1056 Stud too large: rework axis 1 1057 Stud too large: rework axis 2 HEIDENHAIN | TNC 640 | Conversational Programming User’s Manual | 10/2017… -
Page 393
1089 Slot position 0 not allowed 1090 Enter an infeed not equal to 0 1091 Switchover of Q399 not allowed 1092 Tool not defined 1093 Tool number not permitted HEIDENHAIN | TNC 640 | Conversational Programming User’s Manual | 10/2017… -
Page 394
Plunging type is not possible 1105 Plunge angle incorrectly defined 1106 Angular length is undefined 1107 Slot width is too large 1108 Scaling factors not equal 1109 Tool data inconsistent HEIDENHAIN | TNC 640 | Conversational Programming User’s Manual | 10/2017… -
Page 395: Fn16: F-Print — Formatted Output Of Texts And Q Parameter Values
Format for text variable QS Format for integer Separation character between output format and parameter End of block character Line break Q parameter value, right-aligned Q parameter value, left-aligned HEIDENHAIN | TNC 640 | Conversational Programming User’s Manual | 10/2017…
-
Page 396
Outputs text only for Polish conversational language L_HUNGARIA Outputs text only for Hungarian conversa- tional language L_CHINESE Outputs text only for Chinese conversational language L_CHINESE_TRAD Outputs text only for Chinese (traditional) conversational language HEIDENHAIN | TNC 640 | Conversational Programming User’s Manual | 10/2017… -
Page 397
«MEASURING LOG OF IMPELLER CENTER OF GRAVITY»; «DATE: %02d.%02d.%04d»,DAY,MONTH,YEAR4; «TIME: %02d:%02d:%02d»,HOUR,MIN,SEC; «NO. OF MEASURED VALUES: = 1»; «X1 = %9.3F», Q31; «Y1 = %9.3F», Q32; «Z1 = %9.3F», Q33; HEIDENHAIN | TNC 640 | Conversational Programming User’s Manual | 10/2017… -
Page 398
MEASURING LOG OF IMPELLER CENTER OF GRAVITY DATE: July 15, 2015 TIME: 8:56:34 AM NO. OF MEASURED VALUES : = 1 X1 = 149.360 Y1 = 25.509 Z1 = 37.000 HEIDENHAIN | TNC 640 | Conversational Programming User’s Manual | 10/2017… -
Page 399
FN 18 (e.g., the number of the last touch probe cycle used). Further information: «FN 18: SYSREAD – Reading system data», page 402 HEIDENHAIN | TNC 640 | Conversational Programming User’s Manual | 10/2017… -
Page 400
FN16-function with the following syntax: Input Function :’QS1′ Set the QS parameter with preceding colon and between single quotation marks :’QL3′.txt Specify additional file name extension for the target file if required HEIDENHAIN | TNC 640 | Conversational Programming User’s Manual | 10/2017… -
Page 401
Printer: as the name of the log file and then enter the corresponding file name. The control saves the file in the PRINTER: path until the file is printed. Example 96 FN 16: F-PRINT TNC:MASKEMASKE1.A/PRINTER:DRUCK1 HEIDENHAIN | TNC 640 | Conversational Programming User’s Manual | 10/2017… -
Page 402: Fn 18: Sysread — Reading System Data
This function eliminates relative file paths. QS parameter Is there a directory with the name QS(IDX)? number 0 = no, 1 = Yes Only absolute directory paths are possible. HEIDENHAIN | TNC 640 | Conversational Programming User’s Manual | 10/2017…
-
Page 403
Programmed cutting speed in turning opera- tion Spindle mode in turning mode: 0 = constant speed 1 = constant cutting speed Coolant status M7: 0 = inactive, 1 = active HEIDENHAIN | TNC 640 | Conversational Programming User’s Manual | 10/2017… -
Page 404
Q parameter number for the result (touch probe cycles 30 to 33) Q parameter type for the result (touch probe cycles 30 to 33) 1 = Q, 2 = QL, 3 = QR HEIDENHAIN | TNC 640 | Conversational Programming User’s Manual | 10/2017… -
Page 405
TT: Breakage tolerance for radius, RBREAK Tool no. Maximum speed NMAX Tool no. Point angle TANGLE Tool no. LIFTOFF allowed (0 = No, 1 = Yes) Tool no. Wear tolerance for radius R2TOL HEIDENHAIN | TNC 640 | Conversational Programming User’s Manual | 10/2017… -
Page 406
Timestamp of last use Tool no. Tool no. Pitch for thread cycles Tool no. AFC: reference load Tool no. AFC: overload early warning Tool no. AFC: overload NC stop HEIDENHAIN | TNC 640 | Conversational Programming User’s Manual | 10/2017… -
Page 407
Oversize for tool length DL Tool radius oversize DR Automatic TOOL CALL 0 = Yes, 1 = No Tool radius oversize DR2 Tool index Active feed rate Cutting speed [mm/min] HEIDENHAIN | TNC 640 | Conversational Programming User’s Manual | 10/2017… -
Page 408
13 = Unload external tool, 14 = Unload internal tool, 15 = Unload special tool Tool number T Length Radius Index Tool data programmed in TOOL DEF 1 = Yes, 0 = No HEIDENHAIN | TNC 640 | Conversational Programming User’s Manual | 10/2017… -
Page 409
0. Index 99 = active spindle Tool compensation 1 = without Active radius oversize 2 = with oversize 3 = with HEIDENHAIN | TNC 640 | Conversational Programming User’s Manual | 10/2017… -
Page 410
Projects the angle specified in the QL parameter from the input coordinate system to the tool coordinate system. If IDX is omitted, the angle 0 is used for projection. HEIDENHAIN | TNC 640 | Conversational Programming User’s Manual | 10/2017… -
Page 411
Read the current position in the active coordinate system Axis Current nominal position in the input system Read the current position in the active coordinate system, including offsets (handwheel, etc.) HEIDENHAIN | TNC 640 | Conversational Programming User’s Manual | 10/2017… -
Page 412
Axis Current system time System time in seconds that has elapsed since 01.01.1970, 00:00:00 (real time). System time in seconds that has elapsed since 01.01.1970, 00:00:00 (look-ahead calcu- lation). HEIDENHAIN | TNC 640 | Conversational Programming User’s Manual | 10/2017… -
Page 413
January 1, 1970 (look-ahead calculation) Format: YYYY-MM-DD hh:mm:ss Formatting of: System time in seconds that have elapsed since 00:00:00 UTC on January 1, 1970 (real time) Format: YYYY-MM-DD hh:mm HEIDENHAIN | TNC 640 | Conversational Programming User’s Manual | 10/2017… -
Page 414
00:00:00 UTC on January 1, 1970 (look-ahead calculation) Format: D.MM.YY Formatting of: System time in seconds that have elapsed since 00:00:00 UTC on January 1, 1970 (real time) Format: YYYY-MM-DD HEIDENHAIN | TNC 640 | Conversational Programming User’s Manual | 10/2017… -
Page 415
00:00:00 UTC on January 1, 1970 (real time) Format: h:mm Formatting of: System time in seconds that have elapsed since 00:00:00 UTC on January 1, 1970 (look-ahead calculation) Format: h:mm HEIDENHAIN | TNC 640 | Conversational Programming User’s Manual | 10/2017… -
Page 416
3 = Working plane coordinate system WPL — GPS: Shift in the workpiece system 0 = Off, 1 = On GPS: Axis offset 0 = Off, 1 = On HEIDENHAIN | TNC 640 | Conversational Programming User’s Manual | 10/2017… -
Page 417
Rapid traverse Measuring feed rate Feed rate for pre-positioning: FMAX_PROBE or FMAX_MACHINE Maximum measuring range Set-up clearance Spindle orientation possible 0=No, 1=Yes Angle of spindle orientation in degrees HEIDENHAIN | TNC 640 | Conversational Programming User’s Manual | 10/2017… -
Page 418
Coordinate / Readout of the measurement results in the axis form of coordinates / axis values in the input system from probing operations. Compensation: only length Oriented spindle stop HEIDENHAIN | TNC 640 | Conversational Programming User’s Manual | 10/2017… -
Page 419
NC error 12 = Continuation with the row in the pallet table in which the NC error arose 13 = Continuation with the next pallet HEIDENHAIN | TNC 640 | Conversational Programming User’s Manual | 10/2017… -
Page 420
Feed-rate limit for high speeds (MP_maxG1Feed) in mm/min Max. jerk at low speeds (MP_maxPathJerk) in m/s Max. jerk at high speeds (MP_maxPath- JerkHi) in m/s Tolerance at low speeds (MP_pathTolerance) in mm HEIDENHAIN | TNC 640 | Conversational Programming User’s Manual | 10/2017… -
Page 421
DCM: Maximum tolerance for linear axes in cal axis mm (MP_maxLinearTolerance) Index of physi- DCM: Maximum angle tolerance in [°] cal axis (MP_maxAngleTolerance) Index of physi- Tolerance monitoring for successive threads cal axis (MP_threadTolerance) HEIDENHAIN | TNC 640 | Conversational Programming User’s Manual | 10/2017… -
Page 422
(MP_maxPathAccHi) Index of physi- Compensation of following error in the jerk cal axis phase (MP_IpcJerkFact) Index of physi- kv factor of the position controller in 1/s cal axis (MP_kvFactor) HEIDENHAIN | TNC 640 | Conversational Programming User’s Manual | 10/2017… -
Page 423
Oversize for tool length DL Tool radius oversize DR Tool radius oversize DR2 Tool locked TL 0 = not locked, 1 = locked Number of the replacement tool RT Maximum tool age TIME1 HEIDENHAIN | TNC 640 | Conversational Programming User’s Manual | 10/2017… -
Page 424
Read and write data of current turning tool Tool number Tool length XL Tool length YL Tool length ZL Tool length oversize DXL Oversize in tool length DYL Tool length oversize DZL Tooth radius (RS) HEIDENHAIN | TNC 640 | Conversational Programming User’s Manual | 10/2017… -
Page 425
Z component of the Z direction X component of the X direction Y component of the X direction Z component of the X direction Type of angle definition: Angle 1 Angle 2 Angle 3 HEIDENHAIN | TNC 640 | Conversational Programming User’s Manual | 10/2017… -
Page 426
If the tool selected by these rules is locked, a replacement tool will be returned. –1: No tool with the specified name found in the tool table or all qualifying tools are locked. HEIDENHAIN | TNC 640 | Conversational Programming User’s Manual | 10/2017… -
Page 427
0 = simulation 2-D graphics during programming active? 1 = yes 0 = no Generate graphics during programming (soft key AUTO DRAW) active? 1 = yes 0 = no HEIDENHAIN | TNC 640 | Conversational Programming User’s Manual | 10/2017… -
Page 428
0 = no 1 = yes M101 active (visible condition)? 0 = no 1 = yes M136 active? 0 = no 1 = yes HEIDENHAIN | TNC 640 | Conversational Programming User’s Manual | 10/2017… -
Page 429
FOR SYNC. Input no. PLC input Output no. PLC output Counter no. PLC counter Timer no. PLC timer Byte no. PLC byte Word no. PLC word Double-word PLC double word HEIDENHAIN | TNC 640 | Conversational Programming User’s Manual | 10/2017… -
Page 430
TS probe type from TYPE column of the touch probe table (tchprobe.tp) Type of TT tool touch probe from CfgTT/type. Key name of the active tool touch probe TT from CfgProbes/activeTT. HEIDENHAIN | TNC 640 | Conversational Programming User’s Manual | 10/2017… -
Page 431
Read data of the current tool (system string) 10950 Current tool name. Example: Assign the value of the active scaling factor for the Z axis to Q25. 55 FN 18: SYSREAD Q25 = ID210 NR4 IDX3 HEIDENHAIN | TNC 640 | Conversational Programming User’s Manual | 10/2017… -
Page 432: Fn 19: Plc — Transfer Values To The Plc
Comply with the documentation from HEIDENHAIN, the machine tool builder, and suppliers. The FN 19: PLC function transfers up to two numerical values or Q parameters to the PLC. HEIDENHAIN | TNC 640 | Conversational Programming User’s Manual | 10/2017…
-
Page 433: Fn 20: Wait For — Nc And Plc Synchronization
NC block only when the NC program has actually reached that block. Example: Pause internal look-ahead calculation, read current position in the X axis 32 FN 20: WAIT FOR SYNC 33 FN 18: SYSREAD Q1 = ID270 NR1 IDX1 HEIDENHAIN | TNC 640 | Conversational Programming User’s Manual | 10/2017…
-
Page 434: Fn 29: Plc — Transfer Values To The Plc
Comply with the documentation from HEIDENHAIN, the machine tool builder, and suppliers. The FN 29: PLC function transfers up to eight numerical values or Q parameters to the PLC. HEIDENHAIN | TNC 640 | Conversational Programming User’s Manual | 10/2017…
-
Page 435: Fn 37: Export
For more detailed information, consult the Remo Tools SDK manual. Example Document values from Q1 and Q23 in the log. FN 38: SEND /»Q parameter Q1: %f Q23: %f» / +Q1 / +Q23 HEIDENHAIN | TNC 640 | Conversational Programming User’s Manual | 10/2017…
-
Page 436: 10.9 Accessing Tables With Sql Commands
The saver is based on a transaction model. A transaction is made up of multiples steps that are executed together, thereby ensuring an orderly and defined processing of the table entries. HEIDENHAIN | TNC 640 | Conversational Programming User’s Manual | 10/2017…
-
Page 437: Overview Of Functions
Q parameters to the table SQL INSERT creates a new table row SQL SELECT reads out a single values from a table and does not open any transaction HEIDENHAIN | TNC 640 | Conversational Programming User’s Manual | 10/2017…
-
Page 438: Programming Sql Commands
If this value is then use in an inch program for the purpose of positioning (L X+Q1800), then an incorrect position will be the result. HEIDENHAIN | TNC 640 | Conversational Programming User’s Manual | 10/2017…
-
Page 439: Application Example
1 faulty read operation The HANDLE QL1 syntax is the transaction designated by the QL1 parameter The value is copied from the so-called result set (intermediate memory) to the bound parameter HEIDENHAIN | TNC 640 | Conversational Programming User’s Manual | 10/2017…
-
Page 440: Sql Bind
Database: column name: define table name and table column (separate with . ) Table name: synonym or path with filename of the table Column name: name displayed in the table editor HEIDENHAIN | TNC 640 | Conversational Programming User’s Manual | 10/2017…
-
Page 441
20 SQL Q5 «SELECT Meas_No,Meas_X,Meas_Y, Meas_Z FROM Tab_Example WHERE Meas_No<20» Example: selection of table rows with the WHERE function and Q parameters . . . 20 SQL Q5 «SELECT Meas_No,Meas_X,Meas_Y, Meas_Z FROM Tab_Example WHERE Meas_No==:’Q11’» HEIDENHAIN | TNC 640 | Conversational Programming User’s Manual | 10/2017… -
Page 442
Less than or equal to <= Greater than > Greater than or equal to >= empty IS NULL Not empty IS NOT NULL Linking multiple conditions: Logical AND Logical OR HEIDENHAIN | TNC 640 | Conversational Programming User’s Manual | 10/2017… -
Page 443
9 SQL Q1800 «ALTER TABLE my_table ADD (WMAT2)» Insert table rows 9 SQL Q1800 «ALTER TABLE my_table DROP (WMAT2)» Delete table rows 9 SQL Q1800 «RENAME COLUMN my_table (WMAT2) TO Rename table column (WMAT3)» HEIDENHAIN | TNC 640 | Conversational Programming User’s Manual | 10/2017… -
Page 444
Program the Q parameter containing the index The row (n=0) is read if nothing is specified The optional syntax elements IGNORE UNBOUND and UNDEFINE MISSING are intended for the machine tool builder. HEIDENHAIN | TNC 640 | Conversational Programming User’s Manual | 10/2017… -
Page 445
Database: Index for SQL result: Row number within the result set Program the row number directly Program the Q parameter containing the index The row (n=0) is assigned a value if none is specified HEIDENHAIN | TNC 640 | Conversational Programming User’s Manual | 10/2017… -
Page 446
Parameter No. for result (return value for the control): 0 successful transaction 1 successful transaction Database: SQL access ID: Define Q parameters for the HANDLE (for identifying the transaction) HEIDENHAIN | TNC 640 | Conversational Programming User’s Manual | 10/2017… -
Page 447
Parameter No. for result (return value for the control): 0 successful transaction 1 successful transaction Database: SQL access ID: Define Q parameters for the HANDLE (for identifying the transaction) HEIDENHAIN | TNC 640 | Conversational Programming User’s Manual | 10/2017… -
Page 448
HANDLE (for identifying the transaction) Database: Index to SQL result: Row that remains in the result set Program the row number directly Program the Q parameter containing the index HEIDENHAIN | TNC 640 | Conversational Programming User’s Manual | 10/2017… -
Page 449
«Application example», page 439 Example 0 BEGIN PGM SQL MM 1 SQL SELECT QS1800 «SELECT WMAT FROM my_table Read and save a value WHERE NO==3» 2 END PGM SQL MM HEIDENHAIN | TNC 640 | Conversational Programming User’s Manual | 10/2017… -
Page 450
Q10 = ASIN 0.75 Arc cosine Inverse function of the cosine; determine the angle from the ratio of the adjacent side to the hypotenuse e.g., Q11 = ACOS Q40 HEIDENHAIN | TNC 640 | Conversational Programming User’s Manual | 10/2017… -
Page 451
When return value Q12 = 1, then Q50 > 0 When return value Q12 = -1, then Q50 < 0 Calculate modulo value (division remainder) e.g., Q12 = 400 % 360 result: Q12 = 40 HEIDENHAIN | TNC 640 | Conversational Programming User’s Manual | 10/2017… -
Page 452
2 Calculation step 3 to the third power = 27 3 Calculation 100 – 27 = 73 Distributive law Law of distribution with parentheses calculation a * (b + c) = a * b + a * c HEIDENHAIN | TNC 640 | Conversational Programming User’s Manual | 10/2017… -
Page 453
OPENING PARENTHESIS soft key Enter 12 (Q parameter number) Select division Enter 13 (Q parameter number) Close parentheses and conclude formula entry Example 37 Q25 = ATAN (Q12/Q13) HEIDENHAIN | TNC 640 | Conversational Programming User’s Manual | 10/2017… -
Page 454
When you use the STRING FORMULA function, the result of the arithmetic operation is always a string. When you use the FORMULA function, the result of the arithmetic operation is always a numeric value. HEIDENHAIN | TNC 640 | Conversational Programming User’s Manual | 10/2017… -
Page 455
Press the SPEC FCT key Press the PROGRAM FUNCTIONS soft key Press the STRING FUNCTIONS soft key Press the DECLARE STRING soft key Example 37 DECLARE STRING QS10 = «Workpiece» HEIDENHAIN | TNC 640 | Conversational Programming User’s Manual | 10/2017… -
Page 456
Example: QS10 is to include the complete text of QS12, QS13 and QS14 37 QS10 = QS12 || QS13 || QS14 Parameter contents: QS12: Workpiece QS13: Status: QS14: Scrap QS10: Workpiece Status: Scrap HEIDENHAIN | TNC 640 | Conversational Programming User’s Manual | 10/2017… -
Page 457
END key Example: Convert parameter Q50 to string parameter QS11, use 3 decimal places 37 QS11 = TOCHAR ( DAT+Q50 DECIMALS3 ) HEIDENHAIN | TNC 640 | Conversational Programming User’s Manual | 10/2017… -
Page 458
The first character of a text string starts internally at the 0-position Example: A four-character substring (LEN4) is read from the string parameter QS10 beginning with the third character (BEG2) 37 QS13 = SUBSTR ( SRC_QS10 BEG2 LEN4 ) HEIDENHAIN | TNC 640 | Conversational Programming User’s Manual | 10/2017… -
Page 459
Information for unbalance cycle, Path of the unbalance calibration table belonging to 10855 the active kinematics Tool data, 10950 Tool name DOC entry of the tool AFC control setting Tool-carrier kinematics HEIDENHAIN | TNC 640 | Conversational Programming User’s Manual | 10/2017… -
Page 460
Close the parenthetical expression with the ENT key and confirm your entry with the END key Example: Convert string parameter QS11 to a numerical parameter Q82 37 Q82 = TONUMB ( SRC_QS11 ) HEIDENHAIN | TNC 640 | Conversational Programming User’s Manual | 10/2017… -
Page 461
Example: Search through QS10 for the text saved in parameter QS13. Begin the search at the third place. 37 Q50 = INSTR ( SRC_QS10 SEA_QS13 BEG2 ) HEIDENHAIN | TNC 640 | Conversational Programming User’s Manual | 10/2017… -
Page 462
END key Example: Find the length of QS15 37 Q52 = STRLEN ( SRC_QS15 ) If the selected string parameter is not defined the control returns the result -1. HEIDENHAIN | TNC 640 | Conversational Programming User’s Manual | 10/2017… -
Page 463
+1: The first QS parameter follows the second QS parameter alphabetically Example: QS12 and QS14 are compared for alphabetic priority 37 Q52 = STRCOMP ( SRC_QS12 SEA_QS14 ) HEIDENHAIN | TNC 640 | Conversational Programming User’s Manual | 10/2017… -
Page 464
KEY_QS: Group name (key) of the machine parameter TAG_QS: Object name (entity) of the machine parameter ATR_QS: Name (attribute) of the machine parameter IDX: Index of the machine parameter HEIDENHAIN | TNC 640 | Conversational Programming User’s Manual | 10/2017… -
Page 465
Assign string parameter for key 15 QS12 = «CfgDisplaydata» Assign string parameter for entity 16 QS13 = «axisDisplay» Assign string parameter for parameter name 17 QS1 = Read out machine parameter CFGREAD( KEY_QS11 TAG_QS12 ATR_QS13 IDX3 ) HEIDENHAIN | TNC 640 | Conversational Programming User’s Manual | 10/2017… -
Page 466
Assign string parameter for key 15 QS12 = «CfgGeoCycle» Assign string parameter for entity 16 QS13 = «pocketOverlap» Assign string parameter for parameter name 17 Q50 = CFGREAD( KEY_QS11 TAG_QS12 ATR_QS13 ) Read out machine parameter HEIDENHAIN | TNC 640 | Conversational Programming User’s Manual | 10/2017… -
Page 467
Tool radius R (tool table or TOOL DEF block) Delta value DR from the tool table Delta value DR from the TOOL CALL block The control remembers the current tool radius even if the power is interrupted. HEIDENHAIN | TNC 640 | Conversational Programming User’s Manual | 10/2017… -
Page 468
Dimensional data of the main program Parameter value Metric system (mm) Q113 = 0 Imperial system (inch) Q113 = 1 HEIDENHAIN | TNC 640 | Conversational Programming User’s Manual | 10/2017… -
Page 469
Tilting the working plane with spatial (workpiece) angles instead of spindle head angles: Coordinates for rotary axes calculated by the control. Coordinates Parameter value A axis Q120 B axis Q121 C axis Q122 HEIDENHAIN | TNC 640 | Conversational Programming User’s Manual | 10/2017… -
Page 470
Parameter value Rotation about the A axis Q170 Rotation about the B axis Q171 Rotation about the C axis Q172 Workpiece status Parameter value Good Q180 Rework Q181 Scrap Q182 HEIDENHAIN | TNC 640 | Conversational Programming User’s Manual | 10/2017… -
Page 471
Q601 = 1 Error Q601 = 2 No monitoring area defined or not enough Q601 = 3 reference images Internal errs (no signal, camera fault, etc) Q601 = 10 HEIDENHAIN | TNC 640 | Conversational Programming User’s Manual | 10/2017… -
Page 472
22 CYCL DEF 7.2 Y+Q2 23 CYCL DEF 10.0 ROTATION Account for rotational position in the plane 24 CYCL DEF 10.1 ROT+Q8 25 Q35 = (Q6 -Q5) / Q7 Calculate angle increment HEIDENHAIN | TNC 640 | Conversational Programming User’s Manual | 10/2017… -
Page 473
43 CYCL DEF 7.1 X+0 44 CYCL DEF 7.2 Y+0 45 L Z+Q12 R0 FMAX Move to set-up clearance 46 LBL 0 End of subprogram 47 END PGM ELLIPSE MM HEIDENHAIN | TNC 640 | Conversational Programming User’s Manual | 10/2017… -
Page 474
Call machining operation 18 FN 0: Q10 = +0 Reset allowance 19 CALL LBL 10 Call machining operation 20 L Z+100 R0 FMAX M2 Retract the tool, end program HEIDENHAIN | TNC 640 | Conversational Programming User’s Manual | 10/2017… -
Page 475
Reset the datum shift 50 CYCL DEF 7.1 X+0 51 CYCL DEF 7.2 Y+0 52 CYCL DEF 7.3 Z+0 53 LBL 0 End of subprogram 54 END PGM CYLIN HEIDENHAIN | TNC 640 | Conversational Programming User’s Manual | 10/2017… -
Page 476
Account for allowance in the sphere radius 28 CYCL DEF 7.0 DATUM SHIFT Shift datum to center of sphere 29 CYCL DEF 7.1 X+Q1 30 CYCL DEF 7.2 Y+Q2 HEIDENHAIN | TNC 640 | Conversational Programming User’s Manual | 10/2017… -
Page 477
Reset the datum shift 55 CYCL DEF 7.1 X+0 56 CYCL DEF 7.2 Y+0 57 CYCL DEF 7.3 Z+0 58 LBL 0 End of subprogram 59 END PGM SPHERE MM HEIDENHAIN | TNC 640 | Conversational Programming User’s Manual | 10/2017… -
Page 479
Miscellaneous Functions… -
Page 480
In this case, the dialog is continued for the parameter input. In the Manual operation and Electronic handwheel operating modes, the M functions are entered with the M soft key. HEIDENHAIN | TNC 640 | Conversational Programming User’s Manual | 10/2017… -
Page 481
M (miscellaneous) function in a STOP block: To program an interruption of program run, press the STOP key Enter a miscellaneous function M Example 87 STOP M6 HEIDENHAIN | TNC 640 | Conversational Programming User’s Manual | 10/2017… -
Page 482
■ Tool change Spindle STOP Program STOP ■ Coolant ON ■ Coolant OFF ■ Spindle ON clockwise Coolant ON ■ Spindle ON counterclockwise Coolant ON ■ Same as M2 HEIDENHAIN | TNC 640 | Conversational Programming User’s Manual | 10/2017… -
Page 483
The coordinate values on the control screen reference the machine datum. Switch the display of coordinates in the status display to REF . Further information: «Status displays», page 98 HEIDENHAIN | TNC 640 | Conversational Programming User’s Manual | 10/2017… -
Page 484
Further information: «Showing the workpiece blank in the working space «, page 815 HEIDENHAIN | TNC 640 | Conversational Programming User’s Manual | 10/2017… -
Page 485
If the M130 function is combined with a cycle call, the control will interrupt the execution with an error message. Effect M130 functions blockwise in straight-line blocks without tool radius compensation. HEIDENHAIN | TNC 640 | Conversational Programming User’s Manual | 10/2017… -
Page 486
15 L IX+100 … Move to contour point 15 16 L IY+0.5 … R… F… M97 Machine small contour step 15 to 16 17 L X… Y… Move to contour point 17 HEIDENHAIN | TNC 640 | Conversational Programming User’s Manual | 10/2017… -
Page 487
M98 becomes effective at the end of the block. Example: Move to the contour points 10, 11 and 12 in succession 10 L X… Y… RL F 11 L X… IY… M98 12 L IX+ … HEIDENHAIN | TNC 640 | Conversational Programming User’s Manual | 10/2017… -
Page 488
Actual contouring feed rate (mm/min): 17 L X+20 Y+20 RL F500 M103 F20 18 L Y+50 19 L IZ-2.5 20 L IY+5 IZ-5 21 L IX+50 22 L Z+5 HEIDENHAIN | TNC 640 | Conversational Programming User’s Manual | 10/2017… -
Page 489
If you change the spindle speed by using the spindle override, the control changes the feed rate accordingly. Effect M136 becomes effective at the start of the block. You can cancel M136 by programming M137. HEIDENHAIN | TNC 640 | Conversational Programming User’s Manual | 10/2017… -
Page 490
The initial state is restored after finishing or canceling a machining cycle. Effect M109 and M110 become effective at the start of the block. M109 and M110 can be canceled with M111. HEIDENHAIN | TNC 640 | Conversational Programming User’s Manual | 10/2017… -
Page 491
PGM CALL the working plane is tilted with Cycle 19 or with the PLANE function M120 becomes effective at the start of the block. HEIDENHAIN | TNC 640 | Conversational Programming User’s Manual | 10/2017… -
Page 492
Before using the functions listed below, you have to cancel M120 and the radius compensation: Cycle 32 Tolerance Cycle 19 Working plane PLANE function M114 M128 TCPM FUNCTION HEIDENHAIN | TNC 640 | Conversational Programming User’s Manual | 10/2017… -
Page 493
The coordinates are entered with the orange axis direction buttons or the ASCII keyboard. Effect To cancel handwheel positioning, program M118 once again without coordinate input. M118 becomes effective at the start of the block. HEIDENHAIN | TNC 640 | Conversational Programming User’s Manual | 10/2017… -
Page 494
For this purpose, program at least the spindle axis with its permitted range of traverse in the M118 function (e.g. M118 Z5) and select the VT axis on the handwheel. HEIDENHAIN | TNC 640 | Conversational Programming User’s Manual | 10/2017… -
Page 495
Effect M140 is effective only in the NC block in which itis programmed. M140 becomes effective at the start of the block. HEIDENHAIN | TNC 640 | Conversational Programming User’s Manual | 10/2017… -
Page 496
There is a danger of collision during these compensating movements! Do not combine M118 with M140 when using machines with head rotation axes. HEIDENHAIN | TNC 640 | Conversational Programming User’s Manual | 10/2017… -
Page 497
M141 functions only for movements with straight-line blocks. Effect M141 is effective only in the NC block in which M141 is programmed. M141 becomes effective at the start of the block. HEIDENHAIN | TNC 640 | Conversational Programming User’s Manual | 10/2017… -
Page 498
M143 becomes effective at the start of the block. M143 deletes the entries in columns SPA, SPB, and SPC in the preset table; reactivating the corresponding preset table line does not activate the deleted basic rotation. HEIDENHAIN | TNC 640 | Conversational Programming User’s Manual | 10/2017… -
Page 499
When a power interruption occurs Effect M148 remains in effect until deactivated with M149. M148 becomes effective at the start of the block, M149 at the end of the block. HEIDENHAIN | TNC 640 | Conversational Programming User’s Manual | 10/2017… -
Page 500
Effect The M197 function acts blockwise and is only effective on outside corners. Example L X… Y… RL M197 DL0.876 HEIDENHAIN | TNC 640 | Conversational Programming User’s Manual | 10/2017… -
Page 501
Special Functions… -
Page 502
You can rapidly navigate with the cursor or mouse and select functions in the tree diagram. The control displays online help for the selected function in the window on the right. HEIDENHAIN | TNC 640 | Conversational Programming User’s Manual | 10/2017… -
Page 503
Define a complex contour See Cycle- formula Programming User’s Manual Define regular machining pattern See Cycle- Programming User’s Manual Select the point file with machin- See Cycle- ing positions Programming User’s Manual HEIDENHAIN | TNC 640 | Conversational Programming User’s Manual | 10/2017… -
Page 504
Define dwell time in seconds or page 580 revolutions Lift off tool at NC stop page 581 Define Dynamic Collision Monitor- page 505 ing DCM Add comments page 208 Choose path interpretation page 640 HEIDENHAIN | TNC 640 | Conversational Programming User’s Manual | 10/2017… -
Page 505
There is a danger of collision during execution! Check the machining sequence using a graphic simulation Carefully test the NC program or program section in the Program run, single block operating mode HEIDENHAIN | TNC 640 | Conversational Programming User’s Manual | 10/2017… -
Page 506
Modify the graphic display of the collision objects in the Test Run operating mode as follows: Press the FURTHER VIEW OPTIONS soft key Modify the graphic display of the collision objects using the following functions HEIDENHAIN | TNC 640 | Conversational Programming User’s Manual | 10/2017… -
Page 507
To return to the standard display: Press the shift key and simultaneously double-click with the right mouse key. The rotation angle is maintained if you only double-click with the right mouse key. HEIDENHAIN | TNC 640 | Conversational Programming User’s Manual | 10/2017… -
Page 508
Further information: «Activating and deactivating collision monitoring», page 512 Note the general limitations of the Dynamic Collision Monitoring (DCM) function. Further information: «Function», page 505 HEIDENHAIN | TNC 640 | Conversational Programming User’s Manual | 10/2017… -
Page 509
Select the Test Run operating mode Press the Collision Monitoring ON soft key You can toggle collision monitoring only after the simulation has been stopped. HEIDENHAIN | TNC 640 | Conversational Programming User’s Manual | 10/2017… -
Page 510
(e.g. for eccentric turning), the control cannot perform collision monitoring. If at least one axis operates with following error or is not referenced, the control cannot perform collision monitoring. HEIDENHAIN | TNC 640 | Conversational Programming User’s Manual | 10/2017… -
Page 511
Special Functions | Dynamic Collision Monitoring (option 40) Note the general limitations of the Dynamic Collision Monitoring (DCM) function. Further information: «Function», page 505 HEIDENHAIN | TNC 640 | Conversational Programming User’s Manual | 10/2017… -
Page 512
Press the Go to soft key Select the condition for which the selected operating modes should apply: Inactive: Deactivate collision monitoring Active: Activate collision monitoring Press the Ok soft key HEIDENHAIN | TNC 640 | Conversational Programming User’s Manual | 10/2017… -
Page 513
512 Symbols Symbols in the status display show the condition of collision monitoring: Icon Function Collision monitoring active Collision monitoring is not available Collision monitoring is not active HEIDENHAIN | TNC 640 | Conversational Programming User’s Manual | 10/2017… -
Page 514
The tool carrier templates may consist of several sub- files. If the sub-files are incomplete, the control will display an error message. Do not use incomplete tool carrier templates! HEIDENHAIN | TNC 640 | Conversational Programming User’s Manual | 10/2017… -
Page 515
If the tool carrier template does not contain any transformation vectors, names, test points and measurement points, the additional ToolHolderWizard tool does not execute any function when the corresponding icons are activated. HEIDENHAIN | TNC 640 | Conversational Programming User’s Manual | 10/2017… -
Page 516
Output file area Press the GENERATE FILE button If required, reply to the message on the control Press the CLOSE icon The control closes the additional tool HEIDENHAIN | TNC 640 | Conversational Programming User’s Manual | 10/2017… -
Page 517
Output file area Press the GENERATE FILE button If required, reply to the message on the control Press the CLOSE icon The control closes the additional tool HEIDENHAIN | TNC 640 | Conversational Programming User’s Manual | 10/2017… -
Page 518
Select the desired tool carrier using the preview screen Press the OK soft key The control copies the name of the selected tool carrier to the KINEMATIC column Exit the tool table HEIDENHAIN | TNC 640 | Conversational Programming User’s Manual | 10/2017… -
Page 519
Additive basic rotat. (W-CS) page 526 Shift (W-CS) page 527 Mirroring (W-CS) page 528 Shift (mW-CS) page 529 Rotation (WPL-CS) page 530 Handwheel superimp.: page 531 Feed rate factor page 535 HEIDENHAIN | TNC 640 | Conversational Programming User’s Manual | 10/2017… -
Page 520
(DCM), then the control must be in a stopped or interrupted state. Further information: «General status display», page 98 As an alternative you can deactivate Dynamic Collision Monitoring (DCM). Further information: «Activating and deactivating collision monitoring», page 512 HEIDENHAIN | TNC 640 | Conversational Programming User’s Manual | 10/2017… -
Page 521
NC program is selected in the file management. Then you can simply acknowledge the message with Ok or call the form directly with CHANGE DATA. HEIDENHAIN | TNC 640 | Conversational Programming User’s Manual | 10/2017… -
Page 522
As an alternative, use form elements to deactivate a setting possibility Further information: «Using the form», page 523 Press the Ok soft key The control applies the settings and closes the form HEIDENHAIN | TNC 640 | Conversational Programming User’s Manual | 10/2017… -
Page 523
Apply actual values of Handwheel superimp.: to the shifts Prerequisite: The coordinate system for Handwheel superimp.: and for Displacement concur You can also easily navigate through the form with a mouse. HEIDENHAIN | TNC 640 | Conversational Programming User’s Manual | 10/2017… -
Page 524
There is a danger of collision during subsequent machining! Test the behavior at the machine If necessary, reset the preset after the offsets have been activated (mandatory for table rotary axes) HEIDENHAIN | TNC 640 | Conversational Programming User’s Manual | 10/2017… -
Page 525
The control considers the 180° rotation for all C axis positioning movements. The control takes the modified tool position into account. The position of the C axis does not affect the preset position. The preset remains unchanged! HEIDENHAIN | TNC 640 | Conversational Programming User’s Manual | 10/2017… -
Page 526
Open the Global Program Settings function Activate the Additive basic rotat. (W-CS) option, specifying 90° Reselect the NC program The control considers the 90° rotation for all axis positioning movements. HEIDENHAIN | TNC 640 | Conversational Programming User’s Manual | 10/2017… -
Page 527
Global Program Settings function) The Shift (W-CS) values are displayed on the GS tab of the additional status display, the values from the NC program on the TRANS tab. HEIDENHAIN | TNC 640 | Conversational Programming User’s Manual | 10/2017… -
Page 528
With PLANE AXIAL, the mirroring of rotary axes is irrelevant. For the TCPM function with axis angles, all axes to be mirrored must be marked explicitly in the form. HEIDENHAIN | TNC 640 | Conversational Programming User’s Manual | 10/2017… -
Page 529
NC program (e.g. Cycle 7 DATUM SHIFT), the same way as it is done for an active Shift (W-CS). HEIDENHAIN | TNC 640 | Conversational Programming User’s Manual | 10/2017… -
Page 530
The value is added to the rotation defined in the NC program (e.g. Cycle 10 ROTATION). HEIDENHAIN | TNC 640 | Conversational Programming User’s Manual | 10/2017… -
Page 531
If no coordinate system transformations were activated using either the NC program or the Global Program Settings function, Handwheel superimp.: is effective in the same way in all coordinate systems. HEIDENHAIN | TNC 640 | Conversational Programming User’s Manual | 10/2017… -
Page 532
Handwheel superimp.: and during the subsequent machining operations! Before exiting the form, always make sure to explicitly select the Machine Coordinate System (M-CS). Test the behavior at the machine HEIDENHAIN | TNC 640 | Conversational Programming User’s Manual | 10/2017… -
Page 533
M118 from the NC program, you should activate Handwheel superimp.: in the Global Program Settings function prior to selecting the program. This ensures that the control uses the Global Program Settings function rather than M118. HEIDENHAIN | TNC 640 | Conversational Programming User’s Manual | 10/2017… -
Page 534
Handwheel superimp.: in virtual axis direction VT requires neither one of the PLANE functions nor the TCPM function. HEIDENHAIN | TNC 640 | Conversational Programming User’s Manual | 10/2017… -
Page 535
Program Settings function) Result of all modifications = current feed rate The control displays the value of the feed rate factor on the GS tab of the additional status display. HEIDENHAIN | TNC 640 | Conversational Programming User’s Manual | 10/2017… -
Page 536
Cutting conditions are changed particularly by: Tool wear Fluctuating cutting depths that occur especially with cast parts Fluctuating hardness caused by material flaws HEIDENHAIN | TNC 640 | Conversational Programming User’s Manual | 10/2017… -
Page 537
This helps to prevent further damage after a tool breaks or is worn out. Protection of the machine’s mechanical elements Timely feed rate reduction and shutdown responses help to avoid machine overload. HEIDENHAIN | TNC 640 | Conversational Programming User’s Manual | 10/2017… -
Page 538
Feed rate for traverse when the tool moves into or out of the material. Enter the value in percent with respect to the programmed feed rate. Maximum input value: 100 % HEIDENHAIN | TNC 640 | Conversational Programming User’s Manual | 10/2017… -
Page 539
Value that the control is to transfer to the PLC at the beginning of a machining step. The machine manufacturer defines the function, so refer to your machine manual. HEIDENHAIN | TNC 640 | Conversational Programming User’s Manual | 10/2017… -
Page 540
The control displays a list with table formats. table format and confirm with the ENT key Select the AFC.TAB The control creates the table that contains the control settings. HEIDENHAIN | TNC 640 | Conversational Programming User’s Manual | 10/2017… -
Page 541
LOAD value with the FUNCTION AFC CUT BEGIN function. If you program both values, the control will use the value programmed in the NC program! HEIDENHAIN | TNC 640 | Conversational Programming User’s Manual | 10/2017… -
Page 542
AFC column. Further information: «Defining basic AFC settings», page 538 Besides the data from the AFC.TAB table, the control also saves the following additional information in the <name>.H.AFC.DEP file: HEIDENHAIN | TNC 640 | Conversational Programming User’s Manual | 10/2017… -
Page 543
Your machine tool builder will either make a function available for this, or will integrate this possibility in the functions for switching on the spindle. The functions for starting and ending a machining step are machine-dependent. HEIDENHAIN | TNC 640 | Conversational Programming User’s Manual | 10/2017… -
Page 544
If the determined reference load is greater than 2 %, the control changes the status from teach-in (L) to controlling (C). Adaptive feed control is not possible for smaller values. HEIDENHAIN | TNC 640 | Conversational Programming User’s Manual | 10/2017… -
Page 545
In order to edit the <name>.H.AFC.DEP file, you must first set the file manager so that all file types can be displayed (SELECT TYPE soft key). Further information: «Files», page 175 HEIDENHAIN | TNC 640 | Conversational Programming User’s Manual | 10/2017… -
Page 546
ON—the control displays the AFC symbol in the position display Further information: «Status displays», page 98 To deactivate the adaptive feed control: Set the soft key to OFF HEIDENHAIN | TNC 640 | Conversational Programming User’s Manual | 10/2017… -
Page 547
The control shows various pieces of information in the additional status display when adaptive feed control is on. Further information: «Additional status displays», page 100 In addition, the control shows the icon in the position display. HEIDENHAIN | TNC 640 | Conversational Programming User’s Manual | 10/2017… -
Page 548
The control enters the results of the evaluation between the key words total and saved in the last line of the log file. Where the time balance is positive, the percentage value is also positive. HEIDENHAIN | TNC 640 | Conversational Programming User’s Manual | 10/2017… -
Page 549
If the AFC.TAB columns FMIN and FMAX each have a value of 100%, adaptive feed control is deactivated but cut-related tool load monitoring remains active. Further information: «Entering tool data into the table», page 242 and page 538 HEIDENHAIN | TNC 640 | Conversational Programming User’s Manual | 10/2017… -
Page 550
ACC is also advantageous during standard roughing. When you use the ACC feature, you must enter the number of tool cuts CUT for the corresponding tool in the TOOL.T tool table. HEIDENHAIN | TNC 640 | Conversational Programming User’s Manual | 10/2017… -
Page 551
Further information: «Status displays», page 98 To deactivate ACC: Set the soft key to OFF If ACC is active, the control shows the icon in the position display. HEIDENHAIN | TNC 640 | Conversational Programming User’s Manual | 10/2017… -
Page 552
You must deactivate the parallel-axis functions before switching the machine kinematics. You can deactivate the programming of parallel axes with the machine parameter noParaxMode (no. 105413). HEIDENHAIN | TNC 640 | Conversational Programming User’s Manual | 10/2017… -
Page 553
Select FUNCTION PARAXCOMP Select the FUNCTION PARAXCOMP DISPLAY function Define the parallel axis whose movements the control is to take into account in the position display of the associated principal axis HEIDENHAIN | TNC 640 | Conversational Programming User’s Manual | 10/2017… -
Page 554
(no. 300203). Your machine tool builder can also activate the PARAXCOMP functions permanently using a machine parameter. HEIDENHAIN | TNC 640 | Conversational Programming User’s Manual | 10/2017… -
Page 555
Select FUNCTION PARAXCOMP Select FUNCTION PARAXCOMP OFF. If you want to switch off the parallel-axis functions only for individual parallel axes, then the respective axis must be specifically indicated. HEIDENHAIN | TNC 640 | Conversational Programming User’s Manual | 10/2017… -
Page 556
& character. The axis with the & character then refers to the principal axis. HEIDENHAIN | TNC 640 | Conversational Programming User’s Manual | 10/2017… -
Page 557
Your machine tool builder will define the calculation of possible offset values (X_OFFS, Y_OFFS and Z_OFFS from the preset table) for the axes positioned with the operator in the presetToAlignAxis machine parameter & (no. 300203). HEIDENHAIN | TNC 640 | Conversational Programming User’s Manual | 10/2017… -
Page 558
Proceed as follows for the definition: Show the soft-key row with special functions Press the PROGRAM FUNCTIONS soft key Select FUNCTION PARAX Select FUNCTION PARAXMODE Select FUNCTION PARAXMODE OFF HEIDENHAIN | TNC 640 | Conversational Programming User’s Manual | 10/2017… -
Page 559
10 FUNCTION PARAXMODE OFF Restore standard axis configuration 11 L Z+0 W+0 R0 FMAX M91 Reset the principal axis and minor axis 12 L M30 13 END PGM PAR MM HEIDENHAIN | TNC 640 | Conversational Programming User’s Manual | 10/2017… -
Page 560
If you try to copy a file that does not exist, the control generates an error message. FILE DELETE does not generate an error message if you try to delete a non-existing file. HEIDENHAIN | TNC 640 | Conversational Programming User’s Manual | 10/2017… -
Page 561
Incremental values always refer to the datum which was last valid (this may be a datum which has already been shifted). HEIDENHAIN | TNC 640 | Conversational Programming User’s Manual | 10/2017… -
Page 562
DATUM TABLE block, then the control uses the datum table previously selected with SEL TABLE or the datum table activated in the Program run, single block or Program run, full sequence operating mode (status M). HEIDENHAIN | TNC 640 | Conversational Programming User’s Manual | 10/2017… -
Page 563
Show the soft-key row with special functions Press the PROGRAM FUNCTIONS soft key Select transformations Select the TRANS DATUM datum shift Press the RESET DATUM SHIFT soft key HEIDENHAIN | TNC 640 | Conversational Programming User’s Manual | 10/2017… -
Page 564
If necessary, note down the counter value and enter it again via the MOD menu after execution. You can use Cycle 225 to engrave the current counter value into the workpiece. Further information: Cycle Programming User’s Manual HEIDENHAIN | TNC 640 | Conversational Programming User’s Manual | 10/2017… -
Page 565
51 FUNCTION COUNT INC Increment the counter value 52 FUNCTION COUNT REPEAT LBL 11 Repeat the machining operations if more parts are to be machined. 53 M30 54 END PGM HEIDENHAIN | TNC 640 | Conversational Programming User’s Manual | 10/2017… -
Page 566
Move cursor one word to the right Move cursor one word to the left Go to next screen page Go to previous screen page Cursor at beginning of file Cursor at end of file HEIDENHAIN | TNC 640 | Conversational Programming User’s Manual | 10/2017… -
Page 567
Soft key Function Delete and temporarily store a line Delete and temporarily store a word Delete and temporarily store a character Insert a line or word from temporary storage HEIDENHAIN | TNC 640 | Conversational Programming User’s Manual | 10/2017… -
Page 568
Press the READ FILE soft key. The control displays the File name = dialog message. Enter the path and name of the file you want to insert HEIDENHAIN | TNC 640 | Conversational Programming User’s Manual | 10/2017… -
Page 569
Find text : dialog prompt Enter the text that you wish to find To find text: press the FIND soft key. Exit the search function: Press the END soft key HEIDENHAIN | TNC 640 | Conversational Programming User’s Manual | 10/2017… -
Page 570
TNC:systemproto directory. Then your template will also be available in the list box for table templates when you create a new table. HEIDENHAIN | TNC 640 | Conversational Programming User’s Manual | 10/2017… -
Page 571
Navigation using the control’s keyboard: Press the navigation keys to go to the entry fields. Use the arrow keys to navigate within an entry field. To open pop-down menus, press the GOTO key. HEIDENHAIN | TNC 640 | Conversational Programming User’s Manual | 10/2017… -
Page 572
This moves the cursor to the left window, and you can select the desired line with the arrow keys. Press the green navigation key to switch back to the input window. HEIDENHAIN | TNC 640 | Conversational Programming User’s Manual | 10/2017… -
Page 573
The table to be opened must have the extension .TAB. Example: Open the table TAB1.TAB, which is saved in the directory TNC:DIR1. 56 FN 26: TABOPEN TNC:DIR1TAB1.TAB HEIDENHAIN | TNC 640 | Conversational Programming User’s Manual | 10/2017… -
Page 574
Q parameters Q5, Q6 and Q7 . 53 Q5 = 3.75 54 Q6 = -5 55 Q7 = 7.5 56 FN 27: TABWRITE 5/»RADIUS,DEPTH,D» = Q5 HEIDENHAIN | TNC 640 | Conversational Programming User’s Manual | 10/2017… -
Page 575
The names of tables and table columns must start with a letter and must not contain an arithmetic operator (e.g., +). Due to SQL commands, these characters can cause problems when inputting data or reading it out. HEIDENHAIN | TNC 640 | Conversational Programming User’s Manual | 10/2017… -
Page 576
Define speed change SCALE The control never exceeds a programmed speed limit. The spindle speed is maintained until the sinusoidal curve of the S-PULSE FUNCTION falls below the maximum speed once more. HEIDENHAIN | TNC 640 | Conversational Programming User’s Manual | 10/2017… -
Page 577
Proceed as follows for the definition: Show the soft-key row with special functions Press the PROGRAM FUNCTIONS soft key Press the FUNCTION SPINDLE soft key Press the RESET SPINDLE-PULSE soft key. HEIDENHAIN | TNC 640 | Conversational Programming User’s Manual | 10/2017… -
Page 578
Press the PROGRAM FUNCTIONS soft key Press the FUNCTION FEED soft key Press the FEED DWELL soft key Define the interval duration for dwelling D-TIME Define the interval duration for cutting F-TIME HEIDENHAIN | TNC 640 | Conversational Programming User’s Manual | 10/2017… -
Page 579
Press the RESET FEED DWELL soft key You can also reset the dwell time by entering D-TIME 0. The control automatically resets the FUNCTION FEED DWELL function at the end of a program. HEIDENHAIN | TNC 640 | Conversational Programming User’s Manual | 10/2017… -
Page 580
Press the PROGRAM FUNCTIONS soft key FUNCTION DWELL soft key Press the DWELL TIME soft key Define the duration in seconds Alternatively, press the DWELL REVOLUTIONS soft key Define the number of spindle revolutions HEIDENHAIN | TNC 640 | Conversational Programming User’s Manual | 10/2017… -
Page 581
Lift-off in the tool axis direction with M148 Further information: «Automatically retracting the tool from the contour at an NC stop: M148», page 499 HEIDENHAIN | TNC 640 | Conversational Programming User’s Manual | 10/2017… -
Page 582
Show the soft-key row with special functions Press the PROGRAM FUNCTIONS soft key Press the FUNCTION LIFTOFF soft key Press the LIFTOFF ANGLE TCS soft key Enter the SPB angle HEIDENHAIN | TNC 640 | Conversational Programming User’s Manual | 10/2017… -
Page 583
Press the FUNCTION LIFTOFF soft key Press the LIFTOFF RESET soft key You can also reset the lift-off with M149. The control automatically resets the FUNCTION LIFTOFF function at the end of a program. HEIDENHAIN | TNC 640 | Conversational Programming User’s Manual | 10/2017… -
Page 585
Multiple-Axis- Machining… -
Page 586
Reduce display value of rotary axes M128 Define the behavior of the control when positioning the rotary axes M138 Selection of tilted axes M144 Calculate machine kinematics LN blocks Three-dimensional tool compensation HEIDENHAIN | TNC 640 | Conversational Programming User’s Manual | 10/2017… -
Page 587
The mirrored rotary axis has no effect on the tilt specified in the PLANE function used, because only the movement of the rotary axis is mirrored HEIDENHAIN | TNC 640 | Conversational Programming User’s Manual | 10/2017… -
Page 588
0. The control only supports tilting the working plane with spindle axis Z. HEIDENHAIN | TNC 640 | Conversational Programming User’s Manual | 10/2017… -
Page 589
PLANE function. While the animation plays, the control highlights the soft key of the selected PLANE function with a blue color. Soft key Function Switch on the animation mode Select the desired animation (highlighted in blue) HEIDENHAIN | TNC 640 | Conversational Programming User’s Manual | 10/2017… -
Page 590
In the Distance-To-Go display (ACTDST and REFDST) the control shows, during tilting (MOVE or TURN mode) in the rotary axis, the distance to go to the calculated final position of the rotary axis. HEIDENHAIN | TNC 640 | Conversational Programming User’s Manual | 10/2017… -
Page 591
It does not need to be defined more than once. Deactivate tilting in the Manual operation operating mode in the 3D ROT menu. Further information: «Activating manual tilting:», page 786 HEIDENHAIN | TNC 640 | Conversational Programming User’s Manual | 10/2017… -
Page 592
The result is identical for both perspectives, as the following comparison shows. Example PLANE SPATIAL SPA+45 SPB+0 SPC+90 … A-B-C C-B-A Home position A0° B0° C0° Home position A0° B0° C0° A+45° C+90° B+0° B+0° C+90° A+45° HEIDENHAIN | TNC 640 | Conversational Programming User’s Manual | 10/2017… -
Page 593
Spatial angle C?: Rotational angle SPC about the (non-tilted) Z axis. Input range from -359.9999 to +359.9999 Continue with the positioning properties Further information: «Specifying the positioning behavior of the PLANE function», page 606 HEIDENHAIN | TNC 640 | Conversational Programming User’s Manual | 10/2017… -
Page 594
You can select the desired positioning behavior. Further information: «Specifying the positioning behavior of the PLANE function», page 606 HEIDENHAIN | TNC 640 | Conversational Programming User’s Manual | 10/2017… -
Page 595
«Specifying the positioning behavior of the PLANE function», page 606 Example 5 PLANE PROJECTED PROPR+24 PROMIN+24 ROT+30 ..Abbreviations used: PROJECTED Projected PROPR Principal plane PROMIN Minor plane Rotation HEIDENHAIN | TNC 640 | Conversational Programming User’s Manual | 10/2017… -
Page 596
The 0° axis is the X axis Continue with the positioning properties Further information: «Specifying the positioning behavior of the PLANE function», page 606 Example 5 PLANE EULER EULPR45 EULNU20 EULROT22 ..HEIDENHAIN | TNC 640 | Conversational Programming User’s Manual | 10/2017… -
Page 597
X axis shift- ed by the precession angle EULROT Rotation angle: angle describing the rotation of the tilted machining plane around the tilted Z axis HEIDENHAIN | TNC 640 | Conversational Programming User’s Manual | 10/2017… -
Page 598
This behavior is independent of the configuration of the machine parameters. You can select the desired positioning behavior. Further information: «Specifying the positioning behavior of the PLANE function», page 606 HEIDENHAIN | TNC 640 | Conversational Programming User’s Manual | 10/2017… -
Page 599
If the normal vector has no X component, the base vector corresponds to the original X axis If the normal vector has no Y component, the base vector corresponds to the original Y axis HEIDENHAIN | TNC 640 | Conversational Programming User’s Manual | 10/2017… -
Page 600
5 PLANE VECTOR BX0.8 BY-0.4 BZ-0.42 NX0.2 NY0.2 NZ0.92 .. Abbreviations used Abbreviation Meaning VECTOR Vector BX, BY, BZ Base vector : X, Y, and components NX, NY, NZ Normal vector : X, Y, and components HEIDENHAIN | TNC 640 | Conversational Programming User’s Manual | 10/2017… -
Page 601
Point 1 and Point 2 (right-hand rule). You can select the desired positioning behavior. Further information: «Specifying the positioning behavior of the PLANE function», page 606 HEIDENHAIN | TNC 640 | Conversational Programming User’s Manual | 10/2017… -
Page 602
«Specifying the positioning behavior of the PLANE function», page 606 Example 5 PLANE POINTS P1X+0 P1Y+0 P1Z+20 P2X+30 P2Y+31 P2Z+20 P3X+0 P3Y+41 P3Z+32.5 ..Abbreviations used Abbreviation Meaning POINTS Points HEIDENHAIN | TNC 640 | Conversational Programming User’s Manual | 10/2017… -
Page 603
Continue with the positioning properties Further information: «Specifying the positioning behavior of the PLANE function», page 606 Example 5 PLANE RELATIV SPB-45 ..Abbreviations used Abbreviation Meaning RELATIVE Relative to HEIDENHAIN | TNC 640 | Conversational Programming User’s Manual | 10/2017… -
Page 604
The SEQ, TABLE ROT and COORD ROT functions have no effect in conjunction with PLANE AXIAL. The PLANE AXIAL function does not take basic rotation into account. HEIDENHAIN | TNC 640 | Conversational Programming User’s Manual | 10/2017… -
Page 605
Input range: –99999.9999° to +99999.9999° Continue with the positioning properties Further information: «Specifying the positioning behavior of the PLANE function», page 606 Abbreviations used Abbreviation Meaning AXIAL In the axial direction HEIDENHAIN | TNC 640 | Conversational Programming User’s Manual | 10/2017… -
Page 606
The mirrored rotary axis has no effect on the tilt specified in the PLANE function used, because only the movement of the rotary axis is mirrored HEIDENHAIN | TNC 640 | Conversational Programming User’s Manual | 10/2017… -
Page 607
FAUTO (feed rate from the TOOL CALL block). If you use PLANE together with STAY, you have to position the rotary axes in a separate block after the PLANE function. HEIDENHAIN | TNC 640 | Conversational Programming User’s Manual | 10/2017… -
Page 608
MB MAX positions the tool just before the software limit switch. HEIDENHAIN | TNC 640 | Conversational Programming User’s Manual | 10/2017… -
Page 609
Define and activate the PLANE function 14 L A+Q120 C+Q122 F2000 Position the rotary axis with the values calculated by the control. Define machining in the tilted working plane HEIDENHAIN | TNC 640 | Conversational Programming User’s Manual | 10/2017… -
Page 610
3 If only one solution is within the traverse range, the control selects this solution 4 If neither solution is within the traverse range, the control displays the Entered angle not permitted error message. HEIDENHAIN | TNC 640 | Conversational Programming User’s Manual | 10/2017… -
Page 611
If no free rotary axis is created in a tilting situation, the COORD ROT and TABLE ROT transformation types have no effect With the PLANE AXIAL function the COORD ROT and TABLE ROT transformation types have no effect HEIDENHAIN | TNC 640 | Conversational Programming User’s Manual | 10/2017… -
Page 612
If no transformation type was specified, the control uses the COORD ROT transformation type for the PLANE functions HEIDENHAIN | TNC 640 | Conversational Programming User’s Manual | 10/2017… -
Page 613
B axis before tilting the working plane is maintained Because the workpiece was not positioned, the control aligns the working plane coordinate system according to the programmed spatial angle SPB+20 HEIDENHAIN | TNC 640 | Conversational Programming User’s Manual | 10/2017… -
Page 614
TOOL CALL 5 Z S4500 PLANE SPATIAL SPA+0 SPB-90 SPC+0 STAY The tilt angle must be precisely adapted to the tool angle, otherwise the control will generate an error message. HEIDENHAIN | TNC 640 | Conversational Programming User’s Manual | 10/2017… -
Page 615
13 PLANE SPATIAL SPA+0 SPB-45 SPC+0 MOVE DIST50 Define and activate the PLANE function F1000 14 M128 Activate M128 15 L IB-17 F1000 Set the incline angle Define machining in the tilted working plane HEIDENHAIN | TNC 640 | Conversational Programming User’s Manual | 10/2017… -
Page 616
14 M128 Activate M128 15 LN X+31.737 Y+21.954 Z+33.165 NX+0.3 NY+0 NZ Set the incline angle with the normal vector +0.9539 F1000 M3 Define machining in the tilted working plane HEIDENHAIN | TNC 640 | Conversational Programming User’s Manual | 10/2017… -
Page 617
M116 is effective in the working plane. Reset M116 with M117. At the end of the program, M116 is automatically canceled. M116 becomes effective at the start of the block. HEIDENHAIN | TNC 640 | Conversational Programming User’s Manual | 10/2017… -
Page 618
10° +20° 10° 340° –30° Effect M126 becomes effective at the start of the block. To cancel M126, enter M127. At the end of program, M126 is automatically canceled. HEIDENHAIN | TNC 640 | Conversational Programming User’s Manual | 10/2017… -
Page 619
C axis to the programmed value L C+180 FMAX M94 Effect M94 is effective only in the NC block where it is programmed. M94 becomes effective at the start of the block. HEIDENHAIN | TNC 640 | Conversational Programming User’s Manual | 10/2017… -
Page 620
If M128 is active, the control shows the TCPM symbol in the status display The TCPM or M128 function cannot be used in conjunction with the Dynamic Collision Monitoring (DCM) function and the additional M118 function HEIDENHAIN | TNC 640 | Conversational Programming User’s Manual | 10/2017… -
Page 621
Enter M129 to cancel M128. The control will also cancel M128 if you select a new program in a program run operating mode. Example: Feed rate of 1000 mm/min for compensation movements L X+0 Y+38.5 IB-15 RL F125 M128 F1000 HEIDENHAIN | TNC 640 | Conversational Programming User’s Manual | 10/2017… -
Page 622
HEIDENHAIN | TNC 640 | Conversational Programming User’s Manual | 10/2017… -
Page 623
M138 becomes effective at the start of the block. You can cancel M138 by reprogramming it without specifying any axes. Example Perform the above-mentioned functions only in the tilting axis C. L Z+100 R0 FMAX M138 C HEIDENHAIN | TNC 640 | Conversational Programming User’s Manual | 10/2017… -
Page 624
M144 becomes effective at the start of the block. M144 does not work in connection with M128 or the Tilt Working Plane function. You can cancel M144 by programming M145. HEIDENHAIN | TNC 640 | Conversational Programming User’s Manual | 10/2017… -
Page 625
NC program for possible contour damages. Defining FUNCTION TCPM Select the special functions Select the programming aids Select FUNCTION TCPM HEIDENHAIN | TNC 640 | Conversational Programming User’s Manual | 10/2017… -
Page 626
13 FUNCTION TCPM F TCP … Feed rate refers to the tool tip 14 FUNCTION TCPM F CONT … Feed rate is interpreted as the speed of the tool along the contour HEIDENHAIN | TNC 640 | Conversational Programming User’s Manual | 10/2017… -
Page 627
Rotary axis coordinates are spatial angles 20 L A+0 B+45 C+0 F MAX Set tool orientation to B+45 degrees (spatial angle). Define space angle A and C with 0 HEIDENHAIN | TNC 640 | Conversational Programming User’s Manual | 10/2017… -
Page 628
13 FUNCTION TCPM F TCP AXIS SPAT PATHCTRL AXIS Tool tip moves along a straight line 14 FUNCTION TCPM F TCP AXIS POS PATHCTRL VECTOR Tool tip and tool directional vector move in one plane HEIDENHAIN | TNC 640 | Conversational Programming User’s Manual | 10/2017… -
Page 629
The main goal of selecting this reference point is to enable machining of complex contours in turning mode with active radius compensation and simultaneously inclined tilting axes (simultaneous turning). Further information: «Simultaneous turning», page 705 HEIDENHAIN | TNC 640 | Conversational Programming User’s Manual | 10/2017… -
Page 630
When you select a new NC program in the Program run, single block or Program run, full sequence operating modes, the control automatically cancels the TCPM function. Example 25 FUNCTION RESET TCPM Reset FUNCTION TCPM HEIDENHAIN | TNC 640 | Conversational Programming User’s Manual | 10/2017… -
Page 631
(3D radius compensation with definition of the tool orientation). Cutting is usually with the lateral surface of the tool. HEIDENHAIN | TNC 640 | Conversational Programming User’s Manual | 10/2017… -
Page 632
> 0 Prog Behavior with M107 With M107 the control suppresses the error message. Effect M107 takes effect at the end of block. You can reset M107 with M108. HEIDENHAIN | TNC 640 | Conversational Programming User’s Manual | 10/2017… -
Page 633
You can suppress the error message with the M107 function. The control will not warn you if there is a danger of contour damage due to tool oversizes. HEIDENHAIN | TNC 640 | Conversational Programming User’s Manual | 10/2017… -
Page 634
R2 + DR2 + DR2 = End mill Prog 0 < R2 + DR2 + DR2 < R: Toroid cutter Prog R2 + DR2 + DR2 = R: Radius cutter Prog HEIDENHAIN | TNC 640 | Conversational Programming User’s Manual | 10/2017… -
Page 635
NZ-0.8764339 F1000 M3 Straight line with 3-D compensation X, Y, Z: Compensated coordinates of the straight-line end point NX, NY, NZ: Components of the surface-normal vector Feed rate Miscellaneous function HEIDENHAIN | TNC 640 | Conversational Programming User’s Manual | 10/2017… -
Page 636
Program a safe tool position before the tilting movement, if necessary. Carefully test the NC program or program section in the Program run, single block operating mode HEIDENHAIN | TNC 640 | Conversational Programming User’s Manual | 10/2017… -
Page 637
Compensated coordinates of the straight-line end point NX, NY, NZ: Components of the surface-normal vector TX, TY, TZ: Components of the normalized vector for workpiece orientation Feed rate Miscellaneous function HEIDENHAIN | TNC 640 | Conversational Programming User’s Manual | 10/2017… -
Page 638
There are two ways to define the tool orientation: In an LN block with the components TX, TY and TZ In an L block by indicating the coordinates of the rotary axes HEIDENHAIN | TNC 640 | Conversational Programming User’s Manual | 10/2017… -
Page 639
Straight line X, Y, Z: Compensated coordinates of the straight-line end point B, C: Coordinates of the rotary axes for tool orien- tation Radius Compensation Feed rate Miscellaneous function HEIDENHAIN | TNC 640 | Conversational Programming User’s Manual | 10/2017… -
Page 640
DR2 for 3-D radius compensation. If you activate FUNCTION PROG PATH, the interpretation of the programmed path as the contour is effective for 3-D compensation movements until you deactivate the function. HEIDENHAIN | TNC 640 | Conversational Programming User’s Manual | 10/2017… -
Page 641
NR: Consecutive line number ANGLE: Measured angle in degrees DR2: Radius deviation from the nominal value The control evaluates a maximum of 100 lines in the compensation value table. HEIDENHAIN | TNC 640 | Conversational Programming User’s Manual | 10/2017… -
Page 642
NC program output at the south pole of the sphere requires tools measured on the tool tip NC program output at the center of the sphere requires tools measured on the tool center HEIDENHAIN | TNC 640 | Conversational Programming User’s Manual | 10/2017… -
Page 643
The basis for this is the real-time operating system HeROS 5 in conjunction with the ADP (Advanced Dynamic Prediction) function of the TNC 640. This enables the control to also efficiently process NC programs with high point densities. From 3-D model to NC program… -
Page 644
Avoid the output of the feed rate in every NC block. This would negatively influence the control’s velocity profile HEIDENHAIN | TNC 640 | Conversational Programming User’s Manual | 10/2017… -
Page 645
3 Q52 = 1350 ; FEED RATE FOR MILLING 25 L Z+250 R0 FMAX 26 L X+235 Y-25 FQ50 27 L Z+35 28 L Z+33.2571 FQ51 29 L X+321.7562 Y-24.9573 Z+33.3978 FQ52 30 L X+320.8251 Y-24.4338 Z+33.8311 HEIDENHAIN | TNC 640 | Conversational Programming User’s Manual | 10/2017… -
Page 646
Normal tolerance in Cycle 32: Between 0.010 mm and 0.020 mm Normal chord error in the CAM system: Smaller than 0.005 mm HEIDENHAIN | TNC 640 | Conversational Programming User’s Manual | 10/2017… -
Page 647
L and permissible contour tolerance TA: T ~ K x L x TA K = 0.0175 [1/°] Example: L = 10 mm, TA = 0.1°: T = 0.0175 mm HEIDENHAIN | TNC 640 | Conversational Programming User’s Manual | 10/2017… -
Page 648
Tuning. Cycle 332 can be used to modify filter settings, acceleration settings, and jerk settings. Example 34 CYCL DEF 32.0 TOLERANCE 35 CYCL DEF 32.1 T0.05 36 CYCL DEF 32.2 HSC MODE:1 TA3 HEIDENHAIN | TNC 640 | Conversational Programming User’s Manual | 10/2017… -
Page 649
Improved reaction to negative effects (e.g. short, step-like stages, coarse chord tolerances, heavily rounded block end- point coordinates) in NC programs generated by CAM system Precise compliance to dynamic characteristics even in difficult conditions HEIDENHAIN | TNC 640 | Conversational Programming User’s Manual | 10/2017… -
Page 651
Pallet Management… -
Page 652
Without a pallet changer you can use pallet tables to process NC programs with different presets in sequence with just one press of NC Start. The file name of a pallet table must always begin with a letter. HEIDENHAIN | TNC 640 | Conversational Programming User’s Manual | 10/2017… -
Page 653
Number of the pallet preset Optional field This entry is only required if pallet presets are used. W-STATUS Execution status Optional field This entry is only required for tool- oriented machining. HEIDENHAIN | TNC 640 | Conversational Programming User’s Manual | 10/2017… -
Page 654
Insert as last line in the table Delete the last line in the table Add several lines at end of table Copy the current value Insert the copied value Select beginning of line HEIDENHAIN | TNC 640 | Conversational Programming User’s Manual | 10/2017… -
Page 655
Select end of line Find text or value Sort or hide table columns Edit the current field Sort by column contents Miscellaneous functions, e.g. saving Open file path selection HEIDENHAIN | TNC 640 | Conversational Programming User’s Manual | 10/2017… -
Page 656
Using the arrow keys, select the desired column. Press the INSERT COLUMN soft key Press the ENT key You can remove the column with the DELETE COLUMN soft key. HEIDENHAIN | TNC 640 | Conversational Programming User’s Manual | 10/2017… -
Page 657
Scroll through the NC program with the arrow keys Press the END PGM PAL soft key The control returns to the pallet table. A machine parameter defines how the control is to react after an error. HEIDENHAIN | TNC 640 | Conversational Programming User’s Manual | 10/2017… -
Page 658
If you interrupt the processing of pallet tables, the control always suggests the previously selected NC block of the interrupted NC program for the BLOCK SCAN function. Further information: «Block scan in pallet programs», page 838 HEIDENHAIN | TNC 640 | Conversational Programming User’s Manual | 10/2017… -
Page 659
If necessary, check the active pallet preset in the PAL tab Check the traverse movements of the machine Use pallet presets only in conjunction with pallets HEIDENHAIN | TNC 640 | Conversational Programming User’s Manual | 10/2017… -
Page 660
Changing the machine statuses with a miscellaneous function (e.g. M13) Writing to the configuration (e.g. WRITE KINEMATICS) Traverse range switchover Cycle 32 Tolerance Cycle 800 Tilting the working plane HEIDENHAIN | TNC 640 | Conversational Programming User’s Manual | 10/2017… -
Page 661
SP-B, SP-C, You can enter safety positions for the axes. The SP-U, SP-V, control only approaches these positions if the SP-W machine tool builder processes them in the NC macros. HEIDENHAIN | TNC 640 | Conversational Programming User’s Manual | 10/2017… -
Page 662
If you want to start machining again, change the W-STATUS to BLANK. If you change the status in the PAL line, all FIX and PGM lines below this line are automatically changed, too. HEIDENHAIN | TNC 640 | Conversational Programming User’s Manual | 10/2017… -
Page 663
Changing the machine statuses with a miscellaneous function (e.g. M13) Writing to the configuration (e.g. WRITE KINEMATICS) Traverse range switchover Cycle 32 Tolerance Cycle 800 Tilting the working plane HEIDENHAIN | TNC 640 | Conversational Programming User’s Manual | 10/2017… -
Page 665
Batch Process Manager… -
Page 666
Times at which manual interventions in the machine are required The tool usage test function has to be enabled and switched on to ensure you get all information! Further information: «Tool usage test», page 263 HEIDENHAIN | TNC 640 | Conversational Programming User’s Manual | 10/2017… -
Page 667
Pallet, Fixture or Program is locked Pallet or Fixture is not enabled for machin- This line is currently being processed in Program run, single block or Program run, full sequence and cannot be edited HEIDENHAIN | TNC 640 | Conversational Programming User’s Manual | 10/2017… -
Page 668
Edit opened job list Collapse or expand tree structure INSERT REMOVE Shows the soft keys INSERT BEFORE, INSERT AFTER and REMOVE Insert a new Pallet, Fixture or Program before the cursor position HEIDENHAIN | TNC 640 | Conversational Programming User’s Manual | 10/2017… -
Page 669
In the pallet management Further information: «Pallet Management», page 651 The control opens the pallet table (.p) in the Batch Process Manager as a job list. Directly in the Batch Process Manager HEIDENHAIN | TNC 640 | Conversational Programming User’s Manual | 10/2017… -
Page 670
Locked: Lock the selected line Editing possible: The selected line cannot be edited Confirm your entries by pressing the ENT key. Repeat the steps if required Press the EDIT soft key HEIDENHAIN | TNC 640 | Conversational Programming User’s Manual | 10/2017… -
Page 671
The following entries can be changed: Name Datum table Preset Locked Editing possible Confirm the edited entries by pressing the ENT key. The control adopts the changes. Press the EDIT soft key HEIDENHAIN | TNC 640 | Conversational Programming User’s Manual | 10/2017… -
Page 672
You can execute the job list using the pallet management Further information: «Processing pallet table», page 657 The control opens the job list as a pallet table in the pallet management (.p). HEIDENHAIN | TNC 640 | Conversational Programming User’s Manual | 10/2017… -
Page 673
Turning… -
Page 674
This makes NC programs with turning functions largely exchangeable and independent of the machine model. HEIDENHAIN | TNC 640 | Conversational Programming User’s Manual | 10/2017… -
Page 675
Clamp the workpiece in the spindle center Clamp workpiece securely Program low spindle speeds (increase as required) Limit the spindle speed (increase as required) Eliminate unbalance (calibrate) HEIDENHAIN | TNC 640 | Conversational Programming User’s Manual | 10/2017… -
Page 676
In turning mode the measured values correspond to the X axis diameter values. You can also use the smartSelect function to define the turning functions. Further information: «Overview of special functions», page 502 HEIDENHAIN | TNC 640 | Conversational Programming User’s Manual | 10/2017… -
Page 677
Press the SELECT KINEMATICS soft key Example 11 FUNCTION MODE TURN «AC_TABLE» Activate turning mode 12 FUNCTION MODE TURN Activate turning mode 13 FUNCTION MODE MILL «B_HEAD» Activate milling mode HEIDENHAIN | TNC 640 | Conversational Programming User’s Manual | 10/2017… -
Page 678
Workpiece blank definition 2 BLK FORM 0.2 X+87 Y+1 Z+2 3 TOOL CALL 12 Tool call 4 M140 MB MAX Retract the tool 5 FUNCTION MODE TURN Activate Turning mode HEIDENHAIN | TNC 640 | Conversational Programming User’s Manual | 10/2017… -
Page 679
S: Nominal speed if no constant cutting speed is active (optional) S MAX: Maximum speed with constant cutting speed (optional). Reset with S MAX 0 GEARRANGE: Gear range for the turning spindle (optional) HEIDENHAIN | TNC 640 | Conversational Programming User’s Manual | 10/2017… -
Page 680
3 FUNCTION TURNDATA SPIN VCONST:ON VC:100 Definition of a constant cutting speed in gear range 2 GEARRANGE:2 3 FUNCTION TURNDATA SPIN VCONST:OFF S550 Definition of a constant spindle speed HEIDENHAIN | TNC 640 | Conversational Programming User’s Manual | 10/2017… -
Page 681
15 L Z-10 F200 Movement at a feed rate of 200 mm/min 19 M136 Feed rate in millimeters per revolution 20 L X+154 F0.2 Movement at a feed rate of 0.2 mm/1 HEIDENHAIN | TNC 640 | Conversational Programming User’s Manual | 10/2017… -
Page 682
Clamp the workpiece in the spindle center Clamp workpiece securely Program low spindle speeds (increase as required) Limit the spindle speed (increase as required) Eliminate unbalance (calibrate) HEIDENHAIN | TNC 640 | Conversational Programming User’s Manual | 10/2017… -
Page 683
Unbalance Monitor function when you switch to turning mode. The unbalance monitor is effective until you switch back to milling mode. Further information: Cycle Programming User’s Manual HEIDENHAIN | TNC 640 | Conversational Programming User’s Manual | 10/2017… -
Page 684
Operating notes: To compensate an unbalance, several balancing weights at different positions may be required. After clamping a balancing weight, the unbalance must be checked again in a measurement. HEIDENHAIN | TNC 640 | Conversational Programming User’s Manual | 10/2017… -
Page 685
With unbalance calibration, the rotary table is operated at various speeds with a defined weight mounted at a defined radial position. The measurement is repeated with different weights. HEIDENHAIN | TNC 640 | Conversational Programming User’s Manual | 10/2017… -
Page 686
In addition to the tool number and tool name, the control also shows the ZL and XL columns from the turning tool table. Example 1 FUNCTION MODE TURN Turning mode selection 2TOOL CALL «TRN_ROUGH» Tool call HEIDENHAIN | TNC 640 | Conversational Programming User’s Manual | 10/2017… -
Page 687
Show the soft-key row with special functions Press the TURNING PROGRAM FUNCTIONS soft Press the FUNCTION TURNDATA soft key Press the TURNDATA CORR soft key. Example 21 FUNCTION TURNDATA CORR-TCS:Z/X DZL:0.1 DXL:0.05 HEIDENHAIN | TNC 640 | Conversational Programming User’s Manual | 10/2017… -
Page 688
Select the machine operating mode, e.g. Manual operation Press the TOOL TABLE soft key Press the TURNING TOOLS soft key Edit the turning tool table: Set the EDIT soft key to ON HEIDENHAIN | TNC 640 | Conversational Programming User’s Manual | 10/2017… -
Page 689
Type of turning tool: Roughing tool ROUGH, finish- ROUGH, FINISH, THREAD, ing tool FINISH, thread tool THREAD, recessing tool RECESS, BUTTON, RECTURN RECESS, button tool BUTTON, groove turning tool RECTURN HEIDENHAIN | TNC 640 | Conversational Programming User’s Manual | 10/2017… -
Page 690
Current value of DXL Current calculated value for the tool New value of DZL New calculated value for the tool New value of DXL New calculated value for the tool HEIDENHAIN | TNC 640 | Conversational Programming User’s Manual | 10/2017… -
Page 691
Further information: Cycle Programming User’s Manual Example Input: Compens. value WPL-Z: 1 Compensation ØWPL-X: 1 Inclination angle ß: 90 Reverse the tool: Yes Result: DZL: +0.5 DXL: +1 HEIDENHAIN | TNC 640 | Conversational Programming User’s Manual | 10/2017… -
Page 692
Cutting radius Required Tool orientation Required Angle of orienta- Orientation angle Required tion CUTWIDTH Width of the recessing Required tool Oversize f. recessing tool Optional width TYPE Tool type Required HEIDENHAIN | TNC 640 | Conversational Programming User’s Manual | 10/2017… -
Page 693
Wear compensation YL Optional Cutting radius Required Tool orientation Required Angle of orienta- Orientation angle Required tion T-ANGLE Tool angle Required P-ANGLE Point angle Required TYPE Tool type Required HEIDENHAIN | TNC 640 | Conversational Programming User’s Manual | 10/2017… -
Page 694
Wear compensation XL Optional Wear compensation YL Optional Tool orientation Required Angle of orienta- Orientation angle Required tion T-ANGLE Tool angle Required P-ANGLE Point angle Required TYPE Tool type Required HEIDENHAIN | TNC 640 | Conversational Programming User’s Manual | 10/2017… -
Page 695
Theoretical tool tip The theoretical tool tip is effective in the tool coordinate system. When the tool is inclined, the position of the tool tip rotates with the tool. HEIDENHAIN | TNC 640 | Conversational Programming User’s Manual | 10/2017… -
Page 696
The virtual tool tip enables you to perform inclined paraxial longitudinal and transverse machining operations with high contour accuracy even without radius compensation. Further information: «Simultaneous turning», page 705 HEIDENHAIN | TNC 640 | Conversational Programming User’s Manual | 10/2017… -
Page 697
Programming recessing and undercutting: Show the soft-key row with special functions Press the TURNING PROGRAM FUNCTIONS soft Press the RECESS/ UNDERCUT soft key Press the GRV (recess) or UDC (undercut) soft HEIDENHAIN | TNC 640 | Conversational Programming User’s Manual | 10/2017… -
Page 698
Z coordinate, use a negative sign Example: Radial recess with depth=5, width=10, pos.= Z-15 21 L X+40 Z+0 22 L Z-30 23 GRV RADIAL CENTER-15 DEPTH-5 BREADTH10 CHF1 FAR_CHF1 24 L X+60 HEIDENHAIN | TNC 640 | Conversational Programming User’s Manual | 10/2017… -
Page 699
UDC THREAD: Thread undercut in compliance with DIN 76 The control always interprets undercuts as form elements in the longitudinal direction. No undercuts are possible in the plane direction. HEIDENHAIN | TNC 640 | Conversational Programming User’s Manual | 10/2017… -
Page 700
Example: Undercut form F with depth = 2, width = 15, depth of face = 1 21 L X+40 Z+0 22 L Z-30 23 UDC TYPE_F R1 DEPTH2 BREADTH15 FACEDEPTH1 24 L X+60 HEIDENHAIN | TNC 640 | Conversational Programming User’s Manual | 10/2017… -
Page 701
Example: Undercut form K with depth = 2, width = 15, opening angle = 30° 21 L X+40 Z+0 22 L Z-30 23 UDC TYPE_K R1 DEPTH3 ANG_WIDTH30 24 L X+60 HEIDENHAIN | TNC 640 | Conversational Programming User’s Manual | 10/2017… -
Page 702
Undercut angle Optional Example: Thread undercut according to DIN 76 with thread pitch = 2 21 L X+40 Z+0 22 L Z-30 23 UDC THREAD PITCH2 24 L X+60 HEIDENHAIN | TNC 640 | Conversational Programming User’s Manual | 10/2017… -
Page 703
Show the soft-key row with special functions Press the TURNING PROGRAM FUNCTIONS soft Press the FUNCTION TURNDATA soft key Press the TURNDATA BLANK soft key Press the BLANK OFF soft key HEIDENHAIN | TNC 640 | Conversational Programming User’s Manual | 10/2017… -
Page 704
Workpiece coordinate system and align tool Q497=+90 ;PRECESSION ANGLE Q498=+0 ;REVERSE TOOL Q530=+2 ;INCLINED MACHINING Q531=-25 ;ANGLE OF INCIDENCE Q532=750 ;FEED RATE Q533=+1 ;PREFERRED DIRECTION Q535=3 ;ECCENTRIC TURNING Q536=0 ;ECCENTRIC W/O STOP HEIDENHAIN | TNC 640 | Conversational Programming User’s Manual | 10/2017… -
Page 705
Use the cutter radius oversize DRS to leave an equidistant oversize on the contour. Use FUNCTION TCPM and REFPNT TIP-CENTER to measure the theoretical tool tip of the turning tools being used for this. HEIDENHAIN | TNC 640 | Conversational Programming User’s Manual | 10/2017… -
Page 706
30 CP PA-180 A+0 DR- 47 L X+100 Z-45 R0 FMAX Cancel radius compensation with R0 48 FUNCTION RESET TCPM Reset FUNCTION TCPM 49 FUNCTION MODE MILL 71 END PGM TURNSIMULTAN MM HEIDENHAIN | TNC 640 | Conversational Programming User’s Manual | 10/2017… -
Page 707
The COORD ROT and TABLE ROT functions, as well as SEQ refer to the XY plane. HEIDENHAIN recommends using the TURN positioning behavior. The MOVE positioning behavior is not the best option in combination with the facing slide. HEIDENHAIN | TNC 640 | Conversational Programming User’s Manual | 10/2017… -
Page 708
In the Manual operation mode, move the facing slide with the U axis key. As the Tilt the working plane function is possible, pay attention to the 3-D ROT status HEIDENHAIN | TNC 640 | Conversational Programming User’s Manual | 10/2017… -
Page 709
Enter enter the feed rate, if required Example 7 FACING HEAD POS Activating without clearance height 7 FACING HEAD POS HEIGHT+100 FMAX Activating with positioning to clearance height Z+100 at rapid traverse HEIDENHAIN | TNC 640 | Conversational Programming User’s Manual | 10/2017… -
Page 710
Press the SPEC FCT key Press the TURNING PROGRAM FUNCTIONS soft Press the FACING SLIDE soft key Press the ENT key Example 7 FUNCTION FACING HEAD OFF Deactivating the facing slide HEIDENHAIN | TNC 640 | Conversational Programming User’s Manual | 10/2017… -
Page 711
In turning mode it is not possible to insert replace- ment tools. If you define the overload reaction M, the control outputs an error message. POUT Entering the minimum load Pmin for tool breakage monitoring HEIDENHAIN | TNC 640 | Conversational Programming User’s Manual | 10/2017… -
Page 712
1 in the SENS column. Further information: «Tool wear monitoring», page 549 Further information: «Tool load monitoring», page 549 HEIDENHAIN | TNC 640 | Conversational Programming User’s Manual | 10/2017… -
Page 713
Manual Operation and Setup… -
Page 714
The control carries out a self-test. If the control does not register an error, it displays the Traverse reference points dialog. If the control registers an error, it issues an error message. HEIDENHAIN | TNC 640 | Conversational Programming User’s Manual | 10/2017… -
Page 715
Only confirm the pop-up window with YES if the axis positions match Despite confirmation, at first only move the axis carefully If there are discrepancies or you have any doubts, contact your machine tool builder HEIDENHAIN | TNC 640 | Conversational Programming User’s Manual | 10/2017… -
Page 716
Press and hold the axis direction button for each axis until the reference point has been traversed The control is now ready for operation in the Manual operation mode. HEIDENHAIN | TNC 640 | Conversational Programming User’s Manual | 10/2017… -
Page 717
If the machine does not have any absolute encoders, the position of the rotary axes must be confirmed. The position shown in the pop-up window is the last position before the control was switched off. HEIDENHAIN | TNC 640 | Conversational Programming User’s Manual | 10/2017… -
Page 718
Always shut down the control Only turn off the main switch after being prompted on the screen HEIDENHAIN | TNC 640 | Conversational Programming User’s Manual | 10/2017… -
Page 719
«Spindle speed S, feed rate F and miscellaneous function M», page 732 If a moving task is active on the machine, the control displays the control in operation symbol. HEIDENHAIN | TNC 640 | Conversational Programming User’s Manual | 10/2017… -
Page 720
If you are in the Jog increment menu, you can switch off incremental jog positioning with the SWITCH OFF soft key. The input range for the infeed is from 0.001 mm to 10 mm. HEIDENHAIN | TNC 640 | Conversational Programming User’s Manual | 10/2017… -
Page 721
An active handwheel must be deactivated before another handwheel can be selected. Refer to your machine manual. This feature must be enabled and adapted by the machine tool builder. HEIDENHAIN | TNC 640 | Conversational Programming User’s Manual | 10/2017… -
Page 722
NC STOP key (machine-dependent function, key can be exchanged by the machine manufacturer) Handwheel Spindle speed potentiometer Feed rate potentiometer Cable connection, not available with the HR 550FS wireless handwheel HEIDENHAIN | TNC 640 | Conversational Programming User’s Manual | 10/2017… -
Page 723
STEP ON or OFF: Incremental jog active or inactive. If the function is active, the control additionally displays the current traversing step Soft-key row: Selection of various functions, described in the following sections HEIDENHAIN | TNC 640 | Conversational Programming User’s Manual | 10/2017… -
Page 724
If this happens you must reduce the distance to the handwheel holder in which the radio receiver is integrated. HEIDENHAIN | TNC 640 | Conversational Programming User’s Manual | 10/2017… -
Page 725
To save the configuration and exit the configuration menu, press END The MOD operating mode includes a function for commissioning and configuring the handwheel. Further information: «Configuring the HR 550FS wireless handwheel», page 877 HEIDENHAIN | TNC 640 | Conversational Programming User’s Manual | 10/2017… -
Page 726
(only when incremental jog is not active). Selectable sensitivity levels: 0.001/0.002/0.005/0.01/0.02/0.05/0.1/0.2/0.5/1 [mm/revolution or degrees/revolution] Selectable sensitivity levels: 0.00005/0.001/0.002/0.004/0.01/0.02/0.03 [in mm/revolution or degrees/revolution] HEIDENHAIN | TNC 640 | Conversational Programming User’s Manual | 10/2017… -
Page 727
Move the active axis in the negative direction with the — key To deactivate the handwheel, press the handwheel key on the HR 5xx Now you can operate the control via the operating panel again. HEIDENHAIN | TNC 640 | Conversational Programming User’s Manual | 10/2017… -
Page 728
Press the KBD soft key to activate the potentiometers of the machine operating panel The control issues a warning if the handwheel potentiometers are still active after the handwheel has been deactivated. HEIDENHAIN | TNC 640 | Conversational Programming User’s Manual | 10/2017… -
Page 729
10. By also pressing the CTRL key, you can increase the counting increment by a factor of 100 when pressing F1 or F2. HEIDENHAIN | TNC 640 | Conversational Programming User’s Manual | 10/2017… -
Page 730
NC block after which the new traversing block is to be inserted Activate the handwheel Press the Generate NC block key on the handwheel The control inserts a complete traversing block containing all axis positions selected through the MOD function. HEIDENHAIN | TNC 640 | Conversational Programming User’s Manual | 10/2017… -
Page 731
Further information: «Returning to the contour», page 839 On/off switch for the Tilt working plane function (handwheel soft keys MOP and then 3D) HEIDENHAIN | TNC 640 | Conversational Programming User’s Manual | 10/2017… -
Page 732
When 3D ROT is active the machining feed rate is shown if several axes are moved If 3D ROT is not active, the feed drive display remains empty if several axes are moved HEIDENHAIN | TNC 640 | Conversational Programming User’s Manual | 10/2017… -
Page 733
To activate the feed rate limit F MAX, proceed as follows: Operating mode: Press the Positioning w/ Manual Data Input key Press the F MAX soft key Enter the desired maximum feed rate Press the OK soft key HEIDENHAIN | TNC 640 | Conversational Programming User’s Manual | 10/2017… -
Page 734
In this chapter you will find explanations of the functions that are additionally available on a control with functional safety. HEIDENHAIN | TNC 640 | Conversational Programming User’s Manual | 10/2017… -
Page 735
Safe operating stop. Provides protection against unexpected start of the drives Safely-limited speed. Prevents the drives from exceeding the specified speed limits when the protective door is opened HEIDENHAIN | TNC 640 | Conversational Programming User’s Manual | 10/2017… -
Page 736
Icon Safety-related operating mode SOM_1 operating mode active SOM_2 operating mode active SOM_3 mode active SOM_4 mode active HEIDENHAIN | TNC 640 | Conversational Programming User’s Manual | 10/2017… -
Page 737
If necessary, move to a safe position before approaching the test positions Watch out for possible collisions Refer to your machine manual. The location of the test position is specified by your machine tool builder. HEIDENHAIN | TNC 640 | Conversational Programming User’s Manual | 10/2017… -
Page 738
SOM_1 is active, the axes and spindles are brought to a stop, because only then will you be allowed to open the guard doors in SOM_1. Select the Manual operation mode Shift the soft-key row Switch on/off feed rate limit HEIDENHAIN | TNC 640 | Conversational Programming User’s Manual | 10/2017… -
Page 739
Never change the number of rows in the copied tables! If you want to reactivate the table, this may lead to problems. To activate the preset table copied to another directory you have to copy it back to the TNC:table directory HEIDENHAIN | TNC 640 | Conversational Programming User’s Manual | 10/2017… -
Page 740
If the preset set manually is active, the control displays the text PR MAN(0) in the status display. HEIDENHAIN | TNC 640 | Conversational Programming User’s Manual | 10/2017… -
Page 741
(the row number is the preset number) If needed, select the column in the preset table that you want to change Use the soft keys to select one of the available entry possibilities HEIDENHAIN | TNC 640 | Conversational Programming User’s Manual | 10/2017… -
Page 742
If inch display is active: Enter the value in inches, and the control will internally convert the entered values to mm HEIDENHAIN | TNC 640 | Conversational Programming User’s Manual | 10/2017… -
Page 743
(2nd soft-key row) Insert a single line at the end of the table (2nd soft- key row) Delete a single line at the end of the table (2nd soft-key row) HEIDENHAIN | TNC 640 | Conversational Programming User’s Manual | 10/2017… -
Page 744
Press the LOCK / UNLOCK PASSWORD soft key Enter the password in the pop-up window Confirm with the OK soft key or with the ENT key: The control writes ### in the LOCKED column. HEIDENHAIN | TNC 640 | Conversational Programming User’s Manual | 10/2017… -
Page 745
Press the LOCK / UNLOCK PASSWORD soft key Enter the password in the pop-up window Confirm with the OK soft key or with the ENT key The control rescinds the write-protection. HEIDENHAIN | TNC 640 | Conversational Programming User’s Manual | 10/2017… -
Page 746
Use Cycle 247 in order to activate presets from the preset table during program run. In Cycle 247 you define the number of the preset to be activated. Further information: Cycle Programming User’s Manual HEIDENHAIN | TNC 640 | Conversational Programming User’s Manual | 10/2017… -
Page 747
If the tool in the tool axis has already been set, set the display of the tool axis to the length L of the tool or enter the sum Z=L+d. HEIDENHAIN | TNC 640 | Conversational Programming User’s Manual | 10/2017… -
Page 748
If you try to set a preset in a locked axis, the control will issue either a warning or an error message, depending on what the machine tool builder has defined. HEIDENHAIN | TNC 640 | Conversational Programming User’s Manual | 10/2017… -
Page 749
Always set a preset in all three principal axes. This clearly and correctly defines the preset. That way you also taken into account possible deviations resulting from the tilting of the axes. HEIDENHAIN | TNC 640 | Conversational Programming User’s Manual | 10/2017… -
Page 750
Setting the preset on any axis Set a corner as preset Set a circle center as preset Setting the centerline as preset Touch probe system data See Cycle Program- management ming User’s Manual HEIDENHAIN | TNC 640 | Conversational Programming User’s Manual | 10/2017… -
Page 751
The control closes the pop-up window. Probe the second touch point If necessary, set the preset End the probing function If the handwheel is active you cannot start the probing cycles. HEIDENHAIN | TNC 640 | Conversational Programming User’s Manual | 10/2017… -
Page 752
Probe hole (inside circle) automatically Probe stud (outside circle) automatically Probe a model circle (center point of several elements) Select a paraxial probing direction for probing of holes, studs and model circles HEIDENHAIN | TNC 640 | Conversational Programming User’s Manual | 10/2017… -
Page 753
Number of touch Number of probing operations (3 to points? Angular length? Probing a full circle (360°) or a circle segment (angular length<360°) Automatic probing routine: Pre-position touch probe HEIDENHAIN | TNC 640 | Conversational Programming User’s Manual | 10/2017…
 -
Page 754
Take the starting angle of the first probing process into account in pre-positioning; for example, at a starting angle of 0° the control will first probe in the positive direction of the reference axis. HEIDENHAIN | TNC 640 | Conversational Programming User’s Manual | 10/2017… -
Page 755
FN16DefaultPath (no. 102202), the control will store the TCHPRMAN.html file in the TNC: main directory. Operating notes: If you run several touch probes cycles in a row, the control stores the measured values below each other. HEIDENHAIN | TNC 640 | Conversational Programming User’s Manual | 10/2017… -
Page 756
Enter the datum number in the Number in table? input field Press the ENTER IN DATUM TABLE soft key The control saves the datum in the indicated datum table under the entered number. HEIDENHAIN | TNC 640 | Conversational Programming User’s Manual | 10/2017… -
Page 757
ENTRY IN LOCKED LINE soft key and enter the password to overwrite the active preset The control displays a note if a table row cannot be written to because of disabling. The probing function itself is not interrupted. HEIDENHAIN | TNC 640 | Conversational Programming User’s Manual | 10/2017… -
Page 758
Measure the radius and the center offset using a stud or a calibration pin Measure the radius and the center offset using a calibration sphere 3-D calibrating (option 92) HEIDENHAIN | TNC 640 | Conversational Programming User’s Manual | 10/2017… -
Page 759
Press the OK soft key for the values to take effect Press the CANCEL soft key to terminate the calibrating function. The control logs the calibration process in the TCHPRMAN.html file. HEIDENHAIN | TNC 640 | Conversational Programming User’s Manual | 10/2017… -
Page 760
180°, and then executes another probing routine. The center offset (CAL_OF in tchprobe.tp) is determined in addition to the radius by probing from opposite orientations. HEIDENHAIN | TNC 640 | Conversational Programming User’s Manual | 10/2017… -
Page 761
The control logs the calibration process in the TCHPRMAN.html file. Refer to your machine manual. In order to be able to determine ball-tip center misalignment, the control needs to be specially prepared by the machine manufacturer. HEIDENHAIN | TNC 640 | Conversational Programming User’s Manual | 10/2017… -
Page 762
The control logs the calibration process in the TCHPRMAN.html file. Refer to your machine manual. In order to be able to determine ball-tip center misalignment, the control needs to be specially prepared by the machine manufacturer. HEIDENHAIN | TNC 640 | Conversational Programming User’s Manual | 10/2017… -
Page 763
The control logs the calibration process in the TCHPRMAN.html file. Refer to your machine manual. In order to be able to determine ball-tip center misalignment, the control needs to be specially prepared by the machine manufacturer. HEIDENHAIN | TNC 640 | Conversational Programming User’s Manual | 10/2017… -
Page 764
This is regardless of whether you want to use a touch-probe cycle in automatic mode or Manual operation mode. For more information about the touch probe table, refer to the User’s Manual for Cycle Programming HEIDENHAIN | TNC 640 | Conversational Programming User’s Manual | 10/2017… -
Page 765
SET BASIC ROTATION or SET TABLE ROTATION soft key. The behavior of the control during presetting depends on the setting in the machine parameter chkTiltingAxes (no. 204601). Further information: «Introduction», page 749 HEIDENHAIN | TNC 640 | Conversational Programming User’s Manual | 10/2017… -
Page 766
Press the BASIC ROT. IN PRESET TABLE soft key If appropriate, the control opens the Overwrite active preset? menu. Press the OVERWRITE PRESET soft key The control saves the basic rotation in the preset table. HEIDENHAIN | TNC 640 | Conversational Programming User’s Manual | 10/2017… -
Page 767
The control deletes the basic rotation from the preset table, and inserts the offset. Or press KEEP BASIC ROT. The control inserts the offset in the preset table, and the basic rotation also remains. HEIDENHAIN | TNC 640 | Conversational Programming User’s Manual | 10/2017… -
Page 768
Or enter Offset of rotary table: 0 Apply with the SET BASIC ROTATION soft key Or apply with the SET TABLE ROTATION soft key To terminate the probe function, press the END soft key HEIDENHAIN | TNC 640 | Conversational Programming User’s Manual | 10/2017… -
Page 769
2nd point is on the reference axis, in a positive direction from the first point 3rd point is on the minor axis, in a positive direction of the desired workpiece coordinate system HEIDENHAIN | TNC 640 | Conversational Programming User’s Manual | 10/2017… -
Page 770
Press the BASIC ROT. IN PRESET TABLE soft key To terminate the probe function, press the END soft key The control saves the 3-D basic rotation in the columns SPA, SPB, and SPC of the preset table. HEIDENHAIN | TNC 640 | Conversational Programming User’s Manual | 10/2017… -
Page 771
Select the probe function by pressing the PROBING PL soft key Enter 0 for all angles Press the SET BASIC ROTATION soft key To terminate the probe function, press the END soft key HEIDENHAIN | TNC 640 | Conversational Programming User’s Manual | 10/2017… -
Page 772
With an active datum shift the determined value is with respect to the current preset (possibly a manual preset from the Manual operation mode). The datum shift is included in the position display. HEIDENHAIN | TNC 640 | Conversational Programming User’s Manual | 10/2017… -
Page 773
756 Further information: «Writing measured values from the touch-probe cycles to the preset table», page 757 To terminate the probe function, press the END soft key HEIDENHAIN | TNC 640 | Conversational Programming User’s Manual | 10/2017… -
Page 774
756 Further information: «Writing measured values from the touch-probe cycles to the preset table», page 757 To terminate the probe function, press the END soft key HEIDENHAIN | TNC 640 | Conversational Programming User’s Manual | 10/2017… -
Page 775
If you activate the offset, the control automatically writes the positions and the offset or only the positions to the preset table. HEIDENHAIN | TNC 640 | Conversational Programming User’s Manual | 10/2017… -
Page 776
The control needs at least three touch points to calculate outside or inside circles, e.g. with circle segments. More precise results are obtained with four touch points. If possible, always pre-position the touch probe to the center. HEIDENHAIN | TNC 640 | Conversational Programming User’s Manual | 10/2017… -
Page 777
To terminate the probe function, press the END soft key Once the probing routine is completed, the control displays the current coordinates of the circle center and the circle radius. HEIDENHAIN | TNC 640 | Conversational Programming User’s Manual | 10/2017… -
Page 778
756 Further information: «Writing measured values from the touch-probe cycles to the preset table», page 757 To terminate the probe function, press the END soft key HEIDENHAIN | TNC 640 | Conversational Programming User’s Manual | 10/2017… -
Page 779
This way you can determine the positions once, and then store them in the principal axis as well as in the secondary axis. HEIDENHAIN | TNC 640 | Conversational Programming User’s Manual | 10/2017… -
Page 780
Finding the coordinates of a corner point on the working plane Find the coordinates of the corner point. Further information: «Corner as preset», page 774 The control displays the coordinates of the probed corner as preset. HEIDENHAIN | TNC 640 | Conversational Programming User’s Manual | 10/2017… -
Page 781
You can measure The angle between the angle reference axis and a workpiece edge; or the angle between two sides The measured angle is displayed as a value of max. 90°. HEIDENHAIN | TNC 640 | Conversational Programming User’s Manual | 10/2017… -
Page 782
PA between the workpiece edges as the rotation angle Cancel the basic rotation, or restore the previous basic rotation by setting the rotation angle to the value that you wrote down previously HEIDENHAIN | TNC 640 | Conversational Programming User’s Manual | 10/2017… -
Page 783
(option 8)», page 587 The control functions for tilting the working plane are coordinate transformations. The working plane is always perpendicular to the direction of the tool axis. HEIDENHAIN | TNC 640 | Conversational Programming User’s Manual | 10/2017… -
Page 784
(3-D tool length compensation). The control only supports the Tilt working plane function in combination with the spindle axis Z. HEIDENHAIN | TNC 640 | Conversational Programming User’s Manual | 10/2017… -
Page 785
Limitations on working with the tilting function The Actual-position capture function is not allowed if the Tilt working plane function is active PLC positioning (determined by the machine tool builder) is not possible. HEIDENHAIN | TNC 640 | Conversational Programming User’s Manual | 10/2017… -
Page 786
Cycle 19 WORKING PLANE or the PLANE function in the machining program, the angle values defined there are in effect. Angle values entered in the menu will be overwritten. HEIDENHAIN | TNC 640 | Conversational Programming User’s Manual | 10/2017… -
Page 787
Tilt working plane menu. Even if the 3D-ROT dialog in the Manual operation mode is set to Active, resetting the tilting (PLANE RESET) with an active basic transformation still functions correctly. HEIDENHAIN | TNC 640 | Conversational Programming User’s Manual | 10/2017… -
Page 788
The behavior of the control during presetting depends on the setting in the optional machine parameter chkTiltingAxes (no. 204601): Further information: «Introduction», page 749 HEIDENHAIN | TNC 640 | Conversational Programming User’s Manual | 10/2017… -
Page 789
As well as option number 136, a HEIDENHAIN camera system is required for VSC functions. You must create an adequate number of reference images to allow the system to compare the situation reliably. HEIDENHAIN | TNC 640 | Conversational Programming User’s Manual | 10/2017… -
Page 790
In this phase, the control only issues a warning if it finds a deviation when comparing images. HEIDENHAIN | TNC 640 | Conversational Programming User’s Manual | 10/2017… -
Page 791
Show current camera view Produce live image Open VSC file manager The control shows the data saved for Cycle 600 and Cycle 601. Open camera cover Close camera cover HEIDENHAIN | TNC 640 | Conversational Programming User’s Manual | 10/2017… -
Page 792
Configuring the field of view of the camera Refer to your machine manual. These settings can only be made after entering a code number. Go back to the previous screen HEIDENHAIN | TNC 640 | Conversational Programming User’s Manual | 10/2017… -
Page 793
All images: Display all images for this monitoring file Reference images: Only display reference images Images with error: Display all images where you have highlighted an error HEIDENHAIN | TNC 640 | Conversational Programming User’s Manual | 10/2017… -
Page 794
Change monitoring area or highlight an error Further information: «Configuration», page 795 Go back to the previous screen If you change the configuration, the control carries out an image evaluation. HEIDENHAIN | TNC 640 | Conversational Programming User’s Manual | 10/2017… -
Page 795
The control indicates the clicked area with a frame. Shift the area if required by holding down the mouse button You can fix the drawn area by double-clicking it, thereby protecting it from unintentional shifting. HEIDENHAIN | TNC 640 | Conversational Programming User’s Manual | 10/2017… -
Page 796
You have changed the monitoring data, monitoring is more sensitive. Blank circle: No error message: All deviations saved in the image have been recognized, monitoring has not identified any conflicts. HEIDENHAIN | TNC 640 | Conversational Programming User’s Manual | 10/2017… -
Page 797
Positioning with Manual Data Input… -
Page 798
Editing an NC block Modifying Q parameter values with the Q INFO soft key Switching the operating modes Restore the contextual reference via repetition of the required NC blocks HEIDENHAIN | TNC 640 | Conversational Programming User’s Manual | 10/2017… -
Page 799
172 You can control and modify Q parameters with the soft keys Q PARAMETER LIST and Q INFO. Further information: «Checking and changing Q parameters», page 388 HEIDENHAIN | TNC 640 | Conversational Programming User’s Manual | 10/2017… -
Page 800
Call the DRILLING cycle 6 L Z+200 R0 FMAX M2 Retract the tool 7 END PGM $MDI MM End of program Straight-line function: Further information: «Straight line L», page 299 HEIDENHAIN | TNC 640 | Conversational Programming User’s Manual | 10/2017… -
Page 801
Select the rotary table axis, enter the rotation angle and feed rate you wrote down, e.g. L C +2.561 F50 Conclude entry Press the NC Start button: The rotation of the table corrects the misalignment HEIDENHAIN | TNC 640 | Conversational Programming User’s Manual | 10/2017… -
Page 802
$MDI file, e.g.Hole Press the OK soft key. To exit the file manager, press the END soft key Further information: «Copying a single file», page 183 HEIDENHAIN | TNC 640 | Conversational Programming User’s Manual | 10/2017… -
Page 803
Test Run and Program Run… -
Page 804
MOD menu Graphic settings you and decrease the Model quality and in that way increase the speed of simulation. If you are using a TNC 640 with touch control, you can replace some keystrokes with hand-to-screen contact. Further information: «Operating the Touchscreen»,… -
Page 805
You can also set the simulation speed before you start a program: Select the function for setting the simulation speed Select the desired function by soft key, e.g. incrementally increasing the simulation speed HEIDENHAIN | TNC 640 | Conversational Programming User’s Manual | 10/2017… -
Page 806
Volume view and tool paths Tool paths Limitations during program run The simulation may contain errors if the control’s computing capacity is being fully utilized for complex machining tasks. HEIDENHAIN | TNC 640 | Conversational Programming User’s Manual | 10/2017… -
Page 807
The high-resolution 3-D view enables you to display the surface of the machined workpiece in greater detail. Using a simulated light source, the control creates realistic light and shadow conditions. Press the 3-D view soft key HEIDENHAIN | TNC 640 | Conversational Programming User’s Manual | 10/2017… -
Page 808
To return to the standard display: Press the shift key and simultaneously double-click with the right mouse key. The rotation angle is maintained if you only double-click with the right mouse key HEIDENHAIN | TNC 640 | Conversational Programming User’s Manual | 10/2017… -
Page 809
Activate measuring If measuring is activated, the control shows the corresponding coordinates in close proxim- ity if you position the mouse cursor on the 3-D graphics of the workpiece. HEIDENHAIN | TNC 640 | Conversational Programming User’s Manual | 10/2017… -
Page 810
A powerful zoom function is available in order for you to quickly recognize the details for the displayed tool paths. The control displays traverse movements in rapid traverse in red. HEIDENHAIN | TNC 640 | Conversational Programming User’s Manual | 10/2017… -
Page 811
Select projection in three planes in the operating modes Program run, single block and Program run, full sequence: Press the GRAPHICS soft key Press the View on 3 Planes soft key HEIDENHAIN | TNC 640 | Conversational Programming User’s Manual | 10/2017… -
Page 812
The sectional plan is automatically reset when the control is restarted. You can also move the sectional plane to its default position manually: Press the soft key for resetting the sectional planes soft key HEIDENHAIN | TNC 640 | Conversational Programming User’s Manual | 10/2017… -
Page 813
Function Program run, full sequence / Program run, single block Test Run The control displays the tool in various colors: Red: Tool is in effect Blue: Tool is retracted HEIDENHAIN | TNC 640 | Conversational Programming User’s Manual | 10/2017… -
Page 814
Select the desired function via soft key, e.g.,saving the displayed time Soft key Stopwatch functions Store displayed time Display the sum of stored time and displayed time Clear displayed time HEIDENHAIN | TNC 640 | Conversational Programming User’s Manual | 10/2017… -
Page 815
Display the current traverse range This shows the traverse ranges config- ured by the machine tool builder and can be selected accordingly. Switch monitoring function on or off Display machine reference point HEIDENHAIN | TNC 640 | Conversational Programming User’s Manual | 10/2017… -
Page 816
With BLK FORM CYLINDER, a cuboid is depicted as the workpiece blank in the working space With BLK FORM ROTATION , no workpiece blanks is depicted in the working space HEIDENHAIN | TNC 640 | Conversational Programming User’s Manual | 10/2017… -
Page 817
NC program in pages: Soft key Functions Go back one screen in the NC program Go forward one screen in the NC — program Select start of program Select end of program HEIDENHAIN | TNC 640 | Conversational Programming User’s Manual | 10/2017… -
Page 818
Program a safe intermediate position after the tool change and before prepositioning Carefully test the NC program in the Program run, single block operating mode If possible, use the Dynamic Collision Monitoring (DCM) function HEIDENHAIN | TNC 640 | Conversational Programming User’s Manual | 10/2017… -
Page 819
Test Run operating mode. This macro will simulate the exact behavior of the machine. In doing so, the machine tool builder often changes the simulated tool change position. HEIDENHAIN | TNC 640 | Conversational Programming User’s Manual | 10/2017… -
Page 820
«Showing the workpiece blank in the working space «, page 815 Operating mode: Press the Test Run key Call the file manager with the PGM MGT key and select the file you wish to test HEIDENHAIN | TNC 640 | Conversational Programming User’s Manual | 10/2017… -
Page 821
In order to continue the test, the following actions must not be performed: Selecting another block with the arrow keys or the GOTO key Making changes to the program Selecting a new program HEIDENHAIN | TNC 640 | Conversational Programming User’s Manual | 10/2017… -
Page 822
Modification before the interruption point: The simulation restarts at the beginning Modification after the interruption point: Positioning at the interruption point is possible with GOTO HEIDENHAIN | TNC 640 | Conversational Programming User’s Manual | 10/2017… -
Page 823
Starting the program run from a certain block Optional block skip Edit the tool table TOOL.T Checking and changing Q parameters Superimpose handwheel positioning Functions for graphic simulation Additional status display HEIDENHAIN | TNC 640 | Conversational Programming User’s Manual | 10/2017… -
Page 824
Program Run, Full Sequence Start the machining program with the NC Start key Program Run, Single Block Start each block of the machining program individually with the NC Start key HEIDENHAIN | TNC 640 | Conversational Programming User’s Manual | 10/2017… -
Page 825
Change setting for the optional programmed interruption with Change setting for the programmed skipping of NC blocks with During major errors, the control automatically aborts the program run (e.g., during a cycle call with stationary spindle). HEIDENHAIN | TNC 640 | Conversational Programming User’s Manual | 10/2017… -
Page 826
Refer to your machine manual. The miscellaneous function M6 may also lead to a suspension of the program run. The machine manufacturer sets the functional scope of the miscellaneous functions. HEIDENHAIN | TNC 640 | Conversational Programming User’s Manual | 10/2017… -
Page 827
The control shows the symbol for the exited inactive status in the status display Actions such as a change of operating mode are available again HEIDENHAIN | TNC 640 | Conversational Programming User’s Manual | 10/2017… -
Page 828
On some machines you may have to press the NC start key after the MANUAL TRAVERSE soft key to enable the axis direction keys. Refer to your machine manual. HEIDENHAIN | TNC 640 | Conversational Programming User’s Manual | 10/2017… -
Page 829
With an erasable error message: Remove the cause of the error Clear the error message from the screen: Press the CE key Restart the program, or resume program run where it was interrupted HEIDENHAIN | TNC 640 | Conversational Programming User’s Manual | 10/2017… -
Page 830
The control selects the mode of traverse and the associated parameters automatically. If the traverse mode or the parameters have not been correctly preselected, you are unable to reset them manually. HEIDENHAIN | TNC 640 | Conversational Programming User’s Manual | 10/2017… -
Page 831
Right-handed thread: the main spindle turns clockwise when moving into the workpiece, counter-clockwise when retracting from it; left-handed thread: main spindle turns counter-clockwise when moving into the workpiece and clockwise when retracting from it HEIDENHAIN | TNC 640 | Conversational Programming User’s Manual | 10/2017… -
Page 832
YES soft key. The control hides Retraction selectedmode. Initialize the machine: if required, cross the reference points Establish the desired machine condition: If required, reset the tilted working plane HEIDENHAIN | TNC 640 | Conversational Programming User’s Manual | 10/2017… -
Page 833
The BLOCK SCAN function must not be used in conjunction with the following functions: Active stretch filter Touch probe cycles 0, 1, 3, and 4 during the search phase of mid-program startup HEIDENHAIN | TNC 640 | Conversational Programming User’s Manual | 10/2017… -
Page 834
After an internal stop, you would like to start in block 12 in the third machining operation of LBL 1. In the pop-up window enter the following data: Start-up at: N =12 Repetitions = 3 HEIDENHAIN | TNC 640 | Conversational Programming User’s Manual | 10/2017… -
Page 835
Press the CONTINUE BLOCK SCAN soft key Enter the NC block where you wish to start If you changed the machine status: Press the NC Start key Press the NC Start key HEIDENHAIN | TNC 640 | Conversational Programming User’s Manual | 10/2017… -
Page 836
Repetitions = 1 Press the NC start key until the control runs the NC block The control continues to run the subprogram and then returns to the main program. HEIDENHAIN | TNC 640 | Conversational Programming User’s Manual | 10/2017… -
Page 837
Enter the desired point number in the Point number = input field. The first point in the point pattern has the point number 0. HEIDENHAIN | TNC 640 | Conversational Programming User’s Manual | 10/2017… -
Page 838
Press the ADVANCED soft key if required The control expands the pop-up window. Press the SELECT LAST BLOCK soft key to select the last saved interruption Press the NC Start key HEIDENHAIN | TNC 640 | Conversational Programming User’s Manual | 10/2017… -
Page 839
Repeat the process for all axes If the tool is located in the tool axis below the starting point, then the control offers the tool axis as the first traverse direction. HEIDENHAIN | TNC 640 | Conversational Programming User’s Manual | 10/2017… -
Page 840
Time (hrs:min:sec): Time of day at which the program is to be started Date (DD.MM.YYYY): Date on which the program is to be started To activate the start, press the OK HEIDENHAIN | TNC 640 | Conversational Programming User’s Manual | 10/2017… -
Page 841
Press the INSERT soft key Delete / symbol In the Programming mode you select the block in which the character is to be erased Press the REMOVE soft key HEIDENHAIN | TNC 640 | Conversational Programming User’s Manual | 10/2017… -
Page 842
Do not interrupt Program run or Test Run with blocks containing M1: Set the soft key to OFF Interrupt Program run or Test Run with blocks containing M1: Set the soft key to ON HEIDENHAIN | TNC 640 | Conversational Programming User’s Manual | 10/2017… -
Page 843
MOD Functions… -
Page 844
END key. Exiting MOD functions Exit the MOD functions: Press the END soft key or the END key HEIDENHAIN | TNC 640 | Conversational Programming User’s Manual | 10/2017… -
Page 845
System settings Set the system time Define the network connection Network: IP configuration Diagnostic functions Bus diagnosis Diagnosis of Drives HEROS information General information Version information License information Machine times HEIDENHAIN | TNC 640 | Conversational Programming User’s Manual | 10/2017… -
Page 846
High High data transfer rate, exact depiction of tool geometry Medium Medium data transfer rate, approximation of tool geometry Low data transfer rate, coarse approximation of tool geometry HEIDENHAIN | TNC 640 | Conversational Programming User’s Manual | 10/2017… -
Page 847
You can change the Counter settings via soft key as follows: Soft key Meaning Reset count Increase count Lower count You can also enter the values directly with a connected mouse. Further information: «Defining a counter», page 564 HEIDENHAIN | TNC 640 | Conversational Programming User’s Manual | 10/2017… -
Page 848
Proceed as follows to restrict external access: In the MOD menu, select the Machine settings group Select the External access menu Set the EXTERNAL ACCESS ON/OFF soft key to OFF Press the OK soft key HEIDENHAIN | TNC 640 | Conversational Programming User’s Manual | 10/2017… -
Page 849
Never Deny continuously Deny once In the overview list, an active connection is shown with a green symbol. Connections without access rights are shown gray in the overview list. HEIDENHAIN | TNC 640 | Conversational Programming User’s Manual | 10/2017… -
Page 850
The settings are kept even after the control has been restarted. You can only deactivate the protection zone by deleting all values or pressing the EMPTY EVERYTHING soft key. HEIDENHAIN | TNC 640 | Conversational Programming User’s Manual | 10/2017… -
Page 851
Select the Tool-usage file menu Select the desired setting for the Program Run, Full Sequence/ Single Block and Test Run operating modes Press the APPLY soft key Press the OK soft key HEIDENHAIN | TNC 640 | Conversational Programming User’s Manual | 10/2017… -
Page 852
MOD function. When you select a kinematics model for the test run this does not affect machine kinematics. Ensure that you have selected the correct kinematics in the Test Run operating mode for checking your workpiece. HEIDENHAIN | TNC 640 | Conversational Programming User’s Manual | 10/2017… -
Page 853: System Settings
Press the NTP off soft key in order to select the Synchronize the time over NTP server entry Enter hostnames or the URL of an TNP server Press the Add soft key Press the OK soft key HEIDENHAIN | TNC 640 | Conversational Programming User’s Manual | 10/2017…
-
Page 854
REF ACTL Reference position; actual position relative to the machine datum REF NOML Reference position; nominal position relative to the machine datum Servo lag; difference between nominal and actual positions HEIDENHAIN | TNC 640 | Conversational Programming User’s Manual | 10/2017… -
Page 855
With the MOD function Position display 1, you can select the position display in the status display. With the MOD function Position display 2, you can select the position display in the additional status display. HEIDENHAIN | TNC 640 | Conversational Programming User’s Manual | 10/2017… -
Page 856
Program run Duration of controlled operation since being put into service Refer to your machine manual. The machine tool builder can provide further operating time displays. HEIDENHAIN | TNC 640 | Conversational Programming User’s Manual | 10/2017… -
Page 857
The control requires a code number for the following functions: Function Code number Select user parameters Configuring an Ethernet card NET123 Enabling special functions for Q parameter 555343 programming HEIDENHAIN | TNC 640 | Conversational Programming User’s Manual | 10/2017… -
Page 858
Open the RS232 folder. The control then displays the following settings: Set BAUD RATE (baud rate no. 106701) You can set the BAUD RATE (data transfer speed) from 110 to 115 200 baud. HEIDENHAIN | TNC 640 | Conversational Programming User’s Manual | 10/2017… -
Page 859
Set stop bits (stopBits no. 106705) The start bit and one or two stop bits enable the receiver to synchronize each transmitted character during serial data transmission. HEIDENHAIN | TNC 640 | Conversational Programming User’s Manual | 10/2017… -
Page 860
With the state of the RTS line (optional), you can define whether the LOW level is active in idle state. TRUE: Level is LOW in idle state FALSE: Level is not LOW in idle state HEIDENHAIN | TNC 640 | Conversational Programming User’s Manual | 10/2017… -
Page 861
Data bits in each transferred 7 bits character Type of parity checking EVEN Number of stop bits 1 stop bit Specify type of handshake: RTS_CTS File system for file operations HEIDENHAIN | TNC 640 | Conversational Programming User’s Manual | 10/2017… -
Page 862
Starting TNCremo under Windows Click on <Start>, <Programs>, <HEIDENHAIN Applications>, <TNCremo> When you start TNCremo for the first time, it automatically tries to set up a connection with the control. HEIDENHAIN | TNC 640 | Conversational Programming User’s Manual | 10/2017… -
Page 863
Further information: «Available tool types», page 276 End TNCremo Select <File>, <Exit> You can open the context-sensitive help function of the TNCremo software by pressing the F1 key. HEIDENHAIN | TNC 640 | Conversational Programming User’s Manual | 10/2017… -
Page 864
Only active if a second, optional Ethernet interface is avail- able on the control hardware Computer Name displayed for the control in your compa- name ny network HEIDENHAIN | TNC 640 | Conversational Programming User’s Manual | 10/2017… -
Page 865
Only activate this function if the optionally available second Ethernet interface should be accessed externally for diagnostic purposes via the control. Only do so after instruction by our Service Department HEIDENHAIN | TNC 640 | Conversational Programming User’s Manual | 10/2017… -
Page 866
Option Manually configure the default gateway: Manually enter the IP addresses of the default gateway Apply the changes with the OK button, or discard them with the Cancel button HEIDENHAIN | TNC 640 | Conversational Programming User’s Manual | 10/2017… -
Page 867
Ask your network specialist for the proper value Group ID: Definition of the group identification with which you access files in the network. Ask your network specialist for the proper value HEIDENHAIN | TNC 640 | Conversational Programming User’s Manual | 10/2017… -
Page 868
IP address in the machine network. You can also select settings for these devices. Advanced options button: Additional settings for the DNS/DHCP server. Set stan- dard values button: Set factory settings. HEIDENHAIN | TNC 640 | Conversational Programming User’s Manual | 10/2017… -
Page 869
Status log Display of status information and error messages. Press the Clear button to delete the contents of the Status Log window. HEIDENHAIN | TNC 640 | Conversational Programming User’s Manual | 10/2017… -
Page 870
Set the Active option to enable the firewall Press the Set standard values button to activate the default settings recommended by HEIDENHAIN. Exit the dialog with the OK button. HEIDENHAIN | TNC 640 | Conversational Programming User’s Manual | 10/2017… -
Page 871
TeleService programs from HEIDENHAIN (e.g. screenshot). If this service is blocked, the VNC configuration dialog shows a warning from HEROS that VNC is disabled in the firewall. HEIDENHAIN | TNC 640 | Conversational Programming User’s Manual | 10/2017… -
Page 872
IP address for a host name in the firewall. Advanced options These settings are only intended for your network specialists Set standard Resets the settings to the default values values recommended by HEIDENHAIN HEIDENHAIN | TNC 640 | Conversational Programming User’s Manual | 10/2017… -
Page 873
Remove the battery from the touch probe Insert the battery into the touch probe The control connects to the touch probe and creates a new row in the table HEIDENHAIN | TNC 640 | Conversational Programming User’s Manual | 10/2017… -
Page 874
The control creates a new row in the table. If necessary, highlight the row with the cursor Enter the touch probe data on the right side The control immediately saves the entered data in the machine parameters. HEIDENHAIN | TNC 640 | Conversational Programming User’s Manual | 10/2017… -
Page 875
You only need to change the signal strength if there is interference. Select the strength of the radio signal You only need to change the signal strength if there is interference. HEIDENHAIN | TNC 640 | Conversational Programming User’s Manual | 10/2017… -
Page 876
Stylus deflected or not deflected Collision Collision or no collision recognized Battery status Display of the battery quality If the charge is less than the displayed bar, then the control outputs a warning. HEIDENHAIN | TNC 640 | Conversational Programming User’s Manual | 10/2017… -
Page 877
Connect HW button. To save the configuration and exit the configuration menu, press the END button HEIDENHAIN | TNC 640 | Conversational Programming User’s Manual | 10/2017… -
Page 878
Click on the Set power button The control displays the three available power settings. Click on the desired setting. To save the configuration and exit the configuration menu, press the END button HEIDENHAIN | TNC 640 | Conversational Programming User’s Manual | 10/2017… -
Page 879
If this occurs, try to improve the transmission quality by selecting another channel or by increasing the transmitter power. Further information: «Setting the transmission channel», page 878 Further information: «Selecting the transmitter power», page 878 HEIDENHAIN | TNC 640 | Conversational Programming User’s Manual | 10/2017… -
Page 880
Select the backup file in the control’s file manager (e.g., BKUP-2013-12-12_.zip) The control opens the pop-up window for the backup. Press Emergency Stop Press the OK soft key to start the backup process HEIDENHAIN | TNC 640 | Conversational Programming User’s Manual | 10/2017… -
Page 881
Tables and Overviews… -
Page 882
Proceed as follows in order to have the actual system names of the parameters be shown: Press the Screen layout key Press the SHOW SYSTEM NAME soft key Follow the same procedure to return to the standard display. HEIDENHAIN | TNC 640 | Conversational Programming User’s Manual | 10/2017… -
Page 883
As well as the Help text, other information is displayed, e.g. unit of measurement, initial value, selection list. If the selected machine parameter matches a parameter in the previous control model, the corresponding MP number is displayed. HEIDENHAIN | TNC 640 | Conversational Programming User’s Manual | 10/2017… -
Page 884
M5: Display spindle position if spindle is in position control and with M5 Show or hide soft key preset table True: Soft key preset table is not displayed HEIDENHAIN | TNC 640 | Conversational Programming User’s Manual | 10/2017… -
Page 885
Program input in HEIDENHAIN Klartext conversational text or in DIN/ISO HEIDENHAIN: Program input in operating mode MDI in Klartext conversational text dialog ISO: Program input in Positioning with MDI mode of operation in DIN/ISO HEIDENHAIN | TNC 640 | Conversational Programming User’s Manual | 10/2017… -
Page 886
CHINESE CHINESE_TRAD SLOVENIAN KOREAN NORWEGIAN ROMANIAN SLOVAK TURKISH PLC dialog language See NC dialog language PLC error message language See NC dialog language Help language See NC dialog language HEIDENHAIN | TNC 640 | Conversational Programming User’s Manual | 10/2017… -
Page 887
ON: With new BLK form in the test run, the tool paths are reset OFF: With new BLK form in the test run, the tool paths are not reset HEIDENHAIN | TNC 640 | Conversational Programming User’s Manual | 10/2017… -
Page 888
Setting the coordinate systems for the display Coordinate system for the datum shift WorkplaneSystem: Datum is displayed in the system of the tilted plane, WPL-CS WorkpieceSystem: Datum is displayed in the workpiece coordinate system, W-CS HEIDENHAIN | TNC 640 | Conversational Programming User’s Manual | 10/2017… -
Page 889
ON: The mM-CS coordinate system can be selected WPL-CS coordinate system is selectable OFF: The WPL-CS coordinate system can not be selected ON: The WPL-CS coordinate system can be selected HEIDENHAIN | TNC 640 | Conversational Programming User’s Manual | 10/2017… -
Page 890
Maximum permissible measuring error with tool measurement 0.001 to 0.999 [mm]: Second maximum permissible measuring error NC stop during tool check True: NC program is stopped if breakage tolerance is exceeded HEIDENHAIN | TNC 640 | Conversational Programming User’s Manual | 10/2017… -
Page 891
0.001 to 99 999.9999 [mm]: Safety clearance in tool axis direction Safety zone around stylus for pre-positioning 0.001 to 99 999.9999 [mm]: Safety clearance in plane perpendicular to tool axis HEIDENHAIN | TNC 640 | Conversational Programming User’s Manual | 10/2017… -
Page 892
Approach behavior on a slot wall in a cylindrical surface LineNormal: Approach with straight line CircleTangential: Approach with an arc movement M function for spindle orientation in machining cycles -1: Spindle orientation directly via NC HEIDENHAIN | TNC 640 | Conversational Programming User’s Manual | 10/2017… -
Page 893
Waiting time at reversal point in thread base –999999999 to 999999999: The spindle stops for this time at the bottom of the thread before starting again in the opposite direction of rotation HEIDENHAIN | TNC 640 | Conversational Programming User’s Manual | 10/2017… -
Page 894
TRUE: For small thread depths the spindles speed is limited to the extent that for about 1/3 of the time it runs at a constant speed FALSE: No limitation of the spindle speed HEIDENHAIN | TNC 640 | Conversational Programming User’s Manual | 10/2017… -
Page 895
TRUE: Paraxial positioning blocks permitted FALSE: Paraxial positioning blocks locked Line number up to which identical syntax elements are searched for 500 to 400000: Search for selected elements with up/down arrow keys HEIDENHAIN | TNC 640 | Conversational Programming User’s Manual | 10/2017… -
Page 896
FN 16 output path for Programming and Test Run operating modes Path for FN 16 output if no path has been defined in the program Serial Interface RS232 Further information: «Setting up data interfaces», page 858 HEIDENHAIN | TNC 640 | Conversational Programming User’s Manual | 10/2017… -
Page 897
Yellow Green Green Brown Brown Signal GND Blue Gray Gray Pink Pink Do not Violet assign Hsg. External Hsg. External Hsg. Hsg. Hsg. Hsg. External Hsg. shield shield shield HEIDENHAIN | TNC 640 | Conversational Programming User’s Manual | 10/2017… -
Page 898
Signal GND Black Black Violet Violet Gray Gray White/ White/ Green Green Do not Green Green assign Hsg. External Hsg. External Hsg. Hsg. Hsg. Hsg. External Hsg. shield shield shield HEIDENHAIN | TNC 640 | Conversational Programming User’s Manual | 10/2017… -
Page 899
Ethernet interface RJ45 socket Maximum cable length: Unshielded: 100 m Shielded: 400 m Signal Description Transmit Data TX– Transmit Data REC+ Receive Data Vacant Vacant REC– Receive Data Vacant Vacant HEIDENHAIN | TNC 640 | Conversational Programming User’s Manual | 10/2017… -
Page 900
5 x USB (1 x front USB 2.0; 4 x rear USB 3.0) ■ Ambient temperature Operation: 5 °C to +40 °C ■ Storage: -20 °C to +60 °C HEIDENHAIN | TNC 640 | Conversational Programming User’s Manual | 10/2017… -
Page 901
Any text string in quotation marks (“”) Number of program section repeats REP 1 to 65 534 (5, 0) Error number in Q parameter function FN14 0 to 1199 (4, 0) HEIDENHAIN | TNC 640 | Conversational Programming User’s Manual | 10/2017… -
Page 902
■ Via circular arc ■ FK free contour programming FK free contour programming in HEIDENHAIN conversational format with graphic support for workpiece drawings not dimensioned for NC HEIDENHAIN | TNC 640 | Conversational Programming User’s Manual | 10/2017… -
Page 903
Programming graphics In Programming mode, the contour of the NC blocks is drawn on screen while they are being entered (2-D pencil-trace graphics), even if another program is running HEIDENHAIN | TNC 640 | Conversational Programming User’s Manual | 10/2017… -
Page 904
■ Compensation of workpiece misalignment, manual or automatic ■ Presetting, manual or automatic ■ Automatically measuring workpieces ■ Cycles for automatic tool measurement ■ Cycles for automatic kinematics measurement HEIDENHAIN | TNC 640 | Conversational Programming User’s Manual | 10/2017… -
Page 905
CAD import Support for DXF , STEP and IGES Adoption of contours and point patterns Simple and convenient specification of presets Selecting graphical features of contour sections from conversational programs HEIDENHAIN | TNC 640 | Conversational Programming User’s Manual | 10/2017… -
Page 906
Cycle 880: Gear hobbing (option 50 and option 131) Remote Desktop Manager (option 133) Remote operation of external Windows on a separate computer unit computer units Incorporated in the control’s interface HEIDENHAIN | TNC 640 | Conversational Programming User’s Manual | 10/2017… -
Page 907
Active Vibration Damping – AVD (option 46) Active vibration damping Damping of machine oscillations to improve the workpiece surface Batch Process Manager (option 154) Batch process manager Planning of production orders HEIDENHAIN | TNC 640 | Conversational Programming User’s Manual | 10/2017… -
Page 908
TS 740: High-precision 3-D touch trigger probe with infrared transmis- sion ■ TT 160: 3-D touch trigger probe for tool measurement ■ TT 460: 3-D touch trigger probe for tool measurement with infrared transmission HEIDENHAIN | TNC 640 | Conversational Programming User’s Manual | 10/2017… -
Page 909
BORING ■ UNIVERSAL DRILLING ■ BACK BORING ■ UNIVERSAL PECKING ■ TAPPING ■ RIGID TAPPING ■ BORE MILLING ■ TAPPING W/ CHIP BRKG ■ POLAR PATTERN ■ CARTESIAN PATTERN HEIDENHAIN | TNC 640 | Conversational Programming User’s Manual | 10/2017… -
Page 910
TURN PLUNGE LONGITUDINAL EXT. ■ CONTOUR-PAR. TURNING ■ TURN CONTOUR TRANSV. ■ SHOULDER, FACE ■ SHOULDER, FACE. EXT. ■ TURN TRANSVERSE PLUNGE ■ TURN PLUNGE TRANSVERSE EXT. ■ THREAD CONTOUR-PARALLEL HEIDENHAIN | TNC 640 | Conversational Programming User’s Manual | 10/2017… -
Page 911
Within the positioning block: Coordinates are referenced to a position defined by machine manufacturer, e.g. tool change position ■ Reduce the rotary axis display to a value below 360° HEIDENHAIN | TNC 640 | Conversational Programming User’s Manual | 10/2017… -
Page 912
NOMINAL positions at end of block ■ M145 Reset M144 ■ M141 Suppress touch probe monitoring ■ M148 Automatically retract tool from the contour at an NC stop ■ M149 Reset M148 HEIDENHAIN | TNC 640 | Conversational Programming User’s Manual | 10/2017… -
Page 913
Tables and Overviews | Functions of the TNC 640 and the iTNC 530 compared 21.5 Functions of the TNC 640 and the iTNC 530 compared Comparison: Specifications Function TNC 640 iTNC 530 Control loops Maximum 24 control 18 maximum loops (including up to… -
Page 914
Tables and Overviews | Functions of the TNC 640 and the iTNC 530 compared Comparison: PC software Function TNC 640 iTNC 530 M3D Converter for the creation of high- Available Not available resolution collision objects for collision monitoring (DCM) ConfigDesign… -
Page 915
Tables and Overviews | Functions of the TNC 640 and the iTNC 530 compared Function TNC 640 iTNC 530 Tool compensation In the working plane and tool length Radius compensated contour look ahead for up to 99 blocks Three-Dimensional Tool Radius Compensation… -
Page 916
Tables and Overviews | Functions of the TNC 640 and the iTNC 530 compared Function TNC 640 iTNC 530 Constant contouring speed relative to the path of the tool center or relative to the tool’s cutting edge Parallel operation: Creating programs while another… -
Page 917
Tables and Overviews | Functions of the TNC 640 and the iTNC 530 compared Function TNC 640 iTNC 530 Q parameter programming: Standard mathematical functions Formula entry String processing Local Q parameters QL Nonvolatile Q parameters QR Changing parameters during program interruption FN15:PRINT –… -
Page 918
Tables and Overviews | Functions of the TNC 640 and the iTNC 530 compared Function TNC 640 iTNC 530 Graphic support 2-D programming graphics REDRAW function (REDRAW) – Show grid lines as the background – 3-D line graphics Test graphics (plan view, projection on 3 planes, 3-D… -
Page 919
Tables and Overviews | Functions of the TNC 640 and the iTNC 530 compared Function TNC 640 iTNC 530 Datum tables: Storing workpiece-specific datums Preset table Preset management Line 0 of the preset table can be edited manually – Pallet management… -
Page 920
Tables and Overviews | Functions of the TNC 640 and the iTNC 530 compared Function TNC 640 iTNC 530 CAM support: Loading of contours from DXF data X, option 42 X, option 42 Load contours from Step data and Iges data X, option 42 –… -
Page 921
Tables and Overviews | Functions of the TNC 640 and the iTNC 530 compared Function TNC 640 iTNC 530 Status displays: Positions, spindle speed, feed rate Larger depiction of position display, Manual operation Additional status display, form view Display of the handwheel path during machining with… -
Page 922
Tables and Overviews | Functions of the TNC 640 and the iTNC 530 compared Comparison: Miscellaneous functions Effect TNC 640 iTNC 530 Program STOP/Spindle STOP/Coolant OFF Optional program STOP Stop program/Spindle STOP/Coolant OFF/ Clear status display (depending on machine parameter)/Return jump to block 1… -
Page 923
Tables and Overviews | Functions of the TNC 640 and the iTNC 530 compared Effect TNC 640 iTNC 530 M112 Enter contour transitions between any two contour transi- – (recommended: tions Cycle 32) M113 Reset M112 M114 Automatic compensation of machine geometry when –… -
Page 924
Tables and Overviews | Functions of the TNC 640 and the iTNC 530 compared Comparator: Cycles Cycle TNC 640 iTNC 530 1 PECKING (recommended: Cycle 200, 203, 205) – 2 TAPPING (recommended: Cycle 206, 207 , 208) – 3 SLOT MILLING (recommended: Cycle 253) –… -
Page 925
Tables and Overviews | Functions of the TNC 640 and the iTNC 530 compared Cycle TNC 640 iTNC 530 205 UNIVERSAL PECKING 206 TAPPING 207 RIGID TAPPING 208 BORE MILLING 209 TAPPING W/ CHIP BRKG 210 SLOT RECIP. PLNG (recommended: Cycle 253) –… -
Page 926
Tables and Overviews | Functions of the TNC 640 and the iTNC 530 compared Cycle TNC 640 iTNC 530 291 COUPLG.TURNG.INTERP. X, option 96 – 292 CONTOUR.TURNG.INTRP. X, option 96 – 800 ADJUST XZ SYSTEM X, option 50 – 801 RESET ROTARY COORDINATE SYSTEM X, option 50 –… -
Page 927
Tables and Overviews | Functions of the TNC 640 and the iTNC 530 compared Comparison: Touch probe cycles in the Manual operation and Electronic handwheel modes of operation Cycle TNC 640 iTNC 530 Touch-probe table for managing 3-D touch probes –… -
Page 928
Tables and Overviews | Functions of the TNC 640 and the iTNC 530 compared Comparison: Probing system cycles for automatic workpiece control Cycle TNC 640 iTNC 530 0 REF. PLANE 1 POLAR PRESET 2 CALIBRATE TS – 3 MEASURING 4 MEASURING IN 3-D 9 CALIBRATE TS LENGTH –… -
Page 929
Tables and Overviews | Functions of the TNC 640 and the iTNC 530 compared Cycle TNC 640 iTNC 530 430 MEAS. BOLT HOLE CIRC 431 MEASURE PLANE 440 MEASURE AXIS SHIFT – 441 FAST PROBING 444 PROBING IN 3-D X, option 92 –… -
Page 930
Tables and Overviews | Functions of the TNC 640 and the iTNC 530 compared Function TNC 640 iTNC 530 Skip block function Available Available Selecting a tool from the table Selection via split-screen menu Selection in a pop-up window Programming special functions with… -
Page 931
Tables and Overviews | Functions of the TNC 640 and the iTNC 530 compared Function TNC 640 iTNC 530 Datum table: Sorting function by values within Available Not available an axis Resetting the table Available Not available Hiding axes that are not present… -
Page 932
Tables and Overviews | Functions of the TNC 640 and the iTNC 530 compared Function TNC 640 iTNC 530 Handling of error messages: Call via ERR key Call via HELP key Help with error messages Switching the operating mode Help menu is closed when the… -
Page 933
Tables and Overviews | Functions of the TNC 640 and the iTNC 530 compared Function TNC 640 iTNC 530 Programming minor axes: Syntax FUNCTION PARAXCOMP: Available Not available Define the behavior of the display and the paths of traverse Syntax FUNCTION PARAXMODE:… -
Page 934
Tables and Overviews | Functions of the TNC 640 and the iTNC 530 compared Comparison: Differences in Test Run, operation Function TNC 640 iTNC 530 Arrangement of soft-key rows and Arrangement of soft-key rows and soft-keys varies depending on the soft keys within the rows active screen layout. -
Page 935
Tables and Overviews | Functions of the TNC 640 and the iTNC 530 compared Comparison: Differences in Manual Operation, functionality Function TNC 640 iTNC 530 Jog increment function The jog increment can be defined The jog increment applies for both… -
Page 936
Tables and Overviews | Functions of the TNC 640 and the iTNC 530 compared Comparison: Differences in Manual Operation, operation Function TNC 640 iTNC 530 Capturing the position values from Confirm actual position with a soft Actual-position capture by hard key… -
Page 937
Tables and Overviews | Functions of the TNC 640 and the iTNC 530 compared Comparison: Differences in Program Run, traverse movements NOTICE Danger of collision! NC programs that were created older controls can lead to unexpected axis movements or error messages on current control models. -
Page 938
Tables and Overviews | Functions of the TNC 640 and the iTNC 530 compared Function TNC 640 iTNC 530 Q60 to Q99 (QS60 to QS99) areal- Q60 to Q99 (QS60 to QS99) Effect of Q parameters ways local. are local or global, depending on MP7251 in converted cycle programs (.cyc). -
Page 939
Tables and Overviews | Functions of the TNC 640 and the iTNC 530 compared Function TNC 640 iTNC 530 The incremental rotation angle IPA Circle programming with polar The algebraic sign of the direc- and the direction of rotation DR… -
Page 940
Tables and Overviews | Functions of the TNC 640 and the iTNC 530 compared Function TNC 640 iTNC 530 SLII Cycles 20 to 24: Behavior with islands not Cannot be defined with Restricted definition in complex contained in pockets complex contour formula… -
Page 941
Tables and Overviews | Functions of the TNC 640 and the iTNC 530 compared Function TNC 640 iTNC 530 PLANE function: TABLE ROT/COORD ROT Effect: Effect The transformation types are The transformation types are effective on all free rotary axes only effective with a C rotary… -
Page 942
Tables and Overviews | Functions of the TNC 640 and the iTNC 530 compared Comparison: Differences in MDI operation Function TNC 640 iTNC 530 Execution of connected sequences Function available Function available Saving modally effective functions Function available Function available… -
Page 943
External access……848 Delete……..170 Data output on the screen..400 External data transfer….201 Block check character….860 Data transfer Block scan File system……860 In a pallet table….838 HEIDENHAIN | TNC 640 | Conversational Programming User’s Manual | 10/2017… -
Page 944
MOD function……844 Closed contours….325 Graphic simulation….813 Exit……..844 Direction and length of contour Tool display……813 Overview……845 elements……323 GS……….519 Select……… 844 Input options Monitoring HEIDENHAIN | TNC 640 | Conversational Programming User’s Manual | 10/2017… -
Page 945
Radius compensation….267 Filter for hole positions..353 Overview……298 Entering……. 268 Selecting a contour….345 Polar coordinates Outside corners, inside Selecting machining positions..Circular path around pole CC……..312 HEIDENHAIN | TNC 640 | Conversational Programming User’s Manual | 10/2017… -
Page 946
Tool change……260 Turning mode selection…. 675 Stop at……..822 Tool compensation….266 Turning Operations….674 Straight line…… 299, 311 Length……..266 Feed rate……681 String parameter Tool Compensation Turning operations HEIDENHAIN | TNC 640 | Conversational Programming User’s Manual | 10/2017… -
Page 947
Wireless touch probe Setup……..873 Working space monitoring..Workpiece positions….159 Workspace monitoring….. 820 Write to log……435 Writing probing values Log……..755 To the datum table….756 ZIP archive……. 196 HEIDENHAIN | TNC 640 | Conversational Programming User’s Manual | 10/2017… -
Page 948
The Information Site for DR. JOHANNES HEIDENHAIN GmbH HEIDENHAIN Controls Dr.-Johannes-Heidenhain-Straße 5 83301 Traunreut, Germany +49 8669 31-0 +49 8669 32-5061 Klartext App E-mail: info@heidenhain.de The Klartext on Your +49 8669 32-1000 Technical support Mobile Device Measuring systems …
 points? Angular length? Probing a full circle (360°) or a circle segment (angular length<360°) Automatic probing routine: Pre-position touch probe HEIDENHAIN | TNC 640 | Conversational Programming User’s Manual | 10/2017…
 Вы здесь
Каталог инструкций » H » HEIDENHAIN » Оборудование HEIDENHAIN » HEIDENHAIN TNC 640 (34059x-05) » Страница инструкции 1
-
1
-
2
-
3
-
4
-
5
-
6
-
7
-
8
-
9
-
10
-
11
-
12
-
13
-
14
-
15
-
16
-
17
-
18
-
19
-
20
-
21
-
22
-
23
-
24
-
25
-
26
-
27
-
28
-
29
-
30
-
31
-
32
-
33
-
34
-
35
-
36
-
37
-
38
-
39
-
40
-
41
-
42
-
43
-
44
-
45
-
46
-
47
-
48
-
49
-
50


- 1
- 2
- 3
- 4
- 5
- 6
- 7
- 8
- 9
- …
- ››
Распечатать
Страница 1 из
- << Предыдущая
- Следующая >>

Tnc 640 в инструкции по эксплуатации HEIDENHAIN TNC 640 (34059x-05)
TNC 640
Руководство пользователя
«Диалог открытым текстом
HEIDENHAIN»
Программное обеспечение с ЧПУ 340590-05 340591-05 340595-05
Русский (ru) 5/2015
- << Предыдущая
- Следующая >>
- Manuals
- Brands
- HEIDENHAIN Manuals
- Control Unit
- TNC 640
Manuals and User Guides for HEIDENHAIN TNC 640. We have 4 HEIDENHAIN TNC 640 manuals available for free PDF download: User Manual, Operating Instructions Manual
Heidenhain TNC 640 User Manual (903 pages)
Brand: Heidenhain
|
Category: Control Panel
|
Size: 56.9 MB
Table of Contents
-
About this Manual
6
-
New Functions 34059X
13
-
The D18 Functions Have Been Expanded, See «D18 – Reading System Data
20
-
Table of Contents
35
-
First Steps with the TNC 640
65
-
Overview
66
-
Machine Switch-On
66
-
Acknowledging the Power Interruption and Moving to the Reference Points
66
-
Programming the First Part
68
-
Selecting the Correct Operating Mode
68
-
The most Important Control Keys
68
-
Opening a New Program/File Management
69
-
Defining a Workpiece Blank
70
-
Program Layout
71
-
Programming a Simple Contour
73
-
Creating a Cycle Program
76
-
Graphically Testing the First Part
78
-
Selecting the Correct Operating Mode
78
-
Selecting the Tool Table for the Test Run
78
-
Choosing the Program You Want to Test
79
-
Selecting the Screen Layout and the View
79
-
Starting the Test Run
80
-
Setting up Tools
81
-
Selecting the Correct Operating Mode
81
-
Preparing and Measuring Tools
81
-
The Tool Table TOOL.T
82
-
The Pocket Table TOOL_P .TCH
83
-
Workpiece Setup
84
-
Selecting the Correct Operating Mode
84
-
Clamping the Workpiece
84
-
Presetting with a 3-D Touch Probe
85
-
Running the First Program
86
-
Selecting the Correct Operating Mode
86
-
Choosing the Program You Want to Run
86
-
Starting the Program
86
-
-
Introduction
87
-
The TNC 640
88
-
HEIDENHAIN Klartext and DIN/ISO
88
-
Compatibility
88
-
Visual Display Unit and Operating Panel
89
-
Display Screen
89
-
Setting Screen Layout
89
-
Control Panel
90
-
Modes of Operation
91
-
Manual Operation and El. Handwheel
91
-
Positioning with Manual Data Input
91
-
Programming
92
-
Test Run
92
-
Program Run, Full Sequence and Program Run, Single Block
93
-
Status Displays
94
-
General Status Display
94
-
Additional Status Displays
96
-
Window Manager
103
-
Overview of Taskbar
104
-
Portscan
107
-
Remote Service
108
-
Printer
110
-
Selinux Security Software
112
-
Vnc
113
-
Backup and Restore
115
-
Remote Desktop Manager (Option 133)
118
-
Introduction
118
-
Configuring Connections — Windows Terminal Service (Remotefx)
119
-
Configuring the Connection — VNC
121
-
Shutting down or Rebooting an External Computer
122
-
Starting and Stopping the Connection
123
-
Accessories: HEIDENHAIN 3-D Touch Probes and Electronic Handwheels
124
-
3-D Touch Probes
124
-
HR Electronic Handwheels
125
-
-
Operating the Touchscreen
127
-
Display Unit and Operation
128
-
Touchscreen
128
-
Operating Panel
128
-
Gestures
129
-
Overview of Possible Gestures
129
-
Navigating in the Table and NC Programs
130
-
Operating the Simulation
131
-
Using the HEROS Menu
132
-
Operating the CAD Viewer
133
-
Functions in the Taskbar
138
-
Touchscreen Calibration
138
-
Touchscreen Configuration
138
-
Touchscreen Cleaning
139
-
-
Fundamentals, File Management
141
-
Fundamentals
142
-
Position Encoders and Reference Marks
142
-
Reference Systems
143
-
Designation of the Axes on Milling Machines
154
-
Polar Coordinates
154
-
Absolute and Incremental Workpiece Positions
155
-
Selecting the Preset
156
-
Creating and Writing Programs
157
-
Structure of an NC Program in ISO Format
157
-
Defining the Blank: G30/G31
158
-
Creating a New NC Program
161
-
Programming Tool Movements in DIN/ISO
162
-
Actual Position Capture
164
-
Editing an NC Program
165
-
The Control’s Search Function
169
-
File Management: Basics
171
-
Files
171
-
Displaying Externally Generated Files on the Control
173
-
Data Backup
173
-
Working with the File Manager
174
-
Directories
174
-
Paths
174
-
Overview: Functions of the File Manager
175
-
Calling the File Manager
176
-
Selecting Drives, Directories and Files
177
-
Creating a New Directory
179
-
Creating New File
179
-
Copying a Single File
179
-
Copying Files into Another Directory
180
-
Copying a Table
181
-
Copying a Directory
182
-
Choosing One of the Last Files Selected
182
-
Deleting a File
182
-
Deleting a Directory
183
-
Tagging Files
184
-
Renaming a File
185
-
Sorting Files
185
-
Additional Functions
186
-
Additional Tools for Management of External File Types
187
-
Additional Tools for Itcs
195
-
Data Transfer to or from an External Data Carrier
197
-
-
Programming Aids
203
-
Adding Comments
204
-
Application
204
-
Entering Comments During Programming
204
-
Inserting Comments after Program Entry
204
-
Entering a Comment in a Separate Block
204
-
Commenting out an Existing NC Block
204
-
Functions for Editing of the Comment
205
-
Freely Editing an NC Program
206
-
Display of NC Programs
207
-
Syntax Highlighting
207
-
Scrollbar
207
-
Structuring Programs
208
-
Definition and Applications
208
-
Displaying the Program Structure Window / Changing the Active Window
208
-
Inserting a Structure Block in the Program Window
209
-
Selecting Blocks in the Program Structure Window
209
-
Calculator
210
-
Operation
210
-
Cutting Data Calculator
213
-
Application
213
-
Programming Graphics
216
-
Activating and Deactivating Programming Graphics
216
-
Generating a Graphic for an Existing Program
217
-
Block Number Display ON/OFF
218
-
Erasing the Graphic
218
-
Showing Grid Lines
218
-
Magnification or Reduction of Details
219
-
Error Messages
220
-
Display of Errors
220
-
Opening the Error Window
220
-
Closing the Error Window
220
-
Detailed Error Messages
221
-
INTERNAL INFO Soft Key
221
-
FILTER Soft Key
221
-
Clearing Errors
222
-
Error Log
222
-
Keystroke Log
223
-
Informational Texts
224
-
Saving Service Files
224
-
Calling the Tncguide Help System
224
-
Tncguide Context-Sensitive Help System
225
-
Application
225
-
Working with Tncguide
226
-
Downloading Current Help Files
230
-
-
Tools
233
-
Entering Tool-Related Data
234
-
Feed Rate F
234
-
Spindle Speed S
235
-
Tool Data
236
-
Requirements for Tool Compensation
236
-
Tool Number, Tool Name
236
-
Tool Length L
236
-
Tool Radius R
236
-
Delta Values for Lengths and Radii
237
-
Entering Tool Data into the NC Program
237
-
Entering Tool Data into the Table
238
-
Importing Tool Tables
248
-
Overwriting Tool Data from an External PC
250
-
Pocket Table for Tool Changer
251
-
Calling the Tool Data
254
-
Tool Change
256
-
Tool Usage Test
259
-
Tool Compensation
262
-
Introduction
262
-
Tool Length Compensation
262
-
Tool Radius Compensation
263
-
Tool Management (Option Number 93)
266
-
Basics
266
-
Calling Tool Management
267
-
Editing Tool Management
268
-
Available Tool Types
272
-
Importing and Exporting Tool Data
274
-
-
Programming Contours
277
-
Tool Movements
278
-
Path Functions
278
-
FK Free Contour Programming
278
-
Miscellaneous Functions M
278
-
Subprograms and Program Section Repeats
279
-
Programming with Q Parameters
279
-
Fundamentals of Path Functions
280
-
Programming Tool Movements for Workpiece Machining
280
-
Approaching and Departing a Contour
283
-
Starting Point and End Point
283
-
Tangential Approach and Departure
285
-
Overview: Types of Paths for Contour Approach and Departure
286
-
Important Positions for Approach and Departure
287
-
Approaching on a Straight Line with Tangential Connection: APPR LT
289
-
Approaching on a Straight Line Perpendicular to the First Contour Point: APPR LN
289
-
Approaching on a Circular Path with Tangential Connection: APPR CT
290
-
Approaching on a Circular Path with Tangential Connection from a Straight Line to the Contour: APPR LCT
291
-
Departing in a Straight Line with Tangential Connection: DEP LT
292
-
Departing in a Straight Line Perpendicular to the Last Contour Point: DEP LN
292
-
Departing on a Circular Path with Tangential Connection: DEP CT
293
-
Departing on a Circular Arc Tangentially Connecting the Contour and a Straight Line: DEP LCT
293
-
Path Contours Cartesian Coordinates
294
-
Overview of Path Functions
294
-
Programming Path Functions
294
-
Straight Line in Rapid Traverse G00 or Straight Line with Feed Rate F G01
295
-
Inserting a Chamfer between Two Straight Lines
296
-
Rounded Corners G25
297
-
Circle Center I, J
298
-
Circular Path Around Circle Center
299
-
Circle G02/G03/G05 with Defined Radius
300
-
Circle G06 with Tangential Connection
302
-
Example: Linear Movements and Chamfers with Cartesian Coordinates
303
-
Example: Circular Movements with Cartesian Coordinates
304
-
Example: Full Circle with Cartesian Coordinates
305
-
Path Contours — Polar Coordinates
306
-
Overview
306
-
Datum for Polar Coordinates: Pole I, J
307
-
Straight Line in Rapid Traverse G10 or Straight Line with Feed Rate F G11
307
-
Circular Path G12/G13/G15 Around Pole I, J
308
-
Circle G16 with Tangential Connection
308
-
Helix
309
-
Example: Linear Movement with Polar Coordinates
311
-
Example: Helix
312
-
Path Contours — FK Free Contour Programming
313
-
Fundamentals
313
-
FK Programming Graphics
315
-
Initiating the FK Dialog
316
-
Pole for FK Programming
316
-
Free Straight Line Programming
317
-
Free Circular Path Programming
318
-
Input Possibilities
319
-
Auxiliary Points
322
-
Relative Data
323
-
Example: FK Programming 1
325
-
-
Data Transfer from CAD Files
327
-
Screen Layout of the CAD Viewer
328
-
Fundamentals of the CAD Viewer
328
-
CAD Import (Option 42)
329
-
Application
329
-
Using the CAD Viewer
330
-
Opening the CAD File
330
-
Basic Settings
331
-
Setting Layers
333
-
Setting a Preset
334
-
Defining the Datum
336
-
Selecting and Saving a Contour
339
-
Selecting and Saving Machining Positions
343
-
-
Subprograms and Program Section Repeats
349
-
Labeling Subprograms and Program Section Repeats
350
-
Label
350
-
Subprograms
351
-
Operating Sequence
351
-
Programming Notes
351
-
Programming the Subprogram
352
-
Calling a Subprogram
352
-
Program-Section Repeats
353
-
Label G98
353
-
Operating Sequence
353
-
Programming Notes
353
-
Programming a Program Section Repeat
354
-
Calling a Program Section Repeat
354
-
Any Desired NC Program as Subprogram
355
-
Overview of the Soft Keys
355
-
Operating Sequence
356
-
Programming Notes
356
-
Calling any Program as a Subprogram
357
-
Nesting
360
-
Types of Nesting
360
-
Nesting Depth
360
-
Subprogram Within a Subprogram
361
-
Repeating Program Section Repeats
362
-
Repeating a Subprogram
363
-
Programming Examples
364
-
Example: Milling a Contour in Several Infeeds
364
-
Example: Groups of Holes
365
-
Example: Group of Holes with Several Tools
366
-
-
Programming Q Parameters
369
-
10.1 Principle and Overview of Functions
370
-
Programming Notes
372
-
Calling Q Parameter Functions
373
-
Part Families-Q Parameters in Place of Numerical Values
374
-
Application
374
-
Describing Contours with Mathematical Functions
375
-
Application
375
-
Overview
375
-
Programming Fundamental Operations
376
-
10.4 Angle Functions
378
-
Definitions
378
-
Programming Trigonometric Functions
378
-
10.5 Calculation of Circles
379
-
Application
379
-
10.6 If-Then Decisions with Q Parameters
380
-
Application
380
-
Unconditional Jumps
380
-
Programming If-Then Decisions
381
-
10.7 Checking and Changing Q Parameters
382
-
Procedure
382
-
Additional Functions
384
-
Overview
384
-
D14: Displaying Error Messages
385
-
D16 — Formatted Output of Texts and Q Parameter Values
389
-
D18 — Reading System Data
395
-
D19 — Transfer Values to the PLC
425
-
D20 — NC and PLC Synchronization
426
-
D29 — Transfer Values to the PLC
427
-
D37 — Export
428
-
D38 — Send Information from NC Program
428
-
Entering Formulas Directly
429
-
Entering Formulas
429
-
Rules for Formulas
431
-
Example of Entry
432
-
String Parameters
433
-
String Processing Functions
433
-
Assign String Parameters
434
-
Chain-Linking String Parameters
435
-
Converting a Numerical Value to a String Parameter
436
-
Copying a Substring from a String Parameter
437
-
Reading System Data
438
-
Converting a String Parameter to a Numerical Value
439
-
Testing a String Parameter
440
-
Finding the Length of a String Parameter
441
-
Comparing Alphabetic Priority
442
-
Reading out Machine Parameters
443
-
10.11 Preassigned Q Parameters
446
-
Values from the PLC: Q100 to Q107
446
-
Active Tool Radius: Q108
446
-
Tool Axis: Q109
447
-
Spindle Status: Q110
447
-
Coolant On/Off: Q111
447
-
Overlap Factor: Q112
447
-
Unit of Measurement for Dimensions in the Program: Q113
447
-
Tool Length: Q114
448
-
Coordinates after Probing During Program Run
448
-
Deviation between Actual Value and Nominal Value During Automatic Tool Measurement With, for Example, the TT 160
448
-
Tilting the Working Plane with Spatial (Workpiece) Angles Instead of Spindle Head Angles: Coordinates for Rotary Axes Calculated by the Control
448
-
Measurement Results from Touch Probe Cycles
449
-
Checking the Setup Situation: Q601
450
-
Programming Examples
451
-
Example: Ellipse
451
-
Example: Concave Cylinder Machined with Spherical Cutter
453
-
Example: Convex Sphere Machined with End Mill
455
-
Advertisement

HEIDENHAIN TNC 640 User Manual (743 pages)
Brand: HEIDENHAIN
|
Category: Control Unit
|
Size: 11.42 MB
Table of Contents
-
Fundamentals | New Cycle Functions of Software 34059X
3
-
Fundamentals | New and Changed Cycle Functions of Software 34059X
4
-
New and Changed Cycle Functions of Software 34059X
11
-
The Character Set of the Fixed Cycle 225 Engraving was
12
-
The Character Set of the Fixed Cycle 225 Engraving was
13
-
Table of Contents
19
-
Fundamentals / Overviews
53
-
Using Fixed Cycles
57
-
Working with Fixed Cycles
58
-
Machine-Specific Cycles
58
-
Defining a Cycle Using Soft Keys
59
-
Defining a Cycle Using the GOTO Function
59
-
Calling a Cycle
60
-
Program Defaults for Cycles
63
-
Overview
63
-
Entering GLOBAL DEF
63
-
Using GLOBAL DEF Information
64
-
Global Data Valid Everywhere
65
-
Global Data for Drilling Operations
65
-
Global Data for Milling Operations with Pocket Cycles 25X
65
-
Global Data for Milling Operations with Contour Cycles
65
-
Global Data for Positioning Behavior
66
-
Global Data for Probing Functions
66
-
PATTERN DEF Pattern Definition
67
-
Application
67
-
Entering PATTERN DEF
68
-
Using PATTERN DEF
68
-
Defining Individual Machining Positions
69
-
Defining a Single Row
69
-
Defining a Single Pattern
70
-
Defining Individual Frames
71
-
Defining a Full Circle
72
-
Defining a Pitch Circle
73
-
Point Tables
74
-
Application
74
-
Creating a Point Table
74
-
Hiding Single Points from the Machining Process
75
-
Selecting a Point Table in the Program
75
-
Calling a Cycle in Connection with Point Tables
76
-
-
Fixed Cycles: Drilling
77
-
Fundamentals
78
-
Overview
78
-
CENTERING (Cycle 240, DIN/ISO: G240)
79
-
Cycle Run
79
-
Please Note While Programming
79
-
Cycle Parameters
80
-
DRILLING (Cycle 200)
81
-
Cycle Run
81
-
Please Note While Programming
81
-
Cycle Parameters
82
-
REAMING (Cycle 201, DIN/ISO: G201)
83
-
Cycle Run
83
-
Please Note While Programming
83
-
Cycle Parameters
84
-
BORING (Cycle 202, DIN/ISO: G202)
85
-
Cycle Run
85
-
Please Note While Programming
86
-
Cycle Parameters
87
-
UNIVERSAL DRILLING (Cycle 203, DIN/ISO: G203)
88
-
Cycle Run
88
-
Please Note While Programming
91
-
Cycle Parameters
92
-
BACK BORING (Cycle 204, DIN/ISO: G204)
94
-
Cycle Run
94
-
Please Note While Programming
95
-
Cycle Parameters
96
-
UNIVERSAL PECKING (Cycle 205, DIN/ISO: G205)
98
-
Cycle Run
98
-
Please Note While Programming
99
-
Cycle Parameters
100
-
Position Behavior When Working with Q379
102
-
BORE MILLING (Cycle 208)
106
-
Cycle Run
106
-
Please Note While Programming
107
-
Cycle Parameters
108
-
SINGLE-LIP DEEP-HOLE DRILLING (Cycle 241, DIN/ISO: G241)
109
-
Cycle Run
109
-
Please Note While Programming
110
-
Cycle Parameters
111
-
Position Behavior When Working with Q379
113
-
3.11 Programming Examples
117
-
Example: Drilling Cycles
117
-
Example: Using Drilling Cycles in Connection with PATTERN DEF
118
-
-
Fixed Cycles: Tapping / Thread Milling
121
-
Fundamentals
122
-
Overview
122
-
TAPPING with a Floating Tap Holder (Cycle 206, DIN/ISO: G206)
123
-
Cycle Run
123
-
Please Note While Programming
124
-
Cycle Parameters
125
-
RIGID TAPPING Without a Floating Tap Holder (Cycle 207, DIN/ISO: G207)
126
-
Cycle Run
126
-
Please Note While Programming
127
-
Cycle Parameters
128
-
Retracting after a Program Interruption
129
-
TAPPING with CHIP BREAKING (Cycle 209, DIN/ISO: G209)
130
-
Cycle Run
130
-
Please Note While Programming
131
-
Cycle Parameters
132
-
Fundamentals of Thread Milling
134
-
Prerequisites
134
-
THREAD MILLING (Cycle 262, DIN/ISO: G262)
136
-
Cycle Run
136
-
Please Note While Programming
137
-
Cycle Parameters
138
-
THREAD MILLING/COUNTERSINKING (Cycle 263, DIN/ISO: G263)
139
-
Cycle Run
139
-
Please Note While Programming
140
-
Cycle Parameters
141
-
THREAD DRILLING/MILLING (Cycle 264, DIN/ISO: G264)
143
-
Cycle Run
143
-
Please Note While Programming
144
-
Cycle Parameters
145
-
HELICAL THREAD DRILLING/MILLING (Cycle 265, DIN/ISO: G265)
147
-
Cycle Run
147
-
Please Note While Programming
148
-
Cycle Parameters
149
-
OUTSIDE THREAD MILLING (Cycle 267, DIN/ISO: G267)
151
-
Cycle Run
151
-
Please Note While Programming
152
-
Cycle Parameters
153
-
4.11 Programming Examples
155
-
Example: Thread Milling
155
-
-
Fixed Cycles: Pocket Milling / Stud Milling / Slot Milling
157
-
Fundamentals
158
-
Overview
158
-
RECTANGULAR POCKET (Cycle 251, DIN/ISO: G251)
159
-
Cycle Run
159
-
Please Note While Programming
160
-
Cycle Parameters
162
-
CIRCULAR POCKET (Cycle 252, DIN/ISO: G252)
164
-
Cycle Run
164
-
Please Note While Programming
166
-
Cycle Parameters
168
-
SLOT MILLING (Cycle 253, DIN/ISO: G253)
170
-
Cycle Run
170
-
Please Note While Programming
171
-
Cycle Parameters
172
-
CIRCULAR SLOT (Cycle 254, DIN/ISO: G254)
174
-
Cycle Run
174
-
Please Note While Programming
175
-
Cycle Parameters
177
-
RECTANGULAR STUD (Cycle 256, DIN/ISO: G256)
180
-
Cycle Run
180
-
Please Note While Programming
181
-
Cycle Parameters
182
-
CIRCULAR STUD (Cycle 257, DIN/ISO: G257)
185
-
Cycle Run
185
-
Please Note While Programming
186
-
Cycle Parameters
187
-
POLYGON STUD (Cycle 258, DIN/ISO: G258)
189
-
Cycle Run
189
-
Please Note While Programming
190
-
Cycle Parameters
192
-
FACE MILLING (Cycle 233, DIN/ISO: G233)
194
-
Cycle Run
194
-
Please Note While Programming
198
-
Cycle Parameters
199
-
Programming Examples
202
-
Example: Milling Pockets, Studs and Slots
202
-
-
Fixed Cycles: Pattern Definitions
205
-
Fundamentals
206
-
Overview
206
-
POLAR PATTERN (Cycle 220, DIN/ISO: G220)
207
-
Cycle Run
207
-
Please Note While Programming
207
-
Cycle Parameters
208
-
LINEAR PATTERN (Cycle 221, DIN/ISO: G221)
210
-
Cycle Run
210
-
Please Note While Programming
210
-
Cycle Parameters
211
-
Programming Examples
212
-
Example: Polar Hole Patterns
212
-
-
Fixed Cycles: Contour Pocket
215
-
SL Cycles
216
-
Fundamentals
216
-
Overview
218
-
CONTOUR (Cycle 14, DIN/ISO: G37)
219
-
Please Note While Programming
219
-
Cycle Parameters
219
-
Superimposed Contours
220
-
Fundamentals
220
-
Subprograms: Overlapping Pockets
220
-
Area of Inclusion
221
-
Area of Exclusion
222
-
Area of Intersection
223
-
CONTOUR DATA (Cycle 20, DIN/ISO: G120)
224
-
Please Note While Programming
224
-
Cycle Parameters
225
-
PILOT DRILLING (Cycle 21, DIN/ISO: G121)
226
-
Cycle Run
226
-
Please Note While Programming
227
-
Cycle Parameters
227
-
ROUGHING (Cycle 22, DIN/ISO: G122)
228
-
Cycle Run
228
-
Please Note While Programming
229
-
Cycle Parameters
230
-
FLOOR FINISHING (Cycle 23, DIN/ISO: G123)
232
-
Cycle Run
232
-
Please Note While Programming
233
-
Cycle Parameters
233
-
SIDE FINISHING (Cycle 24, DIN/ISO: G124)
234
-
Cycle Run
234
-
Please Note While Programming
235
-
Cycle Parameters
236
-
CONTOUR TRAIN (Cycle 25, DIN/ISO: G125)
237
-
Cycle Run
237
-
Please Note While Programming
238
-
Cycle Parameters
239
-
THREE-D CONT. TRAIN (Cycle 276, DIN/ISO: G276)
241
-
Cycle Run
241
-
Please Note While Programming
242
-
Cycle Parameters
244
-
CONTOUR TRAIN DATA (Cycle 270, DIN/ISO: G270)
246
-
Please Note While Programming
246
-
Cycle Parameters
246
-
TROCHOIDAL SLOT (Cycle 275, DIN/ISO: G275)
247
-
Cycle Run
247
-
Please Note While Programming
249
-
Cycle Parameters
250
-
Programming Examples
252
-
Example: Roughing-Out and Fine-Roughing a Pocket
252
-
Example: Pilot Drilling, Roughing-Out and Finishing Overlapping Contours
254
-
Example: Contour Train
256
-
-
Fixed Cycles: Cylindrical Surface
257
-
Fundamentals
258
-
Overview of Cylindrical Surface Cycles
258
-
CYLINDER SURFACE (Cycle 27, DIN/ISO: G127, Software Option 1)
259
-
Cycle Run
259
-
Please Note While Programming
260
-
Cycle Parameters
261
-
CYLINDER SURFACE Slot Milling (Cycle 28, DIN/ISO: G128, Software Option 1)
262
-
Cycle Run
262
-
Please Note While Programming
263
-
Cycle Parameters
265
-
CYLINDER SURFACE Ridge Milling (Cycle 29, DIN/ISO: G129, Software Option 1)
266
-
Cycle Run
266
-
Please Note While Programming
267
-
Cycle Parameters
268
-
CYLINDER SURFACE (Cycle 39, DIN/ISO: G139, Software Option 1)
269
-
Cycle Run
269
-
Please Note While Programming
270
-
Cycle Parameters
271
-
Programming Examples
272
-
Example: Cylinder Surface with Cycle 27
272
-
Example: Cylinder Surface with Cycle 28
274
-
-
Fixed Cycles: Contour Pocket with Contour Formula
275
-
SL Cycles with Complex Contour Formula
276
-
Fundamentals
276
-
Selecting a Program with Contour Definitions
278
-
Defining Contour Descriptions
278
-
Entering a Complex Contour Formula
279
-
Superimposed Contours
280
-
Contour Machining with SL Cycles
282
-
Example: Roughing and Finishing Superimposed Contours with the Contour Formula
283
-
SL Cycles with Simple Contour Formula
286
-
Fundamentals
286
-
Entering a Simple Contour Formula
288
-
Contour Machining with SL Cycles
288
-
-
Cycles: Coordinate Transformations
289
-
Fundamentals
290
-
Overview
290
-
Effectiveness of Coordinate Transformations
290
-
DATUM SHIFT (Cycle 7, DIN/ISO: G54)
291
-
Effect
291
-
Cycle Parameters
291
-
Please Note While Programming
291
-
DATUM SHIFT with Datum Tables (Cycle 7, DIN/ISO: G53)
292
-
Effect
292
-
Please Note While Programming
293
-
Cycle Parameters
293
-
Selecting a Datum Table in the Part Program
294
-
Editing the Datum Table in the Programming Mode of Operation
294
-
Configuring a Datum Table
296
-
Leaving a Datum Table
296
-
Status Displays
296
-
PRESETTING (Cycle 247, DIN/ISO: G247)
297
-
Effect
297
-
Please Note before Programming
297
-
Cycle Parameters
297
-
Status Displays
297
-
MIRRORING (Cycle 8, DIN/ISO: G28)
298
-
Effect
298
-
Please Note While Programming
299
-
Cycle Parameters
299
-
ROTATION (Cycle 10, DIN/ISO: G73)
300
-
Effect
300
-
Please Note While Programming
301
-
Cycle Parameters
301
-
Scaling
302
-
Effect
302
-
Cycle Parameters
302
-
AXIS-SPECIFIC SCALING (Cycle 26)
303
-
Effect
303
-
Please Note While Programming
303
-
Cycle Parameters
304
-
WORKING PLANE (Cycle 19, DIN/ISO: G80, Software Option 1)
305
-
Effect
305
-
Please Note While Programming
306
-
Cycle Parameters
307
-
Resetting
307
-
Positioning the Axes of Rotation
308
-
Position Display in a Tilted System
309
-
Monitoring of the Working Space
309
-
Positioning in a Tilted Coordinate System
310
-
Combining Coordinate Transformation Cycles
310
-
Procedure for Working with Cycle 19 WORKING PLANE
311
-
Programming Examples
312
-
Example: Coordinate Transformation Cycles
312
-
-
Cycles: Special Functions
315
-
Fundamentals
316
-
Overview
316
-
DWELL TIME (Cycle 9, DIN/ISO: G04)
317
-
Function
317
-
Cycle Parameters
317
-
PROGRAM CALL (Cycle 12, DIN/ISO: G39)
318
-
Cycle Function
318
-
Please Note While Programming
318
-
Cycle Parameters
318
-
SPINDLE ORIENTATION (Cycle 13, DIN/ISO: G36)
319
-
Cycle Function
319
-
Please Note While Programming
319
-
Cycle Parameters
319
-
TOLERANCE (Cycle 32, DIN/ISO: G62)
320
-
Cycle Function
320
-
Influences of the Geometry Definition in the CAM System
320
-
Please Note While Programming
321
-
Cycle Parameters
322
-
INTERPOLATION TURNING, CONTOUR FINISHING (Cycle 292, DIN/ISO: G292, Software Option 96)
323
-
Cycle Run
323
-
Please Note While Programming
325
-
Cycle Parameters
327
-
Machining Variants
328
-
Defining the Tool
330
-
COUPLING INTERPOLATION TURNING (Cycle 291, DIN/ISO: G291, Software Option 96)
333
-
Cycle Run
333
-
Please Note While Programming
333
-
Cycle Parameters
335
-
Defining the Tool
336
-
ENGRAVING (Cycle 225, DIN/ISO: G225)
340
-
Cycle Run
340
-
Please Note While Programming
340
-
Cycle Parameters
341
-
Allowed Engraving Characters
343
-
Characters that Cannot be Printed
343
-
Engraving System Variables
344
-
Engraving the Counter Reading
345
-
FACE MILLING (Cycle 232, DIN/ISO: G232)
346
-
Cycle Run
346
-
Please Note While Programming
348
-
Cycle Parameters
349
-
ASCERTAIN the LOAD (Cycle 239, DIN/ISO: G239, Software Option 143)
351
-
Cycle Run
351
-
Please Note While Programming
352
-
Cycle Parameters
352
-
Programming Examples
353
-
Example: Interpolation Turning Cycle 291
353
-
Example: Interpolation Turning Cycle 292
355
-
THREAD CUTTING (Cycle 18, DIN/ISO: G18)
357
-
Cycle Run
357
-
Please Note While Programming
357
-
Cycle Parameters
358
-
HEIDENHAIN TNC 640 User Manual (948 pages)
Brand: HEIDENHAIN
|
Category: Control Panel
|
Size: 22.95 MB
Table of Contents
-
About this Manual
6
-
Table of Contents
37
-
1 First Steps with the TNC 640
67
-
Overview
68
-
Machine Switch-On
68
-
Acknowledging the Power Interruption and Moving to the Reference Points
68
-
-
Programming the First Part
70
-
Selecting the Correct Operating Mode
70
-
The most Important Control Keys
70
-
Opening a New Program/File Management
71
-
Defining a Workpiece Blank
72
-
Program Layout
73
-
Programming a Simple Contour
75
-
Creating a Cycle Program
78
-
-
Graphically Testing the First Part
81
-
Selecting the Correct Operating Mode
81
-
Selecting the Tool Table for the Test Run
81
-
Choosing the Program You Want to Test
82
-
Selecting the Screen Layout and the View
82
-
Starting the Test Run
83
-
-
Setting up Tools
84
-
Selecting the Correct Operating Mode
84
-
Preparing and Measuring Tools
84
-
The Tool Table TOOL.T
85
-
The Pocket Table TOOL_P .TCH
86
-
-
Workpiece Setup
87
-
Selecting the Correct Operating Mode
87
-
Clamping the Workpiece
87
-
Presetting with a 3-D Touch Probe
88
-
-
Running the First Program
89
-
Selecting the Correct Operating Mode
89
-
Choosing the Program You Want to Run
89
-
Starting the Program
89
-
-
-
2 Introduction
91
-
The TNC 640
92
-
HEIDENHAIN Klartext and DIN/ISO
92
-
Compatibility
92
-
-
Visual Display Unit and Operating Panel
93
-
Display Screen
93
-
Setting Screen Layout
93
-
Control Panel
94
-
-
Modes of Operation
95
-
Manual Operation and El. Handwheel
95
-
Positioning with Manual Data Input
95
-
Programming
96
-
Test Run
96
-
Program Run, Full Sequence and Program Run, Single Block
97
-
-
Status Displays
98
-
General Status Display
98
-
Additional Status Displays
100
-
-
Window Manager
107
-
Overview of Taskbar
108
-
Portscan
111
-
Remote Service
112
-
Printer
114
-
Selinux Security Software
116
-
Vnc
117
-
Backup and Restore
119
-
-
Remote Desktop Manager (Option 133)
122
-
Introduction
122
-
Configuring Connections — Windows Terminal Service (Remotefx)
123
-
Configuring the Connection — VNC
125
-
Shutting down or Rebooting an External Computer
126
-
Starting and Stopping the Connection
127
-
-
Accessories: HEIDENHAIN 3-D Touch Probes and Electronic Handwheels
128
-
3 D Touch Probes
128
-
HR Electronic Handwheels
129
-
-
-
Operating the Touchscreen
131
-
Display Unit and Operation
132
-
Touchscreen
132
-
Operating Panel
132
-
-
Gestures
133
-
Overview of Possible Gestures
133
-
Navigating in the Table and NC Programs
134
-
Operating the Simulation
135
-
Using the HEROS Menu
136
-
Operating the CAD Viewer
137
-
-
Functions in the Taskbar
142
-
Touchscreen Calibration
142
-
Touchscreen Configuration
142
-
Touchscreen Cleaning
143
-
-
Advertisement
HEIDENHAIN TNC 640 Operating Instructions Manual (64 pages)
Programming Station
Brand: HEIDENHAIN
|
Category: Controller
|
Size: 3.19 MB
Table of Contents
-
Table of Contents
7
-
1 Important Information on the Software for the Programming Station
9
-
1.1 Introduction
10
-
General Information
10
-
Options/Feature Content Level (FCL)
10
-
-
1.2 Compatibility
11
-
Downward Compatibility
12
-
Differences in Fixed Cycles
13
-
Differences in Touch Probe Cycles
19
-
Differences in Miscellaneous Functions M
27
-
Differences in Q-Parameter Programming
31
-
Differences in Other Functions
33
-
-
Working with the Programming Station
36
-
Starting the Programming Station
36
-
Showing the Virtual Keyboard
37
-
Exiting the Programming Station
37
-
-
Data Transfer from the Programming Station to the Machine Tool
39
-
Prerequisites
39
-
Preparations at the Programming Station
39
-
Calling a Program from the Machine Tool
40
-
Connection between the Programming Station and HEIDENHAIN PC Software
40
-
-
Special Features of the Demo Version
41
-
General Information
41
-
Starting the Demo Version
41
-
Keyboard Assignment
42
-
Overview of Keyboard Assignment
46
-
Key Assignment on Portable Computers
47
-
-
-
2 Items Supplied / Installation
49
-
Items Supplied / System Requirements
50
-
Items Supplied
50
-
System Requirements
51
-
-
Connecting the Programming Station
52
-
Connecting the Keyboard for the Programming Station
52
-
Mounting the Cable Clamps for the USB Cable
52
-
Number Stickers
53
-
Connecting the USB Dongle (for the Version with a Virtual Keyboard)
53
-
Connecting the USB Network Dongle (Only for the Version with a Virtual Keyboard)
53
-
Installing the Programming Station Software
54
-
Configuring the Programming Station Software for Use with a USB Network Dongle
55
-
Network License for Multiple Workstations
56
-
Setting the Conversational Language
58
-
Working with the HEIDENHAIN Basic PLC Program
60
-
Working with a Machine-Specific PLC Program
61
-
Displaying Additional Drives
61
-
-
Advertisement
Related Products
-
HEIDENHAIN TNC 620 Programming Station
-
HEIDENHAIN TNC 620 E
-
HEIDENHAIN TNC 640 E
-
HEIDENHAIN TNC 320 Programming Station
-
HEIDENHAIN TNC 155 B
-
HEIDENHAIN TNC 151 F
-
HEIDENHAIN TNC 151 W
-
HEIDENHAIN TNC 370
-
HEIDENHAIN TNC 426 PB/M
-
HEIDENHAIN TNC 430 PA/M
HEIDENHAIN Categories
Media Converter
Measuring Instruments
Control Systems
Industrial Equipment
Control Unit
More HEIDENHAIN Manuals
 Loading…

User’s Manual
HEIDENHAIN
Conversational
TNC 640
NC Software 340 590-01 340 591-01 340 594-01
English (en) 4/2012

Controls of the TNC
Keys on visual display unit
|
Key |
Function |
|
Split screen layout |
Toggle the display between machining and programming modes
Soft keys for selecting functions on screen
Switch the soft-key rows
Alphanumeric keyboard
Key Function
File names, comments
DIN/ISO programming
Machine operating modes
|
Key |
Function |
|
Manual Operation |
Electronic Handwheel
Positioning with Manual Data Input
Program Run, Single Block
Program Run, Full Sequence
Programming modes
|
Key |
Function |
|
Programming and Editing |
|
|
Test Run |
Program/file management, TNC functions
|
Key |
Function |
|
Select or delete programs and files, |
|
|
external data transfer |
|
|
Define program call, select datum and |
|
|
point tables |
|
|
Select MOD functions |
|
Display help text for NC error messages, |
|||
|
call TNCguide |
|||
|
Display all current error messages |
|||
|
Show calculator |
|||
Navigation keys |
|||
|
Key |
Function |
||
|
Move highlight |
|||
|
Go directly to blocks, cycles and |
|||
|
parameter functions |
|||
Potentiometer for feed rate and spindle speed |
|||
|
Feed rate |
Spindle speed |
||
|
100 |
100 |
||
|
50 |
150 |
50 |
150 |
|
0 |
F % |
0 |
S % |
Cycles, subprograms and program section repeats Key  Function
Define touch probe cycles
Define and call cycles
Enter and call labels for subprogramming and program section repeats
Enter program stop in a program

Tool functions
Key Function
Define tool data in the program
Call tool data
Programming path movements
Key Function
Approach/depart contour
FK free contour programming
Straight line
Circle center/pole for polar coordinates
Circle with center
Circle with radius
Circular arc with tangential connection
Chamfer/Corner rounding
Special functions
Key Function
Show special functions
Select the next tab in forms
Up/down one dialog box or button
Coordinate axes and numbers: Entering and editing
|
Key |
Function |
|
|
. . . |
Select coordinate axes or |
|
|
enter them into the program |
||
|
. . . |
Numbers |
|
Decimal point / Reverse algebraic sign
Polar coordinate input / Incremental values
Q parameter programming /
Q parameter status
Save actual position or values from calculator
Skip dialog questions, delete words
Confirm entry and resume dialog
Conclude block and exit entry
Clear numerical entry or TNC error message
Abort dialog, delete program section


About this Manual
The symbols used in this manual are described below.
This symbol indicates that important notes about the function described must be regarded.
This symbol indicates that there is one or more of the following risks when using the described function:
Danger to workpiece
Danger to fixtures
Danger to tool
Danger to machine
Danger to operator
This symbol indicates that the described function must be adapted by the machine tool builder. The function described may therefore vary depending on the machine.
This symbol indicates that you can find detailed information about a function in another manual.
Would you like any changes, or have you found any errors?
We are continuously striving to improve documentation for you. Please help us by sending your requests to the following e-mail address: tnc-userdoc@heidenhain.de.
About this Manual

TNC Model, Software and Features
TNC Model, Software and Features
This manual describes functions and features provided by TNCs as of the following NC software numbers.
|
TNC model |
NC software number |
|
TNC 640 |
340 590-01 |
|
TNC 640 E |
340 591-01 |
|
TNC 640 Programming Station |
340 594-01 |
The suffix E indicates the export version of the TNC. The export version of the TNC has the following limitations:
Simultaneous linear movement in up to 4 axes
The machine tool builder adapts the usable features of the TNC to his machine by setting machine parameters. Some of the functions described in this manual may therefore not be among the features provided by the TNC on your machine tool.
TNC functions that may not be available on your machine include:
Tool measurement with the TT
Please contact your machine tool builder to become familiar with the features of your machine.
Many machine manufacturers, as well as HEIDENHAIN, offer programming courses for the TNCs. We recommend these courses as an effective way of improving your programming skill and sharing information and ideas with other TNC users.
User’s Manual for Cycle Programming:
All of the cycle functions (touch probe cycles and fixed cycles) are described in a separate manual. Please contact HEIDENHAIN if you need a copy of this User’s Manual. ID: 892 905-xx
6

Software options
The TNC 640 features various software options that can be enabled by your machine tool builder. Each option is to be enabled separately and contains the following respective functions:
Software option 1 (option number #08)
Cylinder surface interpolation (Cycles 27, 28 and 29)
Feed rate in mm/min for rotary axes: M116
Tilting the machining plane (plane functions, Cycle 19 and 3D-ROT soft key in the Manual Operation mode)
Circle in 3 axes with tilted working plane
Software option 2 (option number #09)
5-axis interpolation
3-D machining:
M128: Maintaining the position of the tool tip when positioning with tilted axes (TCPM)
FUNCTION TCPM: Maintaining the position of the tool tip when positioning with tilted axes (TCPM) in selectable modes
M144: Compensating the machine’s kinematic configuration for ACTUAL/NOMINAL positions at end of block
LN blocks (3-D compensation)
HEIDENHAIN DNC (option number #18)
Communication with external PC applications over COM component
Additional conversational language (option number #41)
Function for enabling the conversational languages Slovenian, Slovak, Norwegian, Latvian, Estonian, Korean, Turkish, Romanian, Lithuanian.
Display step (option number #23)
Input resolution and display step:
Linear axes down to 0.01 µm
Rotary axes to 0.00001°
Double speed (option number #49)
Double-speed control loops are used primarily for high-speed spindles as well as for linear motors and torque motors
TNC Model, Software and Features

TNC Model, Software and Features
KinematicsOpt software option (option number #48)
Touch-probe cycles for inspecting and optimizing the machine accuracy
Software option Mill-Turning (option number #50)
Functions for milling/turning mode:
Switching between Milling/Turning mode of operation
Constant cutting speed
Tool-tip radius compensation
Turning cycles
Extended Tool Management software option
(option number #93)
Tool management that can be changed by the machine manufacturer using Python scripts
8

Feature content level (upgrade functions)
Along with software options, significant further improvements of the TNC software are managed via the Feature Content Level (FCL) upgrade functions. Functions subject to the FCL are not available simply by updating the software on your TNC.
All upgrade functions are available to you without surcharge when you receive a new machine.
Upgrade functions are identified in the manual with FCL n, where n indicates the sequential number of the feature content level.
You can purchase a code number in order to permanently enable the FCL functions. For more information, contact your machine tool builder or HEIDENHAIN.
Intended place of operation
The TNC complies with the limits for a Class A device in accordance with the specifications in EN 55022, and is intended for use primarily in industrially-zoned areas.
Legal information
This product uses open source software. Further information is available on the control under
UProgramming and Editing operating mode
UMOD function
ULICENSE INFO soft key
TNC Model, Software and Features

TNC Model, Software and Features
10
![]()
Contents
|
First |
Steps with the TNC 640 |
1 |
||
|
2 |
||||
|
Introduction |
||||
|
Programming: Fundamentals, |
3 |
|||
|
File Management |
||||
|
Programming: Programming Aids |
4 |
|||
|
5 |
||||
|
Programming: Tools |
||||
|
6 |
||||
|
Programming: Programming Contours |
||||
|
7 |
||||
|
Programming: Subprograms and |
||||
|
Program Section Repeats |
8 |
|||
|
Programming: Q Parameters |
||||
|
9 |
||||
|
Programming: Miscellaneous Functions |
||||
|
10 |
||||
|
Programming: Special Functions |
||||
|
11 |
||||
|
Programming: Multiple Axis Machining |
||||
|
12 |
||||
|
Programming: Pallet Editor |
||||
|
13 |
||||
|
Programming: Turning Operations |
||||
|
14 |
||||
|
Manual Operation and Setup |
||||
|
15 |
||||
|
Positioning with Manual Data Input |
||||
|
16 |
||||
|
Test Run and Program Run |
||||
|
17 |
||||
|
MOD Functions |
||||
|
18 |
||||
|
Tables and Overviews |
||||

1 First Steps with the TNC 640 ….. 35
|
1.1 |
Overview ….. |
36 |
|||||||||
|
1.2 |
Machine Switch-On |
….. 37 |
|||||||||
|
Acknowledging the power interruption and moving to the reference points ….. |
37 |
||||||||||
|
1.3 |
Programming the First Part ….. |
38 |
|||||||||
|
Selecting the correct operating mode ….. |
38 |
||||||||||
|
The most important TNC keys ….. |
38 |
||||||||||
|
Creating a new program/file management ….. |
39 |
||||||||||
|
Defining a workpiece blank ….. |
40 |
||||||||||
|
Program layout ….. |
41 |
||||||||||
|
Programming a simple contour ….. |
42 |
||||||||||
|
Creating a cycle program |
….. 45 |
||||||||||
|
1.4 |
Graphically Testing the First Program |
….. 48 |
|||||||||
|
Selecting the correct operating mode ….. |
48 |
||||||||||
|
Selecting the tool table for the test run ….. |
48 |
||||||||||
|
Choosing the program you want to test ….. |
49 |
||||||||||
|
Selecting the screen layout and the view ….. |
49 |
||||||||||
|
Starting the program test |
….. 49 |
||||||||||
|
1.5 |
Tool Setup ….. |
50 |
|||||||||
|
Selecting the correct operating mode ….. |
50 |
||||||||||
|
Preparing and measuring tools ….. |
50 |
||||||||||
|
The tool table TOOL.T ….. |
50 |
||||||||||
|
The pocket table TOOL_P.TCH |
….. |
51 |
|||||||||
|
1.6 |
Workpiece Setup ….. |
52 |
|||||||||
|
Selecting the correct operating mode ….. |
52 |
||||||||||
|
Clamping the workpiece ….. |
52 |
||||||||||
|
Aligning the workpiece with a 3-D touch probe system ….. |
53 |
||||||||||
|
Datum setting with a 3-D touch probe ….. |
54 |
||||||||||
|
1.7 |
Running the First Program ….. |
55 |
|||||||||
|
Selecting the correct operating mode ….. |
55 |
||||||||||
|
Choosing the program you want to run ….. |
55 |
||||||||||
|
Starting the program ….. |
55 |

|
…..2 Introduction |
57 |
|||||||
|
2.1 The TNC 640 |
….. 58 |
|||||||
|
Programming: HEIDENHAIN conversational and ISO formats ….. |
58 |
|||||||
|
Compatibility ….. |
58 |
|||||||
|
2.2 Visual Display Unit and Keyboard ….. |
59 |
|||||||
|
Visual display unit ….. |
59 |
|||||||
|
Setting the screen layout ….. |
60 |
|||||||
|
Operating panel |
….. 61 |
|||||||
|
2.3 Operating Modes ….. |
62 |
|||||||
|
Manual Operation and El. Handwheel |
….. 62 |
|||||||
|
Positioning with Manual Data Input ….. |
62 |
|||||||
|
Programming and Editing ….. |
63 |
|||||||
|
Test Run ….. |
63 |
|||||||
|
Program Run, Full Sequence and Program Run, Single Block ….. |
64 |
|||||||
|
2.4 Status Displays ….. |
65 |
|||||||
|
«General» status display ….. |
65 |
|||||||
|
Additional status displays ….. |
67 |
|||||||
|
2.5 Window Manager ….. |
74 |
|||||||
|
Soft-key row ….. |
75 |
|||||||
|
2.6 Accessories: HEIDENHAIN 3-D Touch Probes and Electronic Handwheels ….. |
76 |
|||||||
|
3-D touch probes ….. |
76 |
|||||||
|
HR electronic handwheels ….. |
77 |
14

|
…..3 Programming: Fundamentals, File Management |
79 |
|||||||||||
|
3.1 Fundamentals ….. |
80 |
|||||||||||
|
Position encoders and reference marks |
….. |
80 |
||||||||||
|
Reference system ….. |
80 |
|||||||||||
|
Reference system on milling machines |
….. |
81 |
||||||||||
|
Designation of the axes on milling machines ….. |
81 |
|||||||||||
|
Polar coordinates ….. |
82 |
|||||||||||
|
Absolute and incremental workpiece positions ….. |
83 |
|||||||||||
|
Setting the datum ….. |
84 |
|||||||||||
|
3.2 Creating and Writing Programs ….. |
85 |
|||||||||||
|
Organization of an NC program in HEIDENHAIN Conversational ….. |
85 |
|||||||||||
|
Define the blank: BLK FORM ….. |
85 |
|||||||||||
|
Creating a new part program |
….. |
86 |
||||||||||
|
Programming tool movements in conversational format |
….. 88 |
|||||||||||
|
Actual position capture ….. |
90 |
|||||||||||
|
Editing a program ….. |
91 |
|||||||||||
|
The TNC search function ….. |
95 |
|||||||||||
|
3.3 File Management: Fundamentals ….. |
97 |
|||||||||||
|
Files ….. |
97 |
|||||||||||
|
Showing externally created files on the TNC ….. |
99 |
|||||||||||
|
Data backup ….. |
99 |
|||||||||||
|
3.4 Working with the File Manager ….. |
100 |
|||||||||||
|
Directories ….. |
100 |
|||||||||||
|
Paths ….. |
100 |
|||||||||||
|
Overview: Functions of the file manager ….. |
101 |
|||||||||||
|
Calling the file manager |
….. 102 |
|||||||||||
|
Selecting drives, directories and files ….. |
103 |
|||||||||||
|
Creating a new directory ….. |
105 |
|||||||||||
|
Creating a new file ….. |
105 |
|||||||||||
|
Copying a single file ….. |
106 |
|||||||||||
|
Copying files into another directory ….. |
107 |
|||||||||||
|
Copying a table ….. |
108 |
|||||||||||
|
Copying a directory |
….. |
108 |
||||||||||
|
Choosing one of the last files selected ….. |
109 |
|||||||||||
|
Deleting a file ….. |
109 |
|||||||||||
|
Deleting a directory |
….. |
110 |
||||||||||
|
Marking files ….. |
111 |
|||||||||||
|
Renaming a file ….. |
112 |
|||||||||||
|
File sorting ….. |
112 |
|||||||||||
|
Additional functions |
….. |
113 |
||||||||||
|
Additional tools for management of external file types ….. |
114 |
|||||||||||
|
Data transfer to or from an external data medium ….. |
119 |
|||||||||||
|
The TNC in a network ….. |
121 |
|||||||||||
|
USB devices on the TNC ….. |
122 |

|
…..4 Programming: Programming Aids |
123 |
|||||||||
|
4.1 Adding Comments |
….. 124 |
|||||||||
|
Application ….. |
124 |
|||||||||
|
Entering comments during programming |
….. 124 |
|||||||||
|
Inserting comments after program entry ….. |
124 |
|||||||||
|
Entering a comment in a separate block ….. |
124 |
|||||||||
|
Functions for editing of the comment ….. |
125 |
|||||||||
|
4.2 Display of NC Programs |
….. 126 |
|||||||||
|
Syntax highlighting ….. |
126 |
|||||||||
|
Scrollbar ….. |
126 |
|||||||||
|
4.3 Structuring Programs ….. |
127 |
|||||||||
|
Definition and applications ….. |
127 |
|||||||||
|
Displaying the program structure window / Changing the active window ….. |
127 |
|||||||||
|
Inserting a structuring block in the (left) program window ….. |
127 |
|||||||||
|
Selecting blocks in the program structure window ….. |
127 |
|||||||||
|
4.4 On-Line Calculator |
….. 128 |
|||||||||
|
Operation ….. |
128 |
|||||||||
|
4.5 Programming Graphics ….. |
130 |
|||||||||
|
Generating / not generating graphics during programming ….. |
130 |
|||||||||
|
Generating a graphic for an existing program ….. |
130 |
|||||||||
|
Block number display ON/OFF ….. |
131 |
|||||||||
|
Erasing the graphic ….. |
131 |
|||||||||
|
Showing grid lines ….. |
131 |
|||||||||
|
Magnifying or reducing a detail ….. |
131 |
|||||||||
|
4.6 Error Messages |
….. |
132 |
||||||||
|
Display of errors ….. |
132 |
|||||||||
|
Open the error window ….. |
132 |
|||||||||
|
Closing the error window ….. |
132 |
|||||||||
|
Detailed error messages ….. |
133 |
|||||||||
|
INTERNAL INFO soft key ….. |
133 |
|||||||||
|
Clearing errors ….. |
134 |
|||||||||
|
Error log ….. |
134 |
|||||||||
|
Keystroke log ….. |
135 |
|||||||||
|
Informational texts ….. |
136 |
|||||||||
|
Saving service files ….. |
136 |
|||||||||
|
Calling the TNCguide help system ….. |
136 |
|||||||||
|
4.7 Context-Sensitive Help System |
….. 137 |
|||||||||
|
Application ….. |
137 |
|||||||||
|
Working with the TNCguide |
….. 138 |
|||||||||
|
Downloading current help files ….. |
142 |
16

|
5 Programming: Tools |
….. 145 |
|||||
|
5.1 Entering Tool-Related Data ….. |
146 |
|||||
|
Feed rate F ….. |
146 |
|||||
|
Spindle speed S |
….. 147 |
|||||
|
5.2 Tool Data ….. |
148 |
|||||
|
Requirements for tool compensation |
….. 148 |
|||||
|
Tool numbers and tool names |
….. 148 |
|||||
|
Tool length L ….. |
148 |
|||||
|
Tool radius R ….. |
148 |
|||||
|
Delta values for lengths and radii ….. |
149 |
|||||
|
Entering tool data into the program ….. |
149 |
|||||
|
Entering tool data in the table |
….. 150 |
|||||
|
Pocket table for tool changer ….. |
157 |
|||||
|
Calling tool data |
….. 160 |
|||||
|
Tool change ….. |
161 |
|||||
|
Tool management (software option) ….. |
166 |
|||||
|
5.3 Tool Compensation |
….. 173 |
|||||
|
Introduction ….. |
173 |
|||||
|
Tool length compensation ….. |
173 |
|||||
|
Tool radius compensation ….. |
174 |

|
6 Programming: Programming Contours |
….. |
177 |
||||||||||||
|
6.1 Tool Movements |
….. |
178 |
||||||||||||
|
Path functions ….. |
178 |
|||||||||||||
|
FK free contour programming ….. |
178 |
|||||||||||||
|
Miscellaneous functions M ….. |
178 |
|||||||||||||
|
Subprograms and program section repeats ….. |
178 |
|||||||||||||
|
Programming with Q parameters |
….. 178 |
|||||||||||||
|
6.2 Fundamentals of Path Functions ….. |
179 |
|||||||||||||
|
Programming tool movements for workpiece machining ….. |
179 |
|||||||||||||
|
6.3 Contour Approach and Departure ….. |
183 |
|||||||||||||
|
Overview: Types of paths for contour approach and departure ….. |
183 |
|||||||||||||
|
Important positions for approach and departure |
….. 184 |
|||||||||||||
|
Approaching on a straight line with tangential connection: APPR LT ….. |
186 |
|||||||||||||
|
Approaching on a straight line perpendicular to the first contour point: APPR LN ….. 186 |
||||||||||||||
|
Approaching on a circular path with tangential connection: APPR CT ….. |
187 |
|||||||||||||
|
Approaching on a circular arc with tangential connection from a straight line to the contour: APPR LCT ….. |
188 |
|||||||||||||
|
Departing on a straight line with tangential connection: DEP LT ….. |
189 |
|||||||||||||
|
Departing on a straight line perpendicular to the last contour point: DEP LN ….. |
189 |
|||||||||||||
|
Departing on a circular path with tangential connection: DEP CT ….. |
190 |
|||||||||||||
|
Departing on a circular arc tangentially connecting the contour and a straight line: DEP LCT ….. |
190 |
|||||||||||||
|
6.4 Path Contours—Cartesian Coordinates ….. |
191 |
|||||||||||||
|
Overview of path functions ….. |
191 |
|||||||||||||
|
Straight line L |
….. |
192 |
||||||||||||
|
Inserting a chamfer between two straight lines |
….. 193 |
|||||||||||||
|
Corner rounding RND ….. |
194 |
|||||||||||||
|
Circle center CCI ….. |
195 |
|||||||||||||
|
Circular path C around circle center CC ….. |
196 |
|||||||||||||
|
Circular path CR with defined radius ….. |
197 |
|||||||||||||
|
Circular path CT with tangential connection ….. |
199 |
|||||||||||||
|
6.5 Path Contours—Polar Coordinates |
….. |
204 |
||||||||||||
|
Overview ….. |
204 |
|||||||||||||
|
Zero point for polar coordinates: pole CC ….. |
205 |
|||||||||||||
|
Straight line LP ….. |
205 |
|||||||||||||
|
Circular path CP around pole CC ….. |
206 |
|||||||||||||
|
Circular path CTP with tangential connection |
….. |
207 |
||||||||||||
|
Helical interpolation ….. |
208 |
18

|
6.6 Path Contours—FK Free Contour Programming ….. |
212 |
||||
|
Fundamentals ….. |
212 |
||||
|
Graphics during FK programming ….. |
214 |
||||
|
Initiating the FK dialog ….. |
215 |
||||
|
Pole for FK programming ….. |
216 |
||||
|
Free programming of straight lines ….. |
216 |
||||
|
Free programming of circular arcs ….. |
217 |
||||
|
Input possibilities |
….. 218 |
||||
|
Auxiliary points ….. |
222 |
||||
|
Relative data ….. |
223 |

|
7 Programming: Subprograms and Program Section Repeats ….. |
231 |
|
7.1 |
Labeling Subprograms and Program Section Repeats ….. |
232 |
|||||||
|
Labels |
….. 232 |
||||||||
|
7.2 |
Subprograms ….. |
233 |
|||||||
|
Operating sequence ….. |
233 |
||||||||
|
Programming notes ….. |
233 |
||||||||
|
Programming a subprogram ….. |
233 |
||||||||
|
Calling a subprogram |
….. |
233 |
|||||||
|
7.3 |
Program Section Repeats ….. |
234 |
|||||||
|
Label LBL ….. |
234 |
||||||||
|
Operating sequence ….. |
234 |
||||||||
|
Programming notes ….. |
234 |
||||||||
|
Programming a program section repeat |
….. 234 |
||||||||
|
Calling a program section repeat ….. |
234 |
||||||||
|
7.4 |
Separate Program as Subprogram ….. |
235 |
|||||||
|
Operating sequence ….. |
235 |
||||||||
|
Programming notes ….. |
235 |
||||||||
|
Calling any program as a subprogram ….. |
236 |
||||||||
|
7.5 |
Nesting ….. |
237 |
|||||||
|
Types of nesting ….. |
237 |
||||||||
|
Nesting depth |
….. 237 |
||||||||
|
Subprogram within a subprogram ….. |
238 |
||||||||
|
Repeating program section repeats ….. |
239 |
||||||||
|
Repeating a subprogram ….. |
240 |
||||||||
|
7.6 |
Programming Examples |
….. |
241 |
20
![]()
|
…..8 Programming: Q Parameters |
247 |
|||||||||||
|
8.1 |
Principle and Overview ….. |
248 |
||||||||||
|
Programming notes ….. |
249 |
|||||||||||
|
Calling Q-parameter functions |
….. |
250 |
||||||||||
|
8.2 |
Part Families—Q Parameters in Place of Numerical Values ….. |
251 |
||||||||||
|
Application ….. |
251 |
|||||||||||
|
8.3 |
Describing Contours through Mathematical Operations |
….. |
252 |
|||||||||
|
Application ….. |
252 |
|||||||||||
|
Overview ….. |
252 |
|||||||||||
|
Programming fundamental operations |
….. |
253 |
||||||||||
|
8.4 |
Trigonometric Functions |
….. 254 |
||||||||||
|
Definitions ….. |
254 |
|||||||||||
|
Programming trigonometric functions |
….. |
255 |
||||||||||
|
8.5 |
Circle Calculations |
….. 256 |
||||||||||
|
Application ….. |
256 |
|||||||||||
|
8.6 |
If-Then Decisions with Q Parameters ….. |
257 |
||||||||||
|
Application ….. |
257 |
|||||||||||
|
Unconditional jumps ….. |
257 |
|||||||||||
|
Programming If-Then decisions |
….. 257 |
|||||||||||
|
Abbreviations used: ….. |
258 |
|||||||||||
|
8.7 |
Checking and Changing Q Parameters ….. |
259 |
||||||||||
|
Procedure ….. |
259 |
|||||||||||
|
8.8 |
Additional Functions ….. |
261 |
||||||||||
|
Overview ….. |
261 |
|||||||||||
|
FN 14: ERROR: Displaying error messages ….. |
262 |
|||||||||||
|
FN 16: F-PRINT: Formatted output of text and Q-parameter values ….. |
267 |
|||||||||||
|
FN 18: SYS-DATUM READ ….. |
271 |
|||||||||||
|
FN 19: PLC: Transfer values to the PLC ….. |
280 |
|||||||||||
|
FN 20: WAIT FOR: NC and PLC synchronization ….. |
280 |
|||||||||||
|
FN 29: PLC: Transfer values to the PLC ….. |
282 |
|||||||||||
|
FN37: EXPORT |
….. 283 |
|||||||||||
|
8.9 |
Accessing Tables with SQL Commands ….. |
284 |
||||||||||
|
Introduction ….. |
284 |
|||||||||||
|
A Transaction |
….. |
285 |
||||||||||
|
Programming SQL commands |
….. |
287 |
||||||||||
|
Overview of the soft keys ….. |
287 |
|||||||||||
|
SQL BIND ….. |
288 |
|||||||||||
|
SQL SELECT ….. |
289 |
|||||||||||
|
SQL FETCH ….. |
292 |
|||||||||||
|
SQL UPDATE |
….. |
293 |
||||||||||
|
SQL INSERT ….. |
293 |
|||||||||||
|
SQL COMMIT ….. |
294 |
|||||||||||
|
SQL ROLLBACK ….. |
294 |

|
8.10 Entering Formulas Directly |
….. 295 |
||||||
|
Entering formulas ….. |
295 |
||||||
|
Rules for formulas ….. |
297 |
||||||
|
Programming example ….. |
298 |
||||||
|
8.11 String Parameters ….. |
299 |
||||||
|
String processing functions ….. |
299 |
||||||
|
Assigning string parameters ….. |
300 |
||||||
|
Chain-linking string parameters |
….. 301 |
||||||
|
Converting a numerical value to a string parameter ….. |
302 |
||||||
|
Copying a substring from a string parameter ….. |
303 |
||||||
|
Converting a string parameter to a numerical value ….. |
304 |
||||||
|
Checking a string parameter ….. |
305 |
||||||
|
Finding the length of a string parameter |
….. 306 |
||||||
|
Comparing alphabetic priority |
….. |
307 |
|||||
|
Reading machine parameters |
….. |
308 |
|||||
|
8.12 Preassigned Q Parameters ….. |
311 |
||||||
|
Values from the PLC: Q100 to Q107 ….. |
311 |
||||||
|
Active tool radius: Q108 ….. |
311 |
||||||
|
Tool axis: Q109 ….. |
312 |
||||||
|
Spindle status: Q110 ….. |
312 |
||||||
|
Coolant on/off: Q111 ….. |
312 |
||||||
|
Overlap factor: Q112 ….. |
312 |
|
Unit of measurement for dimensions in the program: Q113 ….. |
313 |
||||
|
Tool length: Q114 ….. |
313 |
||||
|
Coordinates after probing during program run ….. |
313 |
||||
|
Deviation between actual value and nominal value during automatic tool measurement with the TT 130 ….. |
314 |
||||
|
Tilting the working plane with mathematical angles: rotary axis coordinates calculated by the TNC |
….. 314 |
||||
|
Measurement results from touch probe cycles (see also User’s Manual for Touch Probe Cycles) ….. |
315 |
||||
|
8.13 Programming Examples |
….. 317 |
22

|
…..9 Programming: Miscellaneous Functions |
325 |
||||||||||
|
9.1 Entering Miscellaneous Functions M and STOP ….. |
326 |
||||||||||
|
Fundamentals ….. |
326 |
||||||||||
|
9.2 Miscellaneous Functions for Program Run Control, Spindle and Coolant |
….. 327 |
||||||||||
|
Overview ….. |
327 |
||||||||||
|
9.3 Miscellaneous Functions for Coordinate Data ….. |
328 |
||||||||||
|
Programming machine-referenced coordinates: M91/M92 ….. |
328 |
||||||||||
|
Moving to positions in a non-tilted coordinate system with a tilted working plane: M130 ….. |
330 |
||||||||||
|
9.4 Miscellaneous Functions for Contouring Behavior |
….. 331 |
||||||||||
|
Machining small contour steps: M97 ….. |
331 |
||||||||||
|
Machining open contour corners: M98 ….. |
333 |
||||||||||
|
Feed rate factor for plunging movements: M103 ….. |
334 |
||||||||||
|
Feed rate in millimeters per spindle revolution: M136 ….. |
335 |
||||||||||
|
Feed rate for circular arcs: M109/M110/M111 |
….. 336 |
||||||||||
|
Calculating the radius-compensated path in advance (LOOK AHEAD): M120 ….. |
337 |
||||||||||
|
Superimposing handwheel positioning during program run: M118 ….. |
339 |
||||||||||
|
Retraction from the contour in the tool-axis direction: M140 ….. |
340 |
||||||||||
|
Suppressing touch probe monitoring: M141 ….. |
341 |
||||||||||
|
Delete basic rotation: M143 ….. |
341 |
||||||||||
|
Automatically retract tool from the contour at an NC stop: M148 ….. |
342 |

|
…..10 Programming: Special Functions |
343 |
||||||
|
10.1 Overview of Special Functions ….. |
344 |
||||||
|
Main menu for SPEC FCT special functions ….. |
344 |
||||||
|
Program defaults menu ….. |
345 |
||||||
|
Functions for contour and point machining menu ….. |
345 |
||||||
|
Menu of various conversational functions ….. |
346 |
||||||
|
10.2 Working with the Parallel Axes U, V and W ….. |
347 |
||||||
|
Overview ….. |
347 |
||||||
|
FUNCTION PARAXCOMP DISPLAY ….. 348 |
|||||||
|
FUNCTION PARAXCOMP MOVE ….. |
349 |
||||||
|
FUNCTION PARAXCOMP OFF ….. |
350 |
||||||
|
FUNCTION PARAXMODE ….. |
351 |
||||||
|
FUNCTION PARAXMODE OFF ….. |
352 |
||||||
|
10.3 File Functions ….. |
353 |
||||||
|
Application ….. |
353 |
||||||
|
Defining file functions ….. |
353 |
||||||
|
10.4 Defining Coordinate Transformations |
….. 354 |
||||||
|
Overview ….. |
354 |
||||||
|
TRANS DATUM AXIS ….. |
354 |
||||||
|
TRANS DATUM TABLE ….. |
355 |
||||||
|
TRANS DATUM RESET ….. |
355 |
||||||
|
10.5 Creating Text Files ….. |
356 |
||||||
|
Application ….. |
356 |
||||||
|
Opening and exiting text files ….. |
356 |
||||||
|
Editing texts ….. |
357 |
||||||
|
Deleting and re-inserting characters, words and lines |
….. 358 |
||||||
|
Editing text blocks ….. |
359 |
||||||
|
Finding text sections |
….. |
360 |
24

|
11 Programming: Multiple Axis Machining |
….. |
361 |
|||||||||||
|
11.1 Functions for Multiple Axis Machining |
….. 362 |
||||||||||||
|
11.2 The PLANE Function: Tilting the Working Plane (Software Option 1) ….. |
363 |
||||||||||||
|
Introduction |
….. 363 |
||||||||||||
|
Define the PLANE function ….. |
365 |
||||||||||||
|
Position display ….. |
365 |
||||||||||||
|
Reset the PLANE function ….. |
366 |
||||||||||||
|
Defining the machining plane with spatial angles: PLANE SPATIAL |
….. 367 |
||||||||||||
|
Defining the machining plane with projection angles: PROJECTED PLANE |
….. |
369 |
|||||||||||
|
Defining the machining plane with Euler angles: EULER PLANE ….. |
371 |
||||||||||||
|
Defining the working plane with two vectors: VECTOR PLANE ….. |
373 |
||||||||||||
|
Defining the working plane via three points: PLANE POINTS |
….. 375 |
||||||||||||
|
Defining the machining plane with a single, incremental spatial angle: PLANE RELATIVE ….. |
377 |
||||||||||||
|
Tilting the working plane through axis angle: PLANE AXIAL (FCL 3 function) ….. |
378 |
||||||||||||
|
Specifying the positioning behavior of the PLANE function ….. |
380 |
||||||||||||
|
11.3 Inclined-Tool Machining in a Tilted Plane (Software Option 2) ….. |
385 |
||||||||||||
|
Function ….. |
385 |
||||||||||||
|
Inclined-tool machining via incremental traverse of a rotary axis ….. |
385 |
||||||||||||
|
Inclined-tool machining via normal vectors ….. |
386 |
||||||||||||
|
11.4 Miscellaneous Functions for Rotary Axes ….. |
387 |
||||||||||||
|
Feed rate in mm/min on rotary axes A, B, C: M116 (software option 1) ….. |
387 |
||||||||||||
|
Shorter-path traverse of rotary axes: M126 ….. |
388 |
||||||||||||
|
Reducing display of a rotary axis to a value less than 360°: M94 ….. |
389 |
||||||||||||
|
Maintaining the position of the tool tip when positioning with tilted axes (TCPM): M128 (software option |
|||||||||||||
|
2) ….. |
390 |
||||||||||||
|
Selecting tilting axes: M138 |
….. 392 |
||||||||||||
|
Compensating the machine’s kinematics configuration for ACTUAL/NOMINAL positions at end of block: M144 |
|||||||||||||
|
(software option 2) |
….. 393 |
||||||||||||
|
11.5 TCPM FUNCTION (Software Option 2) |
….. 394 |
||||||||||||
|
Function ….. |
394 |
||||||||||||
|
Defining the TCPM FUNCTION ….. |
395 |
||||||||||||
|
Mode of action of the programmed feed rate |
….. 395 |
||||||||||||
|
Interpretation of the programmed rotary axis coordinates ….. |
396 |
||||||||||||
|
Type of interpolation between the starting and end position ….. |
397 |
||||||||||||
|
Resetting the TCPM FUNCTION ….. |
398 |
||||||||||||
|
11.6 Three-Dimensional Tool Compensation (Software Option 2) ….. |
399 |
||||||||||||
|
Introduction ….. |
399 |
||||||||||||
|
Definition of a normalized vector ….. |
400 |
||||||||||||
|
Permissible tool shapes ….. |
401 |
||||||||||||
|
Using other tools: Delta values ….. |
401 |
||||||||||||
|
3-D compensation without TCPM ….. |
402 |
||||||||||||
|
Face milling: 3-D compensation with TCPM ….. |
402 |
||||||||||||
|
Peripheral milling: 3-D radius compensation with TCPM and radius compensation (RL/RR) ….. |
404 |

|
12 Programming: Pallet Editor ….. |
407 |
|
12.1 Pallet Editor ….. |
408 |
|
|
Application ….. |
408 |
|
|
Selecting a pallet table ….. |
410 |
|
|
Exiting the pallet file ….. |
410 |
|
|
Executing the pallet file ….. |
411 |
26

|
13 Programming: Turning Operations |
….. |
413 |
|||||
|
13.1 Turning Operations on Milling Machines (Software Option 50) ….. |
414 |
||||||
|
Introduction |
….. 414 |
||||||
|
13.2 Basis Functions (Software Option 50) ….. |
415 |
||||||
|
Switching between milling/turning mode of operation ….. |
415 |
||||||
|
Graphical display of turning operations ….. |
417 |
||||||
|
Programming the speed ….. |
418 |
||||||
|
Feed rate ….. |
419 |
||||||
|
Tool call ….. |
420 |
||||||
|
Tool compensation in the program ….. |
420 |
||||||
|
Tool data ….. |
421 |
||||||
|
Tool tip radius compensation TRC ….. |
423 |
||||||
|
Recessing and undercutting |
….. 424 |
||||||
|
Inclined turning ….. |
431 |
||||||
|
13.3 Unbalance Functions |
….. 433 |
||||||
|
Unbalance while turning ….. |
433 |
||||||
|
Measure Unbalance cycle ….. |
435 |

|
14 Manual Operation and Setup |
….. |
437 |
||||||||||
|
14.1 Switch-On, Switch-Off ….. |
438 |
|||||||||||
|
Switch-on ….. |
438 |
|||||||||||
|
Switch-off ….. |
440 |
|||||||||||
|
14.2 Moving the Machine Axes |
….. 441 |
|||||||||||
|
Note ….. |
441 |
|||||||||||
|
Moving the axis using the machine axis direction buttons ….. |
441 |
|||||||||||
|
Incremental jog positioning ….. |
442 |
|||||||||||
|
Traversing with the HR 410 electronic handwheel ….. |
443 |
|||||||||||
|
14.3 Spindle Speed S, Feed Rate F and Miscellaneous Functions M |
….. |
444 |
||||||||||
|
Application ….. |
444 |
|||||||||||
|
Entering values ….. |
444 |
|||||||||||
|
Changing the spindle speed and feed rate |
….. 445 |
|||||||||||
|
Activating feed-rate limitation |
….. |
446 |
||||||||||
|
14.4 Datum Setting without a 3-D Touch Probe |
….. |
447 |
||||||||||
|
Note ….. |
447 |
|||||||||||
|
Preparation ….. |
447 |
|||||||||||
|
Workpiece presetting with axis keys ….. |
448 |
|||||||||||
|
Datum management with the preset table ….. |
449 |
|||||||||||
|
14.5 Using the 3-D Touch Probe ….. |
455 |
|||||||||||
|
Overview ….. |
455 |
|||||||||||
|
Selecting touch probe cycles |
….. |
455 |
||||||||||
|
Writing the measured values from touch probe cycles in datum tables ….. |
456 |
|||||||||||
|
Writing the measured values from touch probe cycles in the preset table ….. |
456 |
|||||||||||
|
14.6 Calibrating a 3-D Touch Probe ….. |
457 |
|||||||||||
|
Introduction ….. |
457 |
|||||||||||
|
Calibrating the effective length |
….. 458 |
|||||||||||
|
Calibrating the effective radius and compensating center misalignment ….. |
459 |
|||||||||||
|
Displaying calibration values ….. |
460 |
|||||||||||
|
14.7 Compensating Workpiece Misalignment with a 3-D Touch Probe ….. |
461 |
|||||||||||
|
Introduction ….. |
461 |
|||||||||||
|
Measuring a basic rotation ….. |
462 |
|||||||||||
|
Saving a basic rotation in the preset table ….. |
462 |
|||||||||||
|
Displaying a basic rotation ….. |
462 |
|||||||||||
|
Canceling a basic rotation ….. |
462 |
28

|
14.8 Datum Setting with a 3-D Touch Probe |
….. 463 |
||||||
|
Overview ….. |
463 |
||||||
|
Datum setting in any axis |
….. 463 |
||||||
|
Corner as datum ….. 464 |
|||||||
|
Circle center as datum ….. |
465 |
||||||
|
Measuring workpieces with a 3-D touch probe ….. |
466 |
||||||
|
Using touch probe functions with mechanical probes or dial gauges ….. |
469 |
||||||
|
14.9 Tilting the Working Plane (Software Option 1) ….. |
470 |
||||||
|
Application, function ….. |
470 |
||||||
|
Traversing reference points in tilted axes ….. |
472 |
||||||
|
Position display in a tilted system ….. |
472 |
||||||
|
Limitations on working with the tilting function |
….. 472 |
||||||
|
Activating manual tilting ….. |
473 |
||||||
|
Setting the current tool-axis direction as the active machining direction ….. |
474 |
||||||
|
Setting the datum in a tilted coordinate system ….. |
475 |

|
15 Positioning with Manual Data Input ….. |
477 |
|
15.1 Programming and Executing Simple Machining Operations ….. 478 |
|
|
Positioning with Manual Data Input (MDI) |
….. 478 |
|
Protecting and erasing programs in $MDI ….. |
481 |
30
![]()
|
16 Test Run and Program Run |
….. |
483 |
|||||||
|
16.1 |
Graphics ….. |
484 |
|||||||
|
Application |
….. 484 |
||||||||
|
Setting the speed of the test run |
….. 485 |
||||||||
|
Overview of display modes ….. |
486 |
||||||||
|
Plan view ….. |
486 |
||||||||
|
Projection in 3 planes ….. |
487 |
||||||||
|
3-D view ….. |
488 |
||||||||
|
Magnifying details ….. |
490 |
||||||||
|
Repeating graphic simulation ….. |
491 |
||||||||
|
Displaying the tool ….. |
491 |
||||||||
|
Measuring the machining time ….. |
492 |
||||||||
|
3-D line graphics ….. |
493 |
||||||||
|
16.2 |
Showing the Blank in the Working Space ….. |
495 |
|||||||
|
Application |
….. 495 |
||||||||
|
16.3 |
Functions for Program Display ….. |
496 |
|||||||
|
Overview ….. |
496 |
||||||||
|
16.4 |
Test Run ….. |
497 |
|||||||
|
Application |
….. 497 |
||||||||
|
16.5 |
Program run ….. |
499 |
|||||||
|
Application |
….. 499 |
||||||||
|
Running a part program ….. |
500 |
||||||||
|
Interrupting machining ….. |
501 |
||||||||
|
Moving the machine axes during an interruption |
….. 502 |
||||||||
|
Resuming program run after an interruption ….. |
503 |
||||||||
|
Mid-program startup (block scan) |
….. 504 |
||||||||
|
Returning to the contour ….. |
506 |
||||||||
|
16.6 |
Automatic Program Start ….. |
507 |
|||||||
|
Application |
….. 507 |
||||||||
|
16.7 |
Optional block skip ….. |
508 |
|||||||
|
Application |
….. 508 |
||||||||
|
Inserting the «/» character ….. |
508 |
||||||||
|
Erasing the «/» character ….. |
508 |
||||||||
|
16.8 |
Optional Program-Run Interruption ….. |
509 |
|||||||
|
Application |
….. 509 |

|
…..17 MOD Functions |
511 |
|||||||
|
17.1 |
Selecting MOD Functions |
….. 512 |
||||||
|
Selecting the MOD functions |
….. |
512 |
||||||
|
Changing the settings ….. |
512 |
|||||||
|
Exiting the MOD functions ….. |
512 |
|||||||
|
Overview of MOD functions ….. |
513 |
|||||||
|
17.2 |
Software Numbers |
….. 514 |
||||||
|
Application ….. |
514 |
|||||||
|
17.3 |
Entering Code Numbers ….. |
515 |
||||||
|
Application ….. |
515 |
|||||||
|
17.4 |
Setting the Data Interfaces ….. |
516 |
||||||
|
Serial interfaces on the TNC 640 |
….. 516 |
|||||||
|
Application ….. |
516 |
|||||||
|
Setting the RS-232 interface ….. |
516 |
|||||||
|
Setting the baud rate (baudRate) |
….. 516 |
|||||||
|
Setting the protocol (protocol) ….. |
516 |
|||||||
|
Setting the data bits (dataBits) ….. |
517 |
|||||||
|
Parity check (parity) ….. |
517 |
|||||||
|
Setting the stop bits (stopBits) ….. |
517 |
|||||||
|
Setting the handshake (flowControl) ….. |
517 |
|||||||
|
Settings for data transfer with the TNCserver PC software ….. |
518 |
|||||||
|
Setting the operating mode of the external device (fileSystem) |
….. 518 |
|||||||
|
Software for data transfer ….. |
519 |
|||||||
|
17.5 |
Ethernet Interface |
….. 521 |
||||||
|
Introduction ….. |
521 |
|||||||
|
Connection possibilities |
….. 521 |
|||||||
|
Configuring the TNC ….. |
522 |
|||||||
|
17.6 |
Position Display Types ….. |
528 |
||||||
|
Application ….. |
528 |
|||||||
|
17.7 |
Unit of Measurement ….. |
529 |
||||||
|
Application ….. |
529 |
|||||||
|
17.8 |
Displaying Operating Times ….. |
530 |
||||||
|
Application ….. |
530 |
32

|
…..18 Tables and Overviews |
531 |
||||||
|
18.1 |
Machine-Specific User Parameters ….. |
532 |
|||||
|
Application ….. |
532 |
||||||
|
18.2 |
Pin Layouts and Connecting Cables for the Data Interfaces ….. |
540 |
|||||
|
RS-232-C/V.24 interface for HEIDENHAIN devices ….. |
540 |
||||||
|
Non-HEIDENHAIN devices ….. |
541 |
|
Ethernet interface RJ45 socket |
….. 541 |
||
|
18.3 |
Technical Information ….. |
542 |
|
|
18.4 |
Exchanging the Buffer Battery ….. |
549 |

34

First Steps with the TNC 640

1.1 Overview
This chapter is intended to help TNC beginners quickly learn to handle the most important procedures. For more information on a respective topic, see the section referred to in the text.
The following topics are included in this chapter:
Machine Switch-On
Programming the First Part
Graphically Testing the First Program
Tool Setup
Workpiece Setup
Running the First Program
|
36 |
First Steps with the TNC 640 |

1.2 Machine Switch-On
Acknowledging the power interruption and moving to the reference points
Switch-on and crossing the reference points can vary depending on the machine tool. Your machine manual provides more detailed information.
USwitch on the power supply for control and machine. The TNC starts the operating system. This process may take several minutes. Then the TNC will display the message «Power interruption.»
U Press the CE key: The TNC compiles the PLC program
USwitch on the control voltage: The TNC checks operation of the emergency stop circuit and goes into the reference run mode
UCross the reference points manually in the displayed sequence: For each axis press the machine START button. If you have absolute linear and angle encoders on your machine there is no need for a reference run
The TNC is now ready for operation in the Manual Operation mode.
Further information on this topic
Traversing the reference marks: See «Switch-on» on page 438
Operating modes: See «Programming and Editing» on page 63
1.2 Machine Switch-On

1.3 Programming the First Part
1.3 Programming the First Part
Selecting the correct operating mode
You can write programs only in the Programming and Editing mode:
UPress the operating modes key: The TNC goes into the Programming and Editing mode
Further information on this topic
Operating modes: See «Programming and Editing» on page 63
The most important TNC keys
|
Functions for conversational guidance |
Key |
Confirm entry and activate the next dialog prompt
Ignore the dialog question
End the dialog immediately
Abort dialog, discard entries
Soft keys on the screen with which you select functions appropriate to the active state
Further information on this topic
Writing and editing programs: See «Editing a program» on page 91
Overview of keys: See «Controls of the TNC» on page 2
|
38 |
First Steps with the TNC 640 |

Creating a new program/file management
U Press the PGM MGT key: The TNC displays the file management. The file management of the TNC is arranged much like the file management on a PC with the Windows Explorer. The file management enables you to manipulate data on the TNC hard disk
UUse the arrow keys to select the folder in which you want to open the new file
UEnter a file name with the extension .H: The TNC then automatically opens a program and asks for the unit of measure for the new program
UTo select the unit of measure, press the MM or INCH soft key: The TNC automatically starts the workpiece blank definition (see «Defining a workpiece blank» on page 40)
The TNC automatically generates the first and last blocks of the program. Afterwards you can no longer change these blocks.
Further information on this topic
File management: See «Working with the File Manager» on page 100
Creating a new program: See «Creating and Writing Programs» on page 85
1.3 Programming the First Part

1.3 Programming the First Part
Defining a workpiece blank
Immediately after you have created a new program, the TNC starts the dialog for entering the workpiece blank definition. Always define the workpiece blank as a cuboid by entering the MIN and MAX points, each with reference to the selected reference point.
After you have created a new program, the TNC automatically initiates the workpiece blank definition and asks for the required data:
UWorking plane in graphic: XY?: Enter the active spindle axis. Z is saved as default setting. Accept with the ENT key
UWorkpiece blank def.: Minimum X: Enter the smallest X coordinate of the workpiece blank with respect to the reference point, e.g. 0. Confirm with the ENT key
UWorkpiece blank def.: Minimum Y: Enter the smallest Y coordinate of the workpiece blank with respect to the reference point, e.g. 0. Confirm with the ENT key
UWorkpiece blank def.: Minimum Z: Enter the smallest Z coordinate of the workpiece blank with respect to the reference point, e.g. –40. Confirm with the ENT key
UWorkpiece blank def.: Maximum X: Enter the largest X coordinate of the workpiece blank with respect to the reference point, e.g. 100. Confirm with the ENT key
UWorkpiece blank def.: Maximum Y: Enter the largest Y coordinate of the workpiece blank with respect to the reference point, e.g. 100. Confirm with the ENT key
UWorkpiece blank def.: Maximum Z: Enter the largest Z coordinate of the workpiece blank with respect to the reference point, e.g. 0. Confirm with the ENT key. The TNC concludes the dialog
Example NC blocks
|
0 |
BEGIN PGM NEW MM |
||||
|
1 |
BLK |
FORM |
0.1 |
Z X+0 |
Y+0 Z-40 |
|
2 |
BLK |
FORM |
0.2 |
X+100 |
Y+100 Z+0 |
|
3 |
END |
PGM |
NEW |
MM |
|
Further information on this topic
Defining the workpiece blank: (see page 86)
|
40 |
First Steps with the TNC 640 |
![]()
Program layout
NC programs should be arranged consistently in a similar manner. This makes it easier to find your place, accelerates programming and reduces errors.
Recommended program layout for simple, conventional contour machining
1Call tool, define tool axis
2Retract the tool
3Pre-position the tool in the working plane near the contour starting point
4In the tool axis, position the tool above the workpiece, or pre-position immediately to workpiece depth. If required, switch on the spindle/coolant
5Move to the contour
6Machine the contour
7Leave the contour
8Retract the tool, end the program
Further information on this topic:
Contour programming: See «Tool Movements» on page 178
Recommended program layout for simple cycle programs
1Call tool, define tool axis
2Retract the tool
3Define the machining positions
4Define the fixed cycle
5Call the cycle, switch on the spindle/coolant
6Retract the tool, end the program
Further information on this topic:
Cycle programming: See User’s Manual for Cycles
Example: Layout of contour machining programs
0 BEGIN PGM BSPCONT MM
1BLK FORM 0.1 Z X… Y… Z…
2BLK FORM 0.2 X… Y… Z…
3TOOL CALL 5 Z S5000
4L Z+250 R0 FMAX
5L X… Y… R0 FMAX
6L Z+10 R0 F3000 M13
7APPR … RL F500
…
16DEP … X… Y… F3000 M9
17L Z+250 R0 FMAX M2
18END PGM BSPCONT MM
Example: Program layout for cycle programming
0 BEGIN PGM BSBCYC MM
1BLK FORM 0.1 Z X… Y… Z…
2BLK FORM 0.2 X… Y… Z…
3TOOL CALL 5 Z S5000
4L Z+250 R0 FMAX
5PATTERN DEF POS1( X… Y… Z… ) …
6CYCL DEF…
7CYCL CALL PAT FMAX M13
8L Z+250 R0 FMAX M2
9END PGM BSBCYC MM
1.3 Programming the First Part

1.3 Programming the First Part
Programming a simple contour
The contour shown to the right is to be milled once to a depth of 5 mm. You have already defined the workpiece blank. After you have initiated a dialog through a function key, enter all the data requested by the TNC in the screen header.
U Call the tool: Enter the tool data. Confirm each of your entries with the ENT key. Do not forget the tool axis
U Retract the tool: Press the orange axis key Z in order to get clear in the tool axis, and enter the value for the position to be approached, e.g. 250. Confirm with the ENT key
UConfirm Radius comp.: RL/RR/no comp? by pressing the ENT key: Do not activate the radius compensation
UConfirm Feed rate F=? with the ENT key: Move at rapid traverse (FMAX)
|
Y |
10 |
||
|
95 |
3 |
||
|
2 |
10 |
||
|
1 |
4 |
20 |
|
|
5 |
|||
|
20 |
X |
||
|
5 |
9 |
UConfirm the Miscellaneous function M? with the END key: The TNC saves the entered positioning block
UPreposition the tool in the working plane: Press the orange X axis key and enter the value for the position to be approached, e.g. –20
UPress the orange Y axis key and enter the value for the position to be approached, e.g. –20. Confirm with the ENT key
UConfirm Radius comp.: RL/RR/no comp? by pressing the ENT key: Do not activate the radius compensation
UConfirm Feed rate F=? with the ENT key: Move at rapid traverse (FMAX)
UConfirm the Miscellaneous function M? with the END key: The TNC saves the entered positioning block
UMove the tool to workpiece depth: Press the orange axis key and enter the value for the position to be approached, e.g. –5. Confirm with the ENT key
UConfirm Radius comp.: RL/RR/no comp? by pressing the ENT key: Do not activate the radius compensation
UFeed rate F=? Enter the positioning feed rate, e.g. 3000 mm/min and confirm with the ENT key
UMiscellaneous function M? Switch on the spindle and coolant, e.g. M13. Confirm with the END key: The TNC saves the entered positioning block
|
42 |
First Steps with the TNC 640 |

UMove to the contour: Press the APPR/DEP key: The TNC shows a soft-key row with approach and departure functions
USelect the approach function APPR CT: Enter the coordinates of the contour starting point 1 in X and Y, e.g. 5/5. Confirm with the ENT key
UCenter angle? Enter the approach angle, e.g. 90°, and confirm with the ENT key
UCircle radius? Enter the approach radius, e.g. 8 mm, and confirm with the ENT key
UConfirm the Radius comp.: RL/RR/no comp? with the RL soft key: Activate the radius compensation to the left of the programmed contour
UFeed rate F=? Enter the machining feed rate, e.g. 700 mm/min, and confirm your entry with the END key
UMachine the contour and move to contour point 2: You only need to enter the information that changes. In other words, enter only the Y coordinate 95 and save your entry with the END key
UMove to contour point 3: Enter the X coordinate 95 and save your entry with the END key
UDefine the chamfer at contour point 3: Enter the chamfer width 10 mm and save with the END key
UMove to contour point 4: Enter the Y coordinate 5 and save your entry with the END key
UDefine the chamfer at contour point 4: Enter the chamfer width 20 mm and save with the END key
UMove to contour point 1: Enter the X coordinate 5 and save your entry with the END key
1.3 Programming the First Part

1.3 Programming the First Part
U Depart the contour
USelect the departure function DEP CT
UCenter angle? Enter the departure angle, e.g. 90°, and confirm with the ENT key
UCircle radius? Enter the departure radius, e.g. 8 mm, and confirm with the ENT key
UFeed rate F=? Enter the positioning feed rate, e.g. 3000 mm/min and save it with the ENT key
UMiscellaneous function M? Switch off the coolant, e.g. M9, with the END key: The TNC saves the entered positioning block
U Retract the tool: Press the orange axis key Z in order to get clear in the tool axis, and enter the value for the position to be approached, e.g. 250. Confirm with the ENT key
UConfirm Radius comp.: RL/RR/no comp? by pressing the ENT key: Do not activate the radius compensation
UConfirm Feed rate F=? with the ENT key: Move at rapid traverse (FMAX)
UMiscellaneous function M? Enter M2 to end the program and confirm with the END key: The TNC saves the entered positioning block
Further information on this topic
Complete example with NC blocks: See «Example: Linear movements and chamfers with Cartesian coordinates» on page 200
Creating a new program: See «Creating and Writing Programs» on page 85
Approaching/departing contours: See «Contour Approach and Departure» on page 183
Programming contours: See «Overview of path functions» on page 191
Programmable feed rates: See «Possible feed rate input» on page 89
Tool radius compensation: See «Tool radius compensation» on page 174
Miscellaneous functions (M): See «Miscellaneous Functions for Program Run Control, Spindle and Coolant» on page 327
|
44 |
First Steps with the TNC 640 |

Creating a cycle program
The holes (depth of 20 mm) shown in the figure at right are to be drilled with a standard drilling cycle. You have already defined the workpiece blank.
U Call the tool: Enter the tool data. Confirm each of your entries with the ENT key. Do not forget the tool axis
U Retract the tool: Press the orange axis key Z in order to get clear in the tool axis, and enter the value for the position to be approached, e.g. 250. Confirm with the ENT key
UConfirm Radius comp.: RL/RR/no comp? by pressing the ENT key: Do not activate the radius compensation
UConfirm Feed rate F=? with the ENT key: Move at rapid traverse (FMAX)
UConfirm the Miscellaneous function M? with the END key: The TNC saves the entered positioning block
U Call the cycle menu
U Display the drilling cycles
USelect the standard drilling cycle 200: The TNC starts the dialog for cycle definition. Enter all parameters requested by the TNC step by step and conclude each entry with the ENT key. In the screen to the right, the TNC also displays a graphic showing the respective cycle parameter
|
Y |
|
|
100 |
|
|
90 |
|
|
10 |
|
|
10 20 |
X |
|
80 90 100 |
1.3 Programming the First Part

1.3 Programming the First Part
U Call the menu for special functions
U Display the functions for point machining
U Select the pattern definition
USelect point entry: Enter the coordinates of the 4 points and confirm each with the ENT key. After entering the fourth point, save the block with the END key
U Display the menu for defining the cycle call
|
U Run the drilling cycle on the defined pattern: |
||||||
|
U Confirm Feed rate F=? with the ENT key: Move at |
||||||
|
rapid traverse (FMAX) |
||||||
|
U Miscellaneous function M? Switch on the spindle and |
||||||
|
coolant, e.g. M13. Confirm with the END key: The TNC |
||||||
|
saves the entered positioning block |
||||||
|
U Retract the tool: Press the orange axis key Z in order |
||||||
|
to get clear in the tool axis, and enter the value for the |
||||||
|
position to be approached, e.g. 250. Confirm with the |
||||||
|
ENT key |
||||||
|
U Confirm Radius comp.: RL/RR/no comp? by pressing |
||||||
|
the ENT key: Do not activate the radius compensation |
||||||
|
U Confirm Feed rate F=? with the ENT key: Move at |
||||||
|
rapid traverse (FMAX) |
||||||
|
U Miscellaneous function M? Enter M2 to end the |
||||||
|
program and confirm with the END key: The TNC |
||||||
|
saves the entered positioning block |
||||||
|
Example NC blocks |
||||||
|
0 |
BEGIN PGM C200 MM |
|||||
|
1 |
BLK |
FORM |
0.1 |
Z X+0 |
Y+0 Z-40 |
Definition of workpiece blank |
|
2 |
BLK |
FORM |
0.2 |
X+100 |
Y+100 Z+0 |
|
|
3 |
TOOL CALL 5 Z |
S4500 |
Tool call |
|||
|
4 |
L Z+250 |
R0 FMAX |
Retract the tool |
|||
|
5 |
PATTERN |
DEF |
Define machining positions |
|||
|
POS1 |
(X+10 |
Y+10 |
Z+0) |
|||
|
POS2 |
(X+10 |
Y+90 |
Z+0) |
|||
|
POS3 |
(X+90 |
Y+90 |
Z+0) |
|||
|
POS4 |
(X+90 |
Y+10 |
Z+0) |
|||
|
46 |
First Steps with the TNC 640 |

|
6 |
CYCL DEF 200 |
DRILLING |
Define the cycle |
|||
|
Q200=2 |
;SET-UP CLEARANCE |
|||||
|
Q201=–20 |
;DEPTH |
|||||
|
Q206=250 |
;FEED |
RATE |
FOR |
PLNGNG |
||
|
Q202=5 |
;PLUNGING |
DEPTH |
||||
|
Q210=0 |
;DWELL |
TIME AT |
TOP |
|||
|
Q203=-10 |
;SURFACE COORDINATE |
|||||
|
Q204=20 |
;2ND SET-UP CLEARANCE |
|||||
|
Q211=0.2 |
;DWELL |
TIME AT |
DEPTH |
|||
|
7 |
CYCL CALL PAT |
FMAX M13 |
Spindle and coolant on, call the cycle |
|||
|
8 |
L Z+250 R0 FMAX M2 |
Retract in the tool axis, end program |
||||
|
9 |
END PGM C200 |
MM |
||||
Further information on this topic
Creating a new program: See «Creating and Writing Programs» on page 85
Cycle programming: See User’s Manual for Cycles
1.3 Programming the First Part

1.4 Graphically Testing the First Program
1.4Graphically Testing the First Program
Selecting the correct operating mode
You can test programs only in the Test Run mode:
UPress the operating modes key: The TNC goes into the Test Run mode
Further information on this topic
Operating modes of the TNC: See «Operating Modes» on page 62
Testing programs: See «Test Run» on page 497
Selecting the tool table for the test run
You only need to execute this step if you have not activated a tool table in the Test Run mode.
U Press the PGM MGT key: The TNC displays the file manager
UPress the SELECT TYPE soft key: The TNC shows a soft-key menu for selection of the file type to be displayed
UPress the SHOW ALL soft key: The TNC shows all saved files in the right window
U Move the highlight to the left onto the directories
U Move the highlight to the TNC: directory
U Move the highlight to the right onto the files
U Move the highlight to the file TOOL.T (active tool table) and load with the ENT key: TOOL.T receives the status S and is therefore active for the Test Run
U Press the END key: Leave the file manager
Further information on this topic
Tool management: See «Entering tool data in the table» on page 150
Testing programs: See «Test Run» on page 497
|
48 |
First Steps with the TNC 640 |

Choosing the program you want to test
U Press the PGM MGT key: The TNC displays the file manager
UPress the LAST FILES soft key: The TNC opens a pop-up window with the most recently selected files
UUse the arrow keys to select the program that you want to test. Load with the ENT key
Further information on this topic
Selecting a program: See «Working with the File Manager» on page 100
Selecting the screen layout and the view
U Press the key for selecting the screen layout. The TNC shows all available alternatives in the soft-key row
UPress the PROGRAM + GRAPHICS soft key: In the left half of the screen the TNC shows the program; in the right half it shows the workpiece blank
USelect the desired view via soft key
U Plan view
U Projection in three planes
U 3-D view
Further information on this topic
Graphic functions: See «Graphics» on page 484
Running a test run: See «Test Run» on page 497
Starting the program test
UPress the RESET + START soft key: The TNC simulates the active program up to a programmed break or to the program end
UWhile the simulation is running, you can use the soft keys to change views.
UPress the STOP soft key: The TNC interrupts the test run
UPress the START soft key: The TNC resumes the test run after a break
Further information on this topic
Running a test run: See «Test Run» on page 497
Graphic functions: See «Graphics» on page 484
Adjusting the test speed: See «Setting the speed of the test run» on page 485
1.4 Graphically Testing the First Program

1.5 Tool Setup
Selecting the correct operating mode
Tools are set up in the Manual Operation mode:
UPress the operating modes key: The TNC goes into the Manual Operation mode
Further information on this topic
Operating modes of the TNC: See «Operating Modes» on page 62
Preparing and measuring tools
UClamp the required tools in their chucks
UWhen measuring with an external tool presetter: Measure the tools, note down the length and radius, or transfer them directly to the machine through a transfer program
UWhen measuring on the machine: Place the tools into the tool changer (see page 51)
The tool table TOOL.T
In the tool table TOOL.T (permanently saved under TNC:TABLE), save the tool data such as length and radius, but also further tool-specific information that the TNC needs to perform its functions.
To enter tool data in the tool table TOOL.T, proceed as follows:
UDisplay the tool table
UEdit the tool table: Set the EDITING soft key to ON
UWith the upward or downward arrow keys you can select the tool number that you want to edit
UWith the rightward or leftward arrow keys you can select the tool data that you want to edit
UTo leave the tool table, press the END key
Further information on this topic
Operating modes of the TNC: See «Operating Modes» on page 62
Working with the tool table: See «Entering tool data in the table» on page 150
|
50 |
First Steps with the TNC 640 |
This part of our website brings various platforms and archives together in one place where machine users can easily find documentation for milling controls and lathe controls, and for digital readouts of the series VRZ, ND, POSITIP 880, and IK 5000 QUADRA-CHEK.
Home
Service & Support
Downloads
Documentation
User documentation for controls, digital readouts, and evaluation units

TNCguide
Information about the following TNC controls: TNC 124, TNC 128, TNC 310, TNC 320, TNC 406/TNC 416, TNC 410, TNC 426/TNC 430, iTNC 530, TNC 620, TNC 640 and TNC7.
Use the TNCguide
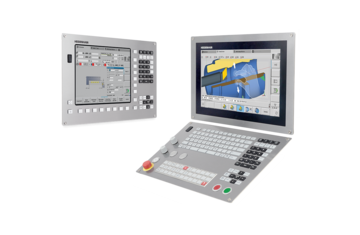
MANUALplus 620 and CNC PILOT 640
This is where you’ll find the user’s manuals for the MANUALplus 620 and CNC PILOT 640.
See the manuals
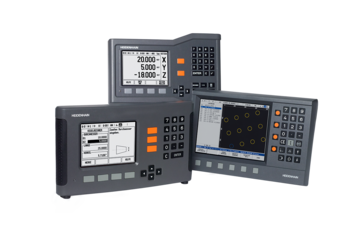
ND and POSITIP 880
The Operating Manuals Archive (O.M.A.) provides instructions for the ND and POSITIP 880 series of devices from HEIDENHAIN.
See the instructions
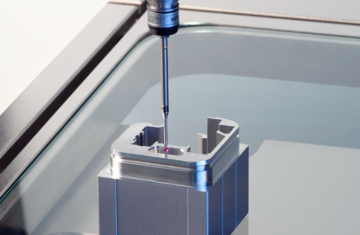
IK 5000 QUADRA-CHEK
The Operating Manuals Archive (O.M.A.) provides instructions for the IK 5000 QUADRA-CHEK package of PC solutions.
See the instructions
VRZ counters
The Operating Manuals Archive (O.M.A.) provides instructions for the VRZ 100 to VRZ 900 series of devices from HEIDENHAIN.
Explore the archive
PreviousNext
TNCguide
Information about the following TNC controls: TNC 124, TNC 128, TNC 310, TNC 320, TNC 406/TNC 416, TNC 410, TNC 426/TNC 430, iTNC 530, TNC 620, TNC 640 and TNC7.
Use the TNCguide
MANUALplus 620 and CNC PILOT 640
This is where you’ll find the user’s manuals for the MANUALplus 620 and CNC PILOT 640.
See the manuals
ND and POSITIP 880
The Operating Manuals Archive (O.M.A.) provides instructions for the ND and POSITIP 880 series of devices from HEIDENHAIN.
See the instructions
IK 5000 QUADRA-CHEK
The Operating Manuals Archive (O.M.A.) provides instructions for the IK 5000 QUADRA-CHEK package of PC solutions.
See the instructions
VRZ counters
The Operating Manuals Archive (O.M.A.) provides instructions for the VRZ 100 to VRZ 900 series of devices from HEIDENHAIN.
Explore the archive
PreviousNext
Infobase: search for specific product
Search for specific product
Internet Explorer cannot fully display all content. For full use of this website, please use a different browser.
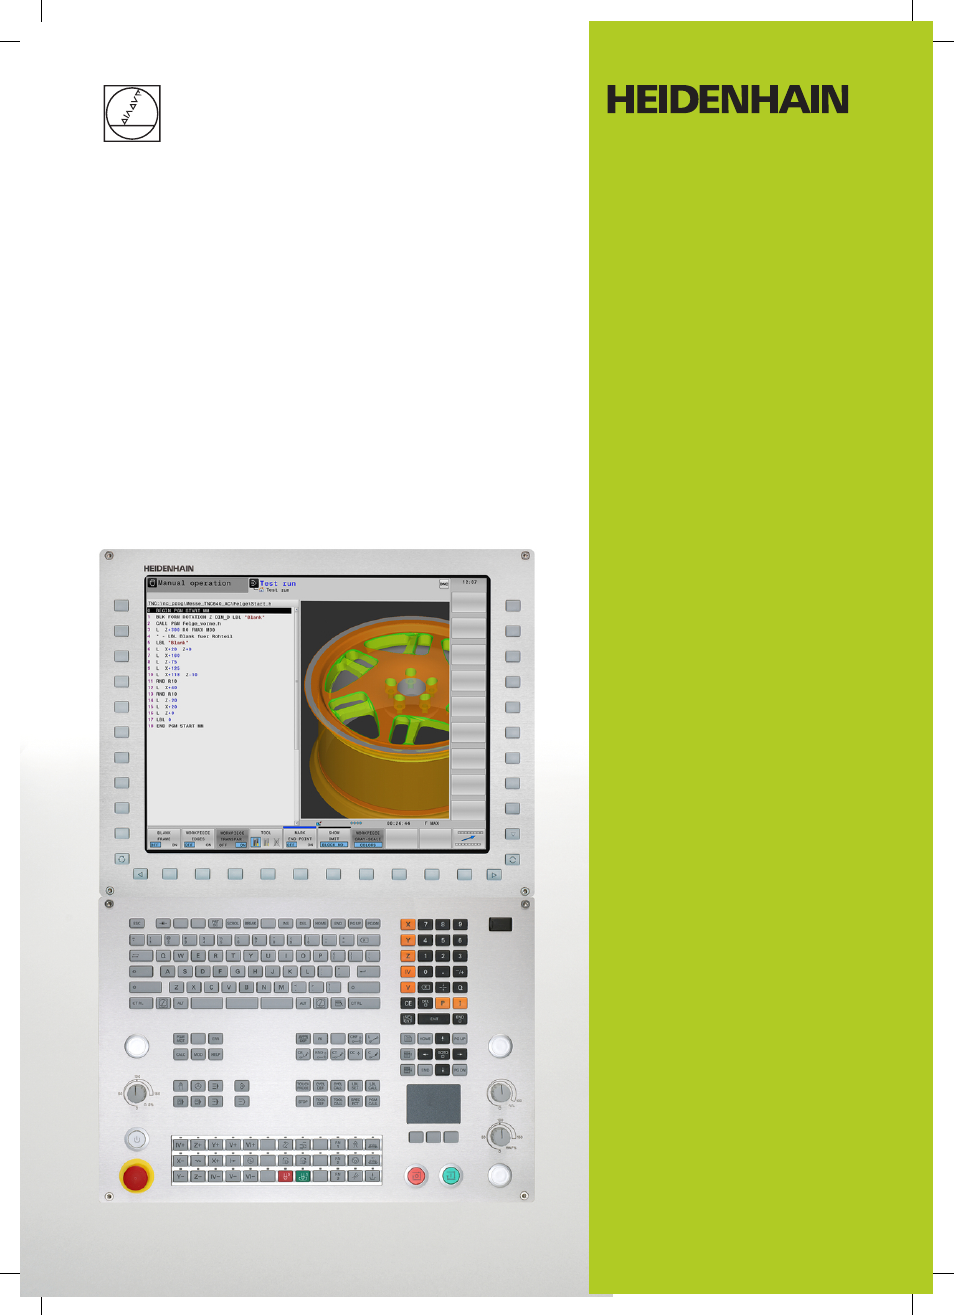
TNC 640
User’s Manual
HEIDENHAIN
Conversational Programming
NC Software
340590-05
340591-05
340595-05
English (en)
1/2015