-
Руководства по ремонту
1
-
Инструкции по эксплуатации
2
Языки:

Pioneer VSX-D511-K инструкция по эксплуатации
(78 страниц)
- Языки:Русский
-
Тип:
ZIP -
Размер:
2.44 MB
Просмотр

Pioneer VSX-D511-K инструкция по эксплуатации
(44 страницы)
- Языки:Английский
-
Тип:
PDF -
Размер:
2.66 MB
Просмотр
На NoDevice можно скачать инструкцию по эксплуатации для Pioneer VSX-D511-K. Руководство пользователя необходимо для ознакомления с правилами установки и эксплуатации Pioneer VSX-D511-K. Инструкции по использованию помогут правильно настроить Pioneer VSX-D511-K, исправить ошибки и выявить неполадки.
- Manuals
- Brands
- Pioneer Manuals
- Receiver
- VSX-D511 — Audio/Visual Receiver
- Operating instructions manual
-
Contents
-
Table of Contents
-
Troubleshooting
-
Bookmarks
Quick Links
AUDIO/VIDEO
MULTI-CHANNEL RECEIVER
RECEPTOR AUDIO/VÍDEO
MULTICANAL
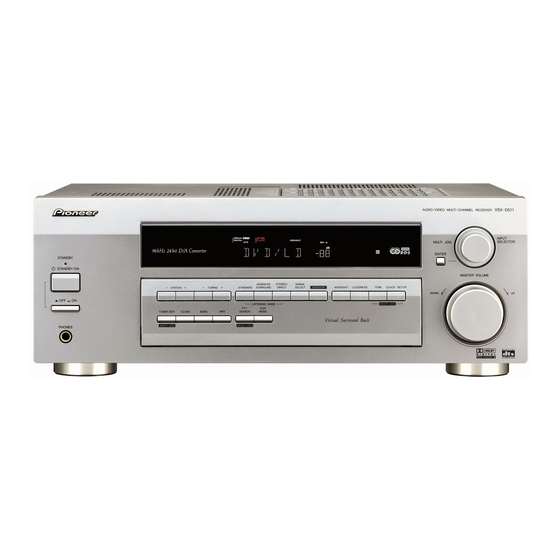
VSX-D511
VSX-D511-S
Operating Instructions
Manual de instrucciones
Related Manuals for Pioneer VSX-D511
Summary of Contents for Pioneer VSX-D511
-
Page 1
AUDIO/VIDEO MULTI-CHANNEL RECEIVER RECEPTOR AUDIO/VÍDEO MULTICANAL VSX-D511 VSX-D511-S Operating Instructions Manual de instrucciones… -
Page 2
El triángulo equilátero con el símbolo de un relámpago PRECAUCIÓN: El triángulo equilátero con un signo de admiración en su en su interior tiene por objeto alertar al usuario de la interior tiene por objeto alertar al usuario de la existencia PARA EVITAR EL RIESGO DE DESCARGA ELÉCTRICA, presencia de “voltaje peligroso”… -
Page 3
«DTS» and «DTS Digital Surround» are trademarks of Digital Theater Systems, Inc. Manufactured under license from Digital Theater Systems, Inc. Manufactured under license from Dolby Laboratories. «Dolby», «Pro Logic» and the double-D symbol are trademarks of Dolby Laboratories. «DTS» y «DTS Digital Surround» son marcas comerciales de Digital Theater Systems Inc. -
Page 4: Table Of Contents
To improve AM reception ……… 22 Connecting the speakers ……….23 Speaker terminals ………… 23 Hints on speaker placement ……… 25 POWER-CORD CAUTION ……..27 Operating other Pioneer components ……27 Controls and displays Front Panel …………..28 Display …………….30 Remote Control ………….. 33 Playing sources Introduction to Sound Modes ……..
-
Page 5
Cómo realizar una grabación de CABLE DE ALIMENTACIÓN ……..27 audio o de vídeo ………….. 61 Funcionamiento de otros Supervisión de la grabación ……..62 componentes Pioneer ………… 27 Información adicional Controles y pantallas Resolución de problemas ……….64 Panel frontal …………..28 Especificaciones ………… -
Page 6
分隔頻率設定 ……49 使用快速設置 ……… 14 LFE 衰減器設定 ……50 連接 前置揚聲器距離設定 ……50 音頻/視頻電纜 ……16 中置揚聲器距離設定 ……51 S視頻電纜(僅限 VSX-D511) ….16 環繞聲揚聲器距離設定 …… 51 數碼音頻電纜/光纜 ……16 動態范圍控制設定 ……52 連接數碼設備 ……… 17 雙重單聲道設定 ……52 連接音頻設備 ……… 18 同軸數碼輸入設定… -
Page 7: Before You Start
Before you start Antes de empezar 開始使用前 Checking what’s in Comprobación de los 檢查附件 the box accesorios 請確認以下附件是否齊全: suministrados Please check that you’ve received • AM環型天線 the following supplied accessories: Le rogamos que compruebe que • FM線型天線 • AM loop antenna ha recibido los siguientes •…
-
Page 8: Loading The Batteries
Loading Cómo cargar las 裝載電池 the batteries pilas Precaución 電池的不當使用可能導致電池泄漏 Incorrect use of batteries may Un uso incorrecto de las pilas result in such hazards as leakage puede provocar situaciones 和爆炸等危險事故。請務必遵照以 and bursting. Observe the follow- peligrosas tales como fugas y 下注意事項進行操作︰…
-
Page 9: Minute Guide
5 minute guide Guía en 5 minutos 五分鐘快捷指南 Introduction to Introducción al 家庭影院簡介 home theater home theater 也許您經常使用立體聲設備欣賞音 You are probably used to using Probablemente esté acostumbrado 樂,但是可能還不熟悉家庭影院系 stereo equipment to listen to a utilizar un equipo estéreo para 統,它能讓您在欣賞影音作品時進 music, but may not be used to escuchar música, pero tal vez no 行更多的選擇(如環繞聲)。…
-
Page 10: Listening To Surround Sound
Listening to Cómo escuchar 收聽環繞聲 Surround Sound sonido surround 本接收機設計有極為簡便的設置方 This receiver was designed with Este receptor se diseñó para una 式,因此若遵照以下快速設置指南 the easiest possible setup in mind, configuración lo más sencilla 進行操作,您很快即可完成系統連 so with the following quick setup posible, así que con la siguiente 接,獲取環繞聲效果。大多數情況…
-
Page 11
* Note: If you hook up using a * Nota: Si realiza la conexión 注意︰若使用光纜連接,請參閱 optical cable, see Optical digital utilizando un cable óptico, 第53頁光學數碼輸入設定的有關 input setting on page 53 to véase la sección Ajuste de la 內容,以便為D V D 分配一個光學 assign the optical input to DVD. -
Page 12
Nota Be sure to complete all connec- 將本機連接至交流電源前請確保 Asegúrese de realizar todas las tions before connecting this unit 所有連接都已完成。 conexiones antes de conectar to the AC power source. este aparato a la fuente de alimentación de CA. Front Speakers Center Speaker Surround Speakers Altavoces frontales Altavoz central… -
Page 13
4 Plug in the receiver and 4 Enchufe el receptor y 4 本接收機插上電源並打開,然後 switch it on, followed by your enciéndalo y, a continuación 再打開DVD播放機、超低音揚聲器 DVD player, your subwoofer haga lo mismo con el 和電視機。 and the TV. reproductor de DVDs, el 請確保已將電視機的視頻輸入設定… -
Page 14: Using The Quick Setup
Using the Quick Cómo utilizar la 使用快速設置 Setup configuración rápida 使用快速設置,您只需按幾個按鈕 Puede utilizar la configuración You can use the Quick Setup to get 就能使系統正常運行。在對揚聲器 rápida para preparar el sistema y your system up and running with hacer que funcione con sólo 設置和房間大小進行選定後,接收…
-
Page 15
Nota Check the table below to find the Compruebe la siguiente tabla 請參照下表選擇與系統匹配的揚 speaker setup that corresponds para buscar la configuración de 聲器設置。 with your system. los altavoces que corresponde a su sistema. Front Speakers Center Speaker Surround Speakers Sub Woofer Altavoces frontales Altavoz central Altavoces surround… -
Page 16: Connecting Up
Connecting up Conexiones 連接 Before making or changing the Antes de efectuar o modificar las 進行或者改變連接前,請務必斷開 connections, switch off the power conexiones, apague y desconecte el 電源,並從AC插座拔下電源插頭。 and disconnect the power cord from cable de alimentación de la toma de the AC wall outlet.
-
Page 17: Connecting Digital Components
Connecting digital Conexión de 連接數碼設備 components componentes 為正確解碼杜比數碼/DTS聲道,您 digitales For proper decoding of Dolby 需要進行數碼音頻連接。可使用同 Digital/DTS soundtracks, you need Para una decodificación adecuada 軸數碼連接或者光學連接(只可二 to make digital audio connections. de las bandas sonoras Doby 中擇一)。兩種連接質量無異,但 You can do this by either coaxial or Digital/DTS, es necesario efectuar optical connections (you don’t 是有些數碼設備只有一種數碼連接…
-
Page 18: Connecting Audio Components
Connecting audio Conexión de 連接音頻設備 components componentes de audio 開 始 設 置 前 , 請 將 模 擬 音 頻 設 備 To begin set up, connect your Para empezar la configuración, (如卡式磁帶機)連接至插口。要 conecte los componentes de audio analog audio components (such as 用…
-
Page 19: Connecting Video Components
Nota The arrows indicate the direction Las flechas indican la dirección 箭頭表示信號的傳輸方向。 of the signal. de la señal. CENTER OUTPUT SUBWOOFER OUTPUT SURROUND OUTPUT DVD/multi-channel decoder with 5.1 channel analog output jacks VIDEO OUTPUT Decodificador de DVD/multicanal con tomas de salida analógicas de FRONT 5.1 canales.
-
Page 20
Nota Las flechas indican la dirección de The arrows indicate the direction 箭頭表示信號的傳輸方向。 la señal. of the signal. AUDIO INPUT VIDEO INPUT S-VIDEO INPUT S-VIDEO OUTPUT VIDEO Video deck OUTPUT Platina del vídeo 視頻裝置 AUDIO OUTPUT AUDIO OUTPUT VIDEO OUTPUT S-VIDEO TV tuner (or Satellite tuner) OUTPUT… -
Page 21: Connecting Antennas
Connecting Conexión de antenas 連接天線 antennas Conecte la antena de cuadro AM y 請如下圖所示連接A M 環型天線與F M la antena de cable FM tal y como Connect the AM loop antenna and 線 型 天 線 。 為 改 善 接 收 質 量 和 音 Para se muestra a continuación.
-
Page 22: Using External Antennas
Using external Cómo utilizar 使用外部天線 antennas antenas externas 改善FM接收 To improve FM reception Para mejorar la recepción de 連接外部FM天線。 Connect an external FM antenna. Conecte una antena de FM externa. One touch PAL connector Conector PAL táctil 單觸點式PAL連接器 UNBAL 75Ω 75 Ω…
-
Page 23: Connecting The Speakers
Connecting the Conexión de los 連接揚聲器 speakers altavoces 本說明書介紹的是六個揚聲器(包 A complete setup of six speakers En la página siguiente, se muestra 括超低音揚聲器)的完整設置,但 (including the subwoofer) is shown una configuración completa de los 是用戶家庭的設置將各不相同。按 here, but everyone’s home setup seis altavoces (incluido el realzador 下圖方法即可輕鬆自如地連接您的…
-
Page 24
Be sure to complete all other Asegúrese de realizar todas las 將本機連接至交流電源前請確保 connections before connecting conexiones antes de conectar 所有連接都已完成。 this unit to the AC power source. este aparato a la fuente de alimentación de CA. Front Speakers Center Speaker Surround Speakers Altavoces frontales Altavoz central… -
Page 25: Hints On Speaker Placement
Hints on speaker Consejos sobre la 揚聲器放置提示 placement ubicación de los 揚聲器通常按已設計好的特定方式 altavoces Speakers are usually designed 擺放。有些設計為落地式,而有些 with a particular placement in Normalmente los altavoces están 則應放置在支架上以獲得最佳的音 mind. Some are designed to be diseñados para ocupar una 效。有些應放置在牆壁附近,而有 floorstanding, while others should ubicación concreta.
-
Page 26
• If possible, place the surround • Si es posible, coloque los • 如有可能,請將環繞聲揚聲器 speakers slightly above ear altavoces surround ligeramente 放置於稍稍高出您雙耳的水平 level. por encima del nivel de los 位置。 oídos. • Try not to place the surround • 環繞聲揚聲器到收聽位置的距 speakers further away from •… -
Page 27: Power-Cord Caution
También CONTROL OUT端子傳送至其他設 puede utilizar el mando a distancia control a Pioneer DVD player. The 備。 de este aparato para controlar un remote control signals are re- reproductor de DVDs Pioneer. Las ceived by the remote sensor of this señales del mando a distancia las…
-
Page 28: Front Panel
Controls and Controles y 控制按鈕和顯示屏 displays pantallas Front Panel Panel frontal 前面板 N∫m-Û.,, AUDIO/VIDEO MULTI-CHANNEL RECEIVER INPUT SELECTOR MULTI JOG ENTER STANDBY STANDBY / ON MASTER VOLUME ADVANCED STEREO/ SIGNAL MONITOR MIDNIGHT LOUDNESS TONE QUICK SETUP STATION TUNING STANDARD SURROUND DIRECT SELECT DOWN…
-
Page 29
7 MULTI JOG/INPUT SELECTOR 7 Selector MULTI JOG/INPUT 7 MULTI JOG/INPUT SELECTOR 旋 dial SELECTOR 鈕 The MULTI JOG/INPUT SELECTOR El selector MULTI JOG/INPUT MULTI JOG/INPUT SELECTOR旋鈕 dial performs a number of tasks. SELECTOR realiza varias tareas. 用 於 執 行 一 系 列 任 務 。 在 按 下 Use it to select options after Utilícelo para seleccionar opciones TONE CONTROL、QUICK SETUP… -
Page 30: Display
16 SIGNAL SELECT (pages 39, 45) STEREO/DIRECT 16 SIGNAL SELECT(參閱第39、45 Use to select between input (páginas 37, 40) 頁) signals. Activa o desactivada la 用於選擇輸入信號。 reproducción directa. La 17 MONITOR (page 62) reproducción directa ignora Press to switch tape monitoring 17 MONITOR(參閱第62頁)…
-
Page 31
1 SIGNAL SELECT indicators 1 Indicadores SIGNAL SELECT 1 SIGNAL SELECT 指示標誌 Lights to indicate the type of input Se ilumina para indicar el tipo de 點亮時表明分配給當前設備的輸入 signal assigned for the current señal de entrada asignada al 信號類型︰ component: componente actual: AUTO︰當選擇AUTO信號時點亮。… -
Page 32
10 Character display 10 Pantalla de caracteres 10 字符顯示 11 ADV. SURR (Advanced 11 ADV. SURR (Surround 11 ADV. SURR(高級環繞聲) Surround) avanzado) 當選擇了本接收機的某一高級環繞 Lights when one of the Advanced Se ilumina cuando uno de los 聲收聽模式時點亮。 Surround listening modes of the modos de audición Surround receiver is selected. -
Page 33: Remote Control
Remote Control Mando a distancia 遙控器 DVD/LD TV/SAT MASTER VOLUME MUTE TUNING STATION BAND CLASS DISPLAY MENU TOP MENU TUNER SETUP EDIT ENTER CH SELECT EFFECT AUDIO SUB TITLE ¡ ¢ DVD CONTROL AV RECEIVER Î RECEIVER RECEIVER RECEIVER Switches the receiver between on Cambia el estado del receptor 用於在接收機打開和待機狀態之間…
-
Page 34
STEREO (page 37) ADVANCED SURROUND ADVANCED SURROUND(參閱 Switches direct playback on or (páginas 38, 42) 第38、42頁) off. Direct playback bypasses Utilícelo para cambiar entre los 用於在多種環繞聲模式之間進行 the tone controls and channel diferentes modos surround. 切換。 levels for the most accurate STEREO (página 37) reproduction of a source. -
Page 35
CLASS (page 59) 9 Botones MASTER VOLUME CLASS(參閱第59頁) Use to switch between the Utilice MASTER VOLUME +/– 用於在三個預設電臺組(類)之 three banks (classes) of station para ajustar el volumen de 間進行切換。 presets. audición general. Utilice MUTE para silenciar el sonido o restaurar MPX(參閱第57頁)… -
Page 36
14 CH SELECT (página 55) 15 DVD CONTROL 按鈕 You can use these buttons to Utilícelo para seleccionar un canal 您可以使用這些按鈕來控制連接至 control a Pioneer DVD player cuando configure el sonido 系統上的先鋒DVD播放機。 connected to your system. surround del receptor. TEST TONE (página 54) Utilícelo para hacer sonar los… -
Page 37: Introduction To Sound Modes
Playing sources Reproducción de 播放音源 fuentes Introduction to 聲音模式簡介 Sound Modes Introducción a los 有三種基本聲音模式可供選擇︰立 There are three basic sound modos de sonido 體聲/直接、標準以及高級環繞 options: Stereo/Direct, Standard or 聲。 Hay tres opciones de sonido Advanced Surround. básicas: Estéreo/Directo, Estándar 立體聲/直接 Stereo/Direct o Surround avanzado.
-
Page 38: Advanced Surround Modes
Pro Logic II Music Pro Logic II Movie Pro Logic II Music This mode gives 5.1 channel Este modo proporciona un sonido 本模式提供5 . 1 聲道的環繞聲,適 surround de 5.1 canales. Es más surround sound and is suitable for 於音樂的播放。較 Pro Logic II apropiado para películas, sobre music.
-
Page 39: Choosing The Input Signal
5-Channel Stereo dinámico y amplio, permitiendo a 5聲道立體聲 las señales (de estéreo) de dos This can be selected to give multi- 本模式可使立體聲音源獲得多聲道 canales imitar el sonido de cinco channel sound to a stereo source, 的音效,將使用您設置的所有揚聲 altavoces. Utilícelo con Dolby Pro using all the speakers in your 器。…
-
Page 40: Using Stereo/Direct
Nota • DVD 5.1 ch is only available • DVD 5.1 ch está disponible • 僅當DVD/LD選為音源時DVD when DVD/LD is selected as únicamente cuando se 5.1 ch才有效。 the source. selecciona DVD/LD como la fuente. • This receiver can only play • 本接收機僅可播放杜比數碼、 back Dolby Digital, PCM •…
-
Page 41: Listening To Multi-Channel Playback
Nota Si cambia a modo de audición Midnight, Loudness o controles del tono cuando está seleccionado DIRECT, el receptor cambia automáticamente a STEREO. Listening to multi- Cómo escuchar una 收聽多聲道播放 channel playback reproducción multicanal INPUT SELECTOR DVD/LD TV/SAT RECEIVER CD-R/ VCR/ STANDARD 1 Switch on the playback…
-
Page 42: Using Advanced Surround
Using Advanced Utilización de los 使用高級環繞聲功能 Surround modos Surround 根據輸入信號,將對杜比專業邏輯 avanzados Dolby Pro Logic, Dolby Digital and (Dolby Pro Logic)、杜比數碼以 DTS signal processing is done El procesamiento de señales Dolby 及DTS信號進行自動處理。 automatically corresponding to the Pro Logic, Dolby Digital y DTS se input signal.
-
Page 43: Using The Tone Controls
• Press MIDNIGHT/LOUDNESS. • Pulse MIDNIGHT/LOUDNESS. • 按MIDNIGHT/LOUDNESS。 Each press cycles through the Cada vez que pulse, avanza por los 每按動一下按鈕將如下循環: effects as follows: efectos de la siguiente manera: Midnight Midnight Midnight Loudness Loudness Loudness 您還可按前面板上的MIDNIGHT或 You can also press MIDNIGHT or También puede pulsar MIDNIGHT 者LOUDNESS。每按動一下該按鈕…
-
Page 44: Playing Other Sources
Playing other Reproducción de 播放其他音源 sources otras fuentes INPUT SELECTOR RECEIVER DVD/LD TV/SAT CD-R/ VCR/ 1 Encienda el componente de 1 Turn on the power of the 1 打開播放設備的電源。 reproducción. playback component. 2 Encienda el receptor. 2 Turn on the power of the 2 打開接收機的電源。…
-
Page 45: Selecting The Multi-Channel Analog Inputs
Selecting the multi- Selección de 選擇多聲道模擬輸入 channel analog entradas analógicas 若用多聲道模擬輸出端將解碼器或 inputs multicanal D V D 播放機連至本機時(參閱第1 8 If you have connected a decoder or En caso de que haya conectado un 頁),您必須選擇多聲道模擬輸入 a DVD player with multi-channel decodificador o un reproductor de 端以收聽5.1聲道的播放。…
-
Page 46: Choosing Your Receiver Setup
Setting up the Configuración del 設置接收機 receiver receptor Choosing your Elección de la 選擇接收機設置 receiver setup configuración de su 即使您在按照第 9 頁至第 15 頁的 五 receptor Even though you may already have 分鐘快捷指南 進行設置後,系統已 your system up and running after 開始正常運行,仍應完成以下設置…
-
Page 47
Center speaker distance Ajuste de la distancia del 中置揚聲器距離設定 setting (page 51) altavoz frontal (página 50) (參閱第 51 頁) Specify the distance from your Especifique la distancia desde 指定中置揚聲器到您收聽位置之 listening position to your center la posición de audición a los 間的距離。… -
Page 48: Speaker Setting
Speaker setting Ajuste de los altavoces 揚聲器設定 • Default setting: S (all speak- • Valor de ajuste por defecto: S • 默認設定︰ S(所有揚聲器) ers) (todos los altavoces) 您必須讓接收機知道您有幾臺揚聲 You must let the receiver know how Deberá hacerle saber al receptor 器以及它們分別有多大。您所選擇…
-
Page 49: Subwoofer Setting
Subwoofer setting Ajuste del realzador de graves 超低音揚聲器設定 • Default setting: ON • Valor de ajuste por defecto: • 默認設定︰ON You can choose whether the 您 可 以 選 擇 是 否 使 用 超 低 音 揚 聲 subwoofer is used or not. Use the Puede elegir si utilizar o no el 器。對重低音使用加強(PLS)設…
-
Page 50: Lfe Attenuator Setting
100 Hz 100 Hz 100 Hz Sends bass frequencies below 100 Envía frecuencias de graves por 將低於 100 Hz 的低音頻率傳送至超 Hz to the subwoofer (or L speak- debajo de los 100 Hz al realzador 低音揚聲器(或者 L 揚聲器)。 ers). de graves (o altavoces L). 150 Hz 150 Hz 150 Hz…
-
Page 51: Center Speaker Distance Setting
Center speaker distance Ajuste de la distancia del 中置揚聲器距離設定 setting altavoz central • 默認設定︰3 米 • Default setting: 3 m • Valor de ajuste por defecto: 3 m 中置揚聲器一般直接放置在收聽室 The center speaker is normally El altavoz central normalmente se 的前方,與聽音位置之間的距離小 coloca directamente en la parte placed directly in the front of the 於前置揚聲器的距離。這意味著︰…
-
Page 52: Dynamic Range Control Setting
Dynamic range control Ajuste del control de la gama 動態范圍控制設定 setting dinámica • 默認設定︰OFF • Default setting: OFF • Valor de ajuste por defecto: 動態范圍是某特定信號最響的聲音 Dynamic range is the difference 與最輕的聲音間的差值。通過此項 between the loudest and softest La gama dinámica es la diferencia 設…
-
Page 53: Coaxial Digital Input Setting
Use ’ or ‘ to cycle through Utilice ’ o ‘ para avanzar 使用 ’ 或者 ‘ 循環切換所有 • • • the possible DUAL MONO por los posibles ajustes DUAL 的 DUAL MONO 設定。 settings. MONO. L ch 1.R ch 2 L ch 1.R ch 2 L ch 1.R ch 2 同軸數碼輸入設定…
-
Page 54: Setting The Relative Volume Level Of Each Channel
Setting the relative Cómo ajustar el 設定各聲道相關音量 volume level of each nivel de volumen 級 channel adecuado de cada • 默認設定︰0 dB canal • Default setting: 0 dB 為獲得最佳播放效果,您應在主聽 For best surround sound playback, • Valor de ajuste por defecto: 0 dB 音位上設定各相關聲道的音量級。…
-
Page 55
4 Use LEVEL +/– to adjust 4 Utilice LEVEL +/– para ajustar 4 使用 LEVEL+/– ,依次調節揚聲 the speaker levels in turn. los niveles de los altavoces por 器音量級。 You should hear the test tone at turno. 當您坐在主聽音位時,應能從各揚 the same volume from each Deberá… -
Page 56: Listening To The Radio
Utilización del Using the tuner 使用調諧器 sintonizador Cómo escuchar la ra- Listening to the 收聽電臺 radio 下列步驟介紹如何使用自動(搜索) Los pasos siguientes le muestran The following steps show you how 和手動(間隔)調諧功能對 FM 以及 cómo sintonizar transmisiones to tune to FM and AM radio AM 廣播進行調諧。一旦您調諧到某…
-
Page 57: Improving Fm Stereo Sound
Manual tuning Sintonización manual 手動調諧 To change the frequency one Para cambiar la frecuencia un 要一次改變一段間隔的頻率,可 step at a time, press the intervalo cada vez, pulse los 按 TUNING+/– 按鈕。 TUNING +/– buttons. botones TUNING +/–. High speed tuning Sintonización a alta velocidad 快速調諧…
-
Page 58: Naming Station Presets
1 Tune to a station you want 1 Sintonice una emisora que 1 調諧至您想要記憶的電臺。 to memorize. desee memorizar. 有關詳情,請參閱 (前一頁) 收聽電 See Listening to the radio (page 56) Véase Cómo escuchar la radio 臺 的有關內容。 for more on this. (página 56) para más información. 2 如果您正在使用是遙控器,請按…
-
Page 59: Listening To Station Presets
• Use the MULTI JOG/INPUT • Utilice el selector MULTI JOG/ • 使用 M U LT I J O G / I N P U T SELECTOR dial (front panel) or INPUT SELECTOR (panel SELECTOR 旋鈕 (前面板上) 或 the } and ] (STATION +/–) frontal) o los botones 者} 和…
-
Page 60: Changing The Frequency Step
Consejo 命名電臺之後,您可在收聽時按 Once you have named a station Cuando ya haya dado nombre a preset, you can press DISPLAY una presintonía, puede pulsar 住DISPLAY切換名稱和頻率。 when listening to a station to DISPLAY mientras esté switch the display between the escuchando una emisora para name and the frequency.
-
Page 61: Making An Audio Or A Video Recording
Making record- Cómo realizar 進行錄製 ings grabaciones Making an audio or Cómo realizar una 進行音頻或視頻錄製 a video recording grabación de audio 您可通過內置式調諧器,或者連接 o de vídeo You can make an audio or a video 至 接 收 機 的 音 頻 或 者 視 頻 播 放 源 recording from the built-in tuner, or (如CD播放機或者電視機等)…
-
Page 62: Monitoring Your Recording
Monitoring your recording Supervisión de la grabación 監控錄製 You can listen to (monitor) the Puede escuchar (supervisar) la 您可在錄製過程中使用前面板上的 recording as it’s being made using grabación según se va haciendo MONITOR 按鈕收聽 (監控) 錄製效 the MONITOR button on the front empleando el botón MONITOR del 果…
-
Page 63: Additional Information
Sometimes the trouble may lie in another component. Investigate the other components and electrical appliances being used. If the trouble cannot be rectified even after exercising the checks listed below, ask your nearest Pioneer authorized service center or your dealer to carry out repair work.
-
Page 64: Resolución De Problemas
Examine los demás componentes del sistema y aparatos eléctricos que se están utilizando. Si el problema no puede rectificarse incluso después de llevar a cabo las comprobaciones listadas a continuación, diríjase a su centro de servicio o distribuidor autorizado Pioneer más cercano para solicitar su revisión o reparación. Problema Solución…
-
Page 65: 故障排除
附加資訊 故障排除 不正確的操作經常被誤認為是故障。如果您認為本機發生故障,請先檢查以下幾點。有時可能是其他設備出了 故障。檢查其他設備以及所使用的電器。如果在對以下幾點檢測後故障仍無法消除,請就近聯繫先鋒授權服務 中心或者經銷商進行維修。 問題 對策 • 將電源插頭連接至牆面插座。 電源無法打開 • 從插座拔下電源插頭,然後再次插入。 • 請確保揚聲器引線未鬆脫並接觸到後面板,否則可能導致接收機自動關閉。 • 請確保設備正確連接(參閱第16-27頁)。 當選中某功能後沒有聲音輸出。 • 按下遙控器上的MUTE關閉靜音功能。 • 調節MASTER VOLUME。 • 按MONITOR按鈕關閉監控功能。 • 請確保設備正確連接(參閱第19-20頁)。 當選中某功能後沒有影像輸出。 • 選擇正確的設備(使用INPUT SELECTOR按鈕)。 • 調諧至正確的頻率。 無線電廣播有相當程度的噪音。 • 連接天線(參閱第21-22頁)。 • 將所有電纜遠離天線端子和電線。 • 完全展開FM線型天線,並將其放置於最佳接收位置且固定在牆上。 • 連接室外FM天線(參閱第22頁)。 •…
-
Page 66: Specifications
………….. 1 Vp-p/75 Ω modifications without notice, due to improvements. Output (Level/Impedance) Published by Pioneer Corporation. VCR/DVR ……….1 Vp-p/75 Ω Copyright © 2002 Pioneer Corporation. Frequency Response All rights reserved. VCR/DVR, DVD/LD, TV/SAT → MONITOR ……….5 Hz to 7 MHz Maintenance of External Surfaces –3…
-
Page 67: Especificaciones
………….. 88 dB/64 dB cambios sin previo aviso con motivos de mejoras. Sección de VIDEO Entrada (sensibilidad/impedancia) Publicado por Pioneer Corporation. Copyright © 2002 por Pioneer Corporation. VCR/DVR, DVD/LD, TV/SAT Todos los derechos reservados…………… 1 Vp-p/75 Ω Salida (nivel/impedancia) VCR/DVR ……….
-
Page 68: 本機清潔
Haven 1087, Keetberglaan 1, B-9120 Melsele, Belgium TEL: 03/570.05.11 PIONEER ELECTRONICS AUSTRALIA PTY. LTD. 178-184 Boundary Road, Braeside, Victoria 3195, Australia, TEL: [03] 9586-6300 PIONEER ELECTRONICS DE MEXICO S.A. DE C.V. San Lorenzo 1009 3er Piso Desp. 302 Col. Del Valle Mexico D.F. C.P. 03100 TEL: 55-5688-52-90 Printed in <XRE3054-A>…
Не можете найти ответ на свой вопрос в руководстве? Вы можете найти ответ на свой вопрос ниже, в разделе часто задаваемых вопросов о Pioneer VSX-D511.
Когда звук считается слишком громким?
Могут ли устройства разных марок подключаться друг к другу при помощи Bluetooth?
Что такое Bluetooth?
Что такое HDMI?
Как лучше всего выполнять чистку Приемник?
Что такое Dolby Atmos?
Инструкция Pioneer VSX-D511 доступно в русский?
Не нашли свой вопрос? Задайте свой вопрос здесь
Архив Форума Hi-Fi.ru
По 23-5-2020
Портал Hi-Fi.ru более не предоставляет возможностей и сервисов по общению пользователей
|
Sergey Sergeev Пользователь Сообщений: 3 |
Не посчитайте великим трудом, у кого есть, поделиться инструкцией к Pioneer VSX-D511 на русском? |
|
Алексей В. Иванов Пользователь Сообщений: 46 |
ivaale8 #2 08-05-2003 12:11:39 www.pioneer-eur.com
Там и на русском и на турецком…… |
|
Sergey Sergeev Пользователь Сообщений: 3 |
sergey_bt #3 08-05-2003 19:30:03 Еще раз сенкс — действительно есть!!! |
Архив Форума Hi-Fi.ru
По 23-5-2020
Портал Hi-Fi.ru более не предоставляет возможностей и сервисов по общению пользователей
Как пользоваться?
Наша цель — обеспечить Вам самый быстрый доступ к руководству по эксплуатации устройства Pioneer VSX-D511. Пользуясь просмотром онлайн Вы можете быстро просмотреть содержание и перейти на страницу, на которой найдете решение своей проблемы с Pioneer VSX-D511.
Для Вашего удобства
Если просмотр руководства Pioneer VSX-D511 непосредственно на этой странице для Вас неудобен, Вы можете воспользоваться двумя возможными решениями:
- Полноэкранный просмотр -, Чтобы удобно просматривать инструкцию (без скачивания на компьютер) Вы можете использовать режим полноэкранного просмотра. Чтобы запустить просмотр инструкции Pioneer VSX-D511 на полном экране, используйте кнопку Полный экран.
- Скачивание на компьютер — Вы можете также скачать инструкцию Pioneer VSX-D511 на свой компьютер и сохранить ее в своем архиве. Если ты все же не хотите занимать место на своем устройстве, Вы всегда можете скачать ее из ManualsBase.
Руководство по эксплуатации Pioneer VSX-D511
Печатная версия
Многие предпочитают читать документы не на экране, а в печатной версии. Опция распечатки инструкции также предусмотрена и Вы можете воспользоваться ею нажав на ссылку, находящуюся выше — Печатать инструкцию. Вам не обязательно печатать всю инструкцию Pioneer VSX-D511 а только некоторые страницы. Берегите бумагу.
Резюме
Ниже Вы найдете заявки которые находятся на очередных страницах инструкции для Pioneer VSX-D511. Если Вы хотите быстро просмотреть содержимое страниц, которые находятся на очередных страницах инструкции, Вы воспользоваться ими.

250 ₽
Инструкция (руководство пользователя) на Ресивер PIONEER VSX-D511
Артикул: pioneer-vsx-d511
Категория: Pioneer
-
Описание
-
Детали
Описание
Инструкцию по эксплуатации PIONEER VSX-D511 на русском языке можно будет скачать в личном кабинете после оформления и оплаты заказа.
-
Pioneer VSX-D511 — page 1
AUDIO/VIDEO MULTI-CHANNEL RECEIVER VSX-D411 VSX-D511 Operating Instructions …
-
Pioneer VSX-D511 — page 2
IMPORTANT NOTICE H006AEn The serial number for this equipment is located in the rear panel. Please write this serial number on your enclosed warranty card and keep it in a secure area. This is for your security. Thank you for buying this Pioneer product. Please read through these operating instructions so you will know how to operate your model pro …
-
Pioneer VSX-D511 — page 3
«DTS», “ES” and «DTS Digital Surround» are trademarks of Digital Theater Systems, Inc. Manufactured under license from Dolby Laboratories. “Dolby”, “Pro Logic II” and the double D symbol 2 are trademarks of Dolby Laboratorories. …
-
Pioneer VSX-D511 — page 4
Contents 1 Before you star t Checking what’s in the box …………………………. 5 Installing the receiver …………………………………. 5 Making cable connections ………………………….. 5 Loading the batteries ………………………………….. 5 Operating range of remote control unit ……….. 5 2 5 minute g …
-
Pioneer VSX-D511 — page 5
Befor e you start 01 5 En Checking what’ s in the box Please check that you’ve received the following supplied accessories: • AM loop antenna • FM wire antenna • Dr y cell batteries (AA size IEC R6P) x 2 • Remote control • These operating instructions Installing the receiver Please note the following points: • Do not place object …
-
Pioneer VSX-D511 — page 6
5 minute guide 02 6 En Intr oduction to home theater Y ou are probably used to using stereo equipment to listen to music, but may not be used to home theater systems that give you many more options (such as surround sound) when listening to soundtracks. Home theater refers to the use of multiple audio tracks to create a surround sound effect, makin …
-
Pioneer VSX-D511 — page 7
5 minute guide 02 7 En Listening to Surround Sound This receiver was designed with the easiest possible setup in mind, so with the following quick setup guide, you should have your system hooked up for surround sound in no time at all. In most cases, you can simply leave the receiver in the default settings. 1 Hook up your DVD player . For surround …
-
Pioneer VSX-D511 — page 8
5 minute guide 02 8 En 3 Connect your speakers. A complete setup of six speakers (including the subwoofer) is shown here, but everyone ’ s home setup will var y . Simply connect the speakers you have in the manner shown below . The receiver will work with just two stereo speakers (the front speakers in the diagram) but using at least three speake …
-
Pioneer VSX-D511 — page 9
5 minute guide 02 9 En 4 Plug in the receiver and switch it on, followed by your DVD player , your subwoofer and the TV . Make sure you ’ ve set the video input on your TV to this receiver . Check the manual that came with the TV if you don ’ t know how to do this. Also make sure that DVD/LD is showing in the receiver ’ s display , indicating …
-
Pioneer VSX-D511 — page 10
5 minute guide 02 10 En Using the Quick Setup Y ou can use the Quick Setup to get your system up and running with just a few button presses. The receiver automatically makes the necessary settings after you have selected your speaker setup and room size. If you want to make more specific settings, refer to Choosing your receiver setup on pages 29 t …
-
Pioneer VSX-D511 — page 11
Connecting up 03 11 En Before making or changing the connections, switch off the power and disconnect the power cord fr om the AC outlet. Audio/Video cor ds Use audio/video cords (not supplied) to connect the audio/video components and a video cord to connect the monitor TV . Connect red plugs to R (right), white plugs to L (left), and the yellow p …
-
Pioneer VSX-D511 — page 12
Connecting up 03 12 En Connecting digital components For proper decoding of Dolby Digital/DTS soundtracks, you need to make digital audio connections. Y ou can do this by either coaxial or optical connections (you don ’t need to do both). The quality of these two types of connections is the same, but since some digital components only have one ty …
-
Pioneer VSX-D511 — page 13
Connecting up 03 13 En Connecting video components Connect your video components to the jacks as shown below . R egarding digital video components (like a DVD player), you must use the connections pictured on this page for the video signal, but in order to hear a digital source (like a DVD) you should hook up the audio to a digital input (see page …
-
Pioneer VSX-D511 — page 14
Connecting up 03 14 En FM wire antenna Connect the FM wire antenna and fully extend vertically along a window frame or other suitable area, etc. Connecting antennas Connect the AM loop antenna and the FM wire antenna as shown at right. T o improve reception and sound quality , connect external antennas (see Using external antennas , next page). Alw …
-
Pioneer VSX-D511 — page 15
Connecting up 03 15 En T o impr ove FM reception Connect an external FM antenna. FM UNBAL 75 Ω FM ANTENNA AM LOOP ANTENNA T o impr ove AM reception Connect a 15-18 feet length of vinyl-coated wire to the AM antenna terminal without disconnect- ing the supplied AM loop antenna. For the best possible reception , suspend horizontally outdoors. Outdo …
-
Pioneer VSX-D511 — page 16
Connecting up 03 16 En 1/2 inches 1 T wist around 1/2 inch of bar e wire strands together . 2 Unclip the speaker terminal and insert the wire. 3 Snap shut the speaker terminal to secure. Speaker terminals ª · Connecting the speakers A complete setup of six speakers (including the subwoofer) is shown here, but everyone ’ s home setup will var y …
-
Pioneer VSX-D511 — page 17
Connecting up 03 17 En Hints on speaker placement Speakers are usually designed with a particular placement in mind. Some are designed to be floorstanding, while others should be placed on stands to sound their best. Some should be placed near a wall; others should be placed away from walls. W e have provided a few tips on getting the best sound fr …
-
Pioneer VSX-D511 — page 18
Connecting up 03 18 En Receiver Other Pioneer products with Î mark Operating other Pioneer components By connecting a control cord (optional), you can point the remote controls of other Pioneer components at the receiver ’ s remote sensor . Y ou can also use the remote control from this unit to control a Pioneer DVD player . The remote control s …
-
Pioneer VSX-D511 — page 19
Contr ols and displays 04 19 En 1 ST ANDBY/ON Switches the receiver between on and standby . 2 ST ANDBY indicator Lights when the receiver is in standby mode. 3 ST A TION (+/–) buttons (pages 35–36) Selects station presets when using the tuner . 4 TUNING (+/–) buttons (page 34) Selects the frequency when using the tuner . 5 Remote sensor Rece …
-
Pioneer VSX-D511 — page 20
Contr ols and displays 04 20 En 1 SIGNAL SELECT indicators Lights to indicate the type of input signal assigned for the current component: AUTO : Lights when AUTO signal select is on . DIGIT AL : Lights when a digital audio signal is detected. 2 DIGIT AL : Lights when a Dolby Digital signal is detected. ANALOG : Lights when an analog signal is dete …
-
Pioneer VSX-D511 — page 21
Contr ols and displays 04 21 En 4 2 PRO LOGIC II When the Standard mode of the receiver is on, this lights to indicate P rologic II decoding. 5A T T Lights when INPUT A TT is used to attenuate (reduce) the level of the input signal (can only be used with an analog signal). 6 DIRECT Lights when source direct playback is in use. This function bypasse …
-
Pioneer VSX-D511 — page 22
Contr ols and displays 04 22 En 1 RECEIVER Switches the receiver between on and standby . 2 MIDNIGHT/LOUDNESS (page 26) Use to switch to Midnight or Loudness listening. 3 LISTENING MODE buttons ST ANDARD (page 24, 26, 33) P ress for Standard decoding and to switch between the various P ro Logic II options. Remote Control CD T V /S AT DVD/LD DVD DVD …
-
Pioneer VSX-D511 — page 23
Contr ols and displays 04 23 En 10 T uner controls The TUNING +/ – buttons can be used to find radio frequencies. The ST A TION +/ – buttons can be used to select preset radio stations (pages 35 – 36). BAND (page 34) Use to switch between the AM and FM bands when the tuner is selected. CLASS (pages 35 – 36) Use to switch between the three b …
-
Pioneer VSX-D511 — page 24
Playing sour ces 05 24 En Intr oduction to Sound Modes There are three basic sound options: Stereo/ Direct, Standard or Advanced Surround. Stereo/Dir ect When you select STEREO or DIRECT , you will hear the source through just the front left and right speakers (and possibly your subwoofer depending on your speaker settings). Dolby Digital and DTS m …
-
Pioneer VSX-D511 — page 25
Playing sour ces 05 25 En Expanded This mode is especially designed to give sound depth to stereo sources. The overall effect builds a dynamic and broad sound space, allowing two-channel (stereo) signals to imitate a five speaker sound. Use with Dolby P ro Logic for a stereo surround effect. Y ou can also use with Dolby Digital sources for a wider …
-
Pioneer VSX-D511 — page 26
Playing sour ces 05 26 En Listening to multi-channel playback INPUT SELECTO R CD T V /S AT DVD/LD R E C EIVE R C D-R / VC R / DVR S TANDAR D 1 Switch on the playback component. 2 Switch on the receiver . 3 Select the sour ce you want to playback. Use the INPUT SELECTOR buttons on the remote (or the MUL TI JOG/INPUT SELECTOR dial on the front panel) …
-
Pioneer VSX-D511 — page 27
Playing sour ces 05 27 En • Press MIDNIGHT/LOUDNESS. Each press cycles through the effects as follows: Off Midnight Loudness Y ou can also press MIDNIGHT or LOUDNESS on the front panel. Each press switches the effect on or off . Using the tone controls Depending on what you are listening to, you may want to adjust the bass or treble using the fro …
-
Pioneer VSX-D511 — page 28
Playing sour ces 05 28 En Selecting the multi-channel analog inputs Connect a DVD player with 5.1 channel output to listen to 5.1 channel playback. 1 Select DVD/LD if it is not already selected. Use the INPUT SELECTOR buttons on the remote (or the MUL TI JOG/INPUT SELECTOR dial on the front panel). 2 Press SIGNAL SELECT (fr ont panel) repeatedly to …
-
Pioneer VSX-D511 — page 29
Setting up the receiver 06 29 En Choosing your receiver setup Even though you may already have your system up and running after using the 5 minute guide on pages 6 to 10, you should also be sure to complete the following set up operations to ensure the best possible surround sound. This is particularly important when using Dolby surround. Y ou only …
-
Pioneer VSX-D511 — page 30
Setting up the receiver 06 30 En 4 Use ’ or ‘ to adjust the setting. The setting is entered automatically . 5 Repeat steps 3 and 4 to set other surround modes. 6 When you’re done, pr ess ENTER to exit. The setting display is automatically exited after 20 seconds of inactivity . Speaker setting • Default setting: S (all speakers) Y ou must l …
-
Pioneer VSX-D511 — page 31
Setting up the receiver 06 31 En 100Hz 150Hz 200Hz 100 Hz Sends bass frequencies below 100 Hz to the subwoofer (or L speakers). 150 Hz Sends bass frequencies below 150 Hz to the subwoofer (or L speakers). 200 Hz Sends bass frequencies below 200 Hz to the subwoofer (or L speakers). If all speakers (front, center , and surround) are set to L , the cr …
-
Pioneer VSX-D511 — page 32
Setting up the receiver 06 32 En When S is selected in the speaker setting, the surround distance cannot be set. Dynamic range control setting • Default setting: OFF Dynamic range is the difference between the loudest and softest sounds in any given signal. With this setting, you can compress the dynamic range, so that low level sounds can be hea …
-
Pioneer VSX-D511 — page 33
Setting up the receiver 06 33 En Setting the relative volume level of each channel • Default setting: 0 dB For best surround sound playback, you should set the relative channel levels from the main listening position. Y ou can set seperate levels for each surround mode. 1 Press ST ANDARD. 2 Press TEST TONE to output the test tone. The test tone i …
-
Pioneer VSX-D511 — page 34
Using the tuner 07 34 En Listening to the radio The following steps show you how to tune to FM and AM radio broadcasts using the automatic (search) and manual (step) tuning functions. Once you are tuned to a station you can memorize the frequency for recall later—see Saving station presets on the next page for more on how to do this. TU NIN G BAN …
-
Pioneer VSX-D511 — page 35
Using the tuner 07 35 En Saving station presets If you often listen to a particular radio station, it’s convenient to have the receiver store the frequency for easy recall whenever you want to listen to that station. This saves the effort of manually tuning in each time. This unit can memorize up to 30 stations, stored in three banks, or class …
-
Pioneer VSX-D511 — page 36
Using the tuner 07 36 En Naming station presets For easier identification , you can name your station presets. 1 Choose the station preset you want to name. See Listening to station presets (this page) for how to do this. 2 If you ’ re using the r emote control, press RECEIVER. 3 Press TUNER EDIT . The display shows ST . NAME , then a blinking cu …
-
Pioneer VSX-D511 — page 37
Making Recor dings 08 37 En Making an audio or a video recor ding Y ou can make an audio or a video recording from the built-in tuner , or from an audio or video source connected to the receiver (such as a CD player or TV) through the analog jacks. Y ou will need to connect a CD recorder , tape deck, MD, VCR, or DVR deck to the CD-R/T APE/MD or VCR …
-
Pioneer VSX-D511 — page 38
Additional information 09 38 En T roubleshooting Incorrect operations are often mistaken for trouble and malfunctions. If you think that there is something wrong with this component, check the points below . Sometimes the trouble may lie in another component. Investigate the other components and electrical appliances being used. If the trouble cann …
-
Pioneer VSX-D511 — page 39
Additional information 09 39 En If the unit does not operate normally due to external effects such as static electricity disconnect the power plug from the outlet and insert again to return to normal operating conditions. Problem No sound from surround or center speakers. Noise during playback of a cassette deck. Sound is produced from other compon …
-
Pioneer VSX-D511 — page 40
Additional information 09 40 En Specifications Amplifier Section Continuous average power output of 100 watts* per channel, min., at 8 ohms, from 20 Hz to 20,000 Hz with no more than 0.2 %** total harmonic distortion (front). Continuous Power Output F ront ……………………………….. 100 W per channel (1kHz, 1.0 %, 8 Ω ) Center ……. …
-
Pioneer VSX-D511 — page 41
Additional information 09 41 En Miscellaneous P ower Requirements ……………. AC 120 V , 60 Hz P ower Consumption …………………………… 260 W In Standby ……………………………………………… 1 W AC Outlet ……………… 100 W MAX. (SWITCHED) Dimensions …………………….. 420 (W) x 158 (H) x 393 (D) mm ( …
-
Pioneer VSX-D511 — page 42
Additional information 09 42 En …
-
Pioneer VSX-D511 — page 43
Additional information 09 43 En …
-
Pioneer VSX-D511 — page 44
Published by Pioneer Corporation. Copyright © 2001 Pioneer Corporation. All rights reserved. PIONEER CORPORATION 4-1, Meguro 1-Chome, Meguro-ku, Tokyo 153-8654, Japan PIONEER ELECTRONICS [USA] INC. P.O. BOX 1540, Long Beach, California 90801-1540, U.S.A. PIONEER ELECTRONICS OF CANADA, INC. 300 Allstate Parkway, Markham, Ontario L3R OP2, Canada PIO …