инструкцияHikvision DS-KV6113-WPE1(B)

Video Intercom Villa Door Staon
User Manual
Посмотреть инструкция для Hikvision DS-KV6113-WPE1(B) бесплатно. Руководство относится к категории Домофон-системы, 13 человек(а) дали ему среднюю оценку 8.9. Руководство доступно на следующих языках: английский. У вас есть вопрос о Hikvision DS-KV6113-WPE1(B) или вам нужна помощь? Задайте свой вопрос здесь
- Legal Information
- Symbol Conventions
- Safety Instruction
- Regulatory Information
- 1 Appearance
- 2 Terminal and Wiring Description
- 3 Installation
- 4 Activation
- 5 Remote Configuration via Web
- 6 Configuration via Client Software
- A. Communication Matrix and Device Command
Главная
| Hikvision | |
| DS-KV6113-WPE1(B) | DS-KV6113-WPE1(B) | |
| Домофон-система | |
| 6941264069270 | |
| английский | |
| Руководство пользователя (PDF) |
Данные об упаковке
| Ширина упаковки | 102 mm |
| Глубина упаковки | 57 mm |
| Высота упаковки | 187 mm |
| Количество в упаковке | 1 шт |
| Ширина упаковки | 102 mm |
| Глубина упаковки | 57 mm |
| Высота упаковки | 187 mm |
| Наружный блок в комплекте | Да |
| Внутренний блок в комплекте | — |
Дизайн
| Цвет товара | Black, Grey |
| International Protection (IP) код | IP65 |
| Материал корпуса | Пластик |
| Светодиодные индикаторы | Да |
Камера
| Угол обзора по горизонтали | 129 ° |
| Угол обзора по вертикали | 75 ° |
| Максимальное разрешение видео | 1920 x 1080 пикселей |
| Поддерживаемые видеоформаты | 720p, 1080p |
| Мегапиксели | 2 MP |
Технические характеристики
| Технология подключения | Проводная |
| Полоса частот | 2.4 — 2.4835 GHz |
| Количество кнопок | 1 кнопок(а) |
| Настенный | Да |
| Цветной | — |
| Громкоговоритель | — |
| Количество поддерживаемых дисплеев | — |
| Максимальное количество поддерживаемых камер | — |
| Эхоподавление | Да |
Сеть
| Поддерживаемые сетевые протоколы | TCP/IP, RTSP |
| Тип Ethernet интерфейса | Быстрый Ethernet |
| Скорость передачи данных Ethernet LAN | 10, 100 Мбит/с |
| Wi-Fi | Да |
| Wi-Fi стандартов | 802.11b, 802.11g, Wi-Fi 4 (802.11n) |
| Стандарты сети | IEEE 802.3af |
| Количество портов Ethernet LAN ( RJ-45) | 1 |
Вес и размеры
| Ширина | 65 mm |
| Глубина | 27 mm |
| Высота | 138 mm |
| Вес | 265 g |
Энергопитание
| Потребляемая мощность (в обычном режиме) | 10 W |
| Тип питания наружного блока | Постоянный ток |
Экран
Условия эксплуатации
| Диапазон температур при эксплуатации | -40 — 55 °C |
| Диапазон относительной влажности при эксплуатации | 10 — 95 % |
Ночное видение
| Ночное видение | Да |
| Тип светодиода | Инфракрасный |
Логистические данные
| Код гармонизированной системы описания (HS) | 85176920 |
показать больше
Не можете найти ответ на свой вопрос в руководстве? Вы можете найти ответ на свой вопрос ниже, в разделе часто задаваемых вопросов о Hikvision DS-KV6113-WPE1(B).
Какой вес Hikvision DS-KV6113-WPE1(B)?
Какой размер экрана Hikvision DS-KV6113-WPE1(B)?
Какая высота Hikvision DS-KV6113-WPE1(B)?
Какая ширина Hikvision DS-KV6113-WPE1(B)?
Какая толщина Hikvision DS-KV6113-WPE1(B)?
Инструкция Hikvision DS-KV6113-WPE1(B) доступно в русский?
Не нашли свой вопрос? Задайте свой вопрос здесь
-
Contents
-
Table of Contents
-
Bookmarks
Quick Links
Video Intercom Villa Door Station
User Manual
Related Manuals for HIKVISION DS-KV6113 Series
Summary of Contents for HIKVISION DS-KV6113 Series
-
Page 1
Video Intercom Villa Door Station User Manual… -
Page 2
WITHOUT LIMITATION, MERCHANTABILITY, SATISFACTORY QUALITY, OR FITNESS FOR A PARTICULAR PURPOSE. THE USE OF THE PRODUCT BY YOU IS AT YOUR OWN RISK. IN NO EVENT WILL HIKVISION BE LIABLE TO YOU FOR ANY SPECIAL, CONSEQUENTIAL, INCIDENTAL, OR INDIRECT DAMAGES,… -
Page 3
LOSS OF DOCUMENTATION, WHETHER BASED ON BREACH OF CONTRACT, TORT (INCLUDING NEGLIGENCE), PRODUCT LIABILITY, OR OTHERWISE, IN CONNECTION WITH THE USE OF THE PRODUCT, EVEN IF HIKVISION HAS BEEN ADVISED OF THE POSSIBILITY OF SUCH DAMAGES OR LOSS. YOU ACKNOWLEDGE THAT THE NATURE OF INTERNET PROVIDES FOR… -
Page 4
Video Intercom Villa Door Station User Manual Symbol Conventions The symbols that may be found in this document are defined as follows. Symbol Description Indicates a hazardous situation which, if not avoided, will or Danger could result in death or serious injury. Indicates a potentially hazardous situation which, if not Caution avoided, could result in equipment damage, data loss,… -
Page 5
Video Intercom Villa Door Station User Manual Safety Instruction Warning • The working temperature of the device is from -10 ºC to 55 ºC. • All the electronic operation should be strictly compliance with the electrical safety regulations, fire prevention regulations and other related regulations in your local region. -
Page 6
Video Intercom Villa Door Station User Manual • Please use the provided glove when open up the device cover, avoid direct contact with the device cover, because the acidic sweat of the fingers may erode the surface coating of the device cover. •… -
Page 7
Video Intercom Villa Door Station User Manual Regulatory Information FCC Information Please take attention that changes or modification not expressly approved by the party responsible for compliance could void the user’s authority to operate the equipment. FCC compliance: This equipment has been tested and found to comply with the limits for a Class B digital device, pursuant to part 15 of the FCC Rules. -
Page 8
Video Intercom Villa Door Station User Manual EU Conformity Statement This product and — if applicable — the supplied accessories too are marked with «CE» and comply therefore with the applicable harmonized European standards listed under the EMC Directive 2014/30/EU, the RoHS Directive 2011/65/EU 2012/19/EU (WEEE directive): Products marked with this symbol cannot be disposed of as unsorted municipal waste in the European Union. -
Page 9: Table Of Contents
Video Intercom Villa Door Station User Manual Contents 1 Appearance ………………..1 2 Terminal and Wiring Description …………..3 2.1 Terminal Description ………………3 2.2 Wiring Description ……………….. 3 2.2.1 Door Lock Wiring ………………3 2.2.2 Door Contact Wiring …………….. 4 2.2.3 Exit Button Wiring ………………
-
Page 10
Video Intercom Villa Door Station User Manual 5.3.3 Network Settings ………………19 5.3.4 Video & Audio Settings …………….24 5.3.5 Image Settings ………………26 5.3.6 Event Settings ………………28 5.3.7 Intercom Settings ………………30 6 Configuration via Client Software …………. 35 6.1 Device Management ……………… -
Page 11
Video Intercom Villa Door Station User Manual 6.5.2 Search Call Logs ………………45 6.5.3 Upload Armed Information …………..46 A. Communication Matrix and Device Command ……..47… -
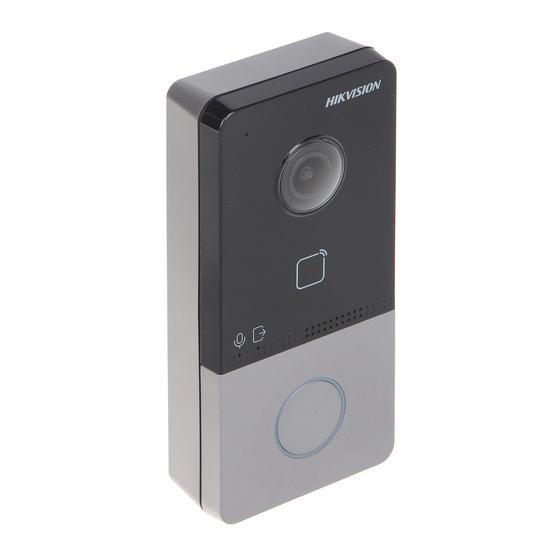
Page 12: Appearance
Video Intercom Villa Door Station User Manual 1 Appearance Front Panel and Rear Panel Here takes DS-KV6113-WPE1 for example. Figure 1-1 Front Panel and Rear Panel Table 1-1 Description Description Microphone Camera Indicator Unlock (Green)/ Call (Orange)/ Communicate (White) Button Card Reading Area…
-
Page 13
Video Intercom Villa Door Station User Manual Description Loudspeaker Terminals Debugging Port TAMPER Set Screw Bottom Panel Figure 1-2 Bottom Panel Table 1-2 Description Description TF Card Slot Network Interface… -
Page 14: Terminal And Wiring Description
Video Intercom Villa Door Station User Manual 2 Terminal and Wiring Description 2.1 Terminal Description Figure 2-1 Terminal Description 2.2 Wiring Description 2.2.1 Door Lock Wiring Figure 2-2 Door Lock Wiring…
-
Page 15: Door Contact Wiring
Video Intercom Villa Door Station User Manual Note Terminal NC/COM is set as default for accessing magnetic lock/electric bolt; terminal NO/COM is set as default for accessing electric strike. 2.2.2 Door Contact Wiring Figure 2-3 Door Contact Wiring 2.2.3 Exit Button Wiring Figure 2-4 Exit Botton Wiring…
-
Page 16: Alarm Input Device Wiring
Video Intercom Villa Door Station User Manual 2.2.4 Alarm Input Device Wiring Figure 2-5 Alarm Input Device Wiring…
-
Page 17: Installation
Video Intercom Villa Door Station User Manual 3 Installation Note • Make sure the device in the package is in good condition and all the assembly parts are included. • Make sure your power supply matches your door station. • Make sure all the related equipment is power-off during the installation.
-
Page 18: Surface Mounting Without Protective Shield
Video Intercom Villa Door Station User Manual 3.2 Surface Mounting without Protective Shield Before You Start • Tools that you need to prepare for installation: Drill (ø2.846) and gradienter. • Purchase the protective shield before installation. Steps 1. Stick the mounting template on the wall. Drill screw holes according to the mounting template.
-
Page 19: Surface Mounting With Protective Shield
Video Intercom Villa Door Station User Manual Figure 3-3 Surface Mounting without Protective Shield 3.3 Surface Mounting with Protective Shield Before You Start • Tools that you need to prepare for installation: Drill (ø2.846) and gradienter. • Purchase the protective shield before installation. Steps 1.
-
Page 20
Video Intercom Villa Door Station User Manual Figure 3-4 Mounting Template 2. Align the protective shield with the mounting template. 3. Secure the mounting plate and protective shield on the wall with 4 supplied screws according to the screw holes. 4. -
Page 21
Video Intercom Villa Door Station User Manual Figure 3-5 Flush Mounting with Protective Shield… -
Page 22: Activation
Video Intercom Villa Door Station User Manual 4 Activation 4.1 Activate Device via Web You are required to activate the device first by setting a strong password for it before you can use the device. Default parameters of the door station are as follows: •…
-
Page 23: Edit Network Parameters
Video Intercom Villa Door Station User Manual 3. Select an inactivated device and click Activate. 4. Create a password, and confirm the password. Note We highly recommend you to create a strong password of your own choosing (using a minimum of 8 characters, including at least three kinds of following categories: upper case letters, lower case letters, numbers, and special characters) in order to increase the security of your product.
-
Page 24: Remote Configuration Via Web
Video Intercom Villa Door Station User Manual 5 Remote Configuration via Web 5.1 Live View In the browser address bar, enter the IP address of the device, and press the Enter key to enter the login page. Enter the user name and password and click Login to enter the Live View page. Or you can click Live View to enter the page.
-
Page 25: Parameters Settings
Video Intercom Villa Door Station User Manual Figure 5-2 Organization Structure Settings 2. Click Fresh to refresh the list. 3. Enter the Keyword and click Search. The person information will display in the list. 5.3 Parameters Settings Click Configuration to set the parameters of the device. Note Run the browser, click →…
-
Page 26
Video Intercom Villa Door Station User Manual Set the stream type as Main Stream or Sub-stream. Play Performance Set the live view performance to Shortest Delay, Balanced or Fluent. Rules It refers to the rules on your local browser, select enable or disable to display or not display the colored marks when the motion detection, face detection, or intrusion detection is triggered. -
Page 27: System Settings
Video Intercom Villa Door Station User Manual Set the saving path of the manually captured pictures in live view mode. Note You can click Browse to change the directory for saving the clips and pictures, and click Open to open the set folder of clips and picture saving. Click Save to enable the settings.
-
Page 28
Video Intercom Villa Door Station User Manual RS-485 Click System Settings → RS-485 to enter the settings page. Select the No. and Working Mode from the drop-down list. Click Save to enable the settings. Maintenance Click Maintenance → Upgrade & Maintenance to enter the settings page. Figure 5-3 Maintenance •… -
Page 29
Video Intercom Villa Door Station User Manual Note The upgrading process will last 1 to 10 minutes, do not power off during the upgrading. The device reboots automatically after upgrading. User Management Click User Management to enter the settings page. Administrator can edit the permission for the users. -
Page 30: Network Settings
Video Intercom Villa Door Station User Manual Arming/Disarming Information Click User Management → Arming/Disarming Information to view the information. Click Refresh to get the present information. 5.3.3 Network Settings TCP/IP Settings TCP/IP settings must be properly configured before you operate the device over network.
-
Page 31
Video Intercom Villa Door Station User Manual Steps 1. Click Network → Basic Settings → Port to enter the settings page. Figure 5-6 Port Settings 2. Set the ports of the device. HTTP Port The default port number is 80, and it can be changed to any port No. which is not occupied. -
Page 32
Video Intercom Villa Door Station User Manual 4. Click Save to enable the settings. SNMP Settings Before You Start Before setting the SNMP, please download the SNMP software and manage to receive the camera information via SNMP port. By setting the Trap Address, the camera can send the alarm event and exception messages to the surveillance center. -
Page 33
Video Intercom Villa Door Station User Manual 4. Click Save to enable the settings. Note To lower the risk of information leakage, you are suggested to enable SNMP v3 instead of SNMP v1 or v2. FTP Settings Steps 1. Click Network → Advanced Settings → FTP to enter the settings page. Figure 5-8 FTP Settings 2. -
Page 34
Video Intercom Villa Door Station User Manual 3. Select Server Type. 4. Input the Server IP Address and Port. 5. Configure the FTP Settings, and the user name and password are required for the server login. 6. Set the Directory Structure, Parent Directory and Child Directory. 7. -
Page 35: Video & Audio Settings
Video Intercom Villa Door Station User Manual Figure 5-9 Linked Network Settings 2. Set the Master Station IP, SIP Server IP Address, Center IP Address and Center Port No. 3. Click Save to enable the settings. 5.3.4 Video & Audio Settings Video Parameters Steps 1.
-
Page 36
Video Intercom Villa Door Station User Manual Figure 5-10 Video Parameters 2. Select the Stream Type. 3. Configure the video parameters. Video Type Select the stream type to video stream, or video & audio composite stream. The audio signal will be recorded only when the Video Type is Video & Audio. -
Page 37: Image Settings
Video Intercom Villa Door Station User Manual higher frame rate is advantageous when there is movement in the video stream, as it maintains image quality throughout. Max. Bitrate Set the max. bitrate from 32 to 16384 Kbps. The higher value corresponds to the higher video quality, but the better bandwidth is required.
-
Page 38
Video Intercom Villa Door Station User Manual Figure 5-11 Display Settings 2. Select the Format. 3. Set the display parameters. Wide Dynamic Range can be used when there is a high contrast of the bright area and the dark area of the scene. Brightness Brightness describes bright of the image, which ranges from 1 to 100. -
Page 39: Event Settings
Video Intercom Villa Door Station User Manual You can customize the camera name, time/date format, display mode, and OSD size displayed on the live view. Steps 1. Click Image → OSD Settings to enter the settings page. 2. Check the corresponding checkbox to select the display of camera name, date or week if required.
-
Page 40
Video Intercom Villa Door Station User Manual Figure 5-12 Motion Detection 2. Check Enable Motion Detection to enable the function. 3. Click Draw Area.Click and drag the mouse on the live video to draw a motion detection area. Click Stop Drawing to finish drawing one area. Click Save to save the settings. -
Page 41: Intercom Settings
Video Intercom Villa Door Station User Manual Notify Surveillance Center Send an exception or alarm signal to the remote management software when an event occurs. 7. Click Save to enable the settings. Access Control Events Steps 1. Click Event → Access Control Event to enter the settings page. 2.
-
Page 42
Video Intercom Villa Door Station User Manual Note • For main door station (D series or V series), the serial No. is 0. • For sub door station (D series or V series), the serial No. cannot be 0. Serial No. -
Page 43
Video Intercom Villa Door Station User Manual Figure 5-14 Access Control and Elevator Control 2. Set the access control parameters. 1) Select the Door No. 2) Set the Door-unlocked Duration. 3) Optional: Enable Delay Door Alarm. 4) Click Save to enable the settings. Note •… -
Page 44
Video Intercom Villa Door Station User Manual 2) Set the Negative Floor. 3) Select the Interface Type as RS-485 or Network Interface. And enable the elevator control. If you select RS-485, make sure you have connected the door station to the elevator controller with RS-485 wire. -
Page 45
Video Intercom Villa Door Station User Manual Note • For door station, maximum speaking time and maximum message time should be configured. • Maximum speaking time varies from 90s to 120s, and maximum message time varies from 30s to 60s. Ring-Back Tone Settings Click Intercom →… -
Page 46: Configuration Via Client Software
Video Intercom Villa Door Station User Manual 6 Configuration via Client Software 6.1 Device Management Device management includes device activation, adding device, editing device, and deleting device, and so on. After running the iVMS-4200, video intercom devices should be added to the client software for remote configuration and management.
-
Page 47: Add Device By Ip Address
Video Intercom Villa Door Station User Manual Figure 6-1 Add to the Client 6.1.2 Add Device by IP Address Steps 1. Click +Add to pop up the adding devices dialog box. 2. Select IP/Domain as Adding Mode. 3. Enter corresponding information. 4.
-
Page 48: Live View Via Door Station
Video Intercom Villa Door Station User Manual You can add many devices at once whose IP addresses are among the IP segment. Steps 1. Click +Add to pop up the dialog box. 2. Select IP Segment as Adding Mode. 3. Enter corresponding information, and click Add. 6.2 Live View via Door Station Steps 1.
-
Page 49: Modify And Delete Organization
Video Intercom Villa Door Station User Manual Note Up to 10 levels of organizations can be created. 6.3.2 Modify and Delete Organization You can select the added organization and click to modify its name. You can select an organization, and click X button to delete it. Note •…
-
Page 50
Video Intercom Villa Door Station User Manual 1) Enter basic information: name, gender, tel, birthday details, effective period and email address. Note The length of person name should be less than 15 characters. 2) Click Add face to upload the photo. Note The picture should be in *.jpg format. -
Page 51: Modify And Delete Person
Video Intercom Villa Door Station User Manual 6.4.2 Modify and Delete Person Select the person and click Edit to open the editing person dialog. To delete the person, select a person and click Delete to delete it. Note If a card is issued to the current person, the linkage will be invalid after the person is deleted.
-
Page 52: Get Person Information From Device
Video Intercom Villa Door Station User Manual 5) Click OK to start importing. 6.4.5 Get Person Information from Device If the added device has been configured with person information (including person details, fingerprint, issued card information), you can get the person information from the device and import to the client for further operation.
-
Page 53
Video Intercom Villa Door Station User Manual Figure 6-2 Issue Card in Batch 2. Click Settings. -
Page 54: Permission Settings
Video Intercom Villa Door Station User Manual Figure 6-3 Card Settings 3. Select Card Type and Card No. Type. 4. Click OK to save the settings. Result After issuing the card to the person, the person and card information will display in the Person(s) with Card Issued list.
-
Page 55: Video Intercom Settings
Video Intercom Villa Door Station User Manual 2) Select the Template of the schedule. 3) Check the person to Selected according to your needs. 4) Check the device to Selected according to your needs. 4. Click Save. 5. Check the permission and click Apply All to Device. The status of the permission displays as Applied.
-
Page 56
Video Intercom Villa Door Station User Manual Adjust the Volume of Click to adjust the volume of loudspeaker. Loudspeaker Hang Up Click Hang Up to hang up. Adjust the Volume of Click to adjust the volume of microphone. Microphone Unlock Remotely For door station, you can click to open the door remotely. -
Page 57
Video Intercom Villa Door Station User Manual 2. Set the search conditions, including call status, device type, start time and end time. Call Status Click ˅ to unfold the drop-down list and select the call status as Dialed, Received or Missed. Or select All to search logs with all statuses. Device Type Click ˅… -
Page 58
A. Communication Matrix and Device Command Communication Matrix Scan the following QR code to get the device communication matrix. Note that the matrix contains all communication ports of Hikvision access control and video intercom devices. Figure A-1 QR Code of Communication Matrix Device Command Scan the following QR code to get the device common serial port commands. -
Page 59
Video Intercom Villa Door Station User Manual Figure A-2 Device Command… -
Page 60
UD16095B…

Домофоны Hikvision DS-KV6113-WPE1 УТ-00024312 — инструкция пользователя по применению, эксплуатации и установке на русском языке. Мы надеемся, она поможет вам решить возникшие у вас вопросы при эксплуатации техники.
Вы можете скачать инструкцию к Hikvision DS-KV6113-WPE1 УТ-00024312 по ссылке ниже, если не хотите ждать загрузки. Если остались вопросы, задайте их в комментариях после инструкции.
«Загружаем инструкцию», означает, что нужно подождать пока файл загрузится и можно будет его читать онлайн. Некоторые инструкции очень большие и время их появления зависит от вашей скорости интернета.
Остались вопросы?
Не нашли свой ответ в руководстве или возникли другие проблемы? Задайте свой вопрос в форме ниже с подробным описанием вашей ситуации, чтобы другие люди и специалисты смогли дать на него ответ. Если вы знаете как решить проблему другого человека, пожалуйста, подскажите ему


Часто задаваемые вопросы

Как посмотреть инструкцию к Hikvision DS-KV6113-WPE1 УТ-00024312?
Необходимо подождать полной загрузки инструкции в сером окне на данной странице или скачать кликнув по специальной кнопке.
Руководство на русском языке?
Все наши руководства представлены на русском языке или схематично, поэтому вы без труда сможете разобраться с вашей моделью
Как можно распечатать инструкцию?
Скачайте ее по специальной кнопке над формой чтения на ваше устройства и отправьте на печать.