This article is a walkthrough of Welcome to the Game.
Welcome to the Game is a randomly generated puzzle game where you start off navigating the Deep Wiki I in search of eight bits of code called called «keys», hidden within the websites of the Deep Web. You only have 30 in-game days to do so.
- First off, don’t waste your time with filler sites; sites that are never open no matter what or never contain keys.
- Secondly, you only start off at the Deep Wiki I, which only ultimately contains 3-4 keys per playthrough. The other websites that contain the rest of the keys are at the Deep Wiki II or Deep Wiki III and you can only get its address by solving certain puzzles, These puzzles are on specific sites and will give you the address to the second Deep Wiki or if you are on a puzzle in Deep Wiki II, it will give you a key to the Deep Wiki III.
- Note that Welcome to the Game is randomly-generated and the keys will always be in a different location each playthrough. This article only lists all the possible spawn locations of the keys.
- While the game encourages you to copy each link and key down with your in-game notes, thanks to Hacking, it’s possible to lose all of your notes, so to be safe, write down all of the links and keys on an actual notepad (physical or digital) that you couldn’t lose.
- Each key begins with «*number* — *code*». The number is for what order the code is supposed to go in. For example, 1 — yx6B would be the first code in the address, always behind «https://» and in front of «.ann».
- Tip: You’re not going to beat this game if you’re a very slow typer, as the Kernel hacks get progressively harder and harder and require relatively fast typing.
- Tip: You can copy and paste text in-game by highlighting it, pressing ctrl + C, then ctrl + V respectively.
- Tip: You’re not going to beat this game if you’re not good with hearing noises, this is because even the faintest sound could be an indication that the Kidnapper or Breather are about to approach your destination.
Dead Link Sites
- 133734
- Alphabit Market
- ANN Hoster
- ANN Wallet
- Beaminfo
- BLACKHOST
- Black Wire
- CannabisWorld
- Charlie EU
- Cheap Cigs
- Decrypt You
- Deepweed
- DoubleUP
- Dream Place
- Easy Paybuddy
- Flame
- Gnumped
- Hidden Questions
- Hotel ANN
- Mobile Market
- Parasite
- Pay Blocker
- Paybuddy Dolla
- PirateHACKERS
- Pounds
- Rent A Hacker
- Shiwa
- The Info Exchange
- Upper Earth
- Vess
- XXXTEENXXX
Sites that have possible keys spawns (With open times)
- Bathroom Cams (Always Open)
- Black Hat Post(Open from 10PM — 1AM)
- Borrow My Daughter (Always Open) <played 2018 APR>
- Burned At The Stake (Open from 10PM — 2AM)
- Cheap Surgery (Always Open) k
- DarkBook (Always Open)
- Death Log (Always Open)
- Doctor Murder (Open from 12PM — 3AM)
- Euro Firearms (Open from 10PM — 1AM)
- Family Drug Shop (Always Open)
- Father Donald (Open from 12PM — Rest of Night)
- Flesh Trade (Always Open)
- Forgive Me (Always Open)
- Forsaken Gifts (Always Open)
- Grandmas Fantasy (Always Open)
- Grave Thieves (Open from 11PM — 3AM)
- Greet MySisters (Open from 12PM — Rest of Night)
- Hail Satan (Always Open)
- Hidden Cams (Always Open)
- Hot Burners (Always Open)
- Illuminati (Open from 3AM — Rest of Night)
- IsEvil (Open from 2AM — Rest of Night)
- Kill For Me (Open from 12PM — Rest of Night)
- Legion (Always Open)
- NudeYouTubers (Open from 11PM — 2AM)
- Organ Mart (Open from 10PM — 1AM)
- Passports R Us (Always Open)
- Pay 2 Rape (Open from 1AM — Rest of Night)
- Scream Bitch (Always Open)
- Shadow Web Portal (Open from 12PM — 3AM)
- Steroid Queen (Always Open)
- Takedownman (Always Open)
- Tango Down (Open from 10PM — 2AM)
- Testical Mutilation (Open from 12PM — 3AM)
- The Bomb Maker (Always Open)
- The Butcher (Always Open)
- The Doll Maker (Always Open)
- The Loogaroo (Always Open)
- The Muhgel (Open from 10PM — 1AM)
- The Pedo Handbook (Open from 1AM — Rest of Night)
- The Prey (Open from 11PM — 2AM)
- Warehouse 33 (Always Open)
- Weed Post (Always Open)
- zeroDay (Always Open)
Sites that will always have a key (With open times)
- The Gatekeeper (Always Open)
Sites that contain Deep Wiki URLs (With open times)
- ChosenAwake (Always Open)
- Claffis (Always Open)
Sites that contain Secret N Keys
- Grandmas Fantasy
- Greet MySisters yes
- NudeYouTubers
- Testical Mutilation
Sites that have been Ceased (Used to work but don’t anymore)
- Cotton Road
- The Bunker
Overview
Полное руководство до мелочей на русском языке
Вступление
Добро пожаловать в игру!
Сегодня нам предстоит просматривать темную сеть для поиска 8 частей ключа,которые раскиданы по всей темной паутине и могут скрываться как и в картинках,так и в каждой буковке.Ниже будут подробно расписаны все нюансы игры касаемо угроз,инструментов,поиска ключей и так далее.
Вся информация взята из общедоступных источников и основана на личном опыте автора.
Описание угроз
Врага нужно знать в лицо,по этому этот раздел будет первым.Всего угроз в игре 5,но этого вполне достаточно,чтобы вы не смогли ее пройти.
Полиция.
Полиция-три бравых товарища выбьют вашу дверь и бросят светошумовую гранату,после чего повалят вас на пол,наведут на вас свои блестящие G36 и обзовут плохим словом.Они доставляет очень большое количество проблем начинающим игрокам, так как вопрос,придут они за вами или нет,на прямую зависит от того как часто вы меняется вай-фай подключения т.к. по городу объявлена операция отслеживания и отлова людей использующих темную сеть.
Если же вас не было дома во время их штурма,они будут терпеливо ждать вас в коридоре вашего этажа,либо на лестнице.
Об их появлении можно судить по звукам сирен за окном,которые как бы намекают,что у вас есть считанные секунды,чтобы сменить вай-фай.Так же об их появлении можно судить по отдаленным переговорам и шагам за вашей стеной,но если вы это слышите-игре конец.
Чтобы справиться с полицией достаточно менять сеть вай-фай раз в 10 минут(бесплатный),10-15 минут(wep),15-20 минут(wpa) и 25-40 минут(wpa2).О разновидностях сетей вай-фай и об их взломе речь пойдет ниже.
В борьбе с полицией помогаютPolice scaner,skyBREAK
Нуар
Главные антогонисты игры, представляют собой мужчину и женщину, одетых в черную одежду и белые маски. Могут появляться в окне с лева от вашего компьютера и на балконе, а так же в любой части комнаты где отключен свет,коридоре и на улице за забором.
Как было сказано выше,чем меньше света в вашей квартире,тем ближе к вам они будут появляться,а так же,будет увеличиваться шанс МГНОВЕННОГО убийства,так что есть смысл не выключать свет,или,хотя-бы не выключать слишком много.
Если вы увидели Нуар,просто повернитесь к ним спиной(на вид показывается только один из них) и ,как говорит обучение в игре,досчитайте до 30.На практике же можно считать всего до 15 секунд.
Лукас
Местный хитман/агент47-лысый человек в костюме,перчатках,наемный убийца,самый непредсказуемый противник в игре,требует кое-каких навыков,чтобы противостоять ему.
Некоторые источники говорят,что Лукас появляется только когда вы найдете 2 ключа,либо после 12 часов,но на практике он может придти даже до 11 часов(при определенных условиях).
О том,что Лукас появился в здании свидетельствуют 2 гудка машины на улице,так же иногда слышны звуки шагов в квартире на верхнем этаже.
Чтобы проникнуть в вашу квартиру,Лукасу необходимо взломать замок на входной двери(если конечно дверь вообще закрыта),об этом свидетельствует короткий скрипучий звук подбора замка отмычками.В этот момент вам нужно срочно выключить компьютер(иначе Лукас сворует N-ную сумму ваших сбережений и удалит все записи из блокнота) и пулей бежать в ванную комнату и уже там спрятаться в ванной за занавесками.
Обратите внимание,что в тот момент,когда вы прячетесь в ванной,активируется звук от вашего микрофона(если включено в настройках) и сидеть тихо придется как в игре,так и в реальной жизни.
Длительность нахождения Лукаса в квартире напрямую зависит от количества включенного света-чем меньше света,тем меньше Лукас пробудет в квартире(опасайтесь Нуар!)
После того как Лукас выйдет из квартиры,крайне рекомендую просидеть в ванной еще 20 секунд(но не более 30-опасность нападения Нуар),чтобы дать ему снова закрыть вашу дверь и покинуть этаж.
На весь ритуал по выключению ПК и забеганию в ванну у вас не больше 5-7 секунд,по этому действовать нужно очень быстро и отлажено.
Чтобы эффективно противостоять Лукасу,нужно закупиться 1-2 Motion sensor и Motion alert,о которых речь пойдет ниже.
Так же Лукаса можно встретить в коридоре на вашем этаже(100% смерть и гора кирпичей),либо даже поймать его за взломом вашей же двери!При этом он не будет вас видеть,что даст шанс(не большой) скрыться от него.
Breather
Серийный маньяк убийца в капюшоне и медицинской маске,появляется только когда вы спускаетесь в переулок за своими покупками. В первый раз никогда не появляется,что может быть использовано в свою пользу.Если вы спускаетесь за покупками после 11 часов,шанс встретить его около 80%,после 12 часов -100%
Подсказки о его появлении: в квартире вы услышите довольно громкое дыхание(практически в спину),так же дыхание можно услышать у дверей в холле(редко),в самой аллее сразу после выхода из здания можно услышать его смех,звук как он пинает мусорные баки,шаги(как громкие так и очень тихие),его голос;в общем любой посторонний звук будет являться знаком того,что Breather идет за вами.Так же очень редко звуков может не быть вовсе.
Единственный способ борьбы с ним-после выхода в аллею бежать сломя ног не за посылкой,а в дверь с правой стороны-маленькая рабочая комнатка,в которой нужно спрятаться,подойти к двери и нажать правую кнопку мыши,чтобы заблокировать дверь и ждать,когда он подойдет(или не подойдет,если вы не уверенны в его присутствии),до считать до 30,и если вы не услышите звуки его шагов,то путь чист и можно смело забирать посылку(ки) и идти домой;но если же вы услышали шаги,то будьте готовы к самому суровому испытанию в игре…Breather будет пытаться зайти в комнату до 10 раз!Каждый раз как он будет пытаться сделать это вы увидите как дверь слегка при открывается-сразу жмите ЛКМ,чтобы закрыть дверь(следите за выносливостью в правой части экрана,чтобы не остаться беззащитным в его следующей атаке.
ВНИМАНИЕ!!!СПОЙЛЕРЫ!!!
The Doll Maker
Секретный персонаж в игре,не появляется в игре до тех пор,пока вы не зайдете на одноименный сайт и не нажмете кнопку ENTER.
После того,как вы нажмете ее,жизнь больше никогда не станет прежней,т.к. начнется квест Кукольника-сидя за компьютером,вы услышите странную музыку,доносящуюся из-за входной двери…Посмотрев в глазок вы увидите это:
после чего выключится свет и после того как вы его включите,то на вас с зади нападет сам Кукольник и скажет,что за посещение его сайта нужно платить,и платой для вас будет служить помощь Кукольнику в поиске очередной жертвы,иначе этой жертвой станете вы:

После того,как вы нашли подходящую девушку и оставили на ее двери метку,можете смело возвращаться домой,и в скором времени вы услышите характерные звуки того,что Кукольник приходил за своей новой жертвой.
В скором времени ему снова понадобится ваша помощь,так что не расслабляйтесь.
Список физических предметов
В игре существует 2 типа предметов:физический и цифровой
Физические предметы продаются в Shadow Market и доставляются в переулок через какое-то время.В переулок можно попасть через парадную дверь 1-ого этажа.После того,как вы подобрали посылку,предмет автоматически появляется в квартире,так что не паникуйте,когда не увидите предмета у себя в руках.
Вот список и описание физических предметов:
wi-fi приемник,увеличивает количество доступных подключений и скорость соединения.
детектор движения,можно установить в любое место,но в разумных пределах-подумайте сами,где он будет приносить больше всего пользы!Можно покупать до 4-х штук.после подбора в переулке,появляется слева от входной двери на тумбе.
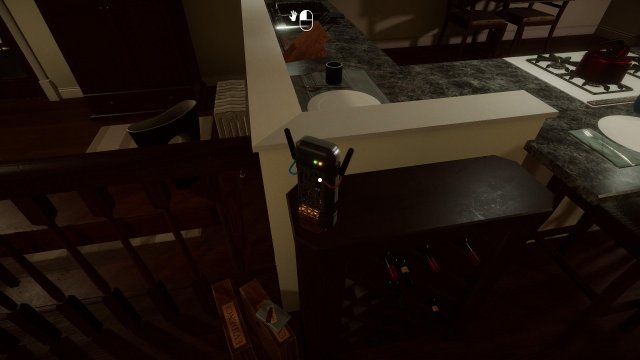
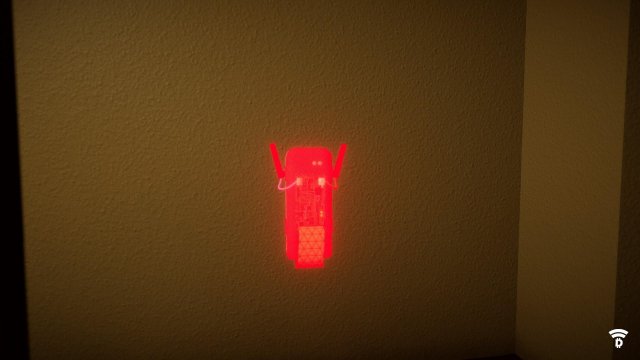
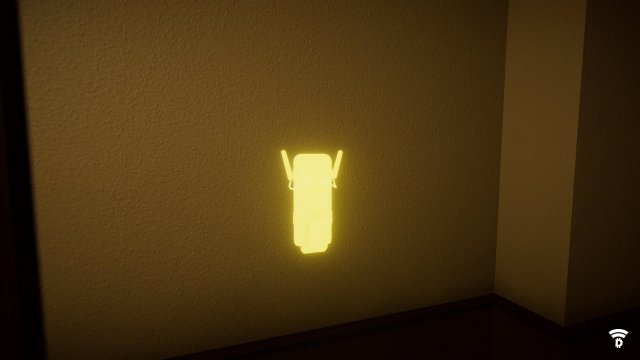
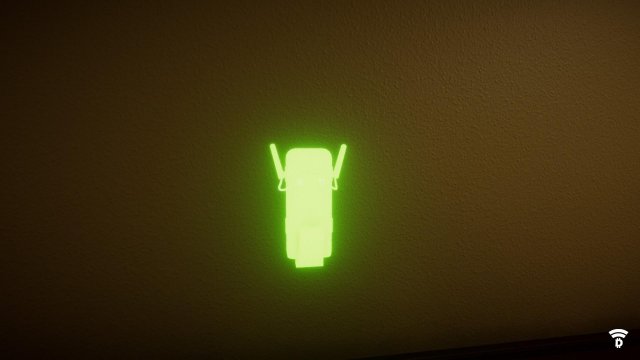
девайс,который поможет заработать денежек,после подбора в переулке,появляется в квартире прямо на против входной двери.Можно купить до 5 штук.Чтобы VPN приносил достаточное кол-во денег,нужно установить его на стене в зоне хорошего сигнала
Зеленый-отличный сигнал,желтый-средний,красный-плохой.Чтобы проверить эффективность ваших VPN,на ПК нужно нажать на значок DOSCOIN в левом верхнем углу
На данный момент лучший сигнал-6 DOSCOIN за 108 секунд,худший 0.3 за 1400 секунд
сканер полиции,сообщает о приближающемся рейде.После подбора в переулке автоматически устанавливается на стол около ПК.
позволяет взломать компьютер в лобби
позволяет слышать все что происходит около вашего ПК в ваше же отсутствие,на пример,устанавливаете VPN или пошли в переулок.
Список цифровых предметов
Цифровые предметы продаются в zeroDay Market,после чего устанавливаются на ваш ПК,каждый товар занимает разное время для установки.
skyBREAK,wpa lib,wpa2 lib-утилиты позволяющие взламывать чужие сети wi-fi.Отличие между ними в разных сложностях wi-fi,о взломе которых разговор пойдет ниже.
одноразовый скрипт,позволяет при успешном отражении хакерской атаки спереть деньги у самих хакеров.Важно всегда иметь хотя-бы 2 в запасе.Работает только после ZoneWall!Если вы прошли ZoneWall идеально,то хакерская атака будет заблокирована моментально,и вы не получите ничего,а скрипт исчезнет.
утилита,добавляющая звуковой сигнал к вашим детекторам движения.Очень полезная вещь для борьбы с Лукасом.
утилита,снижающая риск хакерской атаки.Полезна в середине прохождения,когда у вас достаточно денег,и вам не нужно лишнее внимание.Имеет 5 уровней,каждый из которых уменьшает шанс быть атакованным хакерами на 20%(в любом случае на 5 уровне,шанс блока равен 99%)После установки утилиты,ее следует активировать,нажав на значок черепа в правом верхнем углу экрана
утилита,которая уведомляет вас о наличии части ключа на странице.Если на странице есть ключ-в правом нижнем углу браузера появится значок ключа.Самый дорогой и самый долгоустанавливающийся предмет в игре.
антивирус.нужен лишь в том случае,если вы играете в режиме 1337.После провала мини игры с хакерством,на ваш ПК может быть занесен вирус,заставляющий ПК хаотично перезагружаться и ворующий деньги.Каждый раз нужно покупать заново.
Хакерские атаки
Однажды,после 10:20,на вас начнут совершать атаки хакеры с целью украсть ваши кровные деньги и стереть записи из внутриигрового блокнота.
Каждая хакерская атака сопровождается двумя мини играми,которые помогут вам отразить атаку.
Всего в игре 4 вида мини игр
1-ZoneWall-самая простая из всех,обязательно в каждой атаке.Чтобы пройти ее нужно всего лишь попасть в красную зону
2-memD3FR4G3R-в этой мини игре вам поочередно будут показаны буквы и цифры,после чего нужно будет ввести их в той же последовательности
3-stackPUSHER-в этой мини игре нужно перетаскивать блоки данных в центр,используя специальный блок в виде 4-х треугольников.Радиус действия активного блока 3х3.
4-NOD3H3X3R-представляет собой поле,заполненное двумя типами клеток.Нужно соединить все отмеченные точки.Две одинаковые точки соединять нельзя.
Со временем мини игры становятся гораздо сложнее,а времени на их выполнение меньше.
Взлом wep сетей Wi-fi
Чтож,настало время взломать пару тройку точек wi-fi,начнем.
Для начала нужно купить программу skyBREAK.Купили?Отлично,можно приступать.
1-откройте программу,она находится на рабочем столе в левом углу экрана
2-в появившемся окне можно выбрать тип wi-fi,который можно взломать:wep,wpa,wpa2.
Так как у нас в начале есть только wep,в появившемся окне пишем wep и жмем enter.


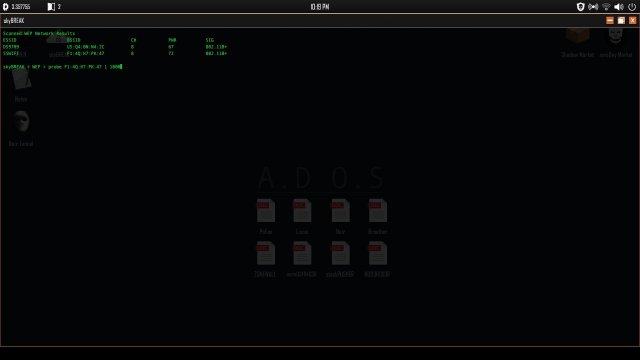
4-сначала нужно узнать порт,для этого пишем probe,далее на против названия точки wi-fi ее идентификационный номер “BSSID” и зону поиска портов.
Пример:

Если процесс не пошел,значит вы ошиблись в написании команды/BSSID/превысили минимальные или максимальные размеры порта(1-минимум,1000-максимум)


Взлом WPA и WPA2 сетей
Принцип взлома WPA и WPA2 сетей очень похож на принцип взлома WEP,но с 1 существенным отличием.
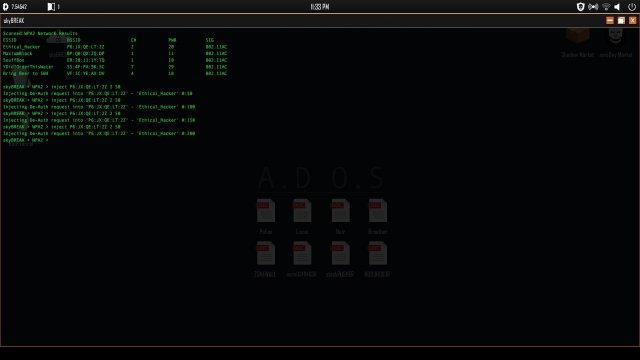
Вместо probe BSSID [port min port max] мы пишем inject BSSID CH и не большое число данных,которое мы будем вводить(от 25 до 83 на разных точка wi-fi)
Вводить же эту команду нужно 1 раз не чаще строго определенного времени для каждой wi-fi точки,если вводить слишком часто и/или слишком много-сеть отключится и будет недоступна какое-то время и при дальнейшем ее взломе весь прогресс будет утерян.
К примеру для взлома точки “MaximumBlack” мы пишем: inject 8H:3Y:VV:JH:WP 4 25 и жмем enter,а для точки Ethical_Hacker inject HH:45:Z7:2A:PQ 7 83 и enter.
Самые лучшие точки для взлома будут видны,если установить приемник wi-fi прямо на стол перед собой.
Таблица взлома точек на столе:
Название точки
Кол-во введенных данных
Интервалы между вводом(сек)
Время безопасного использования wi-fi(внутри игровые минуты)
Ethical_Hacker
83
3
25-35
Bring_Beer to 504
78
3
20-25
YdidIOrderThisWater
67
6
22-32
MaximumBlack
25
4?
20-25?
После того,как порт наконец-то найден,выполняем процесс взлома так же как в wep,ждем пароль.
Готово!У вас теперь есть доступ к лучшим точкам wi-fi.Теперь можно просто прыгать с одной на другую в порядке взлома,и вы навсегда забудете,что когда то переживали на счет полиции.
Поиск Deep Wiki II и III(что это?)
Как вы уже заметили играя в игру,то список сайтов для поиска ключей предоставлен сервисом Deep Wiki.Но у него тоже есть свои секреты,такие как две дополнительные страницы с новыми списками сайтов.
Вы начинаете на Deep Wiki I,чтобы найти вторую страницу,нужно внимательно рассматривать каждый сайт через режим просмотра Source Code.Чтобы его включить,находясь на сайте,нажмите на иконку увеличительного стекла,чтобы открыть исходный код страницы.
Открыли?Отлично,теперь,среди всей этой белеберды,что там написана,нужно найти что-то на подобие такой записи
<!—-[link]-это и есть ссылка на Deep Wiki II.Скопируйте ее и вставьте в окно обозревателя,после чего нажмите enter.
ВНИМАНИЕ!!!
Если вы нашли ссылку,пройдя по ней ОБЯЗАТЕЛЬНО добавьте сайт в закладки,для этого необходимо просто нажать на звездочку.Если этого не сделать,можно потерять уйму времени,чтобы снова найти заветную ссылку.
Чтобы попасть на Deep Wiki III,на второй вики всегда есть сайт “Rule of Three”-на котором для получения ссылки нужно пройти небольшую головоломку.
Все,теперь все 3 вики у вас в браузере и можно приступать к изучению сайтов в поисках частей ключа.
Поиск частей ключа и создание из них целого.
Что нужно знать перед охотой на эти осколочки:
1-часть ключа выглядит так: 2-d0c5c35123a6,где цифра 2 в начале это последовательность ввода части ключа при создании целого.
2-части ключа могут быть в Souce Code и будут выглядеть так:<!—-2-d0c5c35123a6—>
3-части ключа могут быть на самом видном месте на странице,даже ничем не замаскированы
4-части ключа могут быть спрятаны в куче текста,читайте внимательно!
5-части ключа могут быть в любой картинке,на любой странице любого сайта.Чтобы проверить,содержит ли картинка ключ-просто наведите на нее курсором и щелкните по ней.Если картинка содержала ключ,вы услышите характерный звук,означающий,что вы нашли часть кода,и он либо появился где-то на странице,либо как отдельный файл на рабочем столе
6-части ключа могут быть в любой букве,на любой странице любого сайта.
7-Количество ключей на всех трех вики всегда одинаковое:на первой вики 2 ключа;на второй и третьей по 3
8-ключи и ссылки генерируются случайным образом
Исходя из всего вышеперечисленного,нам понадобится Key Cue,ведь без него пройти игру становится практически невозможно из-за ограничение времени(игра начинается в 10:00,заканчивается в 04:00)
Так же крайне рекомендую записывать все ключи и сайты,где эти ключи были найдены,и даже ссылку на wiki в блокнот на ВАШЕМ ПК,чтобы потом было проще объединить все части ключа и ничего не потерять при удавшейся хакерской атаке,или не дай бог ,краша игры.
Нашли все 8 частей ключа?Превосходно!Теперь нужно соединить их в 1 сплошную линию(без пробелов) в том порядке,котором они были подписаны.После соединения их воедино,нужно открыть приложение на ПК под названием Noir Tunnel,и вставить туда получившийся ключ.Так же надо обязательно иметь на этот момент 250 DOSCOIN в запасе,иначе толку от этого ключа никакого.
А если вы собрали целый ключ и у вас есть 250 DC,то можете смело вводить ключ и жать кнопку,после чего вы увидите небольшую сцену,в которой вам будет сказано бежать на 1 этаж(бежать придется в прямом смысле,если не хотите потерять ВСЕ)
Хитрости
За все время игры,я заметил некоторые вещи,которые можно обратить в свою сторону:
1-Если в начале игры открылось окно при просмотре какой-либо страницы-возможно на ней есть ключ.(окно может так же открыться совершенно спонтанно)
2-открытое окно позволяет лучше слышать звуки на улице(очевидно жеж)
3-Если вы слышите шаги Лукаса на другом этаже-готовьтесь,ваш этаж-следующий
4-Когда вы видите Нуар в окне слева от ПК,не обязательно вставать и отворачиваться от них,можно просто продолжить работу,т.к. это считается за то,что вы отвернулись(но,все же для успокоения нервов лучше встать).То же самое с Нуар на балконе.
5-Физические предметы можно покупать только по 1 за тип.То есть нельзя купить 2 детектора движения,за каждым нужно бежать по отдельности,но это не означает,что нельзя купить детектор движения, Remote VPN,полицейский сканер за раз,спуститься и собрать все сразу,плюс,если это ваша первая вылазка за игру,то прилетит еще и бесплатный VPN от Адама(в итоге можно утащить сразу 2 VPN)
6-Breather никогда не появляется,когда вы забираете посылку в 1 раз.Этим можно воспользоваться-накопить денег,сделать много покупок и со спокойной душой спустить за ними,однако,всегда будьте готовы к его появлению-эта игра не всегда предсказуема на 100%
7-в первые 20 минут(с 10:00 до 10:20 с вами ничего не может случится(прямо вообще ничего),
этим тоже можно пользоваться,используя время спокойствия для поиска ссылки на Deep Wiki II
8-на сайте The Rule of Three можно использовать адресную строку как временный блокнот,для облегчения прохождения пазла.
Заключение
В общем и целом игра не такая сложная,если в ней разобраться, единственное,что атмосфера будет нагнетаться с вашим прогрессом,главное держать себя в руках и мыслить четко
Удачи и Welcome to the Game!
Домой» руководства», добро пожаловать в игру II — руководство успеха & полезные подсказки
Этот гид стремится помогать Вам получить все успехи и полезные подсказки так, чтобы Вы не умирали все время, надо надеяться, избивая игру. В этом руководстве будут помехи, но ни один не определяет окончание (окончания). Эта игра — буквально 95%-й RNG, который является одной из основных причин относительно того, почему эта игра чрезвычайно трудная.
Другое приветствие руководствам игры 2:
- Руководство новичков.
- Доступность веб-сайта и времена.
- Обман.
Введение
В игре есть 26 успехов. Я устрою их как таковой: Легкий, Средний, Трудно, и Трудный. Будут полезные подсказки в разделе Difficult этого руководства.
Легкие успехи
#GoodGuyAdam
Закончите обучающую программу.
Двоение
Повесьте трубку на всех требованиях от Адама.
Знание — сила
Прочитайте все 8 учебных документов о компьютере.
Я не делаю узла
Потеряйте самый низкий уровень nodeHexer. Это должно быть довольно очевидно, какой — самый низкий уровень nodeHexer. Как только Вы видите его, просто позвольте таймеру закончиться, ничего не делая.
Сталкер
Посетите Твиттер Адама и его YouTube в то время как в браузере A.N.N. Вы можете найти связи с ними в закладках.
Перегрузка стека
Потеряйте самый низкий толкач стопки уровня. Это также очевидный, относительно которого считают самым низким уровнем. Снова, как только Вы видите его, просто позвольте таймеру закончиться, ничего не делая.
Память золотой рыбки
Потеряйте самый низкий уровень memDefrager. Этот также очевиден. Даже не читайте письма, которые подходят, просто проигрывают.
Героинщик знаний
Прочитайте все примечания, липкие примечания, письма, бумаги и/или статьи об информационном табло рядом с Вашим компьютером.
Затем подойдите к маленькому, круглому столу около двери балкона и прочитайте картину на нем.
Наконец, идите/управляйте полностью к лобби и прочитайте все примечания по информационному табло рядом с почтовым ящиком около главного входа.
Средние успехи
Согнуть
Это на самом деле простое, но я поместил его столь средний, как это потребует, чтобы Вы начали использовать VPNs, чтобы получить Ваши монеты DOS и/или покупать черные ходы и успешно заблокировать любую из загадок кроме Зональной Стены. Закажите два или больше пакета с Теневого Рынка. Затем идите/управляйте к дорожке через главный вход лобби и ждите тайника. Вы будете знать, что есть два или больше пакета в тайнике, если Вы видите две из пронумерованных коробок.
Ночное видение
Время от времени власть выключится. И иногда, Вы — идиот для того, чтобы не брать фонарь в начале, таким образом Вы не видите ничего вообще. Когда власть выключится, пробейтесь к столу рядом с Вашей кроватью и возьмите фонарь.
Держите дверь
Входя в дорожку, есть шанс, что Вы услышите смех или шаги. Если Вы делаете, пятитесь в комнату на стороне. Войдите в комнату. Держитесь все еще рядом с дверью и ждите Передышки, чтобы попытаться ворваться в комнату. Обычно, Вы, как предполагается, только считаете дверь закрытой, когда дверь продвигается в. Однако, если Вы хотите этот успех. Считайте дверь закрытой, когда дверь не будет выдвинута в, и Вы потерпите неудачу, который даст Вам успех.
Заплаченный, чтобы сидеть
Купите четыре VPNs и разместите их везде, где Вам нравится. Как только они все активны, Вы должны получить этот успех.
Пальцы масла
Потеряйте Зональную Стену. 20 Раз. Подряд. Это должно быть довольно легко, но я выбрал этот успех в качестве среды, потому что нет никакого сообщения, будете ли Вы жить для 20 хакерских проникновений, чтобы получить Вас.
Трудные успехи
Цифровой потребитель
Купите одно из каждого изделия на zeroDay Рынке. Очевидный.
Отгрузка укладчика
Купите одно из каждого изделия на Теневом Рынке. Я на самом деле полагаю, что этот успех немного более труден, потому что Вы сталкиваетесь. Передышка как угроза каждый раз Вы входите в дорожку. Очевидный.
Покупательский бум
Как только Вы достигаете Цифрового Потребительского и Судоходного Укладчика, Вам необходимо получить этого также.
Параноидальный
Имейте все 4 активные датчика движения и владейте синим шепотом.
Домашнее животное производителя куклы
Нажмите на территорию Производителя Куклы в Глубокой Wiki I. Там, Вы будете видеть, что леди на экране со словами «входит» около основания. Не имеет значения, сколько времени Вы находитесь на веб-сайте. Момент Вы нажимаете на ссылку, запуски миссии стороны Производителя Куклы.
Вскоре после Вы начнете слышать, что музыкальная-шкатулка-esque настраивает прибытие из за пределами Вашей двери. Просмотрите глазок своей двери, и Вас встретит Производитель Куклы. Власть закроется, таким образом, Вы должны будете включить питание.
Хождение назад к Вашей двери вызовет более близкое введение в Производителя Куклы. Он просит, чтобы Вы нашли женщину в той же самой квартире, которая моложе, чем 30, так, чтобы он мог добавить ее к своей коллекции куклы.
Вам будет нужен диск LOLPY, чтобы получить доступ к списку арендаторов и их соответствующих номеров комнаты. Однажды покупка диска LOLPY, вставьте его в башню ниже монитора на ресепшн лобби.
По некоторым причинам, каждый раз, когда я пытаюсь заказать диск LOLPY, Передышка ждет меня. Так, когда Вы входите в переулок путь, быть очень осторожными Передышки. Он будет, вероятно, метать икру.
Маркер будет помещен в Вашу дверь, которую Вы должны будете взять, и место, что маркер на двери женщины, которая молода. Вы, возможно, должны выполнить эту миссию стороны несколько раз, поскольку Производитель Куклы желает для многократных женщин добавить к его коллекции.
Возможные арендаторы, которые могут быть помечены, включают: Лариса Клей, Клэр Холлоуэй, Лилиан Тайлер, Элис Шоу, Халли Николсон, Ashlynn Rangel, Эмма Эверетт, Джейниа Осборн и Аяна Армстронг.
Номера комнаты беспорядочно произведены кроме нескольких арендаторов как номер комнаты Клинта 803.
Это могло бы требовать времени для Производителя Куклы, чтобы отложить маркер на Вашей двери, чтобы продолжить его поиски стороны. Возможно, как 30 минут в режиме реального времени.
Эта миссия стороны может занять все время с 22:00 до 4:00, таким образом, я рекомендую не бродить по сети вообще, и просто сосредоточиться на этой миссии стороны избежать угроз и получить успех.
Одна вещь обратить внимание. Если Вы помещаете маркер на неправильную дверь, Вы не умираете. Производитель Куклы помещает маркер назад на Вашу дверь и смех. Вы только умираете, если Вы не помещаете маркер на дверь вовремя, или Вы получаете слишком много неправильных маркеров, помещенных на дверь.
Вы будете знать, поместили ли Вы маркер на правильную дверь. Вне Вашей двери Вы услышите шаги и девочку, кричащую для помощи.
Агент
- Взломайте все сети WiFi.
- Путем я приблизился, это не должно было бродить по сети вообще, чтобы избежать Лукаса и возможно Передышки. Однако Вы должны будете все еще иметь дело с другими угрозами и случайными отключениями электроэнергии.
- Исключение к этому правилу должно посетить DeDo, территорию портала Хакера. Возможности состоят в том, когда Вы пытаетесь, соединяются, Вы получите хакерское проникновение. Или в значительной степени любой из поддельных веб-сайтов.
- Вы собираетесь нуждаться во всех модернизациях защитной заглушки и всех модернизациях skyBREAK.
- Молитесь к RNGesus, чтобы Вы были взломаны много для дополнительного закулисного действия.
- Взгляд на Разную информацию для получения информации обо всех адресах WiFi.
- Я не уверен в некоторых ценностях в том списке.
Трудные Успехи & Полезные Подсказки
1%
Победите игру.
Профессионал
- Победите игру, ничего не покупая.
- Вы будете следовать некоторым советам от Полезных Подсказок.
- Для Лукаса Вы должны будете зависеть от своего слушания, чтобы услышать его lockpicking.
- Прежде чем Лукас уезжает, только выключите огни около своей кровати и одной близости Ваш шкаф, и затем скройтесь в шкафу.
- После того, как Лукас уезжает, возвратите те огни на немедленно, и затем вернитесь к бизнесу.
- Для Нуара удостоверьтесь, что оставили свои огни включенными в Вашей комнате. Опасайтесь внешней икры.
- Проигнорируйте производителя куклы.
- Для Передышки войдите в комнату и прислушайтесь к его дыханию. Держите дверь, когда он выдвинет дверь в.
- Вы должны будете зависеть от уже данного WiFis для этой целой игры. Молитесь к RNGesus, чтобы Вы не становились совершенными рейд полицией. Вероисповедание RNGesus.
- У Вас только есть один свободный VPN.
Кто та леди?
- Во время окончания нажмите D.
Стальная ловушка
Победите высший уровень memDefrager. Это — вид meta, но что я рекомендовал бы, должен записать комбинацию письма/числа в заказе на листок бумаги или напечатать его в блокноте примечания. Или, Вы знаете, запоминаете его.
Самый твердый: 6 (13 — 16)-letter/number комбинации
Я рекомендовал бы высокое разрешение для этого успеха.
Владелец сцепления
По-моему, nodeHexer — самая твердая мини-игра. Это отчасти похоже на ту одну игру трубопровода, где Вы соединяете все трубы в определенных вращениях для воды, чтобы пройти без утечки.
В nodeHexer Ваша цель состоит в том, чтобы начаться в беспорядочно произведенном начале, и затем пробиться узлами присоединения к обрисованным в общих чертах узлам.
Когда Вы соединяетесь с обрисованным в общих чертах узлом, Вы должны соединиться с противоположным узлом. Альфа — противоположность Беты, и наоборот.
Чем более обрисованные в общих чертах узлы, которые Вы соединяете, тем быстрее таймер заканчивается. В тяжелее nodeHexer мини-игры, обрисованные в общих чертах узлы более распространены, обособленно делая его еще более трудным для Вас, так как Вы должны соединить их всех.
Самый твердый: 12 теговых узлов?
Нажмите Master
Вы должны щелкнуть, когда зеленая линия находится в красной точечной зоне. Легче сказать чем сделать. Моя дурная привычка к нажатию далеко, чтобы добраться до второй мини-игры хакерского проникновения уничтожила меня. Есть зональные стены, у которых есть 5 рядов или 6 рядов, возможно 7 рядов, и красная точечная зона только содержит 2 точки, делая некоторые зональные стены смехотворно трудно. Или возможно, Вы знаете, я действительно плох. Кроме того, Вы имеете к блоку 20 их. 20. Возможности, Вы собираетесь умереть полицией или Лукасом, прежде чем Вы будете мочь даже стены зоны блока 20 подряд.
8 рядов, только 1 красная точка?
Про кнопка
Победите толкач стопки высшего уровня. Используйте плюс знак, выглядящий блоком, чтобы получить доступ к стекам, которые Вы выдвигаете к центральному блоку. Я действительно не испытываю желание объяснять мини-игру, потому что не слишком трудно понять его. Только посмотрите на обучающую программу, что Адам предусматривает Вас.
Самый твердый: 15 стеков?
Полезные подсказки
- Ваша цель состоит в том, чтобы найти 8 мешанин через Глубокую Wiki I, II, и III. Вам также будут нужны 250 монет DOS, готовых, чтобы завершить Тоннель Нуара, который предоставит Вам заканчивающуюся сцену.
- Окно открывается беспорядочно.
- Власть выходит беспорядочно или вызвана Куклой Maker/Police/Lucas и т.д.
- Начните монету DOS, занимающуюся сельским хозяйством с VPNs в зеленых положениях. Лучше, если у Вас есть максимальная сумма VPNs для максимального потенциального поколения монет DOS.
- Модернизируйте свою защитную заглушку так, чтобы Вы не должны были продолжать перемещать ее.
- В начале черные ходы — отличный способ делать деньги, будучи взломанным.
- Это должно уже быть очевидно, но WEP WiFis — мусор, WPA WiFis лучше, и WPA2 WiFis являются лучшими.
- Ключевой поиск может взять навсегда. Используйте выбор исходного кода в ваших интересах.
- Ключевой Сигнал стоит 375 монет DOS, который является зверски дорогим. Это — один из наиболее подавленных пунктов в игре, все же.
- Все эти страницы — поддельные связи: Кулаки BathRoom, Черный рынок, Сожженный В Доле, Дешевой Хирургии, Выбранной Не спящий, Трупы Для, Продают, Коттон-Роуд, DEEPDOTWEB, DeDo, Место Мечты, F*ck Вы!, Семейный Магазин Препарата, Пламя, Отец Дональд, Торговля Плотью, CAT ИГРУ, Hackers4Hire, сатана Града, Счастливая Семья, Горячие Горелки, Иллюминаты, Легион, паспорта R США, Разрушение Роз, SKYWEB, Безопасное Снижение, Портал Понюшки, Танго Вниз, 8-й Грех и Мясник.
- Я не уверен, верно ли это или нет, но по-видимому, есть шанс, что Вы можете быть взломаны, когда Вы пытаетесь посетить поддельные связи.
- Некоторые веб-сайты только доступны в определенное время.
- Избегайте веб-сайта Производителя Куклы. Щелкните, только если у Вас больше нет веб-сайтов, чтобы проверить.
- Сделайте привычкой захватить Вашу дверь.
- Чем больше ключей, которые Вы обнаруживаете, тем больше угрозы враги становится.
- Чем больше Вы модернизируете свой VPN, тем меньше шанса Вы будете взломаны.
- Позже в игре, Вы захотите модернизировать свой VPN, потому что Вы не хотите получать взломанный эндшпиль, поскольку Вы могли бы пропустить аудио сигналы.
- Я не уверен, если выключение Вашего микрометра или на делает игру более трудной или нет. Я вполне уверен, игра действительно проверяет, есть ли у Вас микрофон или нет, независимо.
- Если Вы — заголовок, удостоверьтесь, что выключили наготу. И будьте осторожны, что некоторые пароли по адресу WiFi содержат чрезвычайно светский язык.
Угрозы
Лукас или наемный убийца
- Когда Вы обнаружите две интернет-страницы с ключом, Лукас начнет метать икру. Чтобы уточнить, Вы не должны находить, что фактическая мешанина вызывает Лукаса. Например, Вы думали бы, что только нашли один ключ, но если Лукас метал икру, который означает, что Вы пропустили ключ на веб-сайте, который Вы просмотрели.
- Это также подразумевает, что, если Вы не бродите по сети или обнаруживаете какие-либо ключи, Лукас не будет метать икру.
- Если Вы слышите, что дверь lockpicked, это — аудио сигнал Лукаса.
- Используя движение оповещения по датчикам/аудио могут помочь Вам определить прибытие Лукаса.
- Если Вы не можете услышать шаги Лукаса, то наиболее вероятное означает, что Вы заняли слишком много времени скрываться, или он травит Вас, чтобы уехать.
- Попытайтесь не посмотреть вообще, скрываясь и не идти, бегая, чтобы скрыться. Вы должны бежать, и Вы должны быть быстрыми.
- Когда Вы слышите аудио сигнал, не посмотрите на дверь, поскольку это вызовет неизбежную insta-смерть для Вас.
- Если Вы оставите огни включенными, Вы будете наказаны за то, что Вы напрасно тратили время. Выключите огни, затем скройтесь. Когда Лукас уедет, быстро снова включите все огни. Если огни были выключены слишком долго, Вы будете убиты Нуаром.
- Есть шанс, власть выйдет, в то время как Лукас все еще посещает Вашу комнату. Опасайтесь Нуара, когда это произойдет.
- Используя Синий Шепот с движением датчики — отличный способ знания, вошел ли Лукас в Вашу комнату или не, когда Вы за пределами своей комнаты.
- Лукас может убить Вас на полу 1, 3, 5, 6, 8, и 10. Он может также убить Вас, когда Вы находитесь на компьютере лобби и у главной двери. Имейте два датчика движения около своей двери, и в лестнице.
- Время от времени Вы могли бы столкнуться с Лукасом в лестничной клетке или любой другой области кроме Вашей комнаты квартиры. Я все еще экспериментирую, почему это происходит.
Передышка
- Я лично ненавижу Передышку больше всего. Он всегда пугает меня, и я ненавижу его.
- Два аудио подают реплики в лобби. Дыхание, как только Вы выходите из лестничной клетки. Ходьба, когда около парадной двери.
- Четыре аудио подают реплики, входя в дорожку. Смех, стучащий в мусорный контейнер, шаги и телефонную музыку для мобильного телефона.
- Избиение Передышки возможно. Если Вы слышите смешной шум или шаги, входя в дорожку, быстро бежите в комнату и открываете дверь. Когда внутри, ждите Передышки, чтобы идти (Вы услышите его шаги), и когда Передышка прибудет в дверь, он попытается сломаться внутри. Есть два звука, которые он сделает.
- Он вдохнет и медленно выдыхать.
- Другой звук — то, что он вдохнет и выдохнет быстрее.
- Вы должны считать дверь моментом дверные толчки в.
- Во время события Передышки не смотрите на него через окно.
- Если Вы не можете взять пакет или открыть дверь, Вы немедленно мертвы. Я все еще пытаюсь видеть, преодолимо ли это.
- Вы будете знать, что сделаны, когда после всей этой напряженности, Вы слышите, что он уходит. Ждите 30 секунд после этого, и затем пойдите, чтобы взять Ваш пакет.
- Если Вы не бродите по сети (никакие обнаруженные ключи), Передышка не могла бы метать икру. Однако у меня были пробеги, где я столкнулся с передышкой даже без работы в сети.
Полиция
- Это — то, как полиция следит за Вами, насколько я знаю. Это — 100%-й RNG. У каждого WiFi есть определенное отслеживание/процент раскрытых преступлений. Проценты раскрытых преступлений WEP WiFi являются самыми высокими, проценты раскрытых преступлений WPA WiFi ниже, и проценты раскрытых преступлений WPA2 WiFi являются самыми низкими. Разъединение может помочь в сокращении вероятности полицейской облавы. Переключение WiFis неэффективно, если Вы переключаетесь между WEP WiFis. Если Вы переключаетесь с трех WEP WiFis, и у всех них есть высокие проценты раскрытых преступлений, возможности Вас ударяемый очень высоки. Если Вы переключаетесь с трех WPA2 WiFis, возможности Вас ударяемый решительно ниже. Почему Вы думаете, что Адам сказал, что есть WiFi, который делает Вас в значительной степени необнаружимыми?
- SnuffBox и PHATCLOUD5 — очень хороший WiFis. Вы можете просто переключиться между теми двумя, и Вы будете в значительной степени в безопасности от полиции.
- Вы не должны перемещать свою защитную заглушку WiFi. Только, когда Вы ищете другие адреса WiFi.
- Полицейский Сканер делает много, чтобы помочь Вам обнаружить, если полиция находится в преследовании Вашей близости. Если они, просто разъединяют от того WiFi. Затем Вы можете или переключиться на другой WiFi, обращаются или продолжают соединяться с тем же самым адресом WiFi.
Нуар
- По-видимому, если Вы выключаете огни слишком долго (две минуты), и затем снова включаете огни. Нуар будет ждать Вас, чтобы пойти на Ваш компьютер. Как только Вы оставляете монитор, Вы будете убиты Нуаром.
- Чем больше ключей, которые Вы обнаруживаете, тем более агрессивный Нуар становятся. Они будут метать икру в большем количестве областей более часто. Если Вы выключаете свои огни в Вашей комнате в попытке сократить визит Лукаса, есть шанс, что, когда Вы выходите из сокрытия (в зависимости от того, сколько ключей Вы имеете), Нуар нападет на Вас в темноте.
- У Вас должны быть все свои огни, включенные, чтобы уменьшить шанс Нуара от порождения в Вашей комнате. Порождение Нуара за Вашим окном, прихожей или дверью очень случайно, но станет более частым, когда Вы обнаруживаете больше ключей.
- Это складывается, чем больше ключей, которые Вы обнаруживаете, тем выше шанса Нуар будет метать икру где угодно, несмотря ни на что. Выключая Ваши увеличения огней тот шанс. Если Ваши огни включены, есть все еще шанс, что Нуар может метать икру рядом с Вами или в Вашей комнате.
- Насколько я знаю, Нуар может метать икру на Вас, особенно когда Вы меньше всего ожидаете его. Вы могли спускаться с прихожей, и внезапно Нуар убивает Вас.
Возможные стратегии
Одна большая проблема об этой игре — RNG, означая, что скоростные прохождения игры для этой игры могут быть напряжены.
Стратегия № 1
- В начале у Вас должны быть свободный VPN, skyBREAK, и черный ход.
- Вы хотите получить много денег (с VPNs), но на этот раз—, чтобы бродить по сети.
- Один способ получить больше хакерских проникновений состоит в том, чтобы массово разослать освежительный напиток на поддельной связи или странице сайта. Затем Вы хотите снова соединиться с бесплатным Wi-Fi, чтобы отменить бар погрузки, делая это деянием спама, чтобы делать деньги быстрее. Это деяние может быть скоро исправлено.
- Эта стратегия вводит угрозы раньше и делает игру более трудной ранее.
- Однако Вы могли бы стать действительно удачливыми и найти все восемь мешанин относительно быстро.
- Вы должны будете столкнуться со всеми угрозами, если Вы планируете серфинг и покупку продуктов друг вместе с другом.
- Это — наиболее распространенная стратегия среди игроков.
Стратегия № 2
- В начале у Вас должны быть свободный VPN, skyBREAK, и черный ход.
- Помещая защитную заглушку в балконе, попытайтесь поместить его быстро и затем идти назад в Вашу квартиру.
- Включая назад власть, попытайтесь бежать, чтобы включить его, затем отбегите, прежде чем дверь обслуживания закрывается.
- Закрытие ANN и затем повторного открытия быстрее на более медленном WiFis, чтобы вернуться в Дом.
- Один способ получить больше хакерских проникновений состоит в том, чтобы массово разослать освежительный напиток на поддельной связи или странице сайта. Затем Вы хотите снова соединиться с бесплатным Wi-Fi, чтобы отменить бар погрузки, делая это деянием спама, чтобы делать деньги быстрее. Это деяние может быть скоро исправлено.
- Доберитесь много денег (продолжайте покупать больше VPNs), и не бродите по сети вообще, кроме связей фальшивки, чтобы начать хакерские проникновения. RNG эффективен в этой игре, таким образом, лучше быть безопасным, чем жаль.
- Если Вы не будете бродить по сети вообще, Лукас и Передышка не будут метать икру. Однако всегда оставайтесь осторожными, входя в дорожку.
- Я рекомендую эти WiFis в заказе (*, требует модернизации защитной заглушки): doody, SuddenLink990, DevShareTwo, NetflxnChillByMyself, Ethical_Hacker, MaximumBlack, TellMyWifiLoveHer, PHATCLOUD5, SnuffBox, * Крупный Дэйв Нетуорк, * Скрытый Нетуорк, * DOSNET.
- Я упомянул их максимальные числа инъекции в Разной информации.
- Если Вы хотите, Вы можете попытаться идти для более высоких модернизаций, но те займут больше времени.
- Вы должны будете тогда пойти для Ключевого Сигнала.
- Причина, почему мы пытаемся получить Ключевой Сигнал и другие модернизации перед работой в сети, состоит в том, чтобы получить необходимые продукты, чтобы разбить игру. Нуар будет все еще метать икру, и полиция все еще будет угрозой.
- Как только у Вас есть Ключевой Сигнал и другие устройства как Датчик Движения для Лукаса или полицейский Сканер для полиции, Вы можете тогда начать заниматься серфингом через сеть, начинающуюся с Глубокой Wiki I.
- Ключевой Сигнал не обнаруживает связи Wiki.
- Глубокая Wiki III всегда получается из Правила Три.
- Вот список поддельных веб-сайтов: Кулаки BathRoom, Черный рынок, Сожженный В Доле, Дешевой Хирургии, Выбранной Не спящий, Трупы Для, Продают, Коттон-Роуд, DEEPDOTWEB, DeDo, Место Мечты, F*ck Вы!, Семейный Магазин Препарата, Пламя, Отец Дональд, Торговля Плотью, CAT ИГРУ, Hackers4Hire, сатана Града, Счастливая Семья, Горячие Горелки, Иллюминаты, Легион, паспорта R США, Разрушение Роз, SKYWEB, Безопасное Снижение, Портал Понюшки, Танго Вниз, 8-й Грех и Мясник.
- Вы хотите проигнорировать все эти веб-сайты, поскольку они тратят впустую Ваше время.
- Территория Производителя куклы должна быть Вашим последним средством. Не посещайте это место, пока Вы не посетили все другие доступные места.
- Есть места, которые только доступны в определенное время. Есть другое руководство, которое определяет те времена. Проверьте его.
- Вы будете мчаться через все эти веб-сайты с SnuffBox (или возможно DOSNET/Big Дэйв Network/DrAdelDink). Если у Вас будет DOSNET, Вы не должны будете волноваться о полиции вообще.
- Вы не должны переключать свою защитную заглушку. Вы, возможно, должны переключить свой WiFis, но это не необходимо, как только Вы добираетесь до SnuffBox или DOSNET.
- Другая причина, почему Вы игнорируете сеть в начале, состоит в том так, чтобы Вы могли получить все пакеты от дорожки, не имея необходимость волноваться о Передышке.
- После того, как Вы получите необходимые продукты, Вы не должны будете посещать дорожку снова.
- Вы должны будете только волноваться о Лукасе, Нуаре и полиции. По-моему, Нуар Ваша самая высокая угроза, как, чем больше ключей, которые Вы обнаруживаете, тем более агрессивный они становятся. Лукас преодолим, пока у Вас есть датчики движения на Полу 8 Прихожих, Лестница, и возможно Лобби.
- Это может не быть самым жизнеспособным скоростным прохождением игры, но это — определенно хороший способ разбить эту игру.
Стратегия № 3
- Этот метод — общая «speedrunning» тактика. Однако в этой игре, экономия находится в интервалах 20 минут. И вещами не будет то же самое для каждого сохранившего файл после. Этот метод мог бы на самом деле больше наказывать, чем Вы думаете. Независимо, если бы кто-то должен был использовать этот метод для «скоростного прохождения игры», я действительно не назвал бы его «скоростным прохождением игры», поскольку тот человек, возможно, изменил игру, сохранили файлы, чтобы лучше удовлетворить тому пробегу; другими словами, этот вид метода мог быть зафиксирован так, чтобы игрок победил игру под желаемым временем.
- Есть затруднения в этой игре как дверное затруднение, в котором Вы можете пойти от пола 8, чтобы поставить в тупик 1 за несколько секунд. Однако это затруднение очень непоследовательно, делая это или игрой, чтобы убить время или чудом.
«Профессиональная» стратегия
- У Вас только есть один свободный VPN, и Вы ничего не можете купить, таким образом, Ваш лучший выбор состоит в том, чтобы найти что сладкое пятно 4,3 Монет DOS в 108 секунд, в противном случае лучше.
- Вы должны будете столкнуться со всеми угрозами.
- Я не слишком уверен, как «ускорить пробег» этот пробег успеха, поскольку это требует, чтобы много богоподобных RNG даже осуществило.
«Стратегия» домашнего животного производителя куклы
- Ваша цель состоит в том, чтобы сделать 135 монет DOS с такой скоростью, как Вы можете. Я был в состоянии достигнуть 150 + монеты DOS с деянием освежительного напитка в 22:30. 135 монет DOS будут необходимы, чтобы купить диск LOLPY.
- Опасайтесь Передышки. По некоторым причинам каждый пробег, я попытался пойти для Домашнего животного Производителя Куклы всегда, приводит к Передышке, мечущей икру после того, как я покупаю диск LOLPY. Таким образом, я предполагаю, что его spawnrate также имеет отношение к сумме денег, Вы имеете или из-за определенных продуктов, которые Вы купили.
- Следуйте моему руководству успеха Производителя Куклы в Трудных Успехах.
Стратегия «Агента»
- Ваша цель состоит в том, чтобы продолжать просматривать, исследовать, вводить и раскалываться.
- Вы хотите модернизировать skyBREAK до WPA2 и защитную заглушку WiFi к уровню 3, поскольку это позволяет Вам получать доступ к другому WiFis, необходимому, чтобы взломать все адреса WiFi.
- Я не слишком уверен, как получить доступ к Скрытой Сети или DonaldsWiFi все же. Я действительно сомневаюсь в людях, которые достигли этого успеха.
Welcome to the info block
Here you can view custom guides that cover most enemies, mechanics, quirks, bugs, and exploits present within the game. These guides have been reviewed and updated many times to attempt to weed out inaccuracies and to improve the available information. In addition you can find some smaller tools along with credits, information about the assistant itself, and how you can provide feedback.
My Statement
I previously disabled this website for a period of around two months due to various issues I have with the developer of WTTG2, Adam Flatau. While I have since restored the Assistant, this section will remain available with the statement posted during the time the site was disabled. If you intend to support Adam Flatau in the future or simply want to hear what I have to say, you may click the button below to open my statement.
Tutorial
Thank you for using my welcome to the game assistant, I will try to make this section as straight to the point so anyone reading can get on their way.
The Wiki Block
The wiki block is the primary note taking tool and can be immensely helpful if you know how to use it. To begin, copy the website list from a deep wiki page in the game by using Ctrl+A and Ctrl+C, then paste the contents of the website into the input area at the top of the block. It will then scan and determine the websites on your wiki. Once your wiki sites are processed you will see their names, sub-pages, availability, and multiple markers.
The markers can be used to indicate that you’ve searched a site and whether you have found anything on it so that you never forget where you need to search in the end-game for remaining keys. The buttons provided are for manual searches, key cue aided searches, and whether a key or link has been found on the page.
The final feature that may need explaining is the mouse button, clicking on it will show you a copy of the site you’ve clicked on with multiple indicators that show the games predetermined key click points. Yellow clickpoints will place a key somewhere on the page you are currently on while green clickpoints will place a key in a file on your desktop. In addition, cyan clickpoints are a combination of both and can trigger either event. Any location labelled as red is a potential place where a key can be placed on a page. This can be either just visibly or after finding a clickpoint that places the key on the page.
The Notes Block
The notes block is quite self-explanatory. The main purpose of this is that of a basic notepad that you can use to store keys, wiki links, and anything else you deem important. However, an additional feature is that any keys pasted into the textarea will be saved and compiled into the master key as you progressively find and enter the eight hidden keys.
The Wifi Block
The wifi block allows you to survey the many wifi networks present in the game. It will also provide information useful for cracking and accessing such wifis. Along with this, the block has password fields and an inbuilt tracking timer that will play a warning when you have one minute remaining to get off a network before the cops trace you.
The Tenant Block
The tenant block can be used to view a database of tenants located in Clint’s apartment. It provides their ages, names, and their notes from the lobby computer. Along with this, it will also tell you if the tenant is a valid victim for the Doll Maker.
The Info Block
The information block is the background of this tool and provides various features. These include project credits and resources, guides for threats and important skills, customization settings, and an area in which you can find ways provide feedback on this project.
With that, you have everything you need to know to use this tool, get on out there and beat this game!
The Game
Welcome to the Game II is a horror game centered around the deep web where you are tasked with finding a female reporter kidnapped for looking into a group suspected of horrific activity. To save her you must search the game’s websites to find 8 keys and gather 250 DosCoin to find her location. During this task you will face up against many killers, threats, and challenges while you race the clock. Perhaps you will be able to power through and join the 2% of players who have beat the game.
Difficulties
The game has two different difficulties with important differences that you should know when playing each.
Normal mode is the easier of the two and is what the majority of players use when trying to beat the game. At the start of the game you will be given 10 DosCoin. In this mode, you will recieve introductory calls from Adam and a free remote VPN after recieving his second call. There is not much else to note as normal is the standard difficulty and does not have any important details beyond the free remote VPN.
1337 mode is not for the faint of heart and has a lot of cruel changes. At the start of 1337 mode, you are only given 1 DosCoin and 1 backdoor hack to start the game. In addition you will not recieve any calls or help from Adam. From the start of the game, all normal enemies will be active at maximum aggression. Unlike normal mode, the police are also more aggressive and have their timers shortened by 30%. Finally, all hacks you recieve will be maximum difficulty. If you intend on beating 1337, be sure that you are able to complete the hacks quickly and that you have a notepad or other note taking method on hand so that you can deal with the 1337 memory hacks.
The Computer
For the majority of the game, you will be stationed at your computer completing various tasks to aid in the collection of DosCoin, searching for keys, and exploring the deep web. To aid in this task, you have many programs and features on your computer desktop.
A.N.N.
A.N.N (Anonymous Node Network) is your Deep Web browser which you will be utilizing to find keys and navigate the web. It is mostly self explainatory to operate… You have the arrows navigate forward or back a page, the home button to jump to deep wiki #1, the refresh button which refreshes the current site, and there is one more button on the right of the URL bar that opens the source code of the current website as well. In addition to deep wiki #1, two more can be found via searching pages. If you wish to know how to search the Deep Web, that is covered in the searching section.
ZeroDay Market
The ZeroDay Market can be used throughout the game to buy critical software and tools to aid in defending yourself or searching the Deep Web. These include applications that allow you to crack into other wifi networks, Backdoor Hacks that let you earn money from counter-hacking, and a Key Cue widget which helps you search for keys on the deep web.
(Specific item information can be found under the markets guide)
Shadow Market
The Shadow Market can be used throughtout the game to buy important hardware items that will be useful throughout the game. Among the items sold are Motion Sensors which can be placed in the hallway, Remote VPNs that can be used to generate DosCoin, and better Wifi Dongles to help you search the Deep Web.
(Specific item information can be found under the markets guide)
Notes
This section is quite self-explanatory. It is the in-game note taking program that can be used to store keys, passwords, or wiki addresses.
Noir Tunnel
The Noir Tunnel is your ultimate goal at the end of the game. To beat the game, you must enter the compiled master key into the tunnel and pay 250 DosCoin. At which point ███ ████ ████ ████ ███ ███ ████ ██ █████ ████ ███ █████ ██████.
Skybreak
Skybreak is a wifi cracking tool that can be purchased from the ZeroDay Market to hack into additional wifi networks. Additionally, libraries can be purchased to allow cracking of better networks. If you want to know how to crack networks, visit the cracking guide.
The Status Bar
The Status Bar at the top of the computer screen includes many menus and buttons that can be useful throughout the game. The following is what the icons do from left to right.
- The DosCoin icon shows you your current balance of DosCoin. Additionally, clicking on it will allow you to view information about currently placed remote VPNs and their performance. It lists each VPN’s yield and seconds between yields.
- The Backdoor Hack label lists how many backdoor hacks you currently have installed.
- In the center you can see the in-game time displayed. It runs two times faster than real life time.
- The VPN Icon allows you to view and manage any purchased VPNs.
- The Motion Alert icon can be used to view and monitor any placed motion sensors. In addition, the task bar icon will blink if a motion sensor is triggered and Sound Alert is pruchased.
- The Wifi Icon will be quite familiar to those who regularly use PCs. It allows you to view nearby networks and log into them.
- The Sound Icon allows you to mute your PCs volume. An important note, doing this will mute all sounds produced by your PC.
- The Power Icon can be clicked to shutdown your PC.
The Building
While quite a good amount of your time will be spent sitting at your computer, there are many important things you should know about your apartment and the building as a whole.
When inside the computer interface you can right click to be able to look around and see your desk. Here you can reboot your computer by interacting with the box on the right of your desk if it is currently powered down. By right clicking again you will be able to get up and explore your room. While there is not much to see, there are some important things to note.
- Your bedside table has a flashlight which will be useful later in the game. It is important to keep in mind that the flashlight has a limited battery life and cant be recharged in the event that it dies.
- Your apartment has various lights each with their own switch. While their purpose will not be discussed in this section, you should keep note of them.
- You can access the bathroom, the balcony, and the hallway by the doors located around the apartment.
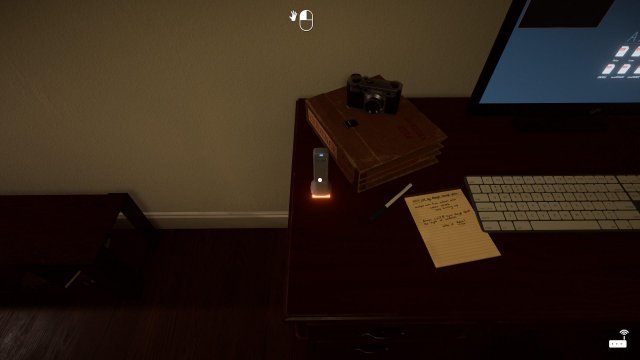
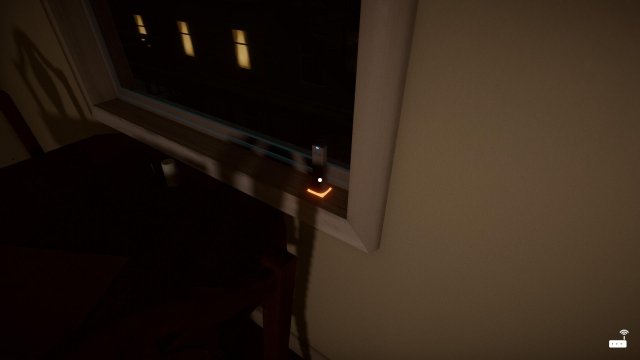
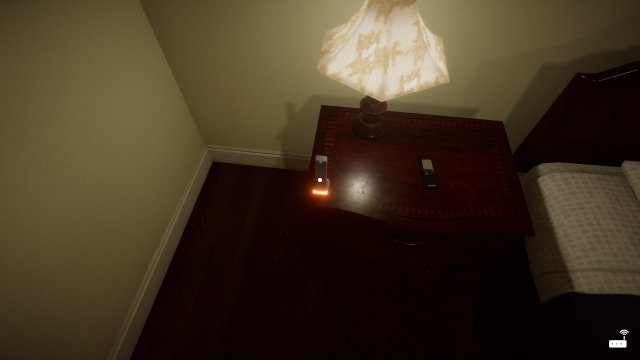
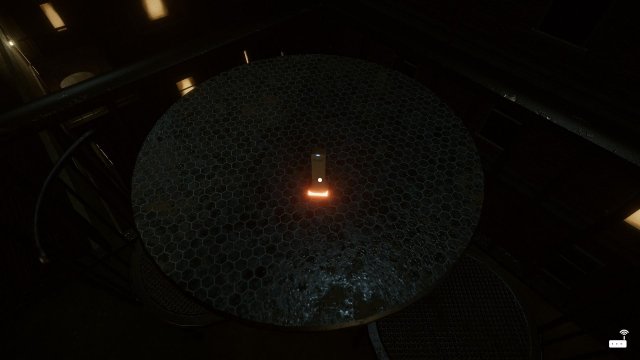
- If you look on the left of your desk you will see your wifi dongle. It can be picked up and moved between 4 spots in your room, these spots include the window, the desk, the bedside table, and the table on your balcony. Moving your dongle to a new location will change the list of networks available on your PC.
- The closet next to the balcony and the shower located in the bathroom can be used as hiding places. Be mindful if you have not turned off your mic in your game settings as the game will listen to it and will deem you not truly hidden if you are caught making noise. These hiding places are relevant for a threat called the Hitman that is discussed in its own guide.
Once you exit your apartment you will be in a hallway located on the 8th floor. Upon entering the stairwell, you will be able to freely travel up and down to other floors. The various other floors are relevant to a certain threat and the placement of Remote VPNs. The most important location you can access via the stairwell is the lobby which can be found on the bottom floor at the bottom of the stairwell. Once there, you can access the lobby computer or exit the front doors to visit the alley. The alley is where all Shadow Market purchases will be shipped by drone after purchase. Additionally, there is a small closet located on the right side of the alleyway used to counter a threat local to the alley if they are present during a visit.
Searching
An important skill for the game includes finding keys hidden within websites on the deep web. Keys can be found in a variety of ways and are always a number followed by a dash and a random string of 12 alphanumeric characters. 1 ‑ a9b98dbc5745 It is quite easy to find these after you know where to look. Firstly, keys can be hidden in plain sight, this of course is the easiest and most straightforward method of which they can be hidden on a page. Secondly, keys and additionally the link to deep wiki #2 can be hidden in a page’s source code. This method can be more unpredictable, but can be quite easy if you know what to look for. All keys or links hidden in this way will be hidden inside of an HTML comment which looks like the following. <!‑‑ 7 ‑ f26aaaac89a4 ‑‑> Finally, keys may be hidden in a site behind a clickpoint. This method is the hardest as it requires you to find and click on certain words or pictures in a site to reveal hidden keys. To do this, you may either bruteforce the locations or use a guide to find them. Once you find a functional clickpoint a sound will be played and the key will appear on the page itself or as a file on your desktop.
In addition to finding keys, you will also need to find two hidden wiki pages to complete the game. Fortunately finding wikis is a much easier task to complete. The link to deep wiki #2 can be found on a website within the first wiki. It will always be hidden within the source code of the first page of the website it is hidden on. Unlike the link to deep wiki #2, the link to deep wiki #3 is always found on the website Rule of Three which is located on the deep wiki #2. To get the link, the site requires you to complete a trial and error memory puzzle. The puzzle consists of six sets of three dots each which must be solved in order. This puzzle is best completed earlier in a run since the solution will be randomized every time the page is reloaded.
There are also a couple quirks with how keys and links are hidden that you can find below.
- Keys and wiki links can exist on the same page, and can also both exist in the source code of a single page at the same time.
- Forgive me will never contain a key, but can contain a wiki link.
- Rule of Three can never contain a key.
- Keys and key clickpoints will never appear inside of PGP key blocks, but they can be in the opening or closing text.
Events
During your playthrough you will encounter two random events in addition to the killers attempting to hunt you.
The first event is the blackout. This event is quite easy to beat as you must walk to the end of the hallway and turn the circuit breaker back on in the maintenance closet. This event requires that the player have the flashlight available to be able to navigate the pitch black hallway. It is important to keep in mind that the flashlight has a limited battery life and cant be recharged in the event that it dies. While the event isnt deadly by itself, Noir has a higher chance to spawn during the event since the darkness allows them to be more active. It is useful to be cautious due to this fact.
The second event is hacks. These events are randomly occuring minigames which you must beat in order to avoid losing notes or DosCoin. In addition, hacks can be used as an easy method of DosCoin collection if you have Backdoor Hacks available. If you want more details about how hacks function, please refer to the hacking guide.
The Markets
During your playthrough there are many useful items that can be purchased to help with evading threats, speeding up your internet, or generating DosCoin. The following is a list of the items available for purchase.
ZeroDay Market
The ZeroDay Market sells useful software and tools for use on your computer.
- Skybreak The basic installation of Skybreak which allows for the cracking of WEP security networks. Can be upgraded with Skybreak libraries.
- Skybreak WPA lib An upgrade to the basic installation of Skybreak which allows for the cracking of WPA security networks.
- Skybreak WPA2 lib An upgrade to the basic installation of Skybreak which allows for the cracking of WPA2 security networks.
- Backdoor Hack Cheap consumables that reward DosCoin for successfully defending against hack events. (Excluding ZoneWall)
- Motion Alert An addon to Motion Sensors. It will create an auditory alert when a placed Motion Sensor is tripped.
- VPN Level # A variety of VPNs that can be purchased to suppress hacks. They can also be disabled at will to control whether hacks can occur. Becomes more effective for each level purchased.
- Key Cue An addon to the A.N.N. browser which detects if a key is on the currently loaded page. It will put a key symbol on the bottom right corner of the browser if it detects a key.
- VWipes VWipes can be purchased to scan for viruses and remove them. VWipes are one use and another must be purchased every time you wish to scan your computer. Viruses can be obtained when hacks are failed and can tamper with your DosCoin balance and shutdown your computer.
Shadow Market
The Shadow Market sells useful hardware and tools to aid in various tasks. All purchases will be delivered to the alleyway for pickup.
- Wifi Dongle Level 2 A more capable wifi dongle that allows for faster web browsing and access to additional wifi networks.
- Wifi Dongle Level 3 The most capable wifi dongle in the game that allows for faster browsing and access to all available wifi networks.
- Motion Sensors Motion Sensors can be used to detect movement outside of your apartment. However, they are only effective on the Hitman.
- Remote VPNs DosCoin generators that can be placed around the building. They should be placed in locations in which they appear green for best performance.
- Police Scanner A device that allows you to listen in on police communications. It can allow you to tell when the police are planning on arriving at your apartment.
- LOLPY Disc A tool that can be used to hack the lobby computer to access the tenant database. It is used to complete the Doll Maker quest.
- Blue Whisper A device that allows you to remotely hear sounds produced by your PC.
The Police
The police are the easiest threat in the game to avoid. To avoid them you must switch wifi networks before you exceed their respective tracking timers. Though if you forget to switch, the game only has a certain chance to trigger the swat team to break down your door based on the network you stayed on. (If they are triggered, they will wait until you approach your front door or the stairwell door of floor eight before causing a game over.) Despite death not being garunteed, you should avoid gambling on that chance. Another note to keep in mind is that networks that you disconnect from have a five minute timer before the police tracking timer on that network is reset. Connecting before this cooldown is complete will cause the police to resume their search from where they left off before you disconnected.
the task of avoiding the cops can be made easier by purchasing skybreak from the ZeroDay Market and cracking higher security networks. Not only will they give you more time to breath, they often load websites faster.
(In 1337 mode the tracking timers are shortened and the police shave a chunk of time off their timer every time you reconnect to a network that is in the middle of cooling down)
The Police Scanner is an optional device that can be purchased to be alerted when the police are close to tracing you. When turned on, the police scanner will occasionally intercept and output random police communications. Certain phrases indicate that they are close to tracing you. Aside from this device, the police do not have any sound cues. (Sound cues can be found below)
Police Scanner Cues
Morse Code
Your browser does not support the audio element.
1 11 1 10
Your browser does not support the audio element.
We need your expertise on that
Your browser does not support the audio element.
Notes
- Remember to switch wifi often
- Hacking into more secure networks using skybreak will allow you more time between switching networks
The Hitman
The Hitman (Also known as Lucas Kumiega) is an enemy that becomes active deeper into the game, they will become active after you have gone into three unique pages that have keys or after you accrue a total of three difficulty points by finding keys and forcing hacks. You can check whether or not they are active by checking if the window to the left of your desk is open. (Please note that this is simplified for brevity, go to the bottom of this quide for a full explaination)
(In 1337 mode the Hitman will be active immediately)
The Hitman is a very difficult enemy to beat due to various reasons, but let’s start from the bottom.
- Remember to always lock your door. The Hitman is the only threat this mechanic is relevant to, but you should practice doing this regularly.
- Make sure that you can hear the lockpicking sound cue. Normally this is the only way to identify that the hitman is at your door and preparing to break in. (Sound cue can be found below)
- Purchase and place motion sensors in addition to buying sound alert. This will give you a more effective method to know when the hitman is coming to your door in addition to giving you more time to hide. (The motion sensors should be placed on the wall on both ends of the hallway, as the hitman can approach from both sides of the hallway)
When you know the Hitman is currently preparing to barge in you must turn off your computer and hide in either the shower in the bathroom or the closet near your balcony. In either case you must be quiet as to not alert the hitman. (This is only relevant if you have the mic enabled in your settings) Also note that if you do not turn off the computer the hitman can erase notes saved into the game’s internal notepad in addition to stealing portions of your DosCoin balance. During the time he is in your apartment, stay in your hiding place until you hear him leave. (Sound cue can be found below) You can affect the time he is in your apartment by turning off more lights in the seconds before you hide and prior.
In addition to encountering the Hitman as he pays a visit to your apartment it is possible for them to kill you when returning to your apartment if they spawn when you are not currently inside the apartment. Unfortunately, if this rare event occurs it is impossible to avoid and you will die the next time you open a hallway door.
Hitman Activation
The Hitman activates based off of a system of difficulty points in the game, this system has two factors that feed into it. For every key you find, you gain one difficulty point and you gain a difficulty point for every 3 forced hacks. (Force hacking is a random event that can occur when visiting a dead site, more information can be found in the exploits section) Whenever you get 3 difficulty points in total, the Hitman will activate and the window of your apartment will open. However, in 1337 mode you automatically start with 8 difficulty points which triggers the Hitman immediately.
Hitman Simulater
If you want to work on improving your ability to hear the Hitmans lockpicking sound cue, I have created an alternate version of a tool created by a Welcome to the Game modder named Nasko. This tool can be found on the left side of the info block in the guide list.
Hitman Sound Cues
Lockpicking
Your browser does not support the audio element.
Hitman Leaving
Your browser does not support the audio element.
Notes
- The default sound cue for the hitman is very faint, you should set up your volume to account for this
- The hitman can erase the in-game notepad if the PC is not turned off during an encounter with him
- Your apartment lights affect how long the hitman stays during his visits, the more off the faster he leaves
- If the Hitman is at the door he can kill you if you use the peep hole
- It is a good investment to buy a pair of motion sensors and motion alert
The Noir
The Noir are a threat prevalent in the game. They appear randomly in various places such as in the apartment, the apartment window, the hallway, behind doors, and in rare cases behind the gate in the back of the alley.
They are a basic threat to mitigate, but can quite easily catch those unfamiliar with them off gaurd. To make them go away, turn around as soon as you see them and count to ten. After this they should be gone. If not, repeat the process. However, they pose a more active threat when they spawn behind doorways. This often catches players who are attempting to rush to and from the alley/lobby and back as fast as possible. In addition, the Noir have a chance to instantly kill you if you have at least two lights turned off in your apartment. (For more details of the Noir insta-kill, check below)
Noir insta-kill
The noir insta-kill is one of the most dangerous aspects of the Noir. It allows the Noir to instantly kill the player if a few criteria are met.
- At least two lights in the apartment are off
- You have at least 4 difficulty points
- No other threat is currently active
Noir will check if these criteria are met every 120 seconds, and if they are met you will be killed the next time you stand from your desk.
Difficulty Points
The game has a system of difficulty points that affect how aggressive enemies are. For every key you find, you gain one difficulty point. Additionally, you gain a difficulty point for every 3 forced hacks you perform. (Force hacking is a random event that can occur when visiting a dead site, more information can be found in the exploits section) However, in 1337 mode you automatically start with 8 difficulty points which forces the Noir to start at maximum aggression.
Notes
- It is advised that you do not run through doors
- The Noir are more active in darkness, be careful if you turn your lights off or if the power goes out
- Make sure to occasionally check for the Noir in the window, on the balcony, and in the apartment
The Breather
The Breather is by far the most annoying threat you can encounter in the game. While he is only active in the alley, it is very difficult to defend against them. The difficulty is also aided by the relative rarity of encountering them in the first place.
Normally, it is unlikely for the Breather to spawn on a visit to the alley. However, as you get more keys throughout the game, the chance for him to spawn will gradually go up. To know if he is active on a visit to the alley, you must listen for any potential sound cues upon entering the alley. (Sound cues can be found below) If you hear a sound (or you are simply not sure) you should go into the room on the side of the alley and prepare to brace the door by clicking on the handle. You can look through the window in an attempt to see him approach, but the Breather will wait to kill you if he sees you. After the Breather approaches the closet he will make many attempts at pushing in the door. If you see him begin to push the door, immediately hold the doorknob. (Keep in mind that this minigame is very strict and will result in death upon failure) After he eventually gives up, you should stop holding to prepare for his next attempt. Repeat this process until he gives up and leaves. After you hear him walking away you must wait a few more seconds so that he doesn’t return to catch you. Then you can simply grab your packages and return to the building.
Breather Cues
Laugh
Your browser does not support the audio element.
Phone Ring
Your browser does not support the audio element.
Footsteps
Your browser does not support the audio element.
Breather spawnrate
For those interested in the specifics of the Breathers spawnrate, the breather has percentage chance to be spawned which depends on how many keys you’ve discovered. (This does not require actually finding them) When you have zero or one keys, the Breather will spawn 20% of the times you visit the alley. Upon discovering any keys after your first, he will gain 5% to his chance of spawning up. However, when you acquire your eighth key, the chance will jump to 65%. (When playing in 1337 mode, the Breather will always have a fixed 65% chance of spawning.)
Notes
- The first visit to the alley in is always safe from the Breather when playing normal mode
- Listen for the Breather when you enter the alley
- Pay close attention to the movement of the door handle as you brace it
- You should avoid visiting the alley later in the game to avoid meeting the Breather
The Dollmaker
The Dollmaker is an optional threat that is activated upon entering the site by the same name. After a certain amount of time, the Dollmaker will ██████ ██ ████ ████ and force you to ████ ████ ███ ████-████. Then the power will ██ ███ ███ █ ████████ ████ ██ █████████.
After you have been given the marker on your doorknob you have a limited amount of time to place it on a suitable door. If you fail to do so, he will return disappointed and kill you wherever he happens to find you. There are two routes you can take to complete the Dollmakers task. You can attempt to randomly select correct doors or you can buy the Lolpy Disk item off the Shadow Market to make sure the selection you make is correct. Once you have the Lolpy Disk, you can go to the lobby computer and hack it with the disk. Once it is finished, you will have access to a database of all tenants in the building. Simply select a room with a female tenant and place the marker on their door. Keep in mind that the Dollmaker will always request five targets during your encounter with him, be sure to listen for him returning the door marker.
Extra Information
The following are specific timers and information for the Doll Makers various events.
When you activate the Doll Maker they will spawn after 3:20 to 7:10 minutes. Once you recieve the door marker from the Doll Maker he will check your selection after 14:00 to 19:00 minutes. After the Doll Maker claims your selection he will wait 7:05 to 14:20 minutes to return the door marker.
Notes
- If possible, you should avoid triggering the Dollmaker in a run going for completion
- If you want to complete the quest, you should attempt to go for it after you have sufficient funds for a better chance of success
- While the time the Dollmaker quest provides is generous, it should be completed as soon as you can manage
Hacking
Occasionally throughout the game you can get hacked and face up against various minigames. While at first they are an annoying hinderance, they can be used to help you complete the game after you learn how to beat them.
ZoneWall
Zonewall is always the first hack you will encounter upon being presented with a hack. ZoneWall consists of multiple lines with randomly selected target areas on each. In addition, you will see a moving bar on the topmost line. The goal is to left click when the bar is hovering over the red section, whether you succeed or not you will then be moved to the next bar down in the sequence. If you successfully time and complete a certain amount of bars, the hack will be instantly blocked. If you fail too many however, you will be randomly given one of the following hacks…
StackPUSHER
StackPUSHER consists of a randomly sized grid with a randomly generated layout. To successfully defend against this hack you must drop all stack nodes 


NodeH3X3R
NodeH3X3R is often regarded as the hardest hack by the greater majority of players. It consists of a randomly sized grid of nodes. Which can each either be Alpha or Beta. 

MemD3FR4G3R
MemD3FR4G3R is by far the easiest hack, at least at lower levels. You will be shown a sequence of letters and numbers in a box that you will be required to remember and reproduce with the buttons that will be provided by the hack. In addition, you may replay the pattern by clicking on the block in the center if you need a second chance to see a pattern. Keep in mind that you may be required to complete multiple levels of MemD3fr4g3r to pass the hack. Also, in 1337 mode or in the late game of a normal run, you may want to have a piece of paper at the ready as the sequence generated can be excessively long if given the right conditions.
When presented with ZoneWall, you may either fail this to get a secondary hack or succeed to instantly block the hack. While instantly blocking hacks sounds better, if you buy backdoors you can get DosCoin by failing ZoneWall and beating the secondary hack. The difficulty of hacks gradually increases based on the games duration, but you can effect the difficulty by the amount of levels succeeded during ZoneWall. Keep in mind, failing hacks can result in losing your in-game notes and a randomly selected amount of DosCoin. In addition, failing can cause you to get a virus which can hinder you from beating the game by causing random shutdowns and stealing DosCoin.
(In 1337 mode all hacks will be given at max level despite zonewall performace or duration of the run)
If you want to avoid getting hacked, you can buy VPN levels on the ZeroDay Market to supress the chance of a hack occuring for the remainder of the game. The supression depends on how many VPN levels you purchase from the ZeroDay market with each lowering the chance a hack will go through by 20%. VPNs can also be disabled by accessing their section on the right side of the taskbar.
Notes
- Backdoors bought from the ZeroDay Market will give you DosCoin for succeeding hacks other than ZoneWall
- Your success on zonewall affects the difficulty of secondary hacks
- VPNs can allow you to optionally suppress hacks
Cracking
An important skill for evading police and extending your available breathing room is cracking. Cracking can be performed after purchasing SkyBreak from the ZeroDay Market. To hack a wifi network, you must first open the application and proceed to type the name of the package you would like to run. («wep»,»wpa»,»wpa2″) By default, a basic installation will only include the ability to access the WEP library.
[You do not need to be connected to a wifi network to use SkyBreak]
WEP
Wep networks are the weakest security network you can crack in the game. They will give you slightly improved times over most free networks available. To hack a WEP network you must first type ‘scan’ to see the currently available wifi networks. Then after choosing the network you wish to crack, type the command ‘probe <The BSSID of the network you want to hack> 1 1000’. Skybreak will then find the open port on your chosen wifi. You can then crack the wifi by typing the command ‘crack <The BSSID of the network> <The channel of the network> <The wifi networks open port>’ which will provide you with the networks password upon completion.
WPA & WPA2
Hacking a wpa or wpa2 network starts similarly to wep networks. First type in ‘scan’ to see your available networks, then proceed to type ‘inject <The BSSID of the network you want to hack> <The channel of the network> <The amount of packets to inject>’. This will proceed to inject the specified number of packets into the target network. Keep in mind that sending too many packets in a certain amount of time will result in a network being knocked offline for some amount of time. To avoid this, try to extend the amount of injections over an extended period of time. (The exact injection rates are included in the wifi section of this site) After completing enough injections to your target network, you can complete the cracking of the wpa or wpa2 network by typing ‘crack <The BSSID of the network you want to hack> <The channel of the network>’ which will provide you with the network password upon completion.
[Skybreak allows you to access a history of commands by pressing the up and down arrow keys.]
Exploits & Bugs
WPA2 Quick Crack
Hacking a WPA or WPA2 takes quite a lot of time due to the requirement to inject these networks before attempting a crack. This can cause a lot of grief both by the innate time cost and the consequences for failure. However, an exploit has been discovered that can easily skip this part of the process by a couple simple steps.
- Open skybreak and find the BSSID of the WPA or WPA2 network you wish to crack.
- Type and copy the following command ‘probe <Target network BSSID> 1 1’.
- Probe and begin to crack a WEP network.
- Before the crack completes paste the command from the previous steps
If you completed the steps correctly SkyBreak will display an error related to the port range as the crack is occuring. It will then complete and display the password for the target network
Window Key Cue
The window to left of Clint’s desk opens based on the games difficulty point system. Due to how this system works, it can be exploited as a single use key cue. To put it simply… If you enter a site and the window opens immediately afterwards, you can say with certainty that the website you enters contains a key somewhere. (Unlike the proper key cue, this trick does not give you a precise page) Additionally, this trick can also be used to rule out websites if you understand the system behind how it works. (If you do not know how the system works refer to the dropdown below) If you search through wiki 1 and successfully discover the locations of both keys, you can go through the sites on wiki2 and eliminate any site for which the window does not open. At the same time, when it finally opens you know the site you just entered has a key located on it somewhere.
Advanced Explanation
The window opens based off of a system of difficulty points in the game, this system has two factors that feed into it. For every key you find, you gain one difficulty point. Additionally, you gain a difficulty point for every 3 forced hacks. Whenever you get 3 difficulty points in total, the window of your apartment will open. However, in 1337 mode you automatically start with 8 difficulty points which prevents the use of this strategy in that mode.
Force Hacking
Force hacking is a strategy you can use to trigger additional hacks by navigating to a dead site and repeatedly refreshing. To perform a force hack you simply need to find a dead website and refresh it repeatedly. This trick works due to the fact the game has a chance to triggere a hack when a dead page is loaded. Unfortunately in the newest patch this trick has been significantly nerfed. In older patches you can attempt force hacks every second, while in the newest patch the cooldown has been raised to 30 seconds.
God Spot
The god spot is the name given to a strange VPN location known for its strange attributes. It is a red location that gives 277 DosCoin every 2770 seconds. (1 DosCoin every 10 seconds) It is not currently known why this location exists, but it can be a powerful tool to earn a lot of DosCoin if you can find it. The following is a strategy that can be used to find it…
- Take a VPN and place it into a red location.
- After a couple seconds, switch to a new red location.
- After you have placed the VPN in a handful of red locations, return to the PC and check your DosCoin balance.
- If your DosCoin balance has significantly changed, you can go back to the last places you searched and trial and error the god spot. Otherwise, you can test other red locations to find it.
Package Quick Grab
Package Quick Grab is a trick that can be done if you enter the alley and the drone is arriving. If this is the case it is possible to grab the package directly from the drone. This can be done by standing right below where the drone dips down near the entrance to the alley and clicking the button to grab the package.
(This exploit will also trigger a bug which prevents the delivery of any packages matching the types you snatch from the drone.)
Noir Quick Hide
The Noir Quick Hide is a strategy you can use to skip turning your back on the Noir. In the event that a Noir is in your apartment your first instinct may be to turn around. However, you can also open the balcony door to make the Noir disappear as well. (This will not work if the Noir is located on your balcony)
Door Clipping
Door Clips are tricks you can perform to cause yourself to go out of bounds and often to useful areas.(Please note that these tricks will not work in the current version of the game and may be unpredictable in all versions)
Apartment Closet
To clip out of bounds using the apartments closet, enter the closet and exit. Immediately after exiting the closet turn around and run into the closet doors. If performed correctly you should fall out of bounds and potentially land in the lobby area.
Alley Closet
The alley closet can be used to clip by exploiting the doors hitbox. To do so, open the door from the inside and run to the boxes in the right of the closet. If you sucessfully get behind the door you will fall out of bounds and may land in the partment.
Quick Navigation
Quick Back Navigation is a simple exploit that exists for an unknown reason. When you press backspace on the A.N.N. browser it will take you to a visual copy of the website that you were in last. Pressing backspace subsequent times will take you to the next site in your browsing history and so on. While the copies you will see look identical to the webpages you visited, they will not have clickpoints and you can not open their source code.
Additionally, this exploit can cause a bug on websites featuring recurring audio. If used on those pages their audio will continue to play after you leave the website. To fix the bug, you must close A.N.N. while you are loading into the website whose audio is glitched. Doing so should fix the bug.
The Copy Bug
A nototiously annoying bug is the Copy Bug. It is triggered by using alt+tab while the game is not paused. When this bug is active all attempts to copy website content such as keys will fail. To fix the bug you must click inside the A.N.N. browser while holding alt
Miscellaneous
Miscellaneous Info
Contrary to many popular myths, there are only one naturally occuring ambient sound cue that has meaning. This sound cue is the Hitman lockpicking your door.
It is not possible to hide from the police. Once they are at your door they will stay there until you approach them.
When placing remote VPNs, both walls of each hallway have identical color zones.
Despite the warning the game will give you, turning off the microphone in the game settings does not make the game more difficult.
Almost all ambience heard in the apartment has no meaning.
Fun Facts
There is actually a page on Bug Friendly in which nudity is shown because it was improperly programmed.
The center photo on ISEVIL is a picture of an untreated snake bite.
On the yellow sub-page of Don’t waste it, the boy located on the left of the photo moves a few seconds after the page is loaded.
The name for the Hitman is a reference to a moderater in Adam’s twitch channel. In addition, the brand name for the police scanner is a direct reference to their username.
There is a bug in the game where if you lean into certain walls or run up against an elevator, you may trigger an easter egg where you are teleported inside an elevator. This is believed to be a form of noclip or glitch protection.
The landing page photo on I Love Cats was sourced from a popular furry site named furaffinity and modified before being used inside the game. The user who posted the orginal photo was named MethLab.
Hidden Pleasures actually has an unused page because of a typo in the game’s code.
Hitman Simulator
The button below will open a tool to practice catching the lockpicking noise made by the Hitman before he enters your apartment. After you activate the simulator it will occasionally play the sound cue. If you hear it, you should go to the widget for the simulator and click «I heard that». It will then tell you if you correctly identified the sound cue or if you were incorrect. It will first play five seconds after you start the simulation for the sake of testing, afterwards you must begin paying attention for when it plays. If you fail to catch the noise it plays, it will warn you that you would have died and will continue the simulator as normal.
Settings
| Primary Color | |
| Secondary Color |
Feedback
If you wish to provide feedback or report a bug, please message leave a comment on the steam guide for the assistant or open an issue on the github page!
A guide to help you get started down the right path in Welcome to the Game II.
Other Welcome to the Game 2 Guides:
- Achievement Guide & Helpful Tips.
- Website Availability and Times.
- Cheating.
Contents
- Introduction
- DOS Coin Mining / Farming
- skyBREAK / WiFi Hacking
- Key / Hash / Deep Wiki II Hunting
- External Threats
Introduction
Now before we start, let’s all come to agree that this game is far more harder than its predecessor, and the fact that no one is making any real progress really stumps everyone what what we’re supposed to do. This guide will serve to help you, based off of everything I’ve come to learn during my own gameplay experience, as well as watching other streamers play the game.
P.S: One of the first things you want to do when loading up a new save is obtaining the flashlight (in the situation that the power goes out on your floor). The flashlight can be located on the nightstand next to the bed. Once you pick up the flashlight, in order to turn it on all you need to do is push F and you should be set for whenever the power goes out.
Flashlight Location:
DOS Coin Mining / Farming
Now, if you’re reading this guide, then you’re probably having a really rough start and don’t know where to begin. During the phone call with Adam, he mentions buying you a remote VPN to start you off mining DOS coin. This remote VPN can be retrieved from the alleyway by taking the stairwell to the first floor, exiting the lobby and walking all the way to the end of the alleyway where the fence is. If you immediately run down to get the VPN, it will take a while, but you will eventually hear the drone overhead, ultimately dropping it down on a couple of boxes.
From here on out, this will be where you retrieve your other physical items (if you so decide to purchase more items). Now, you’re not going to immediately have the VPN: you need to go back to your apartment, where you will find it sitting on a shelf right in front of the door the moment you step into your apartment.
Now comes the tricky part: where to put the VPN. The best DOS coin farming locations are always random, so where you might get 5 DOS coin every 200 seconds in one run, you might get 0.94 DOS coin every 1400 seconds in another run. Also, on a sidenote: if you happen to find a really good spot, that gives, let’s say, 5.43 DOS coin every 250 seconds, and try to place a remote VPN in the same exact spot, or near the area, during the same save, you will not get the same amount of farm from the VPN that is getting 5.43 DOS coin every 250 seconds.
When looking for a suitable location for your remote VPN, you will notice that when you’re deciding where to put the VPN, the VPN’s shadow appears on the wall in one of three colors: red, yellow or green. As I’m sure you can tell, the different VPN shadow colors directly correlates to how good of a connection your VPN has/how good of DOS coin the VPN is farming. Below will be screenshots of how the VPNs will look depending on their DOS coin mining strength:
skyBREAK / WiFi Hacking
Now that DOS coin farming is partially out of the way, onto everyone’s favorite part: WiFi hacking. This part is the most tedious because if you’re not diligent enough, or don’t have enough networks to switch to, the swat team comes busting down your door and it’s game over. So the best thing to do, to begin, is move your modem around and get the passwords for all the WEP networks.
Modem Locations:
This will at least get you a jump start in starting to look for keys and hashes.
How Hacking WEP Should Look:
However, because WEP networks are slower than your remote VPNs farming DOS coin, you’re going to want to upgrade your skyBREAK to allow you to crack WPA2 networks as soon as possible. BUT, cracking WPA2 networks is a whole other beast from cracking WEP networks. Instead of probing, you’re tasking with injecting networks with deauthorization packets until the network opens and you can crack it. This process is lengthier than finding the keys themselves, but it allows for much faster connection speeds. The method to injecting WPA2 networks that I find works best is “inject <XX:XX:XX:XX> <CH> 25”, the last number being how many packets you will be injecting. If you’re impatient like me, you can push it a little further and do 50 packets instead of 25 and see how that works. Now, once skyBREAK has injected the specified amount of packets, I literally just count to 10 in my head and then do it over and over again until the network is ready for cracking. Some networks will crack in less than 100 packets, and some can even take up to 900+ packets to crack: again, completely random.
How Hacking WPA2 Should Look:
Key / Hash / Deep Wiki II Hunting
At last, the moment we’ve all been waiting for: where the ♥♥♥♥ are those keys and hashes at? If you answered, or internally screeched, “IT’S RANDOMIZED,” then you’d be right. Similar to the first game, the keys and hashes you have to find are completely random as to which sites they can be found on. However, unlike the first game, the Deep Wiki II cannot be accessed through the same site/puzzle corresponding to the Welcome to the Game II. Where keys and hashes are found on the site pages themselves, the link to the Deep Wiki II is found in a page’s source code. While I’ve only ever found the link to the Deep Wiki II, I have friends who have also found the link, and as previously mentioned, can only be found in a site’s source code. If you don’t know how to access the source code to a page, just click on the little magnifying glass located to the left of the URL search bar. You know you’ve found a key when you’re randomly scanning a picture, or box of text, and your cursor turns into the Click icon. Some keys place themselves on your desktop when you’ve found them, and others will reveal themselves in the page’s source code.
External Threats
If the game weren’t hard enough as it is trying to find 8 keys/hashes with absolutely no indicator that a key might be on the page you’re looking at, you also have to worry about multiple external forces trying to kill or capture you. As of right now, there are a total of 5 external threats you can encounter while playing: the police, the Dollmaker, Lucas, the Noir and the Breather.
The Police:
The police are pretty simple to understand. You can only get caught by the police if you get too lazy and don’t swap your wifi networks. In the case that you are that lazy, and the Noir were polite enough to open your window for you, you can hear sirens, an indicator that the police are on their way. If you find yourself hearing the sirens growing louder and louder, simply disconnect your computer from the whatever network you’re connected to, turn off your PC (optional) and hide in the shower, as it’s the only place they don’t search. Give it about 5 minutes before returning to your PC and hunting down keys again.
The Dollmaker:
The Dollmaker has to be by-far one of the most interesting interactions you can get in the game. Encountering The Dollmaker is triggered just by visiting the website. It might seem like nothing at first, but you’ll eventually start to hear faint music. In the case that you find yourself in this situation, fret not. All you have to do is go to your door, look through the peephole, which you will then find yourself in the Dollmaker’s quest. As to not spoil the quest itself, I won’t go any further into detail on what will happen and/or what you should do. But, one thing to keep in mind during the Dollmaker’s quest is that room 801 has a broken lock.
Lucas:
Lucas is a pretty random encounter from what I can tell so far. There isn’t anything in particular that I’ve done that seems to trigger him, or at least that I think. There are a couple of things to keep in mind in order to avoid Lucas. To start, I would highly advise against listening to or watching anything while playing Welcome to the Game II, as the game heavily relies on audio queues. For Lucas, there is only 1 audio queue I have been able to pick up so far. While using your computer, you might hear the sound of your door knob jiggling. If that’s the case, check the peephole, and if you see Lucas lockpicking your door (assuming you locked it in the first place), make your way to the closet and hide. Now here’s the part where I’m not entirely sure what to do next, as I hid in the closet for roughly 5 minutes, went back to check the peephole and Lucas was sitting there waiting for me, shooting me through the peephole. The other encounters with Lucas are pretty unavoiable and basically mean you are dead. He can get you while you’re on your computer or he can also get you as you’re coming out from hiding in the bathroom/shower.
The Noir:
Thankfully the Noir were nerfed, otherwise this game would still be 20x as hard. Before the nerf, if you ran into the Noir, there was no running or getting rid of them. So if you found yourself in the alleyway picking up a package, turn around and the Noir is sitting at the end of the alleyway, it was pretty much game over. Now, with the nerf, if you happen to run into the Noir, stay calm, back a decent distance away from the man, turn your back to him and count to 30. Once you finish counting to 30, the man with the mask should be gone and you should be set. DO NOT run into the masked man if you see him, you will be attacked by the masked woman and die. As for where the Noir spawn. There are 2 total places the Noir can spawn (one being entirely random). If you’re browsing the deep web and find that you click on a link but it does absolutely no loading, back out and check your window, because it will most likely be open. At that point, you will need to constantly check your window in order to avoid the Noir from killing you. In the scenario that you see the Noir standing in your window, do the same thing as before (turning your back and counting to 30) and you should be fine. The second place the Noir spawn is entirely random. If you’re out and about roaming, you can run into the Noir for absolutely no reason. At this point, it’s the same process, just rinse and repeat. But whatever you do, DO NOT physically run at, or into, the Noir. I will provide a couple of screenshots of what it will look like if you find the Noir spying on you through the window:
Window Closed
Window Open
Noir in the Window
Getting Rid of the Noir
The Breather:
Unlike the first the game, Welcome to the Game II does not give you any indicators that the Breather has arrived. Also unlike the first game, the Breather does not ever actually enter the apartment complex, which is nice. The one place that you can run into the Breather though is the alleyway. Don’t worry, when you go to get your first remote VPN, he isn’t a threat yet, but after 11 PM would be a safe bet to assume that he could appear at any moment. If you find yourself entering the alleyway after 11 PM, there are a couple of things to keep in mind. If you’re making your way to pick up a package and you either; can’t pick up the package, pause the game or open the door in the alleyway, you’re going to die. There is no way around it, and if you approach the end of the alleyway, the Breather will jump out from behind the blue dumpster and kill you. In order to avoid this, whenever I enter the alleyway after 11 PM, the first thing I do is open the door, hold the door and peekthrough the window at the top of the door while waiting for about 5 minutes. Once the 5 minutes have passed, I pick up the package, then open the door and hide for about another 5 minutes again. Then you should be good to return to the inside of the apartment complex. Someone has told me that there is another encounter with the Breather where he chases you as you try to pick up your package. If there is, I haven’t experienced it yet.


