Printers
-
Home Office Printers
-
Office Laser Printers
-
Multifunction/All-in-One Printers
-
Digital Sheet-fed Printing Presses
-
All Printers
-
Product Finder
Printer Supplies
-
Supplies Finder
-
Xerox Toner for non-Xerox printers
- Scanners
Featured Software
-
All Featured Software
-
Workplace Solutions
-
Print Production Workflow Software
-
XMPie Personalisation Software
-
Content Hub
-
Workflow Central
Office Solutions for Printing and Workflow
-
Office Printing Solutions Overview
-
Office Workflow Solutions
-
ConnectKey Technology
-
Workflow Apps
-
Mobile Solutions
Industry
-
Financial Services
-
Government
-
Healthcare
-
Retail
Global Document Services
-
All Global Document Services
-
Accounts Payable
-
Capture & Content
-
Campaigns on Demand
-
Digital Hub & Cloud Print
-
Managed Print Services
Production Print Solutions
-
Production Print Solutions Overview
-
Print Production Workflow Software
-
Graphic Design Solutions
-
Print Applications
-
Business Development
- Small and Medium Business Solutions
- Solutions Innovation
- Insights
All Support and Drivers
-
Support and Drivers
-
Register your product
-
Printer Security

Руководство
пользователя
www.xerox.com/support
WorkCentre 5016, 5020/B, 5020/DB
XE3025RU0-1
 13:58
13:58
#6 Xerox WorkCentre 5019 5021 5022 5024 бледно печатает | Чем и как заправить Xerox 006R01573
 11:59
11:59
#51 Копир Xerox WorkCentre 5016 / 5020 восстановление драм картриджа | Фотобарабан Xerox 101R00432
 25:14
25:14
#92 Замена девелопера Xerox WC 5325 5330 5335 5222 5225 5230 C118 123 | Phaser 5500
 07:15
07:15
#17 Копир Xerox CopyCentre c118 заминает и застревает бумага | Застревание бумаги — ошибка E3-1000
 02:05
02:05
ОБЗОР МФУ XEROX WorkCentre 5016 (А4-А3)
 01:43
01:43
Change paper size in Xerox WorkCentre 5020/5016
 02:50
02:50
Xerox WorkCentre 5020 MFU
 00:39
00:39
Carregando Toner Xerox Workcentre 5020 5016 315 420 421
Руководство
пользователя
www.xerox.com/support
WorkCentre 5016, 5020/B, 5020/DB
XE3025RU0-1

Переведено:XeroxGKLS European OperationsBessemer RoadWelwyn…
Страница 2
- Изображение
- Текст
Переведено:
Xerox
GKLS European Operations
Bessemer Road
Welwyn Garden City
Hertfordshire
AL7 1BU
UK
© Fuji Xerox Co., Ltd., 2008г. Все права защищены.
Защита авторских прав распространяется на все формы и виды материалов
и информации, которые подлежат таковой защите в соответствии с действующими
правовыми и законодательными нормами, включая, без каких-либо ограничений,
материалы, являющиеся продуктами программного обеспечения и отображаемые на
экране, например, пиктограммы, экранные страницы, графические изображения и т.п.
Xerox
®
и все упоминаемые в данном документе названия и номера изделий Xerox
являются товарными знаками Xerox Corporation. Настоящим признаются товарные знаки
других компаний, упоминаемые в данном документе.
Приведенная здесь информация справедлива на момент опубликования.
Xerox оставляет за собой право изменять ее в любое время без предварительного
уведомления. В последующие издания этого документа будут вноситься изменения
и технические уточнения. Самая последняя информация содержится на сайте
www.xerox.com.
Типовые нормативные требования по экспорту изделия
Экспорт этого оборудования осуществляется в строгом соответствии с законами Японии,
регламентирующими внешнеторговую деятельность и операции с иностранной валютой,
и/или нормативными документами США в отношении контроля за экспортом. Если вы
хотите экспортировать это оборудование, вам необходимо получить соответствующую
лицензию на экспорт у правительства Японии или его посреднической организации и/или
разрешение на реэкспорт у правительства США или его посреднической организации.
Дополнительные нормативные требования по экспорту изделия
Экспорт этого оборудования осуществляется в строгом соответствии с законами Японии,
регламентирующими внешнеторговую деятельность и операции с иностранной валютой,
и/или нормативными документами США в отношении контроля за экспортом. Если вам
известно, что данное оборудование применялось или применяется при разработке,
производстве или использовании любого оружия массового уничтожения, включая
ядерное, химическое и биологическое, вам необходимо получить договор купли-
продажи, законный контракт или другую соответствующую информацию от импортера
и соответствующую лицензию на экспорт от правительства Японии или его
посреднической организации и/или разрешение на реэкспорт от правительства США или
его посреднической организации.


1 перед началом использования аппарата, Серийный номер
Страница 7
- Изображение
- Текст
Руководство пользователя Xerox WorkCentre 5016/5020
7
1 Перед началом использования
аппарата
Благодарим вас за приобретение аппарата семейства Xerox WorkCentre.
Это руководство содержит подробную информацию об аппарате, его
технические характеристики и инструкции по использованию всех его режимов.
В этой главе представлены сведения, с которыми пользователи должны
ознакомиться перед началом использования аппарата.
Горячая линия Xerox
Если вам необходима помощь при установке или эксплуатации изделия,
обращайтесь на веб-сайт Xerox за оперативными решениями и поддержкой.
http://www.xerox.com/support
Вы также можете обратиться к специалистам за помощью по горячей линии
Xerox.
При установке аппарата вам будет предоставлен номер телефона сервисного
центра, обслуживающего данный аппарат. Для последующего обращения
запишите здесь этот номер телефона.
Номер телефона горячей линии или сервисного центра Xerox:
#
Телефон горячей линии Xerox: (495) 956-37-12
Телефон Представительства Xerox в Москве: (495) 956-37-00
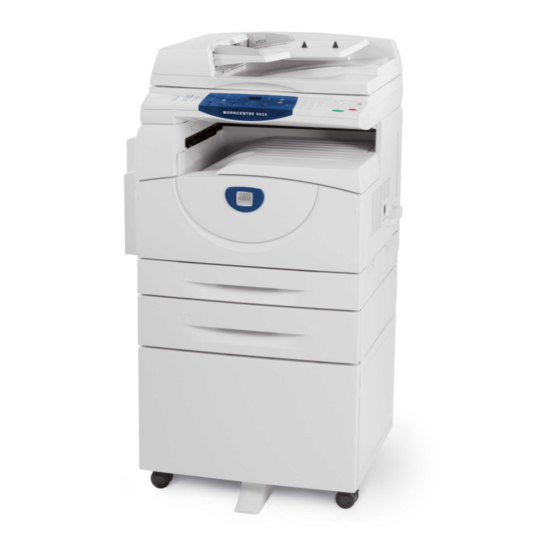
Серийный номер
При обращении по горячей линии Xerox
вам необходимо сообщить серийный
номер аппарата, который находится за
левой крышкой, как показано на рисунке.
Для удобства запишите здесь серийный
номер.
Серийный номер:
Записывайте все коды ошибок.
Эта информация поможет быстрее решить проблему.

Условные обозначения
Руководство пользователя Xerox WorkCentre 5016/5020
8
Условные обозначения
В этом разделе приведены условные обозначения, используемые в данном
руководстве.
ПРЕДУПРЕЖДЕНИЕ: представляет информацию об опасности получения
травмы.
ВНИМАНИЕ:
предупреждает о возможности механического
повреждения аппарата в результате того или иного
действия.
Важно:
представляет важные сведения, с которыми пользователь
должен ознакомиться.
Примечание:
представляет дополнительную информацию по операциям
или функциям.
«
«:
обозначает перекрестные ссылки в данном руководстве
и текстовых сообщениях
[
]:
обозначает значения и коды ошибок, выводимых на
дисплее, а также имена меню, окон, диалоговых окон,
кнопок и других элементов, отображаемых на мониторе
компьютера.
<
>:
обозначает аппаратные кнопки на панели управления
аппарата и клавиши на клавиатуре компьютера.
В этом разделе приведены также термины, используемые в данном руководстве.
• Понятие ориентация относится к расположению изображения на странице.
• LEF (Подача длинной кромкой)
Загрузка документов и бумаги, при которой листы подаются в аппарат длинной
кромкой вперед.
• SEF (Подача короткой кромкой)
Загрузка документов и бумаги, при которой листы подаются в аппарат
короткой кромкой вперед.
• «Бумага» служит синонимом для слова «материал», использование этих
терминов является взаимозаменяемым.
• «Аппарат» служит синонимом для Xerox WorkCentre 5016, 5020/B, 5020/DB,
использование этих терминов является взаимозаменяемым.
• Компьютером называется персональный компьютер или рабочая станция.
• Системный администратор – это лицо, отвечающее за поддержку работы
аппарата, например, за его настройку, установку драйверов принтера
и управление программным обеспечением.
Ориентация LEF
Ориентация SEF
Направление подачи бумаги
Направление подачи бумаги

Информационные ресурсы
Руководство пользователя Xerox WorkCentre 5016/5020
9
Информационные ресурсы
Информация о данном аппарате содержится в следующих источниках:
• Руководство пользователя
• Руководство по установке
• Краткое руководство по использованию
Примечание • Приведенные в руководстве иллюстрации соответствуют полной конфигурации
аппарата, поэтому могут не вполне соответствовать аппаратам с другой
конфигурацией.
• В данном руководстве все графические изображения экрана соответствуют
Windows XP.
Правила техники безопасности
Для обеспечения безопасной эксплуатации аппарата внимательно прочтите эти
инструкции, прежде чем приступить к его использованию.
Ваш аппарат Xerox и рекомендуемые расходные материалы были разработаны
и испытаны по требованиям самых строгих норм техники безопасности.
Эти требования включают одобрение агентства по технике безопасности и
проверку соответствия установленным стандартам охраны окружающей среды.
Прежде чем приступить к работе с аппаратом, внимательно прочитайте
приведенные ниже инструкции и по мере необходимости обращайтесь к ним для
обеспечения безопасной эксплуатации аппарата.
Проверка безопасности и технических характеристик аппарата осуществлялась
только с использованием материалов Xerox.
ПРЕДУПРЕЖДЕНИЕ: Любое несанкционированное изменение, включая
добавление новых функций или подключение внешних устройств, может
повлиять на соответствие требованиям сертификации аппарата.
Для получения дополнительной информации обращайтесь в сервисную
службу.
Предупреждающие знаки
Необходимо соблюдать указания всех предупреждений, размещенных на
аппарате или прилагающихся к нему.
ПРЕДУПРЕЖДЕНИЕ
Это ПРЕДУПРЕЖДЕНИЕ указывает зоны
аппарата, где существует опасность получения
травмы.
ПРЕДУПРЕЖДЕНИЕ
Эта ПРЕДУПРЕЖДЕНИЕ указывает горячие зоны
аппарата, к которым нельзя прикасаться.

Правила техники безопасности Руководство пользователя Xerox…
Страница 10
- Изображение
- Текст
Правила техники безопасности
Руководство пользователя Xerox WorkCentre 5016/5020
10
Электропитание
Электропитание аппарата должно соответствовать типу, указанному на его
паспортной табличке. Если вы не уверены, что электропитание отвечает этим
требованиям, проконсультируйтесь в службе энергонадзора.
ПРЕДУПРЕЖДЕНИЕ: Этот аппарат необходимо подключить к цепи
защитного заземления.
Аппарат оснащен вилкой с заземляющим контактом. Эту вилку можно включать
только в заземленную сетевую розетку. Это мера безопасности. Во избежание
поражения электрическим током розетку следует заменить, если вилка в нее не
вставляется. Не используйте заземленный адаптер для подключения аппарата
к незаземленной сетевой розетке.
Зоны, доступные для оператора
Аппарат спроектирован так, что оператор имеет доступ только к безопасным
зонам. Доступ к опасным зонам защищен крышками и ограждениями, для
открывания которых требуется инструмент. Не снимайте эти крышки и
ограждения.
Обслуживание
Все процедуры по техническому обслуживанию приведены в документации,
входящей в комплект аппарата. Не выполняйте процедуры по обслуживанию,
не указанные в документации для пользователя.
Очистка аппарата
Перед очисткой аппарата выньте вилку сетевого шнура из розетки.
Всегда используйте только рекомендованные для этого аппарата материалы.
Использование других материалов может привести к ухудшению работы
аппарата и возникновению опасных ситуаций. Не используйте аэрозольных
чистящих средств, так как они могут быть пожаро- или взрывоопасными.

Комментарии
-
Page 1: User Guide
WorkCentre 5016, 5020/B, 5020/DB User Guide XE3025EN0-1 www.xerox.com/support Downloaded From ManualsPrinter.com Manuals…
-
Page 2
Corporation. Product names and trademarks of other companies are hereby acknowledged. The information in this document is correct at the time of publication. Xerox reserves the right at any time to change the information without notice. Changes and technical updates will be added in subsequent editions of the documentation. -
Page 3: Table Of Contents
Table of Contents Before Using the Machine …………..7 Xerox Welcome Center …………….7 Serial Number………………7 Conventions …………………8 Related Information Sources…………..8 Safety Notes…………………9 WARNING — Electrical Safety Information ………10 Laser Safety Information…………..10 Operational Safety Information …………11 Maintenance Information …………..11 Ozone Information …………….12 For Consumables …………….12…
-
Page 4
<Paper Supply> button …………..23 Machine Diagram (mimic)…………..24 Copy Features ……………….24 Switching On / Off ………………31 Switching On………………31 Switching Off………………31 Power Saver ………………32 Recycled Paper ………………33 Installing Drivers ………………34 Installing the Print Driver and the Scan Driver (TWAIN driver) ….34 Installing the Scanner Application (Button Manager) ……38 Loading Paper ………………40 Supported Paper Sizes and Types…………40 Supported Paper Sizes…………..40… -
Page 5
Changing the Password…………..71 Setting Copy Job Limits on a User Account ……..74 Reviewing the Total Number of Copies ……….77 Printing………………..78 Setting Up the Printer …………….78 Setting the Printer Preferences…………78 Specifying the Custom Paper Size …………79 Printing Procedure………………80 Printing on the Custom Size Paper…………81 Canceling a Print Job …………….82 Scanning ………………..83 The Scan Driver (TWAIN driver) and Button Manager……83… -
Page 6
Printable Area ………………122 System Settings ……………….123 System Setting List …………….124 Additional System Settings (When Selecting the Single Account Mode) ……..127 Additional System Setting List (When Selecting the Multiple Account Mode)……..128 Document Sizes Detectable by the Document Feeder….130 Optional Accessories…………….130 12 Index ………………..131 Downloaded From ManualsPrinter.com Manuals… -
Page 7: Before Using The Machine
This chapter provides information which users should be aware of before using the machine. Xerox Welcome Center If you need assistance during or after product installation, visit the Xerox website for online solutions and support. http://www.xerox.com/support If you require further assistance, contact our experts at the Xerox Welcome Center. A local representative telephone number may have been provided when the product was installed.
-
Page 8: Conventions
Paper feed direction Paper feed direction • Paper is synonymous with media, and is used interchangeably. • Machine is synonymous with Xerox WorkCentre 5016, 5020/B, 5020/DB, and is used interchangeably. • Computer refers to a personal computer or workstation. • System Administrator refers to a person who is responsible for maintaining the machine, such as setting up the machine, installing the print drivers, and managing software.
-
Page 9: Safety Notes
Read these safety notes carefully before using this product to make sure you operate the equipment safely. Your Xerox product and recommended supplies have been designed and tested to meet strict safety requirements. These include safety agency approval, and compliance to established environmental standards. Please read the following instructions carefully before operating the product and refer to them as needed to ensure the continued safe operation of your product.
-
Page 10: Warning — Electrical Safety Information
Class 1 laser product. It does not emit hazardous light, as the beam is totally enclosed during all phases of customer operation and maintenance. Xerox WorkCentre 5016/5020 User Guide Downloaded From ManualsPrinter.com Manuals…
-
Page 11: Operational Safety Information
Safety Notes Operational Safety Information To ensure the continued safe operation of your Xerox equipment, follow these safety guidelines at all times. Do These: • Always connect equipment to a correctly grounded power outlet. If in doubt, have the outlet checked by a qualified electrician.
-
Page 12: Ozone Information
This product produces ozone during normal operation. The ozone produced is heavier than air and is dependent on copy volume. Install the system in a well-ventilated room. If you need additional information about ozone, please request the Xerox publication Facts About Ozone (part number 610P64653) by calling 1-800-828-6571 in the United States and Canada.
-
Page 13: Product Safety Certification
Operation of this equipment in a residential area is likely to cause harmful interference in which case the user will be required to correct the interference at his own expense. Changes or modifications to this equipment not specifically approved by the Xerox Corporation may void the user’s authority to operate this equipment.
-
Page 14: Environmental Compliance
Battery Recycling and Disposal Dispose of all batteries in accordance with local legislation. For recovery of scarce resources, Xerox reuses the rechargeable batteries used in this product after the product is returned. Those batteries can be reused to make recycle materials and energy recovery.
-
Page 15: Product Recycling And Disposal
Xerox product is part of the program. For more information about Xerox environmental programs, visit www.xerox.com/environment. If you are managing the disposal of your Xerox product, please note that the product contains lamp(s) with mercury, and may contain lead, Perchlorate and other materials whose disposal may be regulated due to environmental considerations.
-
Page 16: Product Overview
Open this cover when a paper jam occurs in the machine and when replacing consumables. For information on how to clear paper jams, refer to «Paper Jams» (P.102). For information on how to replace consumables, refer to «Replacing Consumables» (P.110). Xerox WorkCentre 5016/5020 User Guide Downloaded From ManualsPrinter.com Manuals…
-
Page 17
USB Interface Connector Connects the USB cable to the machine. Power Cord Connector Connects the power cord to the machine. Power Switch Switches the power to the machine on and off. Xerox WorkCentre 5016/5020 User Guide Downloaded From ManualsPrinter.com Manuals… -
Page 18: Inside View
Contains toner and photoconductor used to transfer the toner. Duplex Module Copies and prints on both sides of paper. Note • The Duplex Module may not be fitted depending on the machine model in use. Xerox WorkCentre 5016/5020 User Guide Downloaded From ManualsPrinter.com Manuals…
-
Page 19: Rear View
Machine Components Rear View Component Function Data Label Contains the machine information. Xerox WorkCentre 5016/5020 User Guide Downloaded From ManualsPrinter.com Manuals…
-
Page 20: Control Panel
<Paper Supply> button, refer to «<Paper Supply> button» (P.23). <Copy> button Press this button to switch the machine to the Copy Mode. The button lights up when the machine is ready to process a copy job. <Copy> button Xerox WorkCentre 5016/5020 User Guide Downloaded From ManualsPrinter.com Manuals…
-
Page 21: Scan> Button
To minimize power consumption, the Power Saver feature is automatically activated during periods of machine inactivity. For more information on the Power Saver feature, refer to «Power Saver» (P.32). <Power Saver> button Xerox WorkCentre 5016/5020 User Guide Downloaded From ManualsPrinter.com Manuals…
-
Page 22: All Clear> Button
The machine allows you to scan the next document while this button is blinking. After scanning the last document, <Scan Completed> button press this button. Xerox WorkCentre 5016/5020 User Guide Downloaded From ManualsPrinter.com Manuals…
-
Page 23: Paper Supply> Button
C8 (8K SEF), 16L (16K LEF), 16S (16K SEF), A5 (A5 SEF), 17 (11 x 17” SEF), 14 (8.5 x 14” SEF), 13 (8.5 x 13” SEF), 11L (8.5 x 11” LEF), 11 (8.5 x 11” SEF), 55 (5.5 x 8.5” SEF), A3 (A3 SEF) Xerox WorkCentre 5016/5020 User Guide Downloaded From ManualsPrinter.com Manuals…
-
Page 24: Machine Diagram (Mimic)
For more information on the system settings, refer to «System Settings» (P.123). When the measuring unit is in inches 200% Enlarges a document by 200%. 5.5 x 8.5″ 11 x 17″ Xerox WorkCentre 5016/5020 User Guide Downloaded From ManualsPrinter.com Manuals…
-
Page 25
A4, A4 , B5 Reduces a document by 70.7%. A4, A4 A5, B4 Reduces a document by 50%. Preset Enlarges or reduces a document by any zoom ratio that has been preset. Xerox WorkCentre 5016/5020 User Guide Downloaded From ManualsPrinter.com Manuals… -
Page 26
• The measuring unit can be switched between metric and inches when the machine is in the System Setting Mode (menu number: 15). The following three options change depending on the selected measuring unit. Xerox WorkCentre 5016/5020 User Guide Downloaded From ManualsPrinter.com Manuals… -
Page 27
Copies two pages of the original documents onto one side of a single sheet. For more information on the N-up feature, refer to «4-up/2-up Copies (Copying Multiple Pages onto a Single Sheet)» (P.57). Xerox WorkCentre 5016/5020 User Guide Downloaded From ManualsPrinter.com Manuals… -
Page 28
Duplex Module is installed on the machine. <2-sided> button 2-sided Makes 2-sided copies (making copies on both sides of the sheet). 1-sided Makes 1-sided copies (making copies on one side of the sheet). Xerox WorkCentre 5016/5020 User Guide Downloaded From ManualsPrinter.com Manuals… -
Page 29
How to Scan Landscape Document Feeder Document Glass Copied Output Paper Orientation How to Scan in the Tray Portrait Document Feeder Document Glass Copied Output How to Scan Landscape Document Feeder Document Glass Xerox WorkCentre 5016/5020 User Guide Downloaded From ManualsPrinter.com Manuals… -
Page 30
Delivers the copies in stacks based on the number of copies for each set, and copies are made on both sides of the sheets. Note • 2-sided feature is only available if the Duplex Module is installed on the machine. Xerox WorkCentre 5016/5020 User Guide Downloaded From ManualsPrinter.com Manuals… -
Page 31: Switching On / Off
• After switching off the machine, wait for a few seconds before switching the machine back on again. Xerox WorkCentre 5016/5020 User Guide Downloaded From ManualsPrinter.com Manuals…
-
Page 32: Power Saver
• When the machine receives a print job or a scan job The following procedure describes how to exit the Sleep Mode manually. Press the <Power Saver> button. <Power Saver> button Xerox WorkCentre 5016/5020 User Guide Downloaded From ManualsPrinter.com Manuals…
-
Page 33: Recycled Paper
The use of recycled paper in the machine benefits the environment with no degradation in performance. Xerox recommends recycled paper with a 20% post consumer content which can be obtained both through Xerox and other office suppliers. Contact your Xerox representative or go to www.xerox.com for more information on other types of recycled paper.
-
Page 34: Installing Drivers
• When using Windows Vista, depending on the security settings, another dialog box may appear after Step 2, confirming whether or not you want to run [WorkCentre 5016/ 5020 CD-ROM AutoRun]. Select an option to allow the program to run, in order to display the [WorkCentre 5016/5020 CD-ROM AutoRun] dialog box and to proceed to Step 3.
-
Page 35
[Remove Print Driver] and [Remove Scan Driver] in the [WorkCentre 5016/5020 CD-ROM AutoRun] dialog box to completely remove the software. If you want to install the software, select the option to continue the installation. Xerox WorkCentre 5016/5020 User Guide Downloaded From ManualsPrinter.com Manuals… -
Page 36
[Remove Print Driver] and [Remove Scan Driver] in the [WorkCentre 5016/5020 CD-ROM AutoRun] dialog box to completely remove the software. If you want to install the software, select the option to continue the installation. Xerox WorkCentre 5016/5020 User Guide Downloaded From ManualsPrinter.com Manuals… -
Page 37
The print driver installation starts. The installation of the print driver is now complete. Click [Finish]. The print driver installation wizard dialog box closes. Click [Exit] on the [WorkCentre 5016/ 5020 CD-ROM AutoRun] dialog box. The [WorkCentre 5016/5020 CD-ROM AutoRun] dialog box closes. Note •… -
Page 38: Installing The Scanner Application (Button Manager)
• When using Windows Vista, depending on the security settings, another dialog box may appear after Step 1, confirming whether or not you want to run [WorkCentre 5016/ 5020 CD-ROM AutoRun]. Select an option to allow the program to run, in order to display the [WorkCentre 5016/5020 CD-ROM AutoRun] dialog box and to proceed to Step 2.
-
Page 39
The installation process begins. The installation is now complete. Click [Finish]. The installation wizard dialog box closes. Click [Exit] on the [WorkCentre 5016/ 5020 CD-ROM AutoRun] dialog box. The [WorkCentre 5016/5020 CD-ROM AutoRun] dialog box closes. Note • To remove Button Manager, select [Start] >… -
Page 40: Loading Paper
Using paper that is not listed here may result in paper jams, lower print quality, or machine malfunctions. If you wish to use paper other than those recommended by Xerox, contact the Xerox Welcome Center. Important •…
-
Page 41: Supported Paper Types
Output Tray every 20 sheets or so to prevent them from sticking to one another. • When loading label paper in the tray, if any labels have already been peeled off or cut off, it may cause a paper jam. Xerox WorkCentre 5016/5020 User Guide Downloaded From ManualsPrinter.com Manuals…
-
Page 42: Loading Paper In The Trays
This reduces the possibility of paper jams. Xerox WorkCentre 5016/5020 User Guide Downloaded From ManualsPrinter.com Manuals…
-
Page 43: Loading Paper In Tray 2
Pull out Tray 2 towards you. Important • While the machine processes a job, do not pull out the tray in use. Xerox WorkCentre 5016/5020 User Guide Downloaded From ManualsPrinter.com Manuals…
-
Page 44: Loading Paper In The Bypass Tray
• When using non-standard size paper for a print job, you must register its paper size in the print driver in advance. For information on how to specify a custom paper size in the print driver, refer to «Specifying the Custom Paper Size» (P.79). Open the Bypass Tray. Xerox WorkCentre 5016/5020 User Guide Downloaded From ManualsPrinter.com Manuals…
-
Page 45
Note • If paper runs out in the Bypass Tray during a job, open and close the Left Side Cover once, and reload paper in the Bypass Tray. Xerox WorkCentre 5016/5020 User Guide Downloaded From ManualsPrinter.com Manuals… -
Page 46: Changing The Size And Orientation Of Paper In The Trays
Remove the remaining paper. Push down the metal plate to the bottom of the tray. Slide paper guides towards the front and back of the tray. Xerox WorkCentre 5016/5020 User Guide Downloaded From ManualsPrinter.com Manuals…
-
Page 47
Specify the paper size and orientation on the Control Panel. For information on how to specify the paper size and paper orientation, refer to «Specifying the Size and Orientation of Paper Loaded in the Trays» (P.49). Xerox WorkCentre 5016/5020 User Guide Downloaded From ManualsPrinter.com Manuals… -
Page 48: Changing The Size And Orientation Of Paper In Tray 2
Important • Do not load mixed types or mixed sizes of paper together in Tray 2. • Do not load paper above the maximum fill line. It may cause paper jams or machine malfunctions. Xerox WorkCentre 5016/5020 User Guide Downloaded From ManualsPrinter.com Manuals…
-
Page 49: Specifying The Size And Orientation Of Paper Loaded In The Trays
(the custom size paper cannot be used for a copy job), you do not need to specify the size of paper on <Display Switch> button the Control Panel. Instead, you Xerox WorkCentre 5016/5020 User Guide Downloaded From ManualsPrinter.com Manuals…
-
Page 50
A4 / SEF 8.5 x 14” / B4 / SEF 8.5 x 13” / Note • When Tray 1 or Tray 2 is selected, [A5] and [55] do not appear in the Display. Xerox WorkCentre 5016/5020 User Guide Downloaded From ManualsPrinter.com Manuals… -
Page 51
System Setting Mode (menu number: 15). For more information, refer to «System Settings» (P.123). Press the <Start> button to confirm the selected size and orientation of paper. The machine exits the Paper Setting Mode. <Start> button Xerox WorkCentre 5016/5020 User Guide Downloaded From ManualsPrinter.com Manuals… -
Page 52: Copying
• If the size of the loaded document is smaller than any standard sizes, the edges of the loaded document may create shadow, and may appear to have an outline on the copied output. Xerox WorkCentre 5016/5020 User Guide Downloaded From ManualsPrinter.com Manuals…
-
Page 53
For more information, refer to «<Original Type> button» (P.28). <2-sided> button Select whether to copy on one side or both sides of a sheet. For more information, refer to «<2-sided> button» (P.28). Xerox WorkCentre 5016/5020 User Guide Downloaded From ManualsPrinter.com Manuals… -
Page 54
Completed> button blinks after the first document has been scanned. Load and scan the next document while the button is blinking. After scanning the last document, press <Scan Completed> the <Scan Completed> button. button Xerox WorkCentre 5016/5020 User Guide Downloaded From ManualsPrinter.com Manuals… -
Page 55: Loading Documents
SEF orientation Close the Document Cover. Xerox WorkCentre 5016/5020 User Guide Downloaded From ManualsPrinter.com Manuals…
-
Page 56: Document Feeder
Clearing All the Features This section explains how to clear the specified copy features. Press the <All Clear> button. <All Clear> button Xerox WorkCentre 5016/5020 User Guide Downloaded From ManualsPrinter.com Manuals…
-
Page 57: Canceling A Copy Job
Document Glass with the N-up feature. The button is not selectable when using the <Original Size> Document Feeder as the size of button the original document is automatically detected. Xerox WorkCentre 5016/5020 User Guide Downloaded From ManualsPrinter.com Manuals…
-
Page 58
11 x 17″ SEF can only be made into the 2-up copies. Important • The <Original Size> button is not selectable when using the Document Feeder as the size of the original document is automatically detected. Xerox WorkCentre 5016/5020 User Guide Downloaded From ManualsPrinter.com Manuals… -
Page 59
Document Glass Left Right Bottom Document Feeder Note • The <Original Size> button is not selectable when using the Document Feeder as the size of the original document is automatically detected. Xerox WorkCentre 5016/5020 User Guide Downloaded From ManualsPrinter.com Manuals… -
Page 60
Press the <Paper Supply> button to select a tray that is loaded with an appropriate size and orientation of paper, in reference to the tables below. <Paper Supply> button Xerox WorkCentre 5016/5020 User Guide Downloaded From ManualsPrinter.com Manuals… -
Page 61
8.5 x 13″ SEF, 8.5 x 14″ SEF, 8.5 x 13.4 SEF, 11 x 17″ SEF B5 SEF B5 LEF B5 LEF B5 SEF, B4 SEF If using the Document Feeder to scan documents 1) Press the <Start> button to start copying. <Start> button Xerox WorkCentre 5016/5020 User Guide Downloaded From ManualsPrinter.com Manuals… -
Page 62
SEF orientation 3) Press the <Start> button to scan the loaded document. Note • After scanning the last document, press the <Scan Completed> button to start copying. <Start> button Xerox WorkCentre 5016/5020 User Guide Downloaded From ManualsPrinter.com Manuals… -
Page 63: Id Card Copies (Copying An Id Card-Shaped Document Onto A Sheet)
Press the <Start> button to start scanning one side of the ID card- shaped document. <Start> button The indicator next to the <Scan Completed> button blinks. <Scan Completed> button Xerox WorkCentre 5016/5020 User Guide Downloaded From ManualsPrinter.com Manuals…
-
Page 64
When copying on When copying on paper that is loaded in paper that is loaded the LEF orientation in the SEF orientation Xerox WorkCentre 5016/5020 User Guide Downloaded From ManualsPrinter.com Manuals… -
Page 65: Managing Accounts
(P.69) under «Multiple Account Mode» to log in to the machine under the System Administrator’s account, then proceed to Step 1 of the following procedure to select the account mode. Important • The machine is in the No Account Mode by default. Xerox WorkCentre 5016/5020 User Guide Downloaded From ManualsPrinter.com Manuals…
-
Page 66
For information on the system settings, refer to «System Settings» (P.123). Numeric keys Press the <Start> button to confirm the entered menu number. The currently-set value appears blinking in the Display. <Start> button Xerox WorkCentre 5016/5020 User Guide Downloaded From ManualsPrinter.com Manuals… -
Page 67
Press the <Start> button to confirm the entered account mode. <Start> button The letter [P] appears blinking in the Display. Press the <Log In/Out> button. The machine exits the System Setting Mode. <Log In/Out> button Xerox WorkCentre 5016/5020 User Guide Downloaded From ManualsPrinter.com Manuals… -
Page 68: Single Account Mode
Press the <Start> button to confirm the entered password. <Start> button If the entered password is correct, the machine enters the Copy Mode, and [1] appears in the Display. Xerox WorkCentre 5016/5020 User Guide Downloaded From ManualsPrinter.com Manuals…
-
Page 69: Multiple Account Mode
The account number that you enter appears in the Display. Note • The account number «1» is used as an example in this procedure. Press the <Start> button to confirm the entered account number. <Start> button Xerox WorkCentre 5016/5020 User Guide Downloaded From ManualsPrinter.com Manuals…
-
Page 70
If you wish to run a scan job after logging in, simply press the <Scan> button to switch the <Log In/Out> machine to the Scan Mode. button Xerox WorkCentre 5016/5020 User Guide Downloaded From ManualsPrinter.com Manuals… -
Page 71: Changing The Password
• The default System Administrator’s password is «111». Numeric keys For security reasons, as you enter each digit of the password, a hyphen appears in the Display instead of the actual number that you enter. Xerox WorkCentre 5016/5020 User Guide Downloaded From ManualsPrinter.com Manuals…
-
Page 72
Specify a three-digit password of the account number 9 within a range of 000 — 999. Specify a three-digit password of the account number 10 within a range of 000 — 999. Xerox WorkCentre 5016/5020 User Guide Downloaded From ManualsPrinter.com Manuals… -
Page 73
Press the <Start> button to confirm the new password. <Start> button The letter [P] appears blinking in the Display. Press the <Log In/Out> button. The machine exits the System Setting Mode. <Log In/Out> button Xerox WorkCentre 5016/5020 User Guide Downloaded From ManualsPrinter.com Manuals… -
Page 74: Setting Copy Job Limits On A User Account
• The default System Administrator’s password is «111». Numeric keys For security reasons, as you enter each digit of the password, a hyphen appears in the Display instead of the actual number that you enter. Xerox WorkCentre 5016/5020 User Guide Downloaded From ManualsPrinter.com Manuals…
-
Page 75
7 within a range of 0 — 60 (0 — 60,000). Specify the maximum number of pages allowed to copy for the account number 8 within a range of 0 — 60 (0 — 60,000). Xerox WorkCentre 5016/5020 User Guide Downloaded From ManualsPrinter.com Manuals… -
Page 76
• If an incorrect value is specified in step 8, [0] appears in the Display instead of the letter [P]. Press the <Log In/Out> button. The machine exits the System Setting Mode. <Log In/Out> button Xerox WorkCentre 5016/5020 User Guide Downloaded From ManualsPrinter.com Manuals… -
Page 77: Reviewing The Total Number Of Copies
Display. Press the <Start> button to display the rest. <Start> button The second half of the numerical value appears in the Display. The value shown in this example is “21100”. Xerox WorkCentre 5016/5020 User Guide Downloaded From ManualsPrinter.com Manuals…
-
Page 78: Printing
Select [Start] at the bottom of the screen, then select [Printers and Faxes]. The [Printers and Faxes] dialog box appears. Right-click on the [Xerox WorkCentre 5016], [Xerox WorkCentre 5020/B], or [Xerox WorkCentre 5020/DB] printer, and select [Properties] from the displayed pop-up menu.
-
Page 79: Specifying The Custom Paper Size
Select [Start] at the bottom of the screen, then select [Printers and Faxes]. The [Printers and Faxes] dialog box appears. Right-click the [Xerox WorkCentre 5016], [Xerox WorkCentre 5020/B], or [Xerox WorkCentre 5020/DB] printer, and select [Properties] from the displayed pop-up menu.
-
Page 80: Printing Procedure
• For more information on the print driver, refer to Help in the print driver. Select [Print] from the menu on the application. Select the machine name in [Name], and click [Properties]. Xerox WorkCentre 5016/5020 User Guide Downloaded From ManualsPrinter.com Manuals…
-
Page 81: Printing On The Custom Size Paper
Click [OK] in the [Properties] dialog box to save specified settings. The [Properties] dialog box closes. Click [OK] in the [Print] dialog box. The [Print] dialog box closes, and the print job starts. Xerox WorkCentre 5016/5020 User Guide Downloaded From ManualsPrinter.com Manuals…
-
Page 82: Canceling A Print Job
The following procedure describes how to cancel a print job on the Control Panel. Press the <Stop> button while the machine is processing a print job that needs to be canceled. <Stop> button Xerox WorkCentre 5016/5020 User Guide Downloaded From ManualsPrinter.com Manuals…
-
Page 83: Scanning
Diagram (mimic) lights up when a document is loaded correctly in the Document Feeder. If the indicator does not light up, the document may not be loaded properly in the Document Feeder. Xerox WorkCentre 5016/5020 User Guide Downloaded From ManualsPrinter.com Manuals…
-
Page 84
• If the WIA (Windows Image Acquisition) driver is displayed instead of the TWAIN driver, close the WIA driver, and select the TWAIN driver correctly. The TWAIN driver appears. Click [Preview] to create a preview image. Xerox WorkCentre 5016/5020 User Guide Downloaded From ManualsPrinter.com Manuals… -
Page 85
Starts scanning a loaded document within the specified scanning area. [Close] button Closes the [TWAIN Driver] dialog box. Note • For more information on each item, click [Help] displayed in the scan driver. Xerox WorkCentre 5016/5020 User Guide Downloaded From ManualsPrinter.com Manuals… -
Page 86: Canceling A Scan Job (Twain Driver)
• Canceling a scan job on the Control Panel Canceling a job on the computer Click [Cancel] in the scanning progress dialog box. Canceling a job on the Control Panel Press the <Stop> button. <Stop> button Xerox WorkCentre 5016/5020 User Guide Downloaded From ManualsPrinter.com Manuals…
-
Page 87: Scanning Procedure (Using Button Manager)
Scanning Procedure (Using Button Manager) The following procedure describes a basic scanning procedure when using Button Manager. Click the [Start] button, and select [All Programs] > [Xerox] > [WorkCentre 5016 & 5020 Scan Button Manager] > [Scan Button Manager] to start Button Manager. Note •…
-
Page 88
• If the size of the loaded document is smaller than any standard sizes, the edges of the loaded document may create shadow, and may appear to have an outline on the scanned image. Xerox WorkCentre 5016/5020 User Guide Downloaded From ManualsPrinter.com Manuals… -
Page 89: Canceling A Scan Job (Button Manager)
Button Manager] dialog box in Step 2 becomes the size of the scanned image. Canceling a Scan Job (Button Manager) The following procedure describes how to cancel a scan job. Press the <Stop> button while the machine is scanning a document. <Stop> button Xerox WorkCentre 5016/5020 User Guide Downloaded From ManualsPrinter.com Manuals…
-
Page 90: Troubleshooting
For information on how to switch the machine on and off, refer to «Switching On / Off» (P.31). • Xerox Welcome Center If a problem persists after applying all the suggested solutions, contact the Xerox Welcome Center. Machine Diagram (mimic)
-
Page 91: Bypass Tray
For information on how to load paper in the Bypass Tray, refer to «Loading Paper in the Bypass Tray» (P.44). For information on how to clear paper jams in the Bypass Tray, refer to «C3: Paper Jam in the Bypass Tray» (P.108). Xerox WorkCentre 5016/5020 User Guide Downloaded From ManualsPrinter.com Manuals…
-
Page 92: Error Codes
Document book on the Document Glass, if Glass. another document is also loaded in the Document Feeder, the machine does not allow you to scan a document on the Document Glass. Xerox WorkCentre 5016/5020 User Guide Downloaded From ManualsPrinter.com Manuals…
-
Page 93
Open and close the Left Side Cover once, and load paper in the Bypass Tray. For information on how to load paper in the Bypass Tray, refer to «Loading Paper in the Bypass Tray» (P.44). Xerox WorkCentre 5016/5020 User Guide Downloaded From ManualsPrinter.com Manuals… -
Page 94
E Codes Error Code Description Remedy During a copy job, the machine Press the <Stop> button to cancel the erased already-scanned images copy job, and try again. before outputting on the paper. Xerox WorkCentre 5016/5020 User Guide Downloaded From ManualsPrinter.com Manuals… -
Page 95
<Paper Supply> button, <Variable of 50 — 200%. Zoom Ratio> button, or the <Reduce/ Enlarge> button.This error code can also be cleared when you remove the loaded document from the Document Feeder. Xerox WorkCentre 5016/5020 User Guide Downloaded From ManualsPrinter.com Manuals… -
Page 96
Press the <Stop> button to cancel the Account Mode, it reached the copy job. Break up the job into smaller job limit that has been set for a segments. particualr user account. Xerox WorkCentre 5016/5020 User Guide Downloaded From ManualsPrinter.com Manuals… -
Page 97
U0, U1, U2, An internal error occurred in the Switch the machine off and on. If the U3, U4, U6, machine. error persists, contact the Xerox U7, U8, U9 Welcome Center. Xerox WorkCentre 5016/5020 User Guide Downloaded From ManualsPrinter.com Manuals… -
Page 98: Troubleshooting Table
«System Settings» (P.123). Failed to run a print job. Delete the print job, and run the print job again. Switch off the machine. Wait for five seconds, then switch on the machine. Xerox WorkCentre 5016/5020 User Guide Downloaded From ManualsPrinter.com Manuals…
-
Page 99
Replace the Drum Cartridge. Add toner if the toner indicator on the Machine Diagram (mimic) flashes or the error code indicating that toner needs to be added appears in the Display. Xerox WorkCentre 5016/5020 User Guide Downloaded From ManualsPrinter.com Manuals… -
Page 100
If the document has large areas of solid density, adjust the density feature for the contrast. Light copies when scanning glossy, shiny, or Use the Document Glass instead of the coated documents through the Document Document Feeder. Feeder. Xerox WorkCentre 5016/5020 User Guide Downloaded From ManualsPrinter.com Manuals… -
Page 101
Load paper in Tray 1 and Tray 2 seam side Load paper in the Bypass Tray seam side down. Load custom media in the Bypass Tray. Refer to «Loading Paper in the Trays» (P.42) for procedures. Xerox WorkCentre 5016/5020 User Guide Downloaded From ManualsPrinter.com Manuals… -
Page 102: Paper Jams
Lift up the Left Side Cover Latch gently to open the Left Side Cover. Xerox WorkCentre 5016/5020 User Guide Downloaded From ManualsPrinter.com Manuals…
-
Page 103
• If the paper is still jammed tightly even after pulling up the green lever, open Access Cover 1. This may release the jammed paper loose, allowing you to remove it. 4) Gently close the Left Side Cover. Xerox WorkCentre 5016/5020 User Guide Downloaded From ManualsPrinter.com Manuals… -
Page 104: E2: Paper Jam In The Left Side Cover
1) If the paper is jammed in the location shown in the diagram, remove the jammed paper pulling upwards. 2) If the paper is jammed in the location shown in the diagram, remove the jammed paper pulling upwards. Xerox WorkCentre 5016/5020 User Guide Downloaded From ManualsPrinter.com Manuals…
-
Page 105: E4: Paper Jam In The Left Side Cover
[E4] appears in the Display. Hold the latch, and open Access Cover Hold the latch, and open Access Cover Lift up the Left Side Cover Latch gently to open the Left Side Cover. Xerox WorkCentre 5016/5020 User Guide Downloaded From ManualsPrinter.com Manuals…
-
Page 106: C1: Paper Jam In Tray 1
Remove the jammed paper. Note • Do not leave any torn pieces of paper inside the machine. Push Tray 1 gently back into position. Xerox WorkCentre 5016/5020 User Guide Downloaded From ManualsPrinter.com Manuals…
-
Page 107: C2: Paper Jam In Tray 2
• Paper Tray 2 is an optional accessory that can be used as Tray 2. Hold the latch, and open Access Cover Hold the latch, and open Access Cover If the jammed paper is accessible through Access Cover 1, remove the jammed paper. Xerox WorkCentre 5016/5020 User Guide Downloaded From ManualsPrinter.com Manuals…
-
Page 108: C3: Paper Jam In The Bypass Tray
Insert the paper into the tray with the side to be copied or printed facing down. For information on how to load paper in the Bypass tray, refer to «Loading Paper in the Bypass Tray» (P.44). Xerox WorkCentre 5016/5020 User Guide Downloaded From ManualsPrinter.com Manuals…
-
Page 109: A1: Document Jams
Document Feeder. Note • Torn, wrinkled or folded documents may cause document jams. To copy such documents, place them on the Document Glass. Xerox WorkCentre 5016/5020 User Guide Downloaded From ManualsPrinter.com Manuals…
-
Page 110: Maintenance
• Use of consumables/periodic replacement parts that are not recommended by Xerox can impair quality and performance of the machine. Use only consumables/ periodic replacement parts that are specifically recommended by Xerox. Xerox WorkCentre 5016/5020 User Guide…
-
Page 111: Adding Toner To The Drum Cartridge
Important • When the remaining toner becomes low, the machine may stop during printing to display the error code. If this happens, add toner to continue copying or printing. Xerox WorkCentre 5016/5020 User Guide Downloaded From ManualsPrinter.com Manuals…
-
Page 112
Front Cover. Pull up the Left Side Cover Latch to open the Left Side Cover. Lightly press the orange tab to unlock the Drum Cartridge. Xerox WorkCentre 5016/5020 User Guide Downloaded From ManualsPrinter.com Manuals… -
Page 113
Important • Do not squeeze the toner bottle. • Do not fill the Drum Cartridge with more than a single bottle of toner at a time. Xerox WorkCentre 5016/5020 User Guide Downloaded From ManualsPrinter.com Manuals… -
Page 114: Replacing The Drum Cartridge
Drum Cartridge reaches the end of its life. Important • The use of Drum Cartridges that are not recommended by Xerox may impair quality and performance of the machine. Use only Drum Cartridges specifically recommended by Xerox.
-
Page 115
Important • A bottle of toner must be purchased separately when replacing the Drum Cartridge. Push the Drum Cartridge in until it locks into position. Close the Left Side Cover and the Front Cover. Xerox WorkCentre 5016/5020 User Guide Downloaded From ManualsPrinter.com Manuals… -
Page 116: Cleaning The Machine
Wipe the Document Glass with a soft cloth moistened with water, and then wipe it with a dry cloth. Important • Do not use cleaning agents other than water or neutral detergent. Xerox WorkCentre 5016/5020 User Guide Downloaded From ManualsPrinter.com Manuals…
-
Page 117: Cleaning The Film And Constant Velocity Transport Glass
• Cleaning the machine with an excessive amount of water may cause the machine to malfunction, or damage documents being copied. Pull up the latch to open the Document Feeder Cover completely. Xerox WorkCentre 5016/5020 User Guide Downloaded From ManualsPrinter.com Manuals…
-
Page 118: Cleaning The Corotron Wire
Corotron Wire may help resolve the problem. The following procedure describes how to clean the Corotron Wire. Open the Front Cover. Pull the Corotron Wire back and forth several times. Close the Front Cover. Xerox WorkCentre 5016/5020 User Guide Downloaded From ManualsPrinter.com Manuals…
-
Page 119: Appendix
Image loss width: Leading edge 4 mm or less, trailing edge 4 mm or less, and top/front 4 mm or less. Copy paper weight Tray 1 : 60 — 90g/m Tray 2 : 60 — 90g/m Bypass Tray : 60 — 110g/m Xerox WorkCentre 5016/5020 User Guide Downloaded From ManualsPrinter.com Manuals…
-
Page 120
250 sheets (Tray 1) + 500 sheets (Tray 2) + 50 sheets (Bypass Tray) Maximum paper feed capacity: 800 sheets Important • When using Xerox P paper. Continuous copy pages 99 pages Note • The machine may pause temporarily to perform image stabilization. -
Page 121
2003 Standard Edition ™ Microsoft® Windows® Vista 64-bit editions of Windows® Important • For the latest information on operating systems that are supported by the machine, contact the Xerox Welcome Center. Interface USB 2.0 Xerox WorkCentre 5016/5020 User Guide Downloaded From ManualsPrinter.com Manuals… -
Page 122: Printable Area
Microsoft® Windows® Server 2003 Standard Edition ™ Microsoft® Windows® Vista 64-bit editions of Windows® Important • For the latest information on operating systems that are supported by the machine, contact the Xerox Welcome Center. Scan gradation Monochrome binary Scanning speed 3 sheets/minute (For ITU-T No.1 Chart A4…
-
Page 123: System Settings
Enter a new value using the numeric keypad in reference to «System Setting List» (P.124). Note • Automatically erases the previously set value in the Display as you start entering a new value. Xerox WorkCentre 5016/5020 User Guide Downloaded From ManualsPrinter.com Manuals…
-
Page 124: System Setting List
Document Type Select the default document type. 1: Text* 2: Text & Photo 3: Photo Density Select the default density level. 0: Lightest 1: Light 2: Normal* 3: Dark 4: Darkest Xerox WorkCentre 5016/5020 User Guide Downloaded From ManualsPrinter.com Manuals…
-
Page 125
Low 2: 20 minutes* Power Mode. 3: 60 minutes 4: 120 minutes For more information on the Low 5: 240 minutes Power Mode, refer to «Low Power 254: Disable Mode» (P.32). Xerox WorkCentre 5016/5020 User Guide Downloaded From ManualsPrinter.com Manuals… -
Page 126
<Scan Completed> button is 3: 60 seconds* not pressed for a specified period 4: 90 seconds of time to indicate the last page of documents, the machine automatically resumes to process the copy job. Xerox WorkCentre 5016/5020 User Guide Downloaded From ManualsPrinter.com Manuals… -
Page 127: Additional System Settings (When Selecting The Single Account Mode)
System Administrator. Menu Menu Description Value Number Password Specify the password/System 000 — 999 Administrator’s password using (Default: 111) three digits. Xerox WorkCentre 5016/5020 User Guide Downloaded From ManualsPrinter.com Manuals…
-
Page 128: Additional System Setting List (When Selecting The Multiple Account Mode)
Account Number 5 Password Specify a three-digit password of 000 — 999 the account number 5. Account Number 6 Password Specify a three-digit password of 000 — 999 the account number 6. Xerox WorkCentre 5016/5020 User Guide Downloaded From ManualsPrinter.com Manuals…
-
Page 129
9. Account Number 10 Copy Job Specify the maximum number of 0 — 60 (0 — 60,000) Limit pages allowed to copy for the account number 10. Xerox WorkCentre 5016/5020 User Guide Downloaded From ManualsPrinter.com Manuals… -
Page 130: Document Sizes Detectable By The Document Feeder
Elevates and stabilizes the machine for optimum use, and the attached casters allow you to easily move the machine. Note • The optional accessories are subject to change without notice. • For the latest information, contact the Xerox Welcome Center. Xerox WorkCentre 5016/5020 User Guide Downloaded From ManualsPrinter.com Manuals…
-
Page 131: Index
Document Feeder Jam ……..91 <Start> button ……….22 Document Feeder Roller ……..117 <Stop> button ……….22 Document feeder specifications <Variable Ratio> button ……..24 Capacity …………. 122 Display …………20 Document feeder type ……. 122 Xerox WorkCentre 5016/5020 User Guide Downloaded From ManualsPrinter.com Manuals…
-
Page 132
Tray 2 …………91 product …………15 maintenance …………10 <Reduce/Enlarge> button ……..24 maintenance safety ……….11 Reduce/Enlarge Ratio ……..125 Maximum fill line ………. 43 regulatory information ……..13 Metric/Inch …………126 Xerox WorkCentre 5016/5020 User Guide Downloaded From ManualsPrinter.com Manuals… -
Page 133
Document Type ……… 124 Drum Cartridge Remaining Life ….127 Machine Serial Number ……127 Metric/Inch ……….126 Password ……….. 128 Preset Reduce/Enlarge Zoom Ratio ..125 Reduce/Enlarge Ratio …….. 125 Xerox WorkCentre 5016/5020 User Guide Downloaded From ManualsPrinter.com Manuals…
- Manuals
- Brands
- Xerox Manuals
- All in One Printer
- WorkCentre 5016
- User manual
-
Contents
-
Table of Contents
-
Troubleshooting
-
Bookmarks
Quick Links
WorkCentre 5016, 5020/B, 5020/DB
User Guide
XE3025EN0-1
www.xerox.com/support
Downloaded From ManualsPrinter.com Manuals
Related Manuals for Xerox WorkCentre 5016
Summary of Contents for Xerox WorkCentre 5016
-
Page 1: User Guide
WorkCentre 5016, 5020/B, 5020/DB User Guide XE3025EN0-1 www.xerox.com/support Downloaded From ManualsPrinter.com Manuals…
-
Page 2
Corporation. Product names and trademarks of other companies are hereby acknowledged. The information in this document is correct at the time of publication. Xerox reserves the right at any time to change the information without notice. Changes and technical updates will be added in subsequent editions of the documentation. -
Page 3: Table Of Contents
Table of Contents Before Using the Machine …………..7 Xerox Welcome Center …………….7 Serial Number………………7 Conventions …………………8 Related Information Sources…………..8 Safety Notes…………………9 WARNING — Electrical Safety Information ………10 Laser Safety Information…………..10 Operational Safety Information …………11 Maintenance Information …………..11 Ozone Information …………….12 For Consumables …………….12…
-
Page 4
<Paper Supply> button …………..23 Machine Diagram (mimic)…………..24 Copy Features ……………….24 Switching On / Off ………………31 Switching On………………31 Switching Off………………31 Power Saver ………………32 Recycled Paper ………………33 Installing Drivers ………………34 Installing the Print Driver and the Scan Driver (TWAIN driver) ….34 Installing the Scanner Application (Button Manager) ……38 Loading Paper ………………40 Supported Paper Sizes and Types…………40 Supported Paper Sizes…………..40… -
Page 5
Changing the Password…………..71 Setting Copy Job Limits on a User Account ……..74 Reviewing the Total Number of Copies ……….77 Printing………………..78 Setting Up the Printer …………….78 Setting the Printer Preferences…………78 Specifying the Custom Paper Size …………79 Printing Procedure………………80 Printing on the Custom Size Paper…………81 Canceling a Print Job …………….82 Scanning ………………..83 The Scan Driver (TWAIN driver) and Button Manager……83… -
Page 6
Printable Area ………………122 System Settings ……………….123 System Setting List …………….124 Additional System Settings (When Selecting the Single Account Mode) ……..127 Additional System Setting List (When Selecting the Multiple Account Mode)……..128 Document Sizes Detectable by the Document Feeder….130 Optional Accessories…………….130 12 Index ………………..131 Downloaded From ManualsPrinter.com Manuals… -
Page 7: Before Using The Machine
This chapter provides information which users should be aware of before using the machine. Xerox Welcome Center If you need assistance during or after product installation, visit the Xerox website for online solutions and support. http://www.xerox.com/support If you require further assistance, contact our experts at the Xerox Welcome Center. A local representative telephone number may have been provided when the product was installed.
-
Page 8: Conventions
Paper feed direction Paper feed direction • Paper is synonymous with media, and is used interchangeably. • Machine is synonymous with Xerox WorkCentre 5016, 5020/B, 5020/DB, and is used interchangeably. • Computer refers to a personal computer or workstation. • System Administrator refers to a person who is responsible for maintaining the machine, such as setting up the machine, installing the print drivers, and managing software.
-
Page 9: Safety Notes
Read these safety notes carefully before using this product to make sure you operate the equipment safely. Your Xerox product and recommended supplies have been designed and tested to meet strict safety requirements. These include safety agency approval, and compliance to established environmental standards. Please read the following instructions carefully before operating the product and refer to them as needed to ensure the continued safe operation of your product.
-
Page 10: Warning — Electrical Safety Information
Class 1 laser product. It does not emit hazardous light, as the beam is totally enclosed during all phases of customer operation and maintenance. Xerox WorkCentre 5016/5020 User Guide Downloaded From ManualsPrinter.com Manuals…
-
Page 11: Operational Safety Information
Safety Notes Operational Safety Information To ensure the continued safe operation of your Xerox equipment, follow these safety guidelines at all times. Do These: • Always connect equipment to a correctly grounded power outlet. If in doubt, have the outlet checked by a qualified electrician.
-
Page 12: Ozone Information
This product produces ozone during normal operation. The ozone produced is heavier than air and is dependent on copy volume. Install the system in a well-ventilated room. If you need additional information about ozone, please request the Xerox publication Facts About Ozone (part number 610P64653) by calling 1-800-828-6571 in the United States and Canada.
-
Page 13: Product Safety Certification
Operation of this equipment in a residential area is likely to cause harmful interference in which case the user will be required to correct the interference at his own expense. Changes or modifications to this equipment not specifically approved by the Xerox Corporation may void the user’s authority to operate this equipment.
-
Page 14: Environmental Compliance
Battery Recycling and Disposal Dispose of all batteries in accordance with local legislation. For recovery of scarce resources, Xerox reuses the rechargeable batteries used in this product after the product is returned. Those batteries can be reused to make recycle materials and energy recovery.
-
Page 15: Product Recycling And Disposal
Xerox product is part of the program. For more information about Xerox environmental programs, visit www.xerox.com/environment. If you are managing the disposal of your Xerox product, please note that the product contains lamp(s) with mercury, and may contain lead, Perchlorate and other materials whose disposal may be regulated due to environmental considerations.
-
Page 16: Product Overview
Open this cover when a paper jam occurs in the machine and when replacing consumables. For information on how to clear paper jams, refer to «Paper Jams» (P.102). For information on how to replace consumables, refer to «Replacing Consumables» (P.110). Xerox WorkCentre 5016/5020 User Guide Downloaded From ManualsPrinter.com Manuals…
-
Page 17
USB Interface Connector Connects the USB cable to the machine. Power Cord Connector Connects the power cord to the machine. Power Switch Switches the power to the machine on and off. Xerox WorkCentre 5016/5020 User Guide Downloaded From ManualsPrinter.com Manuals… -
Page 18: Inside View
Contains toner and photoconductor used to transfer the toner. Duplex Module Copies and prints on both sides of paper. Note • The Duplex Module may not be fitted depending on the machine model in use. Xerox WorkCentre 5016/5020 User Guide Downloaded From ManualsPrinter.com Manuals…
-
Page 19: Rear View
Machine Components Rear View Component Function Data Label Contains the machine information. Xerox WorkCentre 5016/5020 User Guide Downloaded From ManualsPrinter.com Manuals…
-
Page 20: Control Panel
<Paper Supply> button, refer to «<Paper Supply> button» (P.23). <Copy> button Press this button to switch the machine to the Copy Mode. The button lights up when the machine is ready to process a copy job. <Copy> button Xerox WorkCentre 5016/5020 User Guide Downloaded From ManualsPrinter.com Manuals…
-
Page 21: Scan> Button
To minimize power consumption, the Power Saver feature is automatically activated during periods of machine inactivity. For more information on the Power Saver feature, refer to «Power Saver» (P.32). <Power Saver> button Xerox WorkCentre 5016/5020 User Guide Downloaded From ManualsPrinter.com Manuals…
-
Page 22: All Clear> Button
The machine allows you to scan the next document while this button is blinking. After scanning the last document, <Scan Completed> button press this button. Xerox WorkCentre 5016/5020 User Guide Downloaded From ManualsPrinter.com Manuals…
-
Page 23: Paper Supply> Button
C8 (8K SEF), 16L (16K LEF), 16S (16K SEF), A5 (A5 SEF), 17 (11 x 17” SEF), 14 (8.5 x 14” SEF), 13 (8.5 x 13” SEF), 11L (8.5 x 11” LEF), 11 (8.5 x 11” SEF), 55 (5.5 x 8.5” SEF), A3 (A3 SEF) Xerox WorkCentre 5016/5020 User Guide Downloaded From ManualsPrinter.com Manuals…
-
Page 24: Machine Diagram (Mimic)
For more information on the system settings, refer to «System Settings» (P.123). When the measuring unit is in inches 200% Enlarges a document by 200%. 5.5 x 8.5″ 11 x 17″ Xerox WorkCentre 5016/5020 User Guide Downloaded From ManualsPrinter.com Manuals…
-
Page 25
A4, A4 , B5 Reduces a document by 70.7%. A4, A4 A5, B4 Reduces a document by 50%. Preset Enlarges or reduces a document by any zoom ratio that has been preset. Xerox WorkCentre 5016/5020 User Guide Downloaded From ManualsPrinter.com Manuals… -
Page 26
• The measuring unit can be switched between metric and inches when the machine is in the System Setting Mode (menu number: 15). The following three options change depending on the selected measuring unit. Xerox WorkCentre 5016/5020 User Guide Downloaded From ManualsPrinter.com Manuals… -
Page 27
Copies two pages of the original documents onto one side of a single sheet. For more information on the N-up feature, refer to «4-up/2-up Copies (Copying Multiple Pages onto a Single Sheet)» (P.57). Xerox WorkCentre 5016/5020 User Guide Downloaded From ManualsPrinter.com Manuals… -
Page 28
Duplex Module is installed on the machine. <2-sided> button 2-sided Makes 2-sided copies (making copies on both sides of the sheet). 1-sided Makes 1-sided copies (making copies on one side of the sheet). Xerox WorkCentre 5016/5020 User Guide Downloaded From ManualsPrinter.com Manuals… -
Page 29
How to Scan Landscape Document Feeder Document Glass Copied Output Paper Orientation How to Scan in the Tray Portrait Document Feeder Document Glass Copied Output How to Scan Landscape Document Feeder Document Glass Xerox WorkCentre 5016/5020 User Guide Downloaded From ManualsPrinter.com Manuals… -
Page 30
Delivers the copies in stacks based on the number of copies for each set, and copies are made on both sides of the sheets. Note • 2-sided feature is only available if the Duplex Module is installed on the machine. Xerox WorkCentre 5016/5020 User Guide Downloaded From ManualsPrinter.com Manuals… -
Page 31: Switching On / Off
• After switching off the machine, wait for a few seconds before switching the machine back on again. Xerox WorkCentre 5016/5020 User Guide Downloaded From ManualsPrinter.com Manuals…
-
Page 32: Power Saver
• When the machine receives a print job or a scan job The following procedure describes how to exit the Sleep Mode manually. Press the <Power Saver> button. <Power Saver> button Xerox WorkCentre 5016/5020 User Guide Downloaded From ManualsPrinter.com Manuals…
-
Page 33: Recycled Paper
The use of recycled paper in the machine benefits the environment with no degradation in performance. Xerox recommends recycled paper with a 20% post consumer content which can be obtained both through Xerox and other office suppliers. Contact your Xerox representative or go to www.xerox.com for more information on other types of recycled paper.
-
Page 34: Installing Drivers
• When using Windows Vista, depending on the security settings, another dialog box may appear after Step 2, confirming whether or not you want to run [WorkCentre 5016/ 5020 CD-ROM AutoRun]. Select an option to allow the program to run, in order to display the [WorkCentre 5016/5020 CD-ROM AutoRun] dialog box and to proceed to Step 3.
-
Page 35
[Remove Print Driver] and [Remove Scan Driver] in the [WorkCentre 5016/5020 CD-ROM AutoRun] dialog box to completely remove the software. If you want to install the software, select the option to continue the installation. Xerox WorkCentre 5016/5020 User Guide Downloaded From ManualsPrinter.com Manuals… -
Page 36
[Remove Print Driver] and [Remove Scan Driver] in the [WorkCentre 5016/5020 CD-ROM AutoRun] dialog box to completely remove the software. If you want to install the software, select the option to continue the installation. Xerox WorkCentre 5016/5020 User Guide Downloaded From ManualsPrinter.com Manuals… -
Page 37
The print driver installation starts. The installation of the print driver is now complete. Click [Finish]. The print driver installation wizard dialog box closes. Click [Exit] on the [WorkCentre 5016/ 5020 CD-ROM AutoRun] dialog box. The [WorkCentre 5016/5020 CD-ROM AutoRun] dialog box closes. Note •… -
Page 38: Installing The Scanner Application (Button Manager)
• When using Windows Vista, depending on the security settings, another dialog box may appear after Step 1, confirming whether or not you want to run [WorkCentre 5016/ 5020 CD-ROM AutoRun]. Select an option to allow the program to run, in order to display the [WorkCentre 5016/5020 CD-ROM AutoRun] dialog box and to proceed to Step 2.
-
Page 39
The installation process begins. The installation is now complete. Click [Finish]. The installation wizard dialog box closes. Click [Exit] on the [WorkCentre 5016/ 5020 CD-ROM AutoRun] dialog box. The [WorkCentre 5016/5020 CD-ROM AutoRun] dialog box closes. Note • To remove Button Manager, select [Start] >… -
Page 40: Loading Paper
Using paper that is not listed here may result in paper jams, lower print quality, or machine malfunctions. If you wish to use paper other than those recommended by Xerox, contact the Xerox Welcome Center. Important •…
-
Page 41: Supported Paper Types
Output Tray every 20 sheets or so to prevent them from sticking to one another. • When loading label paper in the tray, if any labels have already been peeled off or cut off, it may cause a paper jam. Xerox WorkCentre 5016/5020 User Guide Downloaded From ManualsPrinter.com Manuals…
-
Page 42: Loading Paper In The Trays
This reduces the possibility of paper jams. Xerox WorkCentre 5016/5020 User Guide Downloaded From ManualsPrinter.com Manuals…
-
Page 43: Loading Paper In Tray 2
Pull out Tray 2 towards you. Important • While the machine processes a job, do not pull out the tray in use. Xerox WorkCentre 5016/5020 User Guide Downloaded From ManualsPrinter.com Manuals…
-
Page 44: Loading Paper In The Bypass Tray
• When using non-standard size paper for a print job, you must register its paper size in the print driver in advance. For information on how to specify a custom paper size in the print driver, refer to «Specifying the Custom Paper Size» (P.79). Open the Bypass Tray. Xerox WorkCentre 5016/5020 User Guide Downloaded From ManualsPrinter.com Manuals…
-
Page 45
Note • If paper runs out in the Bypass Tray during a job, open and close the Left Side Cover once, and reload paper in the Bypass Tray. Xerox WorkCentre 5016/5020 User Guide Downloaded From ManualsPrinter.com Manuals… -
Page 46: Changing The Size And Orientation Of Paper In The Trays
Remove the remaining paper. Push down the metal plate to the bottom of the tray. Slide paper guides towards the front and back of the tray. Xerox WorkCentre 5016/5020 User Guide Downloaded From ManualsPrinter.com Manuals…
-
Page 47
Specify the paper size and orientation on the Control Panel. For information on how to specify the paper size and paper orientation, refer to «Specifying the Size and Orientation of Paper Loaded in the Trays» (P.49). Xerox WorkCentre 5016/5020 User Guide Downloaded From ManualsPrinter.com Manuals… -
Page 48: Changing The Size And Orientation Of Paper In Tray 2
Important • Do not load mixed types or mixed sizes of paper together in Tray 2. • Do not load paper above the maximum fill line. It may cause paper jams or machine malfunctions. Xerox WorkCentre 5016/5020 User Guide Downloaded From ManualsPrinter.com Manuals…
-
Page 49: Specifying The Size And Orientation Of Paper Loaded In The Trays
(the custom size paper cannot be used for a copy job), you do not need to specify the size of paper on <Display Switch> button the Control Panel. Instead, you Xerox WorkCentre 5016/5020 User Guide Downloaded From ManualsPrinter.com Manuals…
-
Page 50
A4 / SEF 8.5 x 14” / B4 / SEF 8.5 x 13” / Note • When Tray 1 or Tray 2 is selected, [A5] and [55] do not appear in the Display. Xerox WorkCentre 5016/5020 User Guide Downloaded From ManualsPrinter.com Manuals… -
Page 51
System Setting Mode (menu number: 15). For more information, refer to «System Settings» (P.123). Press the <Start> button to confirm the selected size and orientation of paper. The machine exits the Paper Setting Mode. <Start> button Xerox WorkCentre 5016/5020 User Guide Downloaded From ManualsPrinter.com Manuals… -
Page 52: Copying
• If the size of the loaded document is smaller than any standard sizes, the edges of the loaded document may create shadow, and may appear to have an outline on the copied output. Xerox WorkCentre 5016/5020 User Guide Downloaded From ManualsPrinter.com Manuals…
-
Page 53
For more information, refer to «<Original Type> button» (P.28). <2-sided> button Select whether to copy on one side or both sides of a sheet. For more information, refer to «<2-sided> button» (P.28). Xerox WorkCentre 5016/5020 User Guide Downloaded From ManualsPrinter.com Manuals… -
Page 54
Completed> button blinks after the first document has been scanned. Load and scan the next document while the button is blinking. After scanning the last document, press <Scan Completed> the <Scan Completed> button. button Xerox WorkCentre 5016/5020 User Guide Downloaded From ManualsPrinter.com Manuals… -
Page 55: Loading Documents
SEF orientation Close the Document Cover. Xerox WorkCentre 5016/5020 User Guide Downloaded From ManualsPrinter.com Manuals…
-
Page 56: Document Feeder
Clearing All the Features This section explains how to clear the specified copy features. Press the <All Clear> button. <All Clear> button Xerox WorkCentre 5016/5020 User Guide Downloaded From ManualsPrinter.com Manuals…
-
Page 57: Canceling A Copy Job
Document Glass with the N-up feature. The button is not selectable when using the <Original Size> Document Feeder as the size of button the original document is automatically detected. Xerox WorkCentre 5016/5020 User Guide Downloaded From ManualsPrinter.com Manuals…
-
Page 58
11 x 17″ SEF can only be made into the 2-up copies. Important • The <Original Size> button is not selectable when using the Document Feeder as the size of the original document is automatically detected. Xerox WorkCentre 5016/5020 User Guide Downloaded From ManualsPrinter.com Manuals… -
Page 59
Document Glass Left Right Bottom Document Feeder Note • The <Original Size> button is not selectable when using the Document Feeder as the size of the original document is automatically detected. Xerox WorkCentre 5016/5020 User Guide Downloaded From ManualsPrinter.com Manuals… -
Page 60
Press the <Paper Supply> button to select a tray that is loaded with an appropriate size and orientation of paper, in reference to the tables below. <Paper Supply> button Xerox WorkCentre 5016/5020 User Guide Downloaded From ManualsPrinter.com Manuals… -
Page 61
8.5 x 13″ SEF, 8.5 x 14″ SEF, 8.5 x 13.4 SEF, 11 x 17″ SEF B5 SEF B5 LEF B5 LEF B5 SEF, B4 SEF If using the Document Feeder to scan documents 1) Press the <Start> button to start copying. <Start> button Xerox WorkCentre 5016/5020 User Guide Downloaded From ManualsPrinter.com Manuals… -
Page 62
SEF orientation 3) Press the <Start> button to scan the loaded document. Note • After scanning the last document, press the <Scan Completed> button to start copying. <Start> button Xerox WorkCentre 5016/5020 User Guide Downloaded From ManualsPrinter.com Manuals… -
Page 63: Id Card Copies (Copying An Id Card-Shaped Document Onto A Sheet)
Press the <Start> button to start scanning one side of the ID card- shaped document. <Start> button The indicator next to the <Scan Completed> button blinks. <Scan Completed> button Xerox WorkCentre 5016/5020 User Guide Downloaded From ManualsPrinter.com Manuals…
-
Page 64
When copying on When copying on paper that is loaded in paper that is loaded the LEF orientation in the SEF orientation Xerox WorkCentre 5016/5020 User Guide Downloaded From ManualsPrinter.com Manuals… -
Page 65: Managing Accounts
(P.69) under «Multiple Account Mode» to log in to the machine under the System Administrator’s account, then proceed to Step 1 of the following procedure to select the account mode. Important • The machine is in the No Account Mode by default. Xerox WorkCentre 5016/5020 User Guide Downloaded From ManualsPrinter.com Manuals…
-
Page 66
For information on the system settings, refer to «System Settings» (P.123). Numeric keys Press the <Start> button to confirm the entered menu number. The currently-set value appears blinking in the Display. <Start> button Xerox WorkCentre 5016/5020 User Guide Downloaded From ManualsPrinter.com Manuals… -
Page 67
Press the <Start> button to confirm the entered account mode. <Start> button The letter [P] appears blinking in the Display. Press the <Log In/Out> button. The machine exits the System Setting Mode. <Log In/Out> button Xerox WorkCentre 5016/5020 User Guide Downloaded From ManualsPrinter.com Manuals… -
Page 68: Single Account Mode
Press the <Start> button to confirm the entered password. <Start> button If the entered password is correct, the machine enters the Copy Mode, and [1] appears in the Display. Xerox WorkCentre 5016/5020 User Guide Downloaded From ManualsPrinter.com Manuals…
-
Page 69: Multiple Account Mode
The account number that you enter appears in the Display. Note • The account number «1» is used as an example in this procedure. Press the <Start> button to confirm the entered account number. <Start> button Xerox WorkCentre 5016/5020 User Guide Downloaded From ManualsPrinter.com Manuals…
-
Page 70
If you wish to run a scan job after logging in, simply press the <Scan> button to switch the <Log In/Out> machine to the Scan Mode. button Xerox WorkCentre 5016/5020 User Guide Downloaded From ManualsPrinter.com Manuals… -
Page 71: Changing The Password
• The default System Administrator’s password is «111». Numeric keys For security reasons, as you enter each digit of the password, a hyphen appears in the Display instead of the actual number that you enter. Xerox WorkCentre 5016/5020 User Guide Downloaded From ManualsPrinter.com Manuals…
-
Page 72
Specify a three-digit password of the account number 9 within a range of 000 — 999. Specify a three-digit password of the account number 10 within a range of 000 — 999. Xerox WorkCentre 5016/5020 User Guide Downloaded From ManualsPrinter.com Manuals… -
Page 73
Press the <Start> button to confirm the new password. <Start> button The letter [P] appears blinking in the Display. Press the <Log In/Out> button. The machine exits the System Setting Mode. <Log In/Out> button Xerox WorkCentre 5016/5020 User Guide Downloaded From ManualsPrinter.com Manuals… -
Page 74: Setting Copy Job Limits On A User Account
• The default System Administrator’s password is «111». Numeric keys For security reasons, as you enter each digit of the password, a hyphen appears in the Display instead of the actual number that you enter. Xerox WorkCentre 5016/5020 User Guide Downloaded From ManualsPrinter.com Manuals…
-
Page 75
7 within a range of 0 — 60 (0 — 60,000). Specify the maximum number of pages allowed to copy for the account number 8 within a range of 0 — 60 (0 — 60,000). Xerox WorkCentre 5016/5020 User Guide Downloaded From ManualsPrinter.com Manuals… -
Page 76
• If an incorrect value is specified in step 8, [0] appears in the Display instead of the letter [P]. Press the <Log In/Out> button. The machine exits the System Setting Mode. <Log In/Out> button Xerox WorkCentre 5016/5020 User Guide Downloaded From ManualsPrinter.com Manuals… -
Page 77: Reviewing The Total Number Of Copies
Display. Press the <Start> button to display the rest. <Start> button The second half of the numerical value appears in the Display. The value shown in this example is “21100”. Xerox WorkCentre 5016/5020 User Guide Downloaded From ManualsPrinter.com Manuals…
-
Page 78: Printing
Select [Start] at the bottom of the screen, then select [Printers and Faxes]. The [Printers and Faxes] dialog box appears. Right-click on the [Xerox WorkCentre 5016], [Xerox WorkCentre 5020/B], or [Xerox WorkCentre 5020/DB] printer, and select [Properties] from the displayed pop-up menu.
-
Page 79: Specifying The Custom Paper Size
Select [Start] at the bottom of the screen, then select [Printers and Faxes]. The [Printers and Faxes] dialog box appears. Right-click the [Xerox WorkCentre 5016], [Xerox WorkCentre 5020/B], or [Xerox WorkCentre 5020/DB] printer, and select [Properties] from the displayed pop-up menu.
-
Page 80: Printing Procedure
• For more information on the print driver, refer to Help in the print driver. Select [Print] from the menu on the application. Select the machine name in [Name], and click [Properties]. Xerox WorkCentre 5016/5020 User Guide Downloaded From ManualsPrinter.com Manuals…
-
Page 81: Printing On The Custom Size Paper
Click [OK] in the [Properties] dialog box to save specified settings. The [Properties] dialog box closes. Click [OK] in the [Print] dialog box. The [Print] dialog box closes, and the print job starts. Xerox WorkCentre 5016/5020 User Guide Downloaded From ManualsPrinter.com Manuals…
-
Page 82: Canceling A Print Job
The following procedure describes how to cancel a print job on the Control Panel. Press the <Stop> button while the machine is processing a print job that needs to be canceled. <Stop> button Xerox WorkCentre 5016/5020 User Guide Downloaded From ManualsPrinter.com Manuals…
-
Page 83: Scanning
Diagram (mimic) lights up when a document is loaded correctly in the Document Feeder. If the indicator does not light up, the document may not be loaded properly in the Document Feeder. Xerox WorkCentre 5016/5020 User Guide Downloaded From ManualsPrinter.com Manuals…
-
Page 84
• If the WIA (Windows Image Acquisition) driver is displayed instead of the TWAIN driver, close the WIA driver, and select the TWAIN driver correctly. The TWAIN driver appears. Click [Preview] to create a preview image. Xerox WorkCentre 5016/5020 User Guide Downloaded From ManualsPrinter.com Manuals… -
Page 85
Starts scanning a loaded document within the specified scanning area. [Close] button Closes the [TWAIN Driver] dialog box. Note • For more information on each item, click [Help] displayed in the scan driver. Xerox WorkCentre 5016/5020 User Guide Downloaded From ManualsPrinter.com Manuals… -
Page 86: Canceling A Scan Job (Twain Driver)
• Canceling a scan job on the Control Panel Canceling a job on the computer Click [Cancel] in the scanning progress dialog box. Canceling a job on the Control Panel Press the <Stop> button. <Stop> button Xerox WorkCentre 5016/5020 User Guide Downloaded From ManualsPrinter.com Manuals…
-
Page 87: Scanning Procedure (Using Button Manager)
Scanning Procedure (Using Button Manager) The following procedure describes a basic scanning procedure when using Button Manager. Click the [Start] button, and select [All Programs] > [Xerox] > [WorkCentre 5016 & 5020 Scan Button Manager] > [Scan Button Manager] to start Button Manager. Note •…
-
Page 88
• If the size of the loaded document is smaller than any standard sizes, the edges of the loaded document may create shadow, and may appear to have an outline on the scanned image. Xerox WorkCentre 5016/5020 User Guide Downloaded From ManualsPrinter.com Manuals… -
Page 89: Canceling A Scan Job (Button Manager)
Button Manager] dialog box in Step 2 becomes the size of the scanned image. Canceling a Scan Job (Button Manager) The following procedure describes how to cancel a scan job. Press the <Stop> button while the machine is scanning a document. <Stop> button Xerox WorkCentre 5016/5020 User Guide Downloaded From ManualsPrinter.com Manuals…
-
Page 90: Troubleshooting
For information on how to switch the machine on and off, refer to «Switching On / Off» (P.31). • Xerox Welcome Center If a problem persists after applying all the suggested solutions, contact the Xerox Welcome Center. Machine Diagram (mimic)
-
Page 91: Bypass Tray
For information on how to load paper in the Bypass Tray, refer to «Loading Paper in the Bypass Tray» (P.44). For information on how to clear paper jams in the Bypass Tray, refer to «C3: Paper Jam in the Bypass Tray» (P.108). Xerox WorkCentre 5016/5020 User Guide Downloaded From ManualsPrinter.com Manuals…
-
Page 92: Error Codes
Document book on the Document Glass, if Glass. another document is also loaded in the Document Feeder, the machine does not allow you to scan a document on the Document Glass. Xerox WorkCentre 5016/5020 User Guide Downloaded From ManualsPrinter.com Manuals…
-
Page 93
Open and close the Left Side Cover once, and load paper in the Bypass Tray. For information on how to load paper in the Bypass Tray, refer to «Loading Paper in the Bypass Tray» (P.44). Xerox WorkCentre 5016/5020 User Guide Downloaded From ManualsPrinter.com Manuals… -
Page 94
E Codes Error Code Description Remedy During a copy job, the machine Press the <Stop> button to cancel the erased already-scanned images copy job, and try again. before outputting on the paper. Xerox WorkCentre 5016/5020 User Guide Downloaded From ManualsPrinter.com Manuals… -
Page 95
<Paper Supply> button, <Variable of 50 — 200%. Zoom Ratio> button, or the <Reduce/ Enlarge> button.This error code can also be cleared when you remove the loaded document from the Document Feeder. Xerox WorkCentre 5016/5020 User Guide Downloaded From ManualsPrinter.com Manuals… -
Page 96
Press the <Stop> button to cancel the Account Mode, it reached the copy job. Break up the job into smaller job limit that has been set for a segments. particualr user account. Xerox WorkCentre 5016/5020 User Guide Downloaded From ManualsPrinter.com Manuals… -
Page 97
U0, U1, U2, An internal error occurred in the Switch the machine off and on. If the U3, U4, U6, machine. error persists, contact the Xerox U7, U8, U9 Welcome Center. Xerox WorkCentre 5016/5020 User Guide Downloaded From ManualsPrinter.com Manuals… -
Page 98: Troubleshooting Table
«System Settings» (P.123). Failed to run a print job. Delete the print job, and run the print job again. Switch off the machine. Wait for five seconds, then switch on the machine. Xerox WorkCentre 5016/5020 User Guide Downloaded From ManualsPrinter.com Manuals…
-
Page 99
Replace the Drum Cartridge. Add toner if the toner indicator on the Machine Diagram (mimic) flashes or the error code indicating that toner needs to be added appears in the Display. Xerox WorkCentre 5016/5020 User Guide Downloaded From ManualsPrinter.com Manuals… -
Page 100
If the document has large areas of solid density, adjust the density feature for the contrast. Light copies when scanning glossy, shiny, or Use the Document Glass instead of the coated documents through the Document Document Feeder. Feeder. Xerox WorkCentre 5016/5020 User Guide Downloaded From ManualsPrinter.com Manuals… -
Page 101
Load paper in Tray 1 and Tray 2 seam side Load paper in the Bypass Tray seam side down. Load custom media in the Bypass Tray. Refer to «Loading Paper in the Trays» (P.42) for procedures. Xerox WorkCentre 5016/5020 User Guide Downloaded From ManualsPrinter.com Manuals… -
Page 102: Paper Jams
Lift up the Left Side Cover Latch gently to open the Left Side Cover. Xerox WorkCentre 5016/5020 User Guide Downloaded From ManualsPrinter.com Manuals…
-
Page 103
• If the paper is still jammed tightly even after pulling up the green lever, open Access Cover 1. This may release the jammed paper loose, allowing you to remove it. 4) Gently close the Left Side Cover. Xerox WorkCentre 5016/5020 User Guide Downloaded From ManualsPrinter.com Manuals… -
Page 104: E2: Paper Jam In The Left Side Cover
1) If the paper is jammed in the location shown in the diagram, remove the jammed paper pulling upwards. 2) If the paper is jammed in the location shown in the diagram, remove the jammed paper pulling upwards. Xerox WorkCentre 5016/5020 User Guide Downloaded From ManualsPrinter.com Manuals…
-
Page 105: E4: Paper Jam In The Left Side Cover
[E4] appears in the Display. Hold the latch, and open Access Cover Hold the latch, and open Access Cover Lift up the Left Side Cover Latch gently to open the Left Side Cover. Xerox WorkCentre 5016/5020 User Guide Downloaded From ManualsPrinter.com Manuals…
-
Page 106: C1: Paper Jam In Tray 1
Remove the jammed paper. Note • Do not leave any torn pieces of paper inside the machine. Push Tray 1 gently back into position. Xerox WorkCentre 5016/5020 User Guide Downloaded From ManualsPrinter.com Manuals…
-
Page 107: C2: Paper Jam In Tray 2
• Paper Tray 2 is an optional accessory that can be used as Tray 2. Hold the latch, and open Access Cover Hold the latch, and open Access Cover If the jammed paper is accessible through Access Cover 1, remove the jammed paper. Xerox WorkCentre 5016/5020 User Guide Downloaded From ManualsPrinter.com Manuals…
-
Page 108: C3: Paper Jam In The Bypass Tray
Insert the paper into the tray with the side to be copied or printed facing down. For information on how to load paper in the Bypass tray, refer to «Loading Paper in the Bypass Tray» (P.44). Xerox WorkCentre 5016/5020 User Guide Downloaded From ManualsPrinter.com Manuals…
-
Page 109: A1: Document Jams
Document Feeder. Note • Torn, wrinkled or folded documents may cause document jams. To copy such documents, place them on the Document Glass. Xerox WorkCentre 5016/5020 User Guide Downloaded From ManualsPrinter.com Manuals…
-
Page 110: Maintenance
• Use of consumables/periodic replacement parts that are not recommended by Xerox can impair quality and performance of the machine. Use only consumables/ periodic replacement parts that are specifically recommended by Xerox. Xerox WorkCentre 5016/5020 User Guide…
-
Page 111: Adding Toner To The Drum Cartridge
Important • When the remaining toner becomes low, the machine may stop during printing to display the error code. If this happens, add toner to continue copying or printing. Xerox WorkCentre 5016/5020 User Guide Downloaded From ManualsPrinter.com Manuals…
-
Page 112
Front Cover. Pull up the Left Side Cover Latch to open the Left Side Cover. Lightly press the orange tab to unlock the Drum Cartridge. Xerox WorkCentre 5016/5020 User Guide Downloaded From ManualsPrinter.com Manuals… -
Page 113
Important • Do not squeeze the toner bottle. • Do not fill the Drum Cartridge with more than a single bottle of toner at a time. Xerox WorkCentre 5016/5020 User Guide Downloaded From ManualsPrinter.com Manuals… -
Page 114: Replacing The Drum Cartridge
Drum Cartridge reaches the end of its life. Important • The use of Drum Cartridges that are not recommended by Xerox may impair quality and performance of the machine. Use only Drum Cartridges specifically recommended by Xerox.
-
Page 115
Important • A bottle of toner must be purchased separately when replacing the Drum Cartridge. Push the Drum Cartridge in until it locks into position. Close the Left Side Cover and the Front Cover. Xerox WorkCentre 5016/5020 User Guide Downloaded From ManualsPrinter.com Manuals… -
Page 116: Cleaning The Machine
Wipe the Document Glass with a soft cloth moistened with water, and then wipe it with a dry cloth. Important • Do not use cleaning agents other than water or neutral detergent. Xerox WorkCentre 5016/5020 User Guide Downloaded From ManualsPrinter.com Manuals…
-
Page 117: Cleaning The Film And Constant Velocity Transport Glass
• Cleaning the machine with an excessive amount of water may cause the machine to malfunction, or damage documents being copied. Pull up the latch to open the Document Feeder Cover completely. Xerox WorkCentre 5016/5020 User Guide Downloaded From ManualsPrinter.com Manuals…
-
Page 118: Cleaning The Corotron Wire
Corotron Wire may help resolve the problem. The following procedure describes how to clean the Corotron Wire. Open the Front Cover. Pull the Corotron Wire back and forth several times. Close the Front Cover. Xerox WorkCentre 5016/5020 User Guide Downloaded From ManualsPrinter.com Manuals…
-
Page 119: Appendix
Image loss width: Leading edge 4 mm or less, trailing edge 4 mm or less, and top/front 4 mm or less. Copy paper weight Tray 1 : 60 — 90g/m Tray 2 : 60 — 90g/m Bypass Tray : 60 — 110g/m Xerox WorkCentre 5016/5020 User Guide Downloaded From ManualsPrinter.com Manuals…
-
Page 120
250 sheets (Tray 1) + 500 sheets (Tray 2) + 50 sheets (Bypass Tray) Maximum paper feed capacity: 800 sheets Important • When using Xerox P paper. Continuous copy pages 99 pages Note • The machine may pause temporarily to perform image stabilization. -
Page 121
2003 Standard Edition ™ Microsoft® Windows® Vista 64-bit editions of Windows® Important • For the latest information on operating systems that are supported by the machine, contact the Xerox Welcome Center. Interface USB 2.0 Xerox WorkCentre 5016/5020 User Guide Downloaded From ManualsPrinter.com Manuals… -
Page 122: Printable Area
Microsoft® Windows® Server 2003 Standard Edition ™ Microsoft® Windows® Vista 64-bit editions of Windows® Important • For the latest information on operating systems that are supported by the machine, contact the Xerox Welcome Center. Scan gradation Monochrome binary Scanning speed 3 sheets/minute (For ITU-T No.1 Chart A4…
-
Page 123: System Settings
Enter a new value using the numeric keypad in reference to «System Setting List» (P.124). Note • Automatically erases the previously set value in the Display as you start entering a new value. Xerox WorkCentre 5016/5020 User Guide Downloaded From ManualsPrinter.com Manuals…
-
Page 124: System Setting List
Document Type Select the default document type. 1: Text* 2: Text & Photo 3: Photo Density Select the default density level. 0: Lightest 1: Light 2: Normal* 3: Dark 4: Darkest Xerox WorkCentre 5016/5020 User Guide Downloaded From ManualsPrinter.com Manuals…
-
Page 125
Low 2: 20 minutes* Power Mode. 3: 60 minutes 4: 120 minutes For more information on the Low 5: 240 minutes Power Mode, refer to «Low Power 254: Disable Mode» (P.32). Xerox WorkCentre 5016/5020 User Guide Downloaded From ManualsPrinter.com Manuals… -
Page 126
<Scan Completed> button is 3: 60 seconds* not pressed for a specified period 4: 90 seconds of time to indicate the last page of documents, the machine automatically resumes to process the copy job. Xerox WorkCentre 5016/5020 User Guide Downloaded From ManualsPrinter.com Manuals… -
Page 127: Additional System Settings (When Selecting The Single Account Mode)
System Administrator. Menu Menu Description Value Number Password Specify the password/System 000 — 999 Administrator’s password using (Default: 111) three digits. Xerox WorkCentre 5016/5020 User Guide Downloaded From ManualsPrinter.com Manuals…
-
Page 128: Additional System Setting List (When Selecting The Multiple Account Mode)
Account Number 5 Password Specify a three-digit password of 000 — 999 the account number 5. Account Number 6 Password Specify a three-digit password of 000 — 999 the account number 6. Xerox WorkCentre 5016/5020 User Guide Downloaded From ManualsPrinter.com Manuals…
-
Page 129
9. Account Number 10 Copy Job Specify the maximum number of 0 — 60 (0 — 60,000) Limit pages allowed to copy for the account number 10. Xerox WorkCentre 5016/5020 User Guide Downloaded From ManualsPrinter.com Manuals… -
Page 130: Document Sizes Detectable By The Document Feeder
Elevates and stabilizes the machine for optimum use, and the attached casters allow you to easily move the machine. Note • The optional accessories are subject to change without notice. • For the latest information, contact the Xerox Welcome Center. Xerox WorkCentre 5016/5020 User Guide Downloaded From ManualsPrinter.com Manuals…
-
Page 131: Index
Document Feeder Jam ……..91 <Start> button ……….22 Document Feeder Roller ……..117 <Stop> button ……….22 Document feeder specifications <Variable Ratio> button ……..24 Capacity …………. 122 Display …………20 Document feeder type ……. 122 Xerox WorkCentre 5016/5020 User Guide Downloaded From ManualsPrinter.com Manuals…
-
Page 132
Tray 2 …………91 product …………15 maintenance …………10 <Reduce/Enlarge> button ……..24 maintenance safety ……….11 Reduce/Enlarge Ratio ……..125 Maximum fill line ………. 43 regulatory information ……..13 Metric/Inch …………126 Xerox WorkCentre 5016/5020 User Guide Downloaded From ManualsPrinter.com Manuals… -
Page 133
Document Type ……… 124 Drum Cartridge Remaining Life ….127 Machine Serial Number ……127 Metric/Inch ……….126 Password ……….. 128 Preset Reduce/Enlarge Zoom Ratio ..125 Reduce/Enlarge Ratio …….. 125 Xerox WorkCentre 5016/5020 User Guide Downloaded From ManualsPrinter.com Manuals…